Hexagon sweater crochet pattern: easy granny hexagon cardigan
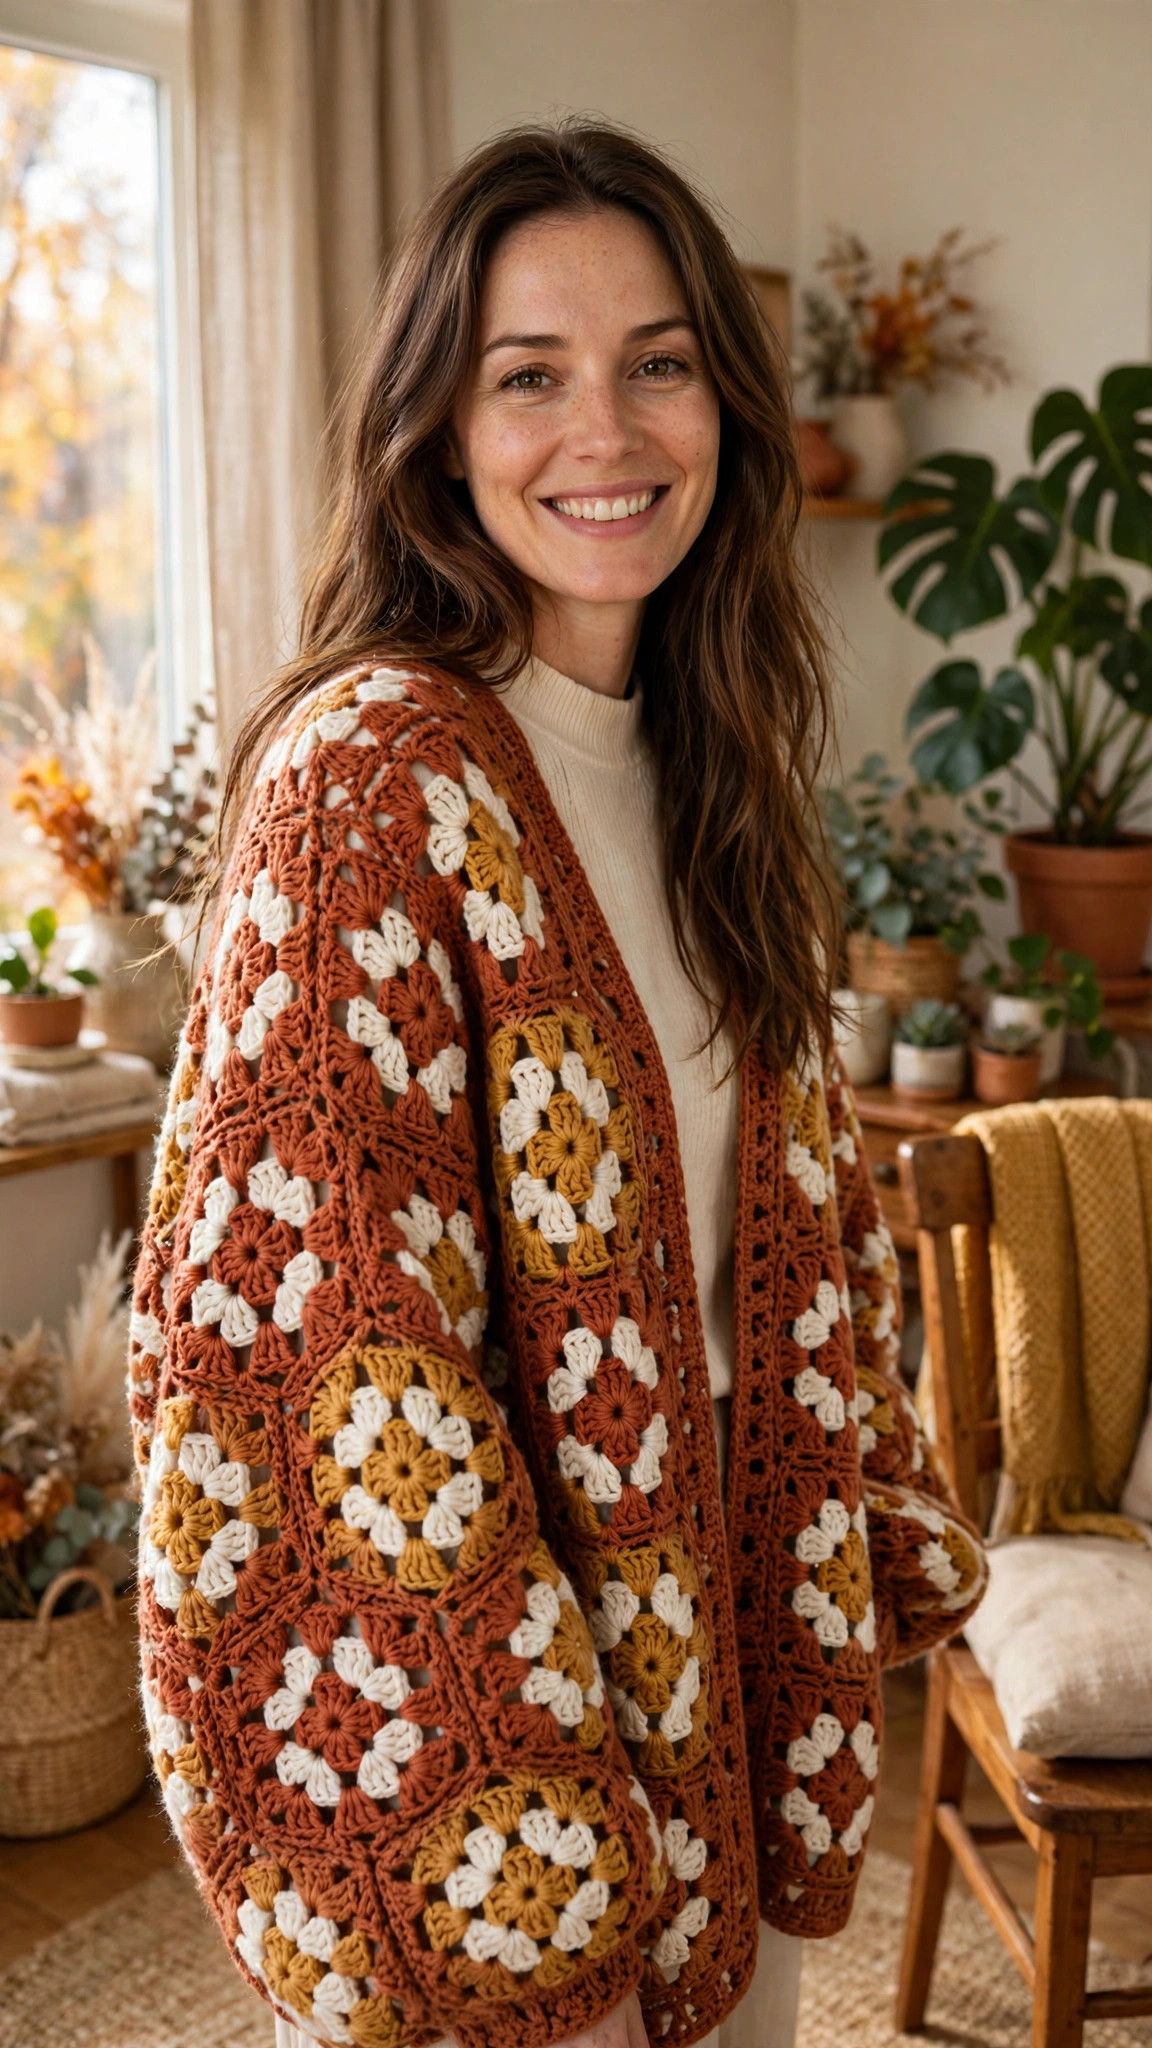
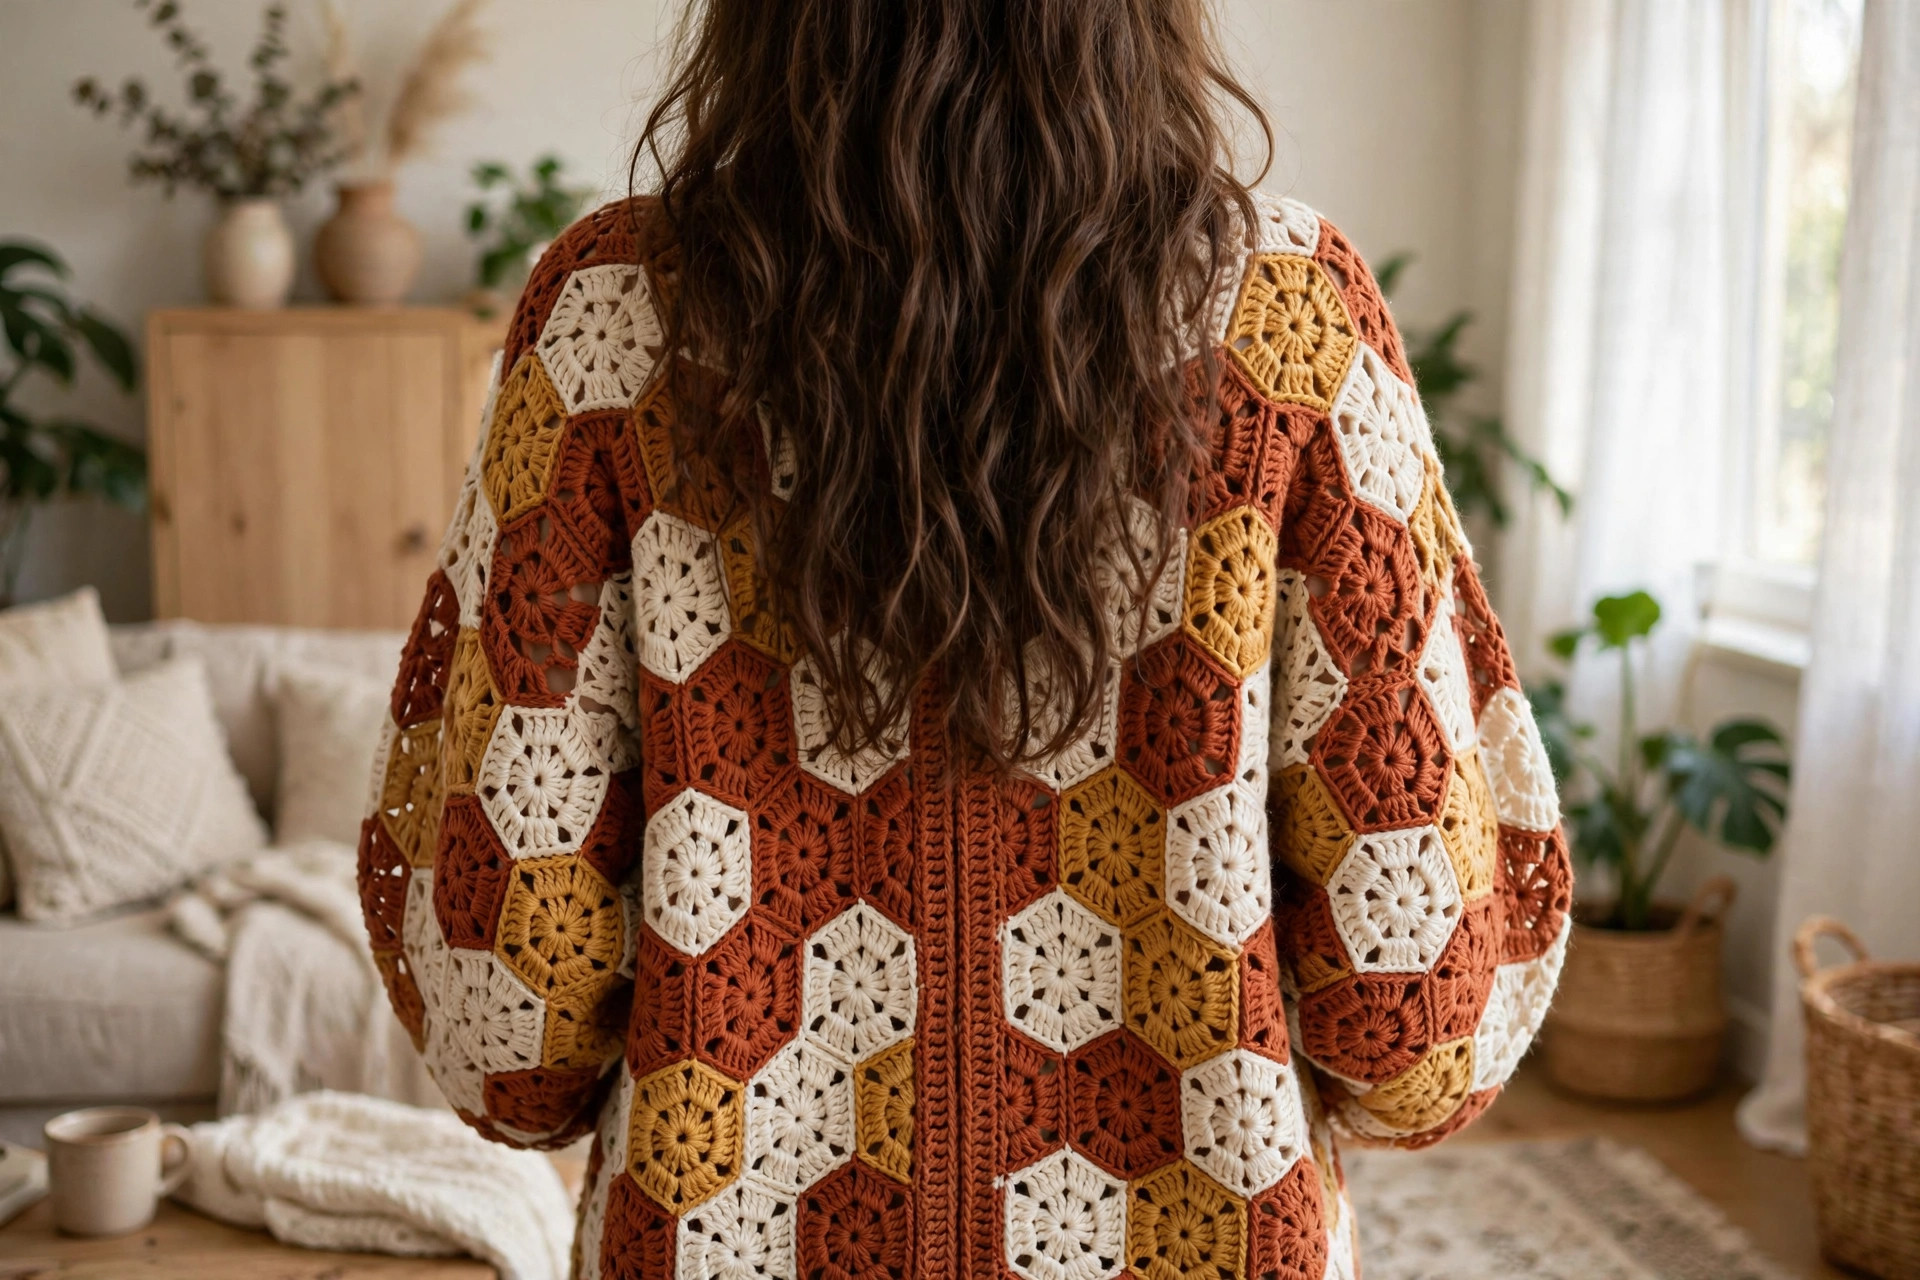
A cozy oversized granny hexagon cardigan in terracotta, cream and mustard, made from just two folded hexagons with ribbed cuffs, a ribbed hem and a buttoned front edging.

Wearables · Crochet
- Finished size
- Bust 40–64 in, sizes XS/S–3X/4X
- Making time
- About 12–16 hours
- Hook
- 5.5 mm, worsted-weight yarn
- Pieces
- 2 hexagons + ribbed bands
- Skill
- Advanced beginner
In this post
- Why you'll love this hexagon sweater crochet pattern
- Materials you'll need
- Size, gauge and skill level
- Abbreviations — US terms
- The pattern (US terms)
- Cuffs, bottom band and front edging
- Finishing touches
- Two cute variations to try next
- Troubleshooting tips
- Frequently asked questions
- More free patterns to try
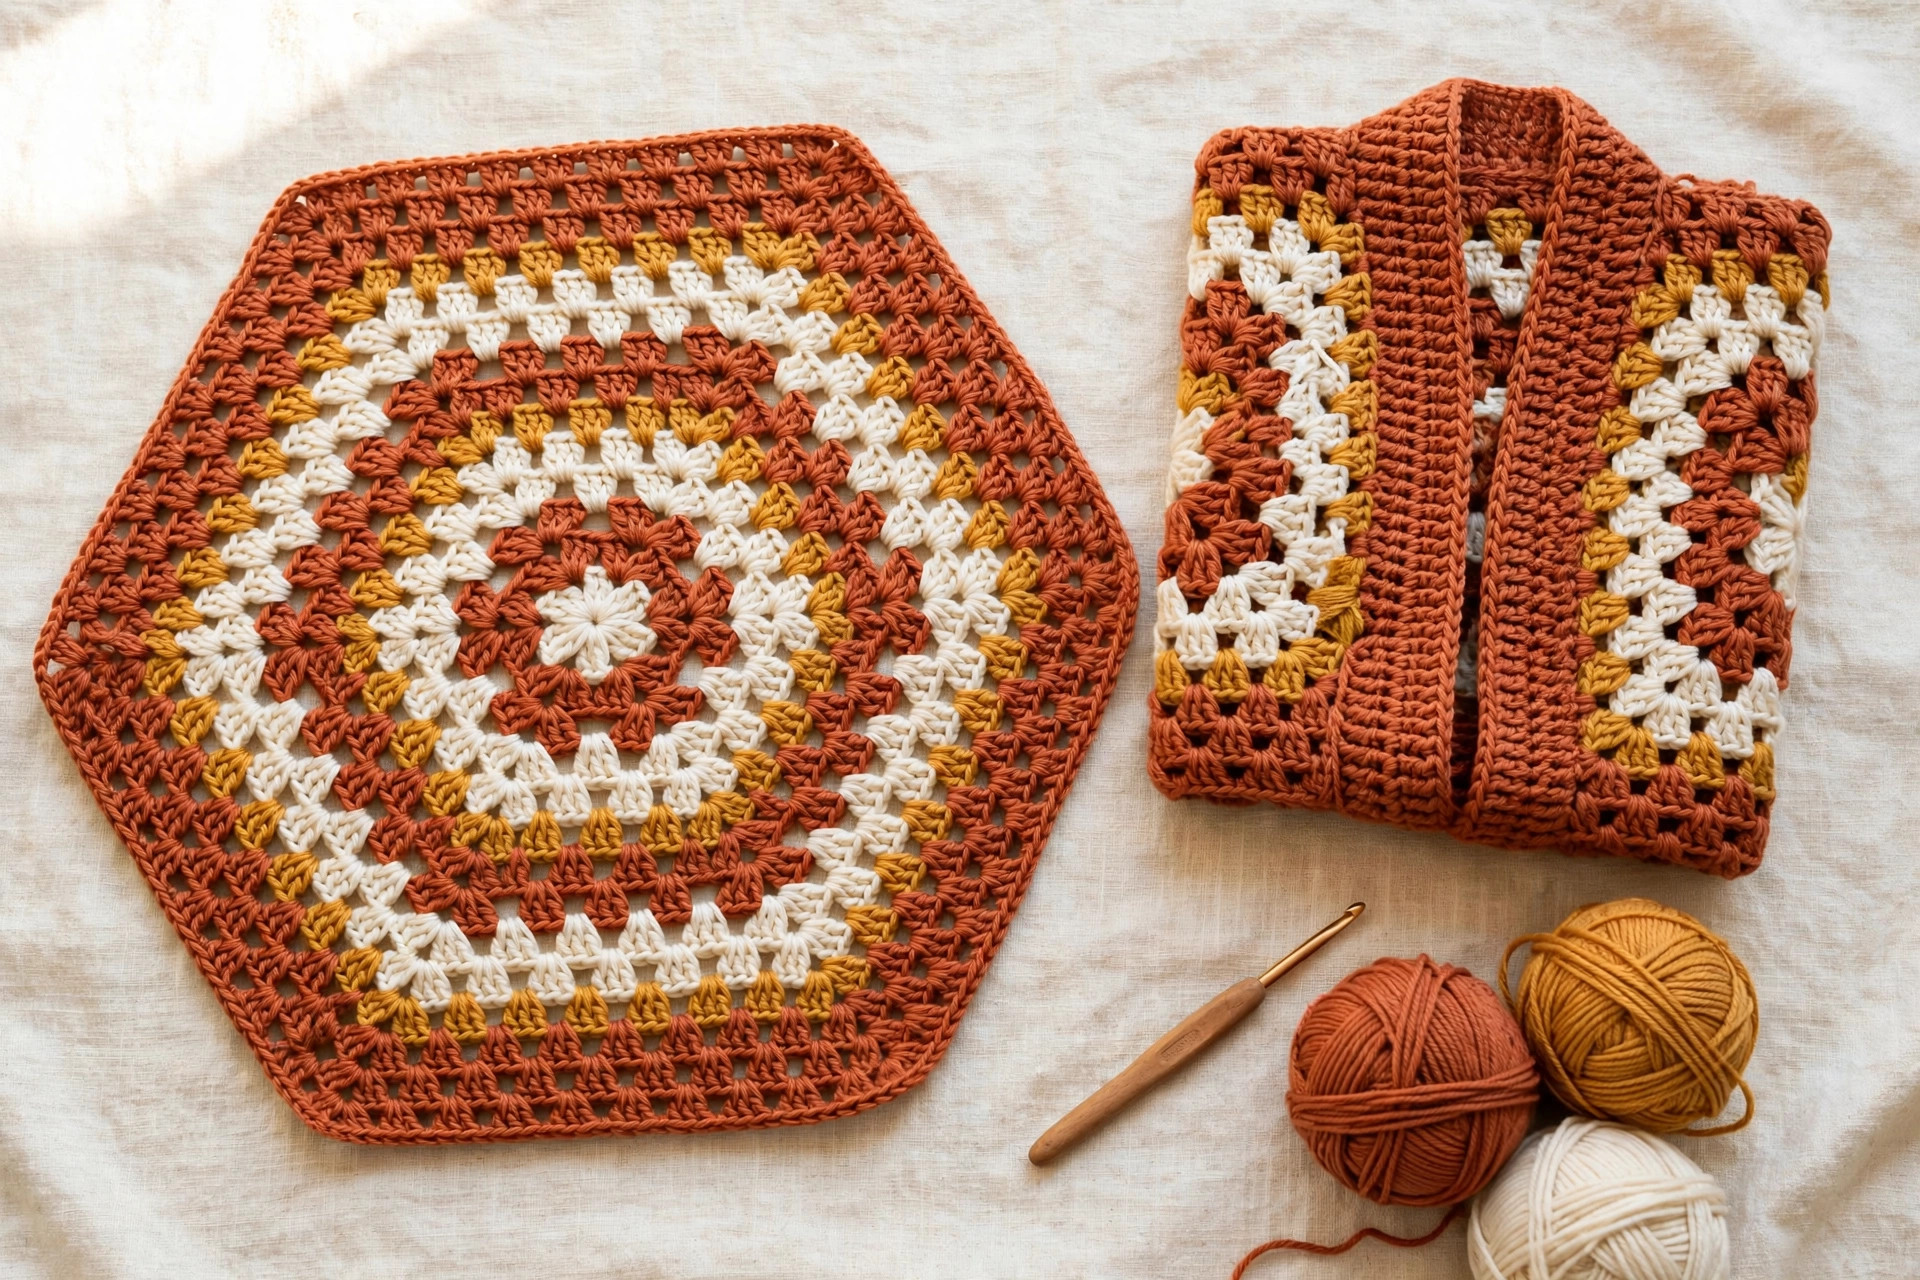
If a hexagon sweater crochet pattern looks too clever to be a beginner project, this one is here to change your mind. The whole cardigan is just two big granny hexagons, folded in half and seamed. No shaping, no sleeves to set in. You crochet the same simple round over and over, and around round ten the flat hexagon in your lap starts looking like a sweater.
This is an original design in cozy worsted-weight yarn with a simple three-color stripe repeat: warm terracotta, soft cream, and mustard gold. The fit is relaxed and oversized, with wide sleeves and ribbed cuffs and hem. It layers beautifully over a tee or a turtleneck, and it is a glorious stash project: the stripes eat through partial skeins.
Why you'll love this hexagon sweater crochet pattern
Most sweater patterns ask you to juggle shaping, gauge swatches, and sleeve caps. The hexagon cardigan skips all of that. The shaping is built into the hexagon: every round adds exactly one cluster to each side, so the piece grows evenly and always lies flat.
It is also one of the most forgiving garments you can make. Because the fit is oversized and the try-on check happens while you crochet, there is no heartbreaking moment of finishing a sweater that doesn't fit. Too short in the sleeve? Add two more rounds.
Materials you'll need
| Supply | What to get |
|---|---|
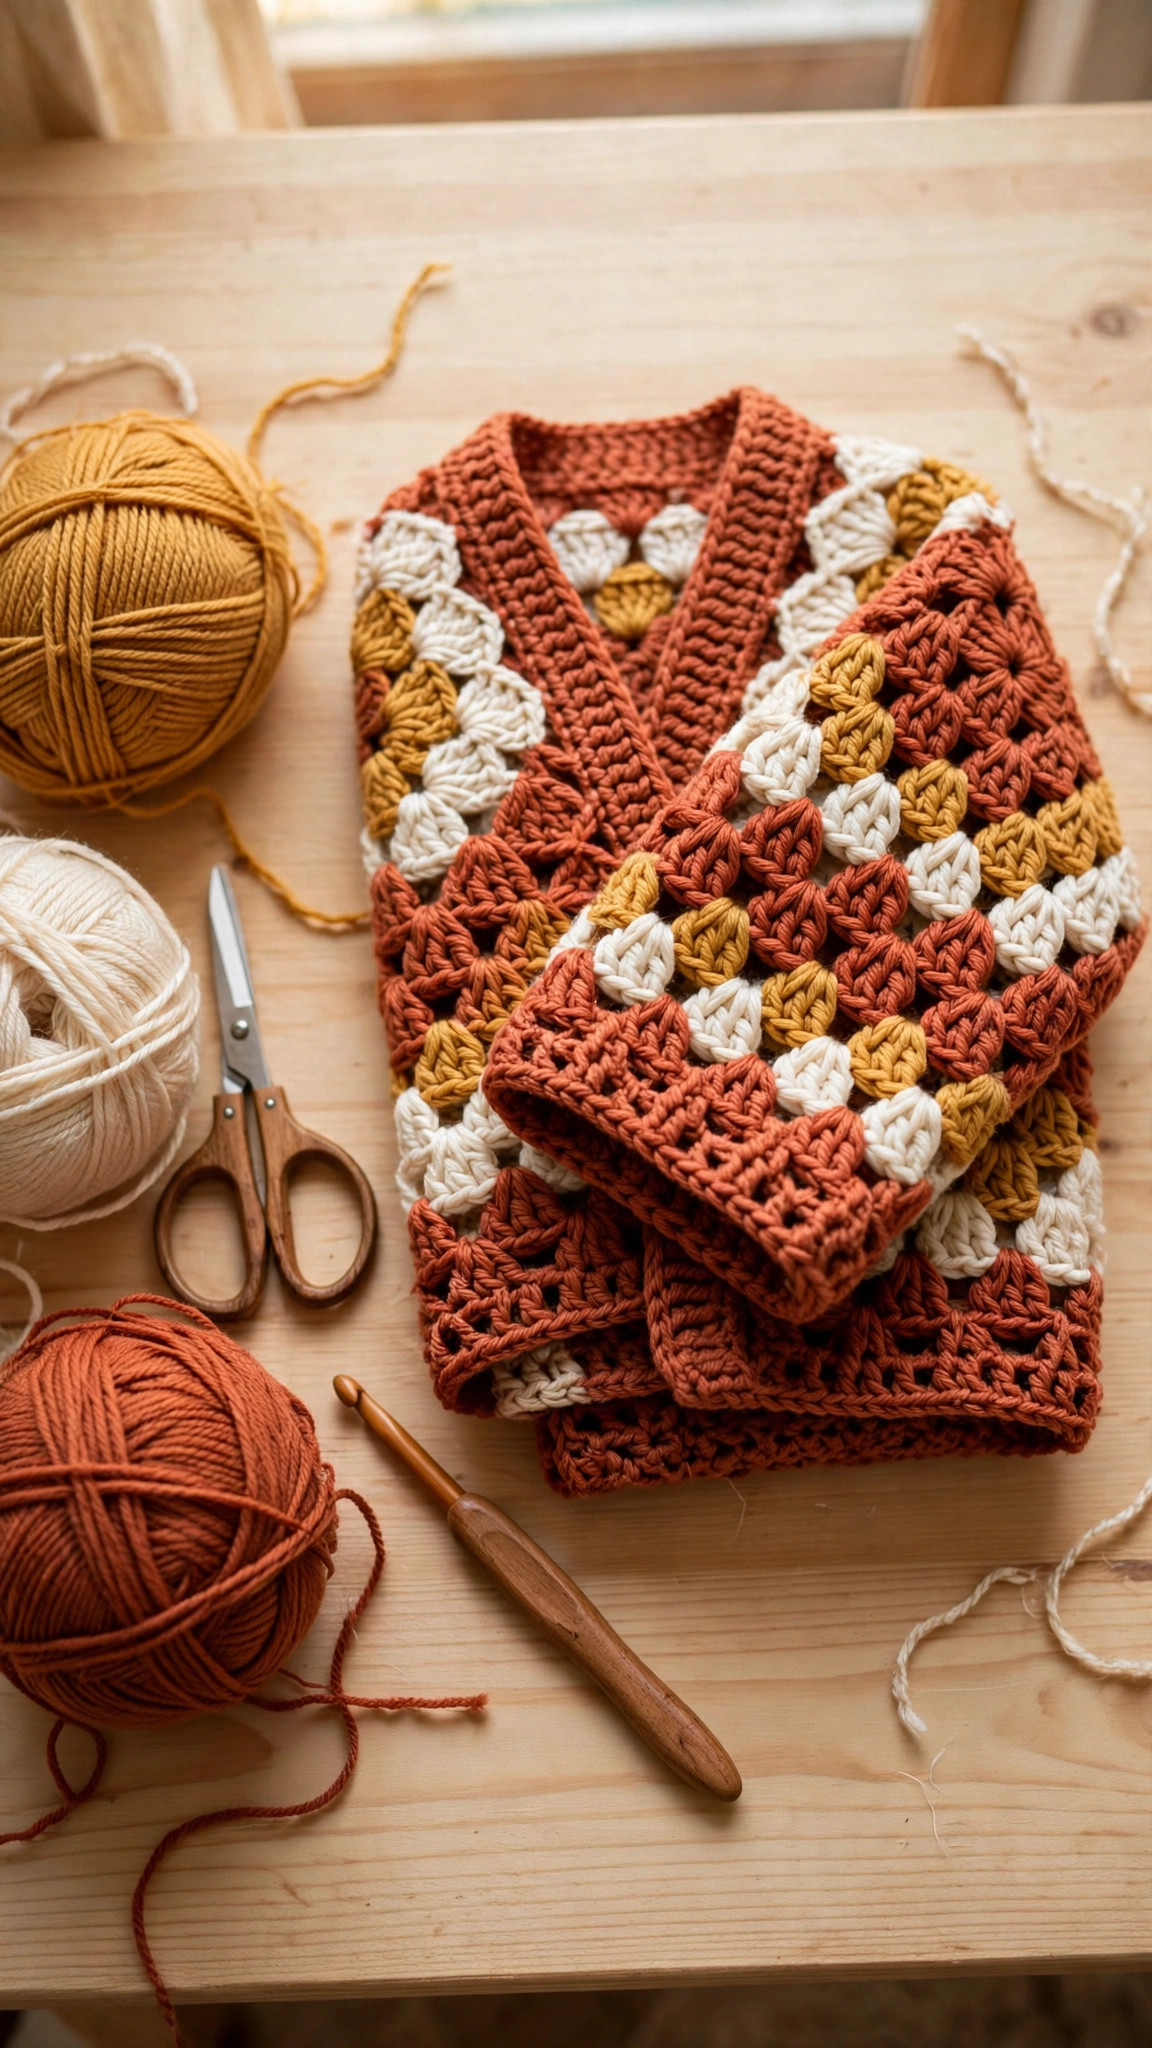
| Yarn A (main) | Worsted-weight (#4) acrylic or wool blend in terracotta/rust, about 50% of total yardage |
| Yarn B | Worsted-weight (#4) in cream, about 30% of total yardage |
| Yarn C | Worsted-weight (#4) in mustard gold, about 20% of total yardage |
| Crochet hook | 5.5 mm (I-9) |
| Buttons (optional) | Three 2.5 cm (1 in) wooden buttons |
| Notions | Tapestry needle, stitch markers, scissors, tape measure |
A soft acrylic or acrylic-blend worsted is the easy pick here: light, good drape, machine washable, and kind to a first-sweater budget. A wool blend gives a warmer cardigan with beautiful drape. Avoid stiff cotton: it makes a heavy hexagon that pulls the shoulders down.
Size, gauge and skill level
- Finished size: relaxed oversized fit with 4–6 in (10–15 cm) of positive ease. Finished bust: XS/S 40 in (102 cm), M/L 48 in (122 cm), XL/2X 56 in (142 cm), 3X/4X 64 in (163 cm).
- Gauge: each hexagon round adds about 1 in (2.5 cm) to the point-to-point width. After Round 6 your hexagon should measure about 7 in (18 cm) across the points. If yours measures much smaller, go up a hook size; if much larger, go down one.
- Skill level: advanced beginner. You should know how to chain, slip stitch, and double crochet, and how to work in joined rounds. Seaming is done with a tapestry needle and simple whipstitch.
How many rounds per size
| Size | To fit bust | Rounds per hexagon | Hexagon point-to-point |
|---|---|---|---|
| XS/S | 32–36 in (81–91 cm) | 15 | 16 in (41 cm) |
| M/L | 38–44 in (97–112 cm) | 17 | 18 in (46 cm) |
| XL/2X | 46–52 in (117–132 cm) | 19 | 20 in (51 cm) |
| 3X/4X | 54–60 in (137–152 cm) | 21 | 22 in (56 cm) |
The fit check that matters: when you are two rounds short of your target, stop and try it on. Fold the hexagon in half so two opposite corners meet, and slip your arm into the fold. The point should reach your wrist, and the folded edge should sit comfortably across your back. If the point stops at your elbow, keep adding rounds.
Yardage
| Size | Total yardage | Skeins |
|---|---|---|
| XS/S | about 1,050 yd (960 m) | 6 |
| M/L | about 1,300 yd (1,190 m) | 7 |
| XL/2X | about 1,600 yd (1,460 m) | 8 |
| 3X/4X | about 1,900 yd (1,740 m) | 10 |
The autumn acorn granny square pattern uses the same stitches in square form, and it is a great warm-up before you start the hexagons.
Abbreviations — US terms
| Abbreviation | Meaning |
|---|---|
| ch | chain |
| dc | double crochet |
| hdc | half double crochet |
| sc | single crochet |
| sl st | slip stitch |
| sp(s) | space(s) |
| st(s) | stitch(es) |
| R | round |
| fpdc | front post double crochet |
| bpdc | back post double crochet |
| hdc2tog | half double crochet 2 together (decrease) |
| FO | fasten off |
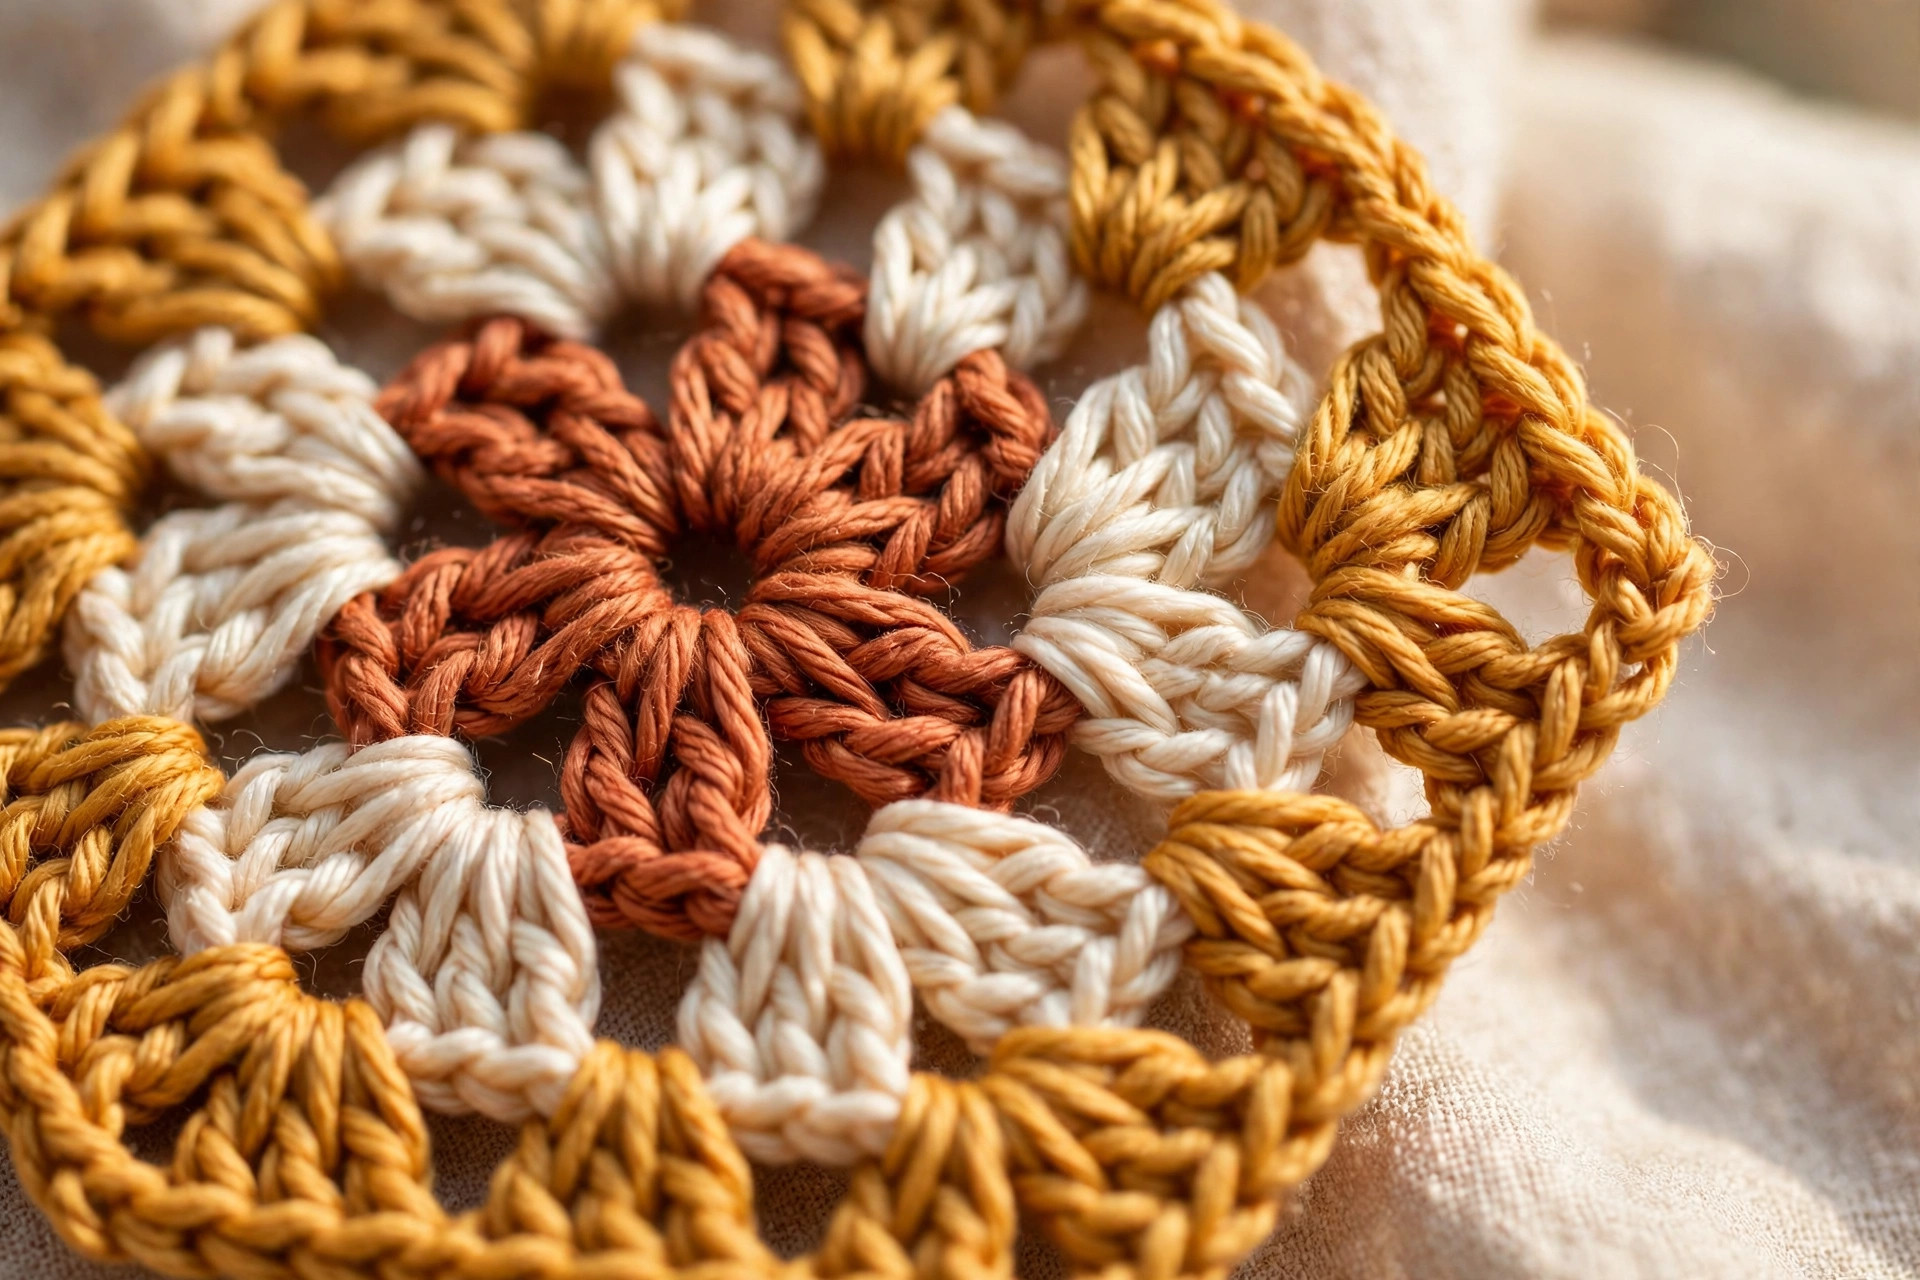
A note on the corner: every corner of the hexagon is worked the same way throughout: (3 dc, ch 2, 3 dc) all in one chain-2 space. That chain-2 gap is what turns the corner and keeps the hexagon flat. If your hexagon starts to cup or ruffle, check the corners first: a missing chain-2 makes it cup, and an extra chain makes it ruffle.
The pattern (US terms)
Work in joined rounds. At the end of each round, slip stitch to the top of the starting chain-3, then slip stitch across to the next chain-2 corner space to begin the next round. The chain-3 at the start of a round counts as the first double crochet. Counts below are the number of 3-dc clusters at the end of each round.
Color sequence: work 2 rounds in each color, repeating A, B, C: Rounds 1–2 in A (terracotta), Rounds 3–4 in B (cream), Rounds 5–6 in C (mustard), Rounds 7–8 in A, and so on. Finish with the last 2–3 rounds in A so the outer edge of both hexagons matches the ribbed bands. Change color at the joining slip stitch: complete the slip stitch with the new color, then continue.
Hexagon — make 2
- R1 (A): magic ring, ch 3 (counts as dc), 2 dc in ring, ch 2, [3 dc in ring, ch 2] × 5, sl st to top of ch-3. (6 clusters)
- R2 (A): sl st into ch-2 sp, ch 3, (2 dc, ch 2, 3 dc) in same sp, [(3 dc, ch 2, 3 dc) in next ch-2 sp] × 5, sl st to top of ch-3. (12 clusters)
- R3 (B): sl st into ch-2 sp, ch 3, (2 dc, ch 2, 3 dc) in same sp, 3 dc in next sp, *[(3 dc, ch 2, 3 dc) in next ch-2 sp, 3 dc in next sp] × 5, sl st to top of ch-3. (18 clusters)
- R4 (B): sl st into ch-2 sp, ch 3, (2 dc, ch 2, 3 dc) in same sp, [3 dc in next sp] × 2, *[(3 dc, ch 2, 3 dc) in next ch-2 sp, [3 dc in next sp] × 2] × 5, sl st to top of ch-3. (24 clusters)
- R5 (C): sl st into ch-2 sp, ch 3, (2 dc, ch 2, 3 dc) in same sp, [3 dc in next sp] × 3, *[(3 dc, ch 2, 3 dc) in next ch-2 sp, [3 dc in next sp] × 3] × 5, sl st to top of ch-3. (30 clusters)
- R6 (C): sl st into ch-2 sp, ch 3, (2 dc, ch 2, 3 dc) in same sp, [3 dc in next sp] × 4, *[(3 dc, ch 2, 3 dc) in next ch-2 sp, [3 dc in next sp] × 4] × 5, sl st to top of ch-3. (36 clusters)
The round rule from R7 onward: slip stitch into the next ch-2 corner space, ch 3, (2 dc, ch 2, 3 dc) in the same space, then work 3 dc in every space along the side until the next corner, work (3 dc, ch 2, 3 dc) in that corner, and repeat around. Each round has one more 3-dc cluster per side than the round before it.
| Round | Clusters per side | Total clusters |
|---|---|---|
| R1 | 1 | 6 |
| R6 | 6 | 36 |
| R15 | 15 | 90 |
| R17 | 17 | 102 |
| R19 | 19 | 114 |
| R21 | 21 | 126 |
Continue until your hexagon reaches the round count for your size, then do the fit check. Make the second hexagon exactly the same: same colors, same rounds, same stitch counts.
Tip: count your clusters at the end of Rounds 3 and 6. If the count is right at R6, the round rule will carry you the rest of the way with no more counting.
Folding and seaming — this is where it becomes a sweater
- Fold the first hexagon. Lay it flat with the right side facing up. Bring two opposite corners together so the hexagon folds in half. The folded shape looks like a wide triangle with a point at one end: that point is your cuff, and the long folded edge is the top of your shoulder and sleeve.
- Seam the sleeve. Starting at the cuff point, whipstitch the two stacked edges together for about 10 in (25 cm) for sizes XS/S and M/L, or 11 in (28 cm) for XL/2X and 3X/4X, working from the right side with matching yarn. Stop at the underarm: the remaining unseamed edges will form the body. Repeat for the second hexagon.
- Try it on. Slip your arms into the two folded hexagons. The points should sit at your wrists, the folded edges across your shoulders, and the open edges hanging down your front and back. If the sleeve feels short, the fix is more rounds, not a longer seam.
- Join the two halves at the center back. Lay both folded hexagons flat, right sides together, and whipstitch the long straight back edges together from the neck down to the hem. This is the only long seam in the sweater.
- Check the back gap. Put the cardigan on. If the two front edges meet or overlap slightly, you are done seaming. If there is a gap of more than 2 in (5 cm) across the back, add the granny back panel described in the FAQ instead of forcing the seam closed: a forced seam pulls the shoulders forward and the sweater will never sit right.
Cuffs, bottom band and front edging
Work all three bands in yarn A (terracotta).
Cuffs — work in the round on each sleeve
- R1: join yarn A at the cuff opening. Work hdc evenly around the opening, working 1 hdc in each stitch or space and working hdc2tog six times spaced evenly around to gently taper the cuff. Join with a sl st.
- R2–R4: ch 2 (does not count as a stitch), fpdc in next st, bpdc in next st, repeat around, sl st to join. Three rounds of ribbing give a cuff that hugs the wrist without squeezing it.
- FO and weave in the ends. Repeat on the second sleeve.
Bottom band — work in rows along the hem
- Row 1: with the cardigan right side facing you, join yarn A at the lower right front corner. Work dc evenly along the entire bottom edge, about 1 dc per stitch or cluster, until you reach the lower left front corner. Turn.
- Row 2: ch 3 (counts as dc), dc in each st across. Turn.
- Rows 3–5: ch 2 (does not count as a stitch), fpdc in next st, bpdc in next st, repeat across. Turn after each row. The ribbed band should measure about 2 in (5 cm) deep.
- FO and weave in the ends.
Front and neck edging — work in rows around the opening
- Row 1: join yarn A at the lower right front corner. Work sc evenly up the right front edge, around the back of the neck, and down the left front edge, placing about 2 sc per cluster side along the edges. Turn.
- Row 2: ch 1, sc in each st around. If you want buttons, work three buttonholes on this row on the right front only: at three evenly spaced points, ch 2 and skip 2 sts. Turn.
- Row 3: ch 1, sc in each st around, working 2 sc in each chain-2 buttonhole space. Turn.
- FO and weave in the ends. Sew the three buttons to the left front, opposite the buttonholes. If you prefer an open-front cardigan, skip the buttonholes and buttons entirely.
Finishing touches
Block the cardigan before you wear it: soak it in lukewarm water with a little gentle detergent for fifteen minutes, press out the water in a towel (never wring it), and lay it flat to dry, shaping the sleeves and hem straight. Blocking relaxes the granny clusters and evens out the stripes. Then weave in every end with a tapestry needle, running each tail through the backs of several stitches and doubling back on itself. Trim the tails close only after the cardigan is blocked and dry.
Two cute variations to try next
Once you have made one hexagon cardigan, the same two-hexagon trick opens up a whole wardrobe.
- Solid-color classic. Work both hexagons in a single soft neutral, such as oatmeal, dusty sage, or charcoal. One color makes the geometry the star.
- Scrap-buster rainbow. Change color every single round instead of every two, using up every partial ball in your basket. Keep one color for the cuffs and bands so the edges tie the chaos together.
And if this project gave you the wearable-crochet bug, the free crochet hoodie pattern is the natural next step, while the free crochet shrug pattern is a faster, lighter layer for spring. For a matching set, the free crochet hat pattern and the free crochet slipper patterns turn one sweater into a full stay-at-home outfit.
Troubleshooting tips
- Your hexagon is cupping into a bowl. You are missing chain-2 spaces at the corners, or your tension is too tight. Check every corner for the (3 dc, ch 2, 3 dc) pair.
- Your hexagon is ruffling like a lettuce leaf. Too many stitches per round, usually an extra chain in the corners or clusters worked into the same space twice. Count the clusters against the table above.
- The sleeves are too tight at the cuff. You decreased too aggressively in cuff Round 1. Undo the cuff, decrease only three times around instead of six, and work the ribbing loosely.
- The back seam pulls and the fronts gape. The hexagons are too small for your shoulders, or the back gap was forced closed. Add the granny back panel from the FAQ below rather than pulling the seam tighter.
Frequently asked questions
Is this hexagon sweater crochet pattern really free?
Yes, the complete pattern above is free, with no email signup and no PDF purchase required. Sharing the post or saving it on Pinterest is the kindest thank-you if you would like to support the site.
What skill level is this pattern?
Advanced beginner. If you can double crochet and work a granny cluster, you can make this cardigan. Folding and seaming are the only new skills, explained step by step. If you have never worked a magic ring, our easy beginner crochet patterns cover the basics before you start.
How long does it take to make?
About 12–16 hours total: roughly 5–6 hours per hexagon, plus 1–2 hours for seaming and the ribbed bands.
Can I sell the finished cardigans I make?
Yes! You may sell finished cardigans made from this pattern in small batches (craft fairs, gifts, online shops). Please credit Little Loop Finds as the pattern designer with a link back to this page. The pattern text and photos themselves may not be redistributed, republished, or sold.
My back gap is wider than 2 inches. What do I do?
Add a granny back panel. Chain a length equal to the gap width, then work rows of granny clusters (3 dc in each space, with a turning chain-3 at the start of each row) until the panel is as long as the center back seam. Seam one long edge of the panel to each half of the cardigan. If you love the oversized poncho shape, the crochet poncho free pattern uses the same drapey, forgiving fit in a pullover style.
More free patterns to try
If this cardigan was fun, keep the hook moving. The autumn acorn granny square pattern is the perfect next motif to master, the free crochet hoodie pattern and the free crochet shrug pattern continue the wearable streak, and the crochet hobo bag pattern free gives you a matching accessory for your new cardigan.