Free Crochet Hat Pattern: Cozy Ribbed Beanie in 4 Sizes
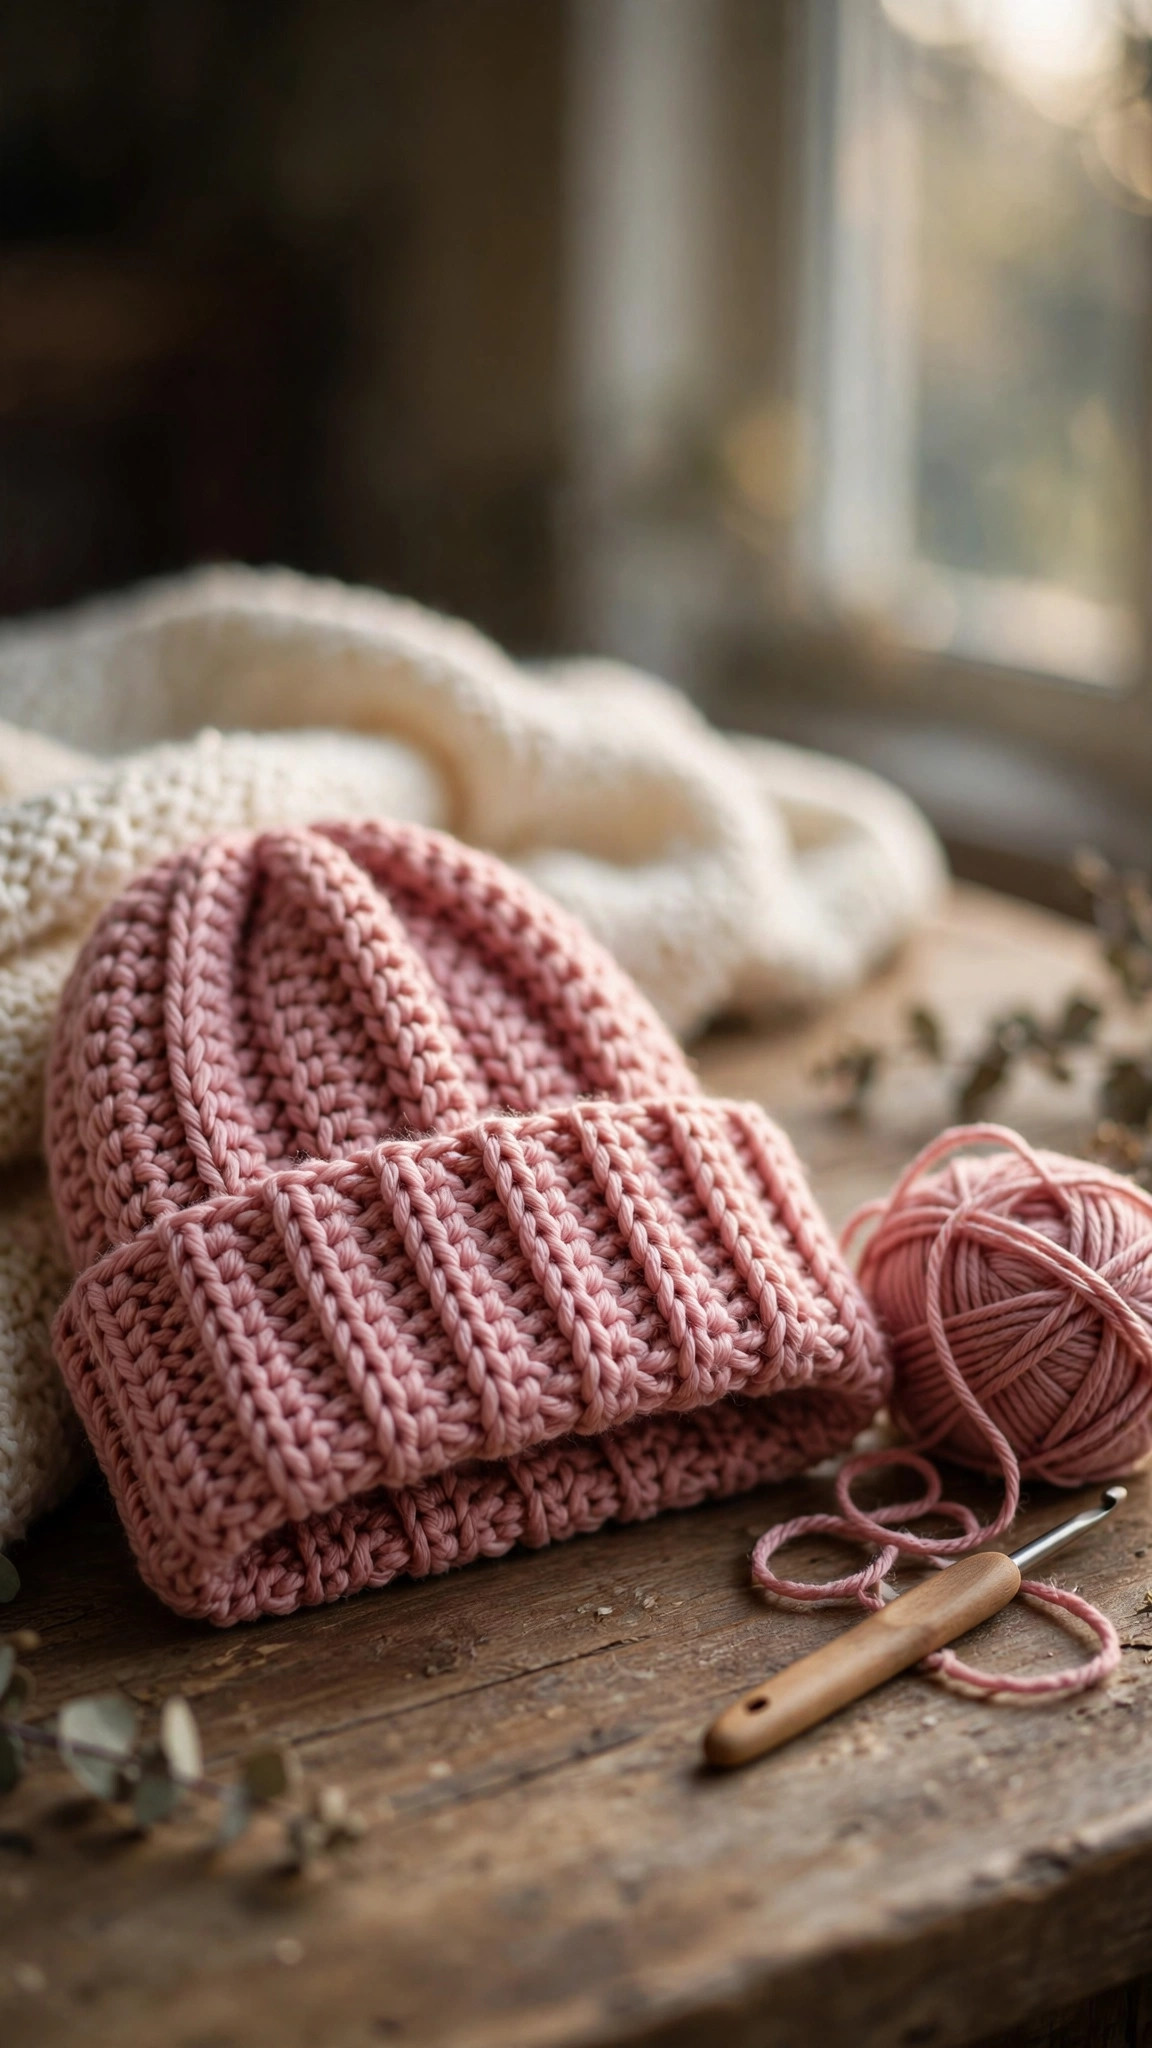
A cozy top-down beanie with a thick stretchy ribbed cuff you fold up — worked in simple half double crochet from the crown down, with exact stitch counts for four sizes from baby to adult large.

Hats · Crochet
- Finished sizes
- Baby, child, adult M, adult L
- Making time
- About 1–3 hours by size
- Hook
- 5.0 mm, worsted-weight yarn
- Main stitch
- Half double crochet + post-stitch rib
- Skill
- Beginner
In this post
If you've ever Googled "free crochet hat pattern" and landed on a beanie that came out too tight, too slouchy, or shaped like a traffic cone — this is the one that finally behaves. It's a classic top-down beanie in half double crochet with a thick, stretchy ribbed cuff you fold up, and it comes with exact stitch counts for four sizes: baby, child, adult medium, and adult large. One pattern, one skein-ish of yarn, and about an evening of crocheting.
Why you'll love this free crochet hat pattern
Most free beanie patterns give you one adult size and wish you luck. This one was written the way hats are actually made and gifted — in batches. The crown uses the classic 8-point increase circle, so the math is clean and the top lies perfectly flat with no pointy tip and no ruffling. The body is worked in plain half double crochet, which is fast, dense, and warm — no lace holes for winter wind to sneak through.
The real star is the cuff: five rounds of front-post/back-post ribbing worked right onto the body, then folded up for that cozy double-thick brim. It looks store-bought, it stretches to grip without squeezing, and it's the detail that makes people ask "wait, you made that?" Make one in an evening, then make three more — it pairs beautifully with our free crochet shawl pattern for a matching winter gift set.

Materials
| Supply | What to get |
|---|---|
| Yarn | Worsted-weight (#4) acrylic or wool blend, about 120 yd (baby), 160 yd (child), 220 yd (adult M), 260 yd (adult L) — one skein covers baby, child, and adult M |
| Crochet hook | 5.0 mm (H-8) |
| Notions | Tapestry needle, stitch markers, scissors, tape measure |
| Optional | Faux-fur or yarn pom-pom, about 4 in / 10 cm |
A quick note on yarn: pick something soft against the forehead — this is a hat, not a dishcloth. Acrylic is the forgiving beginner pick and washes easily (great for kid hats). A wool blend is warmer and has a lovely spring to the ribbing. Avoid stiff cotton for this one; it doesn't stretch and the cuff won't hug properly.
Size & gauge
Gauge: 14 half double crochet stitches × 10 rounds = 4 in / 10 cm with a 5.0 mm hook. Check it — hats live or die by gauge, and two minutes of swatching beats an hour of frogging.
| Size | Fits head | Stitches at widest point | Approx. finished length |
|---|---|---|---|
| Baby (3–6 mo) | 15–16 in / 38–41 cm | 48 sts | 6.5 in / 16.5 cm |
| Child (4–10 y) | 18–19 in / 46–48 cm | 64 sts | 7.5 in / 19 cm |
| Adult M | 20–21.5 in / 51–55 cm | 72 sts | 8 in / 20 cm |
| Adult L | 22–24 in / 56–61 cm | 80 sts | 8.5 in / 21.5 cm |
The stitch counts give you about 1–2 in of negative ease (the hat measures slightly smaller than the head), which is exactly what you want — the ribbed cuff stretches to fit and stays put. If you're between sizes, size down; a slightly snug hat stays on in wind.
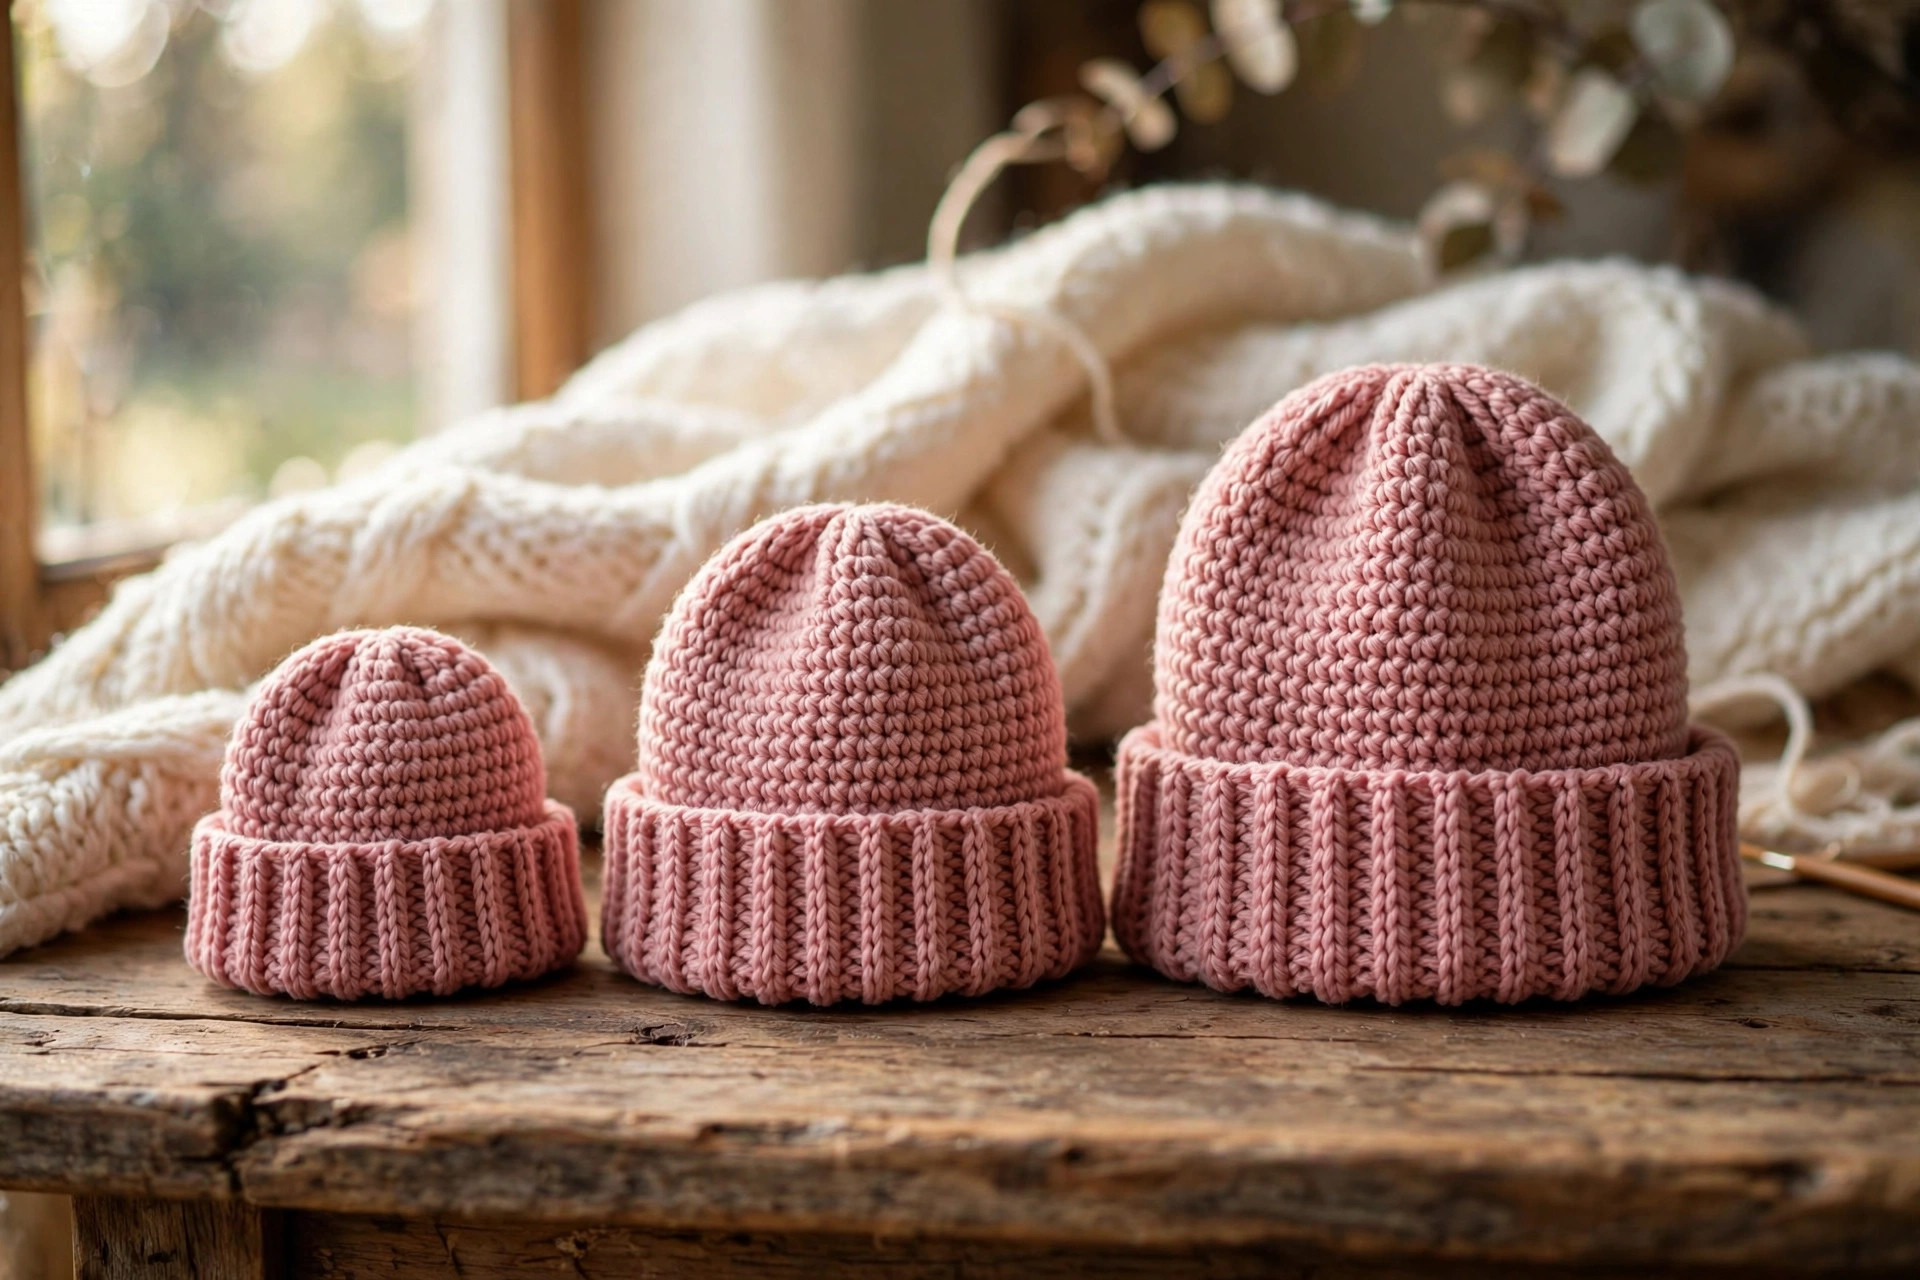
Skill level: confident beginner. You should know the magic ring (or chain-start circle), half double crochet, and how to work in the round. Front-post and back-post stitches sound fancy but are just double crochets worked around the post instead of under the top loops — the Abbreviations section below shows you how, and you'll be ribbing confidently by the second round.
Abbreviations — US terms
| Abbreviation | Meaning |
|---|---|
| MR | magic ring |
| ch | chain |
| hdc | half double crochet |
| FPdc | front post double crochet — yo, insert hook from front to back to front around the post of the next stitch, yo, pull up a loop, finish as a normal dc |
| BPdc | back post double crochet — same as FPdc, but insert the hook from back to front to back around the post |
| inc | increase (2 hdc in the same stitch) |
| st(s) | stitch(es) |
| sl st | slip stitch |
| R | round |
| FO | fasten off |
About the posts: a post stitch pushes (FPdc) or pulls (BPdc) the stitch toward you, which is what creates the raised ribs. The first one feels awkward; the tenth one feels automatic. Keep your tension relaxed on post stitches — yanking them tight makes the cuff pucker.
The pattern (US terms)
Work the crown and body in continuous spirals (no joining) — place a stitch marker in the first stitch of each round and move it up as you go. The stitch count at the end of every round is in parentheses. The band at the end switches to joined rounds so the ribbing lines up cleanly.
The crown — all sizes. Start every size the same way, then stop increasing at your size's round.
- R1: MR, ch 1 (does not count as a stitch), 8 hdc into the ring (8). Pull the ring tight.
- R2: inc (2 hdc) in each st (16)
- R3: [hdc, inc] × 8 (24)
- R4: [2 hdc, inc] × 8 (32)
- R5: [3 hdc, inc] × 8 (40)
- R6: [4 hdc, inc] × 8 (48) — Baby: stop increasing here.
- R7: [5 hdc, inc] × 8 (56)
- R8: [6 hdc, inc] × 8 (64) — Child: stop increasing here.
- R9: [7 hdc, inc] × 8 (72) — Adult M: stop increasing here.
- R10: [8 hdc, inc] × 8 (80) — Adult L: stop increasing here.
Tip: after R4 or R5, lay the circle flat. It should be a true flat disc — if it's cupping into a bowl, your tension is too tight; if the edge ruffles like a potato chip, it's too loose. Adjust your hook, not your hopes.
The body — all sizes. Work even (1 hdc in each st, no increases) until the hat measures the target length below, measured from the top of the crown:
| Size | Even rounds | Measure crown-to-edge |
|---|---|---|
| Baby | R7–R14 (8 rounds) | 4.5 in / 11.5 cm |
| Child | R9–R16 (8 rounds) | 5.5 in / 14 cm |
| Adult M | R10–R18 (9 rounds) | 6 in / 15 cm |
| Adult L | R11–R19 (9 rounds) | 6.5 in / 16.5 cm |
Count rounds, don't guess — two makers' "looks about right" differ by a full inch. When in doubt, try it on the intended head (or your own fist for baby sizes: a loose fist ≈ a baby's head, a snug fact you'll use more than once).
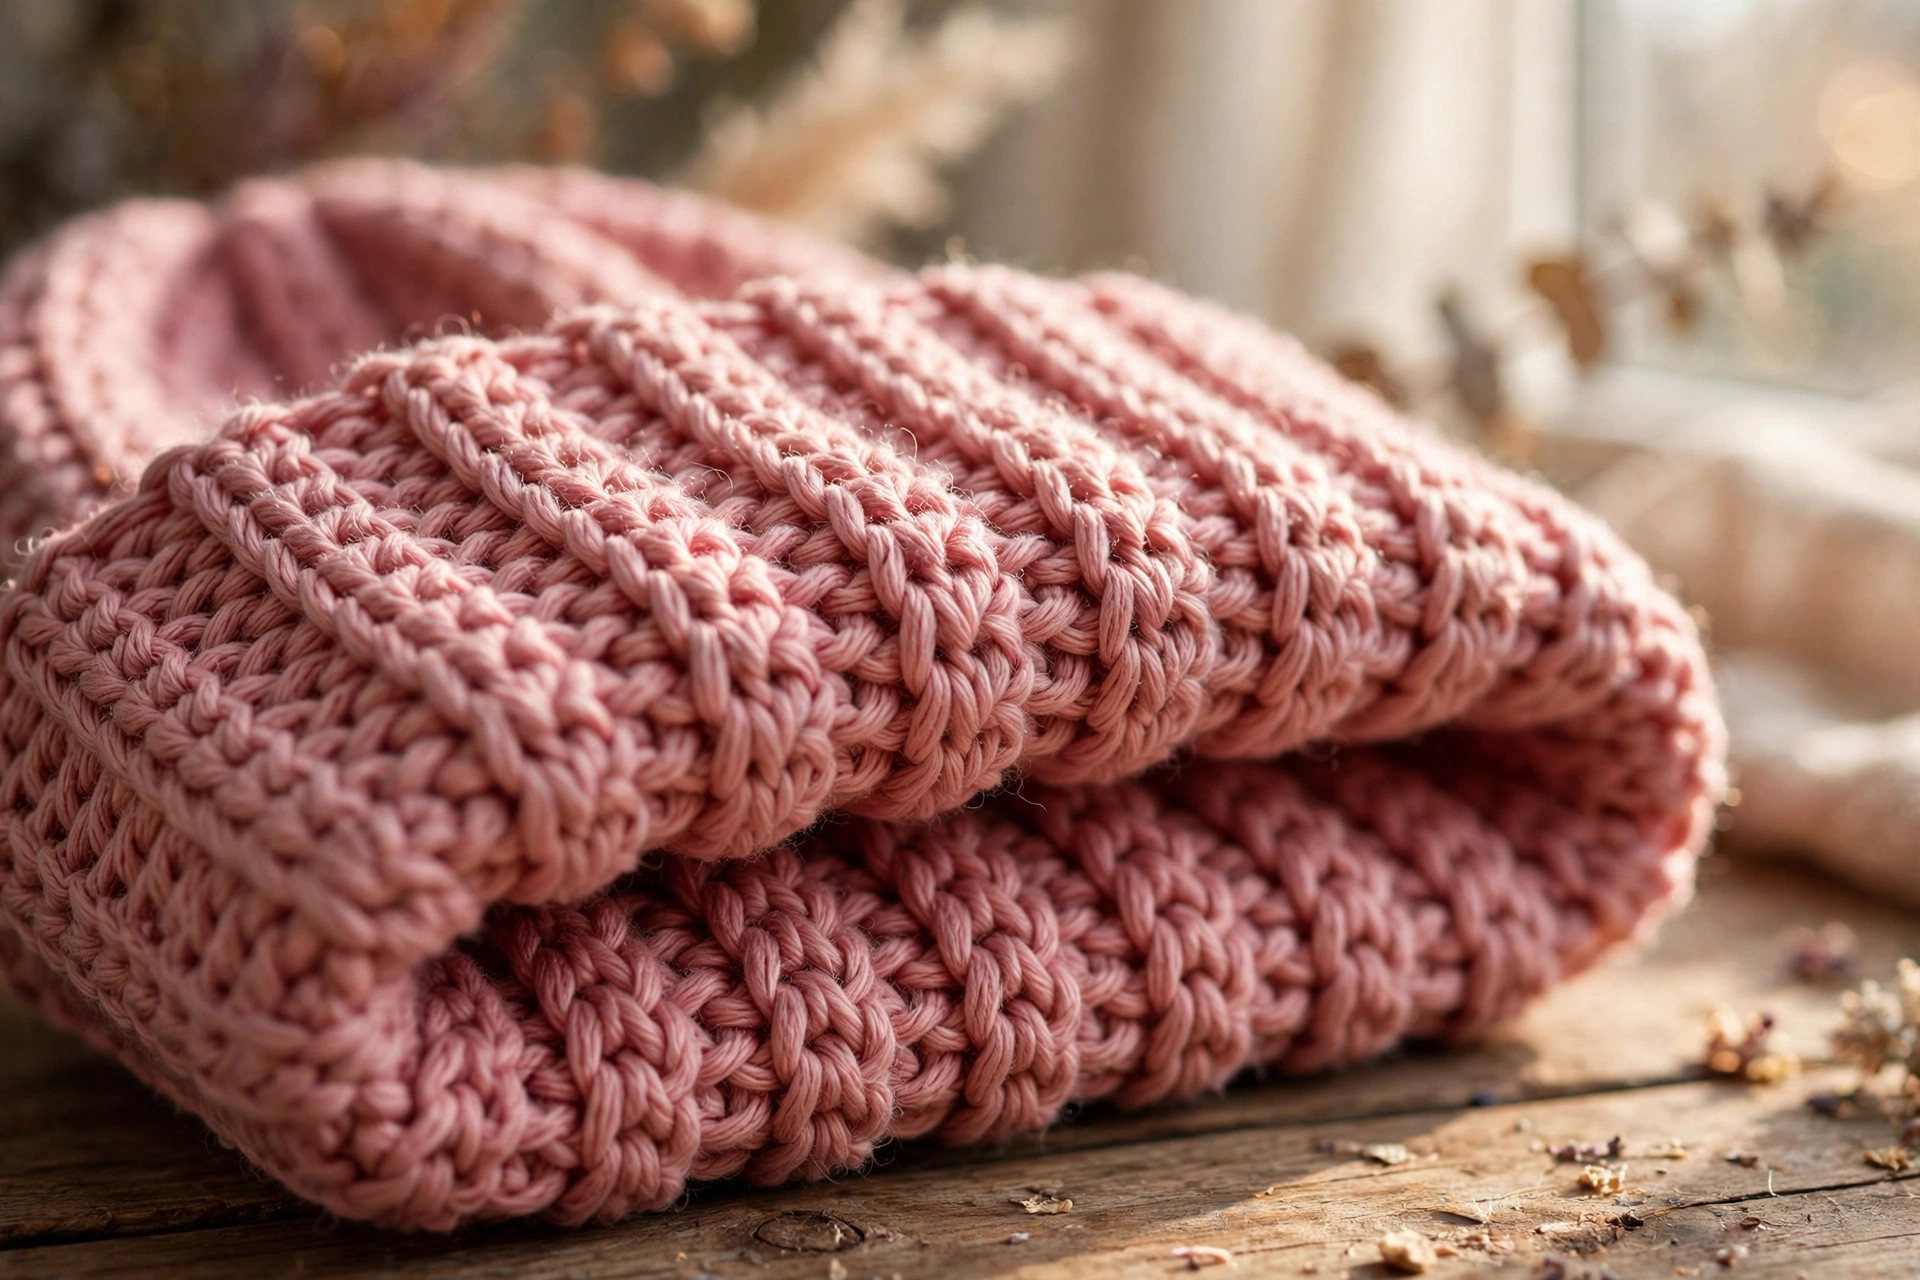
The ribbed cuff — all sizes. This is what turns a plain hat into a finished hat. The stitch counts (48 / 64 / 72 / 80) are all even, which the alternating rib needs.
- Band R1: sl st into the next st to square up, ch 2 (does not count as a stitch). [FPdc around the next st, BPdc around the next st] around. Join with a sl st to the first FPdc.
- Band R2–R5: ch 2, then work FPdc around each FPdc and BPdc around each BPdc from the previous round (the raised ribs sit on raised ribs, the recessed on recessed). Join with a sl st to the first FPdc.
Five rounds gives you a cuff that folds up about 1.5 in / 4 cm. Want a deeper, chunkier fold? Add two more rounds. FO, weave in the end, and fold the cuff up.
Finishing
- Weave in ends with the tapestry needle, working the tail back through the stitches in one direction for about 2 in, then doubling back. Hats get pulled on and off constantly — a lazy weave-in will work itself free by February.
- Pom-pom (optional). A faux-fur pom looks adorable on the child and adult sizes. Sew it on with the yarn tails pulled through to the inside and knotted firmly — then knot it again. Poms take abuse; for a child's hat, consider sewing it on with upholstery thread instead of yarn for extra security.
- Light blocking (optional). If your stitches look uneven, lay the hat flat, spritz with water, pat into shape, and let dry. Don't iron it — you'll flatten the ribbing you just worked so hard on.
Tips from the workbasket
- Swatch the band, not just the body. Post stitches eat more yarn and work up tighter than plain hdc. If your cuff feels like a tourniquet, go up half a hook size just for the band.
- Mark your size. If you make multiples, safety-pin a tiny tag (B / C / M / L) inside the cuff — future you, wrapping Christmas gifts in December, will be grateful.
- Stripe it. The pattern is begging for stripes: change color every 2 body rounds, or work the cuff in a contrast color. Carry the unused color loosely up the inside and you'll have almost no ends to weave.
- Fitted vs. slouchy. For a slouchy beanie, work the body 6 extra even rounds before the cuff (adult sizes). The crown math stays the same; only the length changes.
- Yarn-saving trick. The adult L uses most of a second skein. If you're one skein short, work the cuff in a coordinating solid — it looks intentional and designer-y.
Three colorways to try next
- Classic charcoal + cream cuff. Work the whole hat in dark gray and the band in cream. Timeless, goes with everything, and hides playground dirt on the kid size.
- Sunset stripes. Two rounds each of rust, mustard, and dusty rose through the body, cuff in rust. This is the version that gets the most compliments — and it's a brilliant stash-buster, since each stripe needs only a few yards.
- Winter whiteout. All cream or white with a big faux-fur pom. Pair it with our free crochet shawl pattern in the same yarn for a gift set that looks far more expensive than it was.
And if you're on a gift-making roll, this hat loves company: the star blanket crochet pattern plus a baby-size hat makes the ultimate new-parent gift, the little lamb baby snuggle gift set already includes a hat you can swap this one into, and the crochet Christmas stocking is the natural December companion project.
Troubleshooting
- The crown is pointy or ruffling. Pointy = not enough increases (did you skip one? count your rounds). Ruffling = too many increases or tension too loose. The fix is almost always gauge — make a 4" swatch before restarting.
- The hat is too tight / too loose. One inch of negative ease is the target. If the widest round measures more than 2" less than the head, go up a hook size; if it's equal to or larger than the head, go down. Don't "just stretch it" — stretched hats ride up all day.
- The band is way tighter than the body. Normal-ish: post stitches are denser. But if you can't get it over your ears, redo the band with a hook 0.5 mm larger, or add a chain of breathing room by working the band's first round into the back loops only.
- The join seam in the band slants. You're probably working the ch-2 into the first stitch. Keep the ch-2 uncounted and always join to the first FPdc — the seam will stay straight.
- Gaps at the top of the crown. The magic ring wasn't pulled tight enough, or the starting tail worked loose. Re-thread the tail and cinch it again before weaving in.
- The cuff won't stay folded. Acrylic relaxes with wear. Fold it, spritz with water, and let it dry folded overnight — the memory sets. Or stitch the fold in place with two tiny whipstitches on the inside.
- Yarn keeps splitting on post stitches. Some plied acrylics split when you work around the post. Switch to a hook with a rounded head, or slow down and insert the hook a touch deeper so you're under whole plies.
Frequently asked questions
Is this crochet hat pattern really free?
Yes — the complete pattern above is free, no email signup and no PDF purchase required. If it saved you a search, saving the post on Pinterest or sharing it with a crochet friend is the kindest thank-you.
What skill level do I need?
Confident beginner. If you can half double crochet in the round, you can make the whole hat — the only "new" skill is front-post and back-post double crochet for the cuff, and the Abbreviations section walks you through both. Total new technique count: two stitches, one evening.
How long does it take?
About 1 hour for baby, 1.5 for child, 2–2.5 for adult M, and 3 for adult L. The body is plain hdc, so once the crown is done it flies — most makers finish an adult hat in a single movie.
Can I sell hats made from this pattern?
Yes! Sell finished hats in small batches (craft fairs, Etsy, gifts) and please credit Little Loop Finds as the designer with a link back to this page. The pattern text and photos themselves may not be redistributed, republished, or sold.
Can I use bulky or chunky yarn?
You can, with adjustments: use a 6.0–6.5 mm hook, follow the Adult M stitch counts, and expect a hat that lands between adult M and L in size with a chunkier look. It'll work up in about 90 minutes. Your gauge swatch matters even more here — chunky yarn varies wildly between brands.
How do I make it slouchy instead of fitted?
Keep the crown exactly as written for your size, then add 6 extra even body rounds before starting the cuff (adult sizes). The extra fabric pools softly at the back. Skip the pom-pom or keep it — both look great slouchy.
My head is between sizes — which do I pick?
Size down. The ribbed cuff stretches a full 2" comfortably, and a hat that's slightly snug on day one relaxes with wear. A hat that's loose on day one only gets looser.
Can I make a preemie or newborn size?
Stop increasing at R5 (40 sts) and work 6 even rounds, then the cuff. That gives you roughly a 12–13" hat — always check with the hospital or charity you're donating to, as their size requirements vary.
More free patterns to try
Keep the hook warm. The free crochet shawl pattern turns leftover hat yarn into a matching wrap, the star blanket crochet pattern is the coziest thing to crochet while wearing your new hat, the little lamb baby snuggle gift set pairs a sweet amigurumi with baby accessories, and the crochet dishcloths are the perfect 20-minute palette cleanser between hat batches.
The box below contains an Etsy link. If you buy through it, we may earn a small commission at no extra cost to you. Learn more.
No time to make one?
In a hurry? Find handmade crochet beanies from independent makers on Etsy.
Browse on Etsy (opens Etsy in a new tab)