Arm warmer crochet pattern: cozy fingerless pair
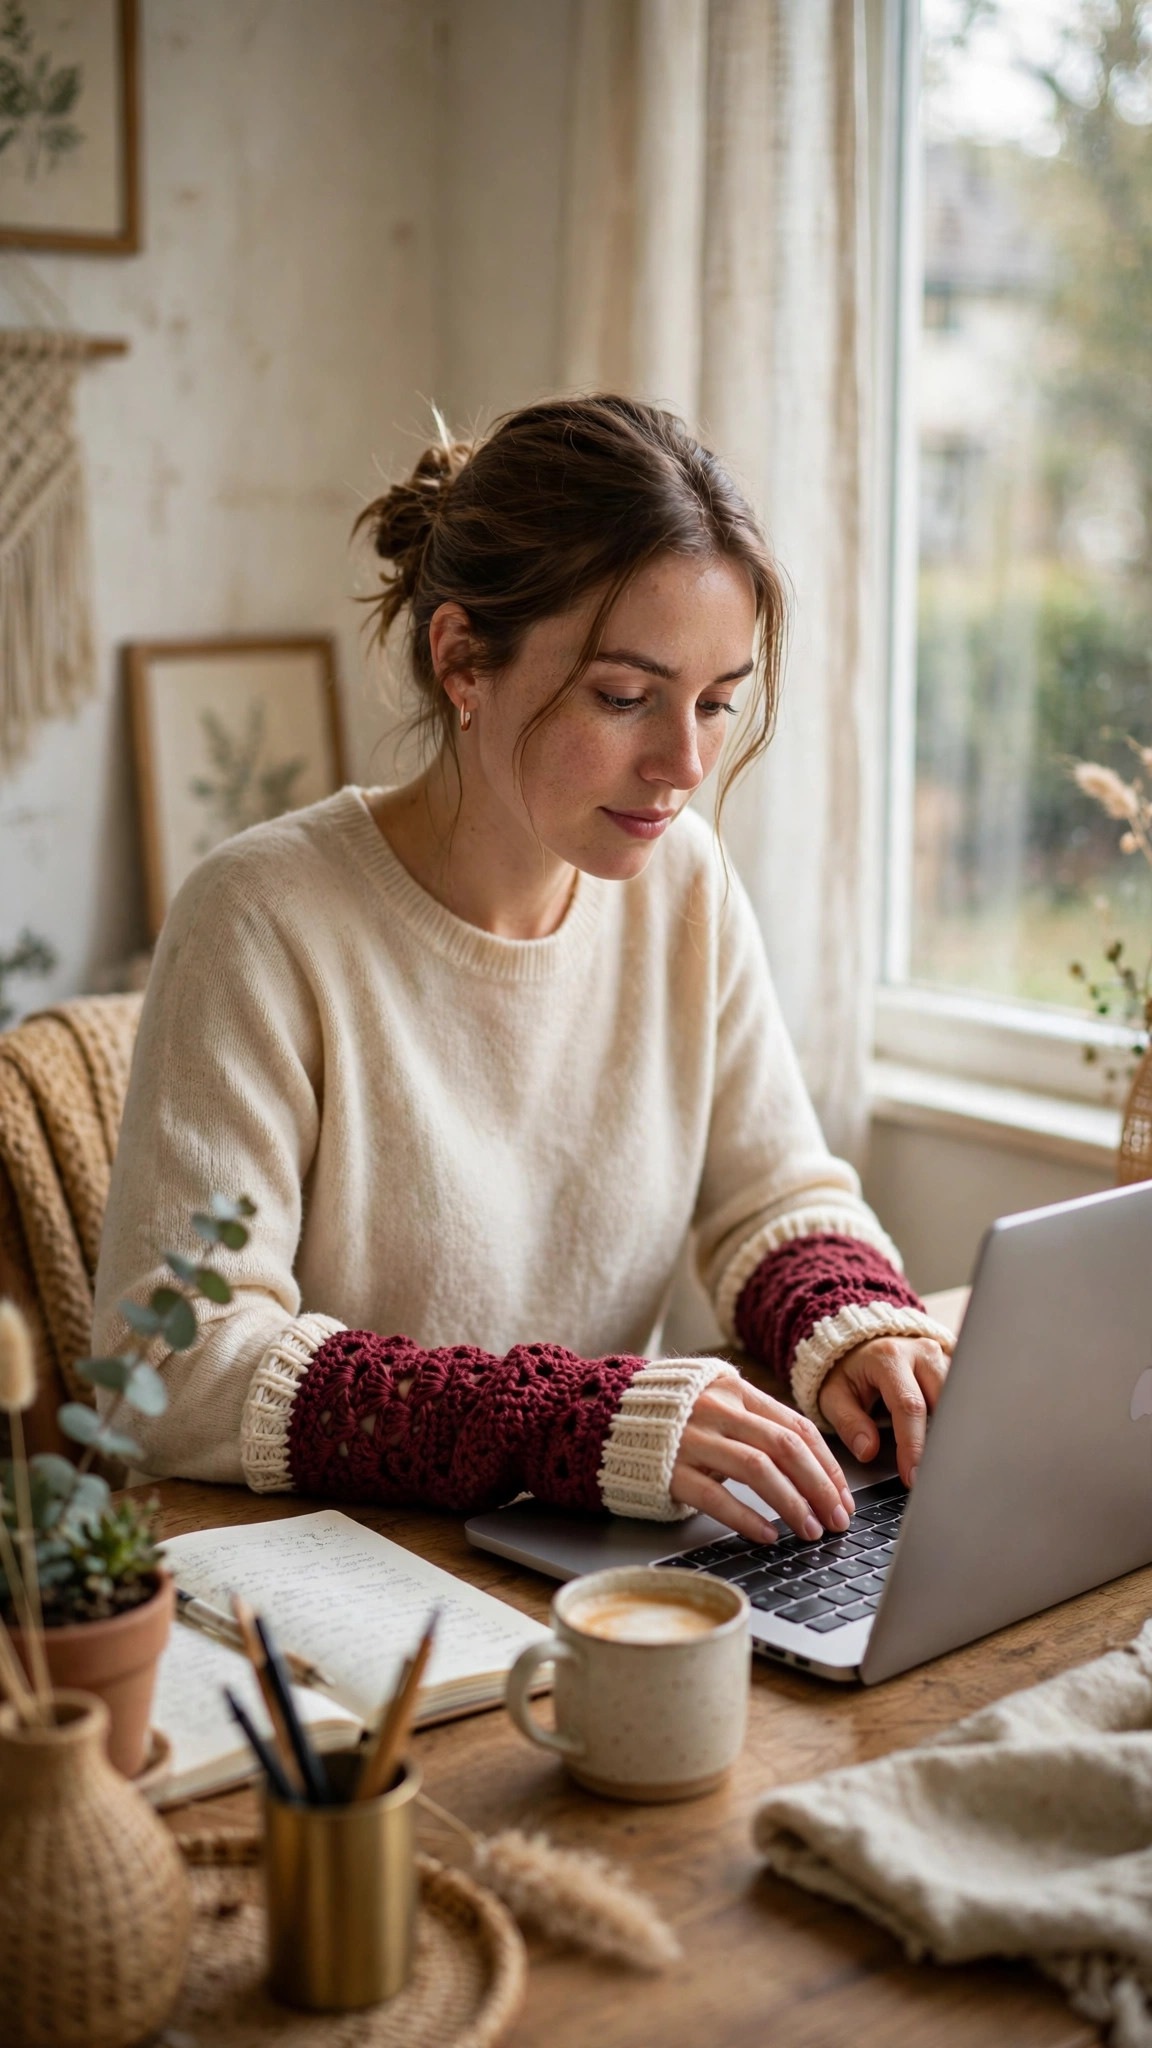
A cozy fingerless pair with ribbed cuffs, a shell stripe and thumb openings, made from two simple rectangles with one short seam each, so your arms stay warm and your fingers stay free.

Accessories · Crochet
- Finished size
- 8 in around, 11 in long (M)
- Making time
- About 3–4 hours
- Hook
- 5.5 mm, worsted-weight yarn
- Construction
- 2 rectangles, thumb-opening seam
- Skill
- Beginner
In this post
Arm warmers are the cozy secret of cold offices, chilly studios, and winter mornings: they keep your forearms and wrists warm while your fingers stay free to type, crochet, write, and hold a mug of tea. This free arm warmer crochet pattern makes a fingerless pair in burgundy with a cream ribbed cuff, worked as two flat rectangles with a thumb opening left in the seam. No shaping, no increasing, no scary math: just relaxing rows of half-double crochet, a ribbed cuff, and one short seam per warmer.
Arm warmers are not leg warmers
Let us be clear before you pick up your hook: this pattern makes arm warmers, the fingerless sleeves you wear on your forearms and wrists. They are not leg warmers. Leg warmers are worn on the lower legs, over tights or leggings, and they are a completely different project with a different fit. If you came here looking for leg warmers, our free leg warmer crochet pattern is the pattern you want, and it is waiting for you there. If you want warm arms and free fingers, you are in exactly the right place, so keep reading.
Arm warmers earn their keep where gloves are too much and bare arms are too cold: typing at a desk, crocheting on the sofa, or walking the dog on a crisp morning. They slide under a coat sleeve, they peek out of a sweater cuff, and they take about an afternoon to make. The thumb opening anchors the warmer on your hand so it never slides down, and it leaves your thumb and fingers completely free.
Why you'll love this free arm warmer crochet pattern
Most arm warmer patterns fall into two traps: the plain tube that slides down your arm all day, and the fiddly glove pattern that turns into a mitten. This pattern dodges both. The ribbed cuff grips your wrist, the thumb opening anchors the warmer on your hand, and the body is a simple rectangle that cannot slide anywhere once it is seamed.
The construction is as simple as crochet gets. Each warmer is one flat rectangle in half-double crochet. The bottom rows are worked in ribbing for the cuff, the middle is plain half-double crochet with a pretty shell stripe, and the top edge is finished with a single round of single crochet. Then you fold the rectangle in half and sew up the side, leaving a gap of about an inch and a half open for your thumb. There is no shaping anywhere, and the only sewing is one short straight seam per warmer.
Half-double crochet is the perfect stitch for arm warmers. It works up fast, it makes a dense, warm fabric that blocks the wind, and it has a soft stretch that hugs the forearm without squeezing. Burgundy with a cream ribbed cuff is the version in the photos, but mustard, forest green, or charcoal all look lovely.

Materials you'll need
| Supply | What to get |
|---|---|
| Main color (A) | Worsted-weight (#4) yarn in burgundy, about 200 yds / 185 m (1 ball) for M |
| Contrast color (B) | Worsted-weight (#4) yarn in cream, about 60 yds / 55 m (a small amount) for M |
| Crochet hook | 5.5 mm (I-9) |
| Tapestry needle | For seaming and weaving in ends |
| Notions | Stitch markers, scissors, tape measure |
| Optional | Two small wooden buttons for the cuff |
A soft acrylic or acrylic-blend worsted is the best pick here: it stretches gently around the forearm, it survives the washing machine, and it will not felt the way wool can. Avoid very dark yarns for your first pair, because the thumb opening is easier to place when you can see your stitches clearly.
Yarn amounts by size (approximate): S — A: 160 yds (1 ball), B: 50 yds. M — A: 200 yds (1 ball), B: 60 yds. L — A: 240 yds (2 balls), B: 70 yds.
Size, gauge and skill level
Each warmer is a flat rectangle, seamed up the side. Measure around your forearm at its widest point, just below the elbow, and pick the size closest to that measurement: the warmer has a little stretch, so a size slightly smaller than your arm is better than a size too big.
| Size | Forearm around | Rectangle width | Rectangle length | Stitches |
|---|---|---|---|---|
| S | 7 in / 18 cm | 7 in / 18 cm | 10 in / 25 cm | 21 hdc |
| M | 8 in / 20 cm | 8 in / 20 cm | 11 in / 28 cm | 24 hdc |
| L | 9 in / 23 cm | 9 in / 23 cm | 12 in / 30 cm | 27 hdc |
- Finished size (M): about 8 in (20 cm) around, 11 in (28 cm) long, with a thumb opening about 1.5 in (4 cm) long.
- Gauge: 12 hdc and 9 rows = 4 in (10 cm) with a 5.5 mm hook, unblocked. Crochet a 5-inch swatch first: if your rectangle comes out wider than the table, drop to a 5.0 mm hook; if narrower, go up to a 6.0 mm hook.
- Skill level: confident beginner. You should know how to chain, half-double crochet, single crochet, and slip stitch. The ribbed cuff is just front-post and back-post double crochet, explained below.
If you have never made a wearable before, this is the perfect first one: there is no shaping anywhere, and if you can crochet a rectangle, you can make arm warmers. And if you fall in love with cozy hand warmers, our easy mitten crochet pattern is the natural next project for full-coverage cold days.
Abbreviations — US terms
| Abbreviation | Meaning |
|---|---|
| ch | chain |
| hdc | half-double crochet |
| dc | double crochet |
| sc | single crochet |
| sl st | slip stitch |
| st(s) | stitch(es) |
| fpdc | front-post double crochet: dc worked around the post of the stitch below, from the front |
| bpdc | back-post double crochet: dc worked around the post of the stitch below, from the back |
| RS | right side |
| FO | fasten off |
A note on turning chains: the ch 2 at the start of a half-double crochet row does not count as a stitch: work the first hdc into the very first stitch. The ch 2 at the start of a ribbed row does not count either.
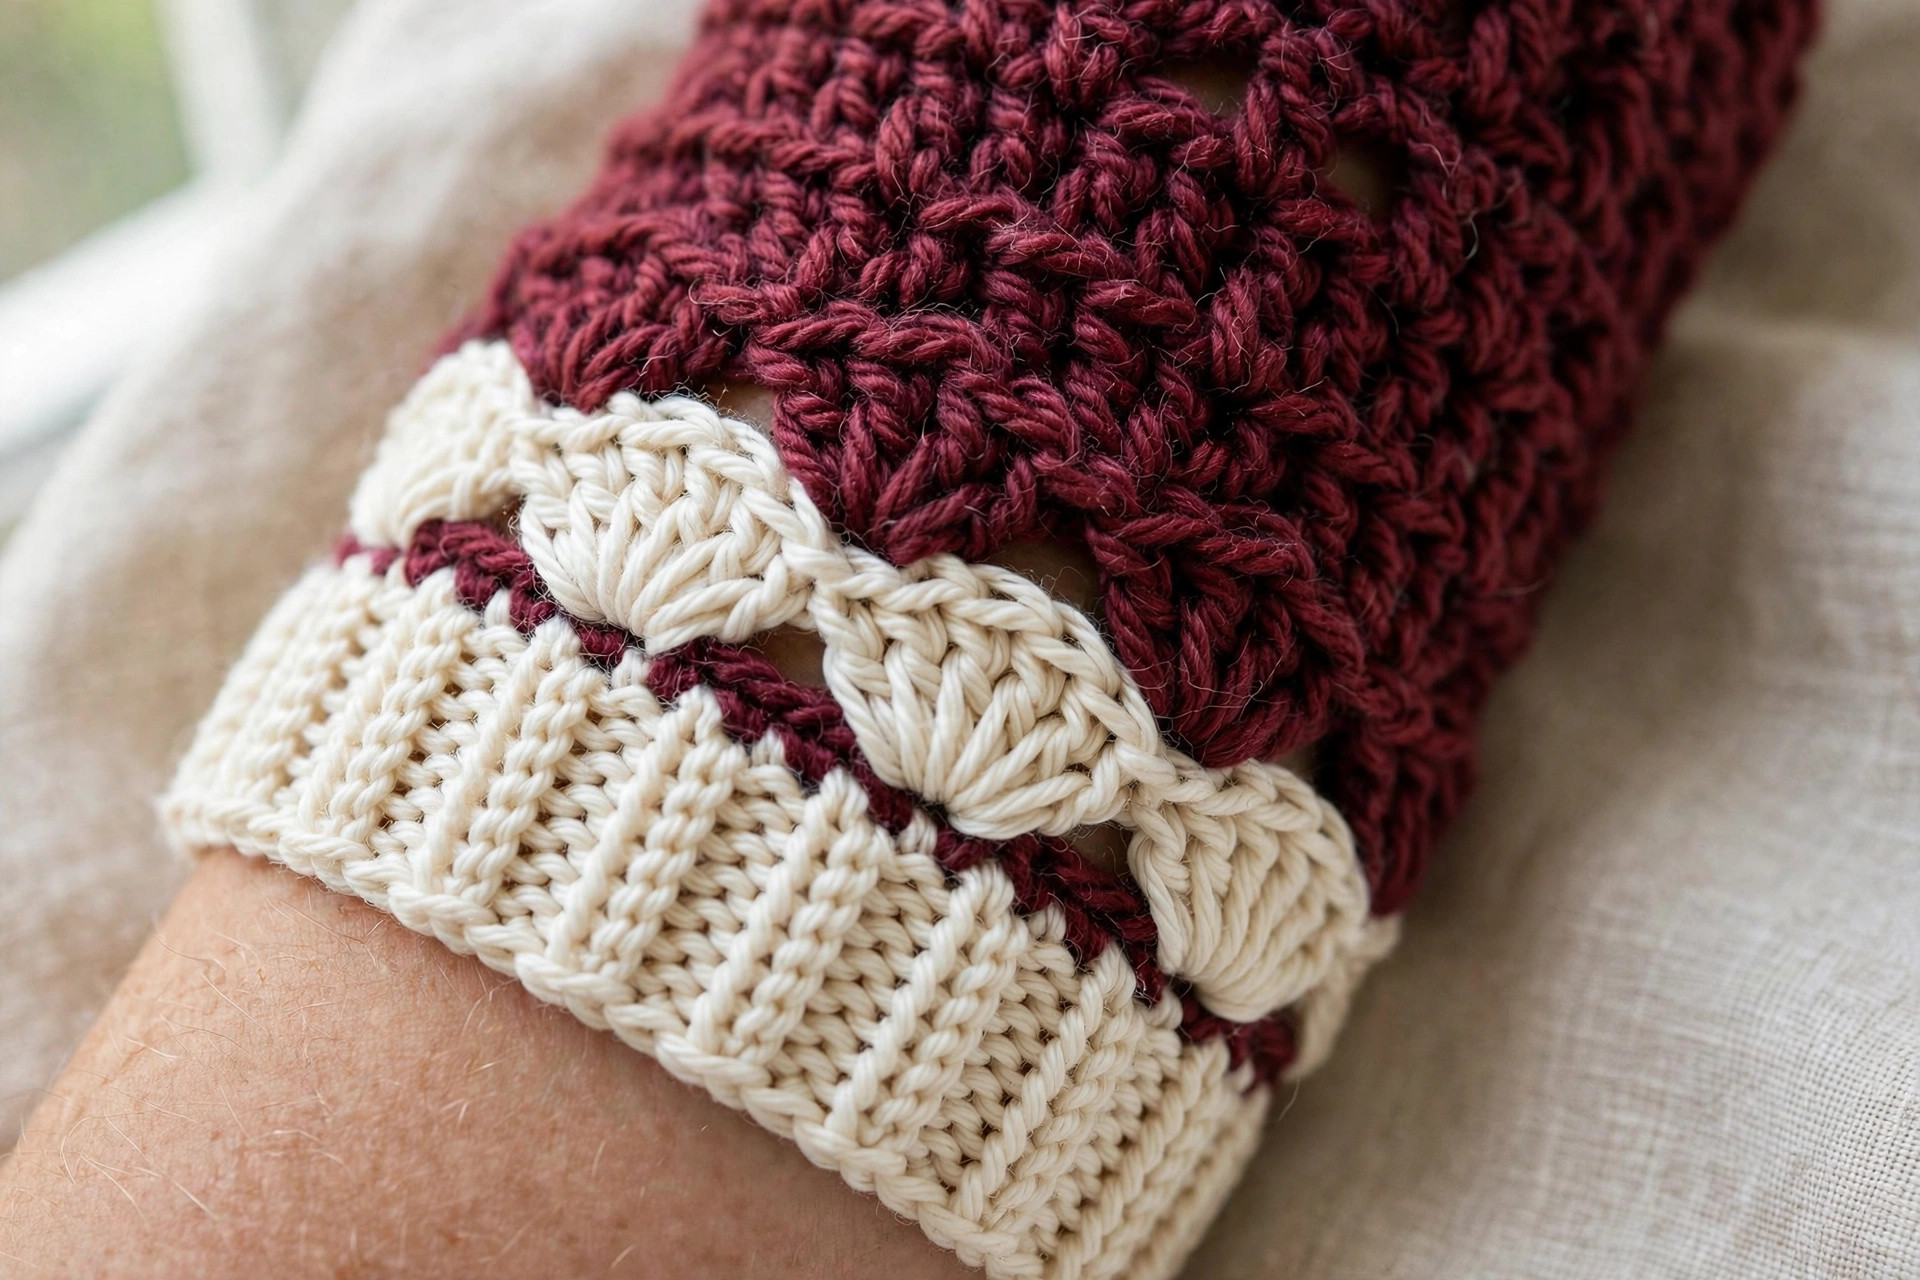
The pattern (US terms)
Make two identical rectangles, then seam each one into a tube with a gap left open for the thumb. The cuff is worked first in ribbing, then the body in half-double crochet with a shell stripe, then a tidy top edge.
Warmer — make 2
With color B and a 5.5 mm hook, chain the foundation chain for your size: S ch 23, M ch 26, L ch 29.
Ribbed cuff (color B):
- Row 1 (RS): dc in 4th ch from hook and in each ch across. (S 20 dc, M 23 dc, L 26 dc)
- Row 2: ch 2 (does not count as a st), turn, *fpdc around next dc, bpdc around next dc; rep from * across, ending with fpdc around the last dc if the count is odd. (S 20 sts, M 23 sts, L 26 sts)
- Rows 3–4: repeat Row 2 twice more, working fpdc around fpdc and bpdc around bpdc so the ribs line up.
The cuff should measure about 2 inches tall. If your ribs look uneven, check that you are working fpdc around the raised posts and bpdc around the recessed posts: the pattern only works when each stitch lines up with the one below it.
Body (color A):
Switch to color A. The first body row is worked into the top of the ribbing, and it adds one stitch so the body sits loosely over the forearm instead of gripping it like the cuff.
- Row 1: ch 2 (does not count as a st), turn, work 2 hdc in the first st, then hdc in each remaining st across. (S 21 hdc, M 24 hdc, L 27 hdc)
- Rows 2–6: ch 2 (does not count as a st), turn, hdc in each st across.
- Shell stripe row (color B): join color B. Ch 1, turn, sc in first st, *skip 2 sts, 5 dc in next st, skip 2 sts, sc in next st; rep from * across, ending with sc in last st. (S 3 shells, M 4 shells, L 4 shells) Fasten off color B and rejoin color A.
- Remaining body rows: ch 2, turn, hdc in each st across, working 1 hdc in each sc and each dc of the shell row, until the rectangle measures the length in the size table: S 10 in (about 23 rows total), M 11 in (about 25 rows), L 12 in (about 27 rows). Count the shell row as one of the rows.
Top edge:
- Top edge row: ch 1, turn, sc in each st across. Fasten off, leaving a long tail of about 18 inches for seaming.
Tip: the two warmers must be mirror images, not identical twins. When you seam them, the thumb opening goes on opposite sides: one warmer's opening faces left, the other's faces right. Mark the thumb side of each rectangle with a stitch marker before you seam, so you do not end up with two left warmers.
Seaming — the thumb opening
- Fold the rectangle in half. Fold each rectangle lengthwise with the right sides facing each other, so the two long edges meet. The cuff is at the bottom, the top edge is at the top.
- Mark the thumb opening. Measure 2 inches down from the top edge and place a stitch marker there, then measure 1.5 inches further down and place a second marker. The gap between the two markers is the thumb opening: S 1.25 in, M 1.5 in, L 1.75 in. Adjust it to your own thumb: the opening should be snug enough to anchor the warmer, but loose enough that your thumb slides through without a struggle.
- Sew the top section. With the long tail and a tapestry needle, whipstitch the two long edges together from the top edge down to the first marker.
- Leave the thumb opening unsewn. Skip the section between the two markers completely: do not sew it, do not close it, do not put a stitch across it.
- Sew the bottom section. Resume whipstitching from the second marker down to the bottom of the cuff.
- Turn right side out and try it on. Slide the warmer onto your forearm with the cuff at your wrist and your thumb through the opening. The cuff should grip your wrist, the thumb opening should sit comfortably at the base of your thumb, and the top edge should reach just below your elbow.
Weave in all ends on the inside of the warmer, where they will never touch your skin. Work each tail in for at least 2 inches, changing direction once so it cannot wriggle out.
Finishing touches
Take fifteen unhurried minutes here: it is the difference between a warmer that slides down and one that stays put.
Block it lightly. Lay the warmers flat on a towel and shape them into neat rectangles, smoothing the cuff ribs straight. Mist lightly with water and let them dry completely before you wear them. Blocking evens out the stitches and sets the cuff ribs so they grip properly. For acrylic yarn, gentle steam from an iron held an inch above the fabric (never pressed down) sets the shape even better.
Check the fit as a pair. Put both warmers on and type a few sentences, hold a mug, and reach for something on a high shelf. The cuffs should stay at your wrists, the thumb openings should not pinch, and the top edges should stay just below your elbows. If a warmer slides down, work the cuff with a hook one size smaller next time, or add a second ribbed row.
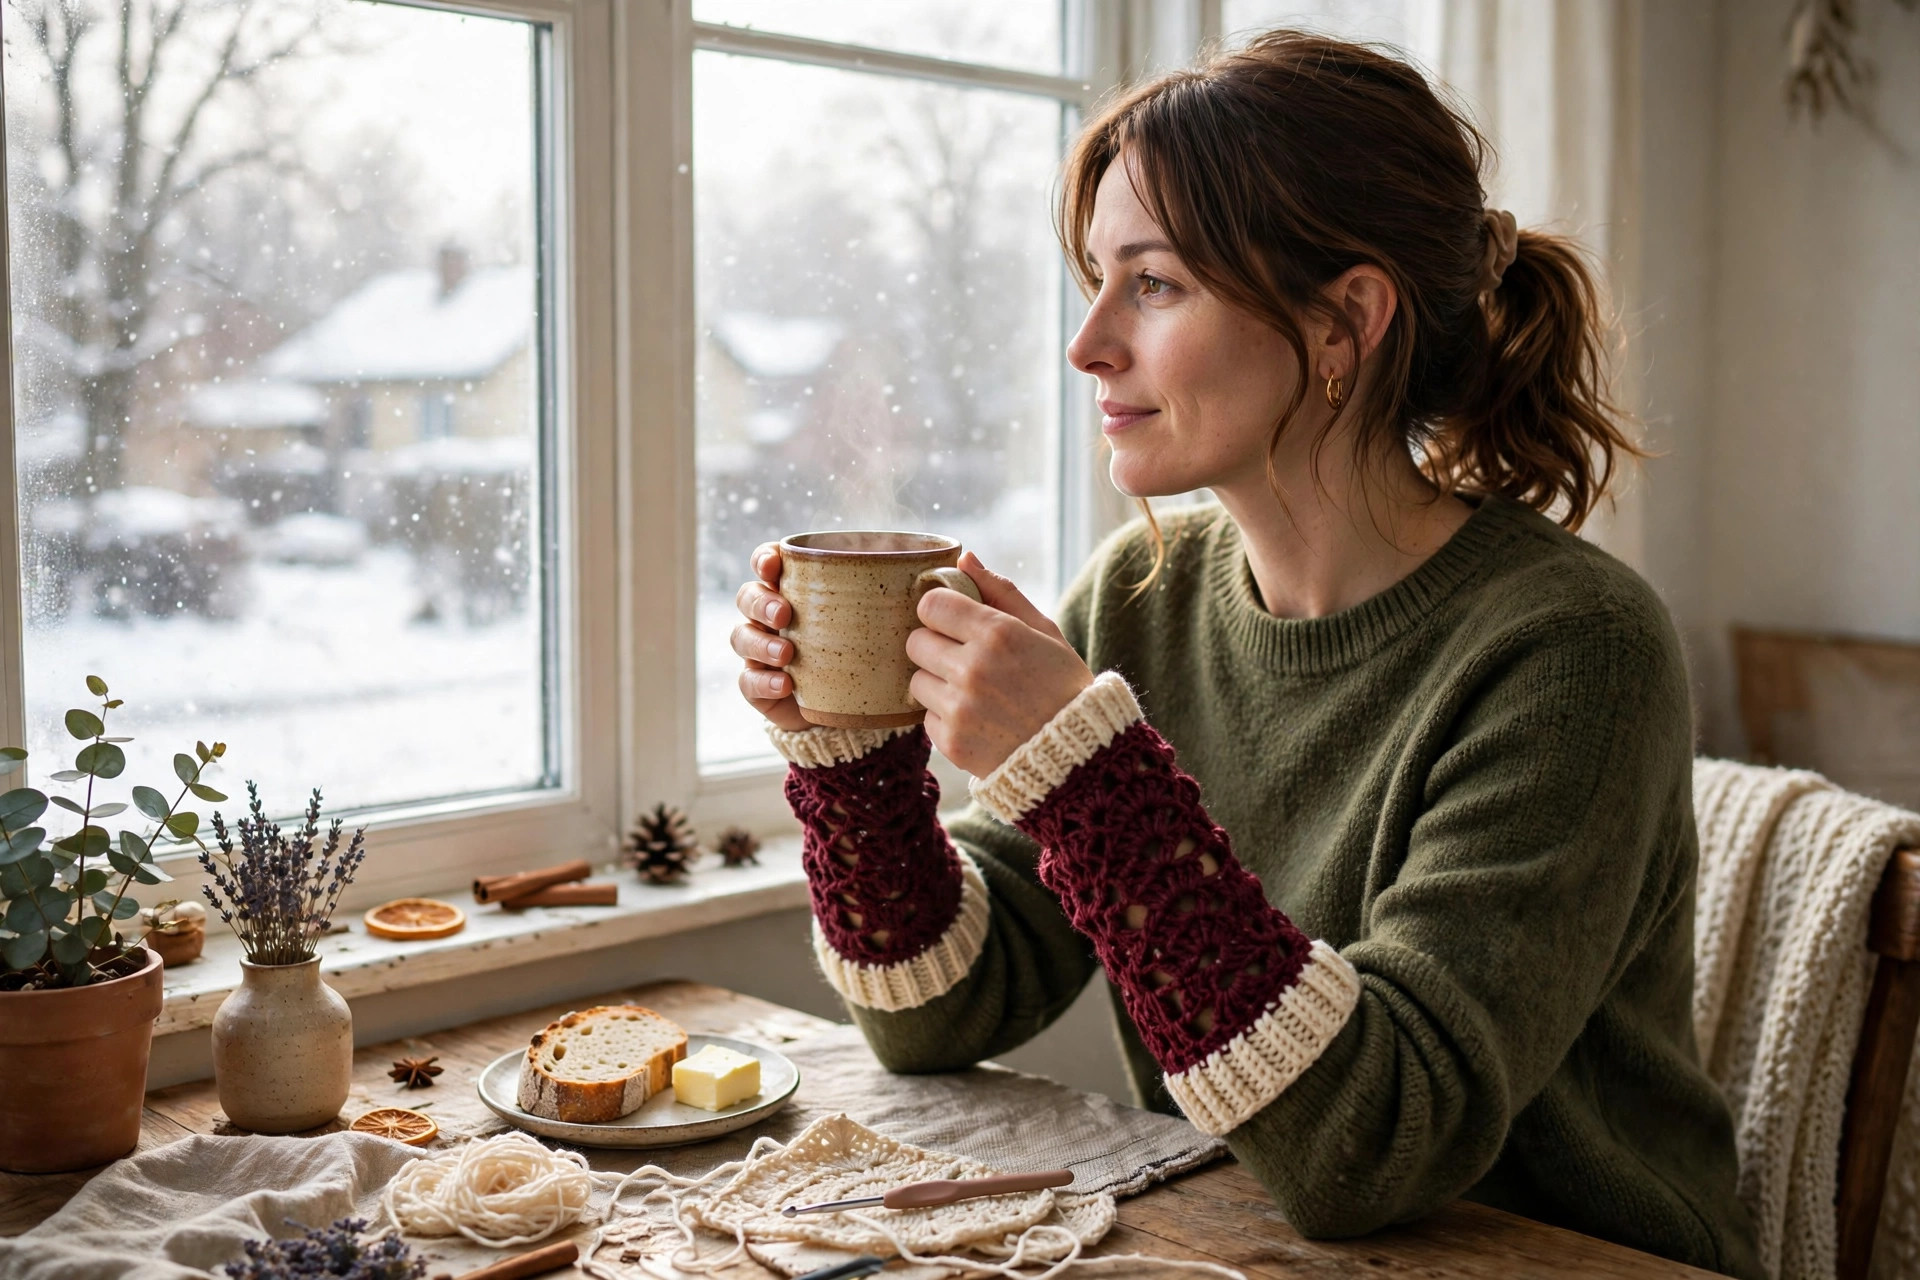
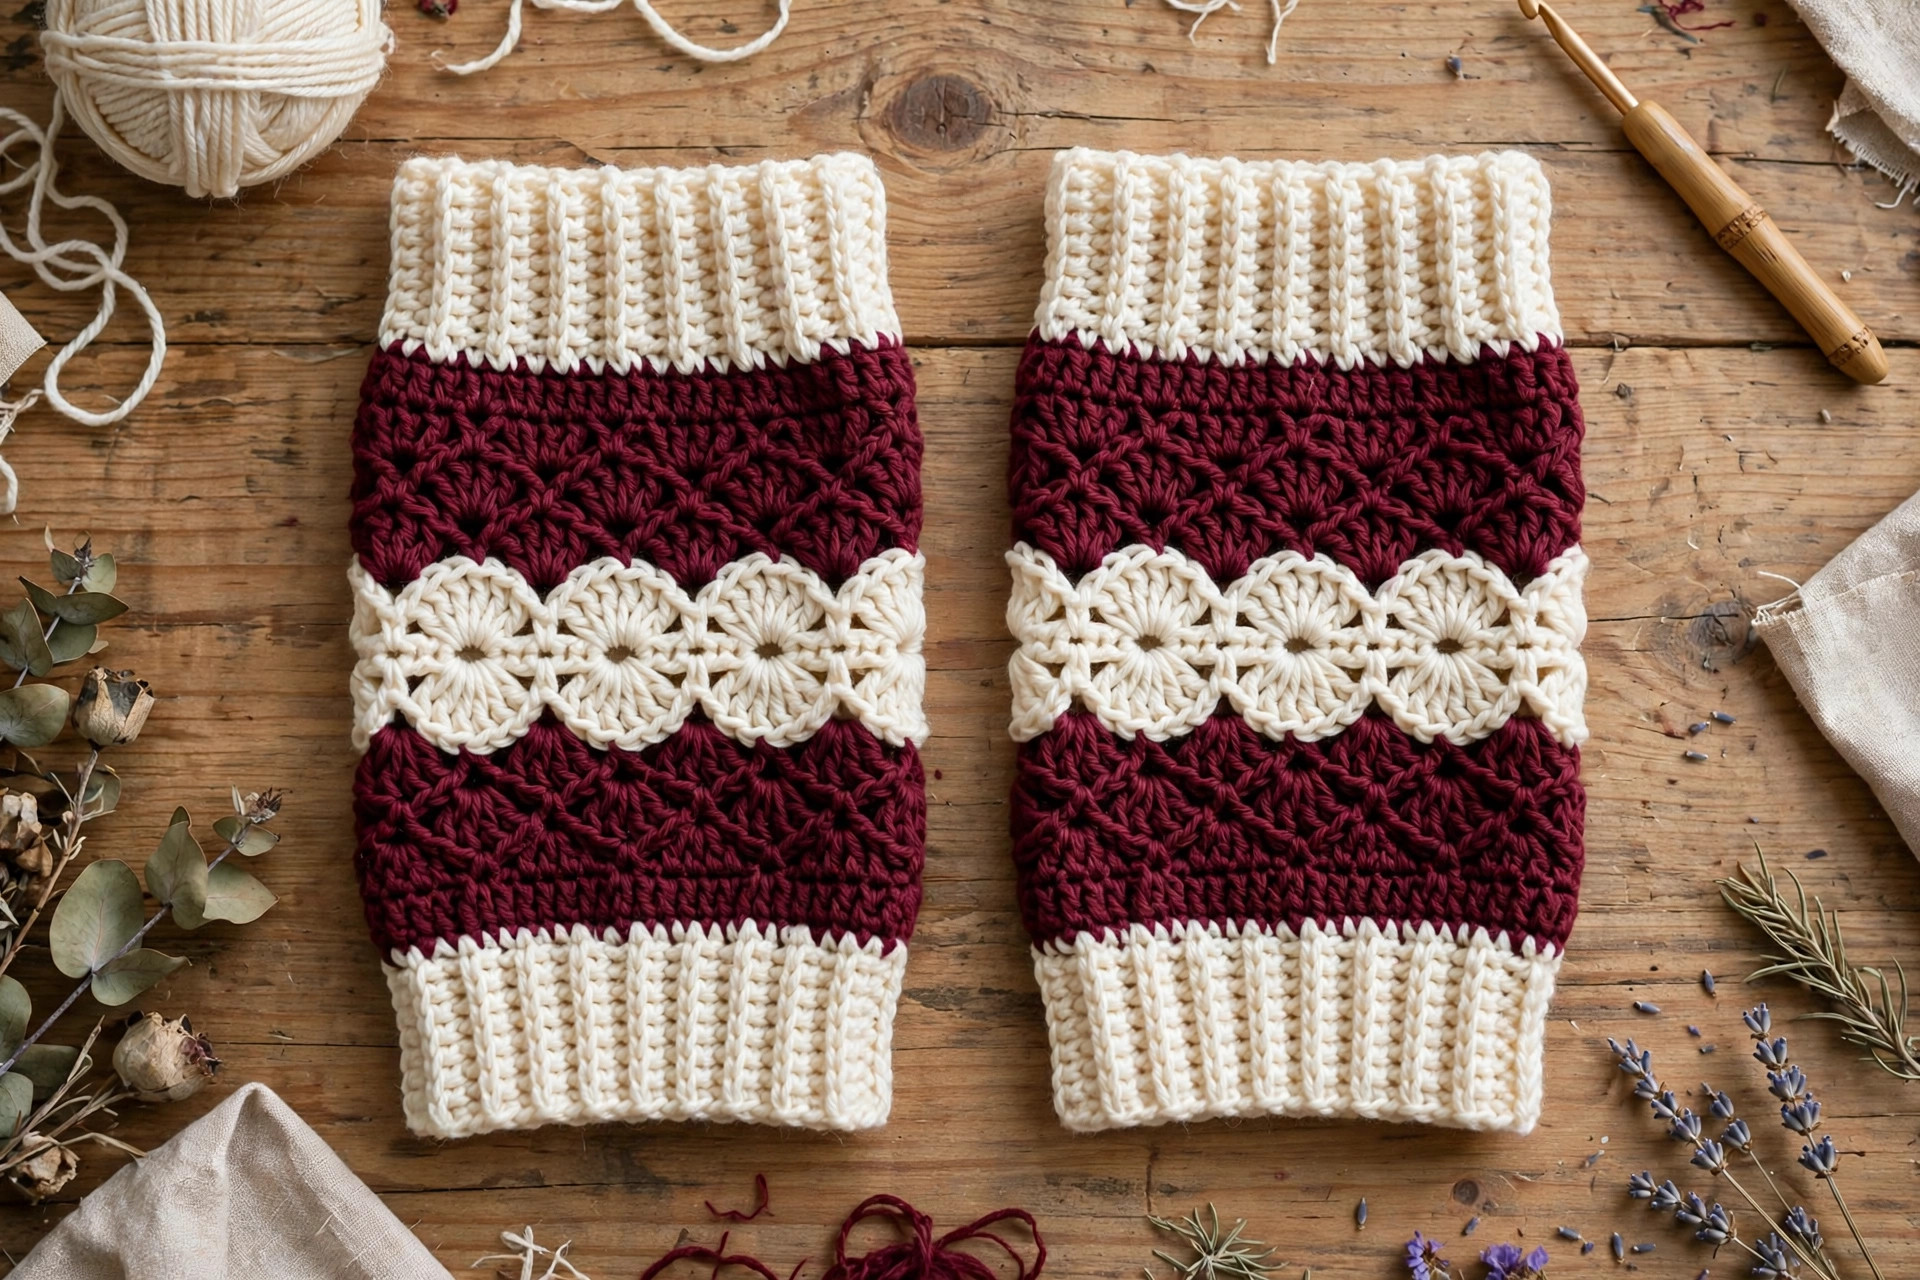
Three cute variations to try next
Once you have made one pair, the formula is yours to play with. Same rectangle, same seam, three personalities:
- Striped arm warmers. Work the body in alternating 4-row stripes of burgundy and cream, with a solid burgundy cuff. The stripes show beautifully on the forearm and use up half balls from your yarn basket. If you like leg warmers too, the free leg warmer crochet pattern uses the same rectangle construction on a bigger scale.
- Buttoned cuffs. Sew a small wooden button to the top corner of each cuff and work a button loop of chain stitches on the opposite corner. The buttons keep the cuff snug and give the warmers a rustic, boutique look. Pair them with our free crochet boot cuff patterns for a matching cuff set.
- Extra-long arm warmers. Work the body 4 inches longer so the warmers reach past the elbow, and add a second shell stripe near the top. They look wonderful peeking out of a short-sleeved sweater in autumn. If you like cozy layers, the crochet poncho free pattern is the next step up in warm, wearable crochet.
And if this project gave you the cold-weather accessory bug, the free ribbed beanie pattern is a quick ribbed hat that matches the warmers perfectly.
Troubleshooting tips
- Your rectangle is a trapezoid, wider at one end. You are adding or dropping stitches at the edges. The ch 2 turning chain does not count as a stitch, so the first hdc goes in the very first stitch and the last hdc in the top of the last stitch below. Count every few rows until the habit sticks.
- The warmer slides down your arm. The cuff is too loose. Work the cuff with a hook one size smaller, or add a second ribbed row. The cuff should grip your wrist gently.
- The thumb opening pinches. The opening is too small. Unpick the seam and make the gap a quarter inch longer on each side. The opening should be snug, not tight.
- The thumb opening gapes open. The opening is too big. Unpick the seam and make the gap a quarter inch shorter on each side, or work a round of single crochet around the opening to pull it in.
- You made two left warmers. It happens to everyone. Unpick one seam and re-sew it with the thumb opening on the opposite side. Mark the thumb side with a stitch marker before you seam, every time.
- The shell stripe looks lopsided. The shells need a stitch count that divides evenly. The body stitch counts (21, 24, 27) all work with the shell repeat, so count your stitches after the first body row: if the count is off, the shells will not line up.
Frequently asked questions
Is this arm warmer crochet pattern really free?
Yes, the complete pattern above is free, no email signup, no PDF purchase required.
Are arm warmers the same as leg warmers?
No. Arm warmers are worn on the forearms and wrists, with a thumb opening so your fingers stay free. Leg warmers are worn on the lower legs, over tights or leggings, with no thumb opening. This pattern makes arm warmers only. If you want leg warmers, our free leg warmer crochet pattern is the pattern you need.
What skill level is this arm warmer pattern?
Confident beginner. If you can chain and half-double crochet, you have every skill this pattern needs. The ribbed cuff is explained stitch by stitch, and there is no shaping anywhere.
How long does it take to make?
About 3 hours for S, 3.5 hours for M, and 4 hours for L for the pair, most of it relaxing rows of half-double crochet. Seaming and the thumb openings take about 30 minutes.
How much yarn do I need?
For M, about 200 yds of the main color and 60 yds of the contrast color in worsted-weight yarn. S needs about 160 yds and 50 yds; L needs about 240 yds and 70 yds.
Can I make the arm warmers longer or shorter?
Easily. Work fewer or more body rows until the rectangle is the length you want, keeping both warmers the same. The cuff and the shell stripe stay where they are.
Can I sell the finished arm warmers I make?
Yes! You may sell finished arm warmers made from this pattern in small batches (craft fairs, markets, gifts). Please credit Little Loop Finds as the pattern designer with a link back to this page.
More free patterns to try
If these arm warmers were fun, keep the hook moving. The easy mitten crochet pattern is the next step up for full-coverage cold days, the free crochet boot cuff patterns are quick matching cuffs, the free ribbed beanie pattern is a ribbed hat that matches the warmers, and the crochet poncho free pattern is a cozy layer for the coldest days.