Crochet potholders free patterns: 3 easy kitchen designs
Three thick, quick cotton potholders for everyday kitchen use: a classic striped double-thick square, a cheerful granny square pair, and a chunky waffle stitch design, all beginner-friendly and free.

Kitchen · Crochet
- Finished size
- About 17 cm / 6.5 in square
- Making time
- About 1-2 hours each
- Hook
- 5.0 mm, worsted-weight cotton
- Designs
- 3 potholders in one set
- Skill
- Beginner
In this post
- Why you'll love these free crochet potholders patterns
- Materials you'll need
- Size, gauge and skill level
- Abbreviations (US terms)
- The patterns (US terms)
- Why cotton is the only yarn for potholders
- Finishing touches and care
- Three colorways to try next
- Troubleshooting tips
- Frequently asked questions
- More free patterns to try
If your kitchen drawers are full of thin, scorched store-bought potholders, it is time to crochet your own. These three crochet potholders free patterns are thick where it matters, quick to finish, and useful every single day: a striped double-thick square, a granny square pair, and a chunky waffle stitch design, all in cotton and US terms, all free on this page.
Why you'll love these free crochet potholders patterns
A potholder is the perfect first kitchen project: small enough to finish in an evening, flat enough that shaping never gets scary, and useful enough to reach for daily.
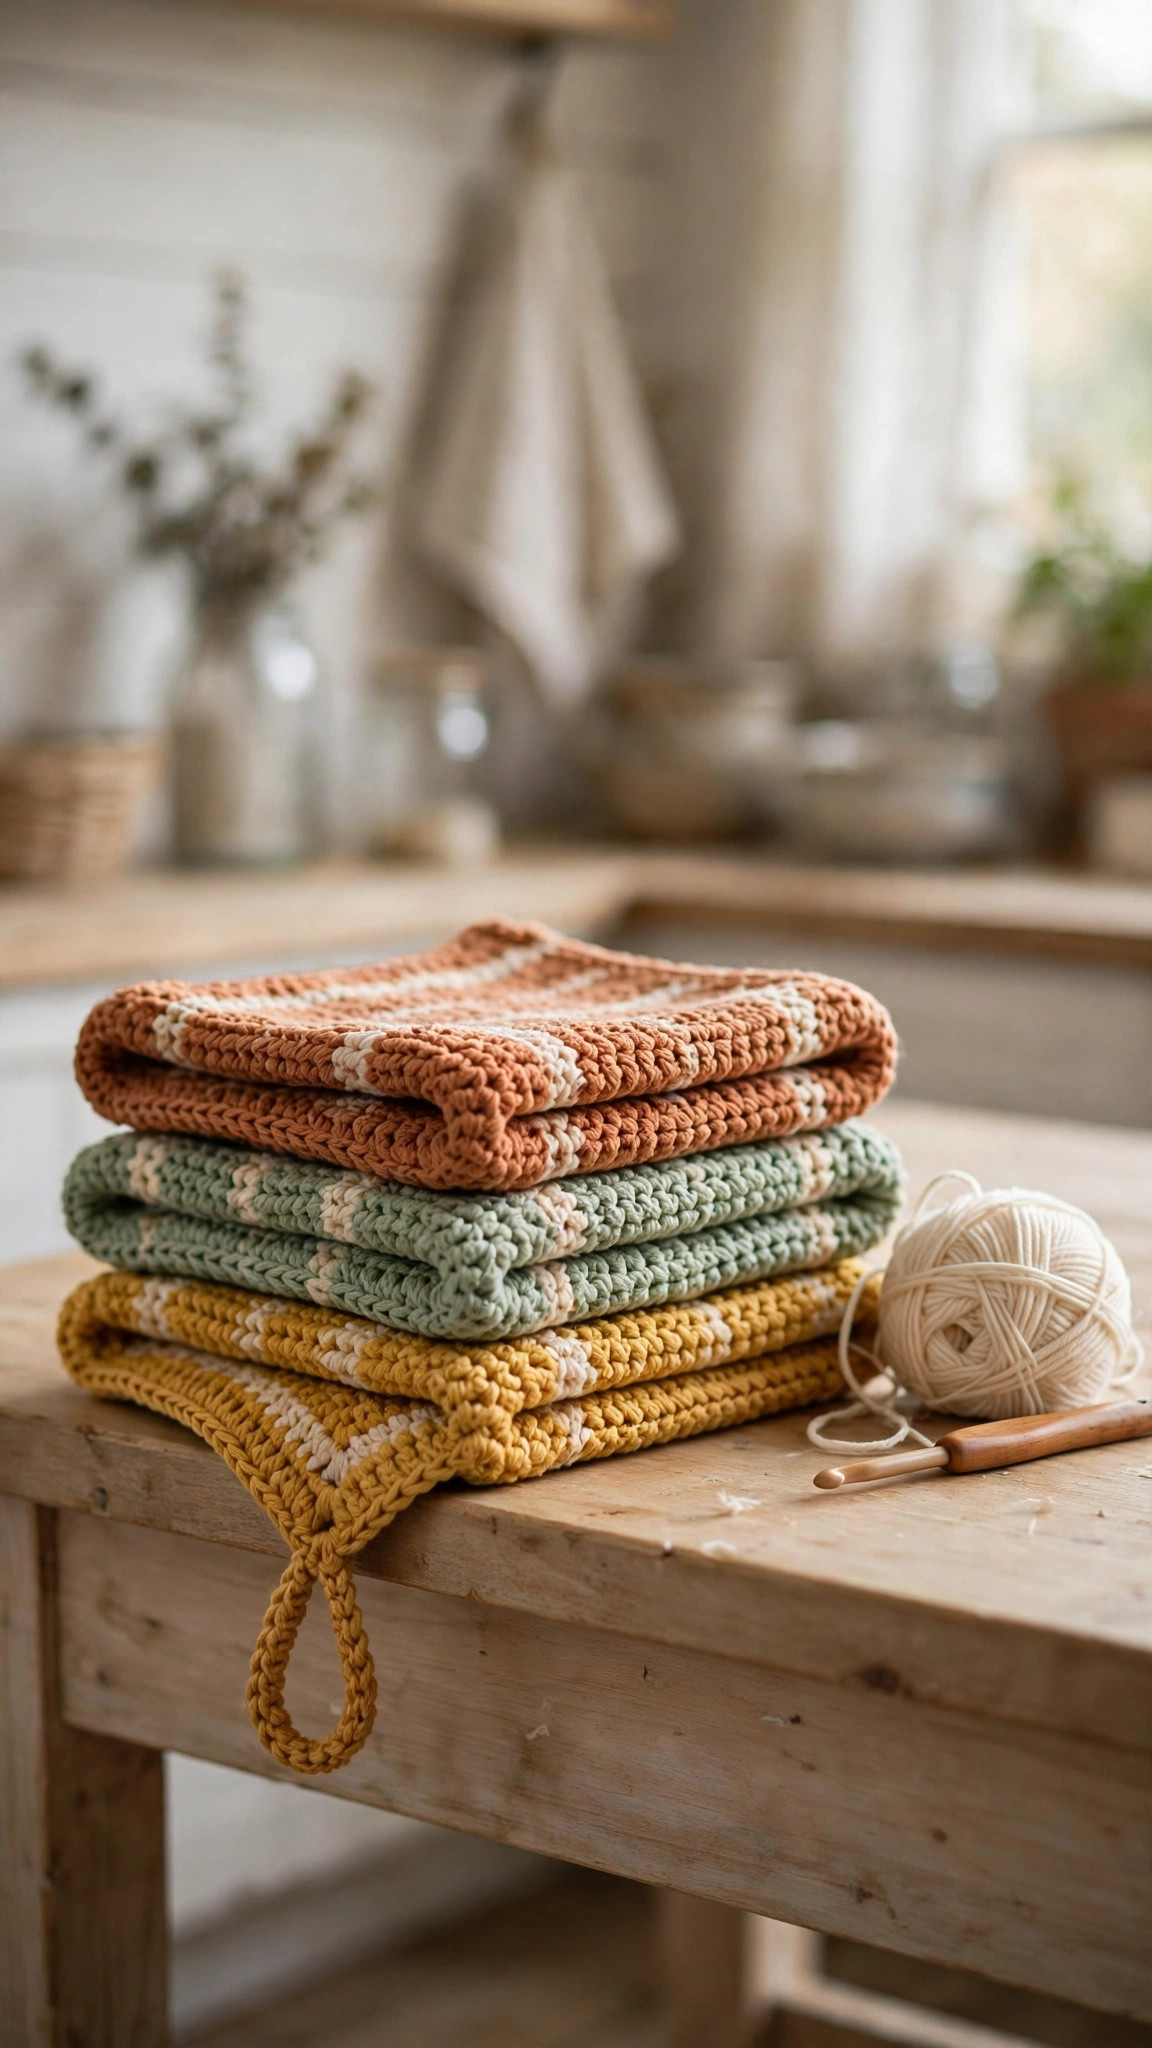
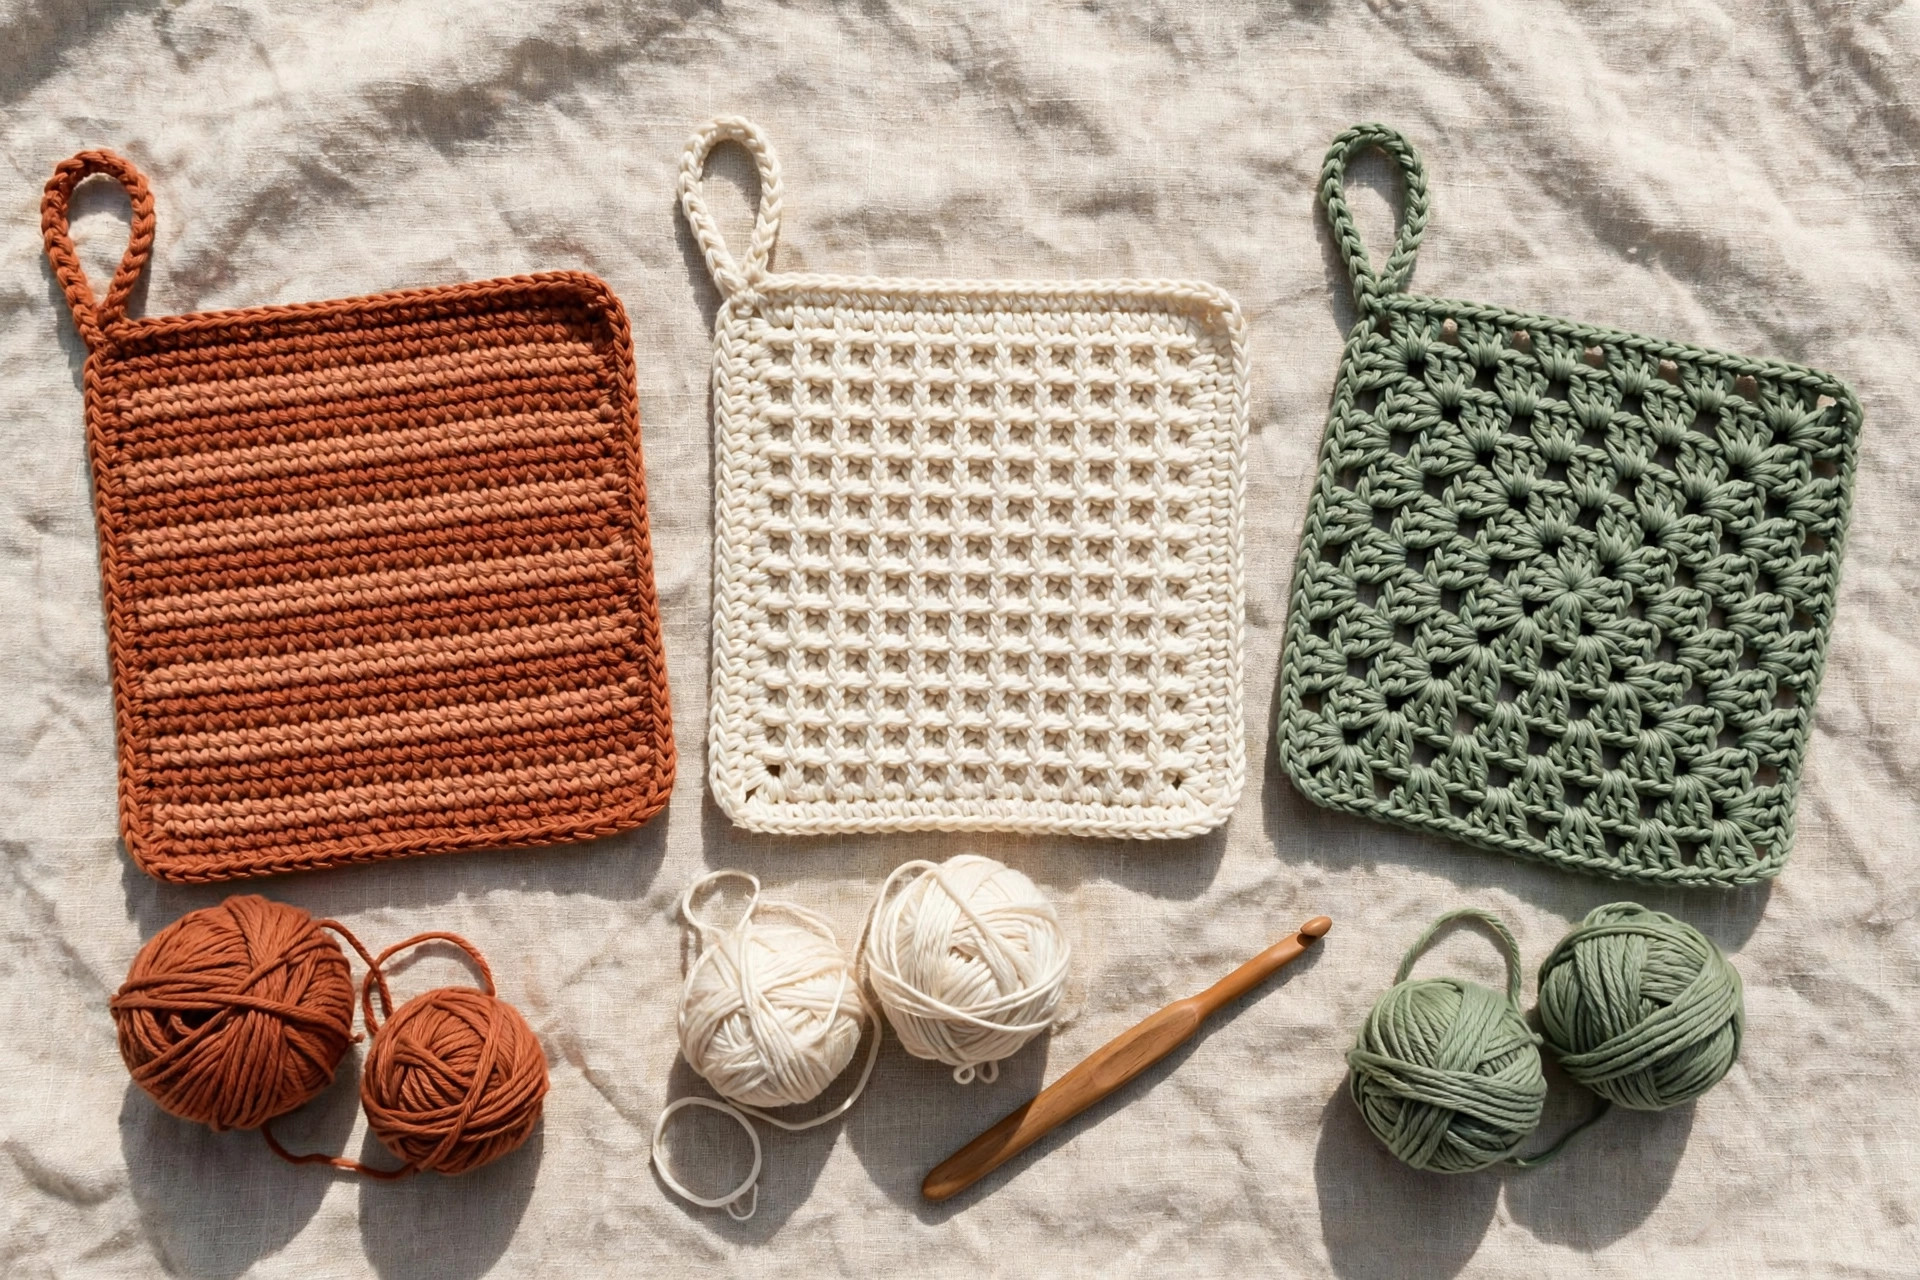
These three designs were planned as a matching set in terracotta, sage, mustard and cream, so you can mix them into a coordinated gift set. Make one to learn the stitches, then make the other two as a housewarming gift. Three handmade potholders tied with twine are one of the most appreciated handmade gifts there is, and they cost very little to make.
They are also stash busters: each potholder uses 50 to 70 g of cotton, so half-used balls finally have a job. If you have already made our free crochet dishcloth patterns, you already own the right yarn and hook.
Materials you'll need
| Supply | What to get |
|---|---|
| Yarn | Worsted-weight (#4) 100% cotton, about 180 g total (one 100 g ball each in terracotta, sage, cream and mustard) |
| Crochet hook | 5.0 mm (H-8) |
| Notions | Tapestry needle, scissors, stitch markers, tape measure |
Use 100% cotton and nothing else for potholders. Cotton takes the heat of a baking dish without melting or going shiny, while acrylic softens and melts near high heat and wool felts in the wash. Kitchen cotton is inexpensive, comes in every color, and softens with every wash. A 4.5 mm hook works too, just keep your fabric tight and check the finished size below.
Size, gauge and skill level
- Finished size: each potholder measures about 17 cm (6.5 in) square, not counting the hanging loop.
- Gauge: 15 sc and 16 rows = 10 cm (4 in) with a 5.0 mm hook; for the waffle design, 14 dc and 9 rows = 10 cm (4 in). A potholder that comes out too small will not cover your hand, so if yours measures small, go up a hook size.
- Skill level: beginner. You should know chain, single crochet, double crochet and slip stitch. The only new skill is front post double crochet, explained in the waffle design.
If this is your very first project, start with Potholder 1: it is pure single crochet, and by the second panel you will be reading rows without thinking. Our easy beginner crochet patterns round up more first projects in the same gentle style.
Abbreviations (US terms)
| Abbreviation | Meaning |
|---|---|
| ch | chain |
| sc | single crochet |
| dc | double crochet |
| fpdc | front post double crochet (a dc worked around the post of the stitch below) |
| sl st | slip stitch |
| st(s) | stitch(es) |
| FO | fasten off |
A note on turning chains: in the flat designs the turning chain does not count as a stitch. In the waffle and granny designs, a chain 3 at the start of a row counts as the first double crochet.
The patterns (US terms)
All three use the same cotton and 5.0 mm hook. Work the flat designs in rows and the granny square in joined rounds. Stitch counts are in parentheses at the end of every row or round.
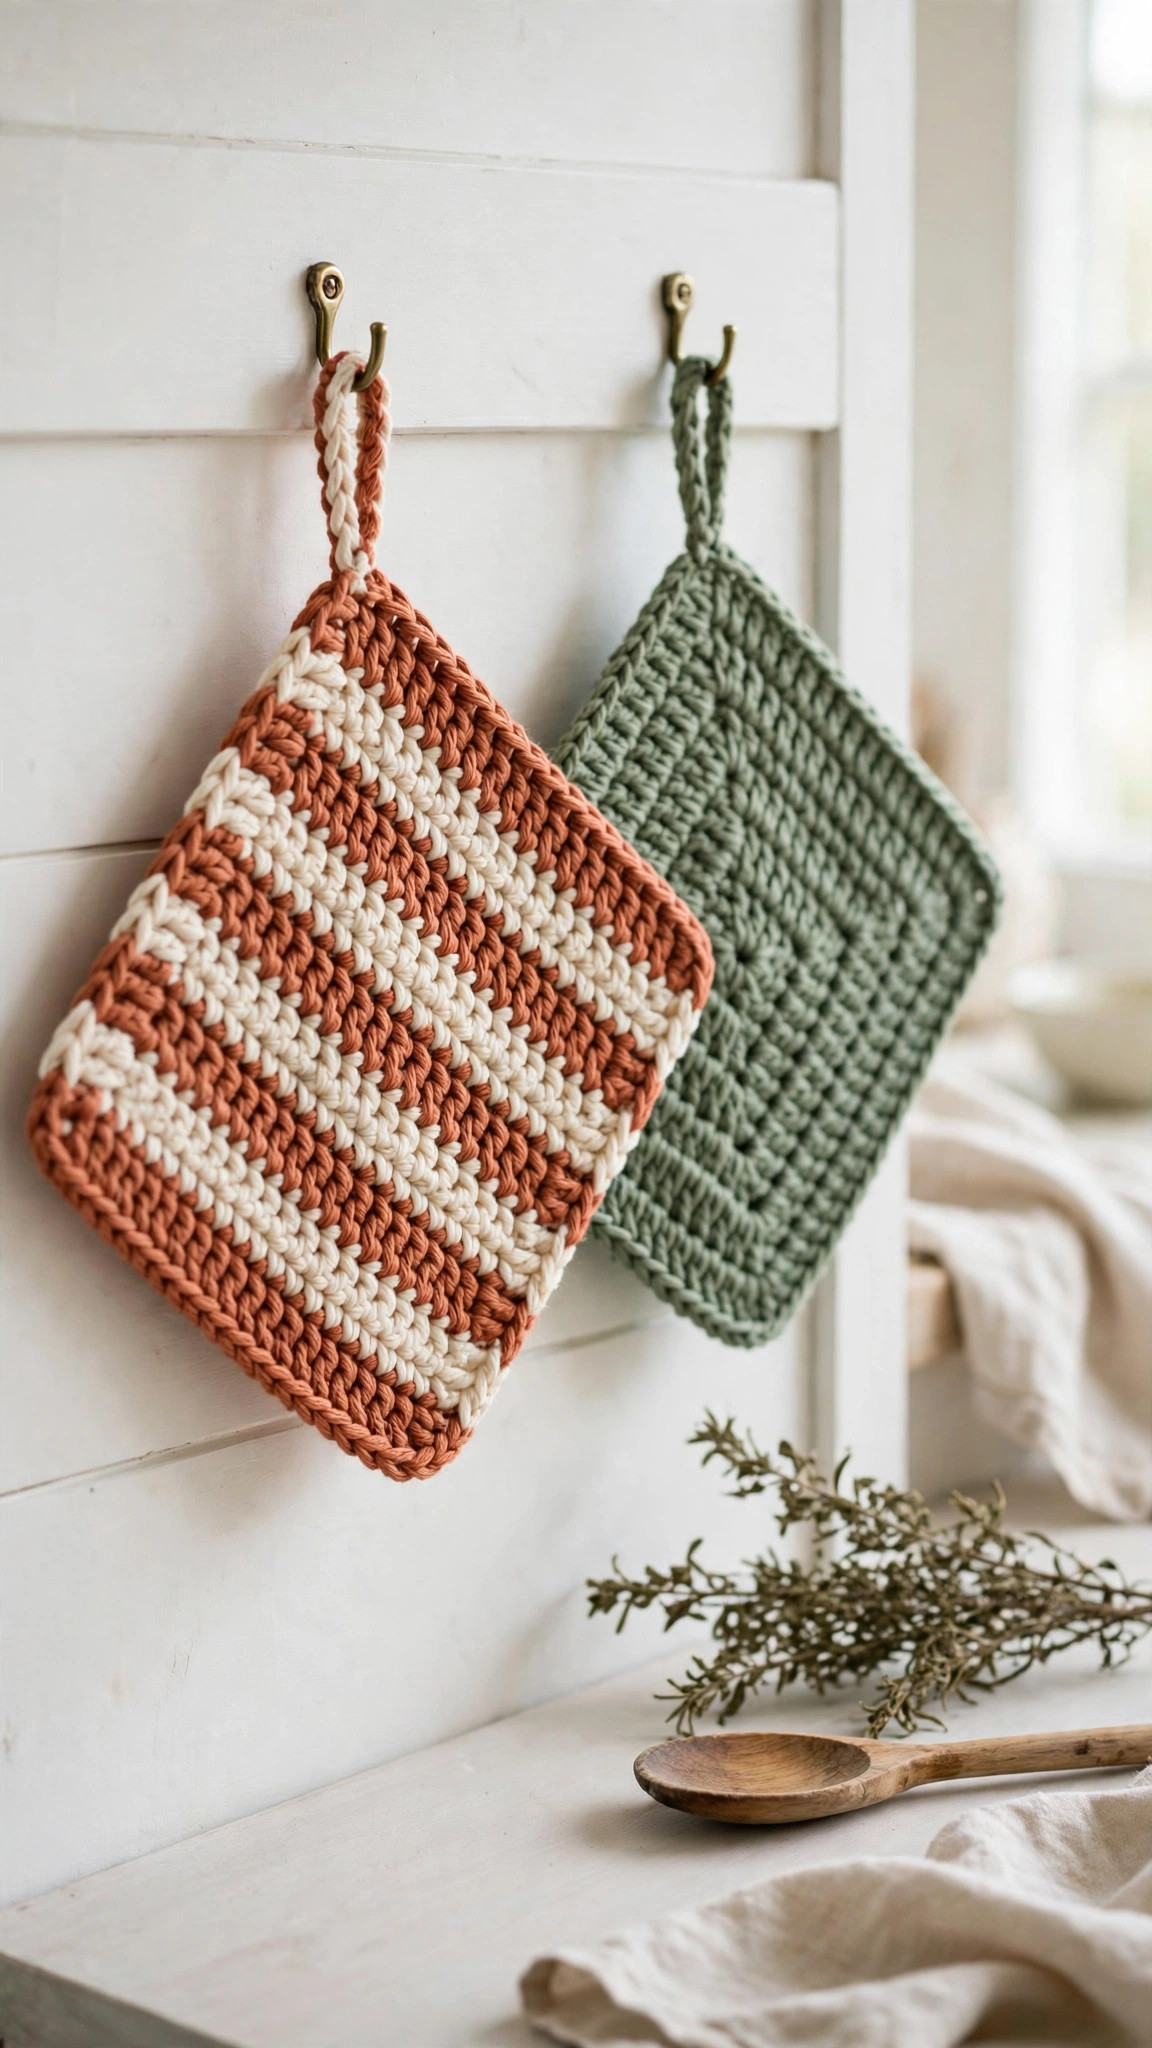
1. Classic striped double-thick potholder
The workhorse of the set. Two single-crochet panels are joined together, giving four layers of cotton between your hand and a hot dish. The stripes do the decorating, so no colorwork skill is needed.
Materials
- Worsted-weight (#4) 100% cotton: about 35 g Color A (terracotta) and 15 g Color B (cream) per panel, about 100 g total
- 5.0 mm hook, tapestry needle, scissors
Size & gauge
- Finished size: about 17 cm (6.5 in) square, plus a 5 cm (2 in) hanging loop
- Gauge: 15 sc and 16 rows = 10 cm (4 in)
- Stitches used: chain, single crochet, slip stitch
Pattern
Make 2 identical panels. Color A is terracotta, Color B is cream.
- Foundation: with Color A, ch 26.
- Row 1: sc in the 2nd ch from the hook and in each ch across (25 sc).
- Rows 2–26: ch 1, turn, sc in each st across (25 sc).
- Stripe sequence: Rows 1–4 in A, 5–6 in B, 7–10 in A, 11–12 in B, 13–16 in A, 17–18 in B, 19–22 in A, 23–24 in B, 25–26 in A. Change color on the last yarn-over before the change, and carry the unused color loosely up the side edge.
- FO and weave in the ends. Work the second panel the same way, or reverse the stripes for a matched-but-not-identical pair.
Finishing
Hold the panels with wrong sides together and right sides out. Join Color A with a sl st in any corner, ch 1, and sc through both layers all the way around: sc in each stitch along the top and bottom, about 1 sc per row along the sides, and 3 sc in each corner. Join with a sl st to the first sc and FO, weaving the ends in between the layers.
Hanging loop: join Color A with a sl st in any corner, ch 12, sl st into the same corner, FO, weave in the ends.
Tips
- Count the first row twice: 24 or 26 stitches instead of 25 means the panels will not line up when you join them.
- Keep your edges straight. The chain 1 is a turning chain only, so work the first sc into the first stitch of the row below, not into the turning chain.
- Steam the panels before joining: a quick press flattens curling edges and makes the joining round neater.
2. Granny square potholder
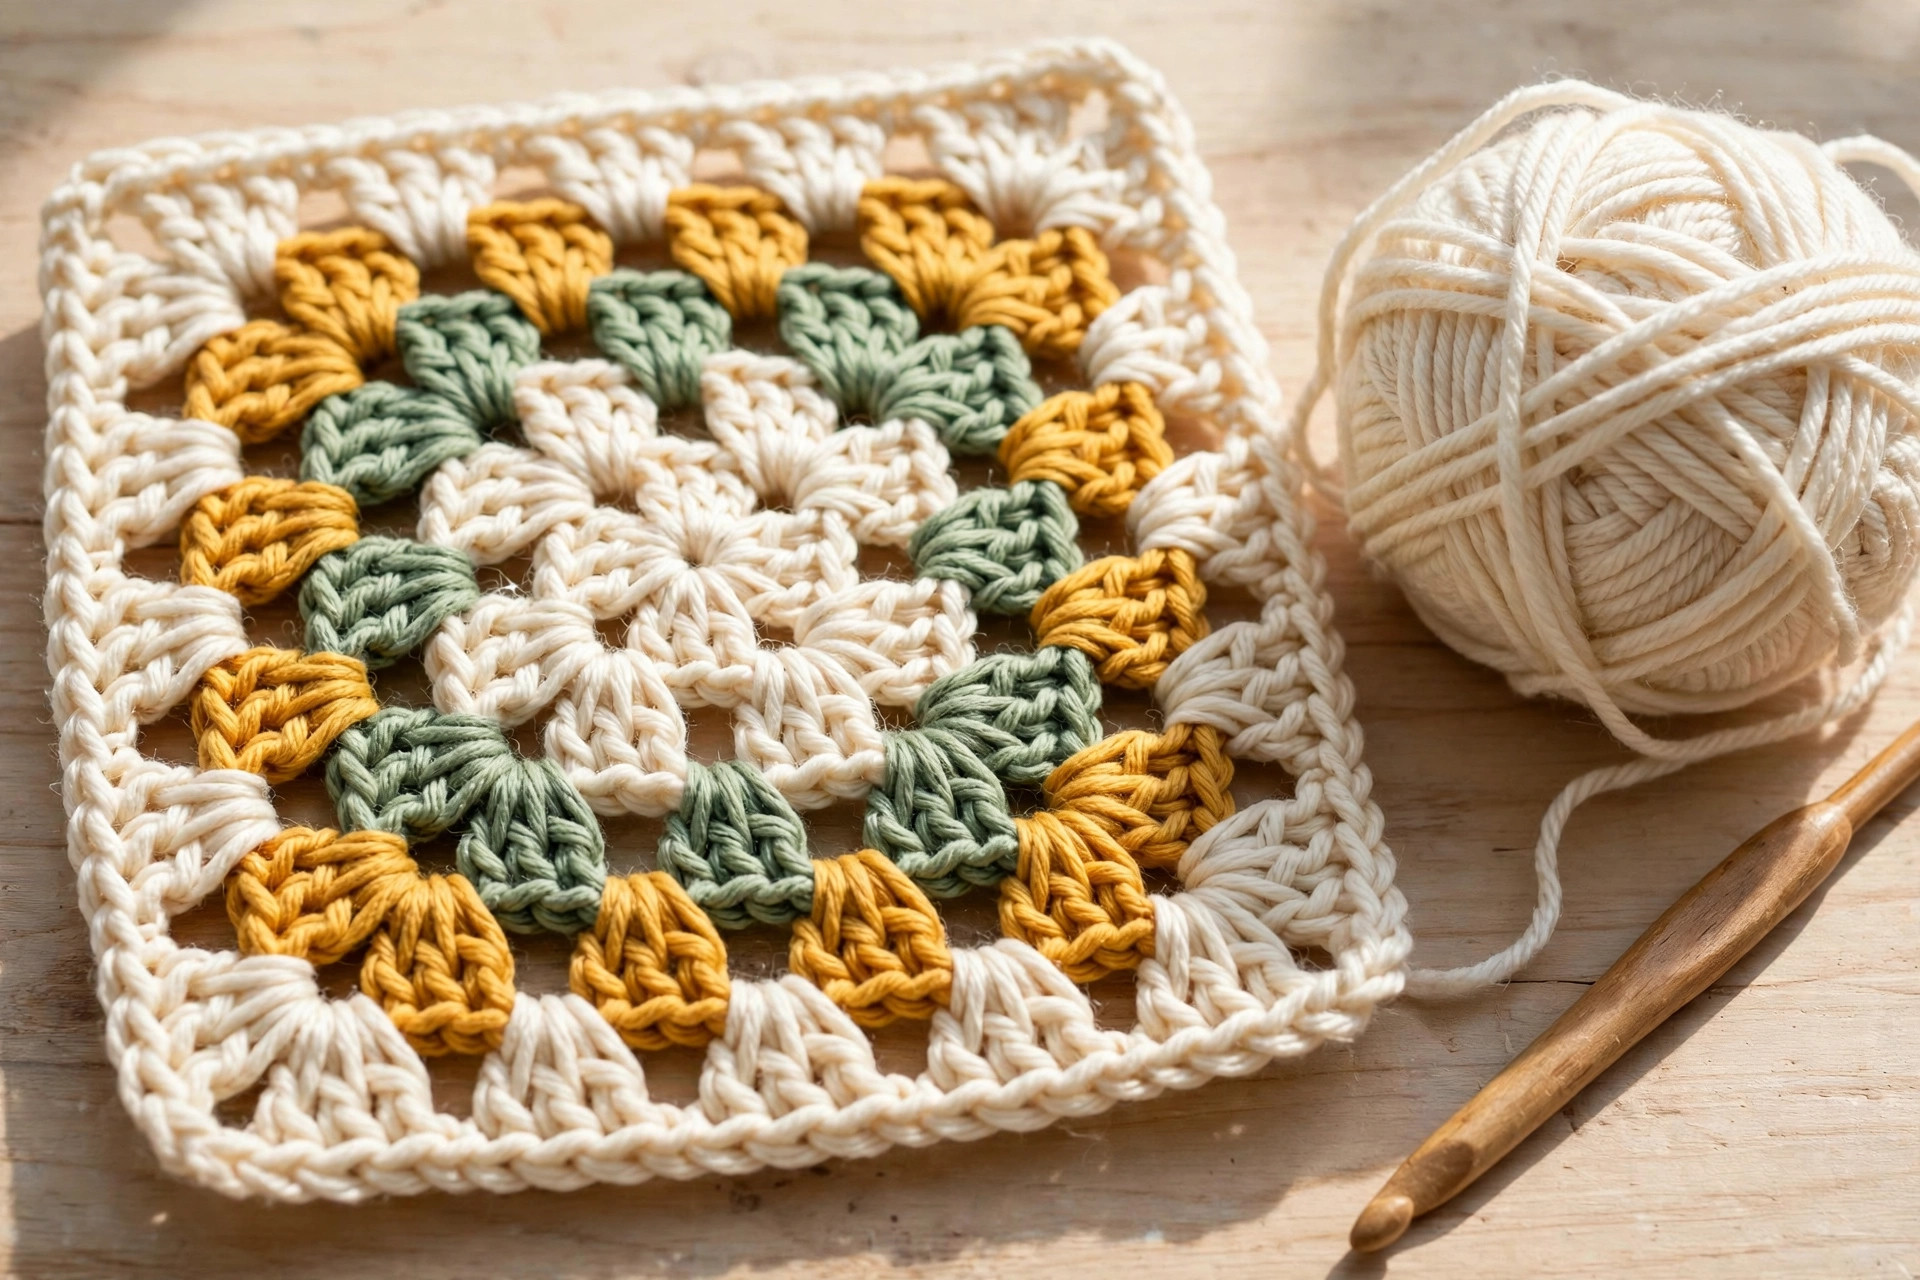
The pretty one. A classic granny square in cream, mustard and sage, worked twice and joined back to back. One granny square has holes, but two together make a thick, heat-proof pad that still looks lacy from the outside.
Materials
- Worsted-weight (#4) 100% cotton: about 20 g cream, 15 g mustard, 15 g sage per square, about 100 g total
- 5.0 mm hook, tapestry needle, scissors
Size & gauge
- Finished size: about 18 cm (7 in) square after 6 rounds, plus a hanging loop
- Gauge: each round adds about 2.5 cm (1 in) to the width
- Stitches used: chain, double crochet, slip stitch
Pattern
Make 2 identical squares.
- Round 1 (cream): ch 4, join with a sl st to form a ring. Ch 3 (counts as the first dc), 2 dc in the ring, ch 2, [3 dc in the ring, ch 2] 3 times, join in the top of the beginning ch 3 (12 dc, 4 corner spaces).
- Round 2 (mustard): sl st into the next corner space, ch 3, (2 dc, ch 2, 3 dc) in the same space, ch 1, [(3 dc, ch 2, 3 dc) in the next corner, ch 1] 3 times, join as before.
- Round 3 (sage): work as Round 2, adding one 3-dc group in the ch-1 space on each side: sl st into the corner space, ch 3, (2 dc, ch 2, 3 dc) in the same space, ch 1, 3 dc in the ch-1 space, ch 1, [(3 dc, ch 2, 3 dc) in the next corner space, ch 1, 3 dc in the next ch-1 space, ch 1] 3 times, join as before.
- Rounds 4–6 (mustard, sage, cream): work as Round 3, adding one more 3-dc group per side each round, so after Round 6 each side has four groups between the corners. FO and weave in the ends.
The rule that keeps granny squares square: every corner gets (3 dc, ch 2, 3 dc), every side space gets one 3-dc group, and groups are separated by a chain 1. Rippling means an extra group; cupping means a missing one.
Finishing
Hold the squares with wrong sides together. Join cream yarn with a sl st in any corner space, ch 1, and sc through both layers all the way around: sc in each dc and each ch-1 space, 3 sc in each corner. Join with a sl st to the first sc and FO. Add the hanging loop as for Potholder 1.
Tips
- Weave in ends as you go: six rounds in three colors means several ends per square, and weaving each one in before the next round saves a tedious session at the end.
- Block the squares before joining: pin each to 18 cm (7 in) on a towel, mist with water, and leave to dry.
- Love granny squares? Our autumn acorn granny square uses the same building blocks at a bigger scale.
3. Waffle stitch potholder
The thickest of the three, and the fastest to impress. Waffle stitch builds a raised grid that traps air between your hand and a hot lid. It is worked as a single layer, so it is the quickest make in the set.
Materials
- Worsted-weight (#4) 100% cotton: about 60 g in cream (or any single color)
- 5.0 mm hook, tapestry needle, scissors
Size & gauge
- Finished size: about 17 cm (6.5 in) square, plus a hanging loop
- Gauge: 14 dc and 9 rows = 10 cm (4 in)
- Stitches used: chain, double crochet, front post double crochet, single crochet, slip stitch
Pattern
- Foundation: ch 26.
- Row 1: dc in the 4th ch from the hook and in each ch across (24 dc, counting the beginning ch 3 as the first dc).
- Row 2: ch 3 (counts as the first dc), turn, [fpdc around the next st, fpdc around the next st, dc in the next st] repeat to the last 2 sts, fpdc around the next st, dc in the top of the turning ch (24 sts).
- Row 3: ch 3 (counts as the first dc), turn, [dc in the next 2 sts, fpdc around the next st] repeat to the last 2 sts, dc in the next st, dc in the top of the turning ch (24 sts).
- Rows 4–17: repeat Rows 2 and 3 eight more times, ending with a Row 3 repeat, for 17 rows total and a clear raised grid on the front.
- Border round: ch 1, turn, sc evenly around all four sides: sc in each stitch along the top and bottom, about 1 sc per row along the sides, 3 sc in each corner. Join with a sl st to the first sc and FO.
Reading the waffle: Row 2 puts the raised posts in one set of columns and Row 3 puts them in the other set. If your grid looks like stripes instead of squares, you repeated the same row twice.
Finishing
Weave in the ends on the back, where the waffle texture hides them. Add the hanging loop as for Potholder 1.
A word on heat: waffle stitch is the thickest single layer here, perfect for lifting lids or steadying a warm bowl. For a casserole straight out of a very hot oven, fold it double or make a second panel and join the two as in Potholder 1.
Tips
- Front post stitches feel awkward for exactly one row. Push the hook in from the front, around the post, and out the front again, then finish the dc as normal.
- Count after every second row: both pattern rows end with 24 stitches, so a quick count after each Row 3 catches a missed stitch before it slants the edge.
- Keep the border snug: if it ripples, skip one side stitch every few rows; if it pulls in, add one here and there.
Why cotton is the only yarn for potholders
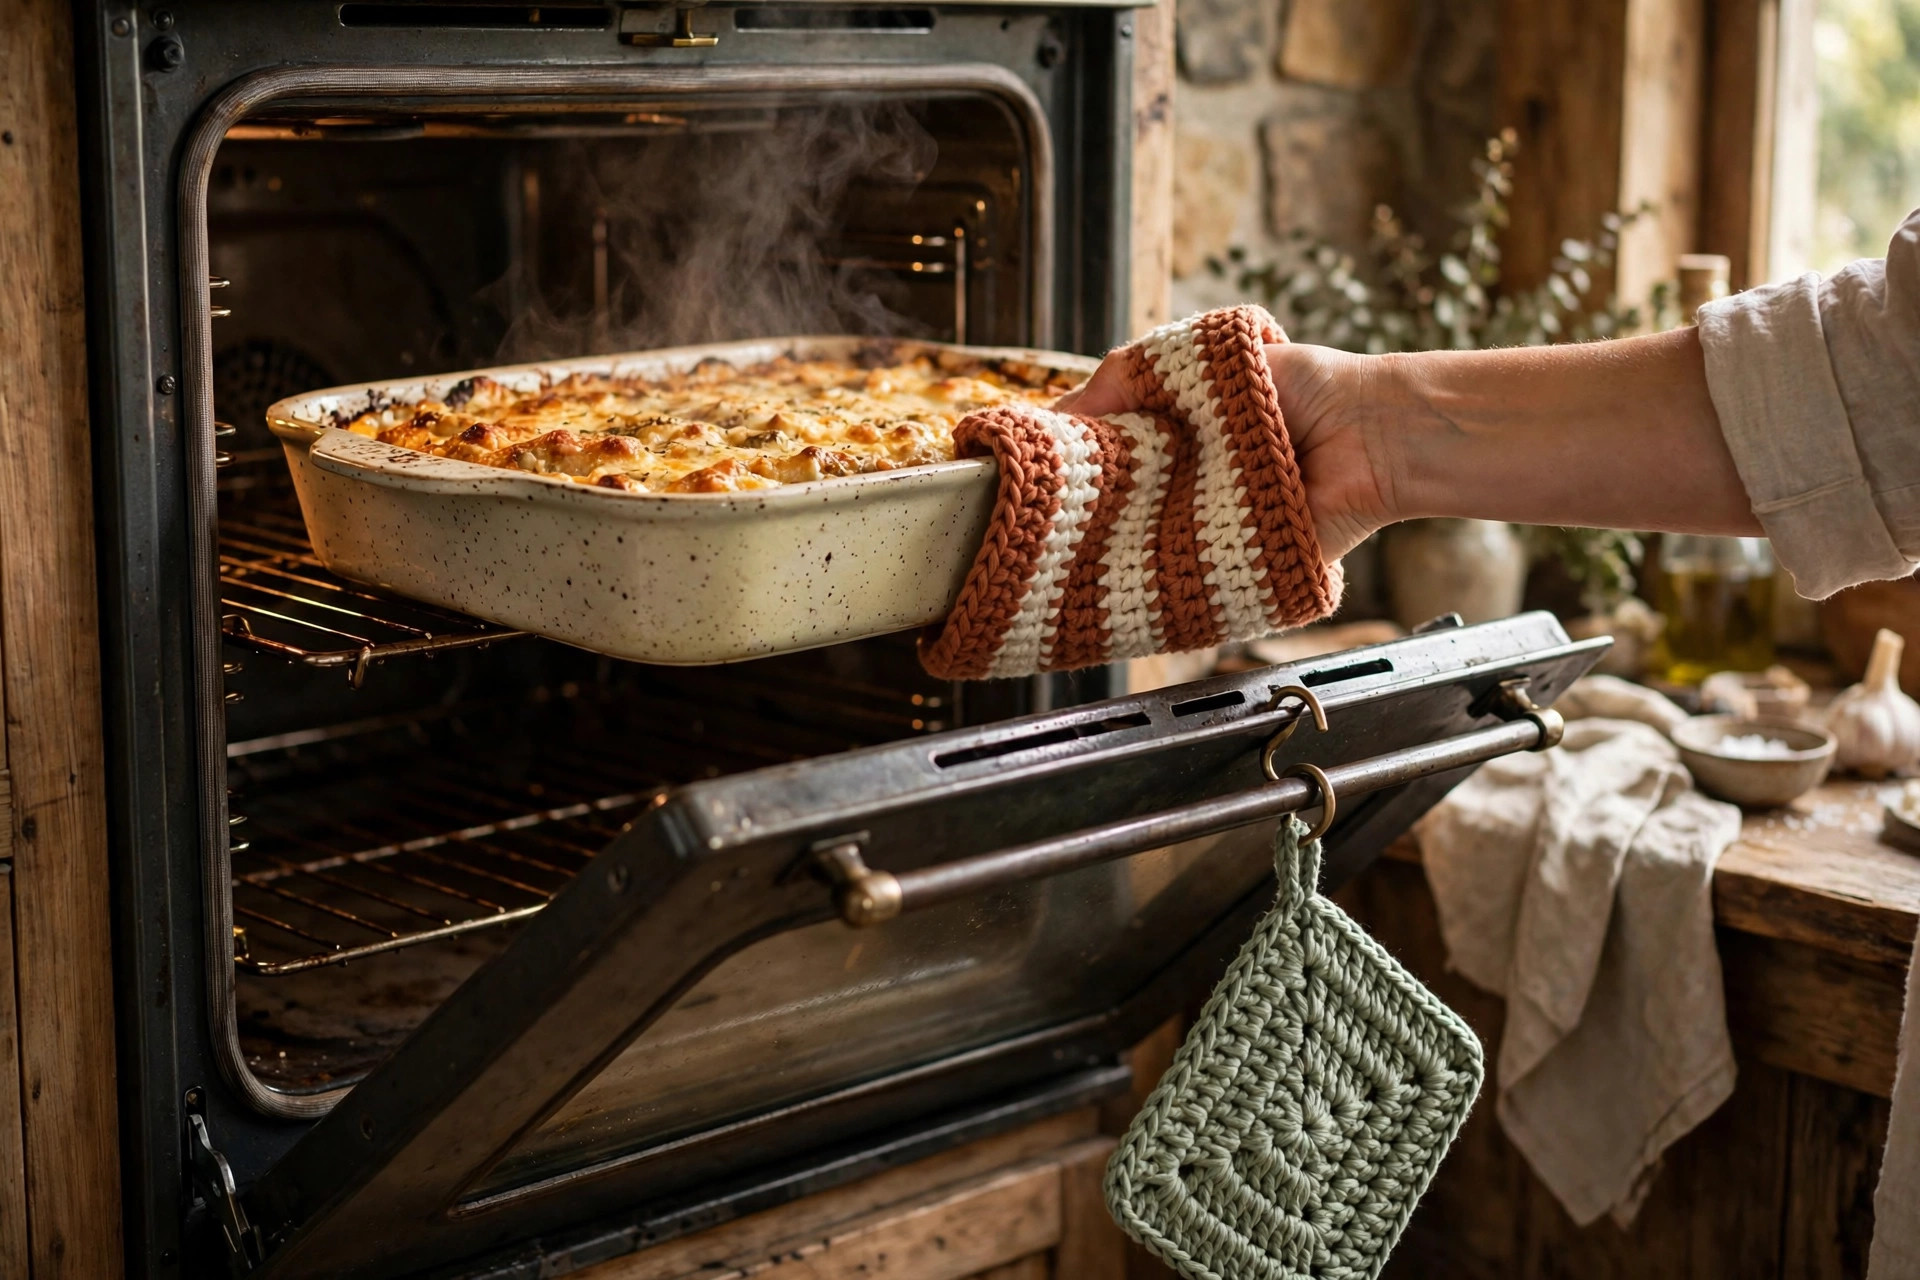
This is the one rule here that is not negotiable: a potholder stands between your hand and something hot, and the fiber decides whether it does that job safely.
Cotton does not melt or go shiny with heat, and it washes hot and tumble dries. Acrylic softens at oven temperatures and can melt onto a hot dish or skin, so never use it for potholders, mitts or trivets. Wool felts and shrinks in a hot wash. Our free crochet scrubby patterns and crochet Christmas coasters are written for cotton too.
Finishing touches and care
This ten-minute step makes handmade look professional instead of homemade.
Block every potholder. Soak it in lukewarm water for ten minutes, press out the water in a towel (never wring it), pin it square, and leave it to dry flat. Blocking evens out the stitches and sharpens the corners.
Weave in ends properly. Weave each tail through the backs of several stitches in one direction, then back the other way. Kitchen items get washed often, and a tail woven in one direction works itself loose.
Washing: machine wash warm with like colors and tumble dry low. The first wash shrinks the cotton slightly, which is why the patterns are written a touch generous. Skip fabric softener, it coats the fibers and makes them less absorbent.
Three colorways to try next
The same three patterns give you completely different kitchens:
- Farmhouse neutrals. Work everything in cream, oatmeal and sage, with no mustard at all, for a white-and-wood kitchen.
- Christmas gift set. Work the striped potholder in red and cream, the granny square in red, green and cream, and the waffle in solid green, then add our flower coaster crochet pattern in red as the fourth piece.
- Bright and bold. Try coral, teal and sunny yellow for a modern kitchen. Bold colors show the waffle texture best, so make it the star of this set.
If this project gave you the kitchen-crochet bug, the crochet doily patterns and crochet table runners use the same cotton and hook, so your next project can start with the yarn you already have open.
Troubleshooting tips
- Your potholder is a rectangle, not a square. Count stitches and rows, then add or remove rows until it measures square. For the striped design, add or remove two rows at a time so the stripes stay balanced.
- The edges curl inward. Your tension tightened, or the foundation chain was too tight. Work the foundation chain with a hook one size larger, then switch back to the 5.0 mm.
- You can feel heat through the potholder. A single layer is not enough for oven-hot dishes: use the double-thick designs, or fold the waffle potholder double.
- The granny square ripples or cups. Round 6 should have exactly four 3-dc groups between the corners on each side.
- The waffle pattern looks like stripes. You repeated the same row twice. Row 2 puts the raised posts in one set of columns and Row 3 in the other, so the two rows must alternate.
- The joining round looks wavy. Your side stitches are too close or too far apart. Aim for about one single crochet per row along the sides.
Frequently asked questions
Are these crochet potholders patterns really free?
Yes, the complete patterns above are free, no email signup and no PDF purchase required. Sharing the post or saving it on Pinterest is the kindest thank-you.
What skill level are these patterns?
Beginner. If you can chain and single crochet, you can make Potholder 1 today. The granny square adds double crochet, and the waffle adds front post double crochet, which takes about one row to learn.
How long does each potholder take to make?
About 1 to 2 hours each: roughly 45 minutes of crocheting per panel, plus joining and finishing. The striped design takes longest with two panels, while the waffle is the quickest single make. A full set of three is a relaxed weekend project.
Can I use acrylic yarn if I do not have cotton?
Please do not. Acrylic softens and melts near high heat, which makes it unsafe for potholders. If cotton is hard to find, look for a cotton-blend yarn that is mostly cotton, and check the ball band before you buy.
Can I sell the finished potholders I make?
Yes! You may sell finished potholders made from these patterns in small batches (craft fairs, gifts, market stalls). Please credit Little Loop Finds as the pattern designer with a link back to this page. The pattern text and photos may not be redistributed, republished, or sold.
More free patterns to try
Keep the hook moving. The free crochet dishcloth patterns use the same cotton for a matching kitchen set, the crochet basket pattern gives your potholders a home on the counter, the flower coaster crochet pattern adds a delicate touch, and the easy beginner crochet patterns round up more first projects.