Free Crochet Dolphin Pattern: Cute Amigurumi Plush
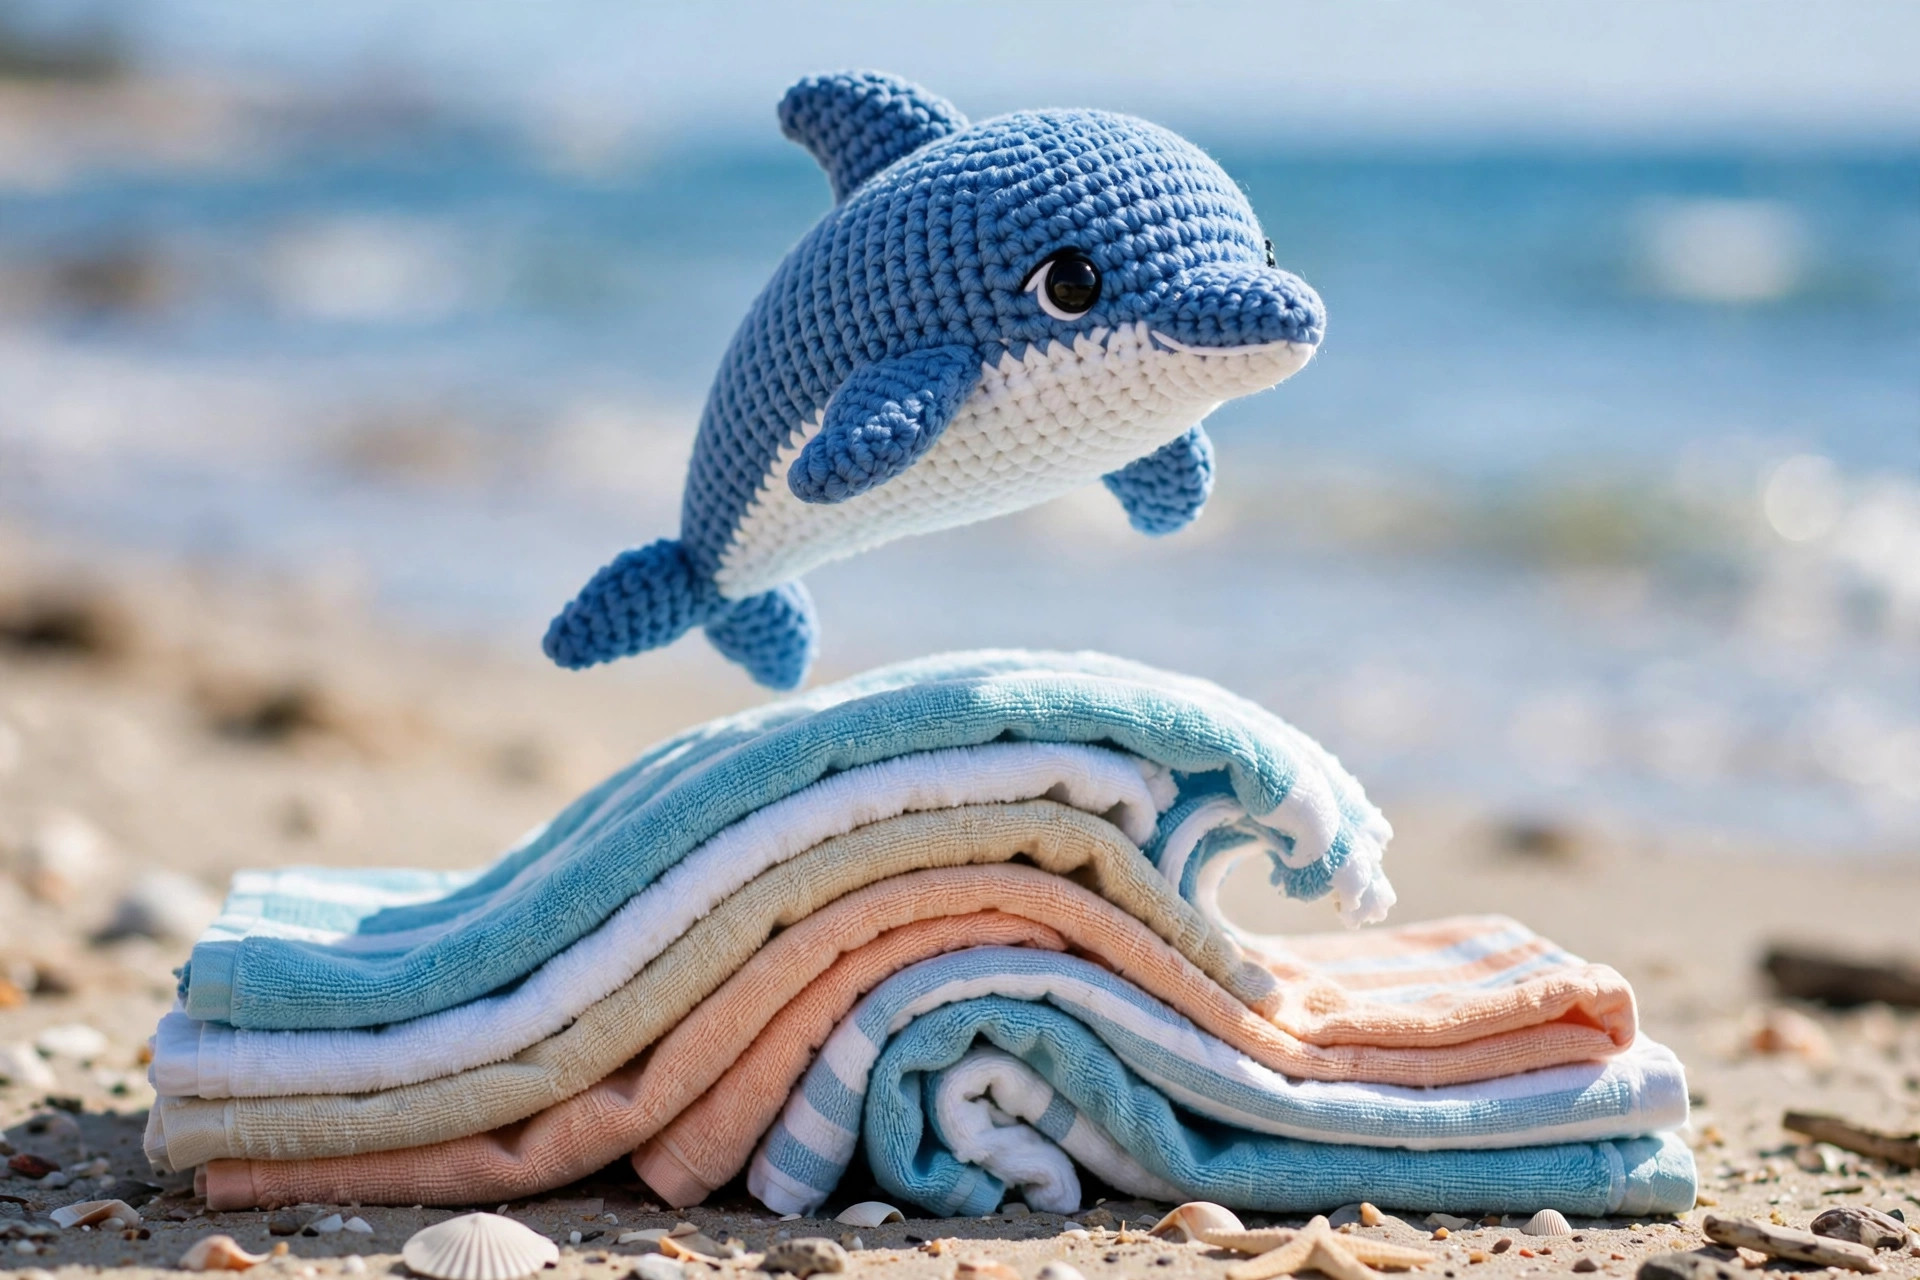
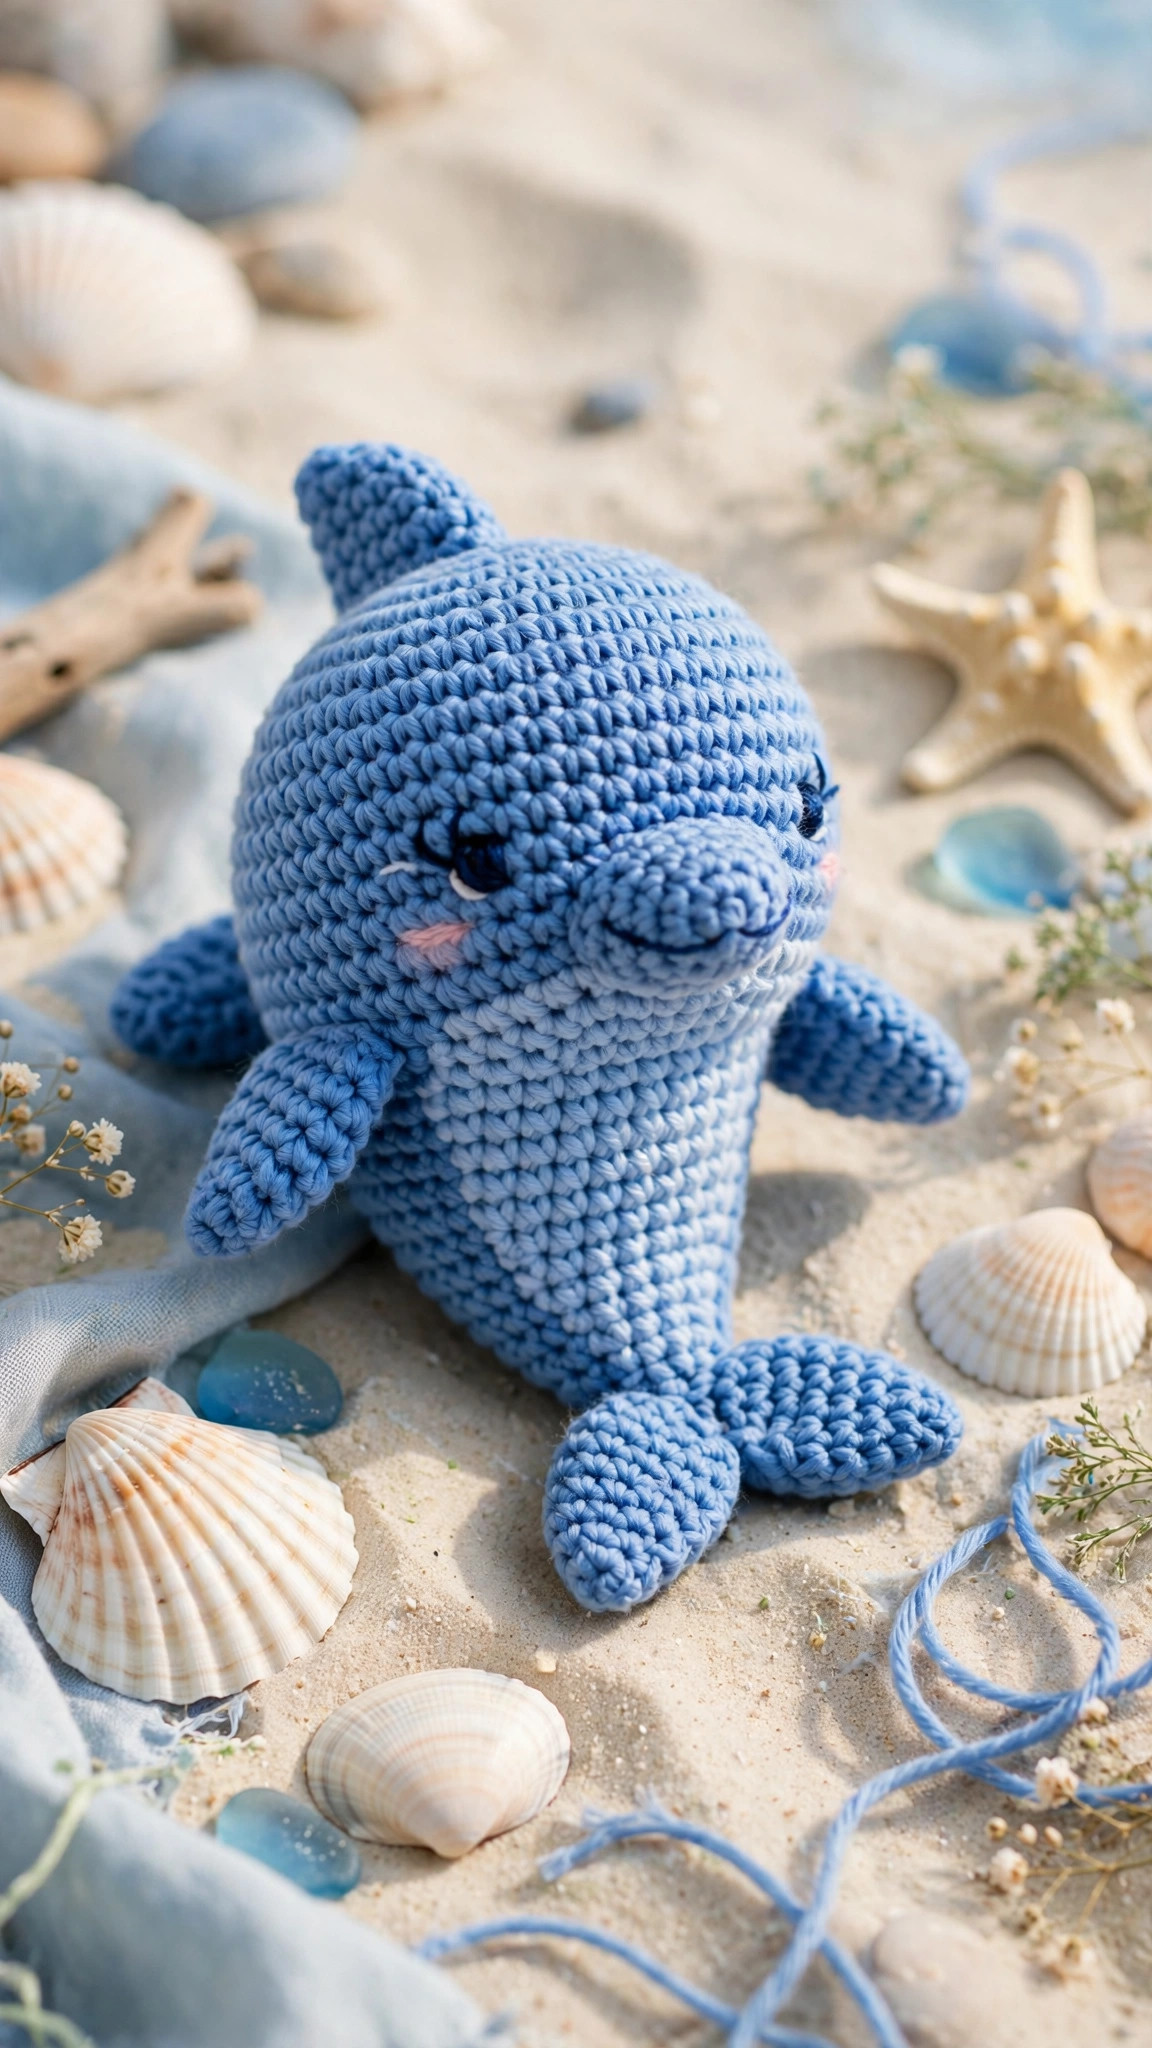
A cute amigurumi dolphin plush: original design, US terms, about 8 inches long, easy level.

Amigurumi · Crochet
- Finished size
- About 8 in long
- Making time
- About 4 hours
- Hook
- 3.5 mm, worsted yarn
- Set
- Body, fins, belly patch
- Skill
- Easy
In this post
- Table of contents
- Why you'll love this crochet dolphin pattern
- Materials you'll need
- Size, gauge and skill level
- Abbreviations, US terms
- The crochet dolphin pattern (US terms)
- Finishing touches and assembly
- Tips and tricks
- Variations to try next
- Troubleshooting tips
- Frequently asked questions
- More free patterns to try
There is something irresistible about a tiny crocheted dolphin: the curved body, the perky dorsal fin, the sweet smile you stitch on at the end. This free crochet dolphin pattern makes an adorable amigurumi dolphin plush about 8 inches long, worked in the round with simple increases and decreases, and it is my own original design written in US terms.
The shaping does all the cute work for you. The body starts at the nose and widens toward the belly, then tapers to the tail, giving you that classic dolphin curve with no complicated construction. A white belly patch sewn on the underside adds the two-tone look real dolphins have, and the fins are simple flat pieces you sew on in minutes.
If you have made even one amigurumi before, this will feel familiar and relaxing. If this is your first, the dolphin is a forgiving choice: the body is mostly even rounds, and the fins hide small sewing imperfections.
Table of contents
- Why you'll love this crochet dolphin pattern
- Materials you'll need
- Size, gauge and skill level
- Abbreviations, US terms
- The crochet dolphin pattern (US terms)
- Finishing touches and assembly
- Tips and tricks
- Variations to try next
- Troubleshooting tips
- Frequently asked questions
- More free patterns to try
Why you'll love this crochet dolphin pattern
Dolphins are one of those animals that everyone loves, and they translate beautifully into amigurumi. The body is a smooth, simple shape with no fiddly legs or ears: fewer pieces to sew, and a faster finish. You get maximum cuteness per hour of stitching, and the finished plush has that lovely curved silhouette that reads as "dolphin" instantly.
The construction is classic amigurumi: one spiralled body piece, then flat fins and flukes. You start at the nose with a magic ring and increase out to the widest part of the belly, work even for the middle, then decrease down to the tail. The white belly is a separate oval you sew on, which is much easier than changing colours mid-round, and it gives the plush that realistic two-tone look.
It is also a fantastic gift project. The dolphin works up in an evening or two, uses less than a skein of yarn, and appeals to kids, teens, and adults alike. Make a whole pod in different blues for a baby mobile or a beach-themed nursery shelf. If you are collecting sea creatures, our crochet hammerhead shark pattern is the dolphin's fun neighbour, and the crab crochet pattern free adds a pop of red to the collection.
Materials you'll need
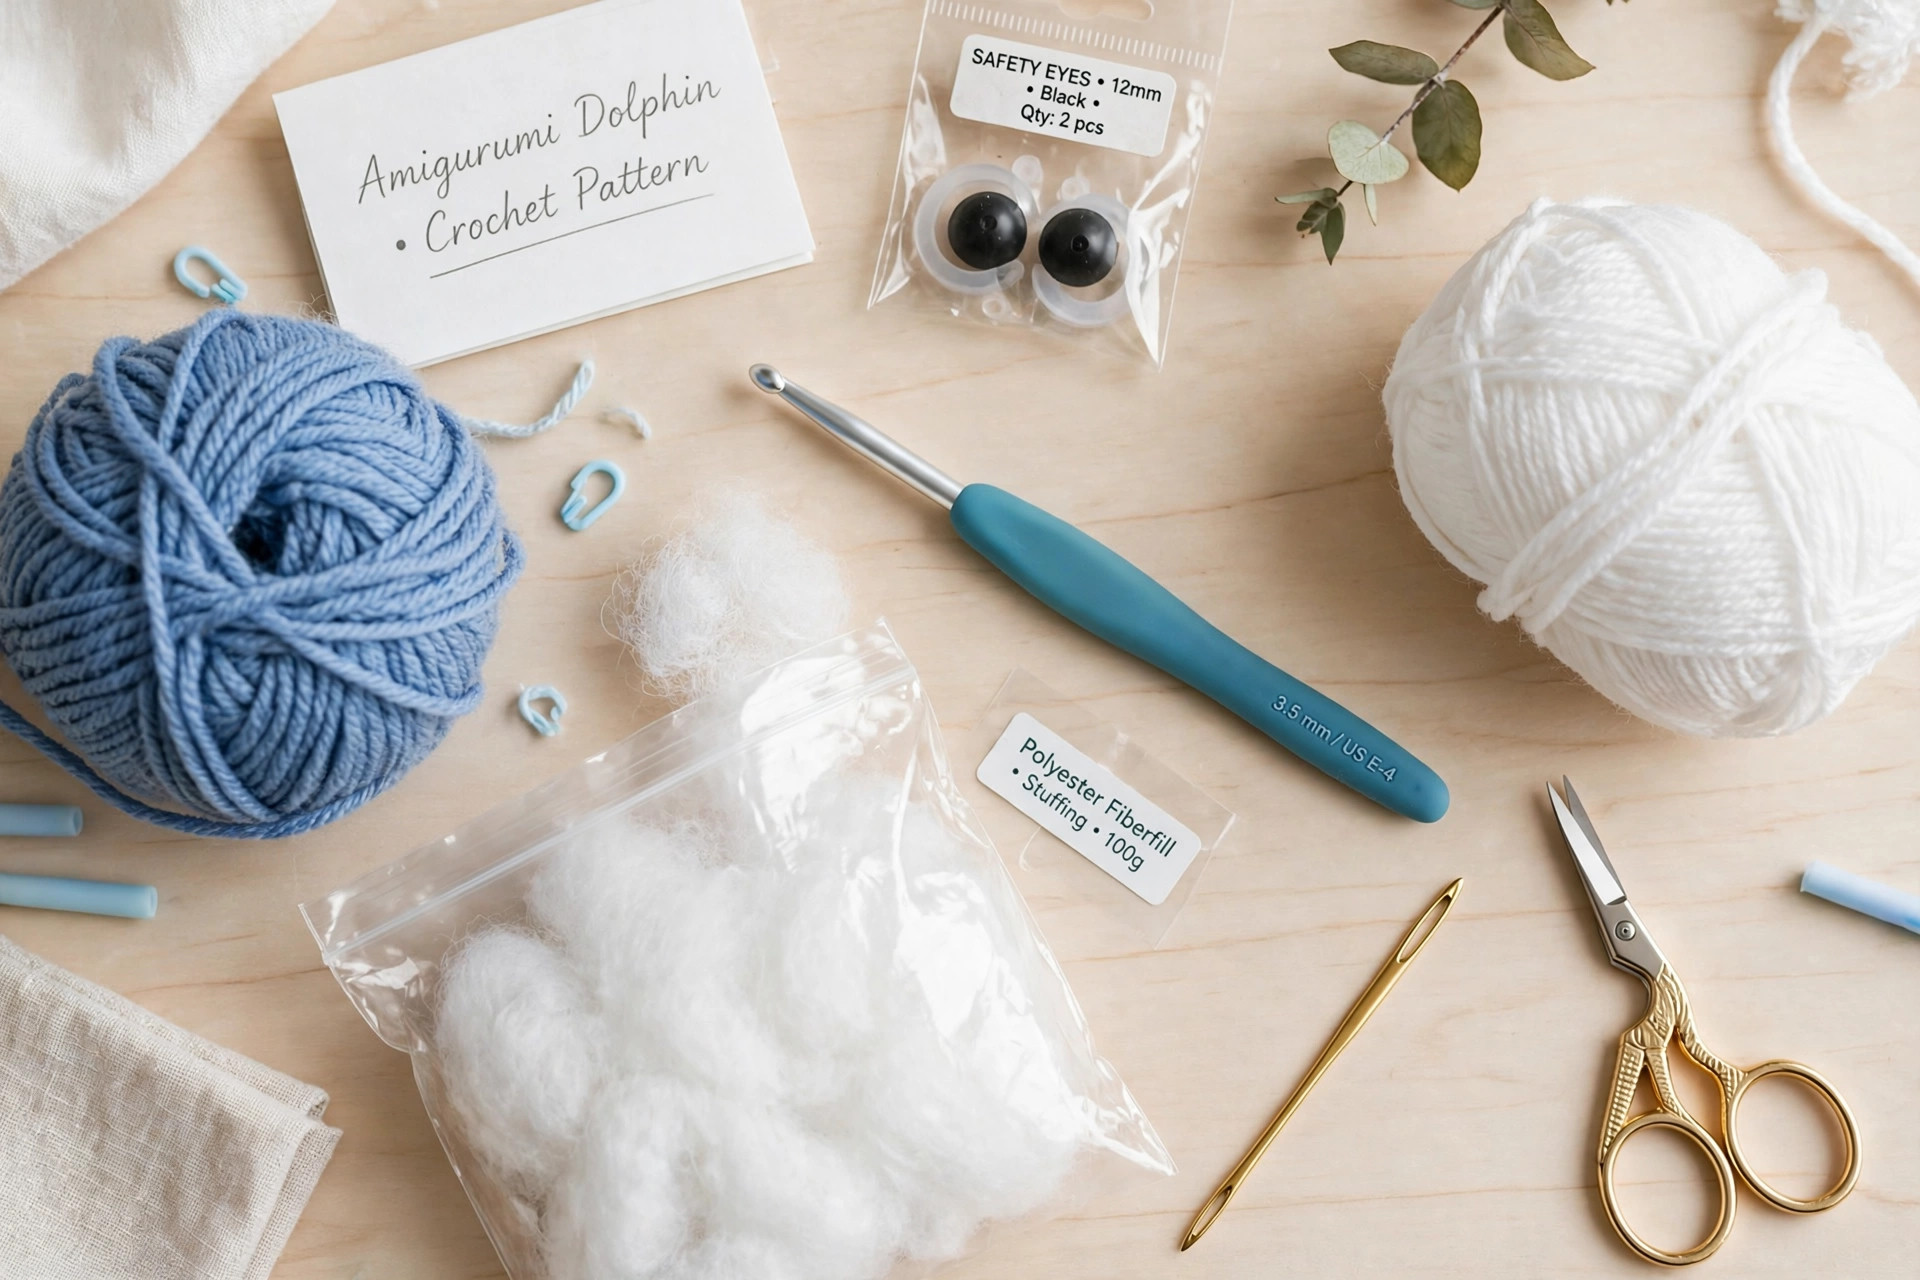
| Supply | What to get |
|---|---|
| Blue yarn | Worsted-weight (#4) yarn in blue or teal, about 90 yds / 82 m |
| White yarn | Worsted-weight (#4) yarn in white, about 25 yds / 23 m, for the belly patch |
| Crochet hook | 3.5 mm (E) |
| Safety eyes | Two 10 mm black safety eyes with washers |
| Stuffing | Polyester fiberfill, a generous handful |
| Tapestry needle | For sewing the fins, flukes, and belly, and embroidering the smile |
| Notions | Scissors, stitch markers, black embroidery floss for the smile |
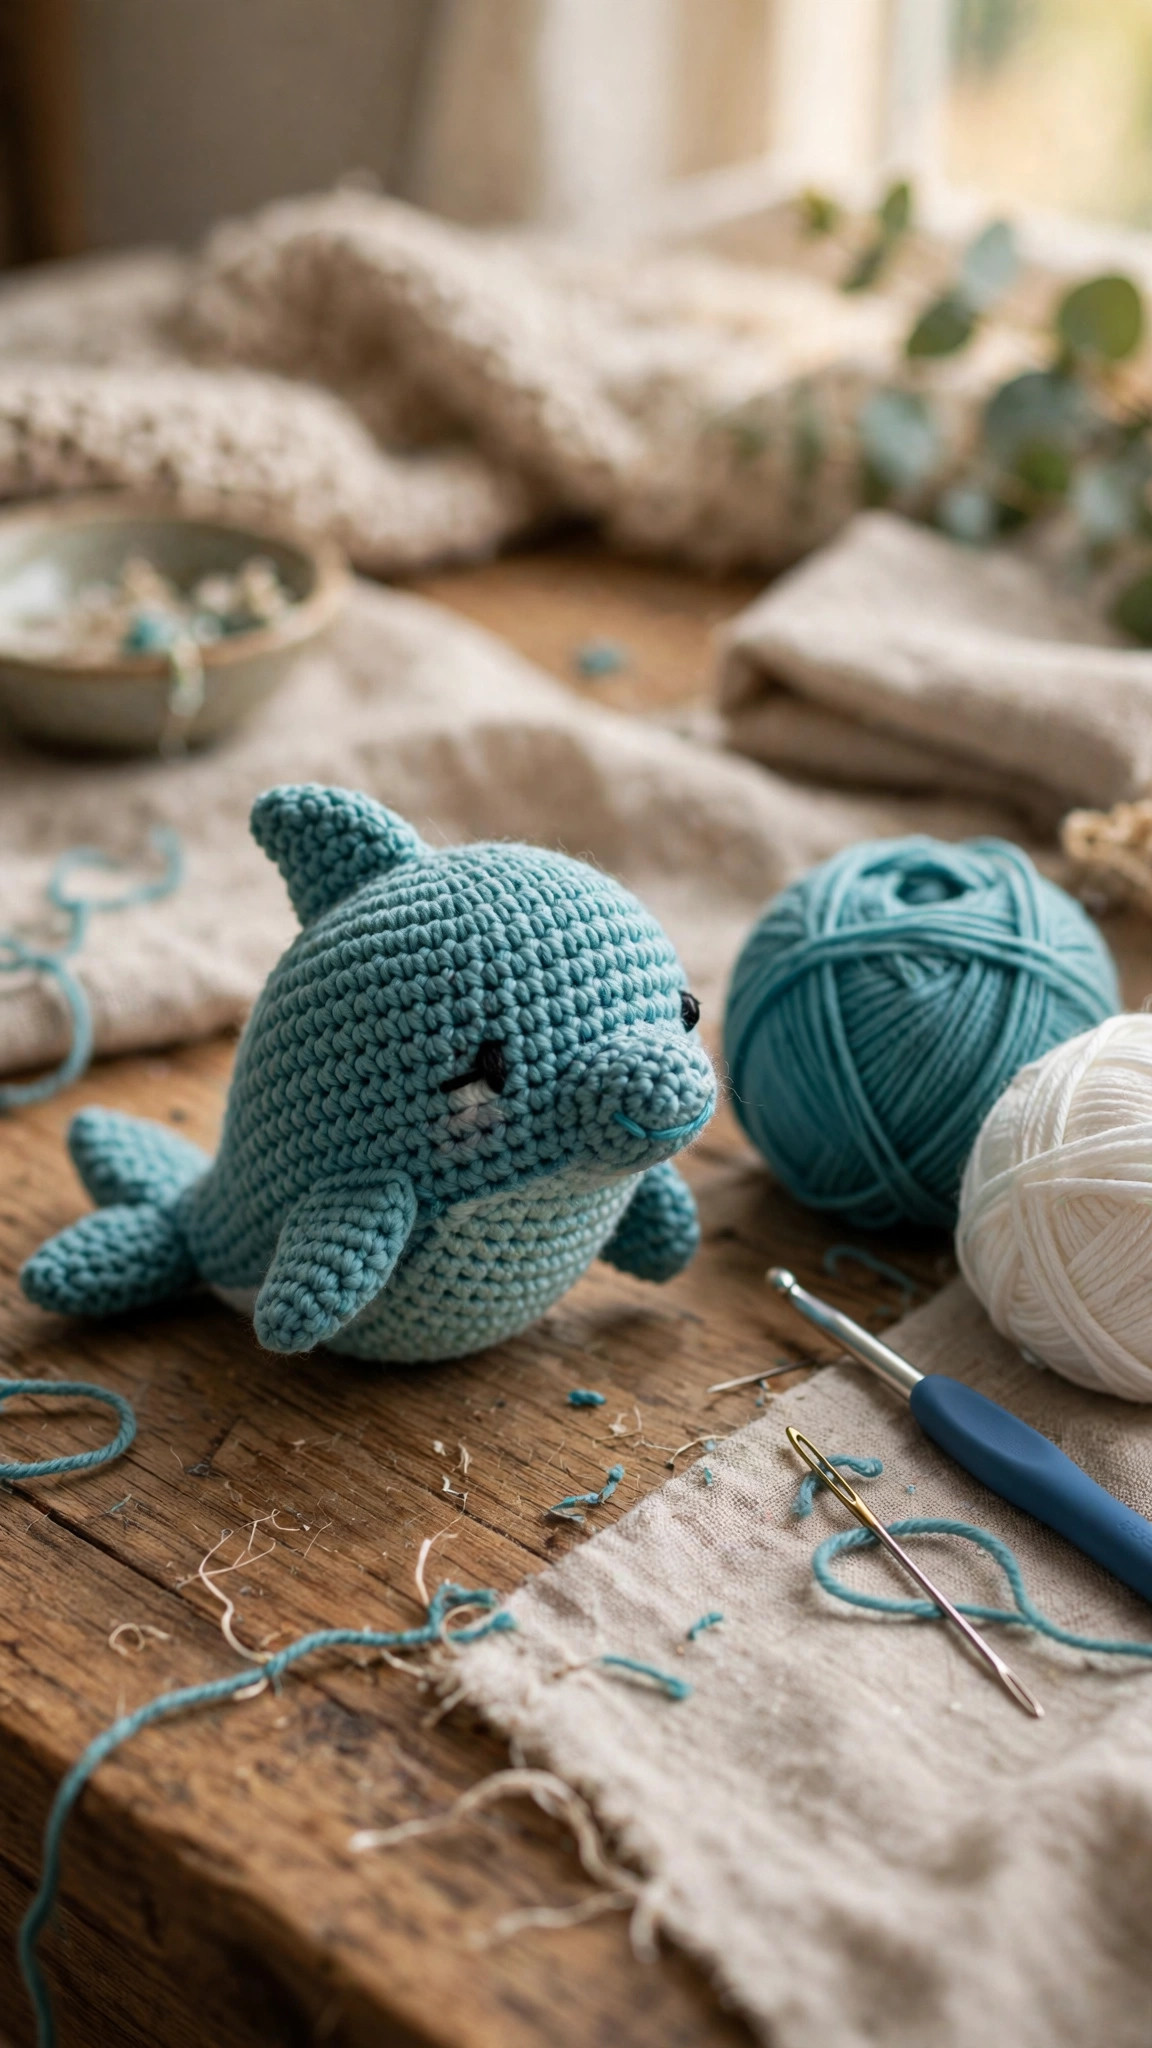
Pick a smooth worsted acrylic or cotton-blend yarn in a cheerful blue: sky blue, teal, or classic dolphin grey-blue all work. The body shows best in a yarn with good stitch definition, because the smooth shaping is the whole look. Avoid dark navy if this is your first amigurumi: it is hard to see your stitches in dark yarn, and counting mistakes hide until it is too late.
A note on the hook: 3.5 mm with worsted yarn gives the tight, dense fabric amigurumi needs so the stuffing never shows through. If you can see daylight between your stitches, drop to a 3.25 mm hook.
Size, gauge and skill level
The dolphin is worked in a continuous spiral: do not join rounds, just keep stitching and move your stitch marker up each round. The body measures about 8 in (20 cm) from nose to tail tip.
- Finished size: about 8 in (20 cm) long and 3.5 in (9 cm) tall at the belly, not counting the fins. A perfect huggable size for small hands.
- Gauge: gauge is not critical for amigurumi, but aim for about 20 sc and 22 rounds = 4 in (10 cm). What matters is that your fabric is tight enough that fiberfill does not poke through.
- Skill level: easy. You should know how to work a magic ring, single crochet, increase, and decrease (invisible decrease recommended). The sewing is simple whipstitching of flat pieces.
If this is your very first amigurumi, read through the whole pattern once before you start, and keep a stitch marker in the first stitch of every round: losing your place in a spiral is the classic beginner mistake.
Abbreviations, US terms
| Abbreviation | Meaning |
|---|---|
| MR | magic ring |
| ch | chain |
| sc | single crochet |
| sl st | slip stitch |
| inc | increase: 2 sc in the same stitch |
| dec | decrease: sc2tog, invisible decrease recommended |
| st(s) | stitch(es) |
| R | round |
| FO | fasten off, leaving a long tail for sewing |
| [ ] | total stitch count at the end of the round |
A note on the invisible decrease: work it in the front loops only (insert hook in front loop of next 2 sts, yarn over, pull through both loops, yarn over, pull through 2 loops). It lies flat and disappears into the fabric, which keeps the dolphin's smooth body perfectly smooth.
The crochet dolphin pattern (US terms)
Work the body first from nose to tail, then the belly patch, fins, and flukes. Stuff the body firmly as you go: add fiberfill once the opening gets small, and keep topping it up until you close.
The body: nose to tail
With blue yarn, work in a continuous spiral.
- R1: MR, 6 sc in ring. [6]
- R2: inc in each st around. [12]
- R3: (sc, inc) x6. [18]
- R4: (2 sc, inc) x6. [24]
- R5: (3 sc, inc) x6. [30]
- R6: (4 sc, inc) x6. [36]
- R7-R14: sc in each st around. [36]
- R15: (4 sc, dec) x6. [30]
- R16: sc in each st around. [30]
- R17: (3 sc, dec) x6. [24]
- R18-R20: sc in each st around. [24]
- R21: (2 sc, dec) x6. [18]
Start stuffing the body now, filling the nose and belly firmly. The head end (R1) is the nose: it should be nicely rounded, not pointy.
- R22: sc in each st around. [18]
- R23: (sc, dec) x6. [12]
- R24-R26: sc in each st around. [12]
This narrow section is the tail stock: the slim part before the flukes. Keep it firmly stuffed so it holds its shape.
- R27: dec x6. [6]
- R28: sc in each st around. [6]
FO, leaving a 10 in tail. Thread the tail through the front loops of the remaining 6 stitches, pull tight to close, and knot securely. The tail end points slightly upward: sew the flukes on to continue that gentle curve, the classic dolphin pose.
The white belly patch
With white yarn, work flat in rows, turning at the end of each row.
- R1: ch 9, sc in 2nd ch from hook and each ch across. [8]
- R2: ch 1, inc in first st, sc across to last st, inc in last st. [10]
- R3: ch 1, sc in each st across. [10]
- R4: ch 1, inc in first st, sc across to last st, inc in last st. [12]
- R5-R8: ch 1, sc in each st across. [12]
- R9: ch 1, dec over first 2 sts, sc across to last 2 sts, dec over last 2 sts. [10]
- R10: ch 1, sc in each st across. [10]
- R11: ch 1, dec over first 2 sts, sc across to last 2 sts, dec over last 2 sts. [8]
- R12: ch 1, sc in each st across. [8]
FO, leaving a 14 in tail for sewing. The patch is a soft oval about 4 in long, sewn to the underside of the body under the belly.
The dorsal fin (make 1)
With blue yarn, work flat in rows.
- R1: ch 7, sc in 2nd ch from hook and each ch across. [6]
- R2: ch 1, dec over first 2 sts, sc in each st across. [5]
- R3: ch 1, sc in each st across. [5]
- R4: ch 1, dec over first 2 sts, sc in each st across. [4]
- R5: ch 1, sc in each st across. [4]
- R6: ch 1, dec over first 2 sts, dec over last 2 sts. [2]
- R7: ch 1, dec over the 2 sts. [1]
FO, leaving a 10 in tail. The fin is a curved triangle: the straight edge (R1) sews to the back, and the point sweeps backward like a real dolphin's fin.
The side fins (make 2)
With blue yarn, work flat in rows.- R1: ch 6, sc in 2nd ch from hook and each ch across. [5]
- R2: ch 1, sc in each st across. [5]
- R3: ch 1, dec over first 2 sts, sc in each st across. [4]
- R4: ch 1, sc in each st across. [4]
- R5: ch 1, dec over first 2 sts, dec over last 2 sts. [2]
- R6: ch 1, dec over the 2 sts. [1]
FO, leaving an 8 in tail on each. These are the pectoral fins: small, sweet, sewn one on each side.
The tail flukes (make 2)
With blue yarn, work flat in rows. Each fluke is half of the tail.
- R1: ch 8, sc in 2nd ch from hook and each ch across. [7]
- R2: ch 1, sc in each st across. [7]
- R3: ch 1, dec over first 2 sts, sc in each st across. [6]
- R4: ch 1, sc in each st across. [6]
- R5: ch 1, dec over first 2 sts, dec over last 2 sts. [4]
- R6: ch 1, sc in each st across. [4]
- R7: ch 1, dec over first 2 sts, dec over last 2 sts. [2]
FO, leaving a 10 in tail on each. The two flukes sew together at the tail tip in a V, like a real dolphin's tail.
Finishing touches and assembly
Sew on the belly patch. Pin the white oval to the underside of the body, centred under the widest part of the belly (around R7-R14), with the nose end of the patch pointing toward the nose. Whipstitch all the way around with the white tail, keeping your stitches small and even. Tuck the tail inside when you finish.
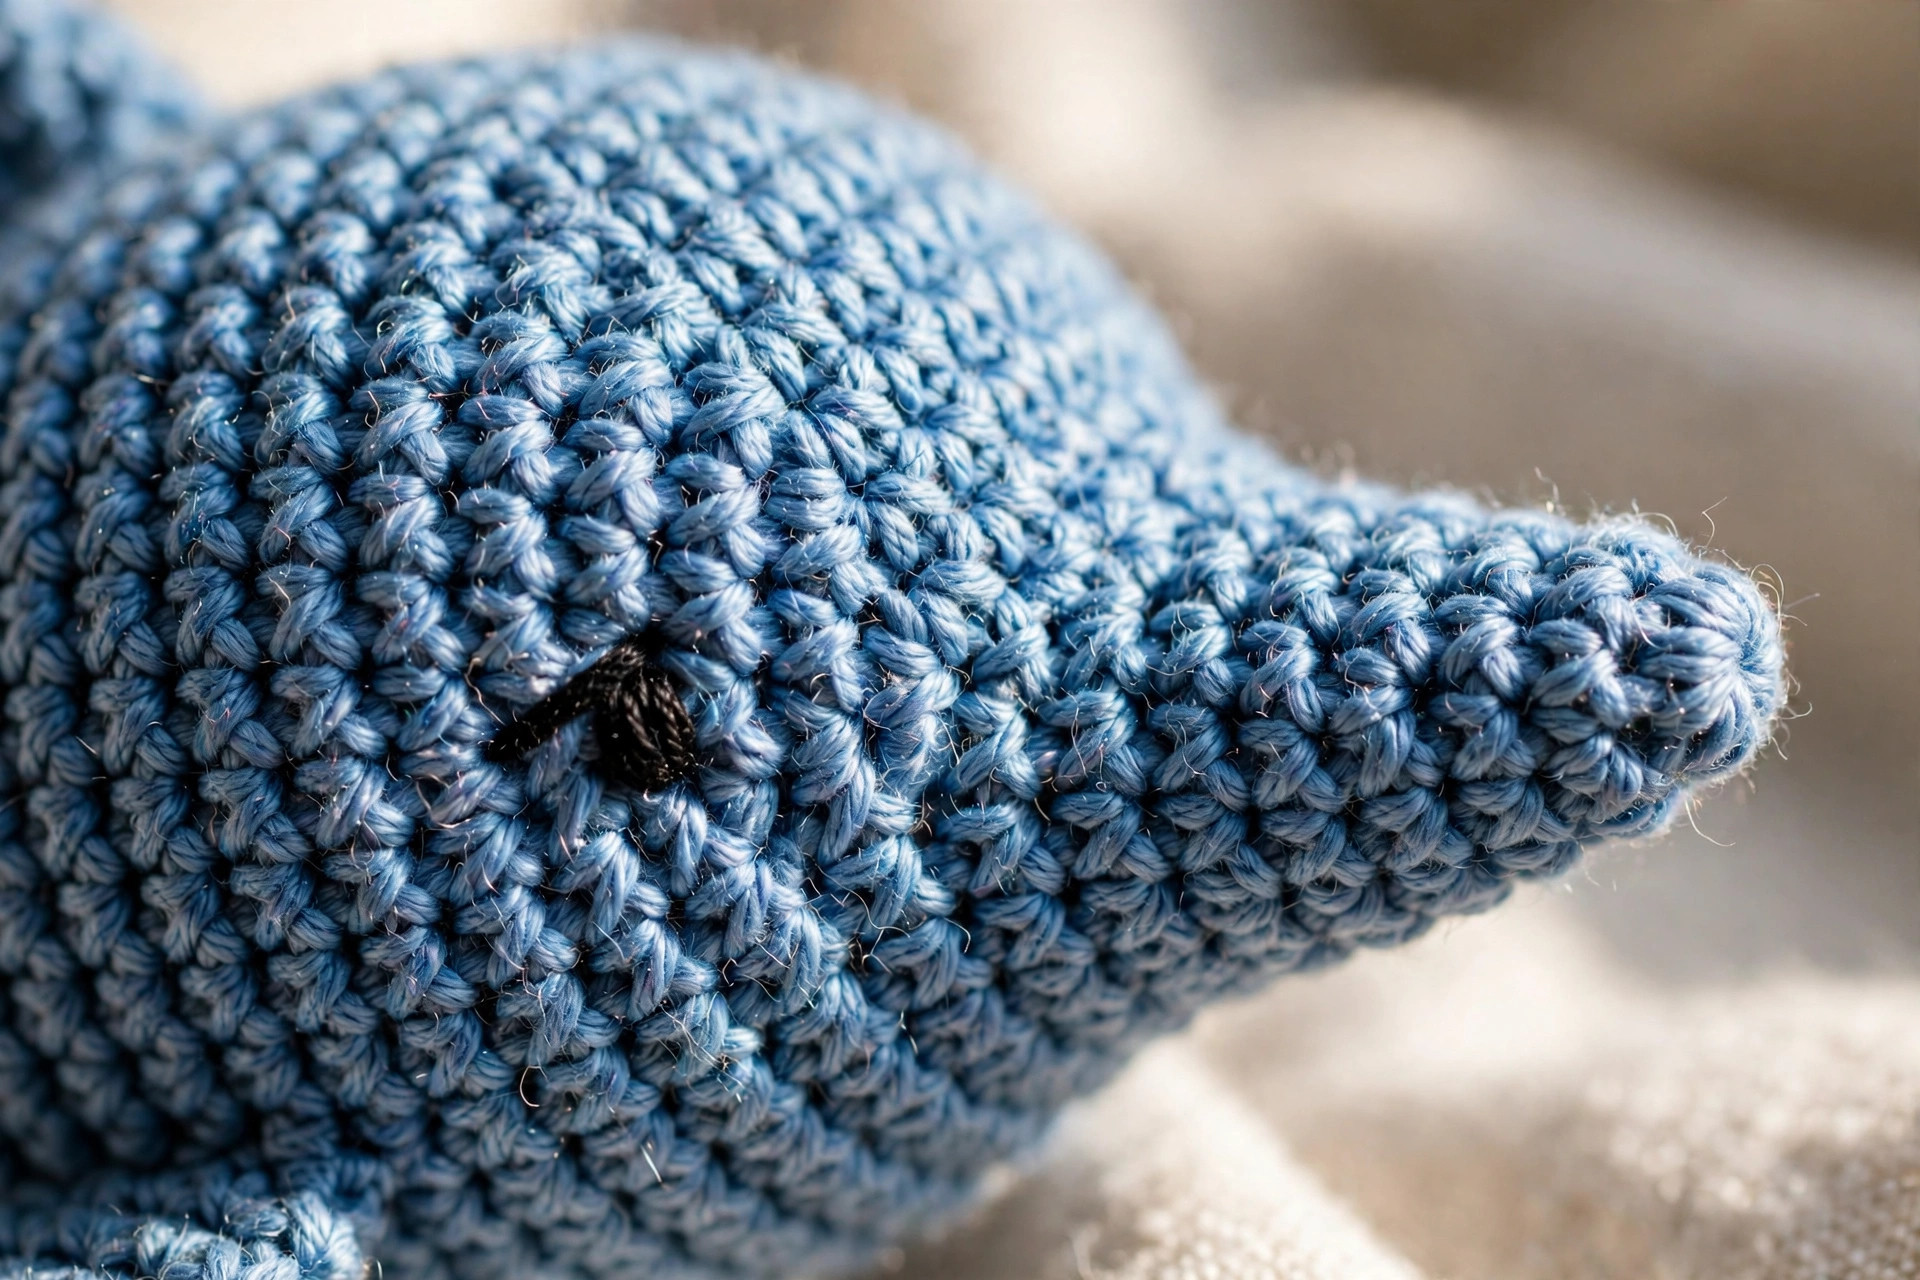
Place the safety eyes. Position the eyes on either side of the head, about R5-R6 and 6 stitches apart, angled slightly toward the nose. Push the posts through and press the washers on firmly from the inside. Safety eyes are permanent, so double-check placement first. For a baby gift, embroider the eyes with black yarn instead.
Sew the dorsal fin. Pin the fin's straight edge along the top of the body at about R11-R13, with the point sweeping toward the tail. Whipstitch firmly: this fin gets grabbed by little hands, so sew it well.
Sew the side fins. Pin one fin on each side at about R9, angled slightly downward and back. Whipstitch the straight edge to the body, mirroring the placement so the dolphin looks balanced.
Assemble the tail flukes. Hold the two flukes with their R1 edges together at the tail tip, forming a wide V. Sew the R1 edges to the tail end, then sew the flukes to each other along the first two rows so the V holds. Angle them slightly upward, continuing the tail's curve.
Embroider the smile. Thread black embroidery floss on the tapestry needle. Below and between the eyes, stitch a small curved smile about 5 stitches wide, and knot inside. Keep it small and sweet.
Final shaping. Squeeze and roll the body gently to distribute the stuffing evenly. The body should feel firm and smooth, with no lumps. Add a pinch more fiberfill through the tail end if the tail stock feels soft, then close it fully.
Tips and tricks
A few details that take this dolphin from homemade to handmade:
Stuff as you go, not at the end. Once the body opening narrows past R21, you cannot reach the nose anymore. Add fiberfill in stages: a firm nose at R10, a full belly at R18, and top up the tail stock before R27.
Use the invisible decrease everywhere. Regular decreases leave small bumps. The invisible decrease (front loops only) keeps the body perfectly smooth, which is the whole look of this plush.
Pin before you sew, always. Pin every piece, step back, check it from the front, top, and side, and only then pick up the needle. Two minutes of pinning saves twenty minutes of re-sewing.
Angle the eyes toward the nose. Eyes angled slightly forward give the dolphin a sweet, alert expression. A tiny change with a big cuteness payoff.
Keep the smile small. A five-stitch smile below the eyes is perfect. A bigger smile can look clownish on a small plush, and embroidery is hard to undo cleanly.
Variations to try next
One dolphin is the start of an ocean:
- Baby dolphin. Use a 3.0 mm hook and stop the even section at R12 instead of R14 for a chubbier baby. Our mini amigurumi patterns free collection has more tiny friends in the same scale.
- Pink dolphin. Real Amazon river dolphins are pink! Work the body in soft pink with a cream belly for a unique twist that kids adore.
- Dolphin rattle. Slip a small rattle insert into the fiberfill at R15 before closing. Use embroidered eyes, never safety eyes, for babies under three.
- Keychain dolphin. Work the pattern in DK yarn with a 2.75 mm hook for a palm-sized version, and add a keychain ring through the dorsal fin.
- Ocean scene set. Pair the dolphin with our crochet hammerhead shark pattern and the crab crochet pattern free for a full under-the-sea shelf display.
Troubleshooting tips
- The stuffing shows through the stitches. Your hook is too big or your tension too loose. Remake with a 3.25 mm hook: amigurumi fabric should be dense.
- The body has a visible seam line. Work in a true spiral with no joins, and move the marker to the first stitch of each new round.
- The nose is pointy instead of round. Add more fiberfill at the nose and ease the magic ring to a soft curve.
- The tail stock flops over. Pack fiberfill firmly into the narrow tail section with the blunt end of your hook before closing R27.
- The flukes will not stay in a V. Sew the inner edges of the two flukes together for the first two rows: that shared seam holds the angle.
- The belly patch puckers. Pin the whole oval first, sew with relaxed tension, and ease the fabric flat as you go.
- The safety eyes feel loose. Push the washer down until it clicks against the fabric and tug hard to test. If it still moves, add a tiny felt circle behind the eye.
Frequently asked questions
Is this free crochet dolphin pattern really free?
Yes, the complete pattern above is free, with no email signup and no purchase required.
What skill level is this dolphin pattern?
Easy. If you can work a magic ring, single crochet in a spiral, and do basic increases and decreases, you have every skill this pattern needs. The sewing is simple whipstitching.
How long does it take to crochet the dolphin?
About 4 hours total: roughly 2 hours for the body, 30 minutes for the belly and fins, and 1 to 1.5 hours for assembly, eyes, and the embroidered smile.
How much yarn do I need?
About 90 yds of blue and 25 yds of white in worsted weight: well under one skein of each, a great stash-buster.
Is this dolphin safe for babies?
With two changes, yes: embroider the eyes with black yarn instead of safety eyes, and make sure any rattle insert is securely enclosed. Always check local toy safety guidance for children under three.
Can I make the dolphin bigger?
Yes. Use bulky yarn with a 5.0 mm hook and follow the pattern exactly: the dolphin will come out about 11-12 inches long with no math changes needed.
Can I sell the finished dolphins I make?
Yes! You may sell finished dolphins from this pattern in small batches (craft fairs, markets, online shops). Please credit Little Loop Finds as the pattern designer.
More free patterns to try
If this ocean friend was fun, the sea is full of patterns. Our crochet hammerhead shark pattern uses similar body shaping for a goofy result, and the free crochet duck pattern is another quick animal with big gift appeal. For a fellow batch-mate, the crochet otter pattern free is an equally huggable water mammal, and the gummy bear crochet pattern is pure squishy joy in miniature.