Free Crochet Mouse Pattern: Adorable Amigurumi Mouse
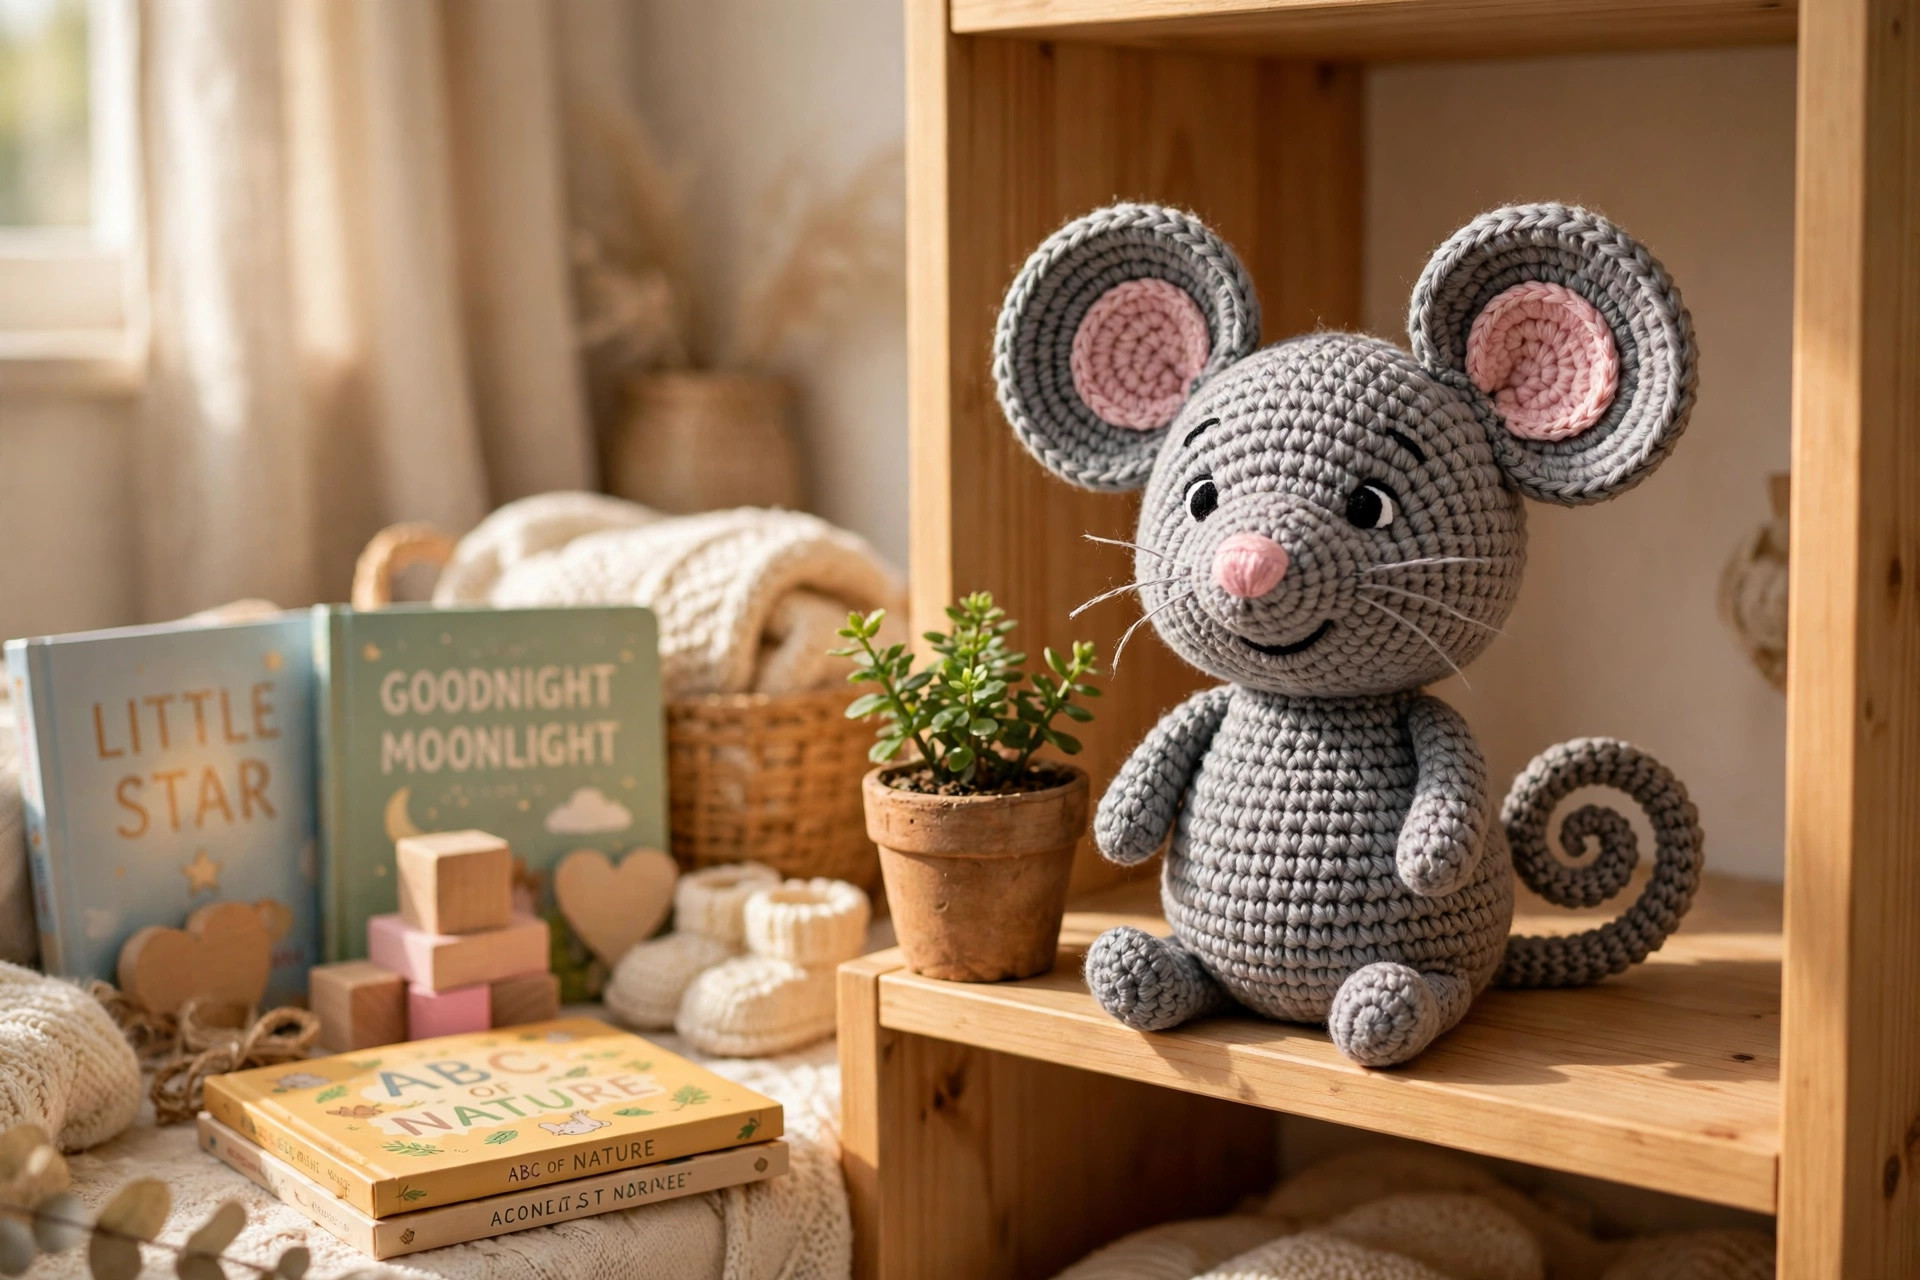
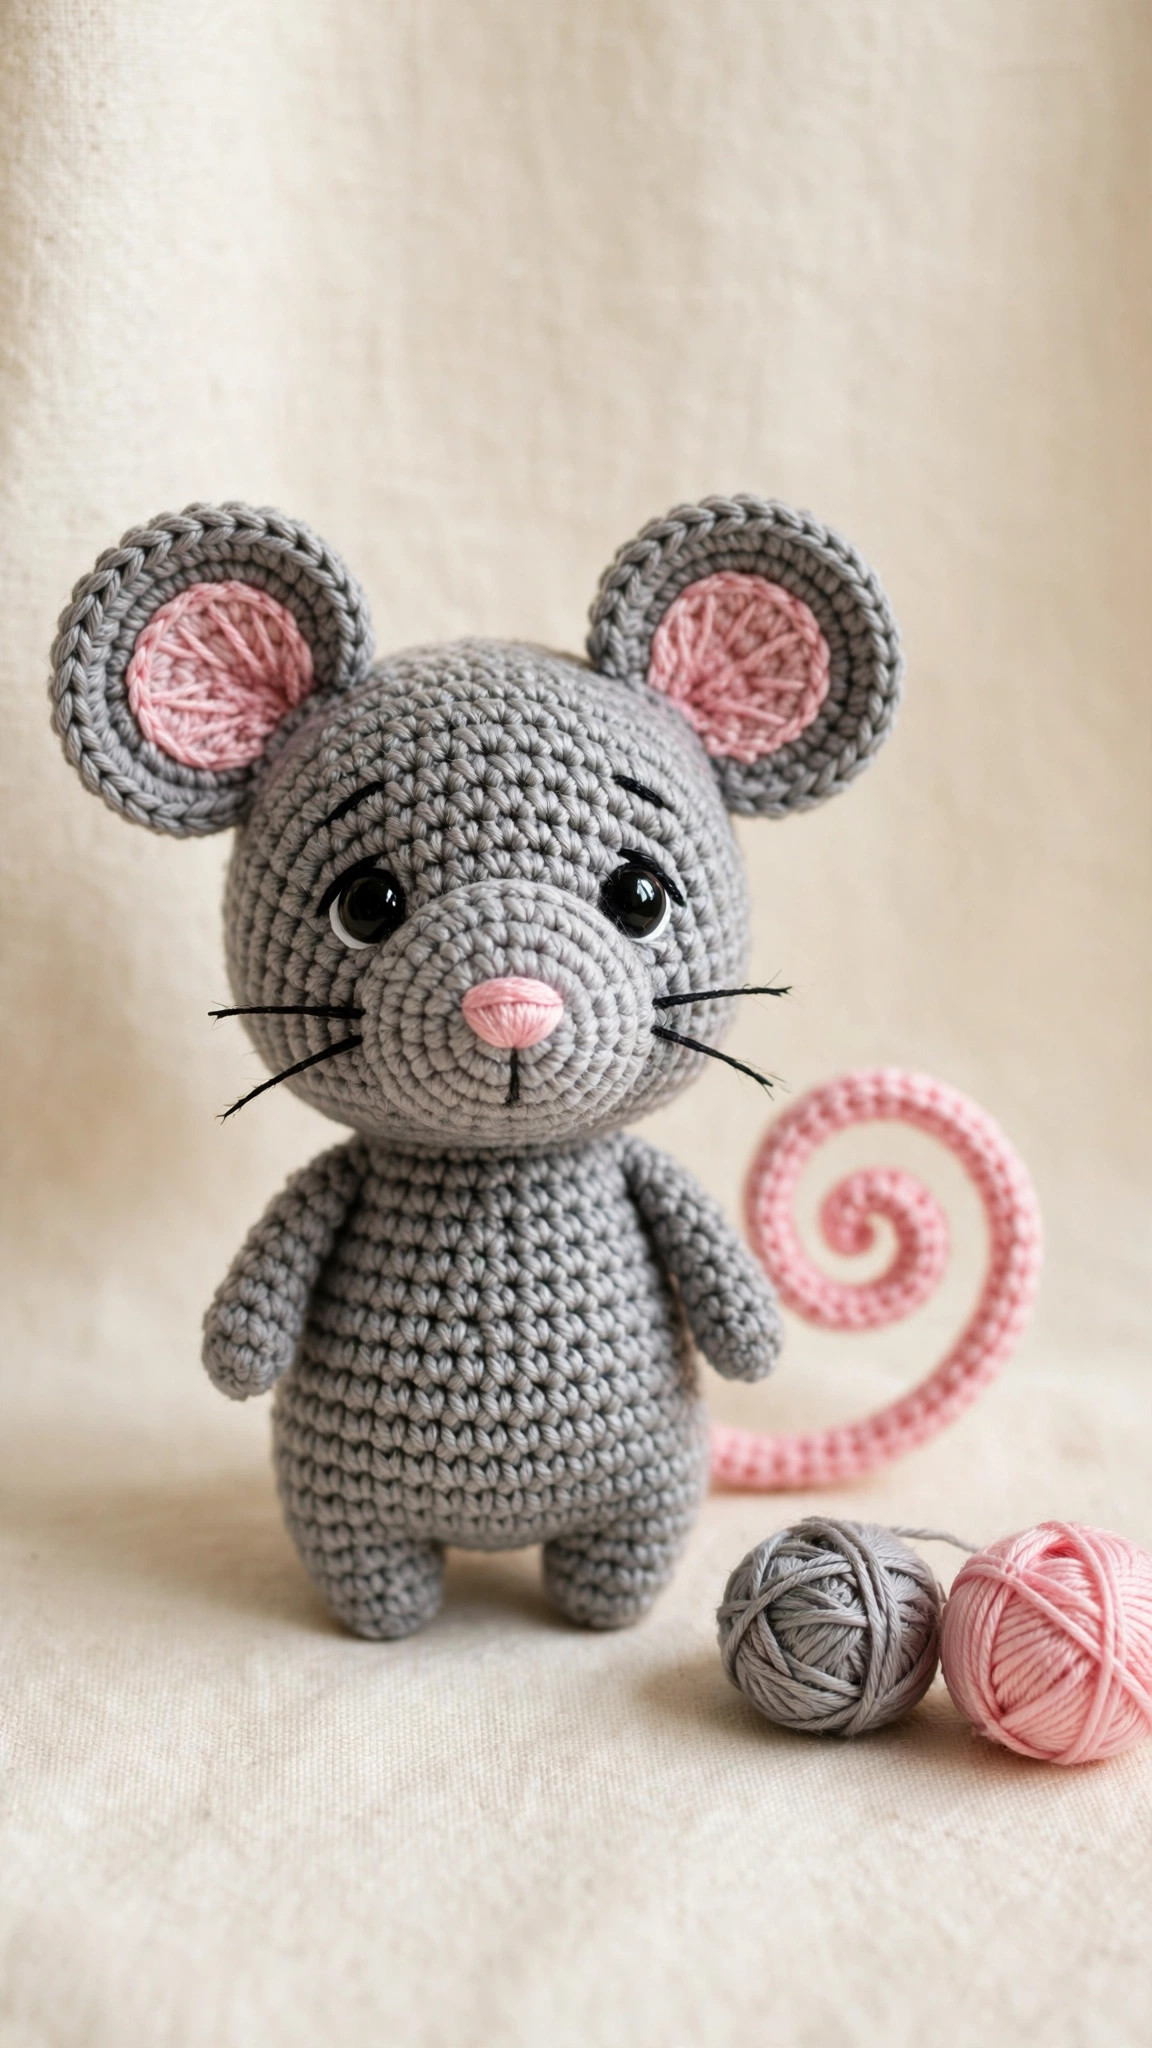
A sweet grey amigurumi mouse with big round ears, a pink stitched nose and a curly tail: original design, US terms, beginner friendly.

Amigurumi · Crochet
- Finished size
- About 4.5 in tall
- Making time
- About 2 hours
- Hook
- 3.5 mm, DK yarn
- Pieces
- Body, 2 ears, tail
- Skill
- Easy
In this post
- Table of contents
- Why you'll love this mouse crochet pattern
- Materials you'll need
- Size, gauge and skill level
- Abbreviations, US terms
- The mouse crochet pattern (US terms)
- Finishing touches and assembly
- Tips and tricks
- Variations to try next
- Troubleshooting tips
- Frequently asked questions
- More free patterns to try
Every amigurumi collection needs a mouse. There is something about those big round ears and the tiny pink nose that makes a crocheted mouse impossible to resist, and this free crochet mouse pattern gives you the sweetest little guy in about two hours of stitching. It is an original design, worked in simple single crochet in the round, with the body and head made as one piece so there is less sewing at the end.
This little mouse stands about 4.5 inches tall, the perfect size for a nursery shelf, a desk buddy, or a gift bag. The big ears are the star of the show: worked in grey with a pink inner ear sewn on top, they give the mouse its classic storybook charm. A curly pink tail, embroidered whiskers, and a tiny triangle nose finish the look.
If you have made even one amigurumi before, you already know every stitch here. The whole pattern uses single crochet with basic increases and decreases, worked in a spiral so there are no seams to join. If this is your very first amigurumi, it is still a great place to start: the shapes are simple, the pattern tells you exactly when to stuff and where to place the eyes, and there is a full troubleshooting section at the end for the usual first-timer hiccups.
Table of contents
- Why you'll love this mouse crochet pattern
- Materials you'll need
- Size, gauge and skill level
- Abbreviations, US terms
- The mouse crochet pattern (US terms)
- Finishing touches and assembly
- Tips and tricks
- Variations to try next
- Troubleshooting tips
- Frequently asked questions
- More free patterns to try
Why you'll love this mouse crochet pattern
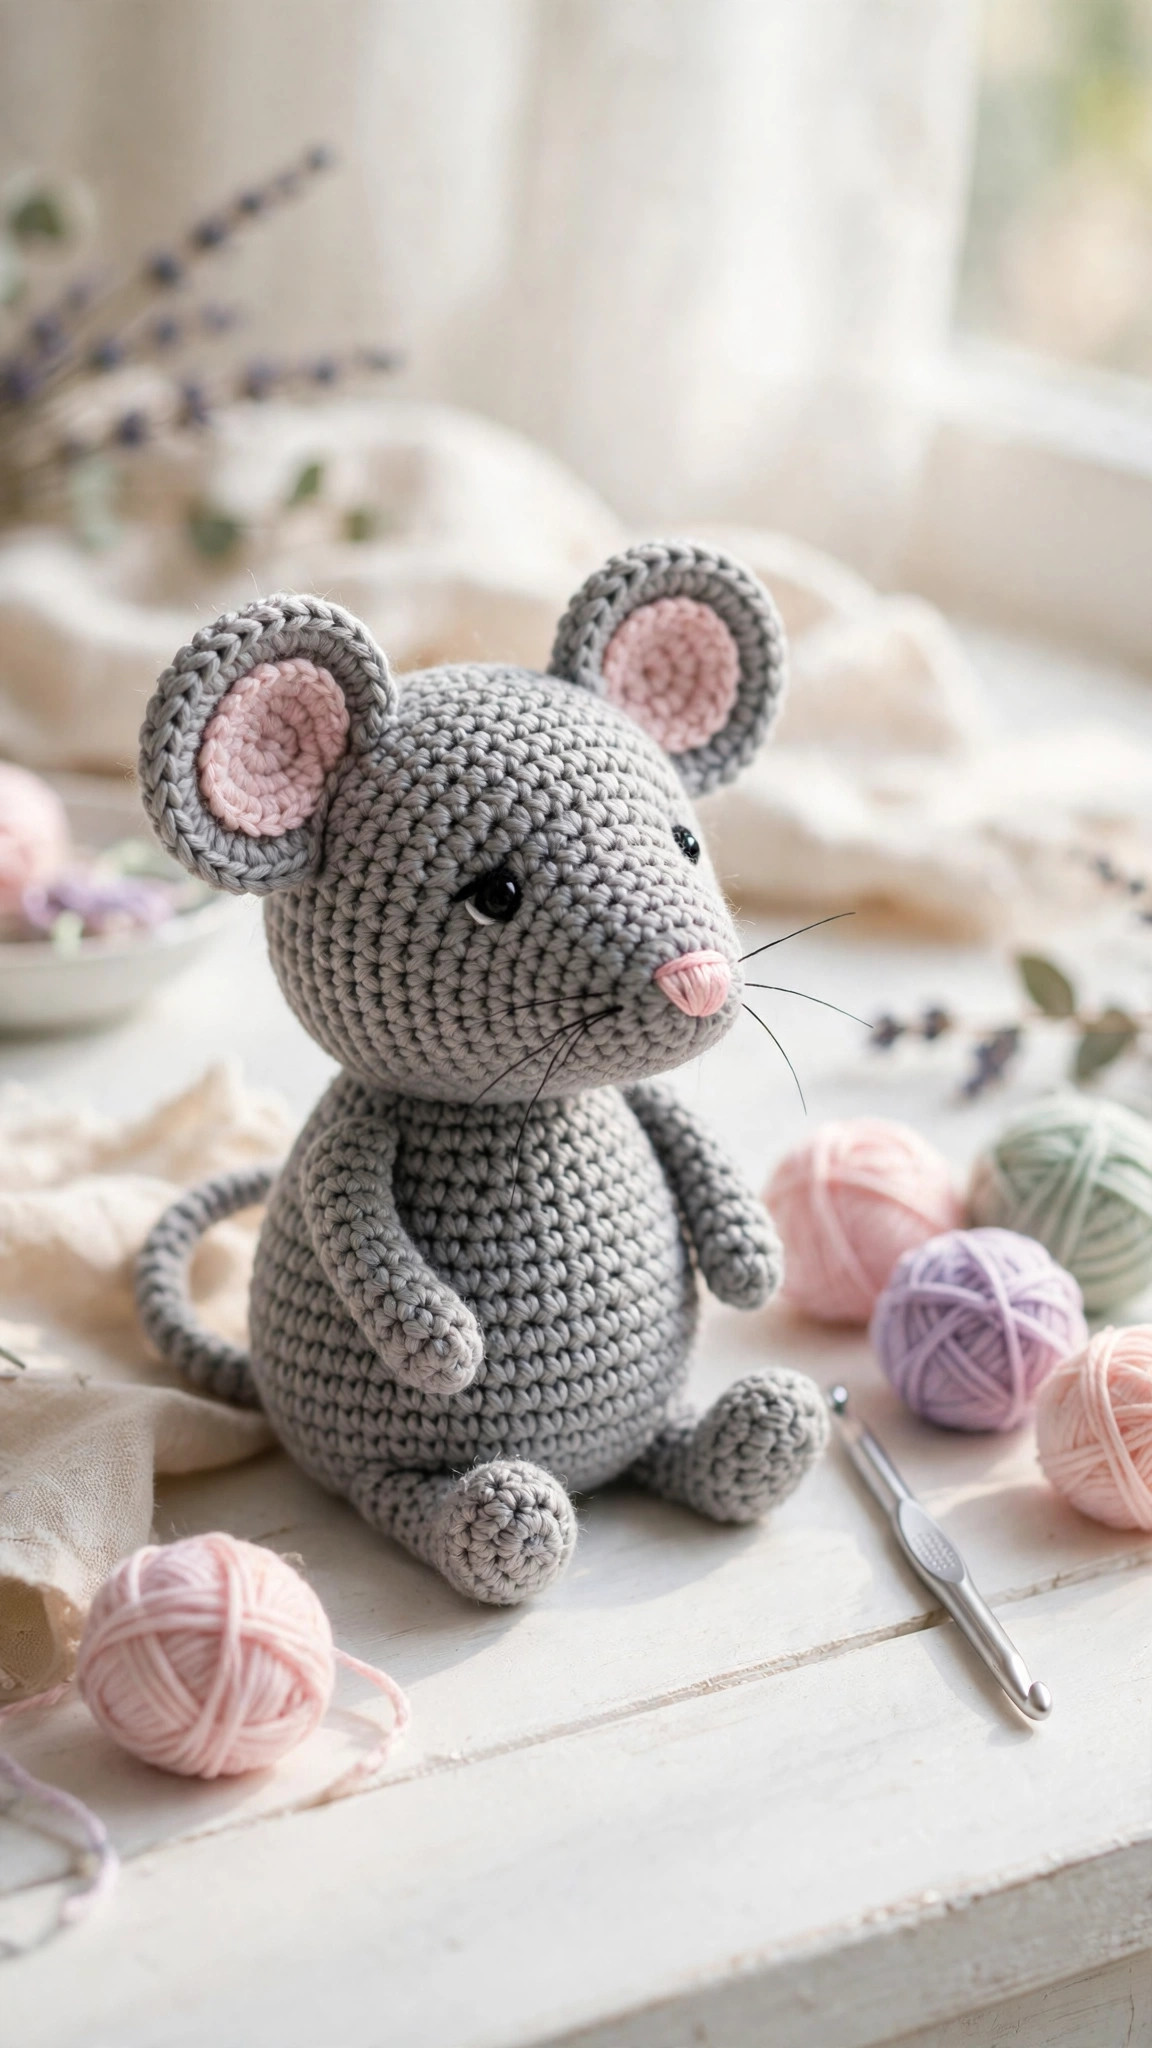
Small amigurumi mice are the ultimate quick win. One skein of grey yarn makes the whole mouse with yarn to spare, the pattern uses only single crochet with basic increases and decreases, and you can finish the entire project in a single evening. It is the kind of make that reminds you why you picked up a hook in the first place: fast, cute, and finished before your attention wanders.
The design keeps sewing to a minimum. The body and head are worked as one continuous piece, so you only attach the ears, arms, feet, and tail. Every attachment point is spelled out with round numbers, so nothing is left to guesswork. If you are collecting quick amigurumi patterns, our mini amigurumi patterns roundup is full of makes this size, and the free crochet bunny pattern uses the same one-piece body technique if you want a matching pair.
Gift-wise, this mouse is a champion. It fits in a stocking, a party favor bag, or a get-well package. Make it in nursery colors for a baby shower gift (embroider the eyes instead of using safety eyes), or stitch a whole mischief of mice in different greys and browns for a children's play set. The crochet fox pattern makes a lovely woodland companion if you are building a little animal collection, and it works up at a similar pace.
Materials you'll need
| Supply | What to get |
|---|---|
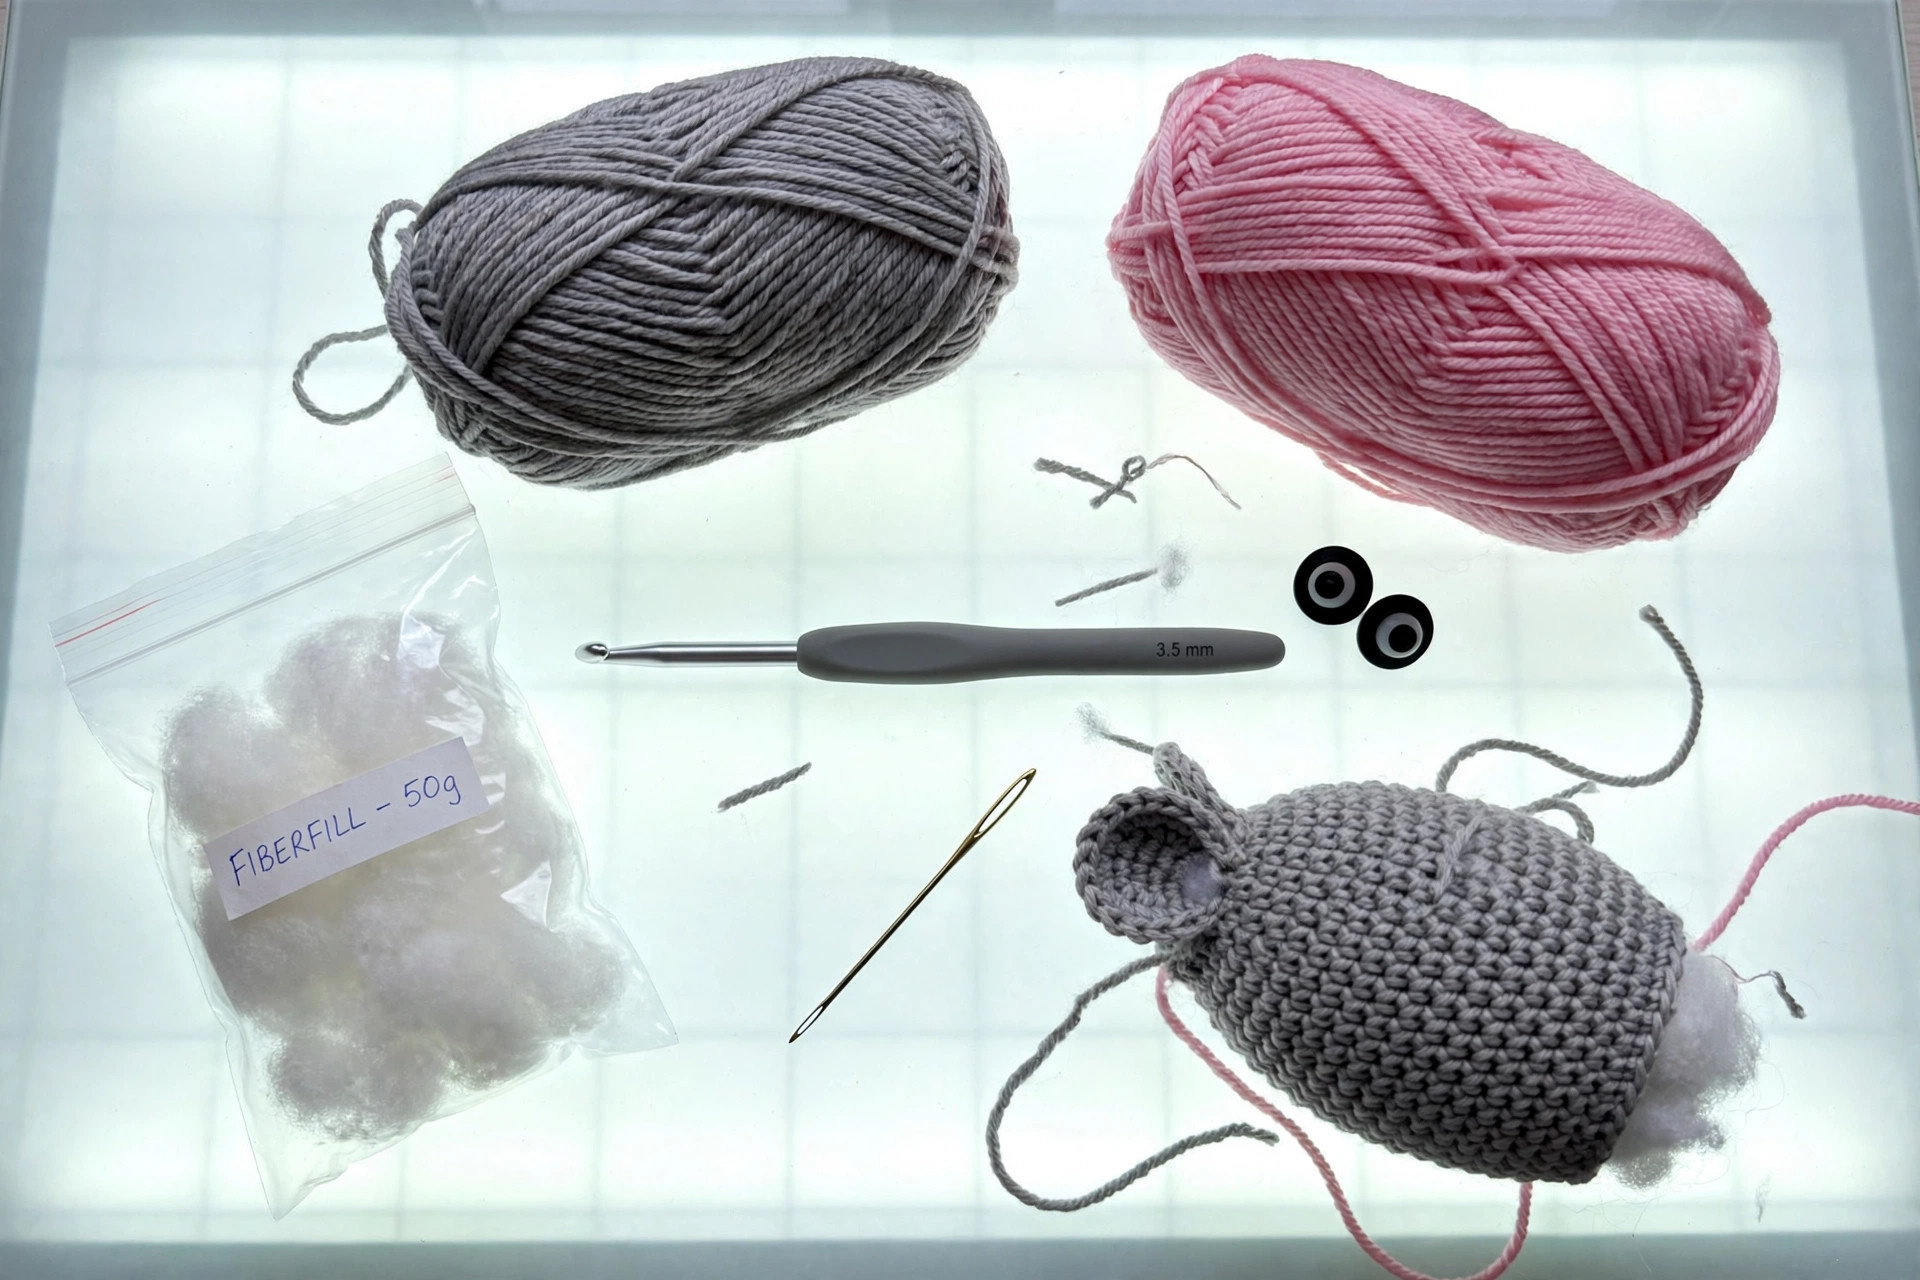
| Grey yarn | DK-weight (#3) yarn in grey, about 80 yds / 73 m |
| Pink yarn | DK-weight (#3) yarn in pink, a small amount (about 10 yds / 9 m) for inner ears, nose and tail |
| Crochet hook | 3.5 mm (E) |
| Safety eyes | Two 8 mm black safety eyes (or black yarn to embroider) |
| Stuffing | Polyester fiberfill, a small handful |
| Tapestry needle | For sewing pieces and embroidering the nose |
| Notions | Scissors, stitch markers |
Choose a smooth DK yarn rather than a fuzzy one: the stitch definition is what makes amigurumi faces look crisp, and smooth yarn is easier to sew pieces onto. A medium grey reads as the classic storybook mouse, but a soft warm grey or even a pale taupe works beautifully. The pink should be a clear, cheerful pink rather than dusty, since the nose and inner ears are tiny accents that need to pop against the grey.
A note on the hook: 3.5 mm with DK yarn gives a tight fabric with no stuffing showing through. If you crochet loosely, drop to a 3.25 mm hook. The goal is stitches so tight you cannot see the fiberfill between them. Test with a small swatch in the round: if you can see daylight through the fabric, size down.
Size, gauge and skill level
The mouse is worked in continuous (spiral) rounds: do not join at the end of each round, just keep going and mark the first stitch of each round with a stitch marker. The body and head are one piece; the ears, arms, feet, and tail are sewn on.
- Finished size: about 4.5 in (11 cm) tall from feet to ear tips, about 3 in (7.5 cm) wide at the body. The tail adds about 4 in (10 cm) of curl behind.
- Gauge: 22 sc and 24 rounds = 4 in (10 cm) in DK yarn with a 3.5 mm hook. Gauge is not critical for a toy, but tight, even stitches are: if your fabric has gaps, go down a hook size.
- Skill level: beginner. You should know how to work a magic ring, single crochet, increase, and decrease. The embroidery is three tiny stitches.
If this is your first amigurumi, count your stitches out loud for the first few rounds. It feels slow, but it is how you catch a missed increase before it becomes a lopsided mouse. Keep the stitch marker moving: in spiral rounds there is no join to tell you where the round ended.
Abbreviations, US terms
| Abbreviation | Meaning |
|---|---|
| MR | magic ring |
| ch | chain |
| sc | single crochet |
| sl st | slip stitch |
| inc | increase: 2 sc in the same stitch |
| dec | decrease: single crochet 2 together (invisible decrease recommended) |
| st(s) | stitch(es) |
| R | round |
| FO | fasten off |
| [ ] | total stitch count at the end of the round |
A note on the invisible decrease: work it in the front loops only. Insert the hook under the front loop of the next two stitches, yarn over, pull through both loops, yarn over, pull through the two loops on the hook. It leaves no bump, which keeps the mouse's face smooth on the shaping rounds.
The mouse crochet pattern (US terms)
Work in continuous rounds unless stated otherwise. Stuff the body firmly as you go: amigurumi should feel solid, not squishy. Read each round fully before you start it.
Body and head (one piece, grey)
Start at the base of the body and work up through the head in one go.
- R1: MR, 6 sc in ring. [6]
- R2: inc in each st around. [12]
- R3: (sc, inc) x6. [18]
- R4: (2 sc, inc) x6. [24]
- R5: (3 sc, inc) x6. [30]
- R6-R11: sc in each st around (6 rounds). [30]
- R12: (3 sc, dec) x6. [24]
- R13: (2 sc, dec) x6. [18]
Pause and stuff the body now, while the opening is still wide. Pack the fiberfill in small pinches and push it down with the end of your hook so the base is firm enough for the mouse to sit.
- R14: (sc, inc) x6. [24]
- R15: (3 sc, inc) x6. [30]
- R16-R19: sc in each st around (4 rounds). [30]
- R20: (3 sc, dec) x6. [24]
- R21: (2 sc, dec) x6. [18]
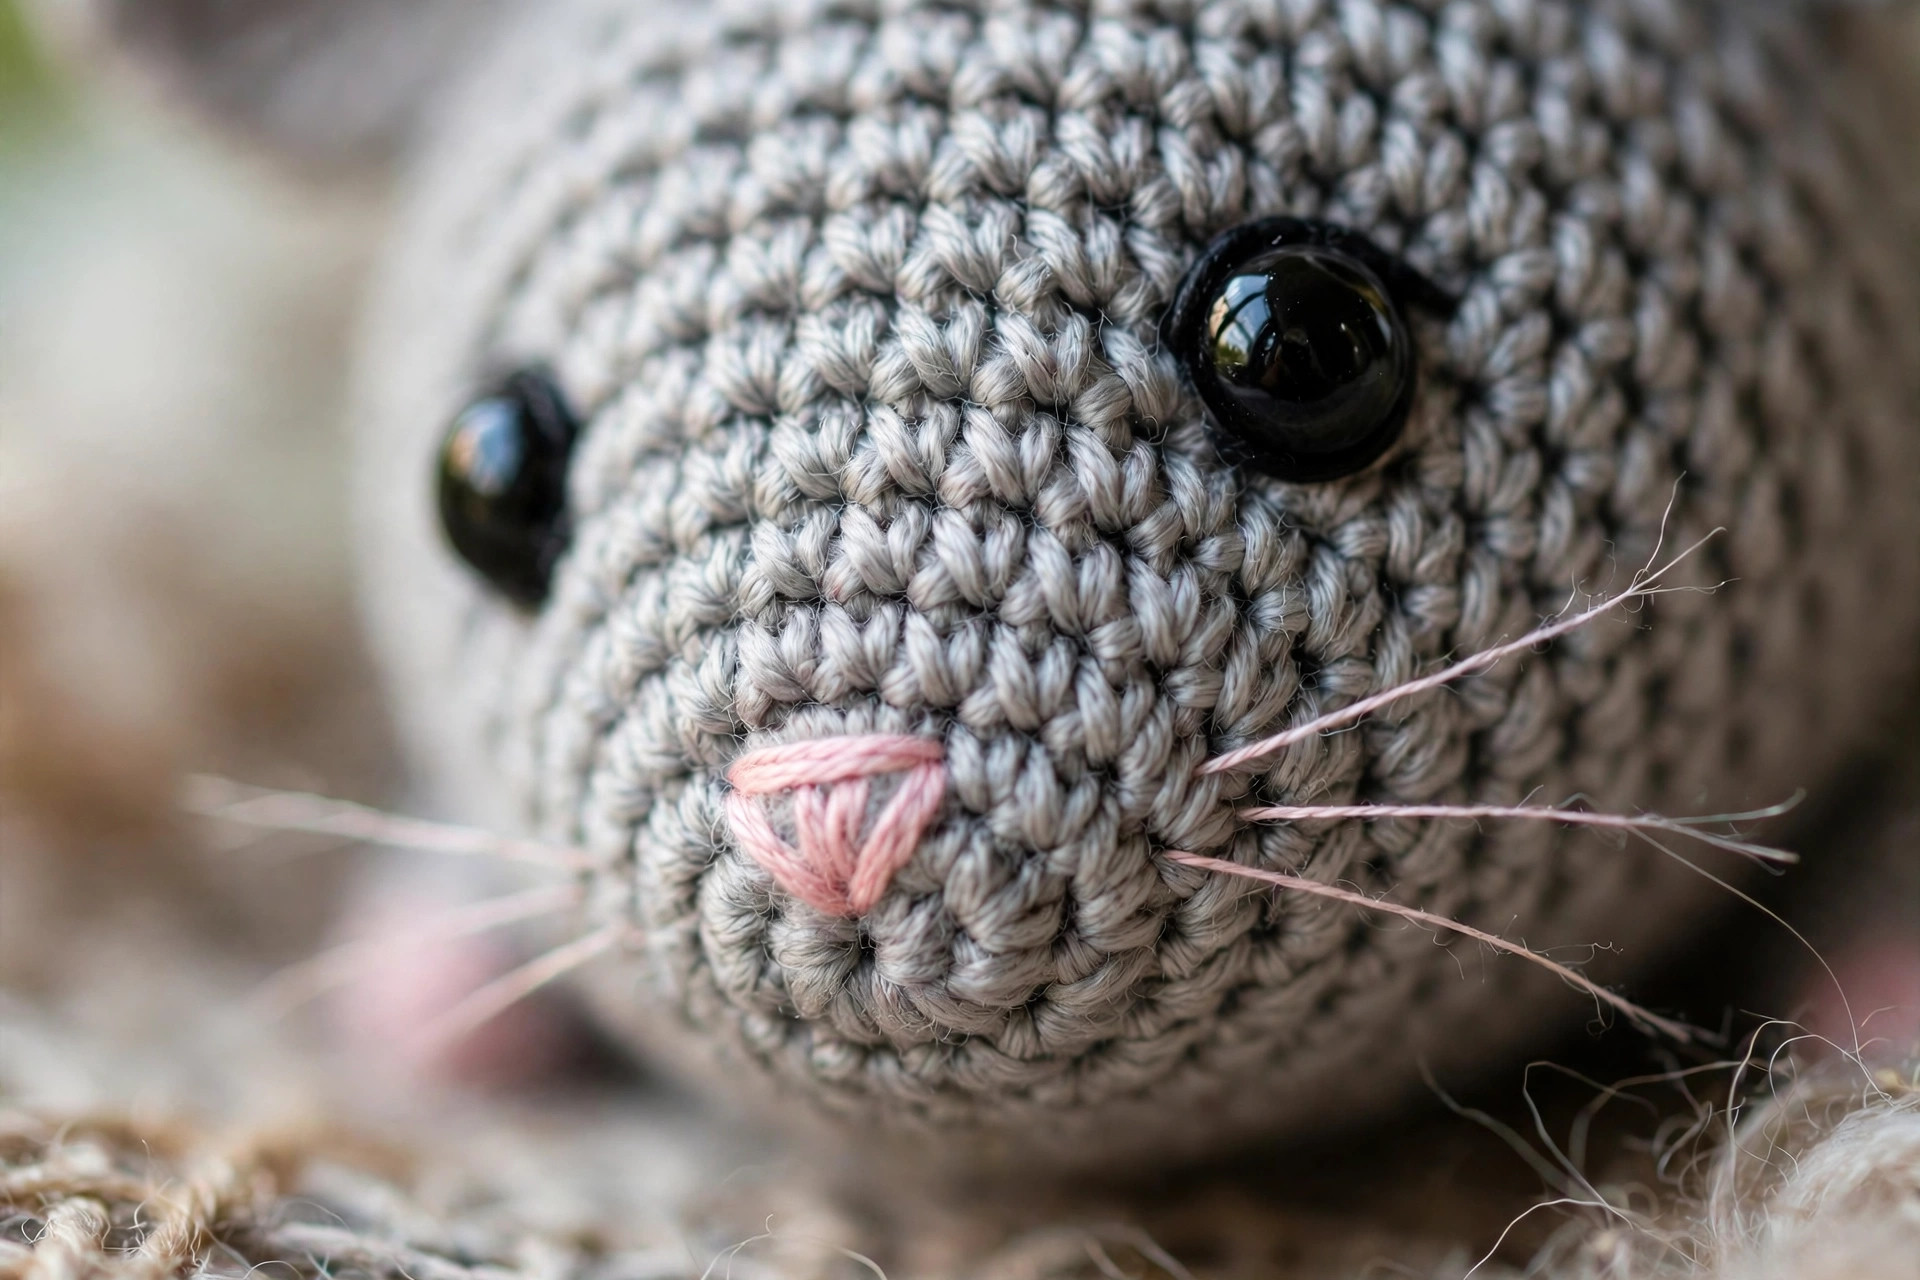
Place the safety eyes now, between R17 and R18, about 8 stitches apart and centered on the face. If you prefer embroidered eyes, mark the spots with pins and stitch them after assembly.
- R22: (sc, dec) x6. [12]
Stuff the head firmly, shaping it round with your fingers. The head should feel like a firm ball, not a soft pillow.
- R23: dec x6. [6]
- FO, thread the tail through the front loops of the remaining 6 stitches, pull tight, and weave the end inside the head.
The neck shaping between R13 and R14 is what gives the mouse a defined head instead of a snowman stack. If your mouse looks more like a pear, you probably skipped the R13 decrease round: count back and check before you stuff the head.
Ears, make 2 (grey outer, pink inner)
Outer ear (grey):
- R1: MR, 6 sc in ring. [6]
- R2: inc in each st around. [12]
- R3: (sc, inc) x6. [18]
- R4-R5: sc in each st around (2 rounds). [18]
- FO, leaving a long tail for sewing. Do not stuff. Flatten the ear and pinch the bottom edge slightly so it curves like a real mouse ear.
Inner ear (pink):
- R1: MR, 6 sc in ring. [6]
- R2: inc in each st around. [12]
- FO, leaving a tail. Sew the pink circle centered on the grey ear, then sew the whole ear to the head in the finishing section.
Arms, make 2 (grey)
- R1: MR, 6 sc in ring. [6]
- R2-R5: sc in each st around (4 rounds). [6]
- FO, leaving a tail. Stuff very lightly or leave unstuffed; sew to the sides of the body at about R10.
Feet, make 2 (grey)
- R1: MR, 6 sc in ring. [6]
- R2: inc in each st around. [12]
- R3: sc in each st around. [12]
- R4: (sc, dec) x4. [8]
- FO, leaving a tail. Stuff lightly, flatten, and sew to the base of the body so the mouse sits upright.
Tail (pink)
- Ch 30. Work 2 sc in the 2nd ch from the hook and in each ch across. The extra stitches force the strip to curl into a tight spiral as you work.
- FO, leaving a tail. Sew the straight end to the back of the body at about R6, and let the curl hang free behind the mouse.
Finishing touches and assembly
Sew the pieces in this order: inner ears to outer ears, ears to head, arms and feet to body, tail last. Use the long tails left on each piece and a tapestry needle, stitching through both the piece and the body with small, even whipstitches. Take your time here: neat sewing is what separates a handmade-looking toy from a polished one.
Place the ears at about R16 of the head, roughly 6 stitches apart across the top, and tilt them very slightly outward for that classic mouse silhouette. Pin everything with straight pins or spare tapestry needles before you sew: it is much easier to adjust a pinned ear than a sewn one. Step back and look at the face from a distance before you commit.
Embroider the nose last. With pink yarn, stitch a small triangle (three short stitches) centered between and just below the eyes, at about R19. Add two or three whisker stitches on each side with grey or white thread if you like. Weave in every end by running the needle through the stuffing and trimming close: buried ends cannot work loose.
Safety note: safety eyes are not safe for children under three, since they can be chewed out and swallowed. For baby gifts and nursery toys, embroider the eyes with black yarn instead: two small French knots or satin stitch ovals look just as sweet.
Tips and tricks
- Mark every round. Move your stitch marker to the first stitch of each new round. In spiral amigurumi, losing your place by one stitch throws off every increase that follows.
- Stuff in stages. Add fiberfill at R13, again before R22, and top up after closing if the head feels soft. Small pinches pack more evenly than one big wad, and even stuffing is what gives the mouse its smooth shape.
- Use the invisible decrease. The standard sc2tog leaves a visible bump; the front-loop-only version disappears into the fabric, which matters most on the face rounds where every bump shows.
- Keep the tail end long. Every piece needs a sewing tail, so fasten off with at least 8 inches of yarn. Running short mid-seam is the most common amigurumi frustration, and it is completely avoidable.
- Check your eye spacing. Hold the head at arm's length before locking the safety eye washers in place. Eight stitches apart looks sweet; ten looks surprised; six looks worried. There is no fixing it after the washers click.
- Steam the ears. A quick pass with a steamer, or a damp cloth and a warm iron held above (never touching) the yarn, flattens the ears and makes them sit neatly against the head instead of cupping forward.
- Weave ends as you go. After sewing each piece, bury its tail immediately. Leaving six tails for the end turns a five-minute job into a tangled twenty-minute one.
Variations to try next
- Field mouse: swap the grey for a warm brown and the pink for cream. Add a tiny crocheted cheese wedge from yellow yarn and you have a storybook scene for a child's shelf.
- White mouse: an all-white body with pink ears and tail. Embroider the eyes in dark grey instead of black for a softer look that suits nurseries.
- Keychain mouse: work the whole pattern in thread-weight yarn with a 1.75 mm hook for a 2 inch mini, then add a keyring through the top of the head. A whole litter fits in a gift bag.
- Sleepy mouse: embroider closed eyes (two gentle curved lines) instead of safety eyes and skip the whiskers for a calm, nursery-friendly sleepy baby mouse.
- Mama and baby set: make the full-size mouse, then make a second one with a 2.75 mm hook and the same yarn for a 75 percent scale baby. They nest together in a gift box beautifully and make an adorable shower gift.
Troubleshooting tips
- My stitches are gappy and the stuffing shows. Go down a hook size, or switch to the invisible decrease. Amigurumi fabric should be nearly solid, with no white peeking through the grey.
- The head looks lopsided. You probably missed an increase or worked two rounds as one. Count the stitches in the last even round: it should be 30. Frog back to the last correct round rather than fudging the count.
- The ears will not stay upright. Sew them with a wider base: take stitches across 5 or 6 head stitches instead of 3. A tiny fold at the base of each ear also adds structure and a natural curve.
- The tail will not curl. You need 2 sc in every chain, not 1. If you worked single stitches, the tail stays straight. The curl appears as you work, so check after the first ten chains and restart if it is flat.
- The mouse will not sit up. The feet need to be sewn flat and slightly forward, and the body needs firm stuffing at the base. Sit the mouse on a table as you pin the feet to find the balance point before sewing.
Frequently asked questions
What skill level is this crochet mouse pattern?
Beginner. If you can work a magic ring, single crochet, increase, and decrease, you have every skill this pattern needs. The embroidery is three tiny stitches for the nose.
How long does it take to crochet the mouse?
About 2 hours: roughly 45 minutes for the body and head, 20 minutes for the ears, and the rest for the limbs, tail, and sewing. Your second mouse will be noticeably faster.
How much yarn do I need?
About 80 yards of grey DK yarn and a 10 yard scrap of pink. One 100 gram skein of grey makes the whole mouse with plenty left over, which is why this is such a good stash buster.
Are safety eyes safe for baby toys?
Not for children under three. Use them for decorative mice and gifts for older kids, and embroider the eyes with black yarn for anything destined for a crib or a toddler's hands.
Can I make the mouse bigger?
Yes. Use worsted-weight yarn with a 4.0 mm hook and the mouse comes out about 6 inches tall. Use chunky yarn with a 5.5 mm hook for a huggable 8 inch version. The proportions stay exactly the same at any scale.
Can I sell the finished mice I make?
Yes! You may sell finished mice made from this pattern in small batches (craft fairs, markets, gifts). Please credit Little Loop Finds as the pattern designer.
More free patterns to try
If this little mouse was fun, keep the amigurumi shelf growing. Our crochet squirrel pattern uses the same one-piece body technique with a gloriously fluffy tail, and the mini octopus crochet pattern is even quicker: no sewing at all, just tentacles. Both make perfect companions for this mouse on a nursery shelf.