Crochet Hammerhead Shark Pattern: Free Amigurumi
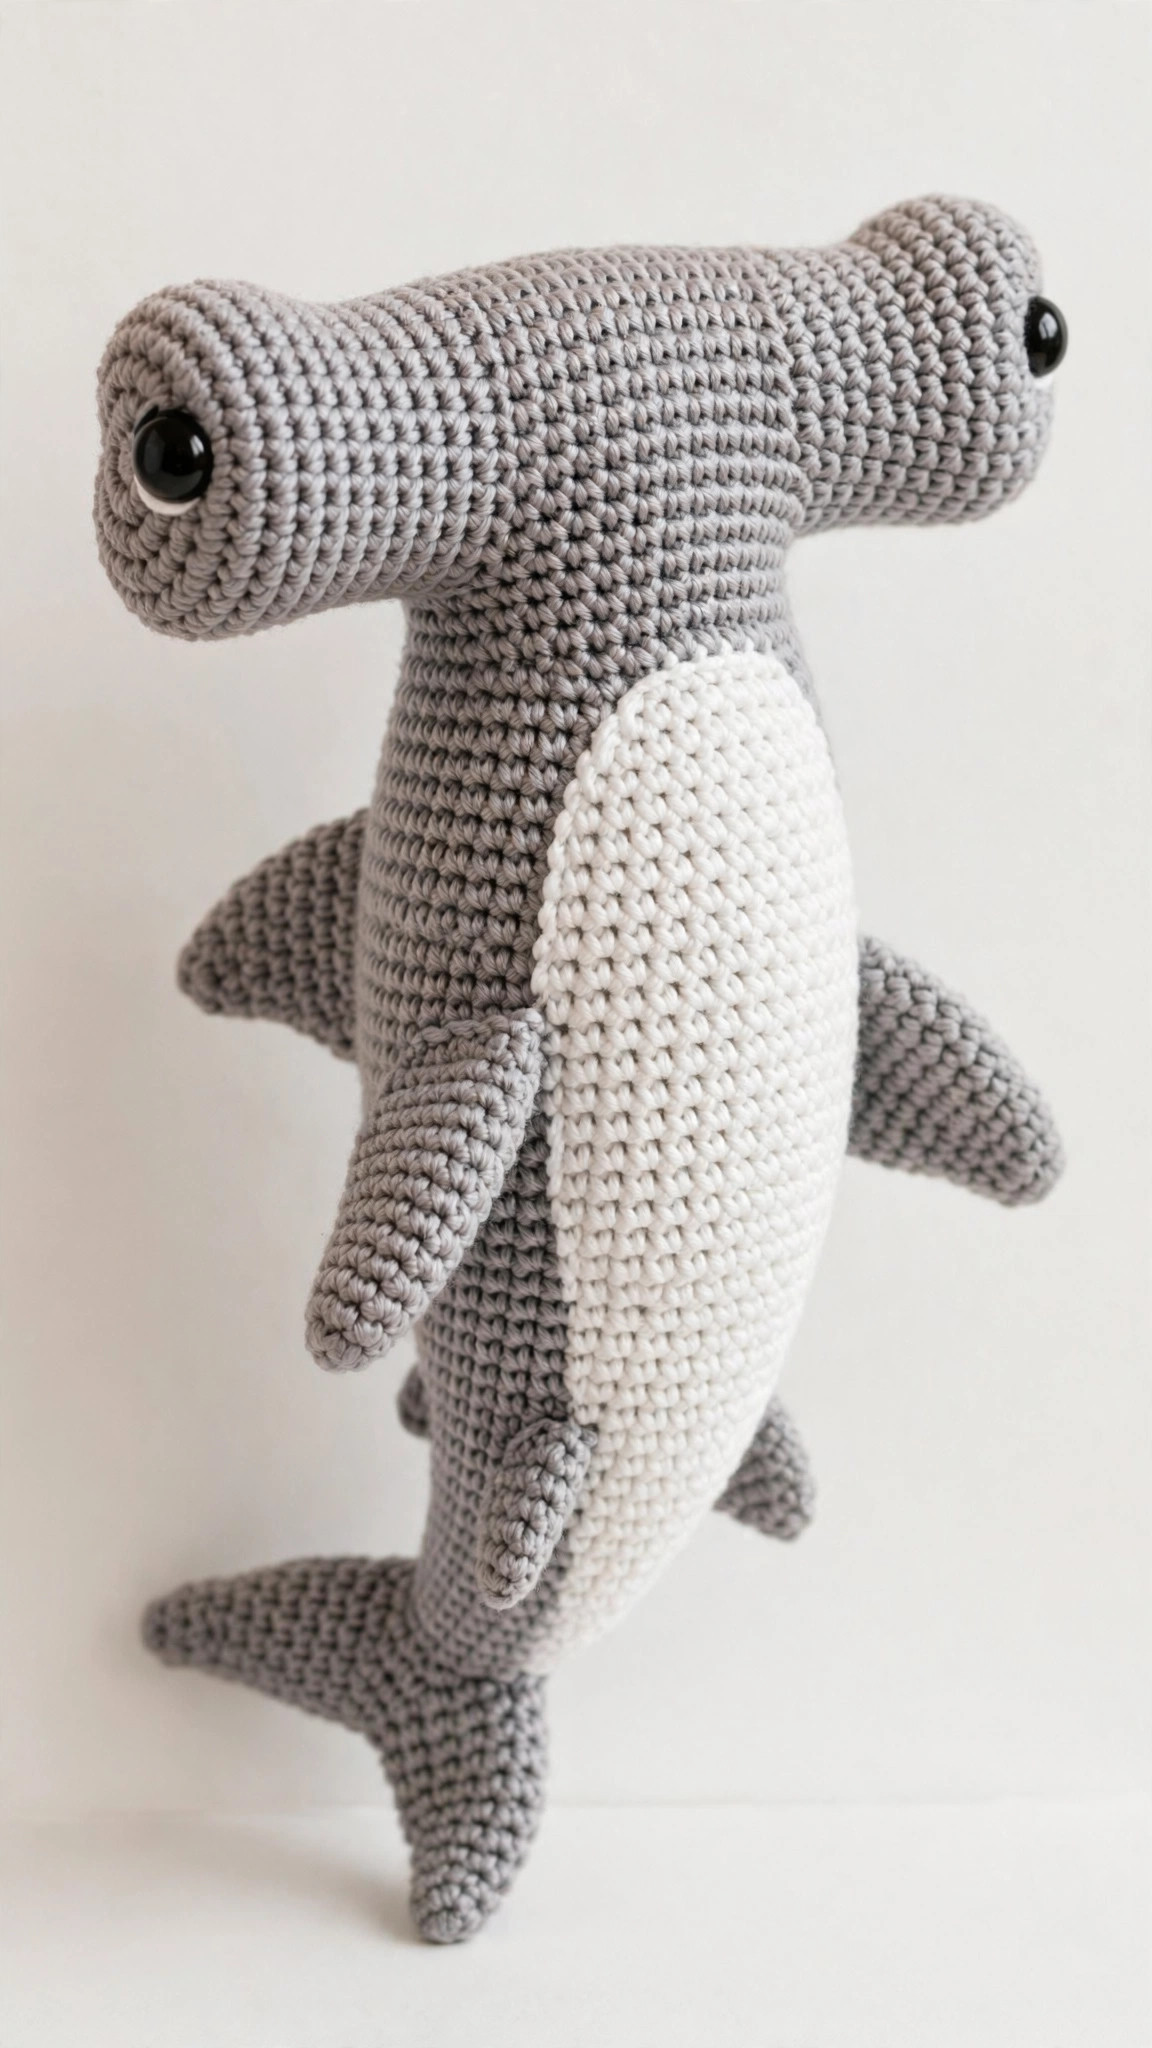
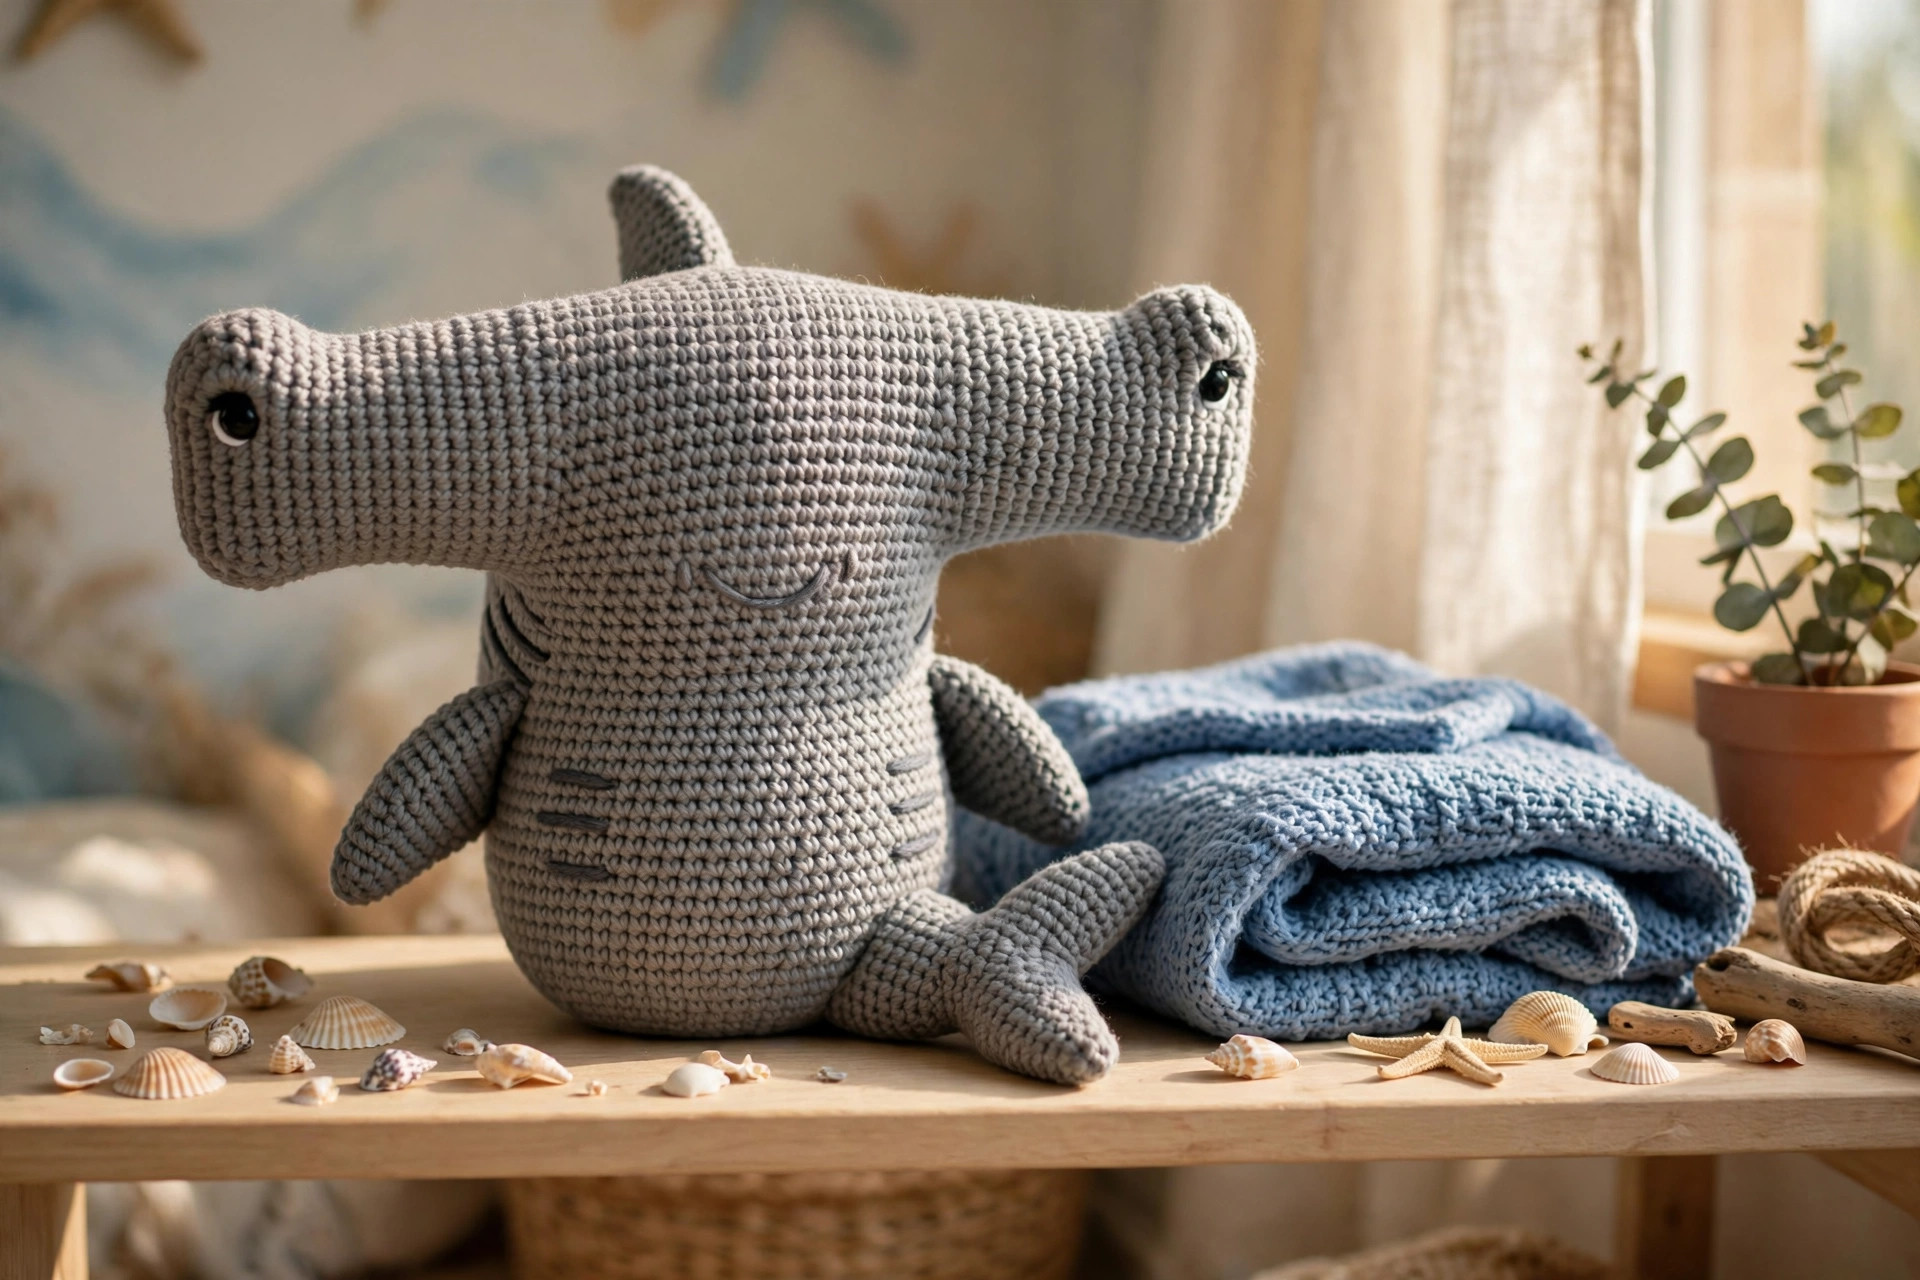
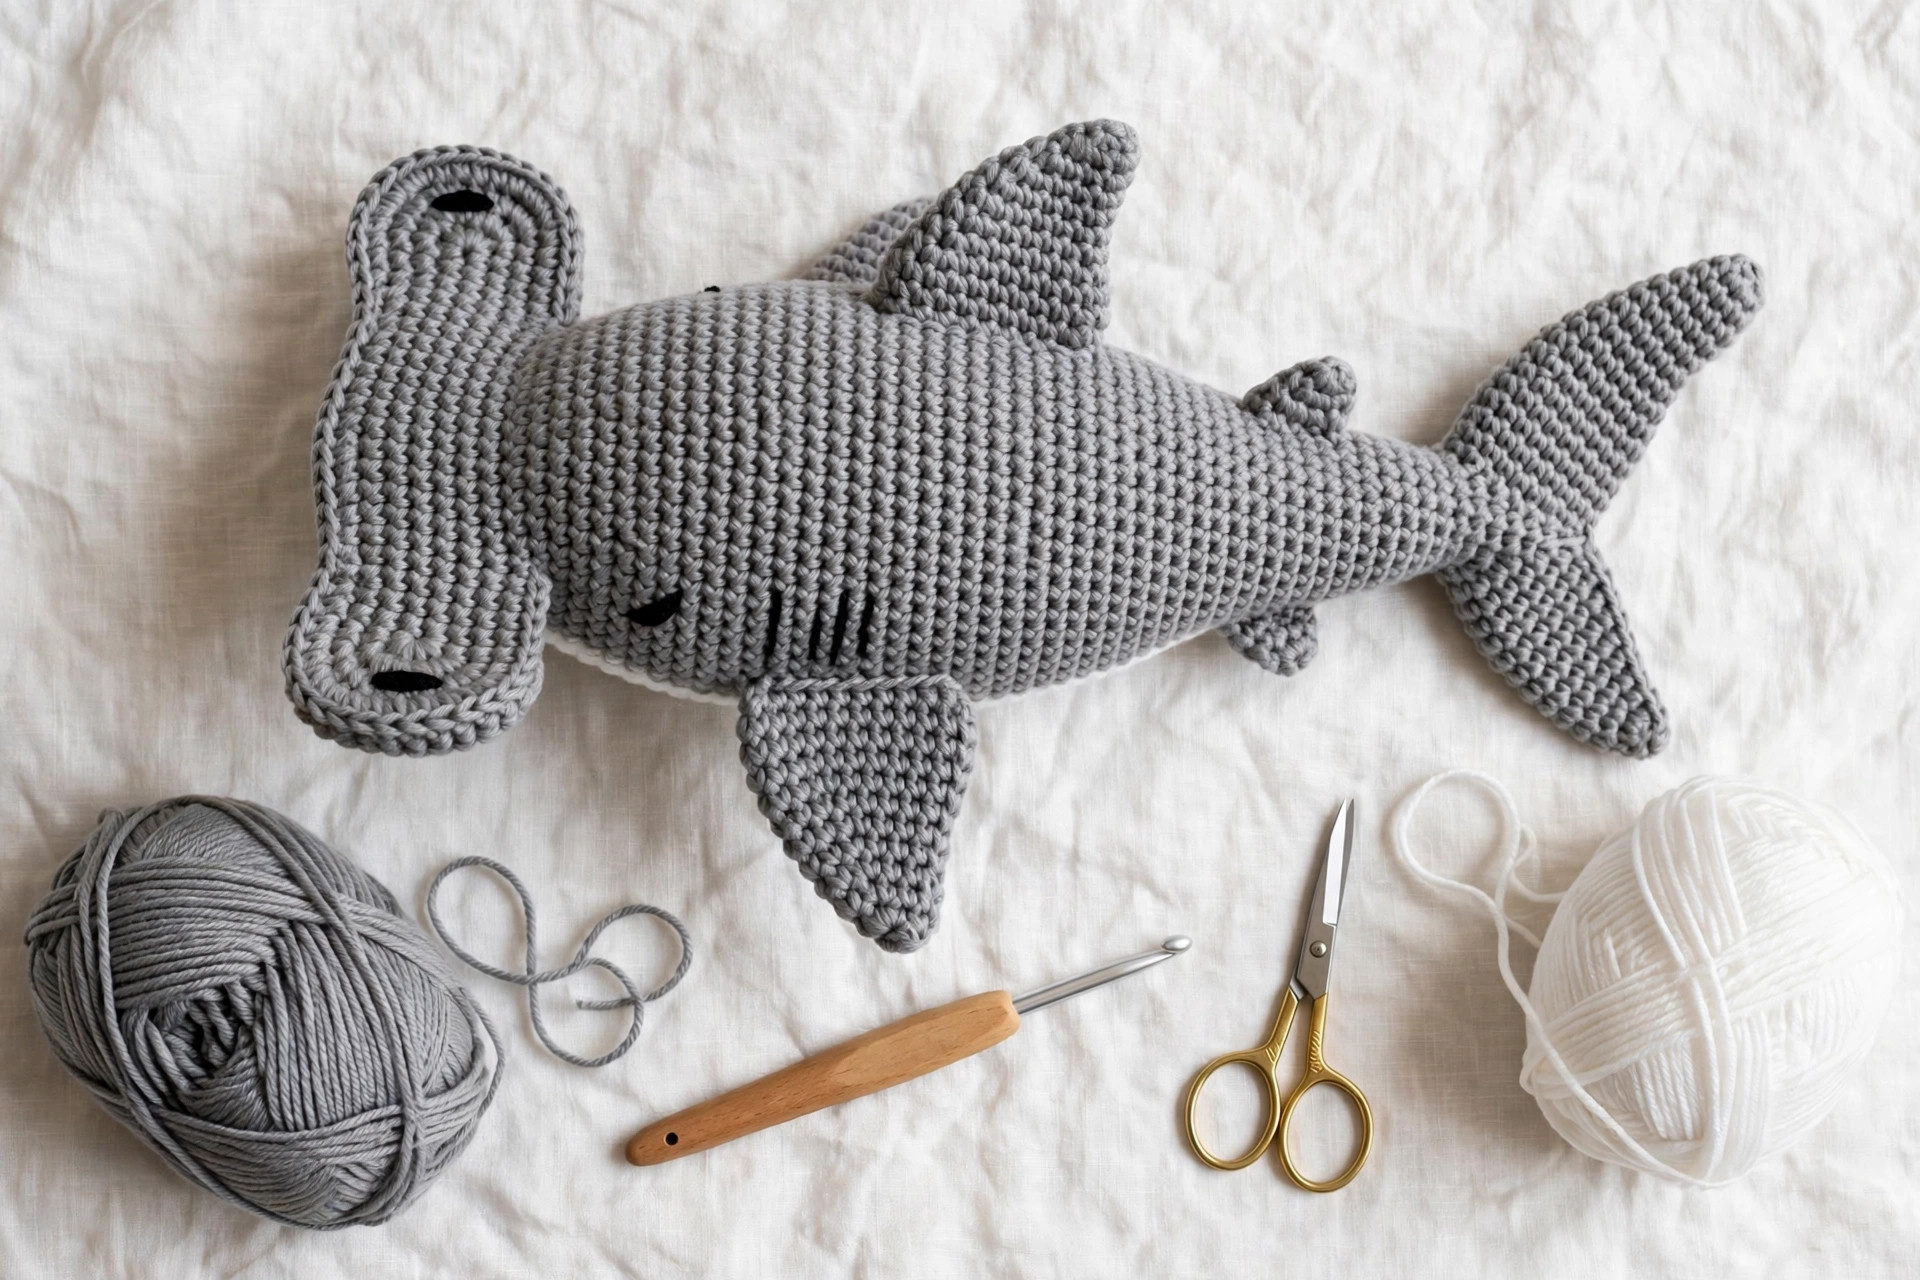
A soft grey hammerhead shark with its famous wide hammer head, an eye at each tip, a pale belly panel and a forked tail — worked in simple single-crochet spirals from 8 small pieces you sew together over a couple of evenings.

Amigurumi · Crochet
- Finished size
- About 28 cm / 11 in long
- Making time
- About 4–6 hours
- Hook
- 3.5 mm, worsted-weight yarn
- Pieces
- 8 pieces to assemble
- Skill
- Easy
In this post
Every shark is cool, but the hammerhead is the one nobody forgets. That wide, flat head with an eye at each end looks like it swam straight out of a cartoon — perfect for amigurumi. This original crochet hammerhead shark pattern turns that unmistakable silhouette into a soft, squeezable plush with a torpedo body, a pale belly panel, a two-lobed tail fin, and those famous eyes perched at the tips of the hammer.
The design is deliberately simple under the drama. The body is one tapered tube in plain single crochet spirals. The hammer is a single elongated capsule — you crochet around a starting chain, so there is no sewing two halves together. The fins are small flattened cones you barely stuff at all. If you can work a magic ring, an increase and an invisible decrease, you already have every skill this shark asks for.
Contents
- Why you'll love this hammerhead shark
- Materials you'll need
- Size, gauge and skill level
- Abbreviations — US terms
- The pattern (US terms)
- Finishing: stuffing and assembly
- Tips for a smooth, professional shark
- FAQ
- What to crochet next
Why you'll love this hammerhead shark pattern
Most amigurumi sharks are grey torpedoes with a fin — cute, but they could be any shark. The hammerhead gives you a silhouette a child can recognise from across the room, and this pattern leans into it. The hammer is worked wide and flat with the eyes set at the very ends, exactly where a real hammerhead carries them, and that one decision does all the character work. Add three embroidered gill slits on each side and a small stitched mouth under the hammer, and your plush reads as friendly rather than fierce.
You will also love how forgiving the construction is. Because the hammer is crocheted in the round around a foundation chain, both ends come out evenly rounded with no extra shaping rounds to memorise. The body decreases in calm, even steps, so the taper is smooth instead of lumpy. The belly panel is a flat oval you sew on at the end, which means you get the classic pale-underside shark look without juggling colour changes in the round — no jogs, no carried yarn, no mid-round stress.
It is a satisfying size, too: big enough to hug, small enough to finish over a couple of evenings. Make it in classic shark grey, or go rogue with mint, coral or mustard — a pastel hammerhead is a baby-shower gift people talk about. It also makes a brilliant centrepiece for an ocean-themed mobile or nursery shelf.
Materials you'll need
| Supply | What to get |
|---|---|
| Main yarn | Worsted-weight (#4) acrylic or cotton in shark grey, about 90 g |
| Belly yarn | Worsted-weight (#4) in white or cream, about 25 g |
| Accent yarn | Small amount of dark grey or charcoal for gills and mouth embroidery |
| Crochet hook | 3.5 mm (E-4) |
| Safety eyes | 10 mm black, one pair |
| Stuffing | Polyester fiberfill |
| Notions | Tapestry needle, stitch markers, scissors, pins |
A note on yarn: smooth worsted acrylic gives crisp stitch definition and a plush that survives enthusiastic play. Cotton works too and gives a firmer, more sculpted hammer — stuff it a touch more firmly so the ends hold their shape. Use the same yarn weight for body and belly so the panel sits flat instead of puckering.
Size, gauge and skill level
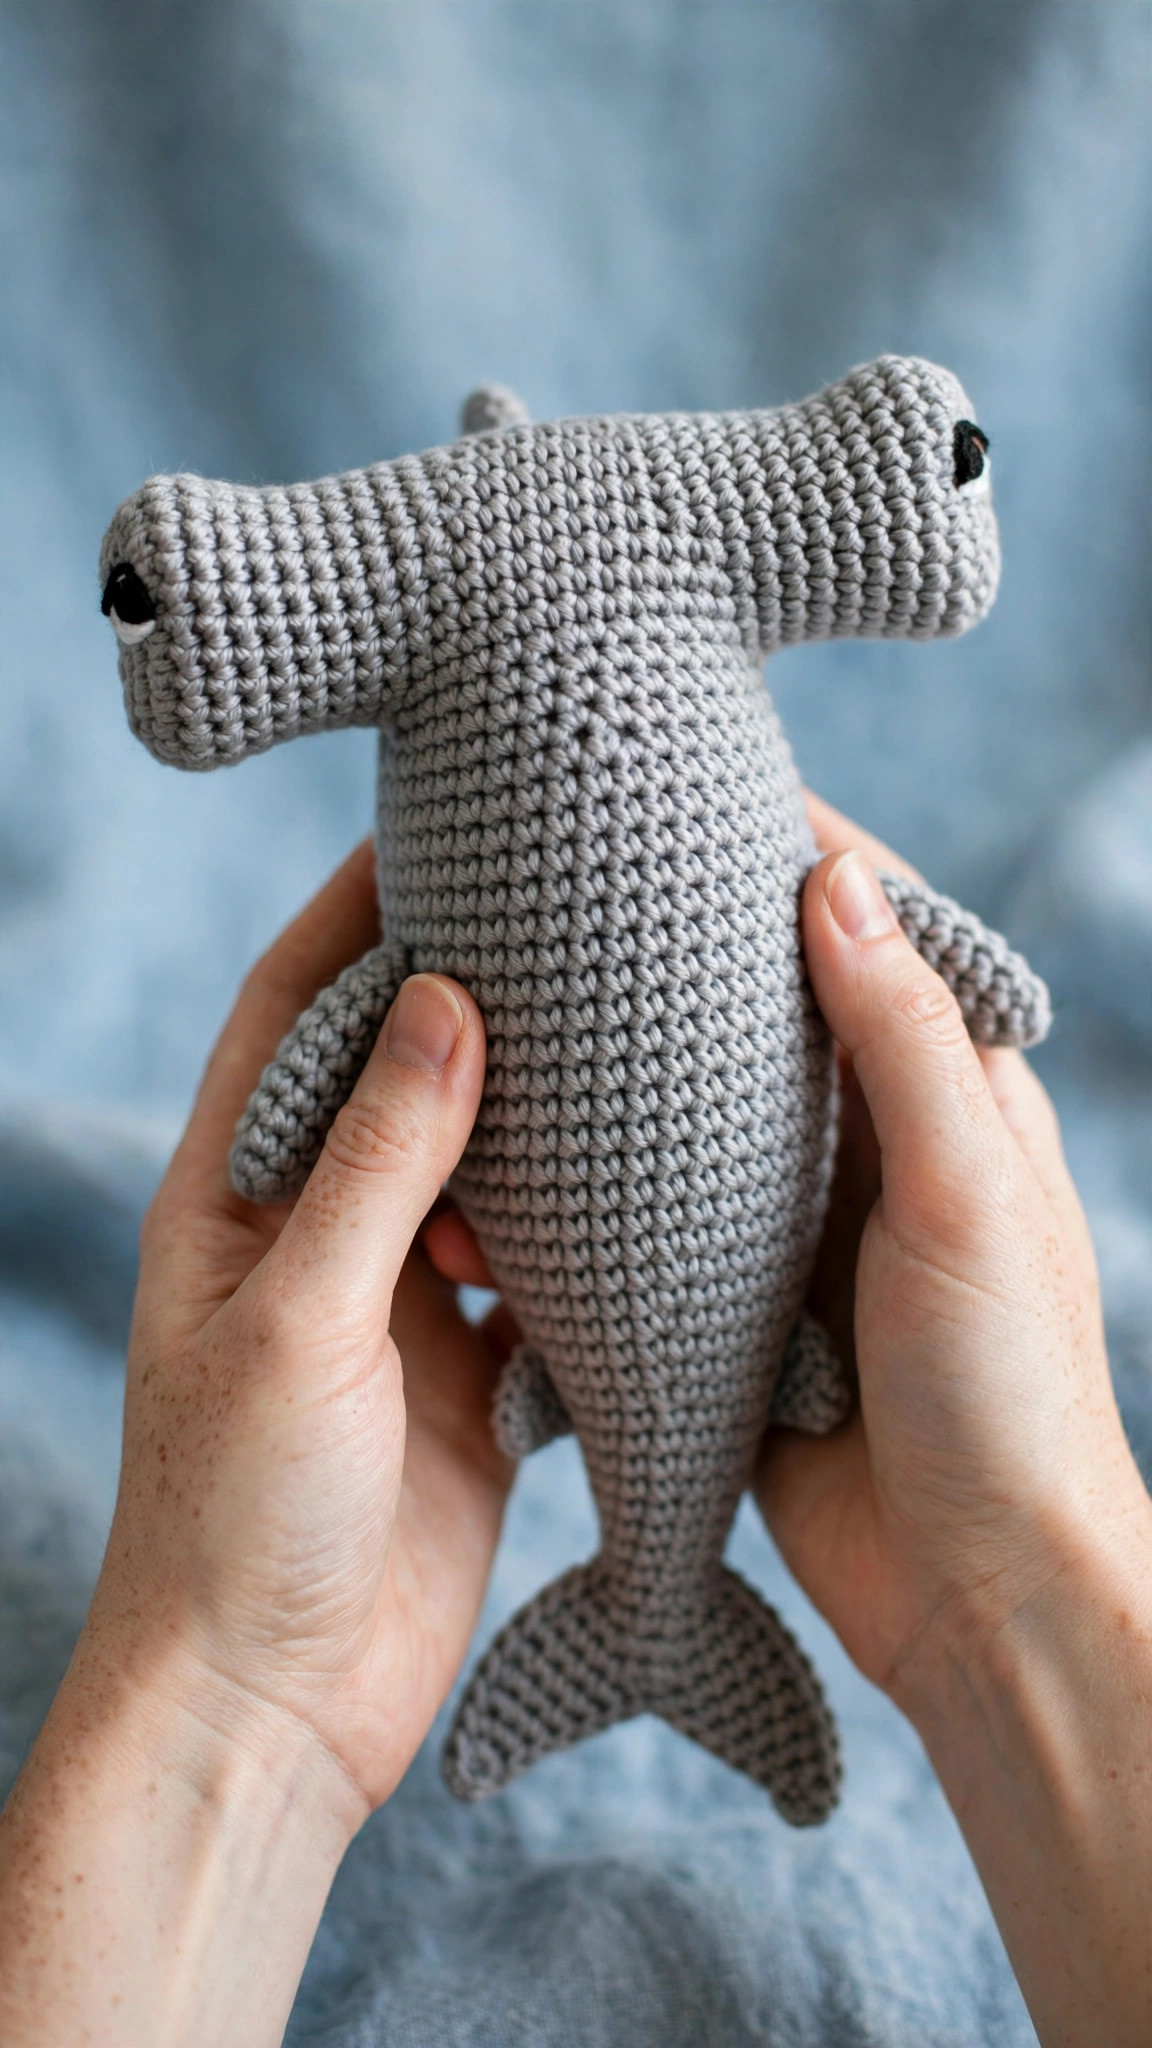
- Finished size: about 28 cm (11 in) from hammer to tail tip; the hammer spans about 16 cm (6.5 in) across, and the body is about 8 cm (3 in) thick.
- Gauge: not critical for amigurumi. What matters is a tight fabric — if you can see stuffing through your stitches, go down a hook size. As a guide, 5 sc should measure roughly 2.5 cm (1 in) with the hook and yarn listed.
- Skill level: easy / confident beginner. You should be comfortable with the magic ring, single crochet, increases, and the invisible decrease. Working around a foundation chain (for the hammer and belly) is the only slightly new move, and it is explained step by step below.
If this is your very first amigurumi, have a quick look at our easy beginner crochet patterns roundup for the basic techniques, or warm up with the crochet cat pattern — it teaches the same spiral shaping on a smaller project. Then come back: the shark is easier than it looks.
Abbreviations — US terms
| Abbreviation | Meaning |
|---|---|
| MR | magic ring |
| sc | single crochet |
| inc | increase (2 sc in the same stitch) |
| dec | invisible decrease (sc 2 together through front loops) |
| st(s) | stitch(es) |
| ch | chain |
| R | round |
| BLO | back loop only |
| FO | fasten off |
A note on decreases: use the invisible decrease throughout — insert your hook into the front loop only of the next two stitches, yarn over and pull up a loop, then yarn over and pull through both loops on the hook. It leaves no bump and no gap, which matters on a smooth shark body where every flaw shows.
The pattern (US terms)
Work in continuous spirals unless a section says otherwise. Move a stitch marker up at the start of every round, and check the stitch count in parentheses as you finish each round — ten seconds of counting now saves a frogging session later. Stuff as you go wherever the pattern flags it.
Body — grey
The body is a tapered torpedo, worked from the wide front dome (which hides under the hammer) down to the narrow tail point.
- R1: MR, 6 sc (6)
- R2: inc in each st around (12)
- R3: [sc, inc] × 6 (18)
- R4: [2 sc, inc] × 6 (24)
- R5: [3 sc, inc] × 6 (30)
- R6–R10: sc in each st around (30) — 5 rounds even
- R11: [3 sc, dec] × 6 (24)
- R12–R14: sc in each st around (24) — 3 rounds even
- R15: [2 sc, dec] × 6 (18)
- R16–R17: sc in each st around (18) — 2 rounds even
- Stuff the body now, firmly at the wide front end and a little softer towards the tail so the tail keeps a gentle flex.
- R18: [sc, dec] × 6 (12)
- R19–R20: sc in each st around (12) — 2 rounds even
- R21: dec × 6 (6). FO, thread the tail through the front loops of the last 6 stitches, pull tight to close, and weave in. Add a pinch more stuffing before you close if the middle feels hollow.
Belly panel — white or cream
A flat oval sewn onto the underside later. Working around a chain feels odd the first time; just remember the chain becomes the centre line of the oval.
- R1: Ch 10. Sc in the 2nd ch from the hook, sc in the next 7 ch, 3 sc in the last ch. Rotate and crochet along the underside of the chain: sc in the next 7 ch, 2 sc in the first ch (20)
- R2: inc, sc in the next 7, inc × 3, sc in the next 7, inc × 2 (26)
- R3: sc in each st around (26)
- FO, leaving a long tail (about 50 cm / 20 in) for sewing. Press the panel flat; a night under a book helps if the edges curl.
Hammer head — grey
Here is the star of the show. The hammer is one elongated capsule crocheted around a foundation chain, so both ends are automatically rounded and mirror each other. Take the first round slowly.
- R1: Ch 13. Sc in the 2nd ch from the hook, sc in the next 10 ch, 3 sc in the last ch. Rotate and work along the underside: sc in the next 10 ch, 2 sc in the first ch (26)
- R2: inc, sc in the next 10, inc × 3, sc in the next 10, inc × 2 (32)
- R3–R5: sc in each st around (32) — 3 rounds even
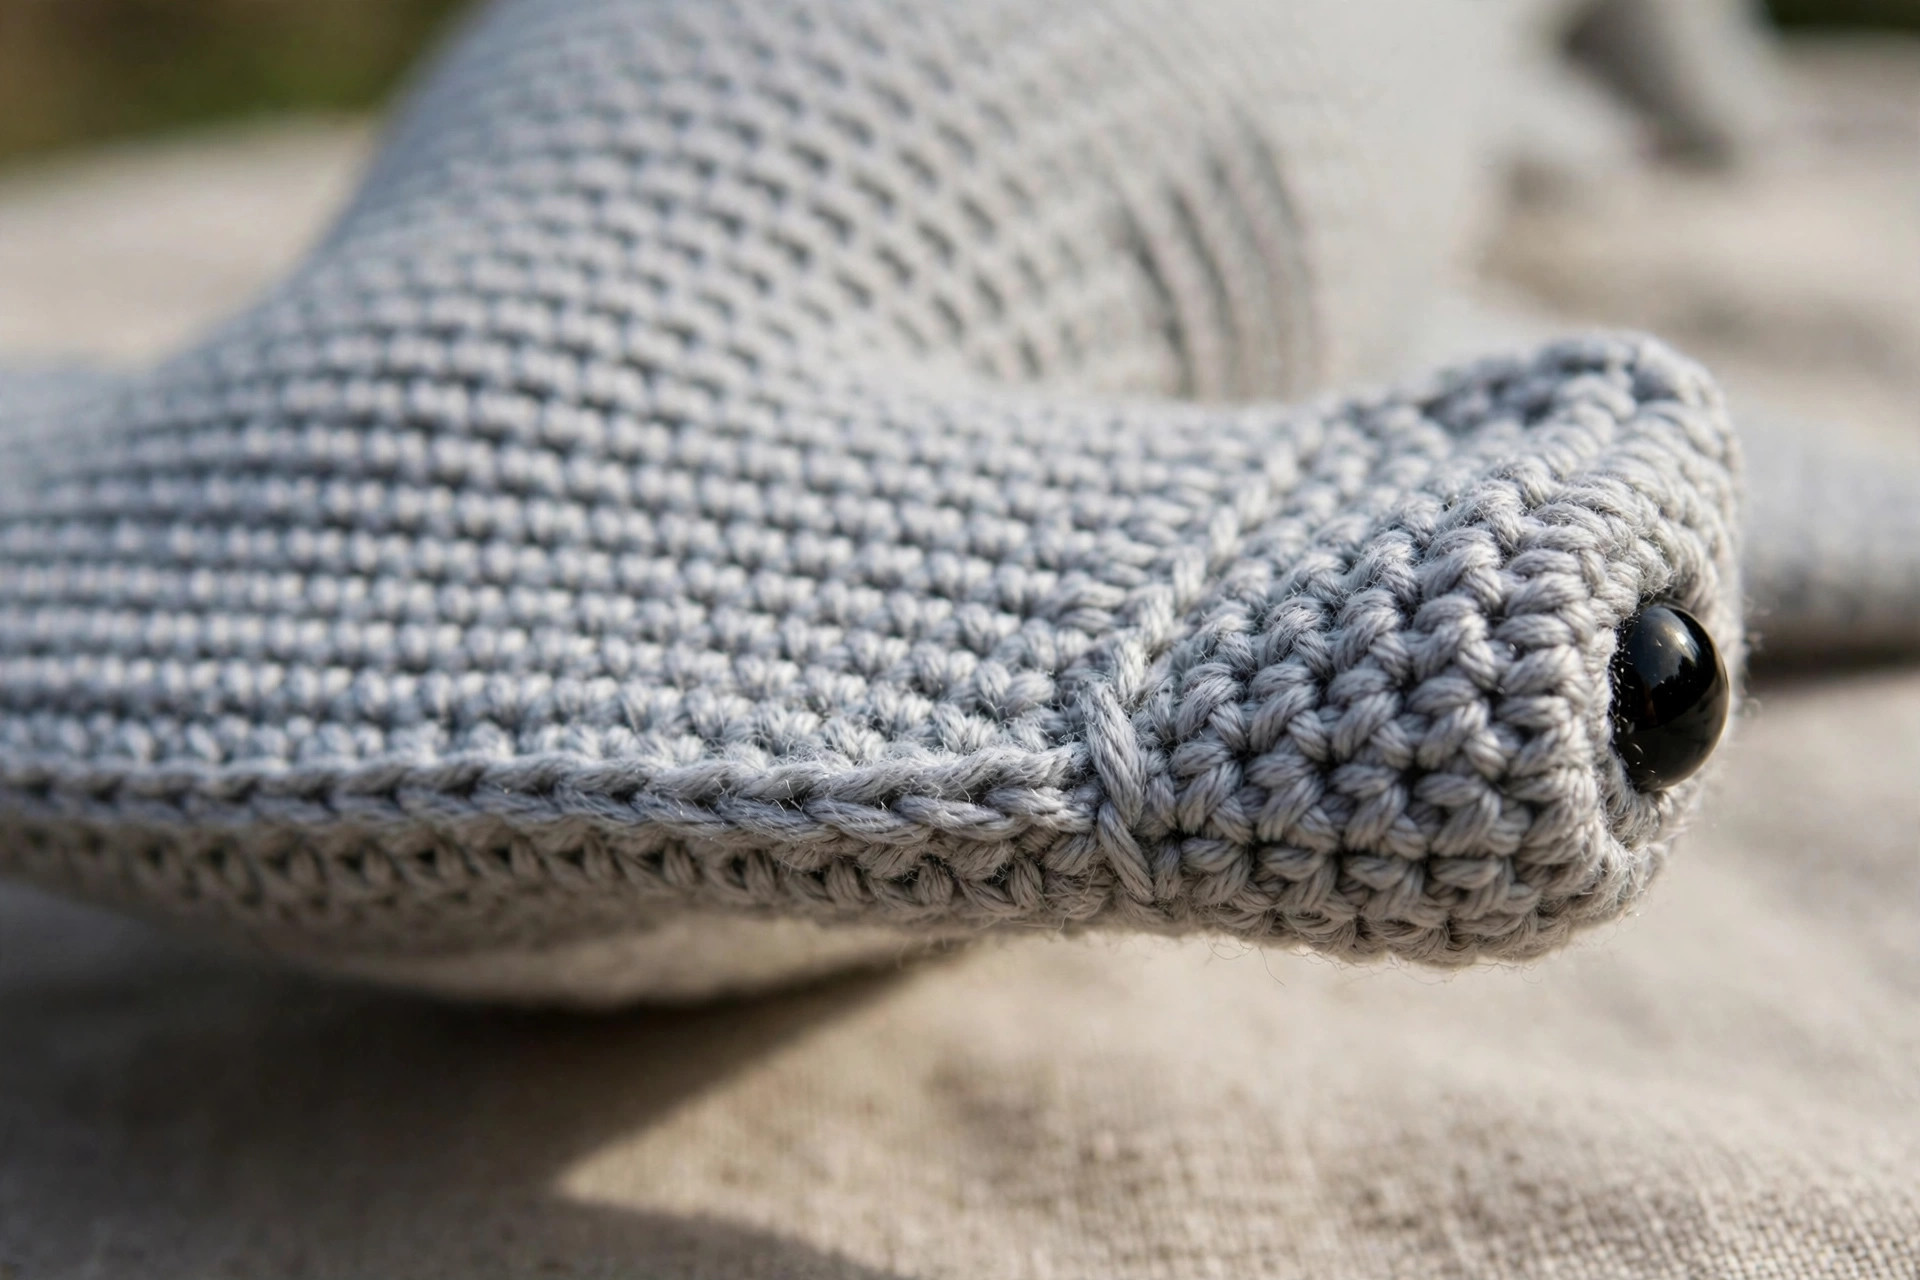
- Insert the eyes now, while the hammer is still an open tube: place one 10 mm safety eye at each end, through the stitches of R3 about 2 stitches in from each tip, centred on the front face. Click the washers on firmly from inside, and check both eyes sit level before you commit.
- R6: dec, sc in the next 10, dec × 3, sc in the next 10, dec × 2 (26)
- Stuff the hammer through the top opening, pushing small tufts right out into both ends first so the tips stay plump, then filling the middle more lightly — the centre needs to stay a little soft so it can hug the body when you sew it on.
- R7: dec, sc in the next 7, dec × 3, sc in the next 7, dec × 2 (20)
- R8: dec × 10 (10)
- R9: [sc, dec] × 3, sc (7). FO, thread the tail through the front loops, pull tight and weave in. Position the little cinched dimple from closing facing down against the body, where nobody will ever find it.
Tail fin lobes — grey, make 2
A hammerhead's tail has a longer top lobe, so make one standard lobe and one extended lobe.
Standard lobe:
- R1: MR, 4 sc (4)
- R2: [sc, inc] × 2 (6)
- R3: sc in each st around (6)
- R4: [2 sc, inc] × 2 (8)
- R5: sc in each st around (8)
- R6: [3 sc, inc] × 2 (10)
- R7: sc in each st around (10). FO, leaving a tail for sewing. Do not stuff — flatten the cone with your fingers.
Extended (top) lobe: work R1–R7 as above, then:
- R8: [4 sc, inc] × 2 (12)
- R9: sc in each st around (12). FO with a sewing tail, flatten.
Dorsal fin — grey, make 1
- R1: MR, 4 sc (4)
- R2: [sc, inc] × 2 (6)
- R3: [2 sc, inc] × 2 (8)
- R4: sc in each st around (8)
- R5: [3 sc, inc] × 2 (10)
- R6: sc in each st around (10). FO with a sewing tail, flatten, no stuffing.
Pectoral fins — grey, make 2
- R1: MR, 6 sc (6)
- R2: [2 sc, inc] × 2 (8)
- R3: [3 sc, inc] × 2 (10)
- R4: sc in each st around (10)
- R5: [4 sc, inc] × 2 (12)
- R6: sc in each st around (12). FO with a sewing tail. Flatten lightly — a tiny pinch of stuffing in the base only keeps the fin from looking papery.
Face and gill details — embroidery
With dark grey yarn and your tapestry needle, add three short curved gill slits on each side of the body, just behind where the hammer will sit: each slit is two or three straight stitches following the curve of the body, spaced about one stitch apart. Under the centre of the hammer, embroider a small mouth — a gentle upward curve about 4 stitches wide gives a friendly shark. Keep these details small; on a hammerhead, understatement is charm.
Finishing: stuffing and assembly in order
Assembly order matters here, because the hammer hides the body's front dome and the belly panel is easiest to sew before the pectoral fins go on. Pin everything first and check the shark from the front, the side and above before you sew a single stitch — hammerheads are all about symmetry, and two minutes of pinning saves a lopsided predator.
- Belly panel. Pin the white oval along the underside of the body, centred between the front dome and the start of the tail taper. Sew with whipstitch using the long tail, catching one stitch of the panel edge and one of the body all the way around, easing the panel gently so it lies smooth.
- Hammer head. Sit the hammer crosswise across the front of the body, centred so it overhangs evenly on both sides, eyes facing forward, with the body's front dome tucked under its middle. Pin, check the eyes are level from the front, then sew around the contact patch with small, firm stitches. Add a second pass if the head wobbles — a hammerhead that nods is cute, one that droops is not.
- Tail lobes. Sew the extended lobe at the tail point angled upwards and the standard lobe angled downwards, tips pointing back, so together they form the classic forked tail. A few stitches through the flattened base of each cone is plenty.
- Dorsal fin. Sew it on top of the body, roughly halfway between hammer and tail, base flat and tip leaning slightly back.
- Pectoral fins. Sew one on each side just behind the gills, angled down and slightly back like little wings. Match their height — uneven fins make the shark look like it is permanently turning left.
- Final check. Roll the shark between your palms to redistribute stuffing, top up soft spots through a seam with the end of your hook, and weave in every remaining tail.
Tips for a smooth, professional shark
- Stuff the hammer ends first. The tips are the last place stuffing wants to travel and the first place that collapses. Push a pea-sized tuft into each end with the blunt end of your hook before filling the middle.
- Count the hammer's first round twice. Working around a chain is where a stitch can quietly vanish or double up. If R1 does not end on 26, fix it now — every later round inherits the mistake.
- Keep your tension boring. Amigurumi rewards consistency over speed. If your hands tighten up during the long even rounds of the body, your shark gets a waist. Put it down, shake your hands out, resume.
- Pin the eyes level before the washers click. Lay the hammer flat, front side up, and compare both eyes against the same round. Once a safety-eye washer is on, it does not forgive.
- Making this for a baby? Swap the safety eyes for embroidered eyes — small clusters of black yarn at each end of the hammer keep the look and make the plush safe for under-threes. Embroider before you stuff the hammer, working from inside the tube.
- Colour play is encouraged. A hammerhead in dusty blue, sage or soft peach reads instantly as a nursery plush. The silhouette does the shark work; the colour sets the mood.
- Block the belly panel if it curls. Ten minutes under a heavy book flattens the oval and makes sewing it on twice as easy.
FAQ
Is this hammerhead shark pattern really free?
Yes — the complete pattern is right here on this page, including every round for the body, hammer, fins and belly panel, plus the assembly order. No sign-up, no add-on: just grab your grey yarn and start at R1 of the body.
How long does the shark take to make?
Most crocheters finish in about 4–6 hours of stitching. The body is the longest piece at roughly 90 minutes; the hammer takes about an hour including the careful eye placement; everything else is small and quick. Split over evenings, it is a very doable two- or three-night project.
Can a beginner make this pattern?
A confident beginner can, yes. There are no advanced stitches — only single crochet, increases and invisible decreases — but the hammer's first round (working around a foundation chain) and the eye placement ask for a little patience. If you have finished one or two simple amigurumi before, you are ready. Brand-new? Practise the chain round on scrap yarn once, and you will sail through it.
Why are the eyes at the ends of the hammer?
Because that is where a real hammerhead keeps them — its wide, flattened head (called a cephalofoil) carries an eye at each tip, giving it superb all-round vision. On the plush, those end-of-hammer eyes are exactly what makes the toy recognisable, so do not be tempted to move them closer together for "cuteness." Wide apart is the whole point.
What yarn works best for this shark?
Worsted-weight (#4) acrylic is the easiest choice: smooth, affordable, washable and available in perfect shark greys. Worsted cotton gives a firmer, more sculpted finish for a display piece. Match the belly yarn's weight to the body yarn so the panel sits flat, and avoid fuzzy yarns, which hide stitch counts and blur the hammer's clean outline.
How do I make the shark bigger or smaller?
Change your yarn and hook together. Chunky (#5) yarn with a 5 mm hook gives a big huggable shark of roughly 40 cm (16 in); DK (#3) yarn with a 2.5 mm hook shrinks it to about 18 cm (7 in). Keep the stitch counts exactly the same — the proportions scale on their own.
Is this shark safe for babies and toddlers?
With embroidered eyes instead of safety eyes, and all fins sewn with a double pass of stitches, yes — it makes a soft nursery toy with no hard parts. Always check seams before gifting, use washable yarn, and supervise play with any handmade toy.
What to crochet next
The box below contains an Etsy link. If you buy through it, we may earn a small commission at no extra cost to you. Learn more.
No time to make one?
Short on time? Find handmade hammerhead shark plushies from independent makers on Etsy.
Browse on Etsy (opens Etsy in a new tab)