Free Car Seat Cover Crochet Pattern for Beginners
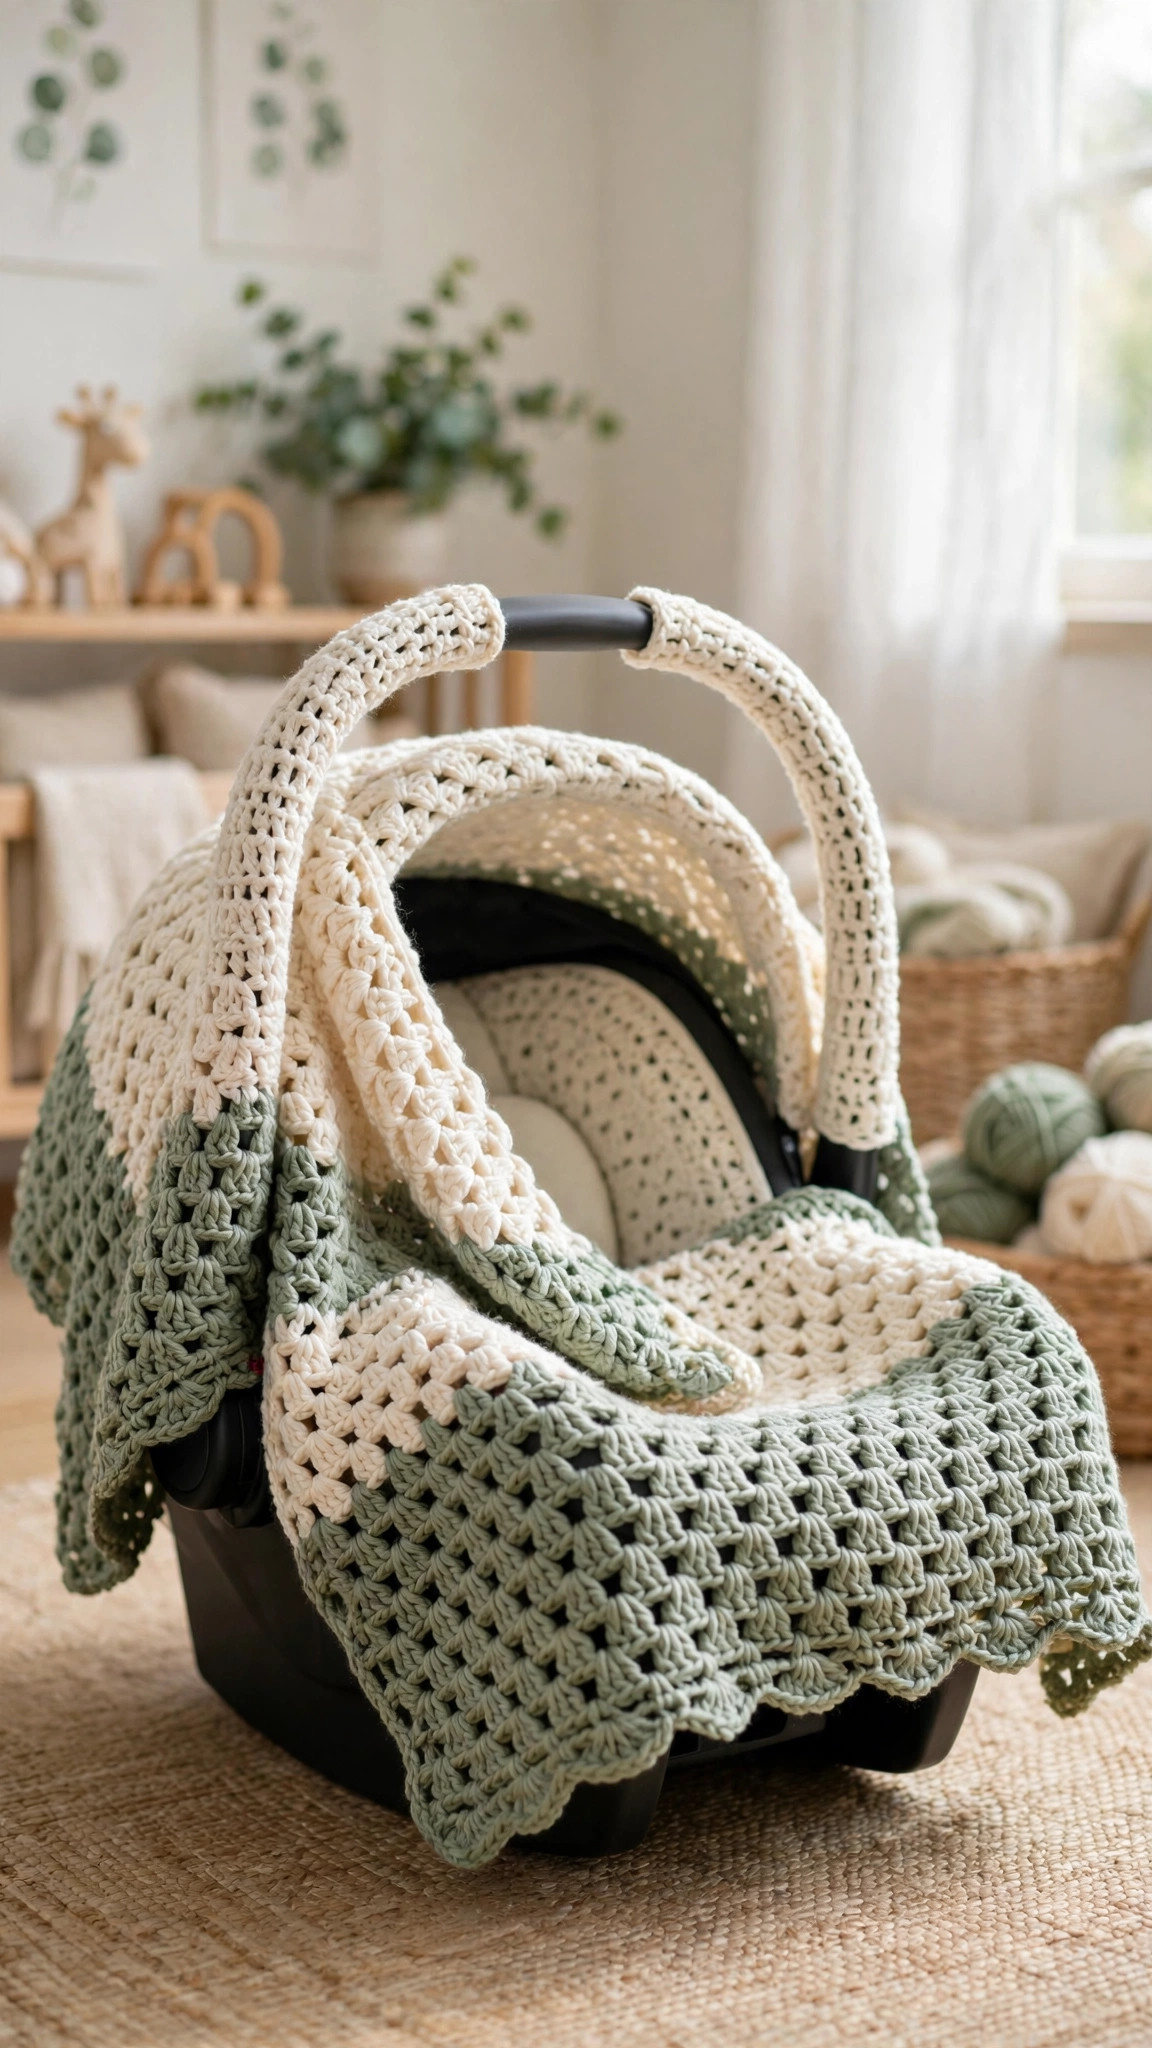
A breathable, canopy-style car seat cover you can crochet in a few evenings — one easy half double crochet panel, two buttoned handle straps, and clear safety notes for using it well.

Baby · Crochet
- Finished size
- 22 x 32 in panel
- Making time
- 10–14 hours
- Hook
- 5.5 mm (US I-9)
- Pieces
- 1 panel + 2 straps
- Skill
- Beginner
In this post
The wind picks up in the parking lot, the sun is at exactly the wrong angle, a friendly stranger leans in too close — and your baby has just, finally, fallen asleep in the carrier. That is when a good car seat cover earns its keep: it blocks glare, softens wind, buys privacy, and lets a sleeping baby stay sleeping.
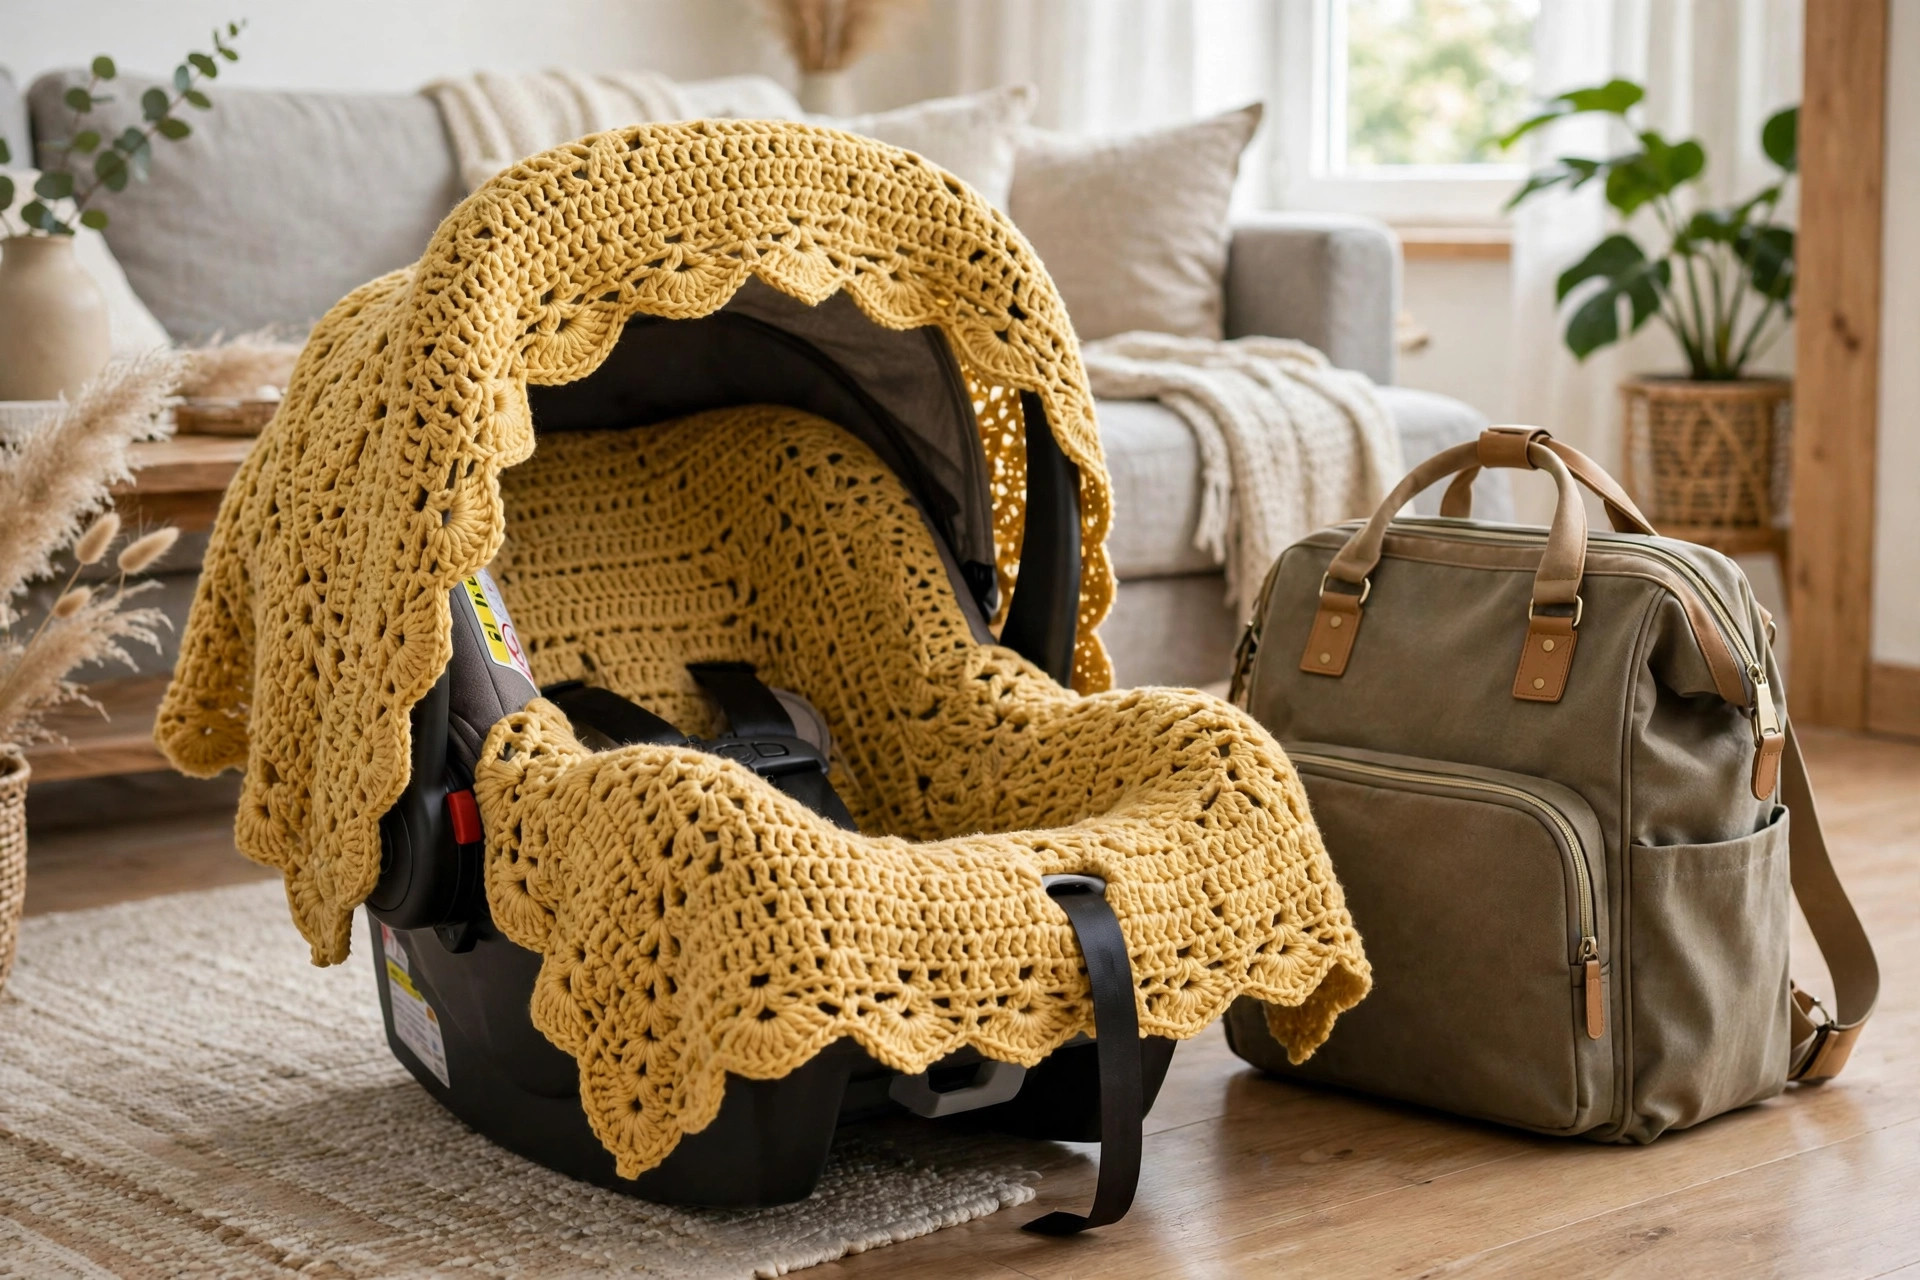
This free car seat cover crochet pattern is a canopy-style cover: one generous, breathable panel that drapes over the infant carrier, held in place by two wide straps that loop over the carry handle. There is no elastic and nothing attaches to the seat itself. To peek in, simply lift the front edge or fold the panel back over the handle.
It is genuinely beginner friendly, too. The panel is worked in half double crochet with a simple two-row texture repeat, the straps are short rectangles with buttonholes, and the edging is a gentle scallop that looks far more polished than the effort involved. If you can chain, half double crochet, and count to seventy-six, you can make this cover.
Contents
- Why you'll love this car seat cover
- Materials you'll need
- Size, gauge and skill level
- Abbreviations — US terms
- The pattern (US terms)
- Finishing your car seat cover
- Safety notes — please read before use
- Tips for the best result
- FAQ
- What to crochet next
Why you'll love this car seat cover
First, breathability. Many store-bought covers use synthetic fabrics that trap warm air, but a crocheted panel in cotton or a cotton blend lets air move through the stitches while still cutting the light and the breeze.
Second, forgiveness. A car seat cover does not have to fit a body, so if your panel comes out an inch narrower or a touch longer than mine, it will still drape beautifully. That makes this an ideal first "big" project after dishcloths and scarves, and it pairs sweetly with the lovey blanket crochet pattern in matching yarn.
Third, speed. Half double crochet builds height quickly, the stitch pattern is only two rows, and there is no shaping at all — just straight, soothing rows. Most makers finish in three or four evenings.
Fourth, it makes a wonderful baby shower gift: practical, impressive tied with a ribbon, and lovely in any color story, from soft neutrals to sage or dusty rose. And cotton washes well, surviving the inevitable spit-up and smudges.
Materials you'll need
Cotton or a cotton blend is best because it breathes, holds its shape, and stays cooler than pure acrylic.
| Item | Details |
|---|---|
| Yarn | Worsted weight (category 4) cotton or cotton blend, approx. 650 yards / 595 m total. Shown in cream with a sage green final edging round. |
| Hook | US I-9 / 5.5 mm crochet hook, or size needed to meet gauge |
| Buttons | 2 buttons, about 1 inch / 25 mm across |
| Tapestry needle | Blunt tip, large eye, for weaving in ends and attaching buttons |
| Scissors | For trimming ends |
| Stitch markers | 2–4, optional, for marking the first and last stitch of a row |
| Measuring tape | For checking gauge and panel length |
| Sewing needle and thread | Optional, if your buttons have small holes |
My sample used about 600 yards of the main color and 50 yards of a contrast color for the final edging round.
Size, gauge and skill level
Finished size: The main panel measures about 22 inches wide by 32 inches long (56 by 81 cm) after light blocking. Each strap measures about 3 inches wide by 9 inches long (7.5 by 23 cm) before buttoning.
Gauge: 14 half double crochet stitches and 11 rows = 4 inches (10 cm) in the pattern repeat, after light blocking. Gauge is not critical here, but stay close: a much looser gauge makes a floppy cover that slides around, and a much tighter gauge makes a stiff, heavy panel.
Skill level: Beginner to easy. You need to chain, single crochet, half double crochet, double crochet (edging only), slip stitch, and work into a chain space. Everything else is explained step by step below.
How the cover works: The panel is one flat rectangle. Two straps attach to the panel, loop over the carrier handle, and button back onto the panel, so nothing is tied, knotted, or clipped to the seat itself, and the cover removes in seconds.
Abbreviations — US terms
| Abbreviation | Meaning |
|---|---|
| ch | chain |
| st(s) | stitch(es) |
| sl st | slip stitch |
| sc | single crochet |
| hdc | half double crochet |
| dc | double crochet |
| sk | skip |
| sp | space |
| rep | repeat |
| RS | right side |
| WS | wrong side |
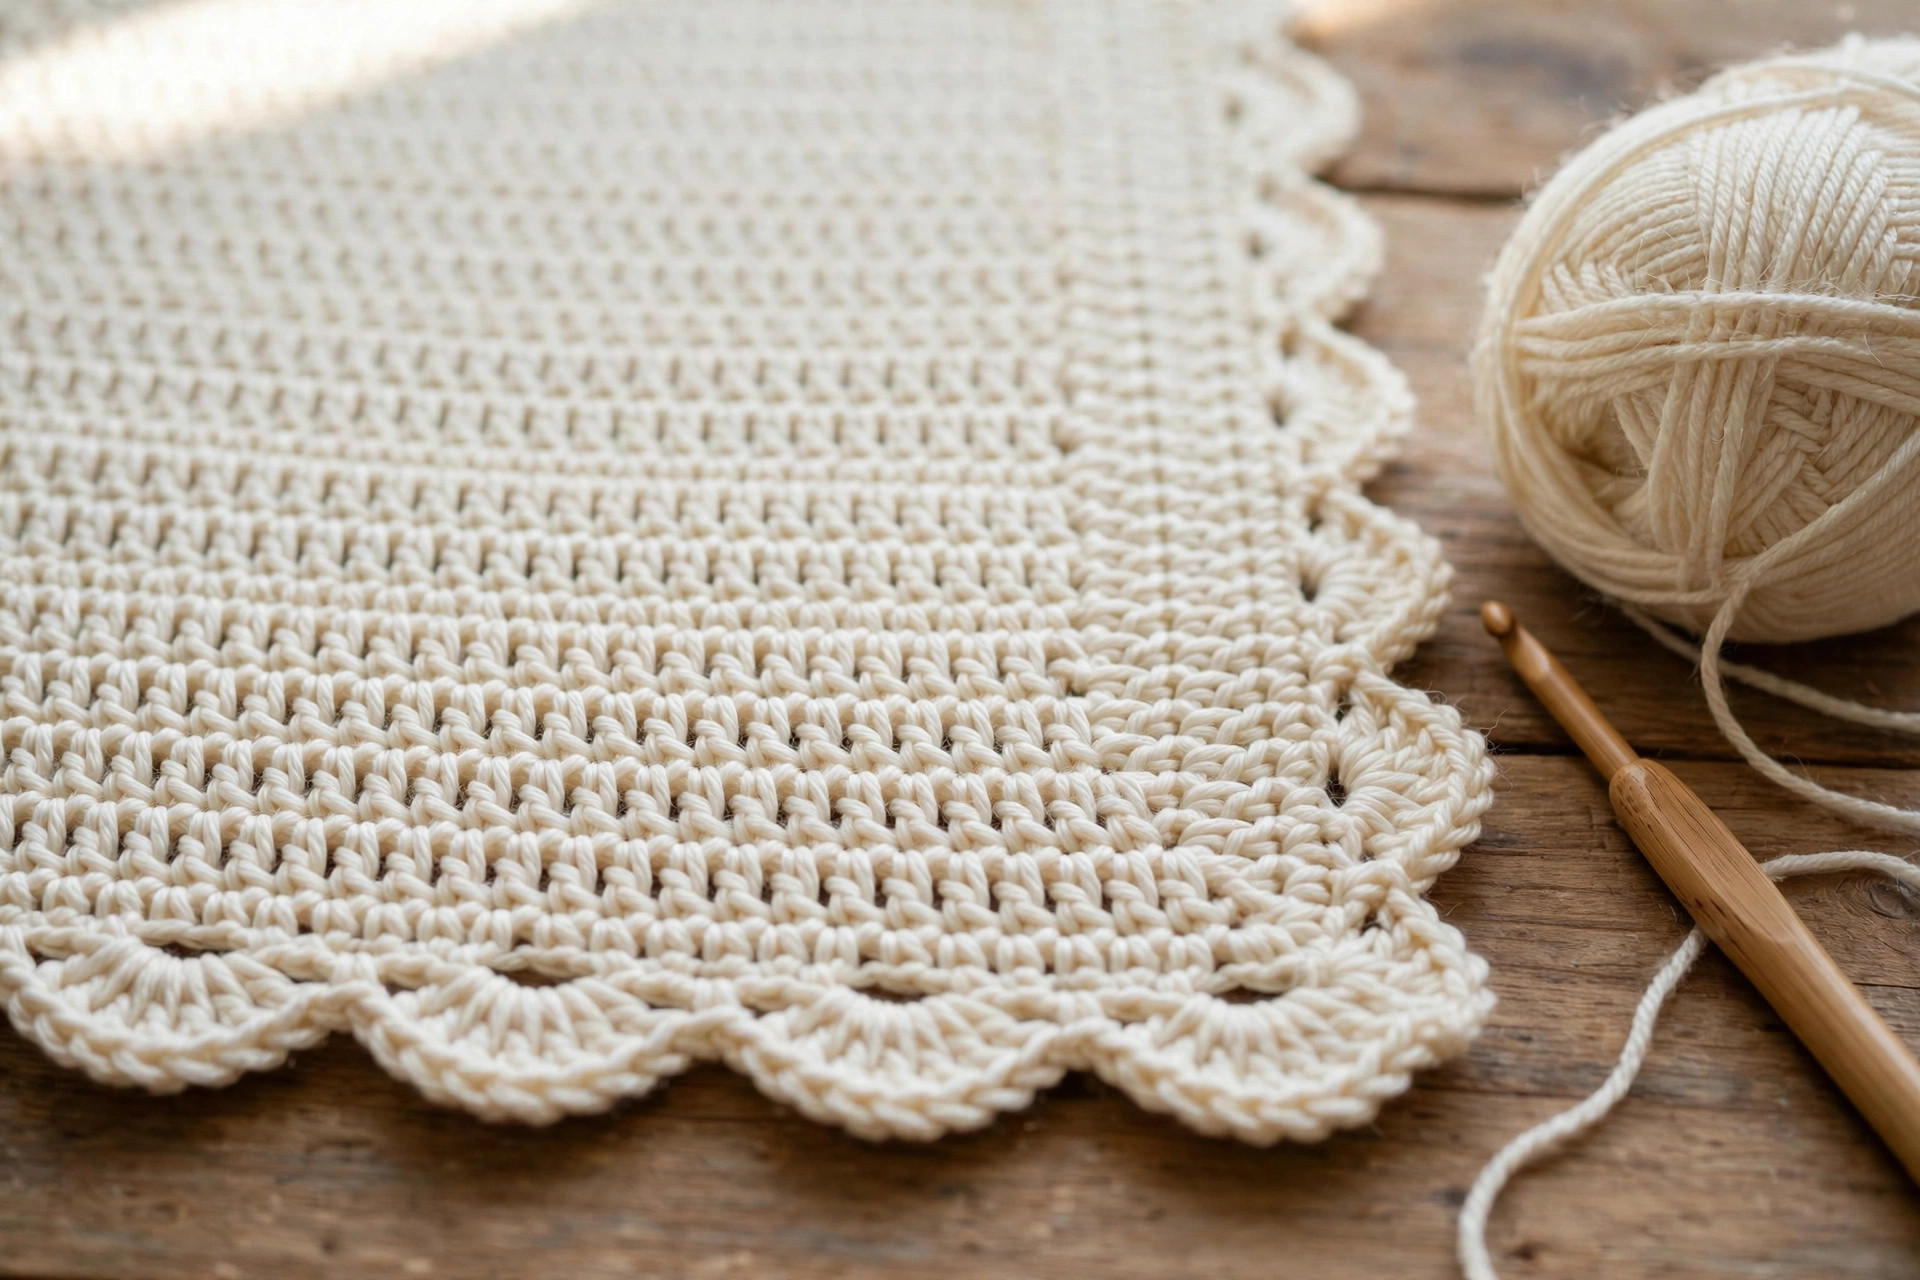
The texture comes from working a half double crochet into the third loop of the stitch below — the small horizontal bar just behind and below the top two loops. Push your hook under that bar instead of the top loops to create the soft, ribbed lines in the close-up photo. Practice on your swatch; it feels natural within a few rows.
The pattern (US terms)
Read the pattern through once before you start. Construction is simple: main panel, two straps, edging, then buttons. There is no shaping anywhere.
Before you begin — make a gauge swatch
Chain 21. Work hdc in the second chain from the hook and in each chain across (20 sts), then work the two-row repeat from the main panel for 14 rows. Block lightly and measure the middle 4 inches: go down a hook size if you have more than 14 stitches, up a size if you have fewer.
Main panel
Foundation: With your main color, ch 77. The panel is worked over 76 stitches.
Row 1 (RS): Hdc in the 2nd ch from the hook and in each ch across. Turn. (76 hdc)
Row 2: Ch 1 (does not count as a stitch throughout), hdc in the first st and in each st across. Turn. (76 hdc)
Row 3: Ch 1, hdc in the third loop of the first st and in the third loop of each st across. Turn. (76 hdc)
Rows 4–88: Repeat Rows 2 and 3, ending with a Row 2 repeat. Your panel should measure about 32 inches long and 22 inches wide. For a longer drape, keep repeating the two rows — each pair adds roughly three-quarters of an inch — and allow extra yarn.
Working notes: the most common mistake on a long rectangle is gaining or losing a stitch at a row end, which turns it into a trapezoid. Count every few rows, or mark the first and last stitch and move the markers up as you go. If you work a plain row where a third-loop row belongs, the texture line simply disappears for that stripe — on a draped cover nobody will notice, so carry on rather than frogging.
Optional stripes: Change color on the last yarn-over of the final stitch of a Row 2 repeat, so the new color starts cleanly on a plain row. Or work the panel in one color and save the contrast for the edging, as in the sample.
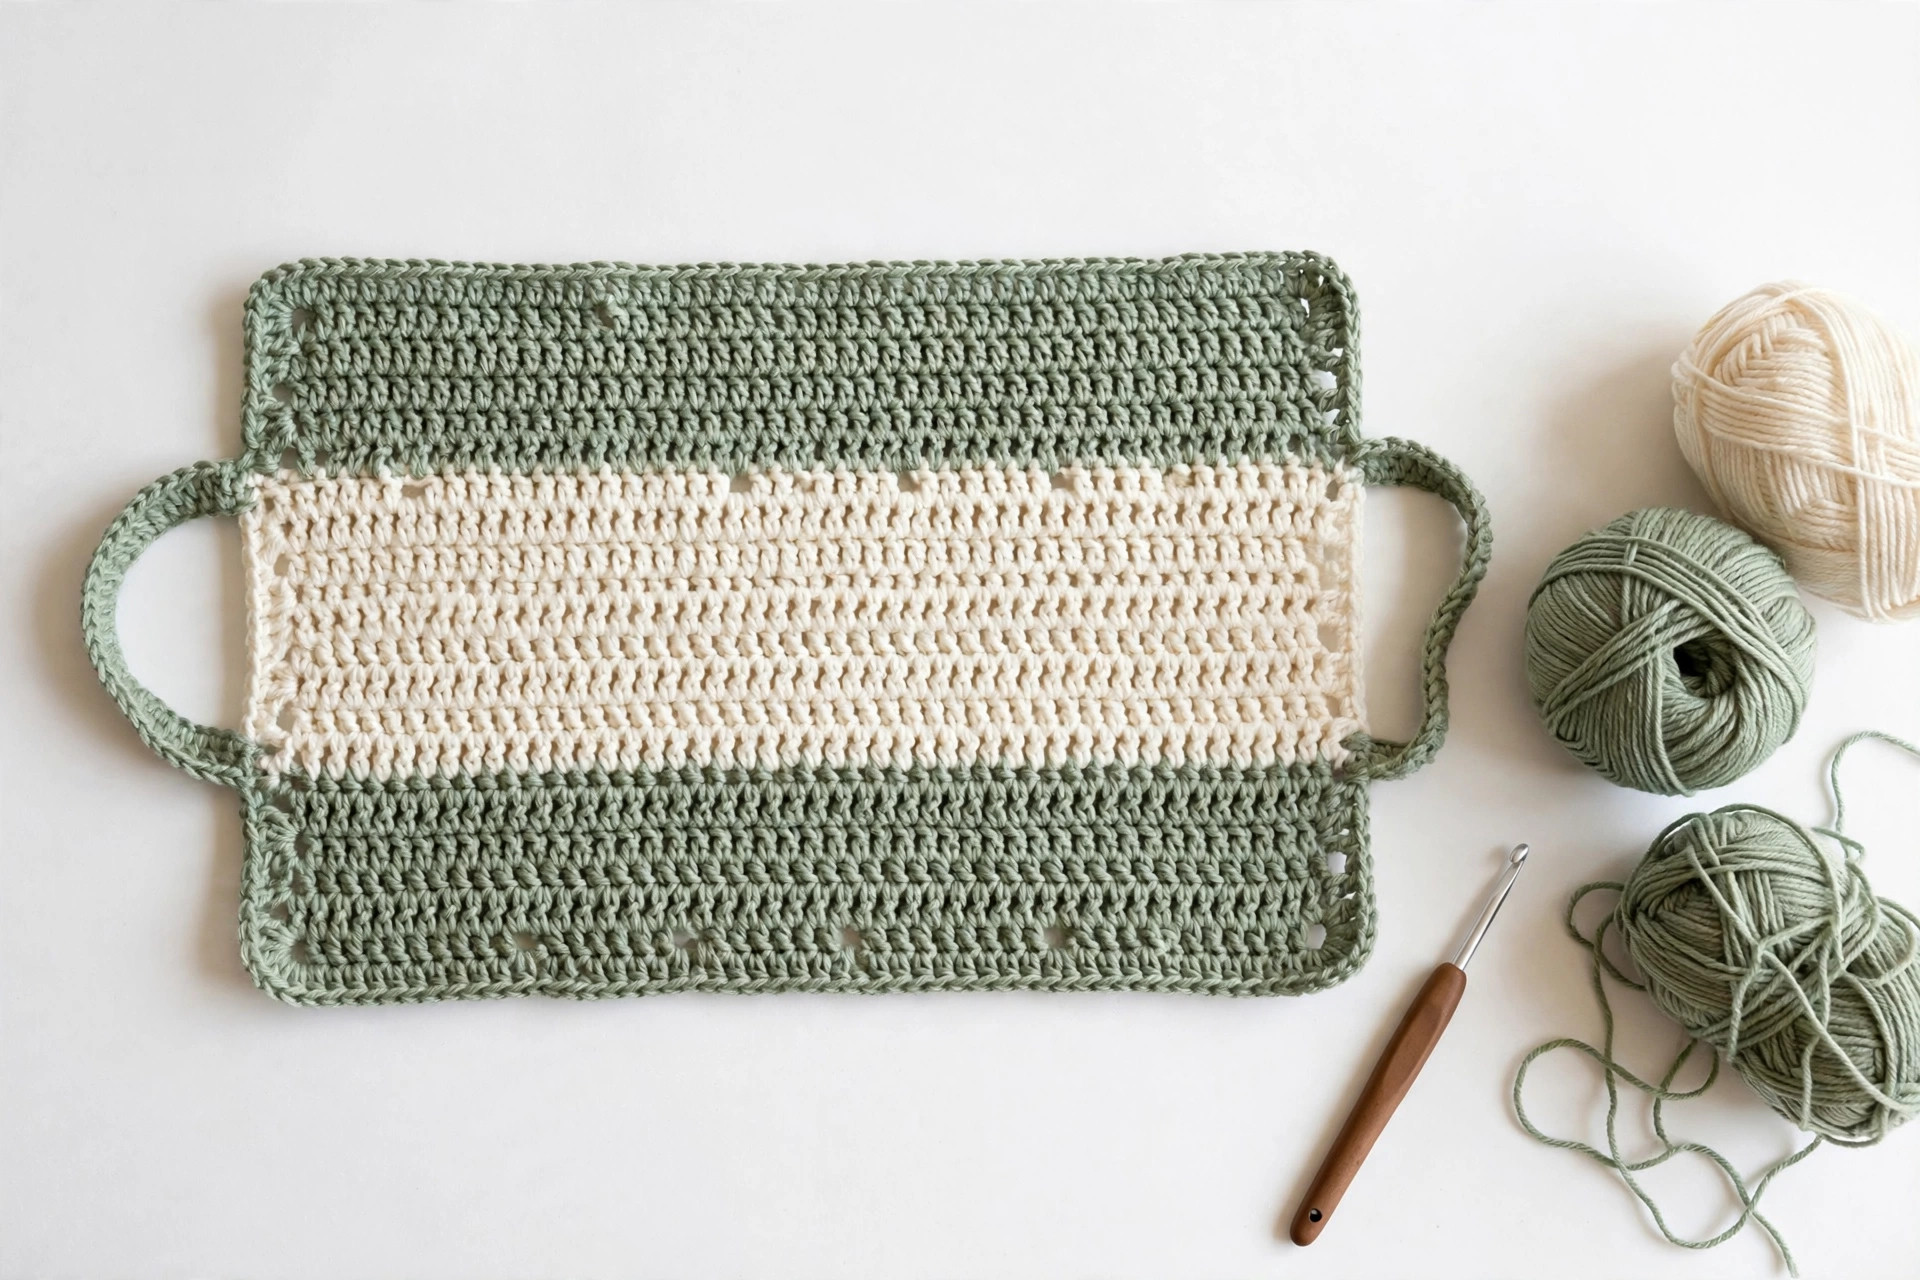
Handle straps (make 2)
Each strap loops over the carrier handle and buttons back onto the panel, holding the drape in place in a breeze and stopping it sliding sideways as you carry the seat.
Foundation: Ch 13. The strap is worked over 12 stitches.
Row 1: Hdc in the 2nd ch from the hook and in each ch across. Turn. (12 hdc)
Rows 2–24: Ch 1, hdc in each st across. Turn. (12 hdc) The strap should measure about 9 inches long.
Row 25 (buttonhole row): Ch 1, hdc in the first 4 sts, ch 2, sk 2 sts, hdc in the next 2 sts, ch 2, sk 2 sts, hdc in the last 2 sts. Turn. Two buttonholes let you adjust the fit by using the nearer or farther one. (8 hdc, 2 ch-2 sps)
Row 26: Ch 1, hdc in each st and 2 hdc in each ch-2 sp across. Turn. (12 hdc)
Row 27: Ch 1, hdc in each st across. Fasten off, leaving a 12-inch tail for sewing the strap to the panel. (12 hdc)
Make the second strap exactly the same and measure them against each other — matching straps mean the cover hangs level.
Positioning the straps on the panel
Lay the panel flat, right side up, last row at the top. Measure 6 inches in from each side edge and mark a point on the top edge — roughly where the handle sits. Better still, check against your own carrier: drape the panel evenly, pinch it where it meets the handle, and mark those points. Each strap attaches at its foundation end to the top edge at one marked point, loops over the handle, and buttons onto the panel about 4 inches below the top edge on the front face.
Edging
The edging stops the sides curling and adds the scalloped charm that makes people ask where you bought it.
Round 1: With the right side facing, join your main color at any corner (or keep going if you have not fastened off). Work sc evenly around all four sides — into the top of each stitch along the top and bottom edges, about 3 sc for every 2 rows along the sides, and 3 sc into each corner so corners turn flat. Join with a sl st to the first sc. Do not turn.
Round 2: Ch 1, sc in each sc around, again working 3 sc in the center stitch of each corner group. Join with a sl st to the first sc.
Round 3 (scallop round): For a contrast scallop, fasten off and join the contrast color at any side stitch. Ch 1, sc in the first st, *sk 2 sts, 5 dc in the next st, sk 2 sts, sc in the next st; rep from * around, adjusting skips slightly near corners so a scallop sits neatly near each corner. Join with a sl st to the first sc. Fasten off.
Do not stress about the corner math: you may need to skip 1 or 3 stitches once per side to keep the scallop rhythm, and on a soft, draped edging that adjusted repeat is invisible.
Finishing your car seat cover
Weave in the ends. Weave each end back and forth through at least three changes of direction, then trim close. Covers get handled and washed a lot, so secure ends matter.
Block lightly. Lay the panel on a towel, ease it into a tidy 22 by 32 inch rectangle, mist with water, and let it dry. The texture lines up and the scallops open out.
Attach the straps. Whipstitch each strap's foundation end securely to the top edge at your marked points, stitching through both layers several times.
Sew on the buttons. Drape the cover over the carrier, loop each strap over the handle, and bring the buttonhole end down to the panel front, about 4 inches below the top edge. Mark exactly where each button must sit so the strap holds snugly without pulling the panel up short, then sew the buttons on firmly, knotting on the wrong side.
Final check. The cover should hang evenly, lift easily at the front edge with one finger, and the straps should hold without straining the buttonholes. Your cover is ready — after the safety notes, which are not optional.
Safety notes — please read before use
This cover is used around a sleeping baby, so a few rules are non-negotiable. Read them before use, and share them if you gift the cover.
- Never leave a baby covered and unattended. Use the cover only while you are right there, awake, and able to check on your baby frequently.
- Check airflow and temperature often. Lift the cover regularly, look at your baby, and feel their chest or the back of their neck. Babies overheat quickly — if the day is hot, skip the cover.
- The cover is for shade and privacy while carrying and while stationary — walking from the car to a shop, sitting at a café, waiting at an appointment.
- Follow your car seat manufacturer's guidance. Some manufacturers state that covers not approved for the seat should not be used while the seat is installed and the vehicle is moving. If your manual says no covers in the car, the cover comes off before the drive, every time.
- The cover must never interfere with the harness straps, buckles, or the handle's locking function, and nothing goes under or behind the baby. This cover drapes over the top and attaches only at the handle area; if it slips toward the harness path, reposition it or remove it.
- Keep the baby's face visible and uncovered whenever the seat is in use in a vehicle, and never let fabric rest directly on a baby's face at any time.
- Stop using the cover if it is damaged. Loose buttons are a choking hazard — check them before every use and re-sew at the first sign of looseness.
- When in doubt, take it off. No photo or nap is worth more than easy breathing and a clear view of your baby.
Used thoughtfully — briefly, supervised, with the face checked often — a canopy cover is a genuinely helpful tool.
Tips for the best result
Pick cotton for summer, blends for winter. Pure cotton is the coolest, most breathable option for warm weather. A cotton-acrylic blend drapes softer and washes beautifully, making it a good everyday choice in cooler months.
Mind your tension on third-loop rows. They naturally pull the fabric tighter. If your panel starts to narrow, relax your tension on those rows or go up half a hook size just for them, and measure the width as you work.
Stripe scraps into it. This panel is a brilliant scrap user: work bands of leftover worsted cotton from kitchen projects — the same yarns you might use for the crochet dishcloths free patterns — and finish with a single-color edging to tie it together.
Make straps longer for chunky handles. Some carriers have thick, padded handles. Work extra plain rows before the buttonhole row so the strap loops comfortably, and use the farther buttonhole for the snug fit.
Wash before first use. A gentle wash softens cotton and sets the stitches. Reshape flat to dry the first time; after that, most cotton blends tolerate a low tumble dry.
Add a personal touch, safely. A tiny crocheted heart stitched securely to one corner makes the cover unmistakably handmade. Keep it small and flat — or skip it entirely. A coordinating extra? The baby bonnet crochet pattern uses the same yarn weight.
FAQ
How long does this car seat cover take to crochet?
About 10 to 14 hours for most beginners, spread over three to five evenings. The panel is the bulk of the time; the straps and edging take under two hours.
What yarn is best for a crochet car seat cover?
Worsted weight cotton or a cotton blend, because it breathes, drapes well, and washes easily. Around 650 yards makes this size. Avoid fuzzy or novelty yarns, and choose something machine washable for a baby item.
Can I use this cover while driving?
Only if your car seat manufacturer explicitly allows covers of this type — many do not, and their guidance comes first. The safe default: the cover is for carrying and stationary use, and a baby in a moving vehicle should have their face visible and uncovered.
Will this cover fit my car seat?
The 22 by 32 inch panel drapes standard infant carriers well. For a larger carrier, work more two-row repeats — each pair adds about three-quarters of an inch — and lengthen the straps too. For a smaller carrier, fold the top edge over once; the straps still hold it.
Can I make this cover without the buttons?
Yes — sew both ends of each strap directly to the panel so the straps form fixed loops that slide over the handle. Tied straps are not recommended, as ties loosen and loose ends near a baby are a bad idea. The buttoned version is secure, adjustable, and removable for washing.
How do I wash the finished cover?
Machine wash gentle in cool or warm water with similar colors, unbuttoning the straps first so nothing snags. Reshape and dry flat the first time; a low tumble dry is fine for most cotton blends afterwards. Check the buttons after washing.
Is this a good first crochet project?
It is a great second or third project: if you have made something flat and rectangular, you already have every skill it needs. Brand-new beginners might first try the free crochet hat pattern or a blanket from the easy crochet patterns for blankets collection, then return with confidence.
What to crochet next
Happy crocheting — and enjoy those quiet, shaded, still-sleeping parking lot moments. You have earned them.
The box below contains an Etsy link. If you buy through it, we may earn a small commission at no extra cost to you. Learn more.
No time to make one?
Short on time? Find handmade crochet car seat covers on Etsy.
Browse on Etsy (opens Etsy in a new tab)