Little lamb baby snuggle gift set: 7-in-1 crochet pattern
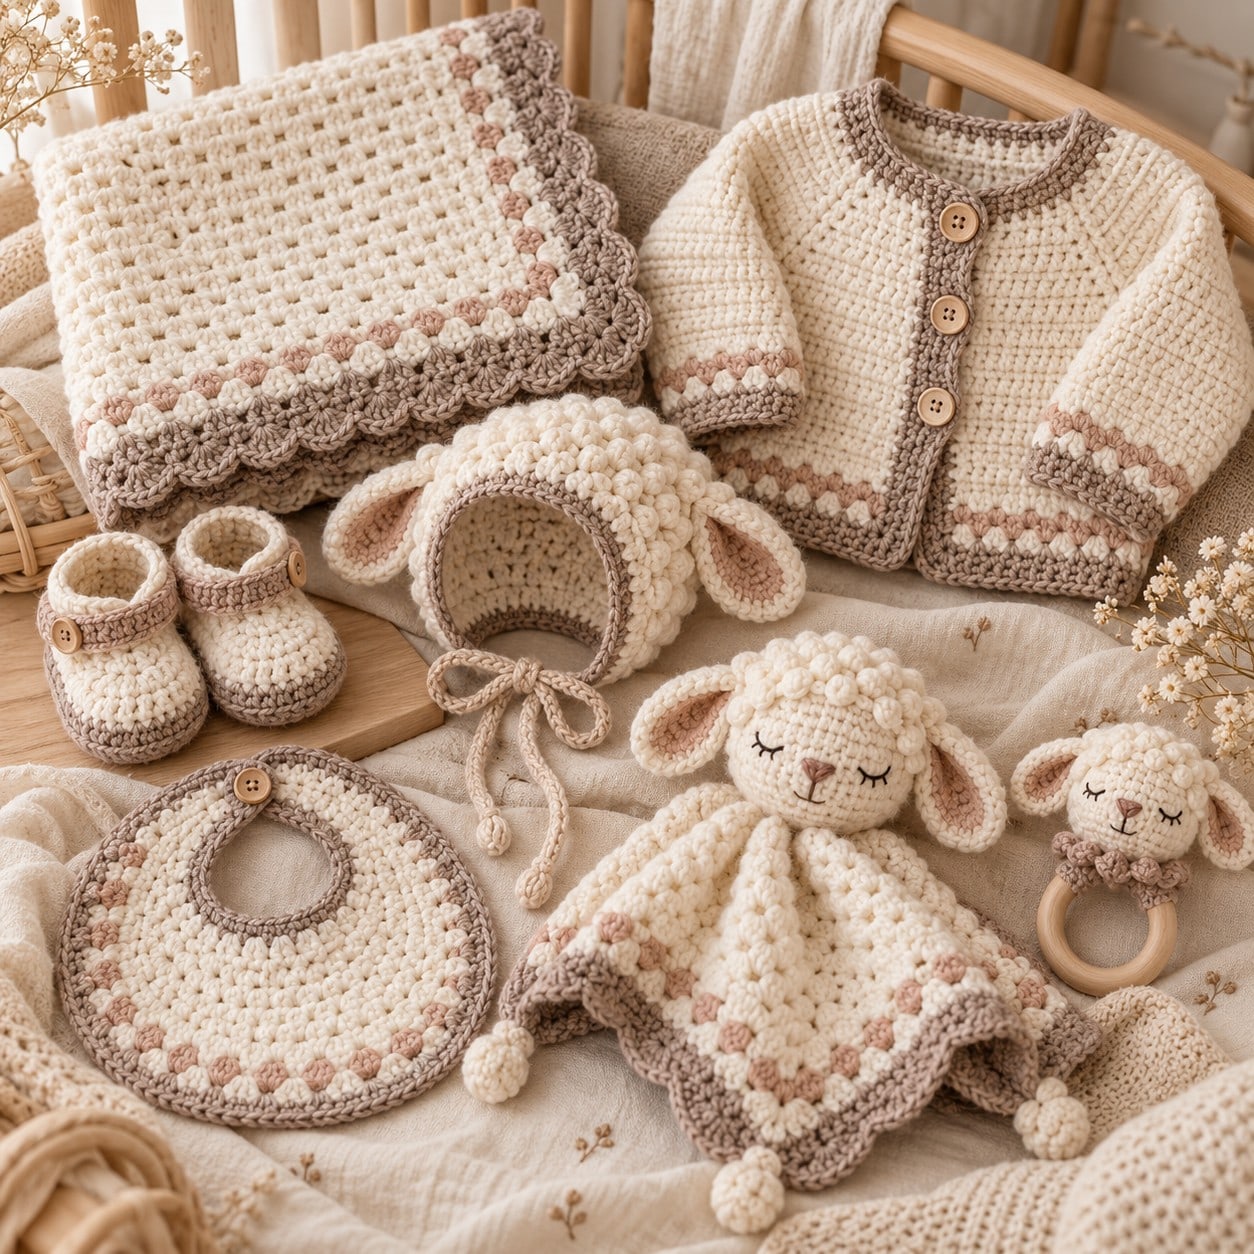
A heirloom blanket, cardigan, bonnet, booties, bib, security lovey and wooden-ring rattle, all in one warm cream, taupe and dusty rose palette, so the finished set gifts beautifully as a collection.

Baby · Crochet
- Blanket size
- 76 × 91 cm / 30 × 36 in
- Yarn
- DK weight (#3)
- Hooks
- 4.0 mm and 3.5 mm
- Projects
- 7 in 1 set
- Skill
- Intermediate
In this post
- What's Included in the 7-in-1 Set
- Yarn Palette + Materials
- Abbreviations
- Gauge + Sizing
- Pattern 1 — Little Lamb Heirloom Baby Blanket
- Pattern 2 — Little Lamb Baby Cardigan
- Pattern 3 — Little Lamb Baby Bonnet
- Pattern 4 — Little Lamb Baby Booties
- Pattern 5 — Little Lamb Baby Bib
- Pattern 6 — Little Lamb Security Lovey
- Pattern 7 — Little Lamb Wooden-Ring Rattle
- Baby Safety Guide
- Blocking, Care + Washing
- Troubleshooting
- Final Collection Checklist
- A Final Note
A baby gift that arrives as a set always feels more special than a single handmade piece, and that's exactly what the Little Lamb Baby Snuggle Gift Set is designed to be. This 7-in-1 crochet collection brings together seven coordinated newborn essentials — a heirloom baby blanket, a cardigan, a bonnet, booties, a bib, a security lovey, and a wooden-ring rattle — all worked in the same warm cream, mushroom taupe, oatmeal, and dusty rose palette, so every piece photographs and gifts beautifully as one collection.
Everything is written in US crochet terminology for DK weight (#3) yarn at an intermediate skill level. Each project includes its own materials list, gauge, finished measurements, exact construction instructions, finishing notes, and project-specific safety checks, so you can make one piece on its own or work through the whole set as a complete gift.
Please note: this is a digital pattern. No physical item is included. For best results, make a gauge swatch first and crochet one complete sample before producing multiples for sale.
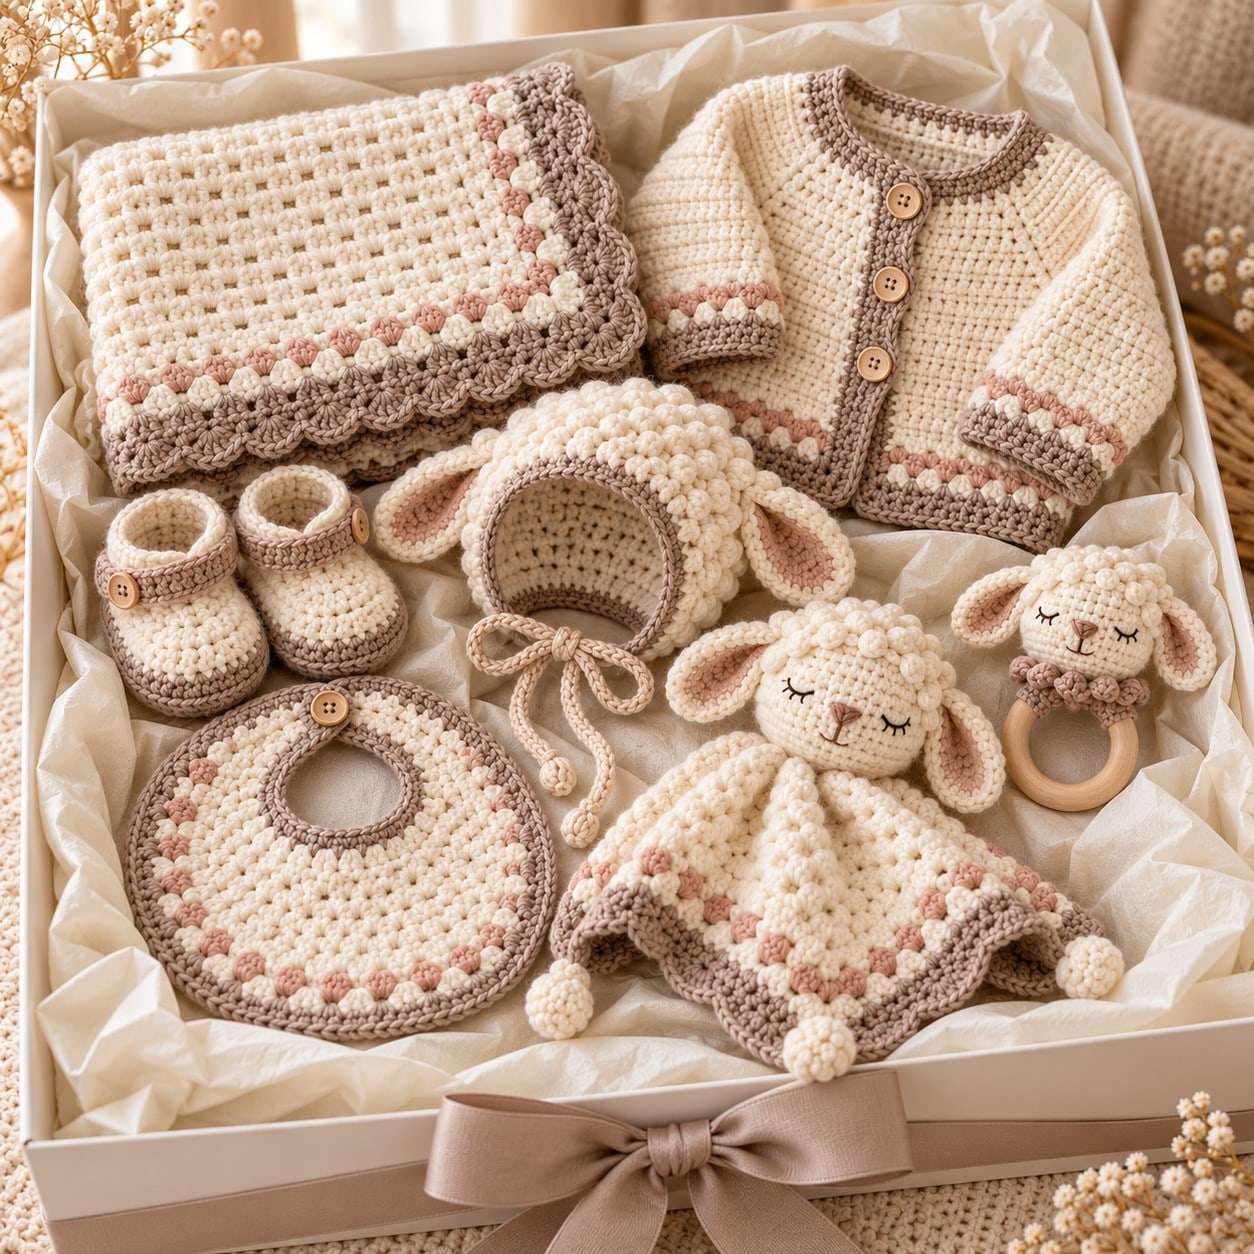
What's Included in the 7-in-1 Set
- Little Lamb Heirloom Baby Blanket
- Little Lamb Baby Cardigan
- Little Lamb Baby Bonnet
- Little Lamb Baby Booties
- Little Lamb Baby Bib
- Little Lamb Security Lovey
- Little Lamb Wooden-Ring Rattle
The seven projects share the same warm cream, mushroom taupe, oatmeal, and dusty rose palette so they photograph and gift beautifully as one collection. Each project includes materials, gauge, finished measurements, exact construction instructions, finishing, and project-specific checks.
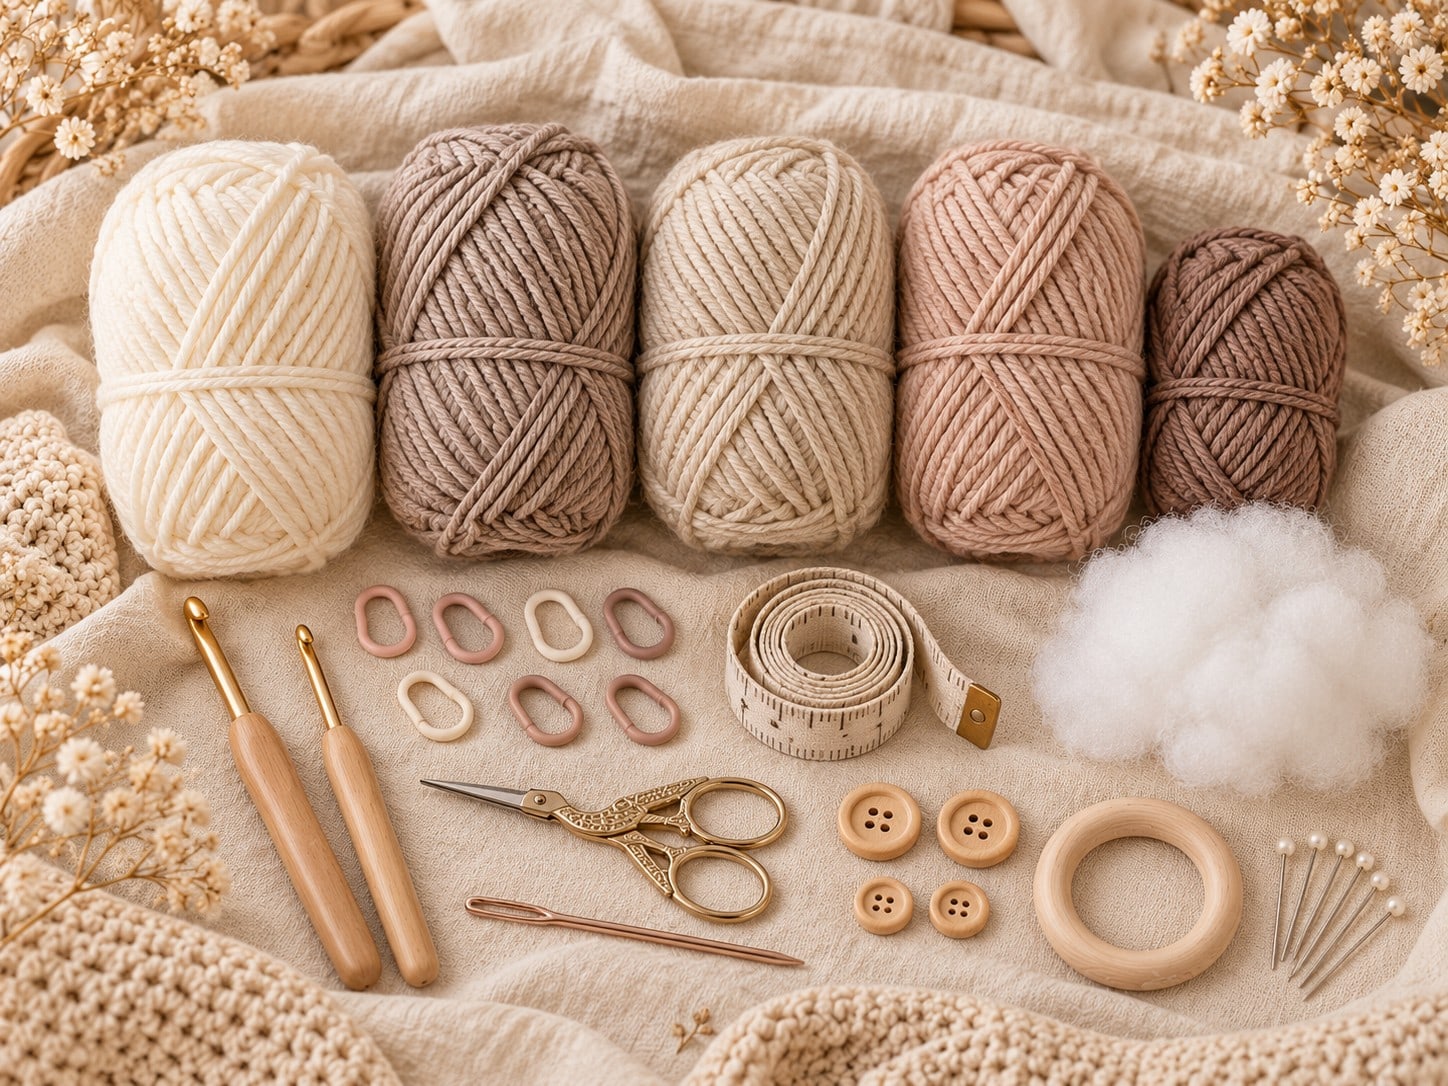
Yarn Palette + Materials
| Specification | Details |
|---|---|
| Yarn | DK weight #3 baby yarn; soft cotton, cotton blend, or baby acrylic with good stitch definition |
| Warm Milk Cream | Approx. 900–1000 g for the full seven-piece set |
| Soft Mushroom Taupe | Approx. 250–300 g |
| Natural Oatmeal | Approx. 80–100 g, optional secondary neutral |
| Dusty Rose Beige | Approx. 80–100 g for accent rows and inner ears |
| Muted Cocoa | Approx. 10–20 g for embroidery details |
| Fiberfill | Approx. 60 g for lovey and rattle heads |
| Wooden buttons | 3 × 15–18 mm for cardigan; 1 × 12–15 mm for bib; optional 2 small buttons for booties |
| Wooden ring | 1 smooth untreated or baby-safe finished ring, approx. 65–70 mm outer diameter |
| Embroidery thread | Small quantity in cocoa/taupe for sleepy eyes, nose and mouth |
Yarn quantities are deliberately rounded up. Exact usage changes with yarn brand, gauge, tension, and finishing choices.
Tools + Notions
- 4.0 mm (G/6) crochet hook — blanket, cardigan, bonnet, booties, bib
- 3.5 mm (E/4) crochet hook — lovey and rattle amigurumi
- Yarn needle and embroidery needle
- Stitch markers
- Scissors
- Flexible measuring tape
- Blocking mats and rust-resistant pins
- Small amount of removable stitch holder yarn
- Polyester fiberfill
- Natural wooden buttons and wooden ring
Before You Begin
- Read the full project section before starting.
- Work a 10 × 10 cm / 4 × 4 in gauge swatch.
- Count stitches at the end of every shaping row or round.
- Use embroidered facial features only on baby items.
- Secure every yarn tail by weaving through several directions; do not leave loose knots.
All crochet terms in this pattern are US terminology. If you substitute yarn or hook size, the finished size and yardage will change.
Abbreviations
- ch = chain
- sl st = slip stitch
- sc = single crochet
- hdc = half double crochet
- dc = double crochet
- inc = increase
- dec = decrease
- st/sts = stitch/stitches
- BLO = back loop only
- rnd = round
- rep = repeat
- RS = right side
- WS = wrong side
Special Stitches
Puff stitch: yarn over, insert hook in indicated stitch, pull up a loop; repeat 3 more times in the same stitch, yarn over and pull through all loops, then chain 1 to close unless the pattern states otherwise.
Bobble stitch: work the required unfinished stitches in the same stitch, then yarn over and pull through all loops on the hook. In this pattern, bobbles are used decoratively and are not counted as extra stitches unless noted.
Scallop edge: a grouped decorative edge, usually 5 dc in one stitch or space, followed by a skipped stitch and a slip stitch or single crochet. Adjust shell size if your edging ripples.
Gauge + Sizing
| Specification | Details |
|---|---|
| Blanket / cardigan / bonnet / booties / bib gauge | 18 hdc × 14 rows = 10 cm / 4 in using 4.0 mm hook |
| Lovey blanket gauge | Classic granny structure using 4.0 mm hook; finished blanket measures approx. 34–36 cm after border |
| Lovey and rattle head gauge | Firm single crochet fabric using 3.5 mm hook; no stuffing should show through stitches |
| Cardigan sample size | 0–3 months, with practical guidance for 3–6 months |
| Blanket finished size | Approx. 76 × 91 cm / 30 × 36 in |
| Bonnet target fit | Newborn to 3 months, with notes for 3–6 months |
| Bootie sole length | Approx. 9.5 cm / 3.75 in for 0–3 months; approx. 10.5 cm / 4.1 in for 3–6 months |
Always match gauge before making a full gift set. Even small changes in tension can affect fit, drape, yarn usage, and safety.
Pattern 1 — Little Lamb Heirloom Baby Blanket
| Specification | Details |
|---|---|
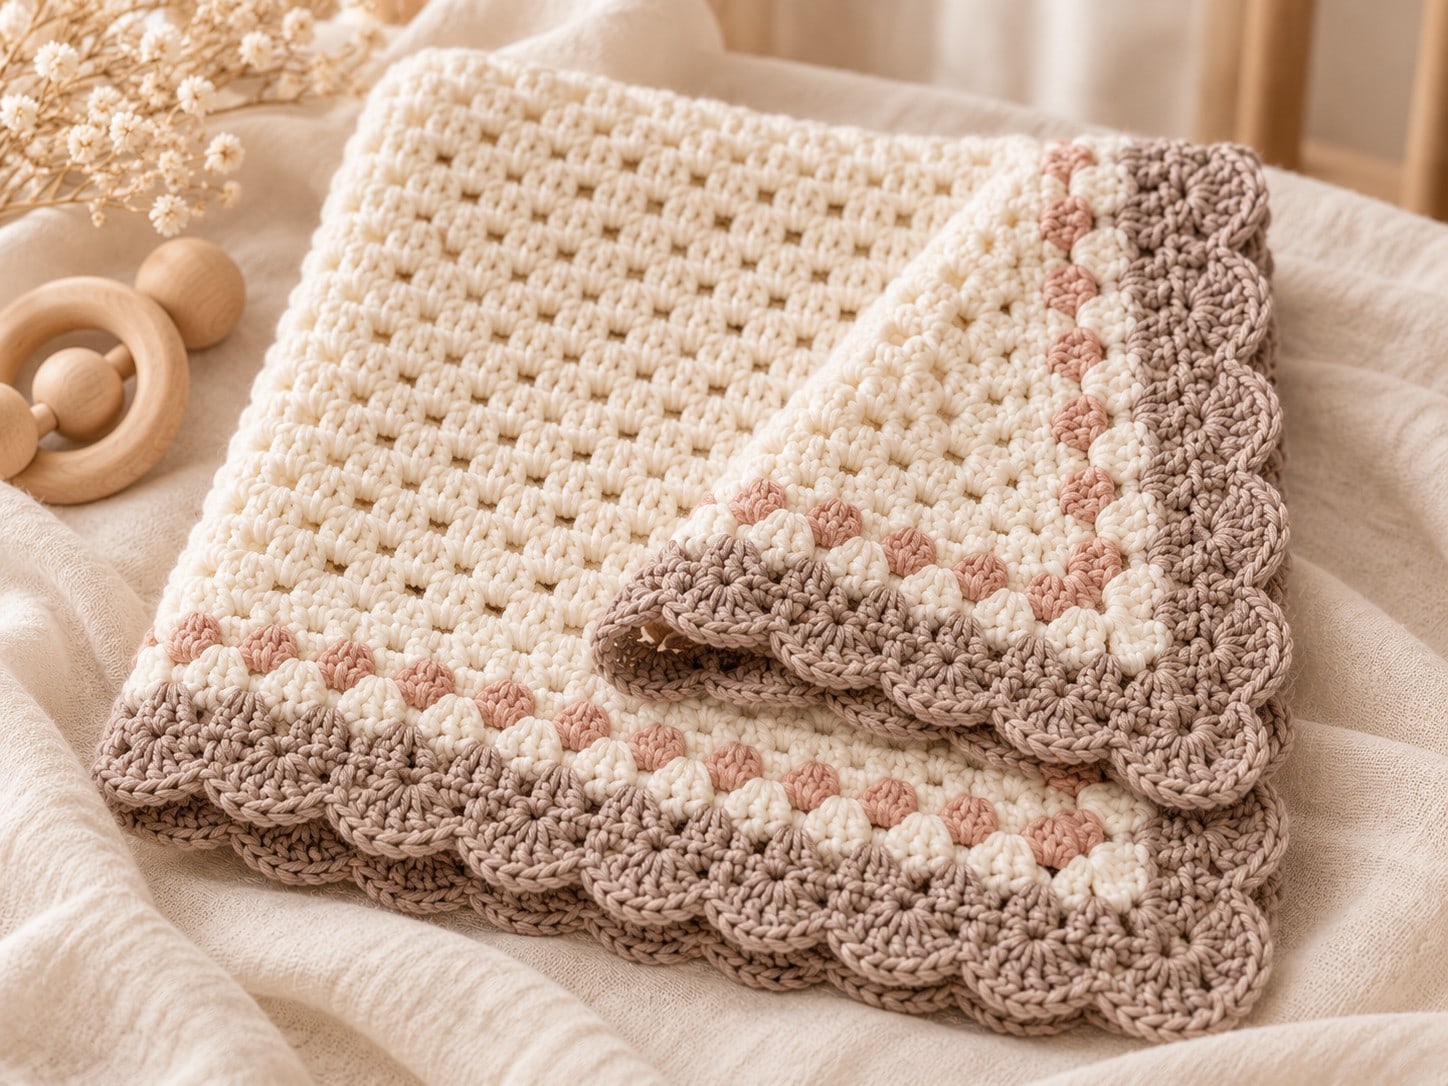
| Finished size | Approx. 76 × 91 cm / 30 × 36 in |
| Hook | 4.0 mm |
| Yarn | Approx. 450 g cream, 110 g taupe, 40 g dusty rose |
| Gauge | 18 hdc × 14 rows = 10 cm / 4 in |
| Construction | Worked flat in hdc with repeating puff-texture rows; border added in rounds |
| Skill focus | Even tension, puff texture, border, scalloped finishing |
Steps 1–3: Foundation + Textured Body
Step 1 — Foundation chain. With cream, ch 140. Turn the chain so the back bumps face you. Working into back bumps, hdc in 3rd ch from hook and in each remaining ch — 138 hdc. A back-bump foundation creates a clean lower edge. Check: the row lies flat and measures close to 76 cm / 30 in at gauge.
Step 2 — Establish base rows. Ch 2, turn (ch-2 does not count). Hdc in each stitch across. Repeat for Row 2 — 138 hdc each row. Place a marker in the first and last stitch so edge stitches are not missed. Check: both rows have 138 stitches.
Step 3 — Work the Lamb Texture repeat. Row 3: ch 2, hdc in first st; hdc in next 3 sts, puff in next st repeat 34 times; hdc in last st. Rows 4–6: hdc across. Repeat Rows 3–6 thirty-one times total, then work 2 final hdc rows. Count after every puff row — the puff closes with a ch 1, but that chain is not counted. Check: 138 stitches on every row, 128 rows total, and the blanket body is approx. 91 cm / 36 in long before the border.
Steps 4–6: Border + Finishing
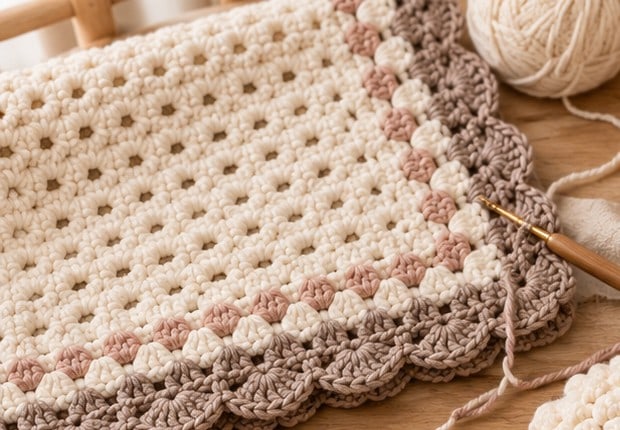
Step 4 — Round 1, clean edge. Join cream at any corner. Sc evenly around: 138 sc across top, 128 sc down side, 138 sc across bottom, 128 sc up side, working 3 sc in each corner — 544 sc total, counting all corner stitches. On side edges, distribute stitches evenly instead of forcing one stitch into every row end if your fabric ripples. Check: the border lies flat with square corners.
Step 5 — Accent rounds. Change to dusty rose. Work 1 sc in each st around, placing a puff in every 4th stitch and keeping the total stitch positions unchanged. Join. Change to taupe and work 1 hdc in each stitch; in the center stitch of each corner work (hdc, ch 1, hdc). Carry unused yarn only a short distance — cut and weave when cleaner. Check: the border remains flat and the accent is subtle.
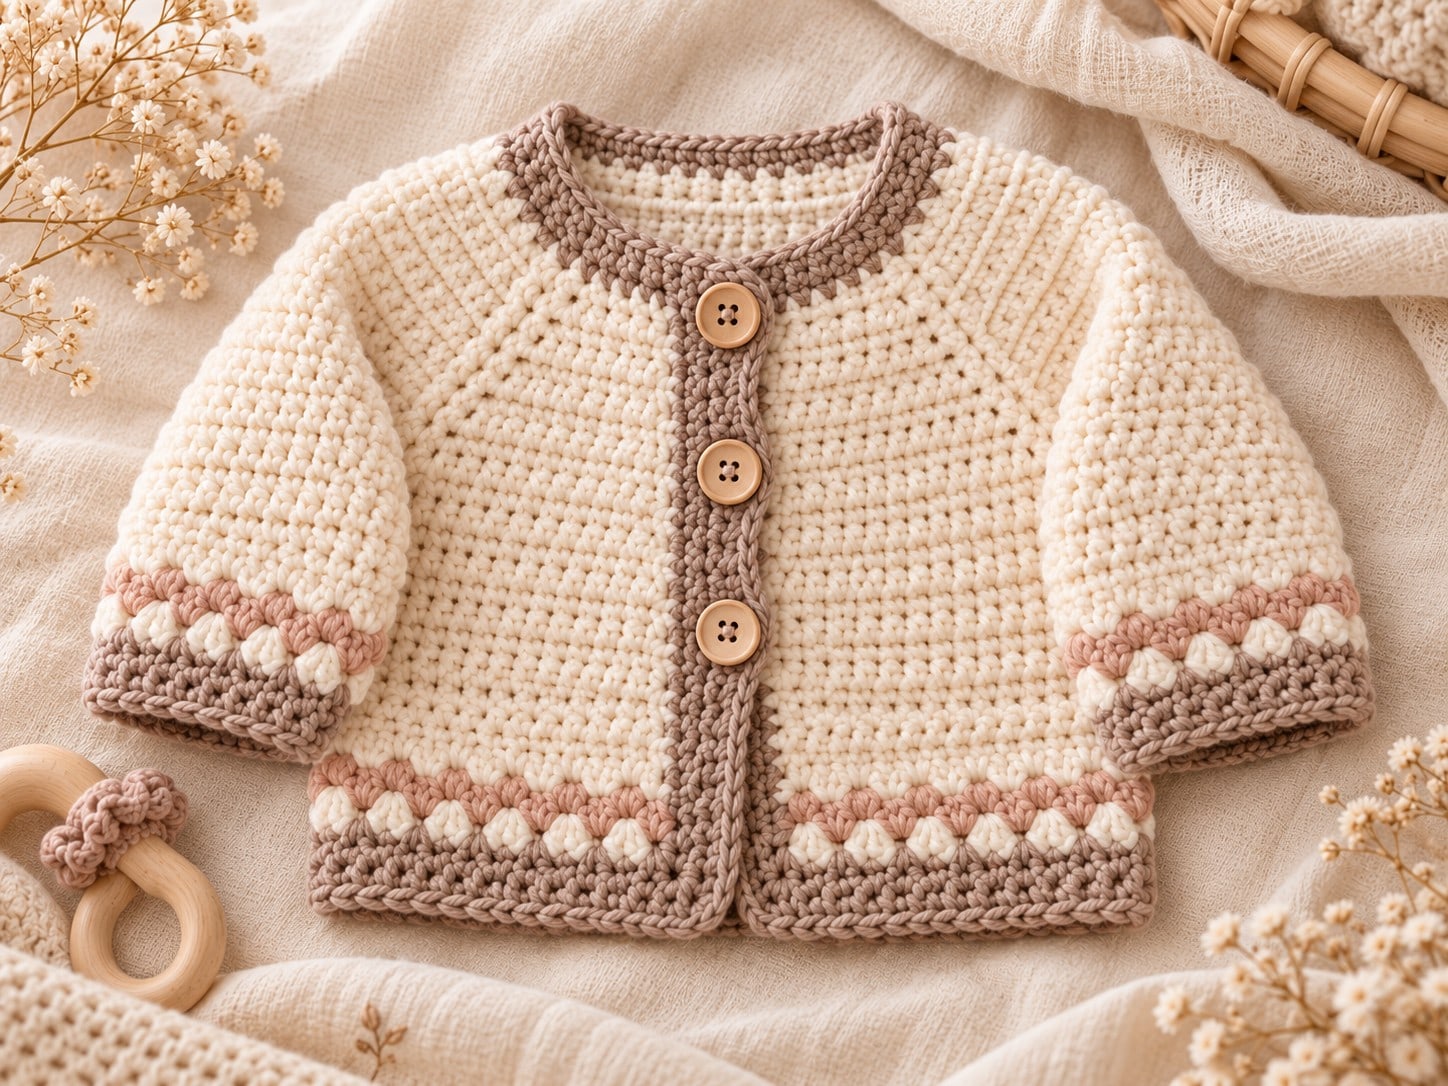
Step 6 — Scalloped outer edge + block. With taupe, work the scallop repeat evenly around: skip 1, 5 dc in next, skip 1, sl st in next. Center one shell over each corner. Fasten off. Wet block or steam-block lightly according to the yarn label, and do not aggressively stretch baby yarn while blocking. Check: the finished blanket is rectangular, smooth, and approx. 76 × 91 cm / 30 × 36 in.
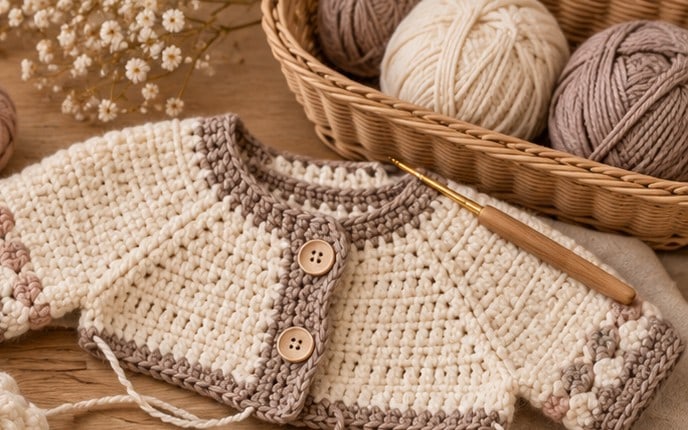
Pattern 2 — Little Lamb Baby Cardigan
| Specification | Details |
|---|---|
| Sizes | 0–3 months (3–6 months) |
| Hook | 4.0 mm |
| Yarn | Approx. 160 g (190 g) cream; 35 g (45 g) taupe; 15 g dusty rose |
| Gauge | 18 hdc × 14 rows = 10 cm / 4 in |
| Buttons | 3 natural wooden buttons, 15–18 mm |
| Construction | Top-down raglan yoke, body worked flat, sleeves worked in joined rounds |
Steps 1–4: Yoke + Body
Step 1 — Foundation + Row 1. With cream, ch 53 (59). Hdc in 3rd ch and next 7 (8); ch 1, hdc 9 (10); ch 1, hdc 17 (19); ch 1, hdc 9 (10); ch 1, hdc 8 (9). Work flat — the four ch-1 spaces form the raglan corners. Count: 51 hdc + 4 ch-1 spaces (57 hdc + 4 spaces). Place a marker in every ch-1 space. Check: fronts, sleeves, and back are correctly separated.
Step 2 — Raglan increase rows. Rows 2–11 (2–12): ch 2, turn. Hdc in each hdc. In every marked ch-1 space work (hdc, ch 1, hdc). Each increase row adds 8 hdc. After the final increase row: 131 hdc (145 hdc), plus 4 ch-1 spaces; sections are 18/29/37/29/18 (20/32/41/32/20). Keep all four raglan lines directly above one another. Check: yoke depth is about 8–9 cm / 3.25–3.5 in.
Step 3 — Separate sleeves. Ch 2, turn. Hdc across first front 18 (20). Ch 4 (5), skip 29 (32) sleeve sts and next ch-1 space. Hdc 37 (41) across back. Ch 4 (5), skip second sleeve and space. Hdc final 18 (20). Count: 81 body sts (91 body sts). Do not twist the underarm chains. Check: both armholes are equal and the fronts meet at center without overlap.
Step 4 — Body length + lower texture. Work 20 (22) rows hdc even. Then work 1 dusty rose accent row: hdc 1, puff in next st, hdc in next 3 across, adjusting the last 1–3 stitches in plain hdc. Work 2 cream hdc rows. Change to taupe and work 3 hdc border rows. Maintain 81 (91) body sts throughout. Try the cardigan on a size-appropriate form or compare to measurements before the border. Check: body length from shoulder is approx. 24–26 cm / 9.5–10.25 in.
Steps 5–8: Sleeves + Button Bands
Step 5 — Sleeve round 1. Join cream at center of underarm chain. Hdc across 4 (5) underarm chains and around 29 (32) skipped sleeve stitches. Join with sl st — 33 (37) sts. Mark the first stitch of every round. Check: no hole remains at the underarm; close any tiny gap later with the yarn tail.
Step 6 — Shape sleeve. Work hdc even for 3 rounds. Decrease round: hdc to last 2 sts, hdc2tog. Repeat the 4-round sequence three times for 0–3 months and four times for 3–6 months. Then work even until the sleeve measures approx. 13 (15) cm from underarm. Decrease near the underarm so shaping is less visible. Finish with approx. 30 sts (33 sts). Check: both sleeves match in length and stitch count.
Step 7 — Cuffs. Work 1 dusty rose puff accent round, then 2 rounds taupe hdc. Fasten off. Repeat the entire sleeve for the second arm. Keep final sleeve counts unchanged through the cuff. If the cuff is loose, use a 3.5 mm hook for the final taupe round. Check: cuffs lie flat and match.
Step 8 — Front bands + buttons. Join taupe at lower right front. Sc evenly up right front, around neckline, and down left front. Work 2 more sc rows. On the buttonhole side, in Row 2 replace 2 sc with ch 2 at three evenly spaced positions. Sew 3 wooden buttons opposite the buttonholes. Mark all three button positions before sewing. Check: front edges lie flat; buttons pass through holes without stretching.
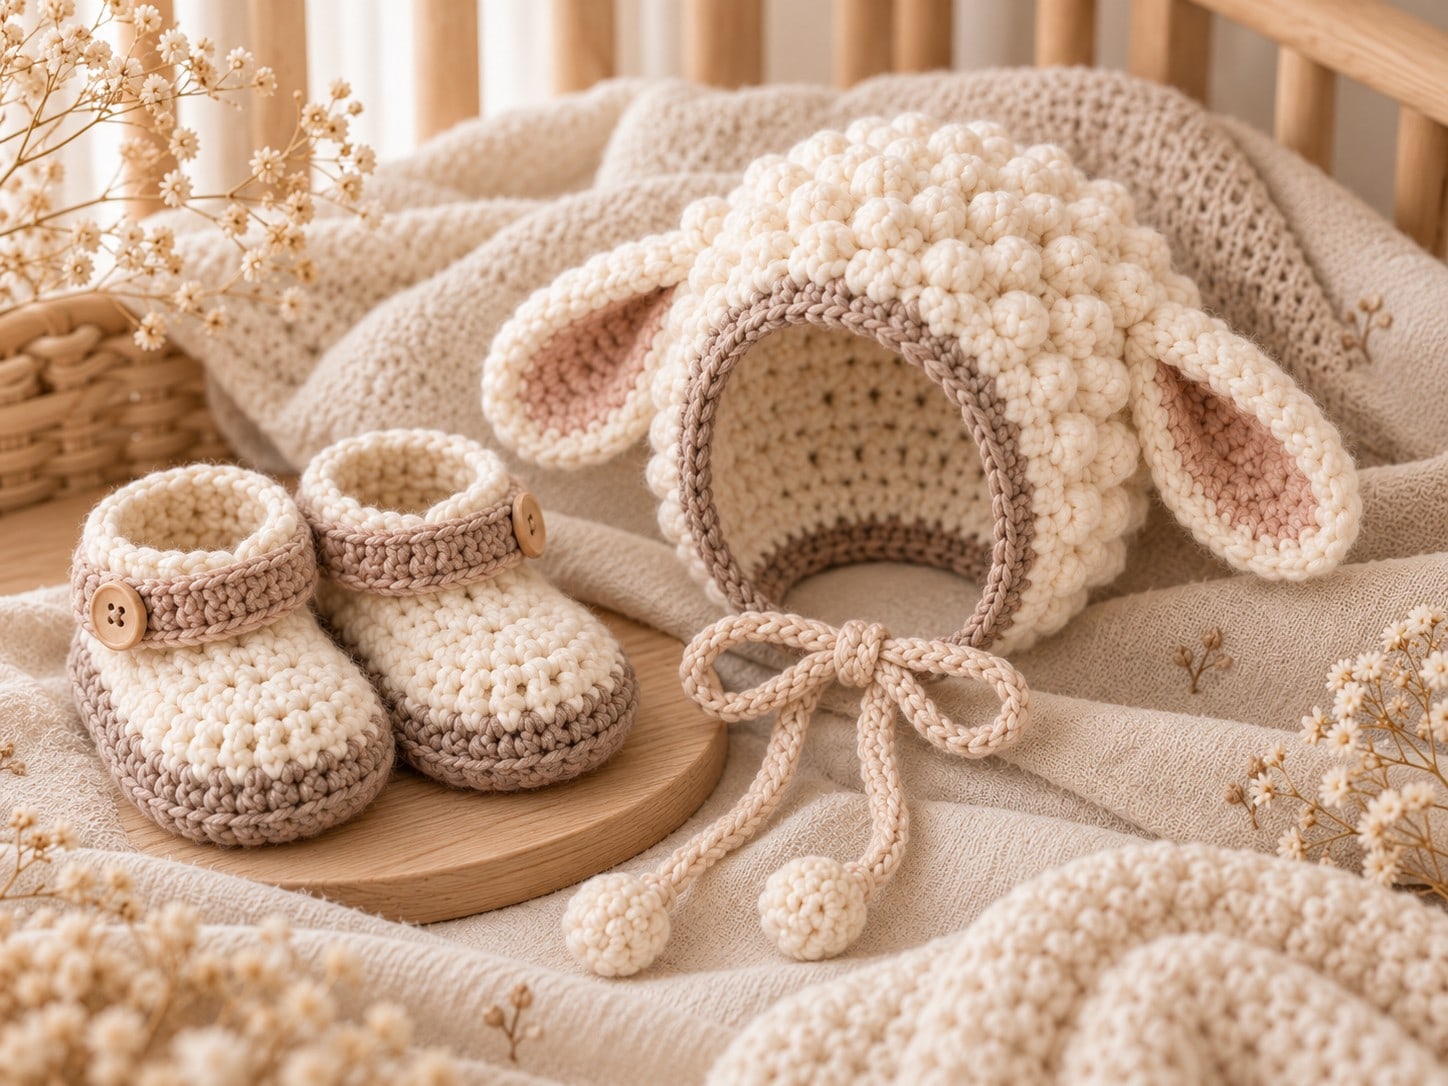
Pattern 3 — Little Lamb Baby Bonnet
| Specification | Details |
|---|---|
| Sizes | 0–3 months (3–6 months) |
| Hook | 4.0 mm |
| Yarn | Approx. 65 g (80 g) cream; 15 g taupe; 10 g dusty rose |
| Gauge | 18 hdc × 14 rows = 10 cm / 4 in |
| Construction | Back crown worked in rounds, front section worked in rows, separate ears, ties, and face edging |
Bonnet Steps
Step 1 — Crown increases. Magic ring. Rnd 1: 10 hdc. Rnd 2: 2 hdc in each st = 20. Rnd 3: (hdc, inc) ×10 = 30. Rnd 4: (2 hdc, inc) ×10 = 40. Rnd 5: (3 hdc, inc) ×10 = 50. Rnd 6: (4 hdc, inc) ×10 = 60. Rnd 7: (5 hdc, inc) ×10 = 70. For 3–6 months only, Rnd 8: (6 hdc, inc) ×10 = 80. Keep the crown flat; if it cups early, loosen tension. Check: crown is flat to gently curved, not ruffled.
Step 2 — Build bonnet depth. Work 4 rounds hdc even: 70 (80). Measure depth from crown center to lower edge. Check: depth is approx. 8.5–9.5 cm / 3.4–3.75 in.
Step 3 — Create face opening. Do not join. Ch 2, turn. Hdc across 56 (64) sts, leaving 14 (16) sts unworked at center front. Work 7 more rows hdc over the same 56 (64) sts. Keep first and last stitches firm but not tight. Check: the opening is centered and both lower corners align.
Step 4 — Face scallop. Join taupe at one lower front corner. Sc evenly around the face opening. Change to cream and work small scallops: skip 1, 5 dc in next, skip 1, sl st next. Use 3 dc instead of 5 dc if your shells look too large. Check: the face edge is soft and does not flare.
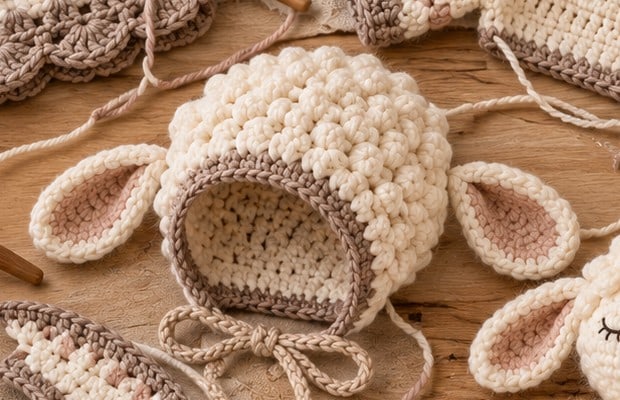
Step 5 — Lamb ears, make 2. With dusty rose, ch 9. Hdc in 2nd ch and next 6, 5 hdc in last ch; working underside, hdc 7, 3 hdc in first chain = 22. Change to cream. Rnd 2: sc around, working 2 sc in each of the 5 end-curve stitches and 2 sc in each of the 3 opposite end stitches — approx. 30 sc after the outer round. Fasten off. Steam lightly and pinch the base before sewing. Check: two ears are symmetrical, approx. 7–8 cm long.
Step 6 — Attach ears + ties. Fold each ear base slightly and sew at the upper side of the bonnet, approx. 4–5 cm apart. For each tie, join cream at the lower corner, ch 55, sl st back along the chain. Repeat on the other side. Reinforce the ear attachment with several yarn passes. Check: ears sit naturally; ties are equal and secure.
Pattern 4 — Little Lamb Baby Booties
| Specification | Details |
|---|---|
| Sizes | 0–3 months (3–6 months) |
| Hook | 4.0 mm |
| Yarn | Approx. 55 g (70 g) cream; 20 g taupe |
| Finished sole | Approx. 9.5 cm (10.5 cm) |
| Construction | Oval sole, side wall, toe decreases, ankle cuff, and optional button strap |
Bootie Steps
Step 1 — Sole round 1. With taupe, ch 11 (13). Hdc 2 in 2nd ch; hdc in next 8 (10); 5 hdc in last ch. Work down the underside: hdc 8 (10); 3 hdc in first chain. Join — 26 sts (30 sts). Mark center heel and toe. Check: the sole lies flat.
Step 2 — Sole round 2. Ch 1. 2 hdc in next 2 sts; hdc 8 (10); 2 hdc in next 5 sts; hdc 8 (10); 2 hdc in final 3 sts. Join — 36 sts (40 sts). Keep increases centered at both ends. Check: the sole remains flat, not cupped.
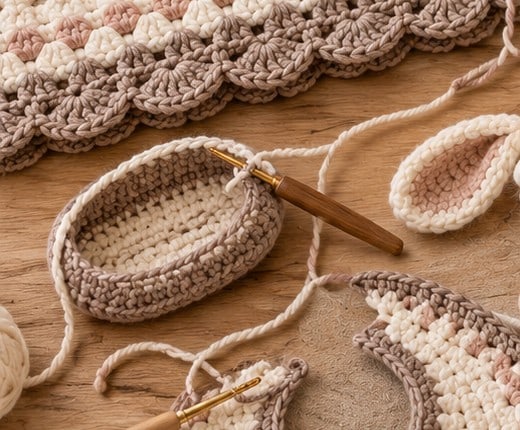
Step 3 — Build side wall. Change to cream. Rnd 3: hdc BLO around. Rnd 4: hdc in both loops around — 36 (40) each round. The BLO round creates the sole ridge. Do not increase. Check: a clean vertical wall begins above the sole.
Step 4 — Shape toe. Rnd 5: sc 10 (11), sc2tog 8 (9) times, sc 10 (11) = 28 (31). Rnd 6: sc 8 (9), sc2tog 6 times, sc 8 (10) = 22 (25). Move the marker so the toe decreases stay centered. Check: the toe is rounded and the heel remains upright.
Step 5 — Ankle cuff. Work 3 rounds hdc even in cream. Change to taupe and work 2 rounds sc — 22 (25) each round. If the cuff seems wide, use a 3.5 mm hook for the taupe rounds. Check: the bootie stays on without feeling rigid.
Step 6 — Optional strap + second bootie. Join taupe at the outer ankle. Ch 13 (15), hdc back across. Add a ch-2 buttonhole near the end if using a button. Sew one small wooden button opposite. Make the second bootie as a mirror placement for the strap/button — 11 (13) hdc strap body, plus buttonhole adjustment. A button is decorative/functional only; check its security before every use. Check: the pair matches in length, sole shape, and strap placement.
Pattern 5 — Little Lamb Baby Bib
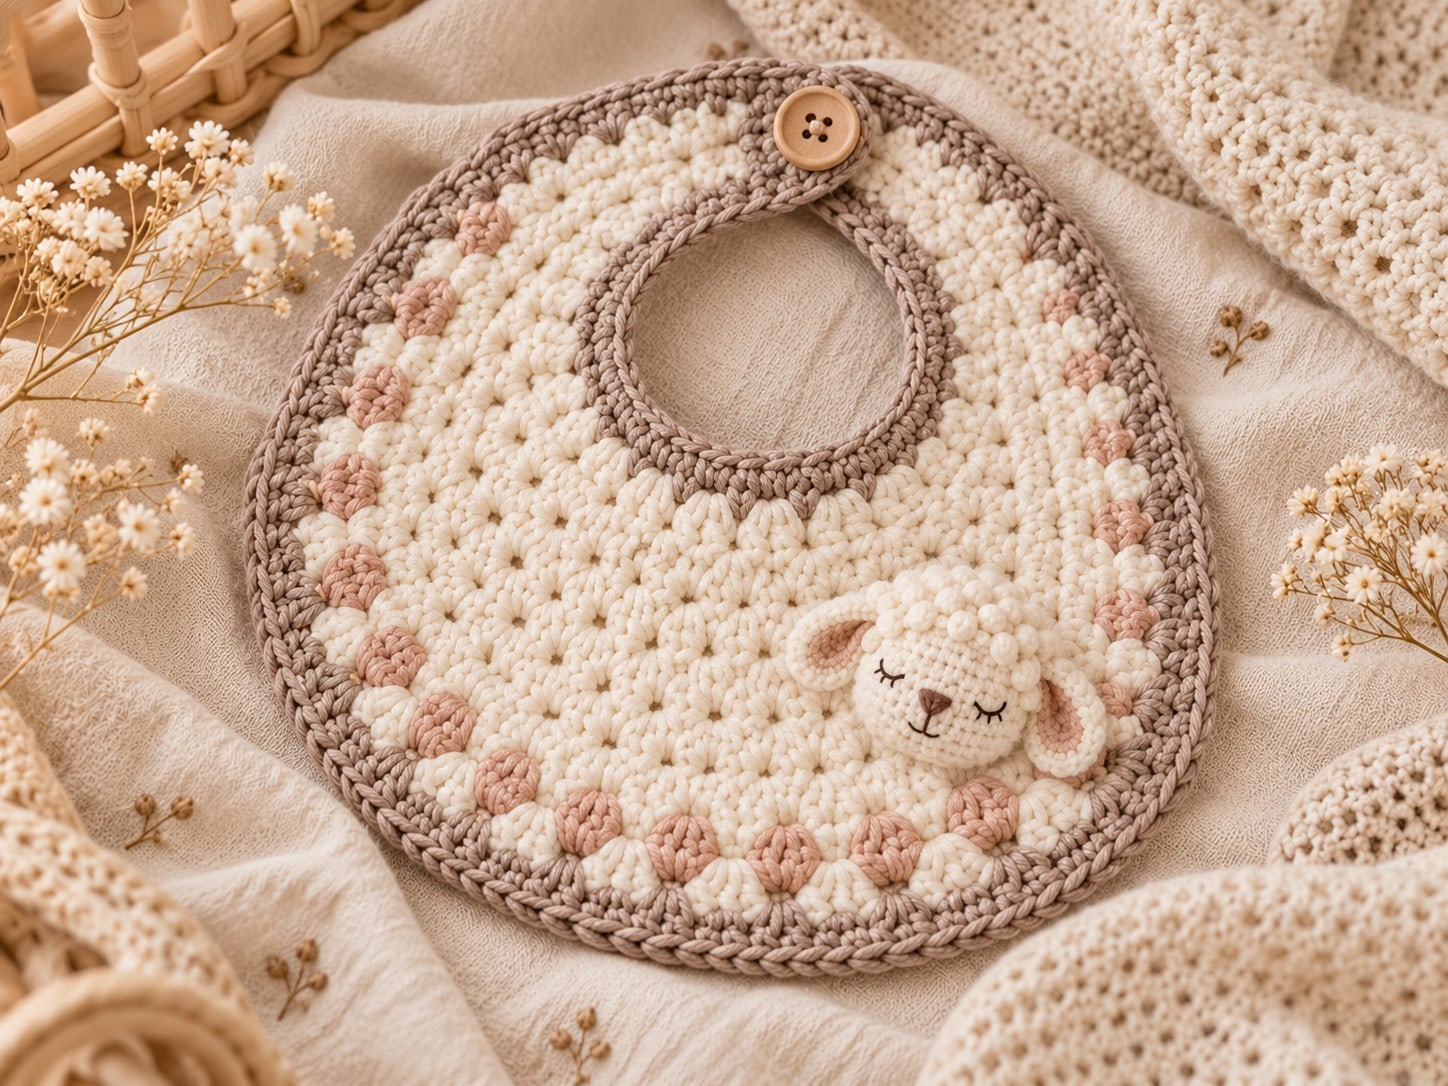
| Specification | Details |
|---|---|
| Hook | 4.0 mm |
| Yarn | Approx. 60 g cream; 20 g taupe; 10 g dusty rose |
| Finished width | Approx. 22–24 cm / 8.5–9.5 in |
| Closure | Single button tab |
| Construction | Top-down curved bib with four increase points, accent row, edging, and small lamb applique |
Bib Steps
Step 1 — Foundation. With cream, ch 46. Hdc in 3rd ch from hook and across — 44 hdc. Place 4 increase markers after stitches 9, 18, 27, and 36. Check: the foundation sits comfortably around the neckline curve without twisting.
Step 2 — Shape curved body. Rows 2–10: ch 2, turn. Hdc across, working 2 hdc in each marked stitch. Move each marker to the first stitch of the increase for the next row. With four increases per row, the counts grow: Row 2 = 48, Row 3 = 52, Row 4 = 56, Row 5 = 60, Row 6 = 64, Row 7 = 68, Row 8 = 72, Row 9 = 76, Row 10 = 80 sts. Keep the increases stacked in four gentle rays. Check: the bib flares smoothly without ruffling.
Step 3 — Accent row. Change to dusty rose. Row 11: hdc 2, puff in next st, hdc in next 3 sts across, ending remaining stitches in hdc — 80 stitch positions maintained. Do not count the puff closing chain separately. Check: the accent is even and not bulky.
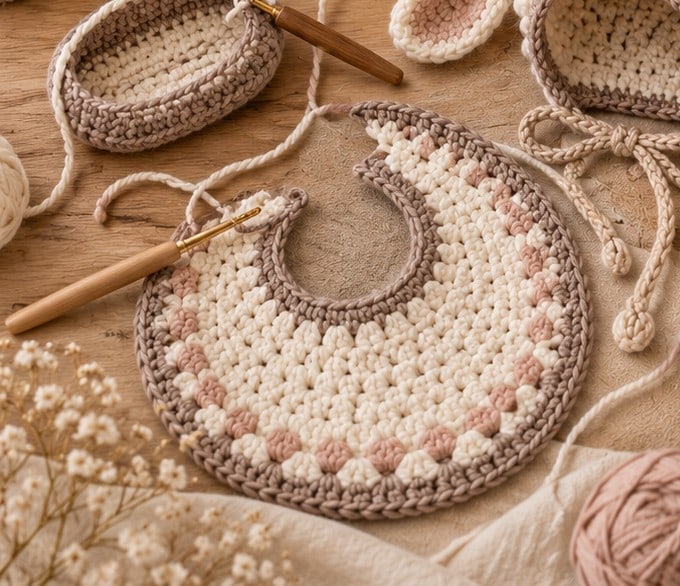
Step 4 — Outer edging. Change to taupe. Work 1 sc row across the curved outer edge. Around the lower edge, add scallops with skip 1, 5 dc, skip 1, sl st. Keep the neckline edge in plain sc for comfort, and do not place large shells directly under the chin area. Check: the bib lies flat.
Step 5 — Button tab. At the left neck end, join taupe, ch 12, hdc in 3rd ch and across. On the next row work 4 hdc, ch 2, skip 2, hdc to end — 10 hdc on the first strap row. Fasten off. Sew a 12–15 mm wooden button to the opposite end. Test the buttonhole before securing the button permanently. Check: the closure lies flat and does not pull the neckline.
Step 6 — Tiny lamb applique. With cream make a 6-sc magic ring, inc around = 12, then work one bobble in every second stitch for a textured body. With taupe, embroider/attach a tiny oval head using 6 sc in a ring, and add minimal stitched features. The body is approx. 3–4 cm / 1.25–1.5 in wide. Sew the applique to one lower corner. For baby use, embroider features only — do not add beads or plastic eyes. Check: the applique is flat, firmly attached, and clear of the neck area.
Pattern 6 — Little Lamb Security Lovey
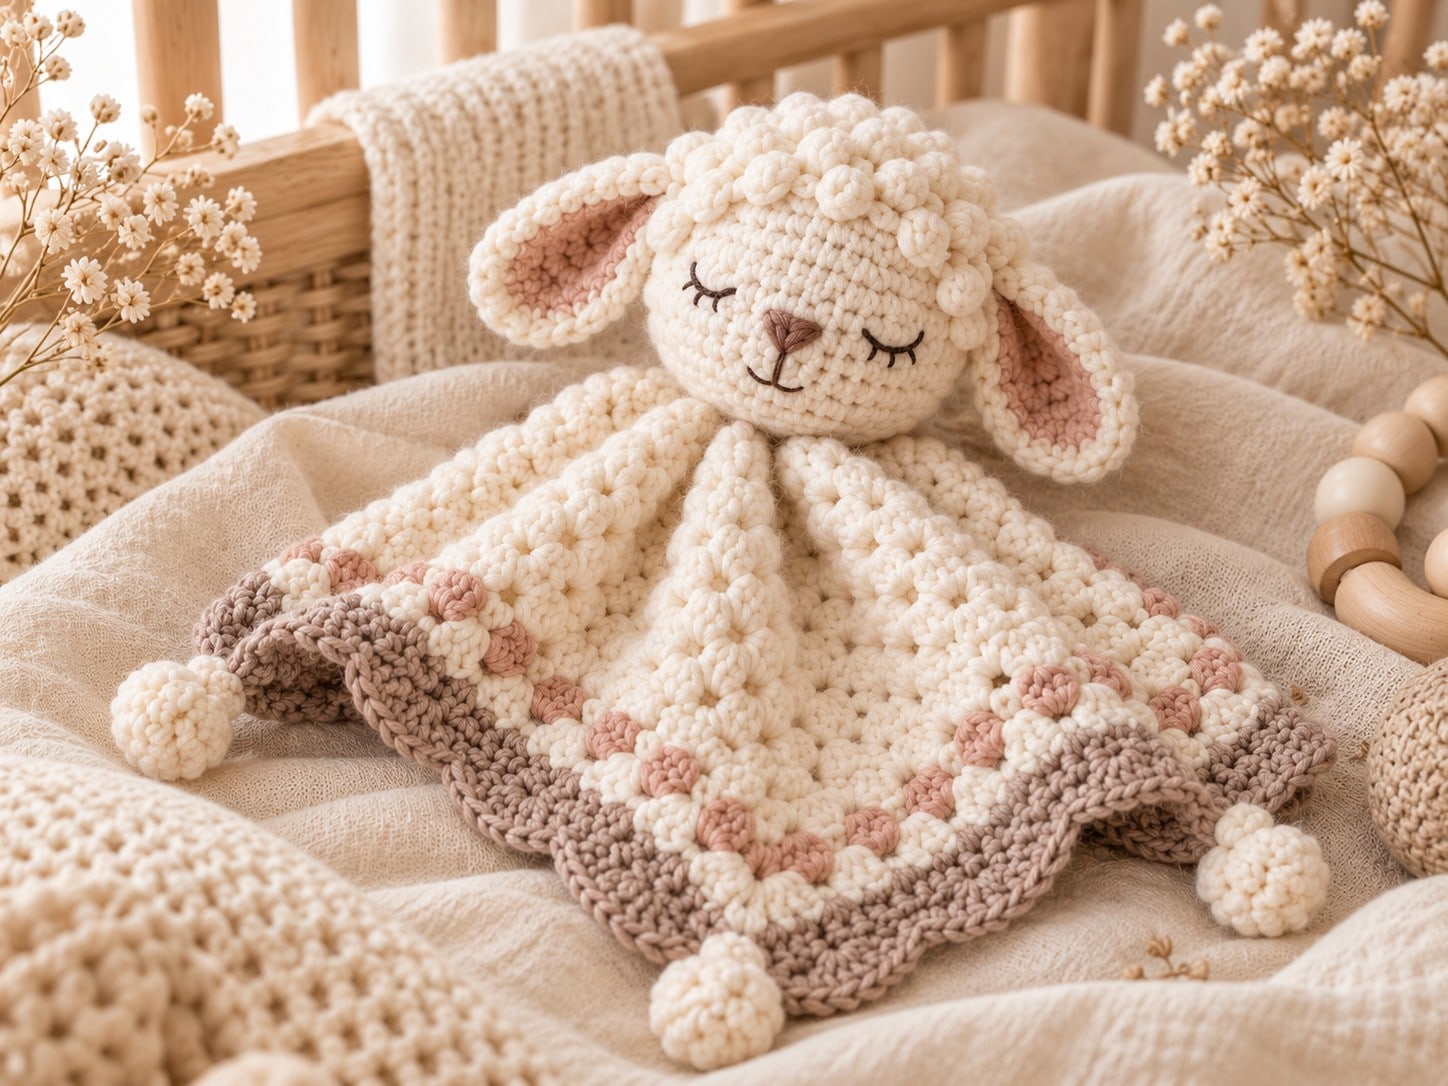
| Specification | Details |
|---|---|
| Hook | 3.5 mm for head; 4.0 mm for blanket |
| Yarn | Approx. 120 g cream, 30 g taupe, 20 g dusty rose, small cocoa embroidery |
| Head | Approx. 10 cm / 4 in diameter after stuffing |
| Blanket | Approx. 34–36 cm / 13.5–14 in before corner pom-poms |
| Safety | Embroidered face only; no safety eyes for baby version |
Steps 1–3: Head Base
Step 1 — Head increases. With cream and the 3.5 mm hook, magic ring 6 sc. R2: inc ×6 = 12. R3: (sc, inc) ×6 = 18. R4: (2 sc, inc) ×6 = 24. R5: (3 sc, inc) ×6 = 30. R6: (4 sc, inc) ×6 = 36. Use a marker and do not join rounds. Check: the circle increases evenly with no corners.
Step 2 — Head depth. R7–R12: sc 36. Begin embroidery placement planning before stuffing completely. Check: the head forms a smooth oval/sphere.
Step 3 — Shape + stuff. R13: (4 sc, dec) ×6 = 30. R14: (3 sc, dec) ×6 = 24. R15: (2 sc, dec) ×6 = 18. Stuff firmly but not rock-hard, using small pieces of stuffing to avoid lumps. R16: (sc, dec) ×6 = 12. R17: dec ×6 = 6. Close the opening. Check: no stuffing is visible through the stitches.
Step 4: Wool Texture on Crown
Join cream on the upper third of the head. Surface crochet small bobbles: sl st to surface, ch 3, bobble in same surface point, sl st into next nearby surface point. Work in irregular rows across the crown only. The texture is visual; the count is not structural. Keep the face area clear so embroidery remains visible. Check: the crown looks woolly but ears and face remain defined.
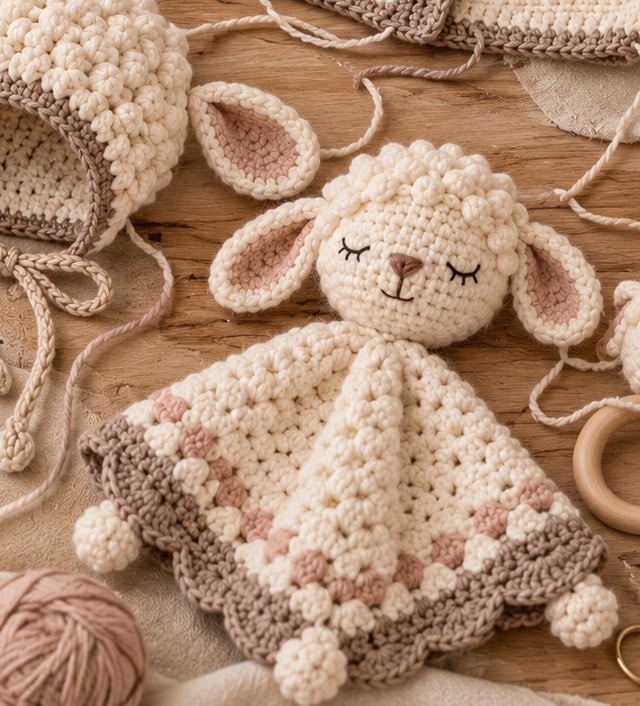
Step 5: Ears
With dusty rose, ch 8. Sc in 2nd ch and next 5, 4 sc in last ch; underside sc 6, 3 sc in first chain — approx. 18 sts on the inner round. Change to cream and sc around, increasing twice around each rounded end — approx. 22–24 sts on the outer round. Fold each ear slightly at the base and sew to the head sides. Pin both ears before sewing to check symmetry. Check: ears droop naturally and are firmly attached.
Steps 6–8: Blanket
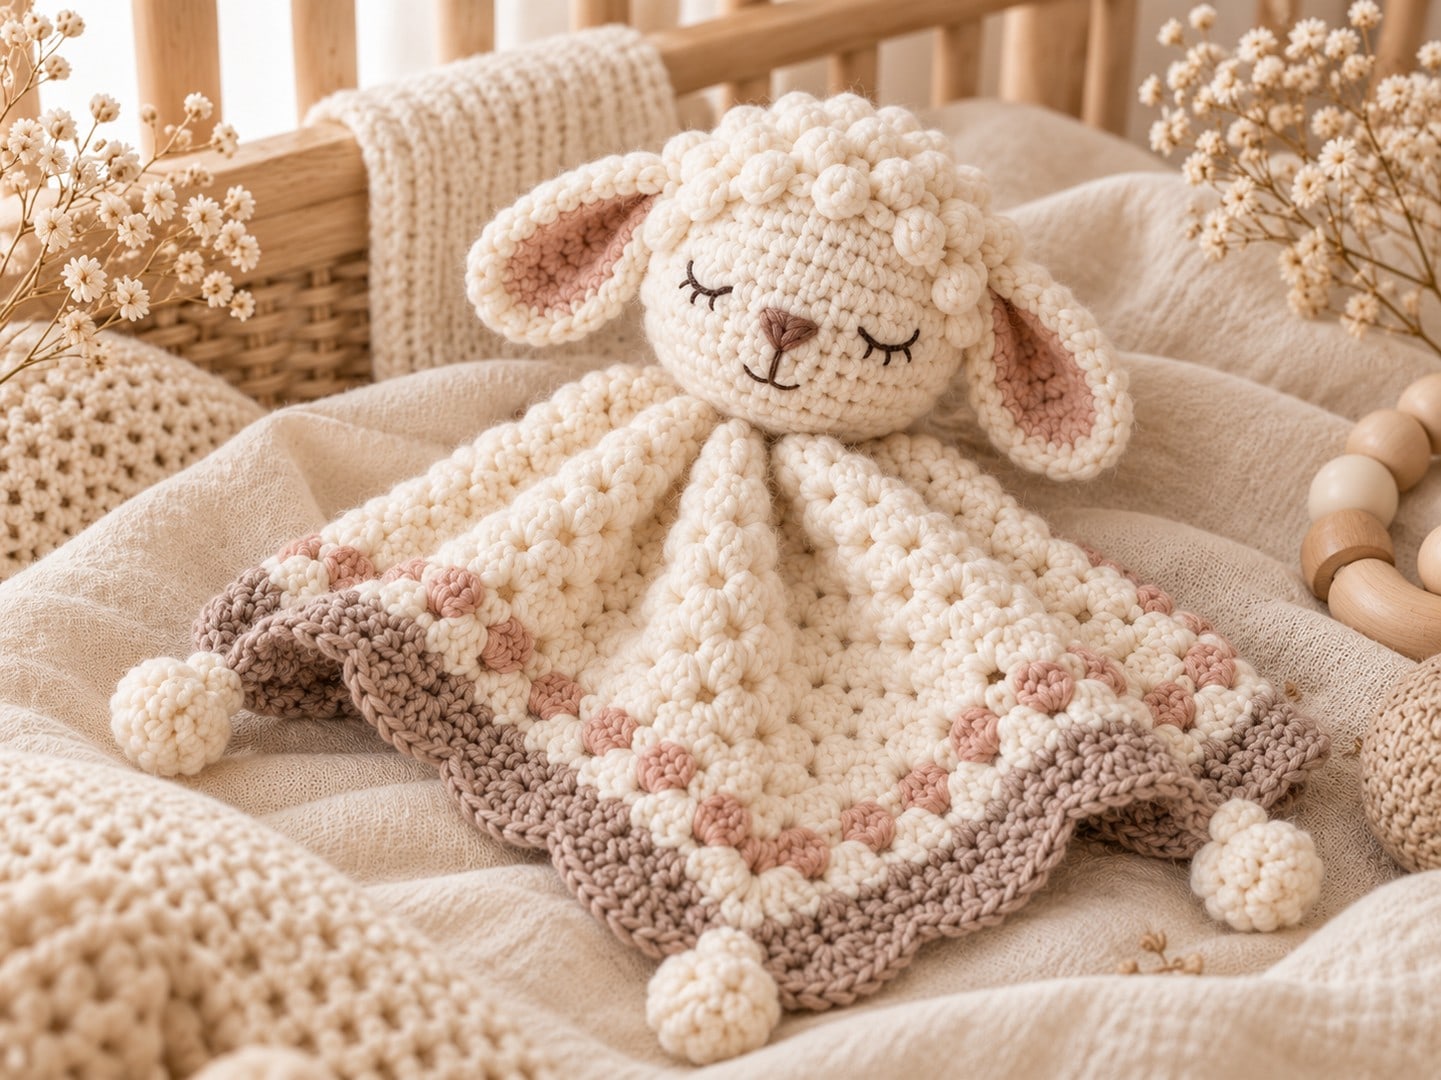
Step 6 — Blanket center. With cream and the 4.0 mm hook, magic ring. Rnd 1: ch 3, 2 dc, ch 2; 3 dc, ch 2 three times. Join. Four 3-dc clusters and four corners — 12 dc + four ch-2 spaces. Ch-3 counts as the first dc only in the blanket section. Check: the square center lies flat.
Step 7 — Grow blanket. Rnd 2: sl st to corner. In each corner work (3 dc, ch 2, 3 dc); between corners work ch 1. Rnds 3–12: in each corner work (3 dc, ch 2, 3 dc); work 3 dc in every ch-1 side space with ch 1 between clusters. Each round adds 4 side clusters; Rnd 12 has 10 side clusters between corner groups. Count side groups rather than individual dc for speed. Check: the blanket is square and approx. 30–32 cm before the border.
Step 8 — Accent + border. Rnd 13, dusty rose: repeat the granny structure for one round. Rnd 14, taupe: sc in each dc and 1 sc in each ch-1 space; work 3 sc in each corner ch-2 space. Rnd 15, taupe: scallops evenly around. Maintain the four corners; the exact scallop count depends on the final edge stitch total. If the edge waves, reduce shell size from 5 dc to 3 dc. Check: the blanket measures approx. 34–36 cm including the border.
Steps 9–11: Face + Assembly
Step 9 — Embroider face. Using cocoa embroidery thread, stitch two gently curved sleepy eyes with 3 short lashes each. Stitch a small taupe/cocoa triangle nose and a short vertical line with a shallow smile. Embroidery only — no plastic components. Knot internally and bury tails deep inside the head. Check: features are symmetrical and cannot be pulled loose.
Step 10 — Attach head. Center the head over the blanket center. Using doubled cream yarn and a yarn needle, sew through the head base and multiple blanket clusters in a wide circle. Make at least 12–16 secure passes, changing direction. Knot internally and bury the tail. The attachment spans approx. 5–6 cm across the blanket center. Pull firmly but do not distort the blanket center. Check: the head does not wobble or rotate when gently tugged.
Step 11 — Crocheted corner balls, make 4 + attach. With cream and the 3.5 mm hook, magic ring 6 sc. R2: inc ×6 = 12. R3: sc 12. Stuff very lightly. R4: dec ×6 = 6. Close firmly, leaving a long sewing tail. Make 4. Sew one ball to each blanket corner with repeated passes through the border and the closed base of the ball. Do not use loose cut-yarn pom-poms on the baby version, and bury every tail inside the crochet fabric. Check: each corner ball stays fixed when pulled firmly, and no yarn loop, knot, or stuffing is exposed.
Pattern 7 — Little Lamb Wooden-Ring Rattle
| Specification | Details |
|---|---|
| Hook | 3.5 mm |
| Yarn | Approx. 35 g cream, 10 g taupe, 5 g dusty rose |
| Wooden ring | Smooth 65–70 mm outer diameter, inspected before every use |
| Head | Approx. 8–9 cm / 3.25–3.5 in |
| Safety | Embroidered face only; no loose internal rattle insert unless specifically baby-safe and fully enclosed |
Rattle Steps
Step 1 — Small lamb head. Magic ring 6 sc. R2: inc ×6 = 12. R3: (sc, inc) ×6 = 18. R4: (2 sc, inc) ×6 = 24. R5: (3 sc, inc) ×6 = 30. R6–R10: sc 30. Keep the fabric dense. Check: no gaps show between stitches.
Step 2 — Close head. R11: (3 sc, dec) ×6 = 24. R12: (2 sc, dec) ×6 = 18. Stuff firmly. R13: (sc, dec) ×6 = 12. R14: dec ×6 = 6. Close. Do not overstuff around the neck attachment area. Check: the head stays round and firm.
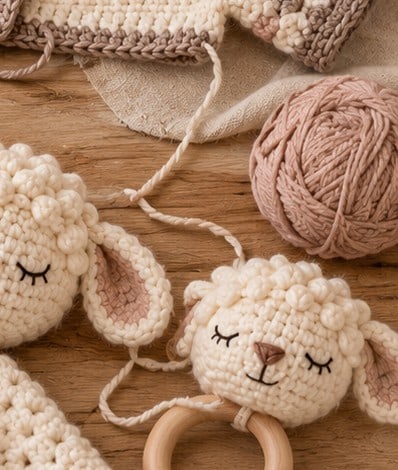
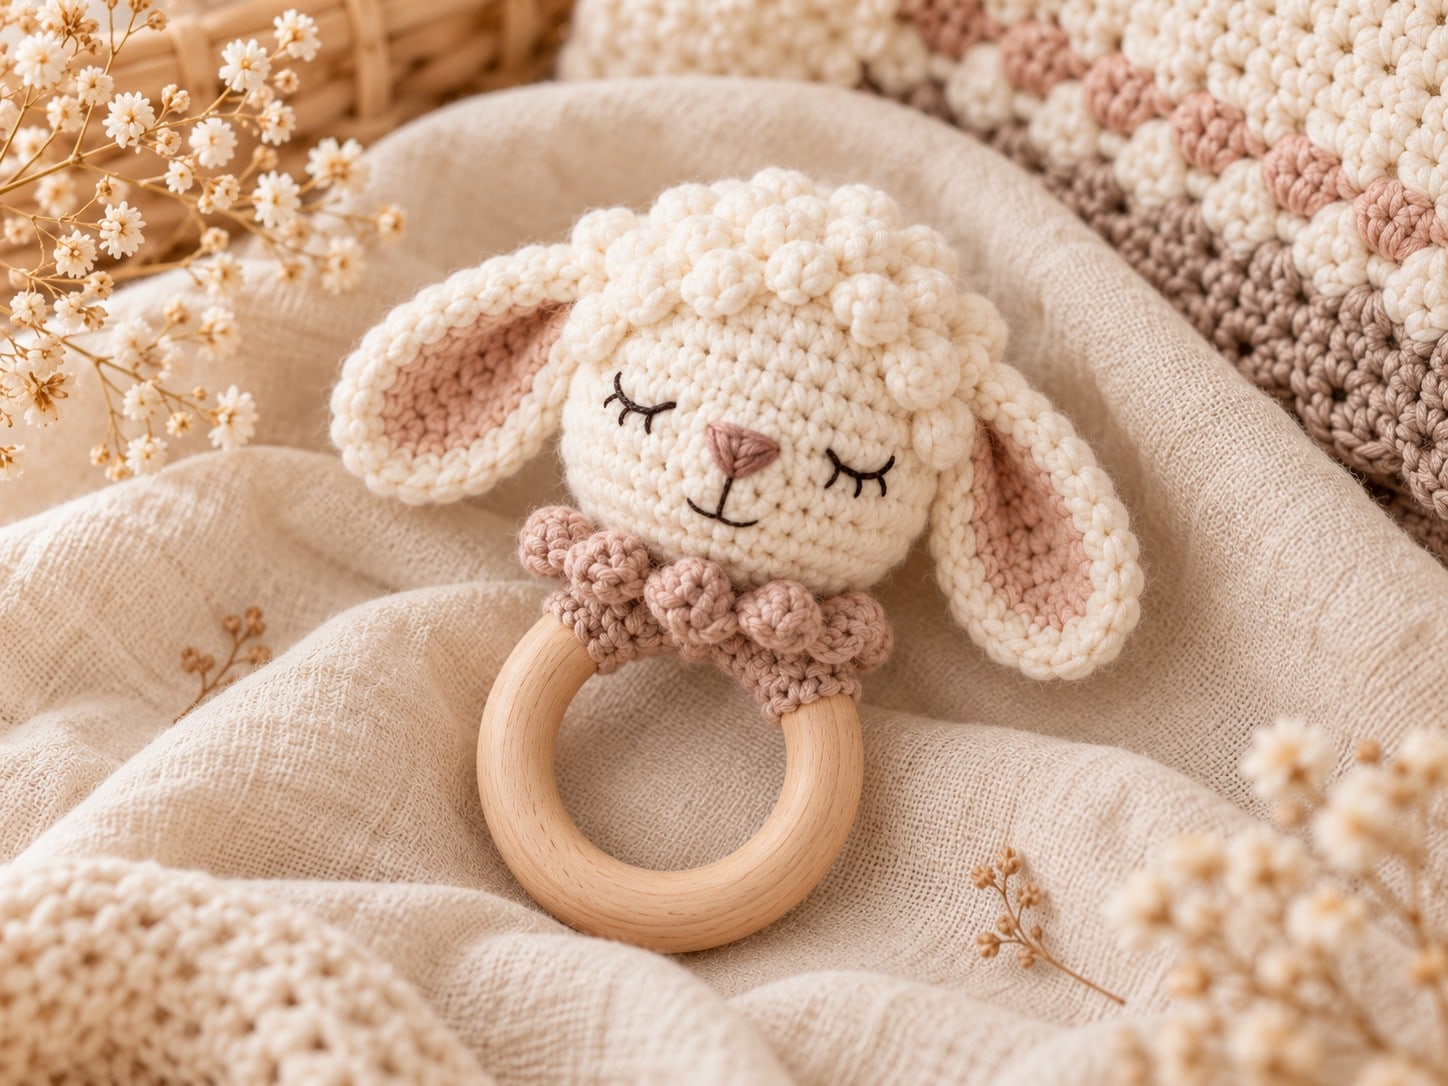
Step 3 — Ears + wool crown. Make two smaller ears: ch 6, work sc around both sides with 4 sc at the rounded end; add one cream sc outer round. The ears are approx. 4.5–5 cm long. Sew the ears to the head, then add surface bobbles over the crown as for the lovey. Keep the ears proportionally smaller than the lovey ears. Check: both ears are secure and balanced.
Step 4 — Embroider face. Add sleepy eyes, a taupe nose, and a tiny mouth using tightly secured embroidery stitches — no beads, buttons, or plastic eyes. Bury embroidery tails through the stuffing. Check: no thread loop can be pulled away from the face.
Step 5 — Ring wrap. With taupe, ch 8. Sc in 2nd ch and across = 7. Work 24 rows sc, or until the strip wraps snugly around the upper third of your ring. Add one dusty rose accent row if desired. Wrap the strip around the ring and whipstitch the long edges together tightly. Adjust the row count only to fit your specific ring circumference. Check: the wrap is snug and immovable, and no wooden edge is pinched by stitching.
Step 6 — Attach head to ring. Position the head over the wrapped section. With doubled taupe yarn, pass through the head base, wrapped fabric, and back into the head at least 10–12 times, alternating directions. Add a second independent reinforcement thread if desired. After attachment, pull the head firmly in every direction before use. Check: the head cannot rotate, lift, or separate from the ring.
Baby Safety Guide
- Use embroidered eyes, nose, and mouth. Do not use plastic safety eyes, beads, glued gems, or loose decorative pieces on items intended for babies.
- Inspect wooden buttons and the ring before every use. Discard any item with cracks, splinters, looseness, or damage.
- For the rattle, the crochet wrap must not slide and the head must be attached with repeated, reinforced sewing passes.
- Keep long bonnet ties and any corded item under adult supervision. Never leave a sleeping baby unattended with ties, cords, bibs, rattles, or loveys.
- Loveys, blankets, and soft toys should be used according to current safe-sleep guidance in the buyer's location; do not place loose soft items in an unattended infant sleep space.
- After washing, recheck every seam, button, embroidered feature, yarn tail, and attachment before returning the item to a baby.
- If selling finished items, follow applicable toy, textile, labeling, and product-safety requirements in your country or market.
Blocking, Care + Washing
Blocking
For the blanket, cardigan, bonnet, booties, and bib: pin to finished measurements on blocking mats. Mist lightly or wet-block according to the yarn label. Shape gently; do not overstretch puff or bobble texture. Allow to dry completely before removing pins.
Washing
- Follow the yarn manufacturer's care label first.
- For machine-washable baby yarn, use a cool gentle cycle in a mesh bag when practical.
- Use mild detergent and avoid harsh bleach.
- Reshape while damp. Lay flat to dry when possible.
- Do not soak the wooden ring. Wipe the wooden ring with a slightly damp cloth and dry immediately.
- Never tumble-dry wooden components unless the ring manufacturer explicitly allows it.
Troubleshooting
| Problem | Likely cause | Fix |
|---|---|---|
| Blanket ripples | Border has too many stitches or tension loosened | Remove border round and reduce side-edge stitch density; recheck gauge |
| Blanket pulls inward | Border too tight | Add a few evenly spaced stitches on long edges or use a larger hook for border |
| Cardigan yoke puckers | Raglan increases are too tight or gauge changed | Loosen ch-1 corners, recheck gauge, and avoid pulling yarn after increases |
| Cardigan fronts flare | Too many edge stitches in button band | Remove band and pick up fewer stitches evenly |
| Bonnet face edge flares | Scallops are too large | Use 3-dc shells or a smaller hook |
| Bootie toe is off-center | Decreases shifted | Mark center toe before every decrease round |
| Bib ruffles | Increase rate too high for your gauge | Work one plain row between increase rows or use a smaller hook |
| Amigurumi stuffing shows | Fabric is too loose | Use a smaller hook and keep sc tension firm |
| Lovey head wobbles | Attachment circle too small or too few passes | Remove and resew with 12–16 wide, reinforced passes |
| Rattle head shifts | Ring wrap or head attachment is loose | Do not use. Rebuild wrap snugly and reattach head with doubled yarn |
Final Collection Checklist
- All seven projects use the same palette and yarn family.
- Gauge and finished measurements have been checked.
- All shaping rows/rounds have the stated stitch counts.
- Buttons are sewn with reinforced thread/yarn and cannot rotate loosely.
- All baby faces are embroidered — no plastic eyes.
- All ears, head attachments, and ring wrap are firmly secured.
- No yarn tails, knots, or loops are exposed.
- Blanket and garments have been blocked and fully dried.
- Wooden ring is smooth, intact, and clean.
- Finished set has been photographed only after a final safety inspection.
A Final Note
Thank you for choosing the Little Lamb Baby Snuggle Gift Set. This bundle was created to feel soft, coordinated, gift-worthy, and practical, so every finished piece belongs beautifully to the same newborn collection. The clear stitch counts, step-by-step order, and finishing checks are there to help you crochet each project with confidence — from the first swatch to the final boxed gift set.
Before making multiples or selling finished items, crochet one full sample in your chosen yarn, confirm gauge, check finished measurements, and complete the baby safety review one final time.
Pattern use: You may use this pattern for personal projects and small-scale handmade selling of finished items. You may not copy, redistribute, resell, upload, share, or reproduce the digital pattern file, images, or written instructions as your own.
Made with care for handmade baby gifting.
The box below contains an Etsy link. If you buy through it, we may earn a small commission at no extra cost to you. Learn more.
No time to make one?
Find handmade crochet baby gift sets from independent makers on Etsy.
Browse on Etsy (opens Etsy in a new tab)