Flower Bouquet Blanket Crochet Pattern
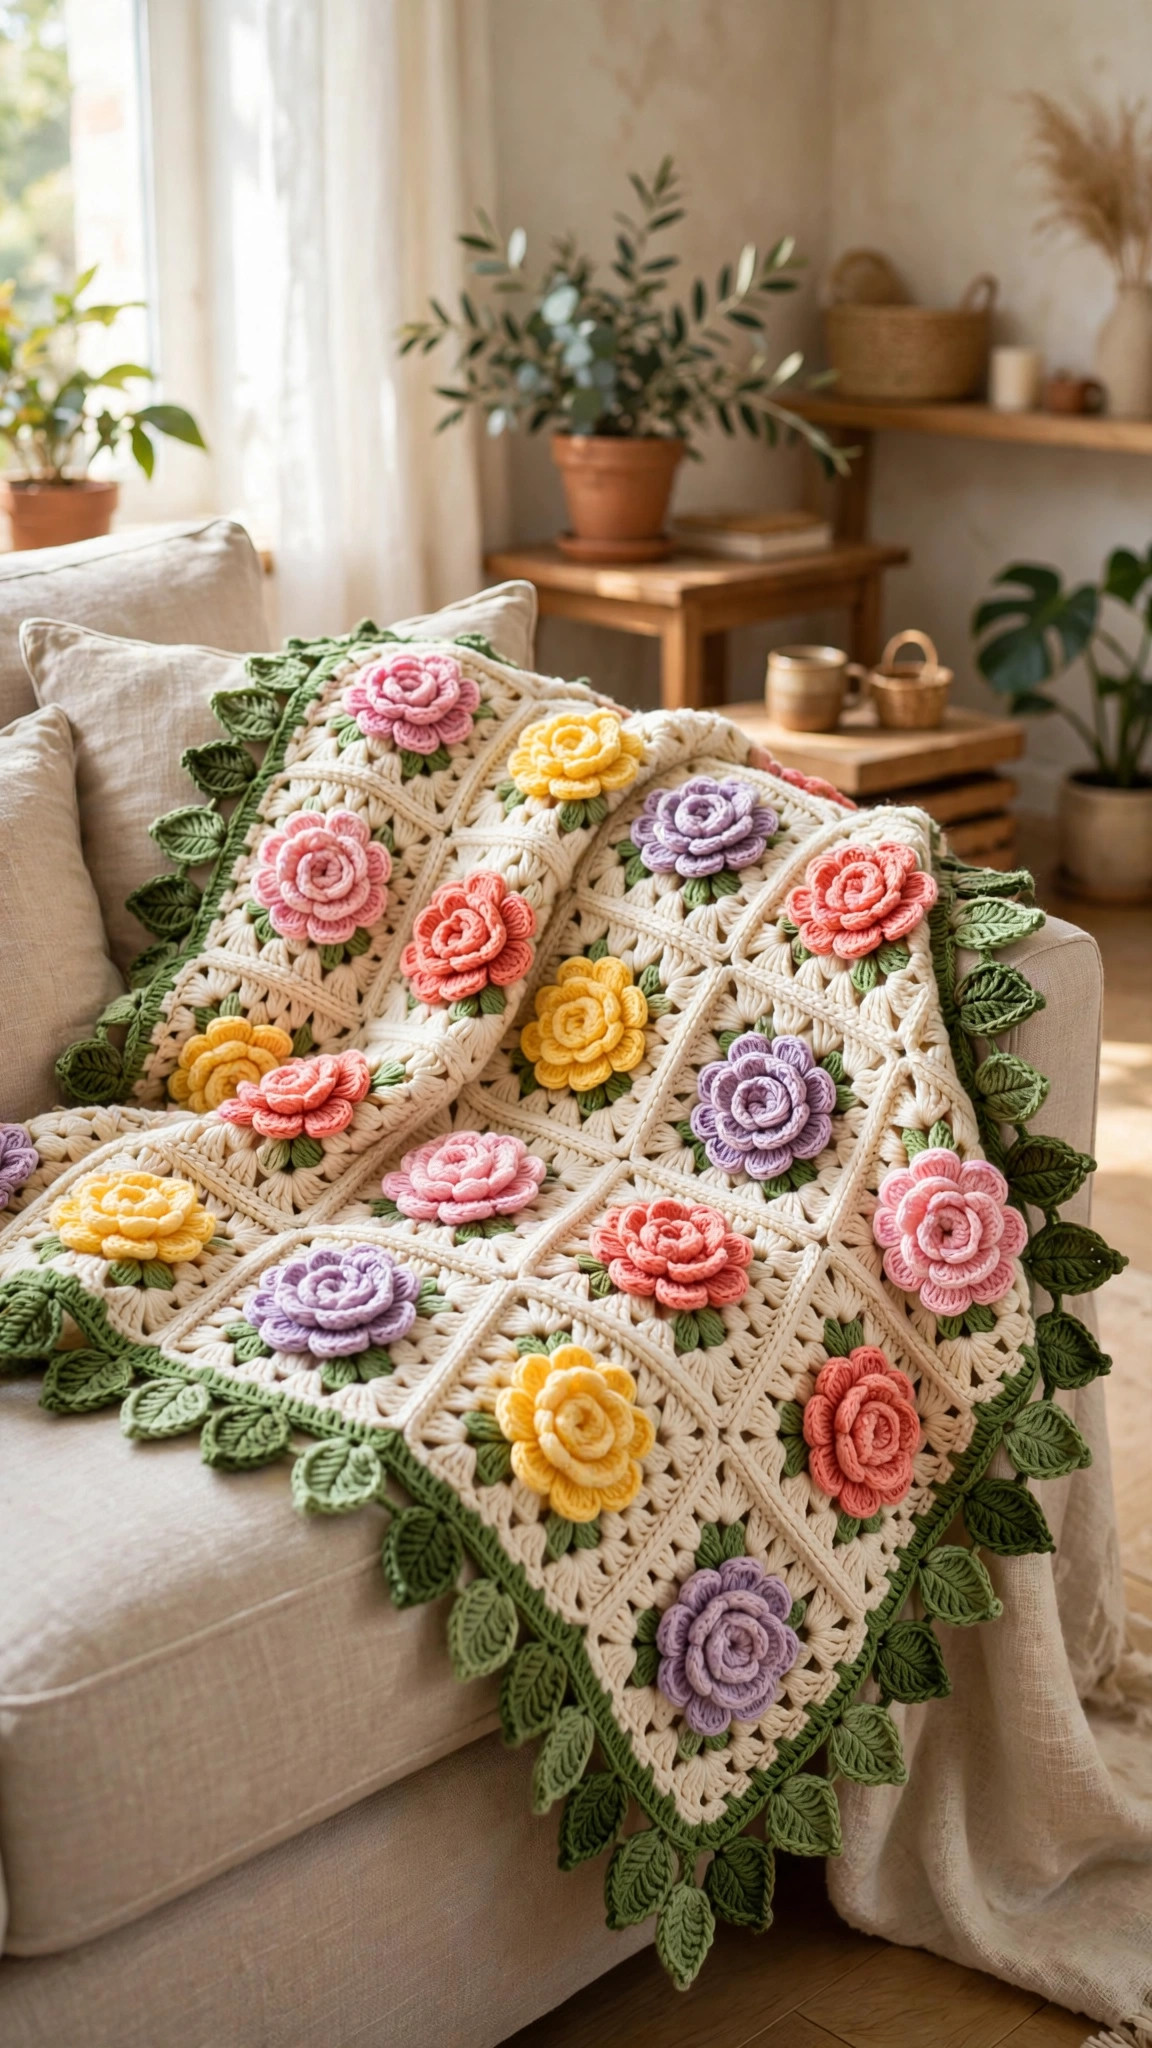
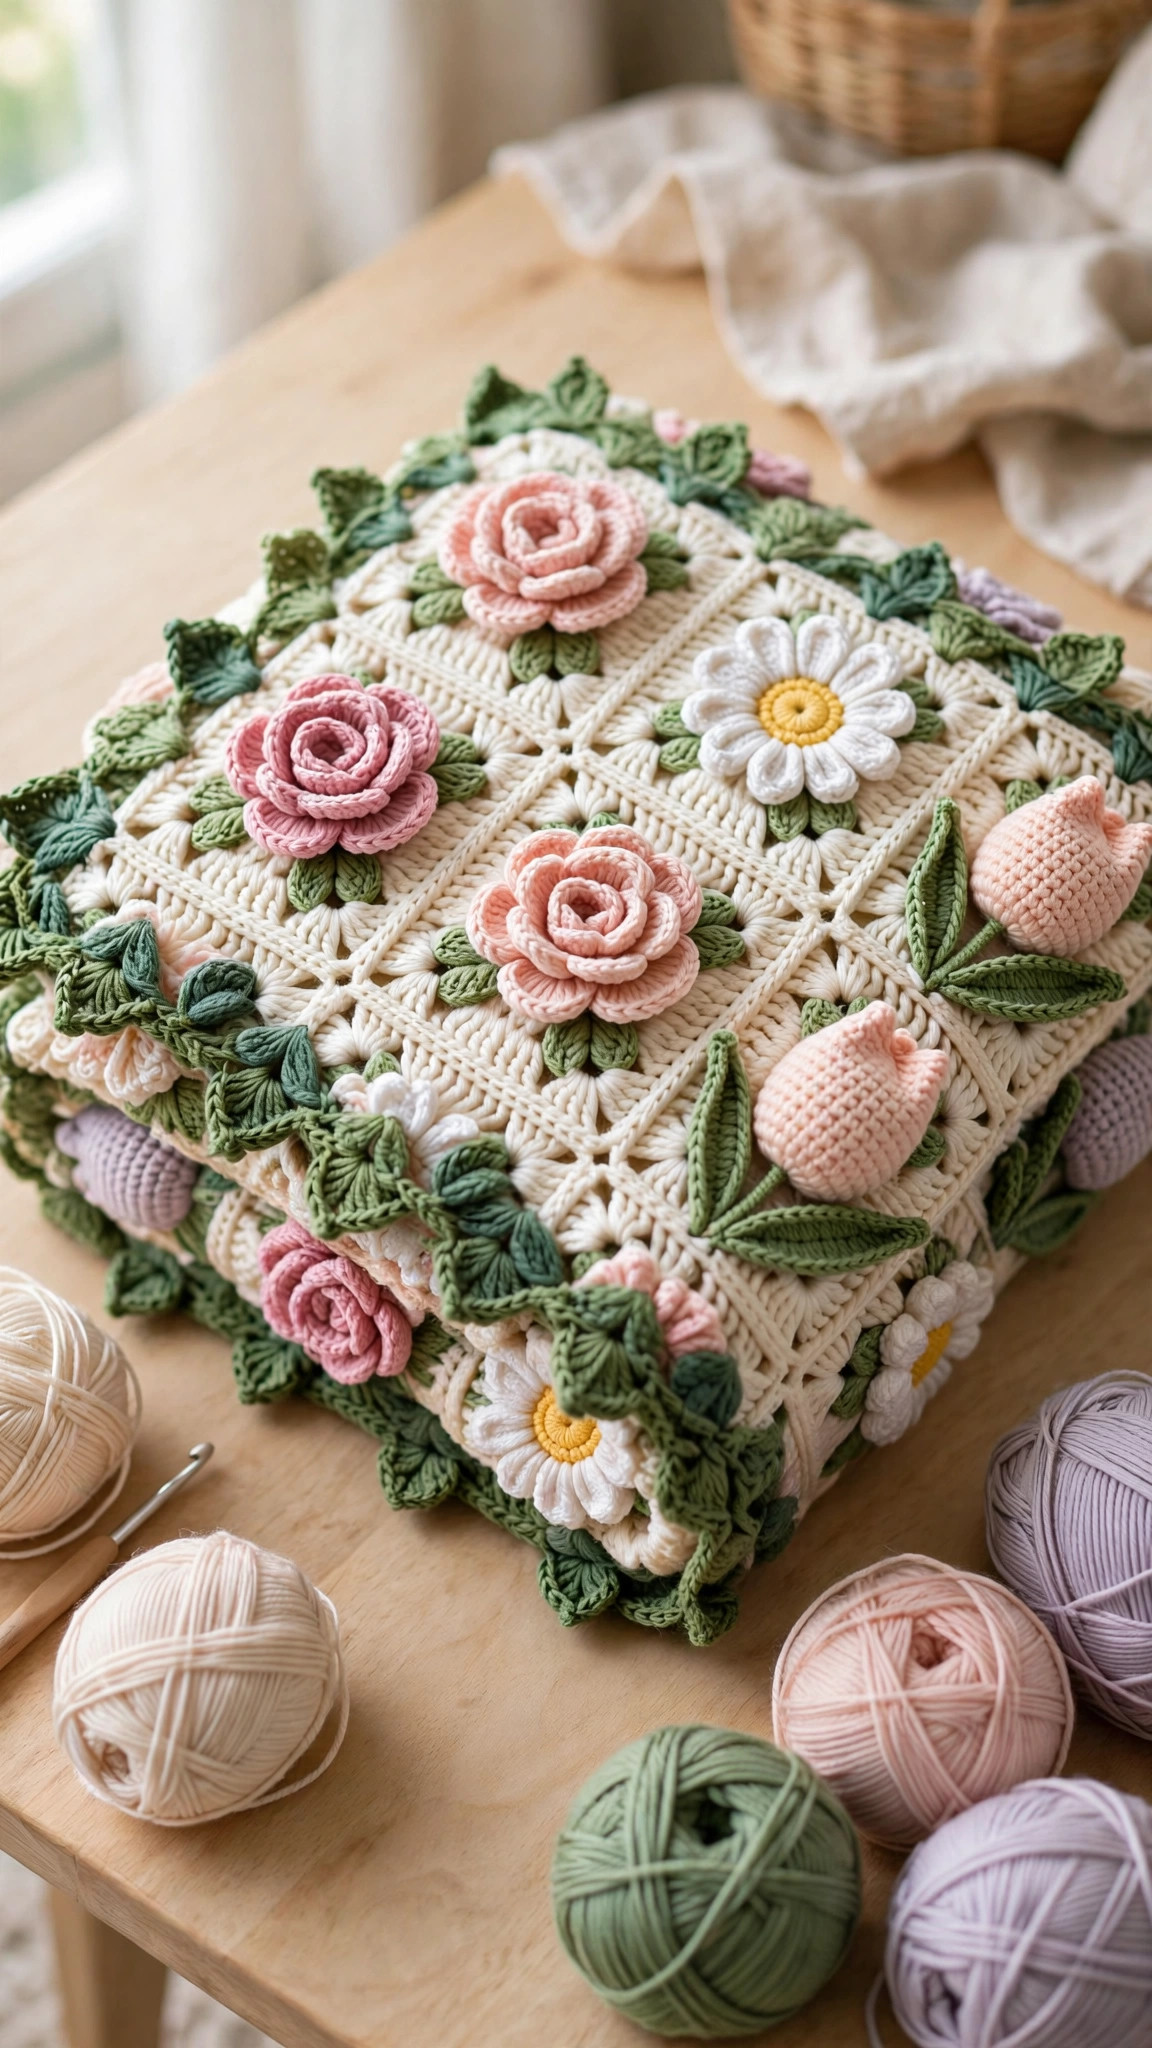
Every square of this throw blooms with a raised 3D rose, daisy or tulip on soft cream, and a leafy green border gathers all 48 squares into one big crochet bouquet. One simple square, three easy flowers, endless colour combinations.

Blankets · Crochet
- Finished size
- 38 x 50 in (97 x 127 cm)
- Making time
- 18–24 hours
- Hook
- 5.5 mm (US I-9)
- Pieces
- 48 squares
- Skill
- Easy–Intermediate
In this post
Some blankets keep you warm. This one makes people smile the moment they walk into the room. The flower bouquet blanket crochet pattern turns a simple cream granny square into a little garden: every square holds one raised, three-dimensional flower — a swirled rose, a sunny daisy or a plump little tulip — and when all forty-eight squares are joined and framed with a leafy green border, the whole throw reads as one big gathered bouquet, ready to drape over a sofa, fold at the foot of a bed, or wrap around someone you love.
It looks far more complicated than it is. There is only one square to learn, and the three flowers all sit on the same small green calyx disc, so after two or three squares your hands will know the rhythm by heart.
Contents
- Why you'll love this blanket
- Materials you'll need
- Size, gauge and skill level
- Abbreviations — US terms
- The pattern (US terms)
- The green calyx disc - Flower 1: the swirled rose - Flower 2: the sunny daisy - Flower 3: the plump tulip - Squaring off the flower - How many squares, and how to arrange them
- Finishing: joining, weaving in and the leafy border
- Tips for a bouquet that really pops
- FAQ
- What to crochet next
Why you'll love this blanket
First, the texture. The flowers are genuinely raised — the roses are rolled and stitched so they sit up off the square, the daisy petals curl slightly, and the tulips are plump little cups. Run your hand across the finished throw and it feels like running it over a flower bed. It is the kind of blanket guests pick up and turn over in their hands.
Second, the colour play is entirely yours. The pattern uses classic bouquet colours — blush pink, coral, butter yellow, lavender and cream-white — but the cream background and green border hold almost any palette together. Go pastel for a nursery, jewel tones for a bold throw, or one colour throughout for a calm, modern look. Each flower uses so little yarn that odd part-balls from your stash become roses.
Third, it is wonderfully giftable. A bouquet that never wilts suits Mother's Day, a housewarming, a get-well gift or a baby shower. And because the work is broken into forty-eight small squares, it never feels overwhelming — you are always one evening away from another finished flower.
If you enjoy motif blankets, you might also like browsing our easy crochet patterns for blankets for more cosy, square-by-square projects.
Materials you'll need
| Supply | What to get |
|---|---|
| Yarn — cream (main colour) | Approx. 1,400 yd (1,280 m) worsted/aran weight (category 4) acrylic or acrylic-wool blend |
| Yarn — leaf green | Approx. 350 yd (320 m) worsted weight, for calyx discs and border |
| Yarn — flower colours | Approx. 600 yd (550 m) total across blush pink, coral, butter yellow, lavender and white |
| Yarn — daisy centres | Small amount of golden yellow |
| Hook | 5.5 mm (US I-9) |
| Yarn needle | Large-eye, blunt tip, for sewing flowers and joining |
| Scissors | Sharp pair for trimming ends |
| Stitch markers | 4, to mark corners on your first few squares |
| Blocking mats and pins (optional) | Helpful for squaring up finished motifs |
A washable acrylic or acrylic blend is the practical choice here: the blanket will be used, loved and washed, and the raised flowers hold their shape beautifully in acrylic. If you prefer natural fibres, a wool-acrylic blend gives lovely stitch definition without being precious about washing.
Size, gauge and skill level
Finished size: approximately 38 x 50 inches (97 x 127 cm) including the border — a generous lap throw or sofa blanket.
Square size: each finished square measures about 6 x 6 inches (15 x 15 cm) before joining. The blanket is built from 48 squares arranged 6 across by 8 rows.
Gauge: one finished square = 6 inches (15 cm) square with a 5.5 mm hook. Gauge is not critical for a blanket, but try to keep your squares consistent with each other — if one flower square comes out much bigger or smaller than the rest, the joins will pucker. A quick block of each square keeps everything honest.
Skill level: easy to intermediate (confident beginner friendly). You should be comfortable with chains, single crochet, half double crochet, double crochet, slip stitches, working in rounds and simple sewing with a yarn needle. Every flower is explained round by round below, and the square itself never changes, so the learning curve is all in the first evening.
Abbreviations — US terms
| Abbreviation | Meaning |
|---|---|
| ch | chain |
| sl st | slip stitch |
| sc | single crochet |
| hdc | half double crochet |
| dc | double crochet |
| st(s) | stitch(es) |
| rep | repeat |
| MR | magic ring (adjustable ring) |
| [ ] | work instructions inside brackets into the same stitch or space |
The pattern (US terms)
Work in this order for every square: make the flower, make the green calyx disc, sew the flower to the centre of the disc, then work the four cream squaring-off rounds around the disc. The disc and the squaring rounds are identical for all three flowers — only the flower on top changes.
The green calyx disc
Make one per square, in leaf green.
Rnd 1: MR, ch 2 (does not count as a st), 12 dc into ring, pull tail to close, sl st to first dc. (12 dc)
Fasten off, leaving a 6 inch tail. This little green disc is the "greenery" each flower sits on, and it peeks out around the flower base once the square is finished, which is exactly what sells the bouquet effect.
Flower 1: the swirled rose
Make 16, in blush pink, coral and lavender.
Row 1: Ch 26, sc in 2nd ch from hook and in each ch across. Turn. (25 sc)
Row 2: Ch 1, sc in first st, [2 sc in next st, sc in next st] rep across to end. Turn. (37 sc) The extra stitches make the strip ruffle and curl — that curl is what becomes the petals.
Row 3: Ch 3 (counts as first dc), dc in same st, 2 dc in each st across. Fasten off, leaving a long 12 inch tail for sewing. (74 dc)
To form the rose, lay the strip flat with Row 1 at the bottom. Starting at one short end, roll the strip up around itself, fairly tightly for the first two turns (the centre bud), then a little looser as you go so the outer edge flares like opening petals. Pinch the flat base, thread your needle with the long tail, and stitch through all layers at the base several times in a cross pattern until the rose holds its shape firmly. The finished rose should measure about 1¾ inches (4.5 cm) across. Sew it to the centre of a green calyx disc with a few firm stitches through the disc.
Flower 2: the sunny daisy
Make 16, with golden yellow centres and white or butter-yellow petals.
Rnd 1 (centre): With golden yellow, MR, ch 1, 8 sc into ring, pull tail to close, sl st to first sc. Fasten off. (8 sc)
Rnd 2 (petals): Join petal colour with a sl st in any sc of Rnd 1. [Ch 3, 2 dc in same st, ch 3, sl st in same st, sl st in next st] — this makes one petal. Rep the bracketed petal 7 more times, working the final sl st into the base of the first petal. Fasten off. (8 petals)
Give each petal a gentle pinch at the tip to encourage a soft point. Sew the daisy flat onto the centre of a green calyx disc, stitching through the yellow centre so the petals stay free and slightly lifted at the edges.
Flower 3: the plump tulip
Make 16, in coral, blush pink and lavender.
Rnd 1: MR, ch 2 (does not count as a st), 12 dc into ring, pull tail to close, sl st to first dc. (12 dc)
Rnd 2: Ch 1, [sc in next 3 sts, ch 3, sl st in first ch of the ch-3 (a pointed petal tip)] rep 3 more times. Fasten off, leaving a tail for sewing. (12 sc, 4 petal tips)
The four pointed tips are the tulip's petal points. Cup the motif gently in your palm so it curves, then sew it to the centre of a green calyx disc, stitching around the base of Rnd 1 so the cup shape stays plump rather than being flattened.
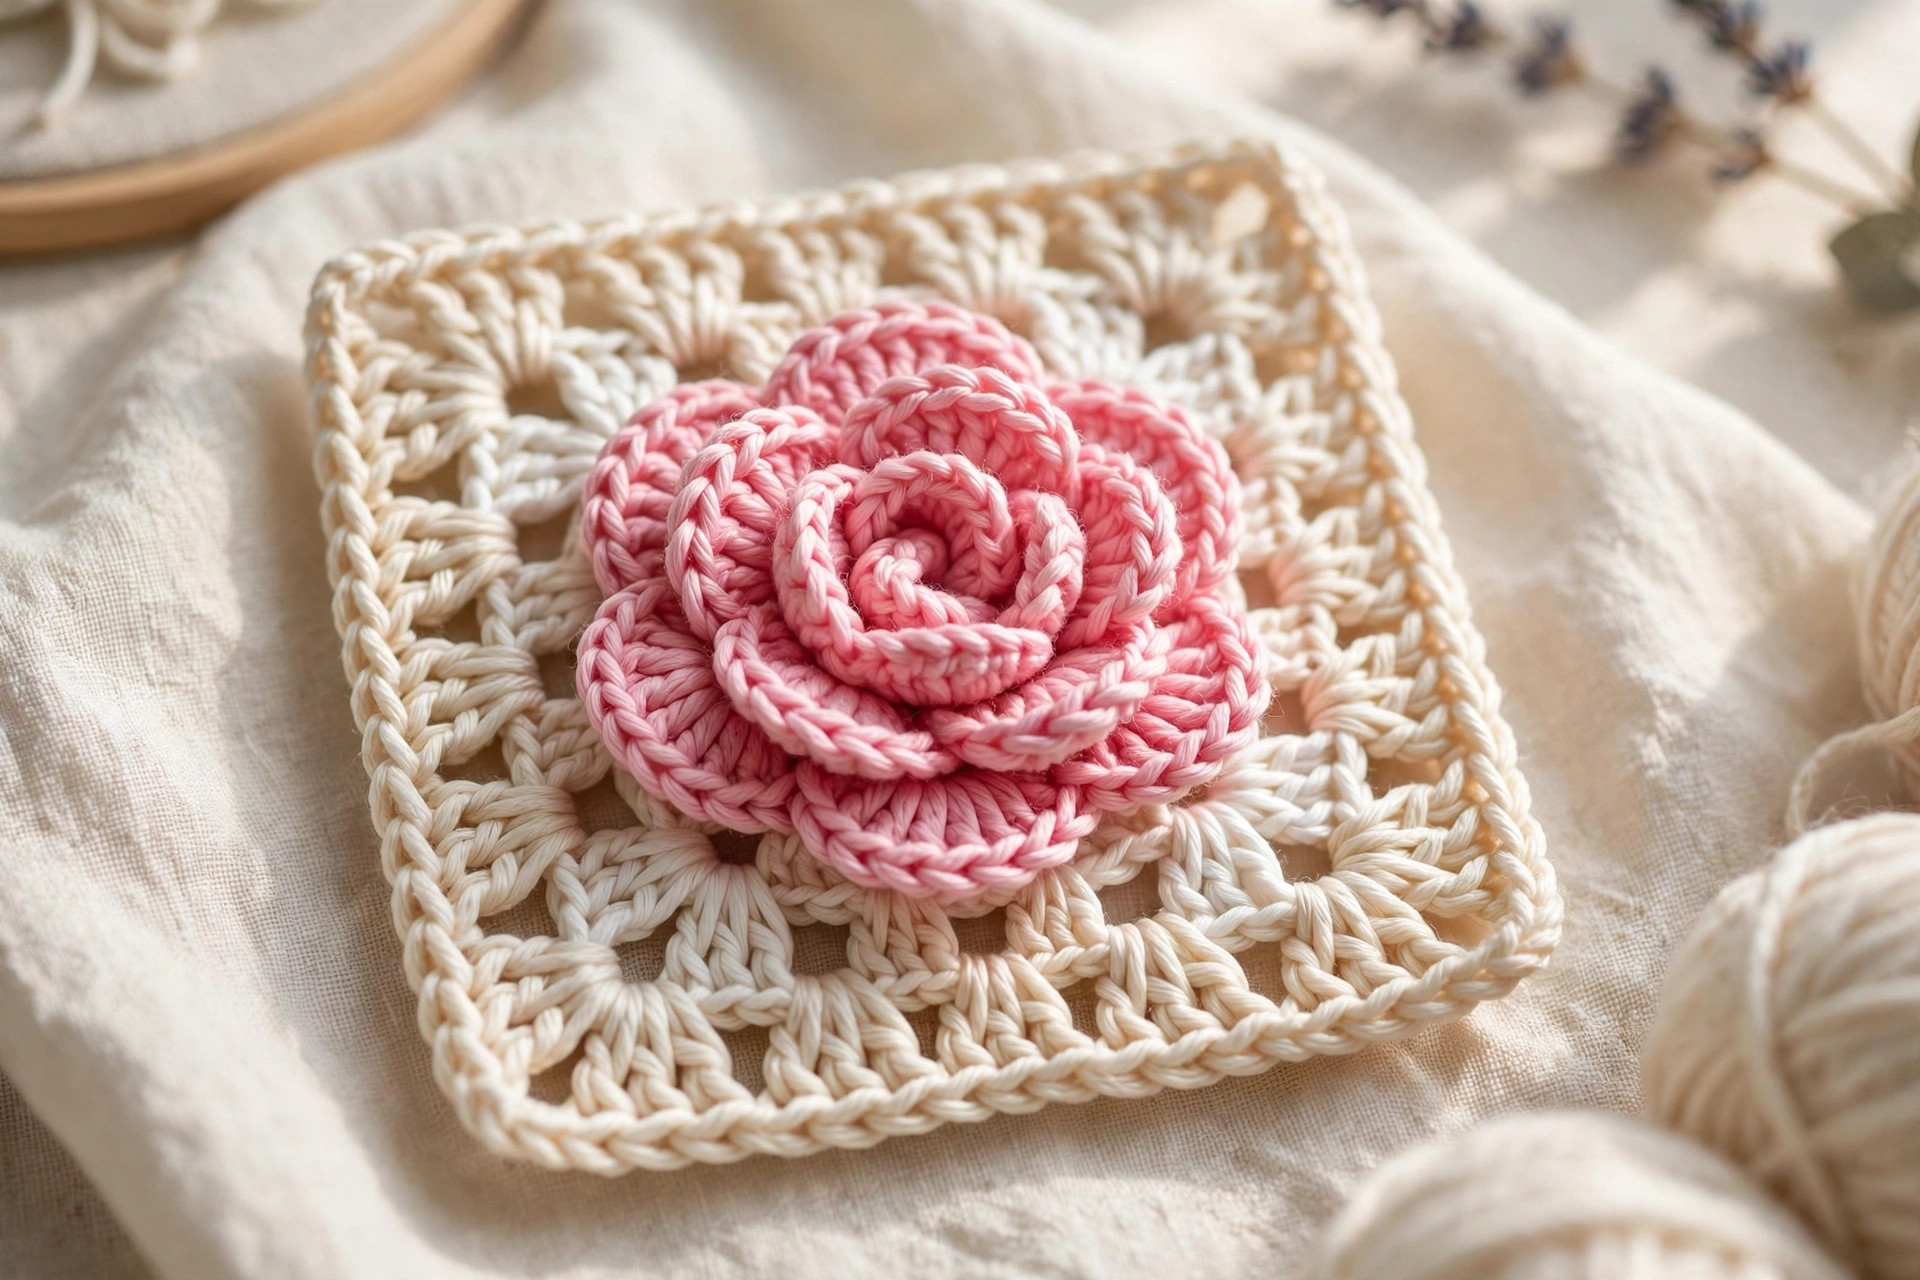
Squaring off the flower
Work these four rounds in cream around every flower-topped disc. The disc's 12 dc are your starting stitches.
Rnd 1: Join cream with a sl st in any dc of the disc. Ch 3 (counts as dc), dc in same st, dc in next 2 sts, [2 dc in next st, dc in next 2 sts] rep 3 more times, sl st to top of ch-3. (16 dc)
Rnd 2: Ch 3 (counts as dc), dc in next 2 sts, [2 dc, ch 2, 2 dc] in next st (corner made), [dc in next 3 sts, [2 dc, ch 2, 2 dc] in next st] rep 2 more times, dc in each of the last 3 sts, sl st to top of ch-3. You have worked all four sides: 3 side dc and one corner on each. (28 dc, 4 ch-2 corner spaces)
Rnd 3: Ch 3 (counts as dc), dc in each dc across to the corner space, [2 dc, ch 2, 2 dc] in the ch-2 space; rep around, working dc in every dc along each side (7 dc per side between corners), sl st to top of ch-3. (44 dc, 4 ch-2 corner spaces)
Rnd 4: Work as Rnd 3: dc in every dc (11 dc per side between corners), [2 dc, ch 2, 2 dc] in each ch-2 corner space, sl st to top of ch-3. Fasten off. (60 dc, 4 ch-2 corner spaces)
Your square should now measure about 6 inches (15 cm) across. Weave in the cream end, and give the square a quick steam or a pin-out on a blocking mat if the corners curl — the flower in the middle makes these squares want to cup slightly, and a minute of blocking flattens them beautifully.
How many squares, and how to arrange them
Make 48 squares in total: 16 rose squares, 16 daisy squares and 16 tulip squares. Lay them out 6 across by 8 rows before you join anything. The arrangement that reads most like a real bouquet is a loose checkerboard: no two squares of the same flower touching side by side, and colours scattered rather than grouped, so pinks, corals, yellows and lavenders are sprinkled evenly across the whole throw. Take a photo of your layout before joining — it is the easiest way to spot a clump of one colour you did not notice from above.
If you love the idea of flower motifs beyond blankets, the companion crochet flower pattern shows more ways to use small blooms, and the flower coaster crochet pattern turns a single flower square idea into a quick one-evening make.
Finishing
Joining the squares
With cream yarn and your yarn needle, join the squares using whipstitch through the back loops only. Working in rows: align the first two squares of row 1 with right sides facing out, match the stitches corner to corner, and whipstitch along the edge, catching the back loop of each stitch on both squares. Continue adding squares until the row is joined, then join the rows to each other in the same way, making sure the four-way intersections line up neatly. Back-loop whipstitch gives a flat, flexible seam with a subtle ridge on the back — perfect for a blanket that will be folded and draped a lot.
Alternatively, if you prefer crocheting your joins, a slip-stitch join through the back loops gives a slightly firmer finish. Either way, join in rows first, then join the long row seams.
The leafy green border
The border is what pulls the whole design together into a "bouquet" — think of it as the greenery and wrapping around your flowers.
Rnd 1 (cream): Join cream with a sl st in any corner space. Work sc evenly around the whole blanket, working into each stitch and each join, and [sc, ch 2, sc] in each corner ch-2 space. Sl st to first sc.
Rnd 2 (green): Join leaf green with a sl st in any sc. Ch 3 (counts as dc), dc in each sc around, working [2 dc, ch 2, 2 dc] in each corner ch-2 space. Sl st to top of ch-3.
Rnd 3 (green, leafy edge): Ch 1, sc in next 3 sts, then make a leaf point: [hdc, dc, tr, dc, hdc] all in the next st. Rep around the blanket — sc in next 3 sts, leaf point in next st — adjusting the sc count slightly at the corners so a leaf point sits close to each corner, and working [sc, ch 2, sc] into each corner space. Sl st to first sc. Fasten off.
Weave in all remaining ends, taking each back and forth in two directions so it stays put through washing. A final gentle block — pin out to 38 x 50 inches and steam lightly, or lay flat overnight — settles the border and lets the flowers sit proudly on top.
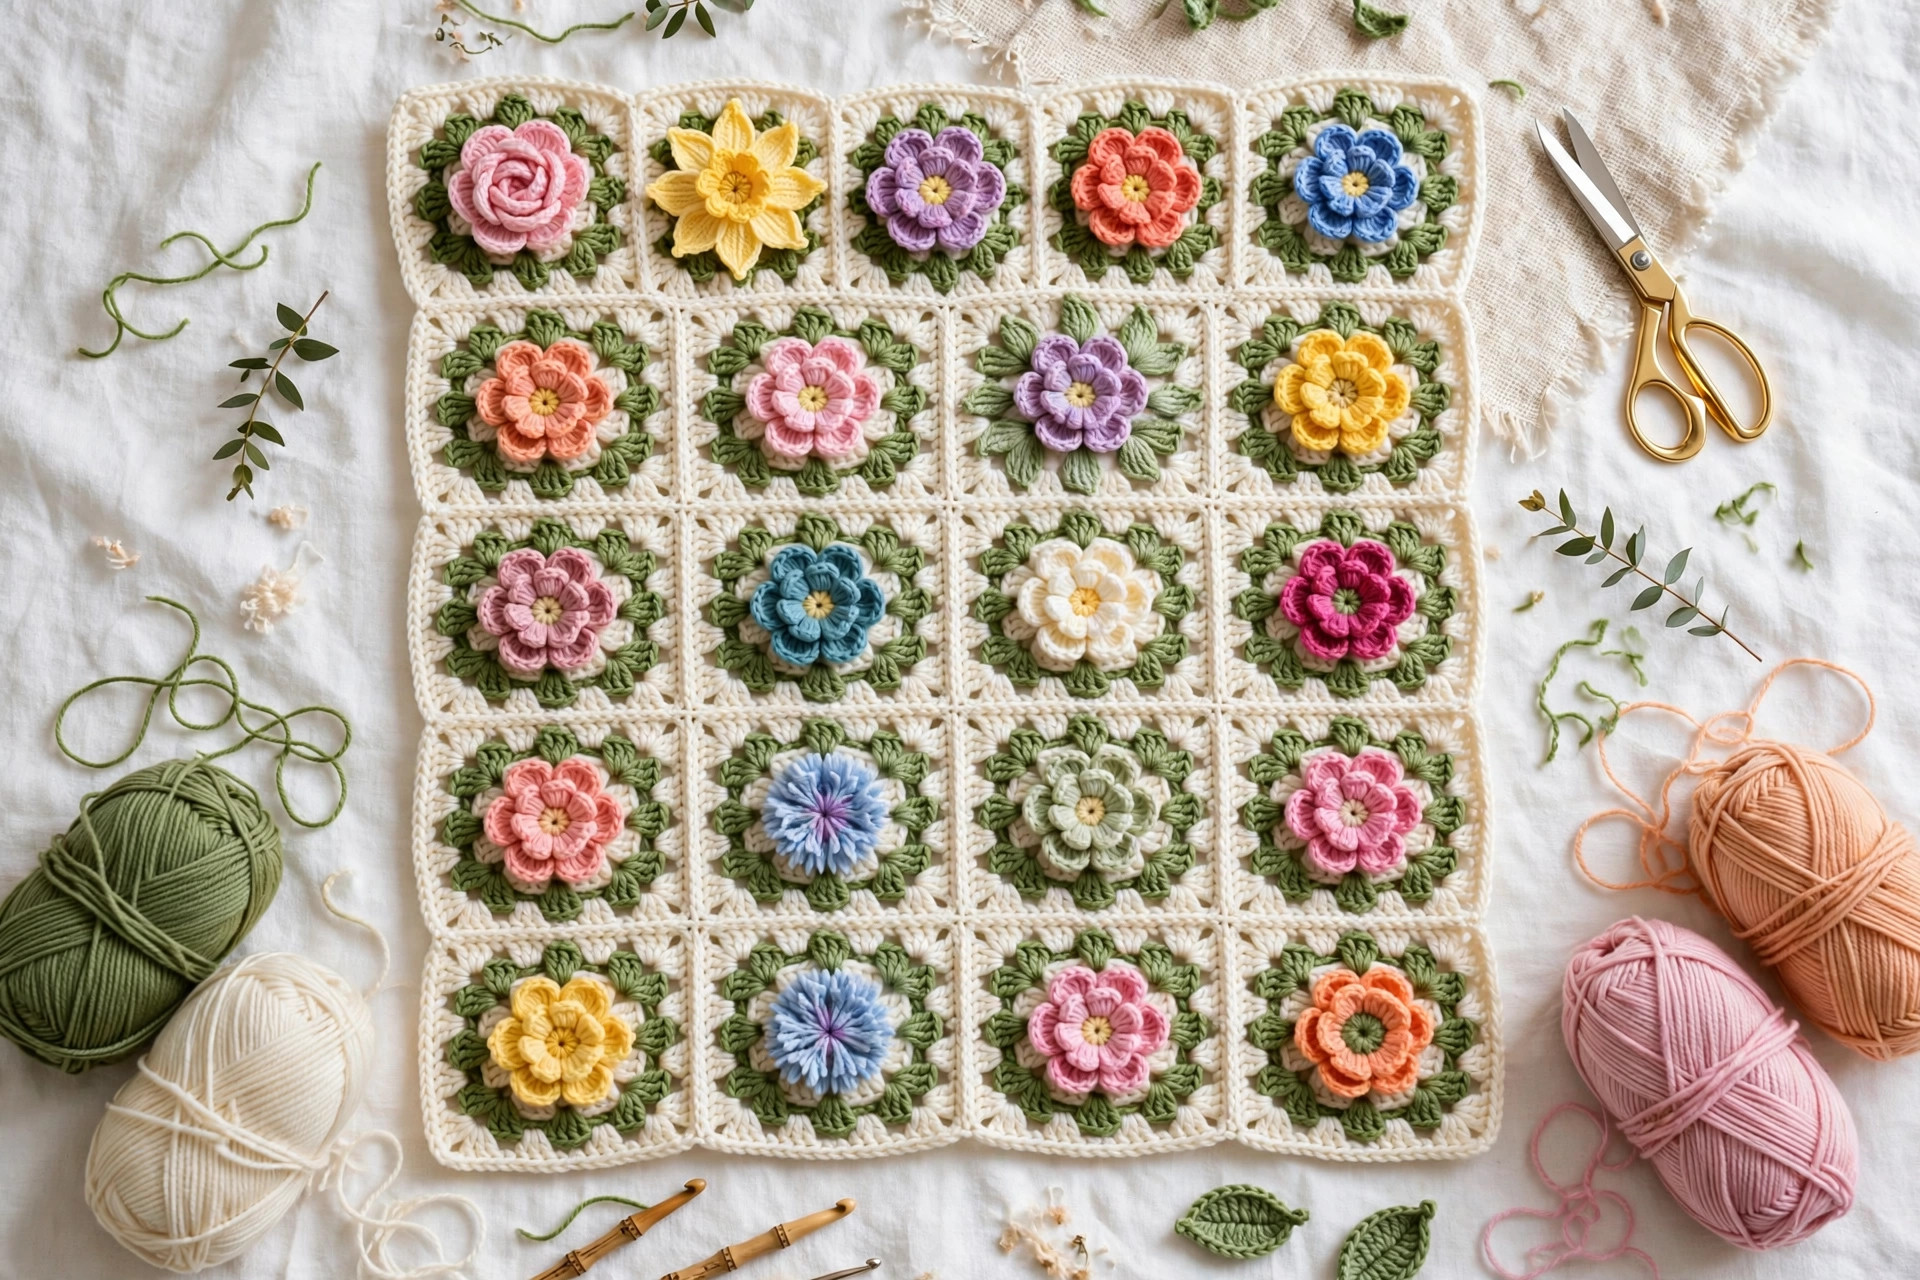
Tips for a bouquet that really pops
Sew the flowers on firmly. The roses especially get handled — little fingers will find them. Stitch through the base in a cross pattern and tug-test each one before squaring off; a rose that wobbles now will work loose later.
Keep your cream consistent. Buy all the cream yarn at the start and check dye lots — a mismatched square in the middle of the blanket will catch your eye forever.
Block the squares, not just the blanket. Ten minutes pinning each batch of squares to 6 inches makes joining faster, seams straighter and the finished throw noticeably more polished. It is the least glamorous step and the one that makes the biggest difference.
Mind your tension on the discs. The 12-dc calyx disc should lie flat. If it ruffles, pull the magic ring snug; if it cups, work the first few stitches a touch looser.
Vary the flowers within a colour. A coral tulip and a coral rose read as texture, not repetition — scattering one colour across different flower types gives that gathered-from-the-garden look.
Weave ends as you go. Forty-eight squares means a lot of tails. Weaving in the flower and disc ends before squaring off each square turns the final finishing session from an afternoon of tails into a quick once-over.
FAQ
How long does this blanket take to make? Most crocheters finish in about 18–24 hours of crocheting spread over a few weeks of evenings. Each square takes roughly 20–30 minutes once you know the pattern, and the squares are portable, so odd pockets of time count.
Can a beginner make this blanket? Yes, if you are a confident beginner who knows the basic stitches listed above. Learn one flower first — the daisy is the easiest — then make a single full square. If that square makes you smile, you have every skill the whole blanket needs.
What yarn works best for the raised flowers? A smooth worsted-weight acrylic or acrylic blend shows the 3D detail best and keeps the flowers springy after washing. Very fuzzy or splitty yarns hide the petal definition, so save those for the cream background if you love them.
Can I make the blanket bigger or smaller? Absolutely — that is the joy of squares. Each square adds about 6 inches. For a baby blanket, try 20 squares (4 x 5). For a double-bed throw, work 100 squares (10 x 10) and budget roughly double the cream yarn. Keep the flower counts in thirds so the mix stays balanced.
How do I wash the finished blanket? Machine wash on a gentle cycle in cool water and dry flat or tumble on low, following your yarn label. The flowers may flatten slightly in the wash; a few minutes of gentle steam and a quick fluff of each rose with your fingers brings the bouquet back to life.
My squares are cupping around the flower — what went wrong? That is normal and fixable. Either block each square flat before joining, or add a few extra stitches in Rnd 1 of the squaring rounds by working 2 dc into every third stitch twice more. A snug magic ring on the calyx disc also helps the whole square sit flatter.
Can I join the squares as I go instead? Yes — on the final cream round, replace the corner ch-2 with ch 1, slip stitch into the neighbouring square's corner space, ch 1, and slip stitch into the joining square's side stitches as you work along shared edges. It takes a little planning of the layout, but it eliminates the sewing-up stage entirely.
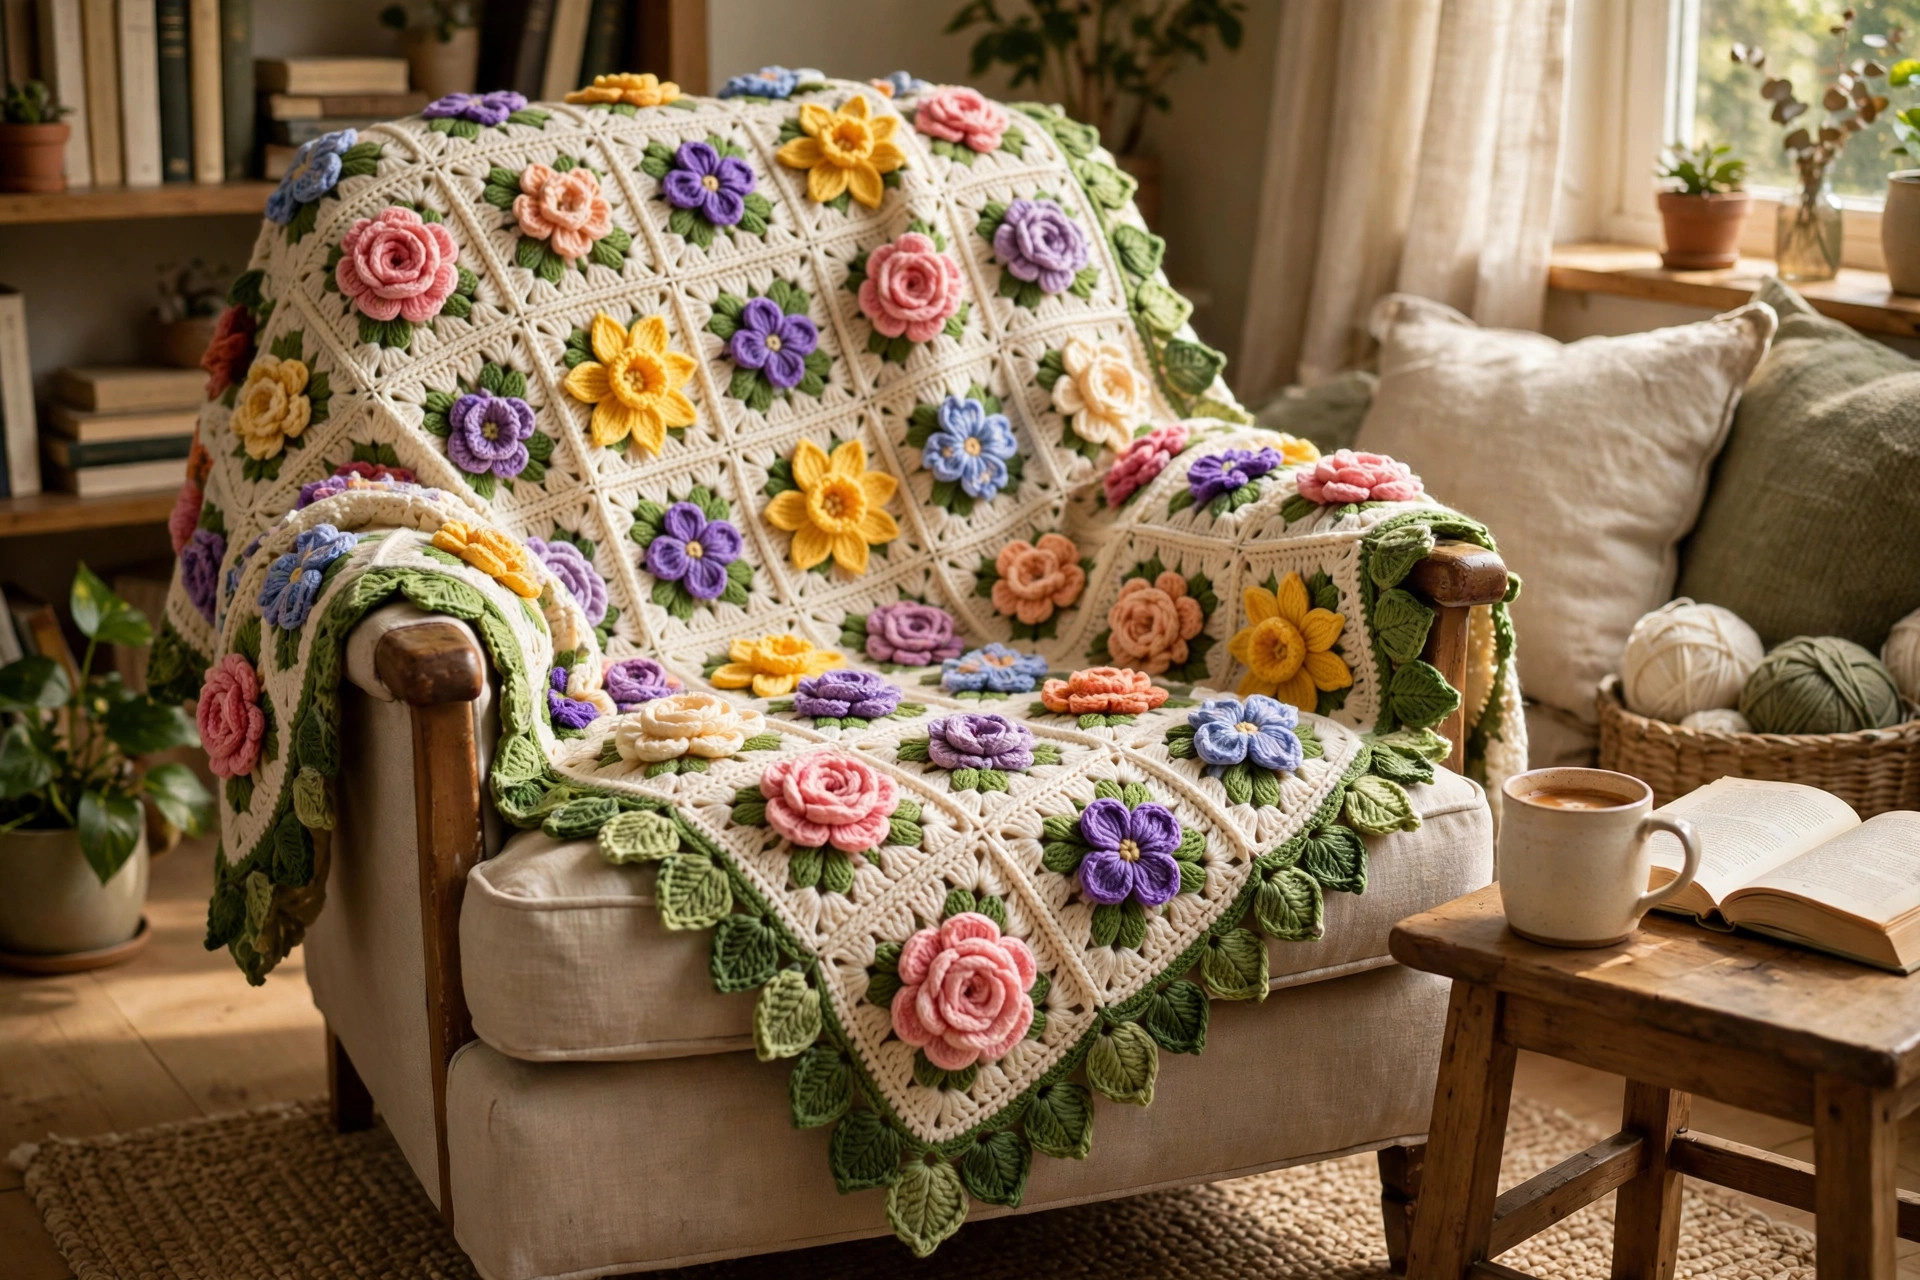
Curl up with your finished bouquet and expect the question: "Wait, are those flowers on the blanket?" Yes — and you put every single one there.
The box below contains an Etsy link. If you buy through it, we may earn a small commission at no extra cost to you. Learn more.
No time to make one?
Shop yarn and kits for a flower bouquet blanket on Etsy
Browse on Etsy (opens Etsy in a new tab)