Free crochet flower pattern: daisy, rose & blossom motifs
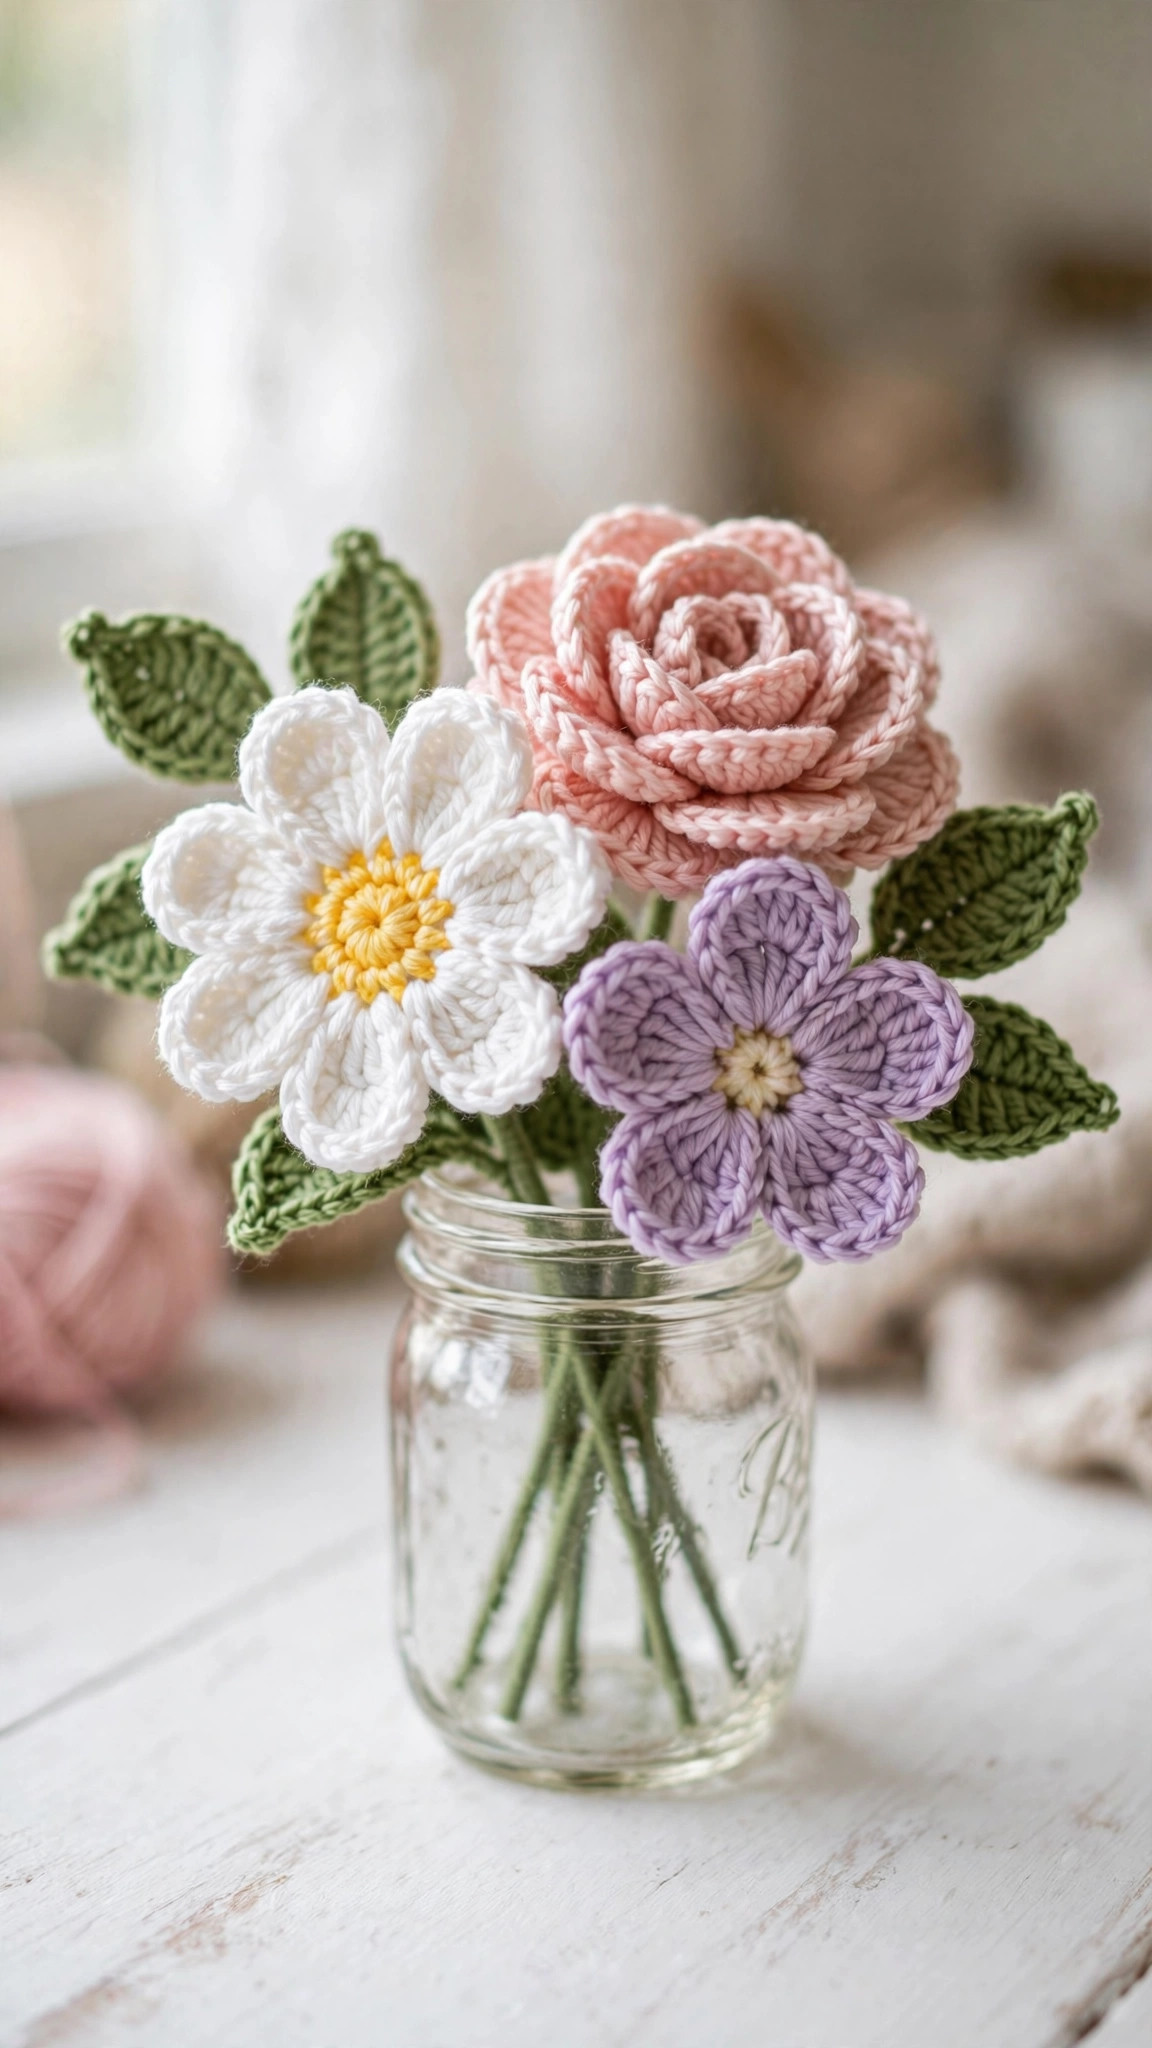
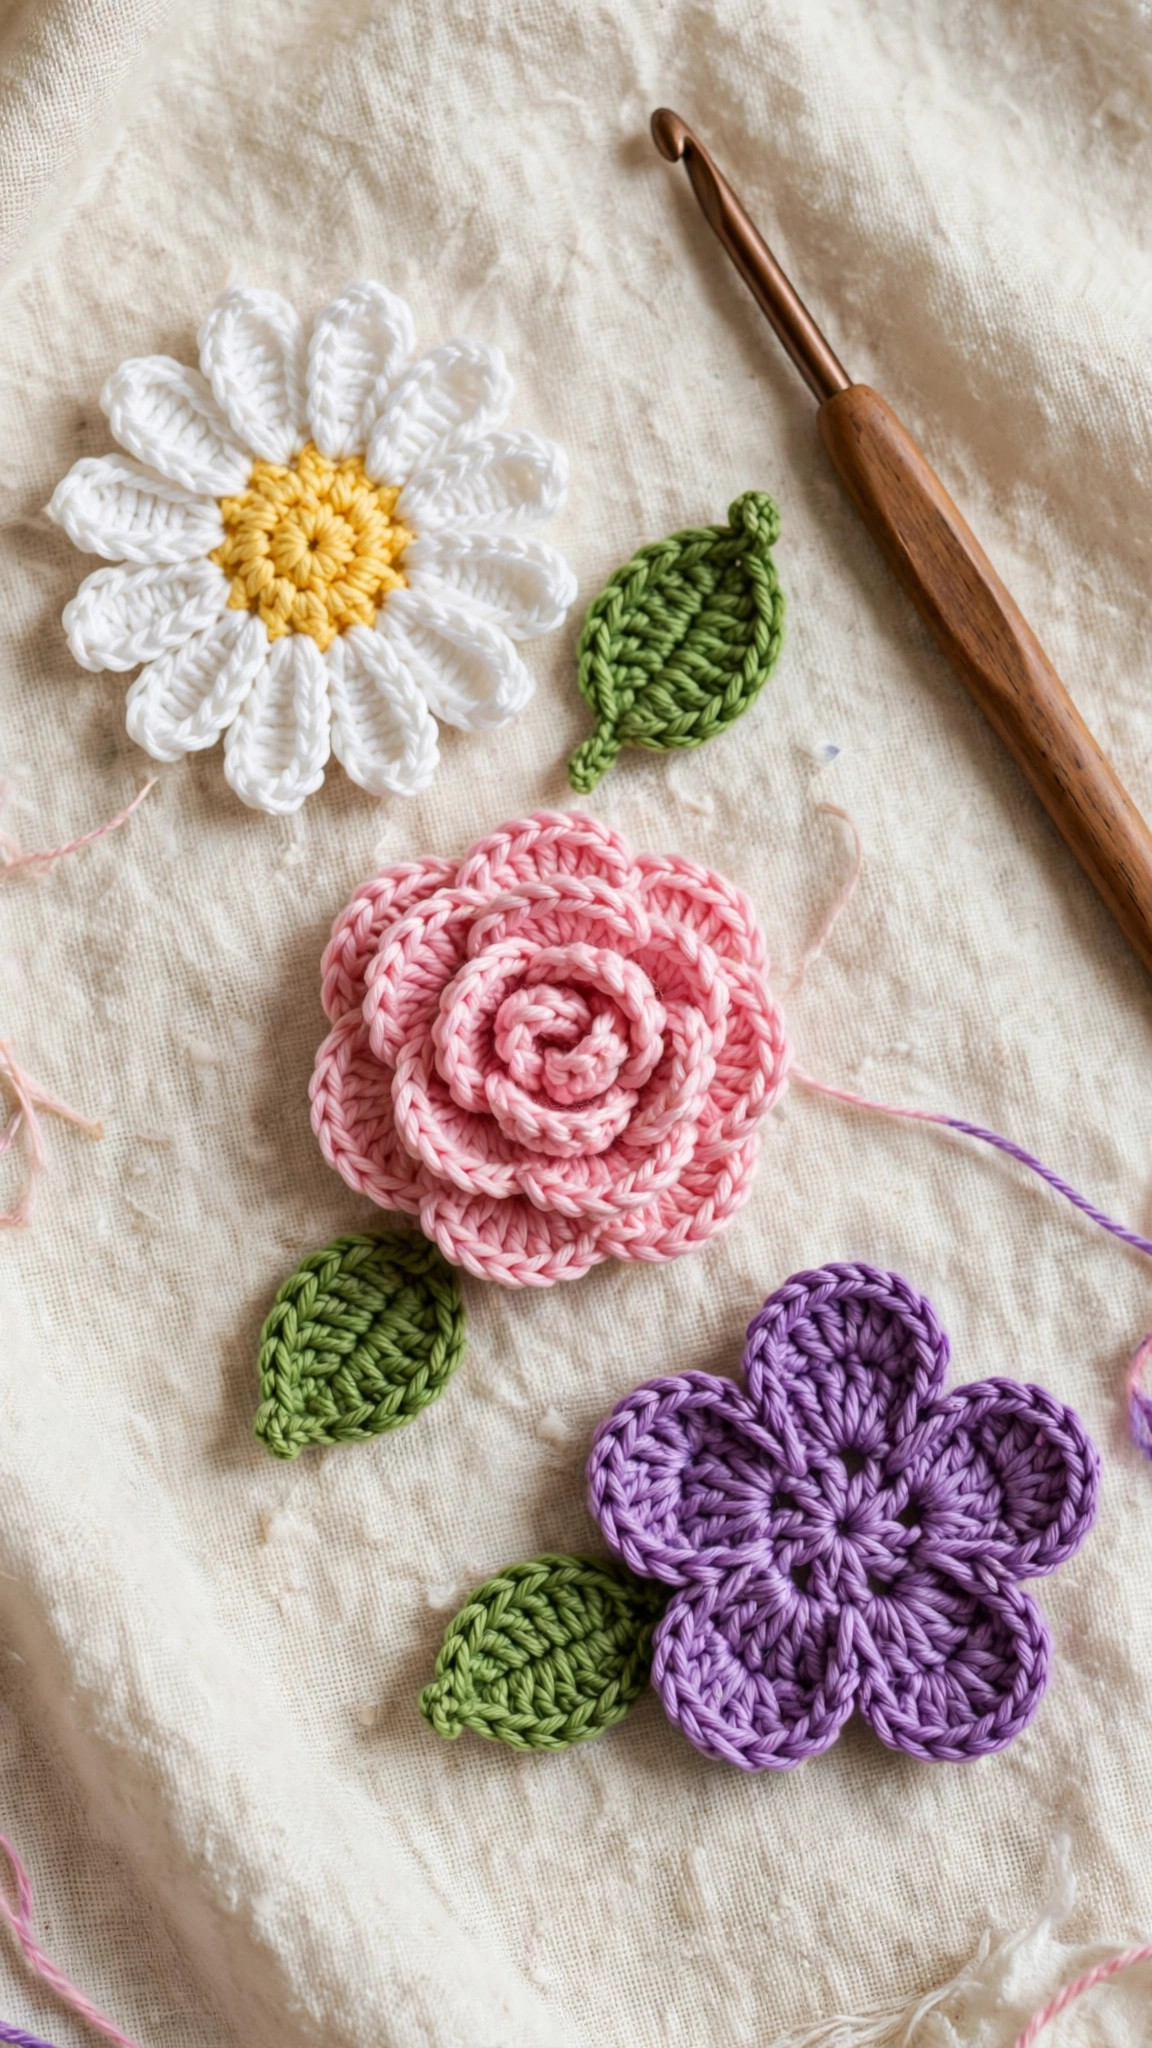
Three original beginner-friendly flower motifs — a cheerful 6-petal daisy, a romantic layered rose and a speedy 5-petal blossom — plus a leaf and stem, all in plain US terms with verified stitch counts.

Motifs · Crochet
- Finished size
- About 6–8 cm / 2.5–3 in across
- Making time
- 15–40 min per flower
- Hook
- 4.0 mm, DK-weight yarn
- Motifs
- 3 original designs + leaf & stem
- Skill
- Beginner
In this post
- Why you'll love this free crochet flower pattern
- Materials you'll need
- Size, gauge and skill level
- Abbreviations — US terms
- Flower 1: the 6-petal daisy
- Flower 2: the layered rose
- Flower 3: the simple 5-petal blossom
- Leaves and stems
- Five ways to use your crochet flowers
- Three color palettes to try next
- Troubleshooting tips
- Frequently asked questions
- More free patterns to try
Few things are as satisfying as a crochet flower. Real flowers wilt in a week; these stay perfect forever, cost almost nothing in yarn, and each one takes less time than an episode of your favorite show. This free crochet flower pattern gives you three original motifs — a cheerful 6-petal daisy, a romantic layered rose, and a simple 5-petal blossom — all written in plain US terms with stitch counts you can trust.
They're endlessly useful too. Sew them onto hats and headbands, scatter them across a blanket, string them into a garland, or wire them into a bouquet that never needs watering. If you love floral crochet, our flower coaster pattern is the natural next project once you've mastered these motifs.
Why you'll love this free crochet flower pattern
Most free flower patterns online have the same problem: vague stitch counts, lopsided petals, or a "rose" that's just a ruffled strip with no shaping logic. These three motifs were designed from scratch with verified stitch math, so the petals space themselves evenly every time and every round's count is exact.
They're also genuinely quick. The blossom is a true one-sitting project — under 20 minutes once you've made one. The daisy's petal round looks fancy but is a single repeated sequence, and the rose uses the classic roll-up technique: crochet one strip, spiral it into a flower, no petal-by-petal assembly.
Best of all, they're stash-busters. Each flower uses under 10 grams of yarn, so those half-skeins of pretty colors you've been hoarding finally have a job.
Materials you'll need
| Supply | What to get |
|---|---|
| Yarn | DK/light-worsted (#3) cotton or acrylic in your chosen colors, under 10 g per flower |
| Green yarn | DK green for leaves and stems, a small scrap |
| Crochet hook | 4.0 mm (G-6) |
| Notions | Tapestry needle, scissors, stitch markers (optional) |
| Optional | Floral wire + floral tape (for bouquet stems), small buttons or beads (for centers) |
A note on yarn choice: cotton gives the crispest stitch definition and holds petal shape beautifully — it's the best pick if your flowers will be photographed or gifted. Acrylic is softer and cheaper, fine for practice and kids' crafts. If you only have worsted-weight (#4) yarn, just drop to a 4.5 mm hook and your flowers will come out slightly larger and chunkier — the stitch math still works.
Size, gauge and skill level
- Finished size: daisy about 8 cm (3 in) across; rose about 6 cm (2.5 in) across; blossom about 6 cm (2.5 in) across. Leaves about 5 cm (2 in) long.
- Gauge: not critical — flowers are forgiving. Aim for a firm, even fabric with no gaps. If your petals look holey, go down half a hook size.
- Skill level: adventurous beginner. You should know the chain, slip stitch, single crochet, half double crochet, double crochet, and treble crochet. The rose adds nothing new — just rolling and sewing.
Abbreviations — US terms
| Abbreviation | Meaning |
|---|---|
| ch | chain |
| sl st | slip stitch |
| sc | single crochet |
| hdc | half double crochet |
| dc | double crochet |
| tr | treble crochet |
| st(s) | stitch(es) |
| MR | magic ring |
| BLO | back loop only |
| FO | fasten off |
All three patterns below use these same abbreviations. Stitch counts in parentheses are checked at the end of each round — count as you go and your petals will space themselves perfectly.
Flower 1: the 6-petal daisy
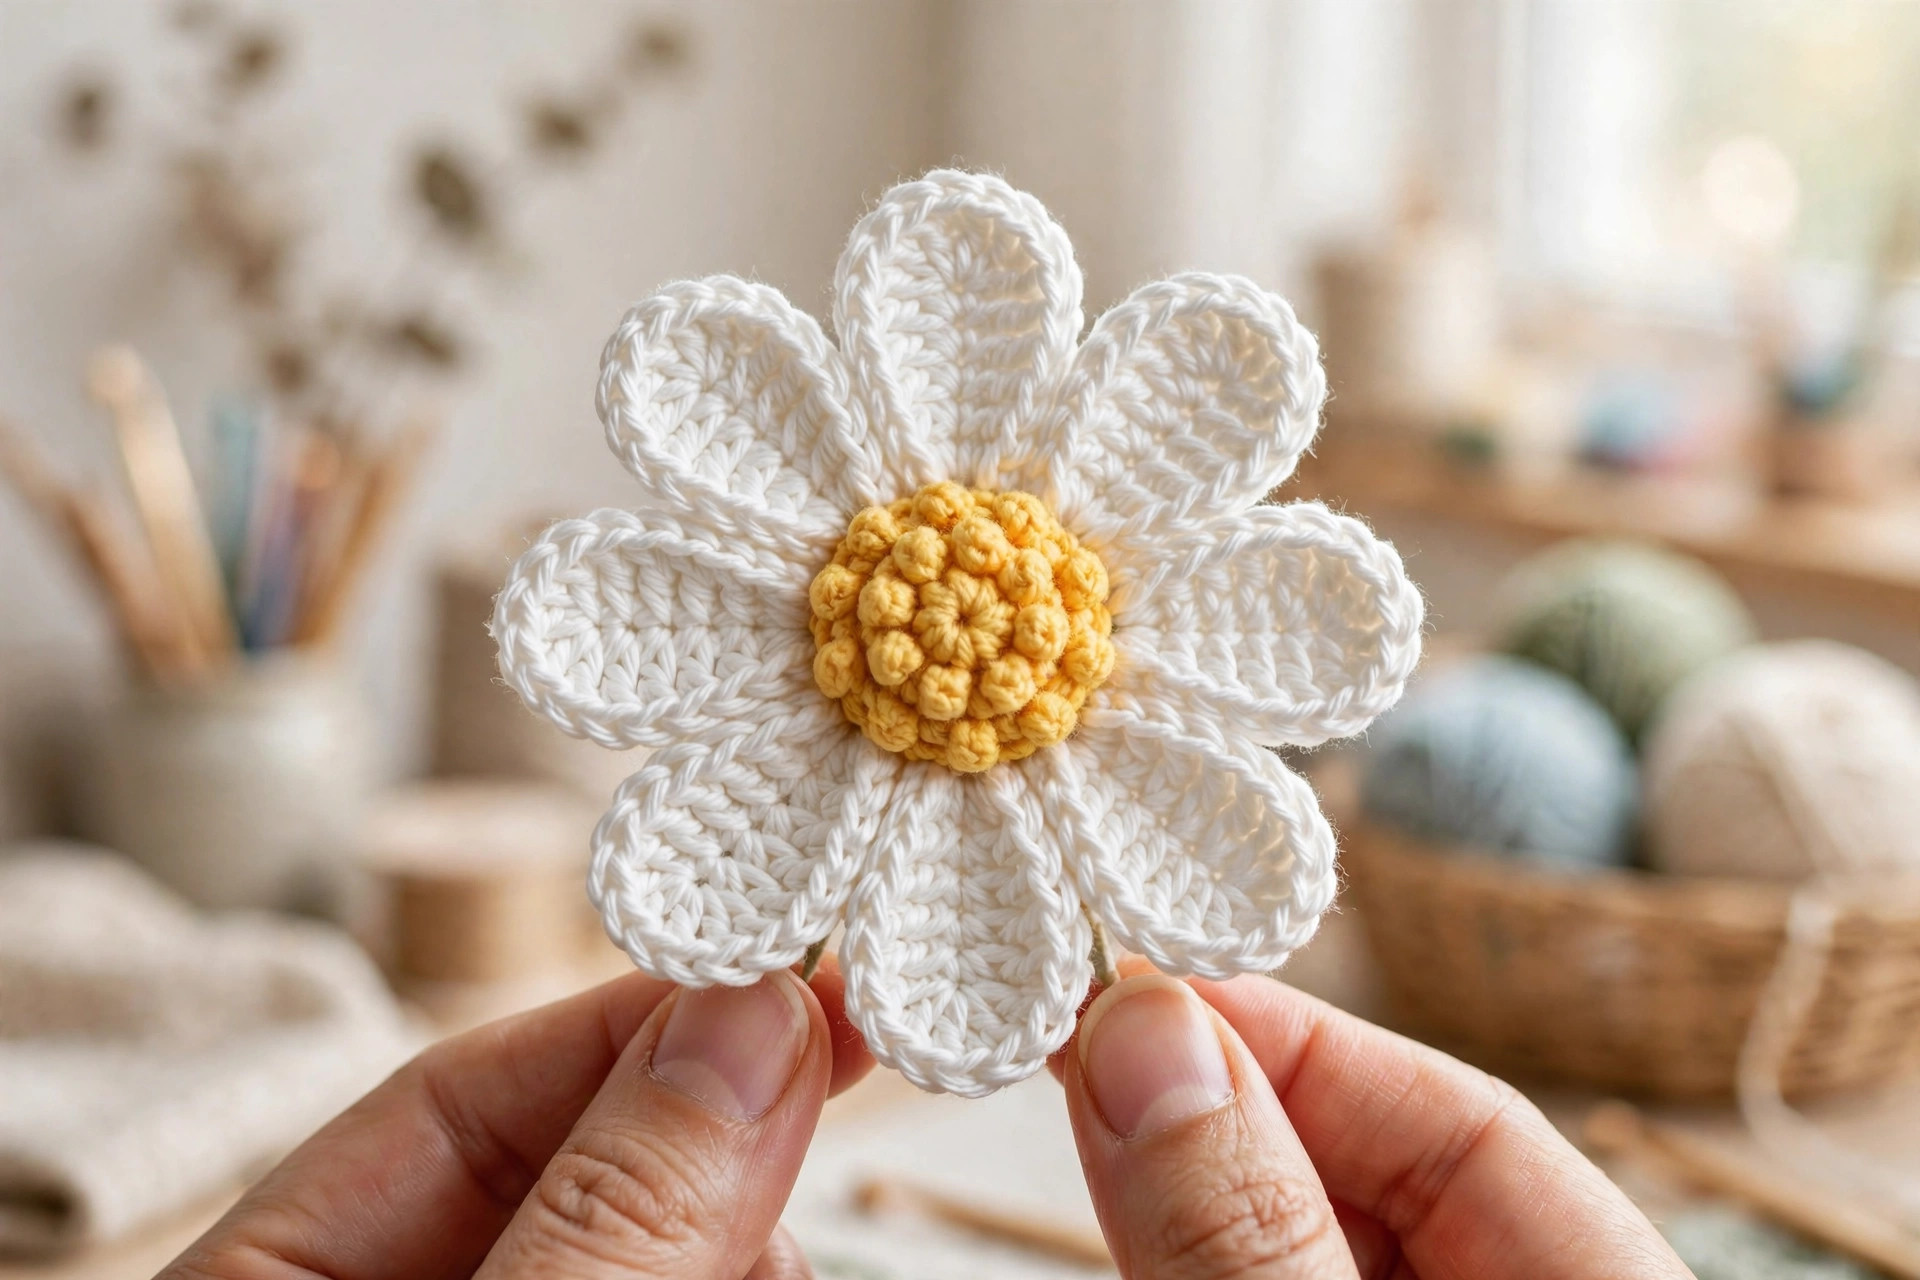
The classic. A puffy yellow center ringed with six crisp white petals — instantly recognizable, endlessly cheerful, and the fastest way to use up white yarn scraps. This is the flower to make first: the petal round teaches you the anchor-and-skip rhythm that makes all petal motifs click.
Materials
- Yellow DK yarn (center), about 5 g
- White DK yarn (petals), about 8 g
- 4.0 mm hook, tapestry needle, scissors
Size & gauge
- Finished daisy: about 8 cm (3 in) across, 1.5 cm (0.6 in) tall at the center.
- Gauge is not critical; keep stitches firm so the center stays puffy.
Abbreviations
Same US-terms table as above. New in this motif: none — if you can sc, dc, and ch, you're set.
The pattern
Center — yellow
- R1: MR, 6 sc (6)
- R2: inc in each st — 2 sc in every stitch (12)
- R3: [sc, inc] × 6 (18)
- R4: sc in each st around (18)
- R5: [sc, dec] × 6 (12) — this pulls the edge in and makes the center puff up
- R6: dec × 6 (6). FO, thread the tail through the front loops of the remaining stitches, pull tight, and weave in.
You now have a small domed disc about 2.5 cm across. The widest round (R3, 18 sts) is where the petals attach.
Petals — white
Join white yarn with a sl st to any stitch of the center's R3 (the 18-stitch round).
- Petal round: [skip 2 sts, (sc, ch 2, 3 dc, ch 2, sc) all in the next st] × 6.
That's it — one round. Each petal consumes 3 stitches of the center (2 skipped + 1 anchored), and 18 ÷ 3 = 6 petals, so they land perfectly evenly with no counting gymnastics. FO, leaving a 15 cm tail to sew the daisy onto projects, and weave in the starting tail.
The stitch logic, demystified: working (sc, ch 2, 3 dc, ch 2, sc) into a single stitch fans the stitches outward into a rounded petal — the sc at each end anchors the edges down while the 3 dc in the middle push the petal outward. The ch-2s on each side give the petal its gentle point-to-round shaping.
Finishing
Weave in both tails on the back of the flower. If the center dome looks flat, pinch it gently from behind to re-round it. For a fuller daisy, work a second, smaller petal round — (sc, ch 2, 2 dc, ch 2, sc) — into the skipped stitches of the first petal round, offset so the new petals sit between the first six.
Tips
- Petals curling under? Your tension is too tight on the petal round. Consciously loosen up, or go up to a 4.5 mm hook for the petals only.
- Center won't stay domed? You probably skipped R5's decrease round or worked it too loosely. The [sc, dec] round is what creates the puff — don't skip it.
- Want a colored daisy? Swap white for any petal color and yellow for a contrasting center. Pink petals with an orange center read as cosmos; all-white with a yellow center is the classic daisy.
Flower 2: the layered rose
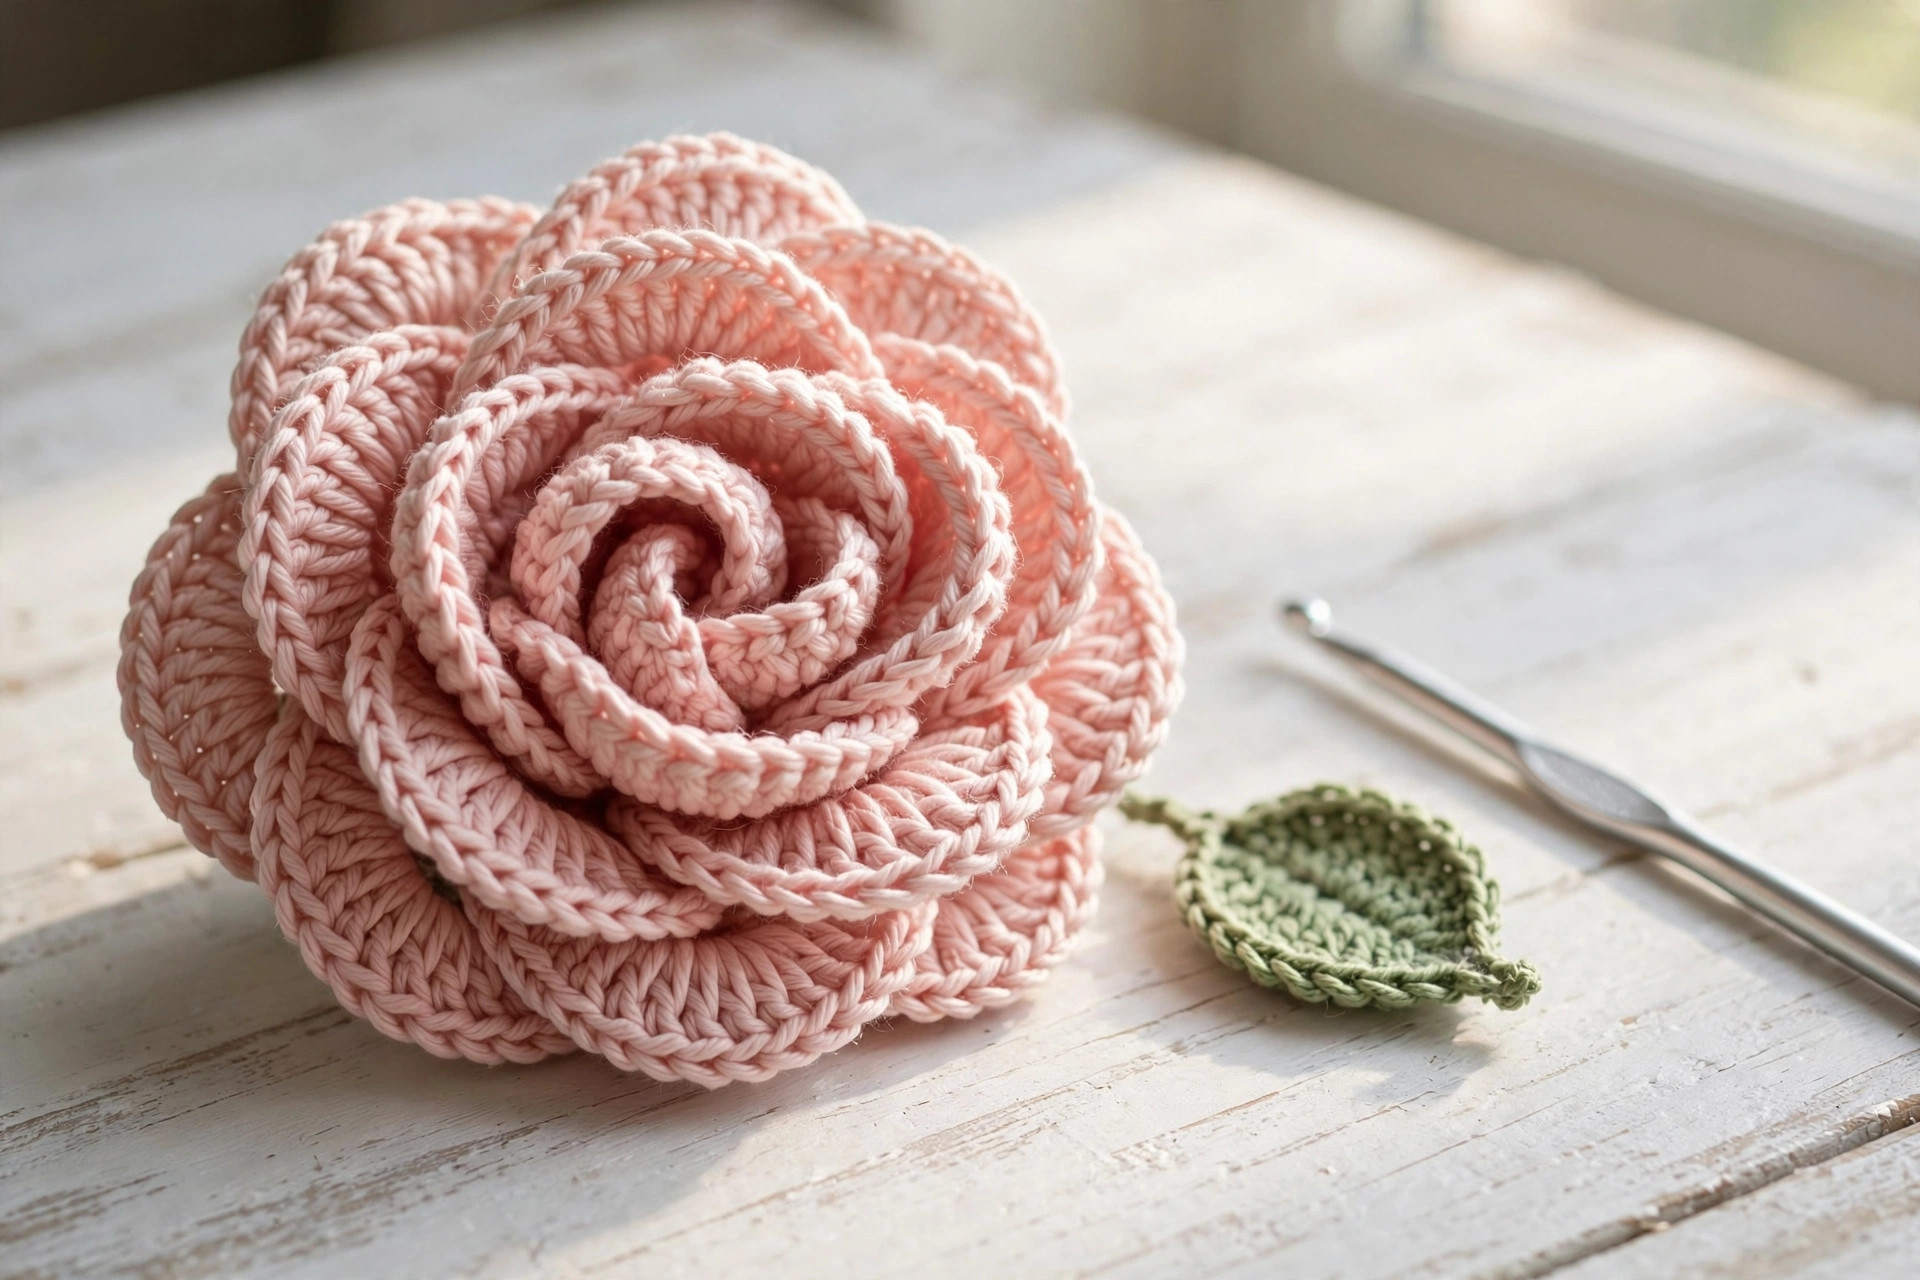
The showpiece. You crochet a single ruffled strip, then roll it into a spiral and sew the base — the layers fall into a convincing rose with zero petal-by-petal assembly. It looks far harder than it is, which makes it the perfect gift flower.
Materials
- Rose-colored DK yarn (blush pink, red, or cream), about 10 g
- Green DK yarn for the leaf (pattern below), a small scrap
- 4.0 mm hook, tapestry needle, scissors
Size & gauge
- Finished rose: about 6 cm (2.5 in) across, 3 cm (1.2 in) tall.
- The strip should ruffle firmly; if it lies flat, your tension is too loose on R2.
Abbreviations
Same US-terms table as above. This motif uses only ch, sc, and dc.
The pattern
The strip — rose color
- Foundation: ch 31.
- R1: dc in the 4th ch from hook and in each ch across (28 dc). The 3 skipped chains count as your first dc.
- R2: ch 3 (counts as dc), turn, 2 dc in each st across (56 dc). This doubling is what creates the ruffle — don't be alarmed when it waves.
- R3: ch 1, turn, [sc in the next st, ch 2, skip 1 st] × 28 (28 scallops). This gives the top edge its petal-like scalloped finish.
- FO, leaving a long tail (about 40 cm / 16 in) for rolling and sewing.
Rolling the rose
- Lay the strip flat with the scalloped edge (R3) at the top and the foundation-chain edge at the bottom.
- Starting at one short end, roll the strip into a tight spiral, keeping the bottom edges aligned. Roll tightly for a bud-like rose, or more loosely — letting each turn sit slightly lower — for an open, blooming rose.
- As you roll, use the long tail and a tapestry needle to sew through all layers at the base every half-turn or so. Four to six whipstitches through the base, catching every layer, is enough — the rose should feel solid, not wobbly.
- When you reach the end, sew the final edge down flat against the base and weave in the tail.
Finishing
Gently open the outer layers with your fingers, fluffing the scalloped edge outward so it reads as petals. If the rose looks more like a cinnamon roll than a flower, you rolled too tightly — unpick the base stitches, re-roll looser, and re-sew. Sew a leaf (pattern below) to the base at a jaunty angle.
Tips
- Strip too short to roll nicely? Chain 41 instead of 31 and work R1 as 38 dc, R2 as 76 dc, R3 as 38 scallops. A longer strip makes a fuller, more open rose.
- Base won't stay sewn? You're probably catching only the outer layer. Push the needle all the way through the roll on each whipstitch — the center of the roll must be anchored.
- Color strategy: variegated yarn does magical things in this pattern — the color shifts land on different layers and look like a real two-tone rose. Pair a rose with a crochet heart for a Valentine's gift that beats real flowers.
Flower 3: the simple 5-petal blossom
The speed demon. A tiny center disc plus one petal round, and you're done in under 20 minutes. Make them in every color for appliqués, garlands, and hair clips — this is the motif you'll batch-produce once the rhythm clicks.
Materials
- Main DK yarn (petal color), about 6 g
- Contrast DK yarn (center color), about 3 g
- 4.0 mm hook, tapestry needle, scissors
- Optional: small button or bead for the center
Size & gauge
- Finished blossom: about 6 cm (2.5 in) across.
- Gauge is not critical; even tension matters more than exact size.
Abbreviations
Same US-terms table as above. This is the only motif that uses the treble crochet (tr) — one yarn-over more than a dc, and the pattern tells you exactly where.
The pattern
Center — contrast color
- R1: MR, 5 sc (5)
- R2: inc in each st (10). FO, weave in the tail.
Petals — main color
Join the main color with a sl st to any stitch of the center's R2 (the 10-stitch round).
- Petal round: [sl st in the next st, (ch 2, dc, tr, dc, ch 2, sl st) in the next st] × 5.
Each petal uses 2 center stitches (one for the anchoring sl st, one for the petal itself), and 10 ÷ 2 = 5 petals — perfectly even, no partial petals, no fudging. FO, leaving a 15 cm tail for sewing, and weave in the starting tail.
Why the tr in the middle? The petal sequence (ch 2, dc, tr, dc, ch 2) builds height toward the middle of the petal — the treble is the tallest stitch, so each petal peaks gently in the center and tapers at the edges. That's what gives the blossom its rounded, natural petal shape instead of a flat star.
Finishing
Weave in tails on the back. Sew a small button or bead to the center for extra charm, or embroider a French knot in a third color. For hair clips or brooches, sew the blossom to a clip or pin back with the long tail.
Tips
- Only getting 4 or 6 petals? Count your center's R2 — it must be exactly 10 stitches. If you have 12, you'll get 6 petals; 8 gives 4. The magic number is 10.
- Petals look pointy instead of round? You're pulling the ch-2s too tight. Let them relax — they form the soft curves at the petal's base and tip.
- Batch tip: make all your centers first (assembly-line style), then do all the petal rounds. You'll be shocked how fast a dozen blossoms pile up. They look adorable scattered across a floral doily table setting or sewn in a row onto a headband.
Leaves and stems
No flower is complete without greenery. This simple leaf works for all three motifs, and the chain stem turns any flower into bouquet material.
Leaf — green, make as many as you like
- Foundation: ch 9.
- Row 1: sc in the 2nd ch from the hook, hdc in the next ch, dc in the next 3 chs, hdc in the next ch, sc in the next ch, 3 sc in the last ch (this rounds the tip); now working back down the other side of the foundation chain: sc in the next ch, hdc in the next ch, dc in the next 3 chs, hdc in the next ch, sc in the next ch, sl st to the first sc. FO, leaving a tail for sewing.
The 3-sc tip turn is what gives the leaf its pointed-but-rounded shape. Make the central vein pop by embroidering one straight stitch down the middle in a darker green.
Simple stem — green
- Ch 26, sl st in the 2nd ch from the hook and in each ch across (25 sl st). FO.
- Sew the flower head to one end and a leaf to the middle of the stem. For a sturdier bouquet stem, lay a 20 cm piece of floral wire alongside the chain as you slip-stitch back, then wrap the whole thing in floral tape.
Five ways to use your crochet flowers
- The forever bouquet. Wire 5–7 flowers onto floral-wire stems, add leaves, and arrange in a jar or vase. It never wilts, never needs water, and makes a genuinely touching gift — especially paired with our flower coasters as a matching set.
- Appliqué everything. Sew blossoms onto hats, headbands, and tote bags — three blossoms clustered on a tote make it one-of-a-kind.
- Garlands and bunting. String a dozen blossoms onto a long chain with leaves spaced between them. Drape over a mantel, a nursery mobile frame, or a party backdrop.
- Gift wrapping upgrade. Skip the plastic bow — hot-glue a small rose to the ribbon on a wrapped gift. It takes two minutes and looks like you hired a stylist.
- Wearables. A blossom sewn to a bobby pin is a 20-minute hair accessory; a row of daisies along the edge of a spring shawl turns a simple wrap into a statement piece.
Three color palettes to try next
Once you've made the classic versions, play with color — it's where these simple motifs really shine:
- Wildflower meadow. Orange daisy centers with red, pink, and purple petals; sunny yellow blossoms. A cottage-core bouquet.
- Monochrome elegance. All-white daisies and blossoms, cream roses, sage leaves — sophisticated wedding-table decor.
- Sunset tones. Coral, terracotta, and gold petals with deep brown centers. The variegated-yarn trick makes each flower unique.
Troubleshooting tips
- Petals are uneven or lopsided. You miscounted the anchor round. The daisy needs exactly 18 stitches in its widest round; the blossom needs exactly 10. Frog back to the center and recount — the petal math only works on exact numbers.
- The flower won't lie flat. Usually too many stitches in the petal round or petals worked too tightly. Block it: pin the flower flat on a towel, spritz with water, and let it dry. Cotton blocks beautifully; acrylic needs steam (hover a steam iron — don't touch).
- The rose unrolls. The base stitches missed the inner layers. Re-sew, pushing the needle through the full thickness of the roll on every stitch, and knot off firmly.
- The center dome collapses. The decrease round was skipped or worked loosely. That [sc, dec] round is structural — it's what tents the fabric upward.
- Leaves curl like potato chips. Too many stitches for the chain length. Drop the tip turn to 2 sc instead of 3, or go down half a hook size for leaves.
- Stems flop over. A plain chain stem can't hold a flower upright in a vase — that's what the floral-wire core is for. For appliqué use, the floppy chain stem is actually ideal since it sews down flat.
Frequently asked questions
Are these crochet flower patterns really free?
Yes — all three complete patterns above are free, no email signup and no PDF purchase required. Pinning the post on Pinterest or sharing it with a crafty friend is the kindest thank-you.
What skill level are these flowers?
Adventurous beginner. If you can chain, slip stitch, and work the basic stitches (sc, hdc, dc), you can make the daisy and blossom today. The blossom's treble crochet is a single stitch in an obvious rhythm, and the rose adds rolling and sewing but no new stitches.
How long does each flower take?
The blossom takes 15–20 minutes, the daisy 25–35 minutes, and the rose 30–40 minutes (most of that is the rolling and sewing). Leaves take about 5 minutes each. A 5-flower bouquet is a pleasant weekend-afternoon project.
Can I sell the finished flowers I make?
Yes! You may sell finished flowers made from these patterns in small batches — craft fairs, Etsy shops, and gift orders are all fine. Please credit Little Loop Finds as the pattern designer with a link back to this page. The pattern text and photos themselves may not be redistributed, republished, or sold.
Can I use a different yarn weight?
Absolutely. The stitch math is proportional, not size-dependent: use the hook your yarn label recommends and the petal counts still land evenly. Chunky yarn with a 6 mm hook makes oversized statement flowers for wall decor; thread crochet with a 1.5 mm hook makes delicate miniature blossoms for jewelry.
How do I attach flowers to hats, bags, and headbands?
Use the long tail you left when fastening off and a tapestry needle. Sew through the back of the flower's center — 4 to 6 small whipstitches in a circle — catching the fabric underneath. For washable items, weave the tail in twice; for gifts, a dot of hot glue on the flower's back works but won't survive the washing machine.
More free patterns to try
If these flowers got your hook moving, keep going. The flower coaster pattern turns the floral motif into practical table decor, the headband pattern is the perfect base for a blossom appliqué, the free bag patterns give you totes worth decorating, the doily patterns pair beautifully with a flower bouquet as a table setting, the shawl pattern takes floral edgings gorgeously, and the crochet heart joins a rose for the sweetest handmade Valentine's gift.
The box below contains an Etsy link. If you buy through it, we may earn a small commission at no extra cost to you. Learn more.
No time to make one?
Short on time? Find handmade crochet flowers from independent makers on Etsy.
Browse on Etsy (opens Etsy in a new tab)