Crochet skull blanket pattern: spooky-cute motif throw
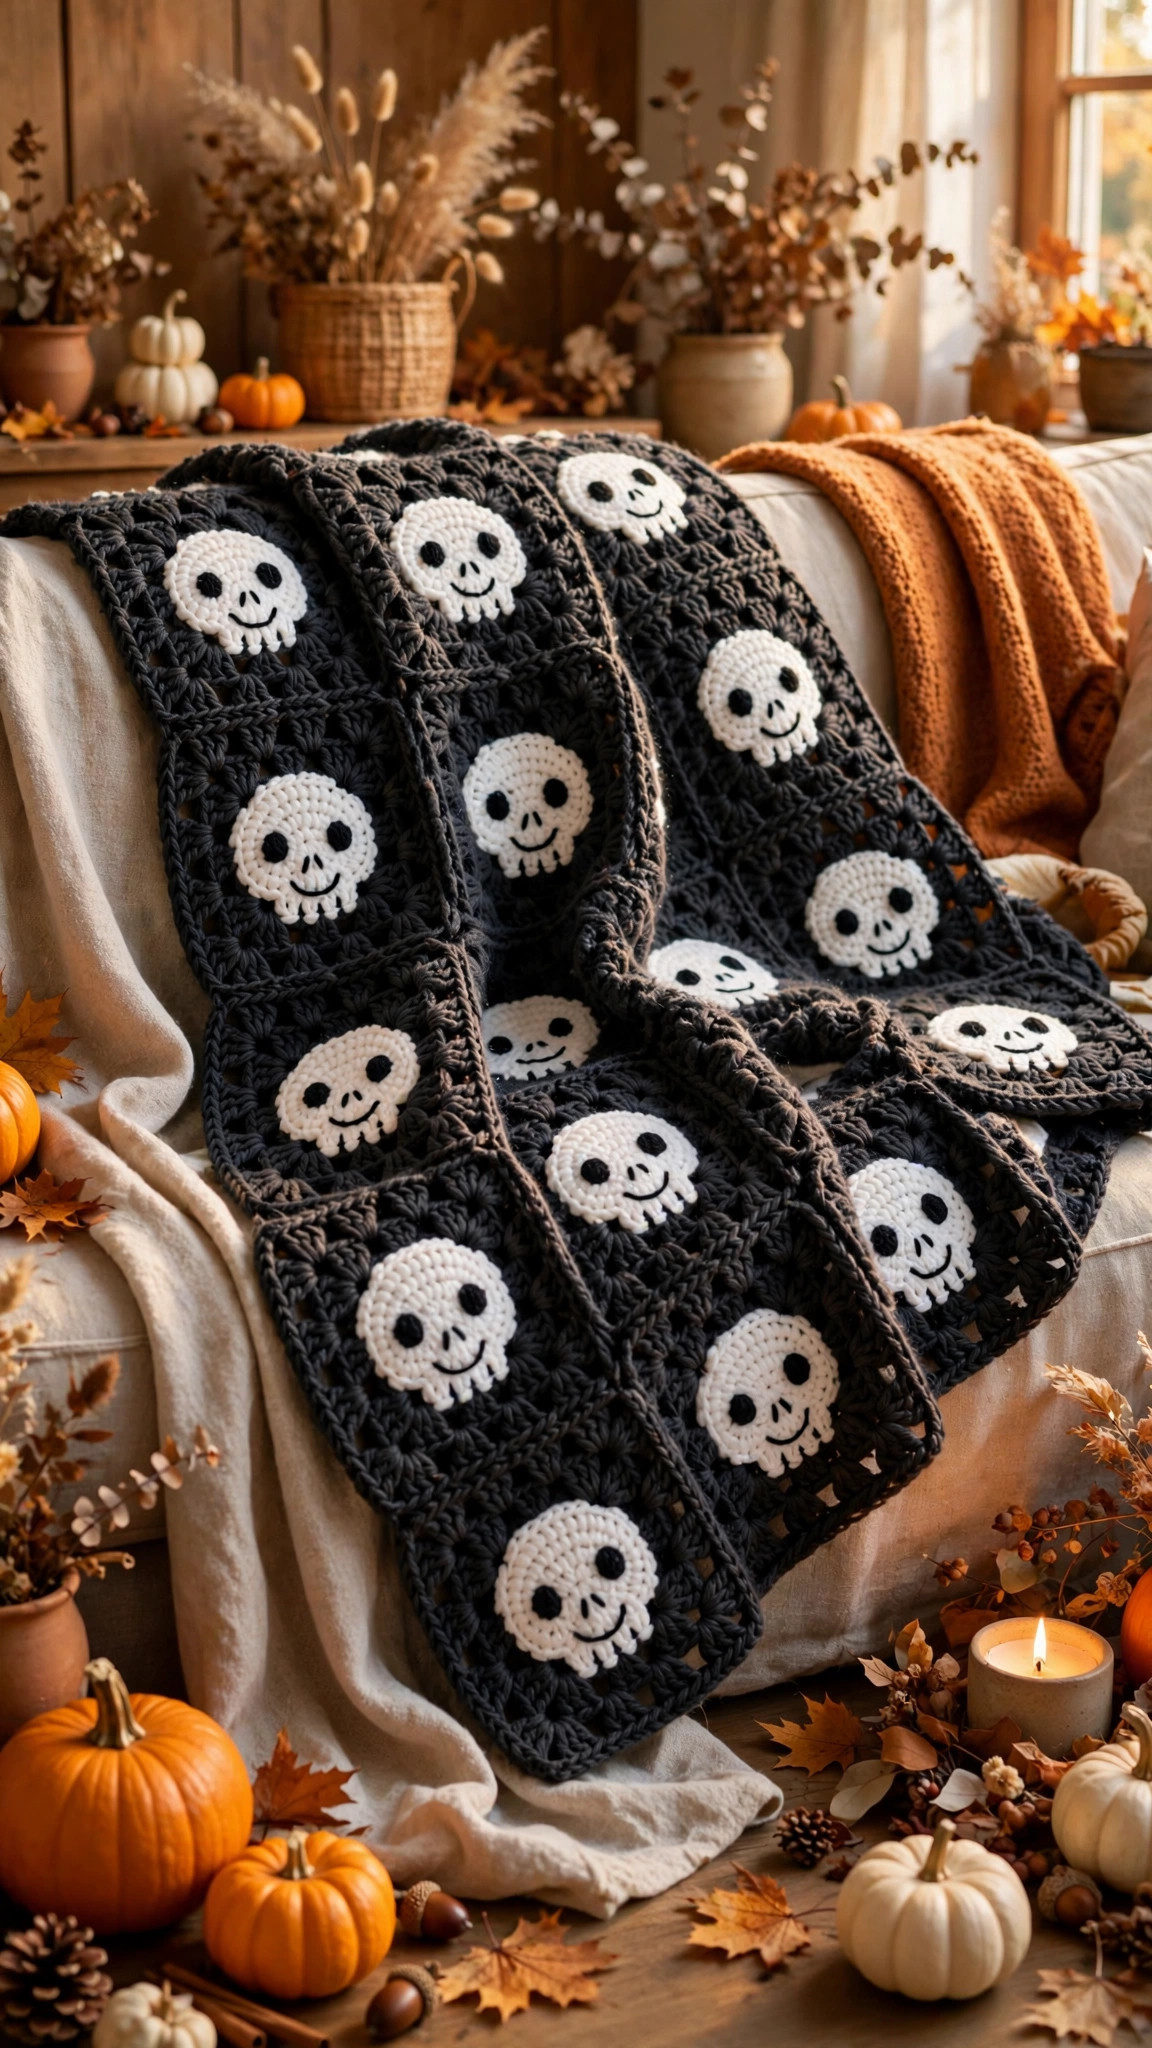
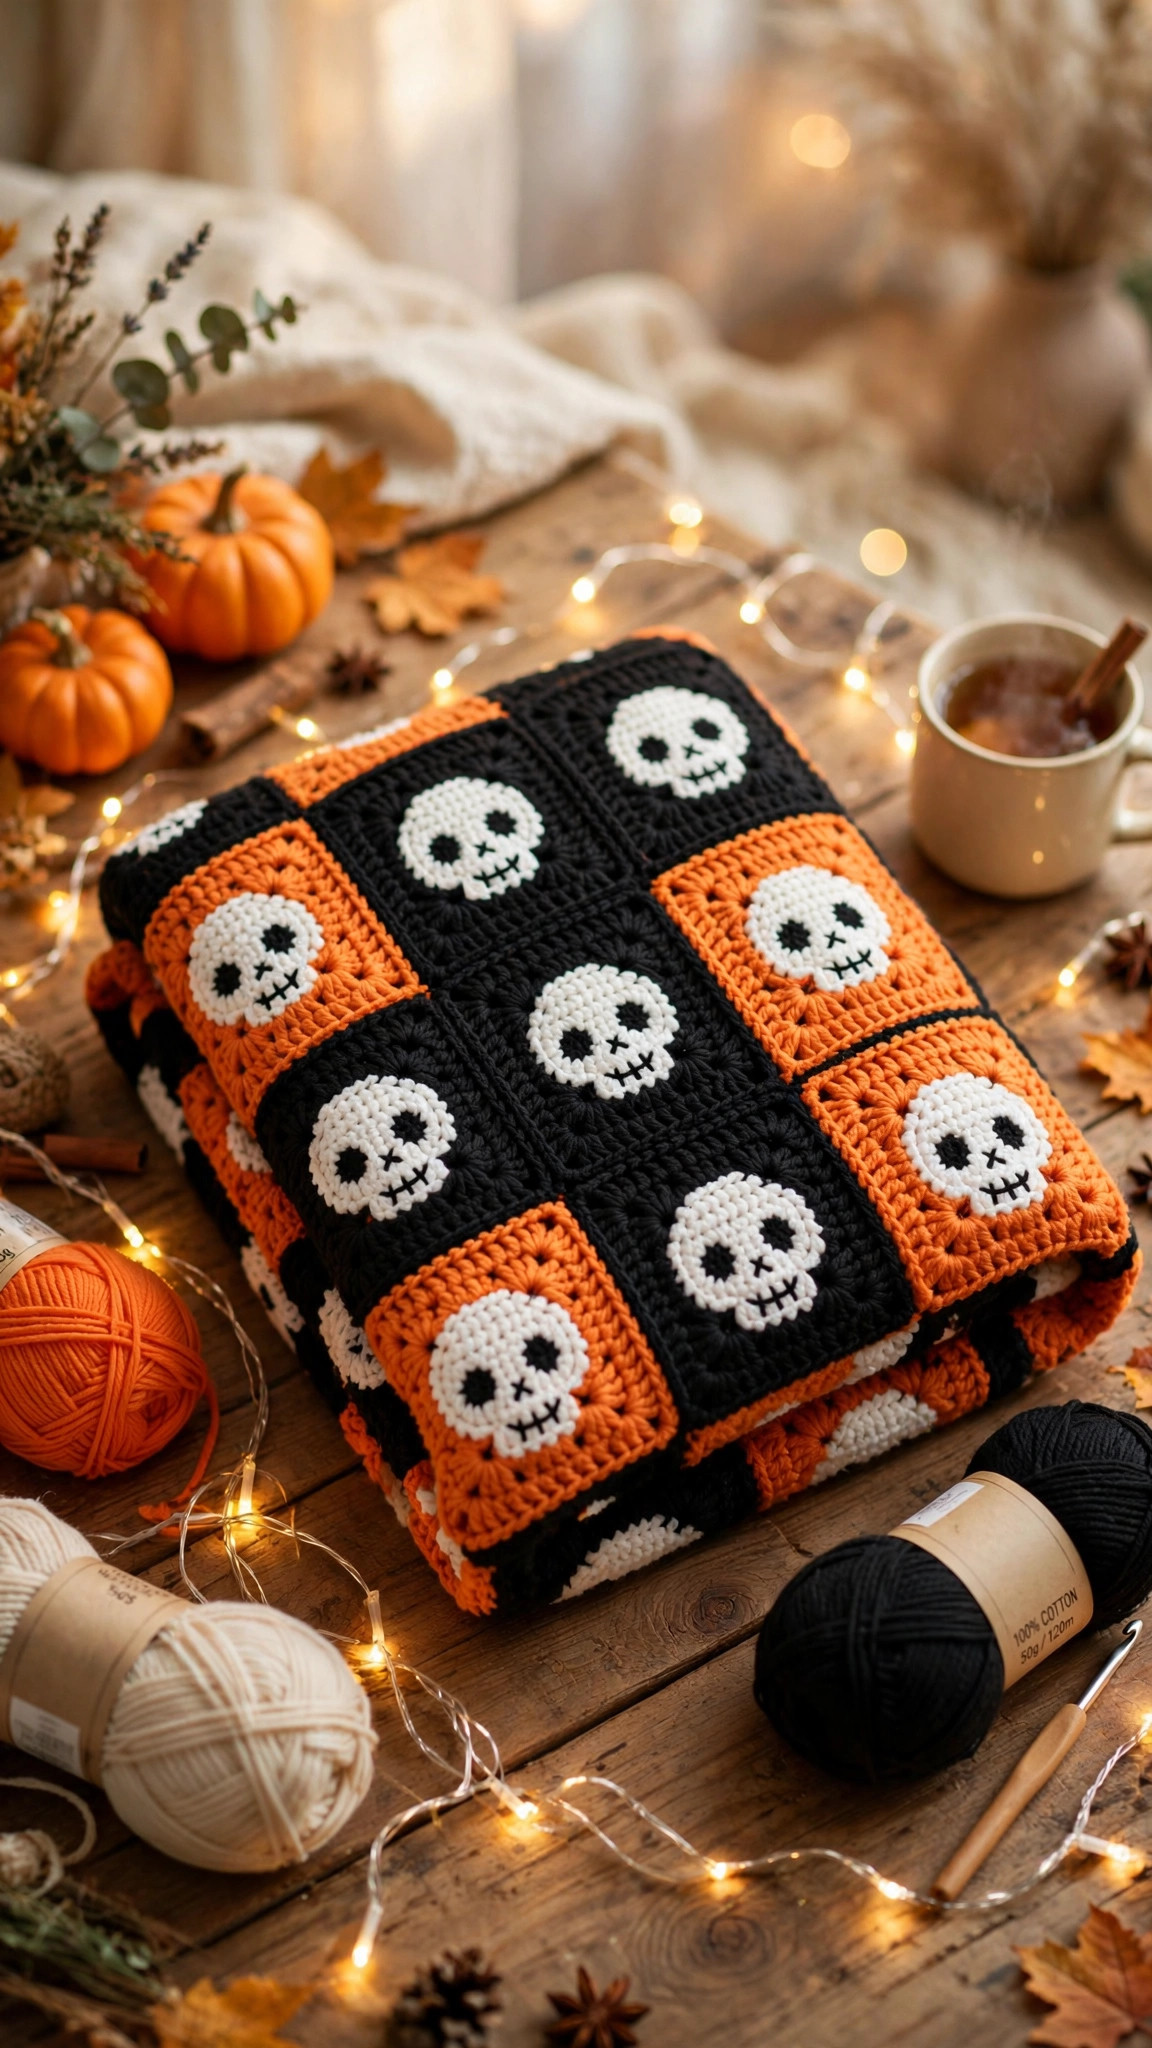
Thirty portable granny-style squares, each with a friendly bone-white skull, wide-set eyes and three little teeth, squared off in charcoal and joined into a cozy Halloween-ready throw — an original US-terms motif pattern with full counts, joining guide and border.

Blankets · Crochet
- Finished size
- About 102 × 122 cm / 40 × 48 in
- Making time
- About 18–22 hours
- Hook
- 5.0 mm, worsted-weight yarn
- Pieces
- 30 motif squares to join
- Skill
- Confident beginner
In this post
Spooky season deserves better than a flimsy throw you fold away on November 1st. This crochet skull blanket pattern is my answer: thirty sturdy granny-style squares, each carrying a friendly off-white skull with big round eyes and a neat stitched smile, joined into a throw that is equal parts Halloween party trick and genuinely cozy sofa blanket. The skulls are cute, not gory — sugar-skull charm meets classic granny square — so it works for an October movie marathon and still looks intentional on your couch in February.
The design is completely original and built the sensible way: crochet the skull first as a small oval medallion, add the jaw and teeth as short flat rows, pop on two tiny black eye discs, then square the motif off in charcoal. After two squares your hands know the pattern, and the rest is the most satisfying kind of portable, one-square-at-a-time crochet. Start now — a square or two an evening and you will be joining the last row well before Halloween night.
Why you'll love this crochet skull blanket pattern
Most skull blankets are either giant single-piece tapestry projects — impressive, but you wrestle a whole blanket from row ten — or pixel charts with no written instructions. This one takes the motif route on purpose: one square uses about 28 grams of yarn, fits in a project bag, and gives you a finished win in about 35 minutes. Thirty small wins beat one endless slog, especially in busy October.
The skull is engineered to read clearly at a distance, where many motif designs fail. The secret is proportion and contrast: a plump oval cranium, eye discs placed wide and low, and a short jaw with three teeth lines — against charcoal, the white skull pops like a porch light. There are no mid-round color changes, no floats, and no chart to follow. It is endlessly giftable, too, and sizing is pure arithmetic: add a column, add a row, done. If you enjoy motif construction, the squares in our easy crochet patterns for blankets roundup use the same satisfying logic with a completely different look.
Materials you'll need
| Supply | What to get |
|---|---|
| Background yarn | Worsted-weight (#4) acrylic in charcoal or soft black, about 700 g |
| Skull yarn | Worsted-weight (#4) acrylic in off-white or bone, about 250 g |
| Eye yarn | Worsted-weight (#4) acrylic in black, about 30 g (scraps work) |
| Accent yarn (optional) | Worsted-weight (#4) in pumpkin orange, about 50 g, for the final border round |
| Crochet hook | 5.0 mm (H-8) |
| Notions | Tapestry needle with a large eye, stitch markers, scissors |
| Blocking (optional) | Foam mats and rustproof pins, or a clean towel |
A quick note on yarn choice: pick a smooth, sturdy acrylic with good stitch definition — this blanket will be sat on, fought over, and washed, and budget acrylic handles all three gracefully. Charcoal is more forgiving than pure black because you can still see your stitches in decent light. Buy the background color in one go if you can; dye-lot shifts absolutely show across thirty squares.
Size, gauge and skill level
- Finished size: about 102 × 122 cm (40 × 48 in) — a generous lap throw / single-sofa blanket — from 30 squares laid out 5 across × 6 down, plus border.
- One square: about 19 × 19 cm (7.5 × 7.5 in) after light blocking, border excluded.
- Gauge: one finished square = 19 cm (7.5 in) across with a 5.0 mm hook. Gauge matters more than usual here because mismatched squares pucker at the joins — measure your first square before you batch-make twenty-nine more.
- Skill level: confident beginner. You should know the magic ring, single crochet, half double crochet, double crochet, slip stitch joining, and how to work in the back loop only. Everything unusual — the jaw rows, the eye discs, the squaring-off round — is explained step by step below.
Sizing math: baby blanket, 16 squares (4 × 4) ≈ 76 × 76 cm (30 × 30 in); this throw, 30 squares; single-bed blanket, 54 squares (6 × 9). Each square uses about 28 g of yarn total — weigh your first square and multiply for the most honest estimate. New to blankets? Warm up with our easy beginner crochet patterns first.
Abbreviations — US terms
| Abbreviation | Meaning |
|---|---|
| MR | magic ring |
| ch | chain |
| sl st | slip stitch |
| sc | single crochet |
| hdc | half double crochet |
| dc | double crochet |
| inc | increase (2 sc in the same stitch) |
| BLO | back loop only |
| st(s) | stitch(es) |
| Rnd | round |
| FO | fasten off |
A note on counting: every round ends with its stitch count in parentheses. If the squaring-off round does not end on exactly 60 stitches, the corners will not land correctly — count it on every square. Twenty seconds now saves twenty minutes later.
The pattern (US terms)
Make 30 squares, then join, then border. Weave in ends as you go if you can — thirty squares means sixty-plus tails, and future-you will be extremely grateful.
The skull medallion — off-white
The cranium is a simple oval worked in continuous rounds. Mark the first stitch of each round and move the marker up as you go.
- Rnd 1: MR, 6 sc (6)
- Rnd 2: inc in each st around (12)
- Rnd 3: [sc, inc] × 6 (18)
- Rnd 4: [2 sc, inc] × 6 (24)
- Rnd 5: [3 sc, inc] × 6 (30)
- Rnd 6: sc in each st around (30)
- Rnd 7: sc in each st around (30)
Your oval should be a plump disc about 8 cm (3.25 in) across. Slight cupping is fine — the squaring round flattens it. If the edge ruffles, drop to a 4.5 mm hook for the skull only.
The jaw — off-white, worked flat
Without fastening off, you now work the jaw as short flat rows across the bottom 10 stitches of the medallion. This rectangular jaw is what turns a plain white circle into an unmistakable skull.
- Row 1: sc in the next 10 sts, ch 1, turn (10)
- Row 2: sc in each st across, ch 1, turn (10)
- Row 3: sc in each st across, ch 1, turn (10)
- Row 4: sc in each st across (10). FO, leaving a 20 cm (8 in) tail.
Teeth lines: cut three 15 cm (6 in) lengths of charcoal yarn. With your tapestry needle, work one straight vertical stitch over Rows 2–3 at the 3rd, 5th and 8th stitches of the jaw — up through the fabric, down one row-height below, pull snug but not tight. These three little bars read instantly as teeth. Knot the ends on the back; they will be hidden inside the blanket's fabric and trimmed after joining.
The eye discs — black, make 2 per square
- Rnd 1: MR, 6 sc, sl st to first sc to close (6). FO, leaving a 20 cm (8 in) tail for sewing.
Sew one disc on each side of the cranium, centered over Rnds 4–5 and about 8 stitches apart, with small whipstitches. Add a tiny nose: one small upside-down V in black, centered between and just below the eyes, over Rnd 6. Eyes wide and low, nose small — that proportion trick keeps the skull friendly rather than fierce.
Squaring off — charcoal
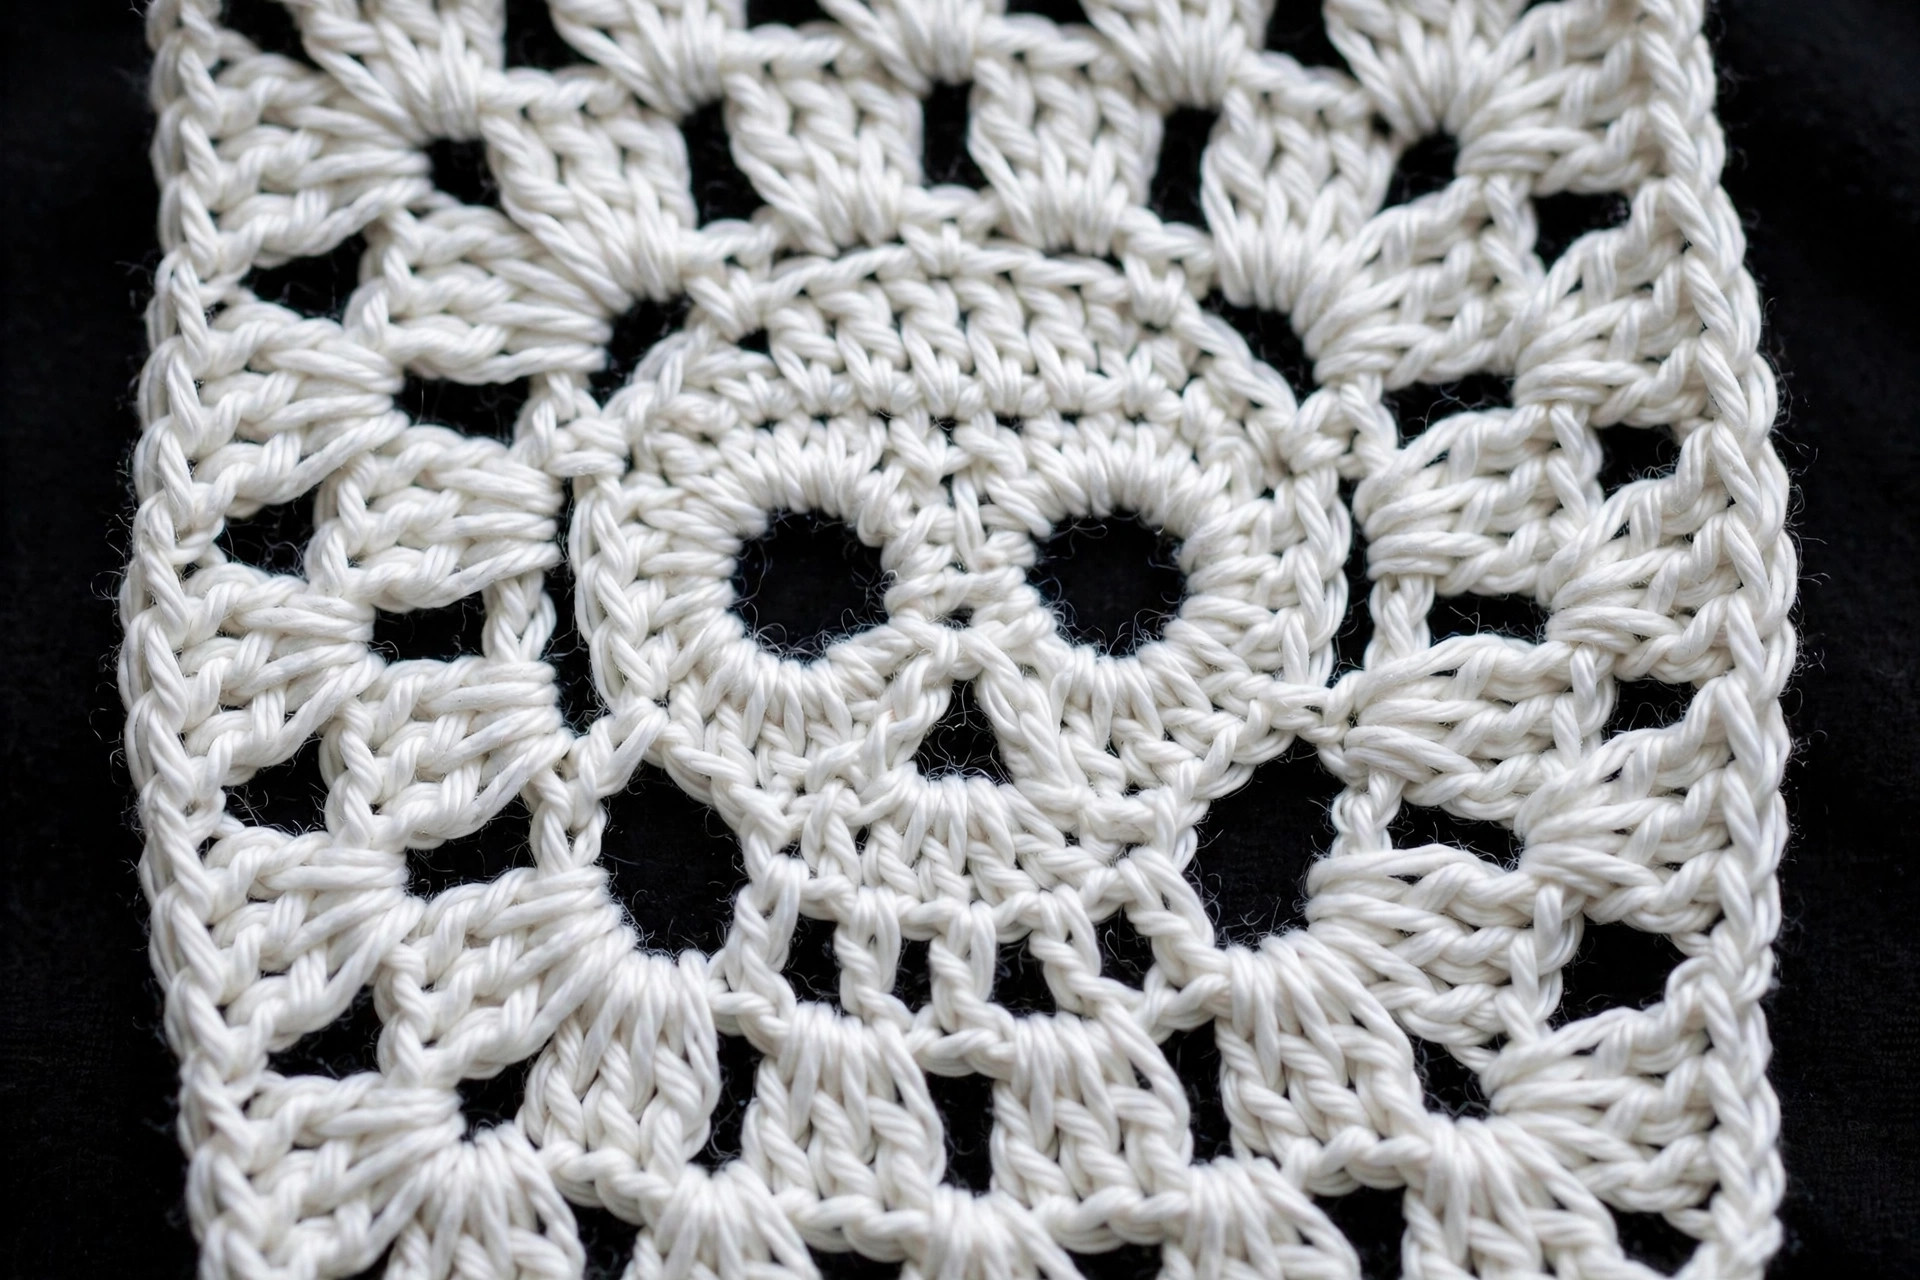
Join charcoal with a sl st at the top center stitch of the cranium, opposite the jaw. You will work sc along the jaw edge and a mix of hdc and dc up the sides, with (2 dc, ch 2, 2 dc) corners — the taller stitches compensate for the oval's curves.
- Rnd 1: ch 1 (does not count as a st), sc in same st, sc in next 4 sts, hdc in next 3 sts, dc in next 2 sts, (2 dc, ch 2, 2 dc) in next st — corner 1 — dc in next 2 sts, hdc in next 3 sts, sc in next 5 sts, (2 dc, ch 2, 2 dc) in next st — corner 2 — work 10 sc evenly across the raw jaw edge (one per row-end and stitch, keeping it flat), (2 dc, ch 2, 2 dc) in the first jaw corner st — corner 3 — hdc in next 3 sts, dc in next 2 sts, (2 dc, ch 2, 2 dc) in next st — corner 4 — dc in next 2 sts, hdc in next 2 sts, sl st to first sc to close (60 sts, not counting ch-2 corners)
- Rnd 2: ch 2 (counts as first dc), dc in each st around, working (2 dc, ch 2, 2 dc) into every ch-2 corner space, sl st to top of ch-2 to close (76)
- Rnd 3: ch 1, sc in each st around, working 3 sc into every ch-2 corner space, sl st to first sc to close (88). FO, leaving a 25 cm (10 in) tail if you plan to sew your squares together, or a short tail if you will slip-stitch join.
Give each square a quick steam or pin it flat for ten minutes while you start the next — blocked squares join dramatically straighter. Stacking finished squares under a heavy book overnight also works beautifully.
Joining the squares
Lay out all 30 squares, 5 across × 6 down, and check every skull faces the same way up — one upside-down skull is the kind of mistake you only notice at the border stage. Photograph your layout so you can rebuild it after each session.
Recommended join — flat slip-stitch in BLO: hold two squares wrong sides together, matching stitch for stitch, and slip stitch through the back loops only of both squares in charcoal, keeping tension loose enough that the seam lies flat — a tight join is the number one cause of a blanket that will not drape. Join squares into 6 strips of 5 first, then join the strips, matching corners at every intersection. The BLO join leaves a neat ridge on the back and an almost invisible seam on the front.
Alternative join — whipstitch: thread a long tail and whipstitch through back loops only, wrong sides facing. Slightly slower, slightly flatter, just as strong.
The border — charcoal, then optional orange
- Rnd 1: join charcoal at any corner space, ch 1, work sc evenly around the whole blanket, placing 3 sc in each corner space and 1 sc in each stitch, and working 1 sc into each square-join point so no gap opens at the seams. Sl st to first sc to close.
- Rnd 2: ch 2 (counts as first dc), dc in each st around, (2 dc, ch 2, 2 dc) in the center sc of each corner, sl st to top of ch-2 to close.
- Rnd 3: ch 1, sc in BLO of each st around, 3 sc in each ch-2 corner space, sl st to first sc to close. This back-loop round gives the edge a crisp, almost piped finish.
- Rnd 4 (optional accent): change to pumpkin orange, ch 1, [sc in next st, ch 1, skip 1 st] around for a simple picot-look dashed edge, working 3 sc into each corner. FO.
Weave in the final ends, and give the whole blanket one last gentle block or steam, paying attention to the four outer corners.
Finishing touches
Do not rush the last twenty minutes — this is the difference between homemade and handmade in the expensive sense.
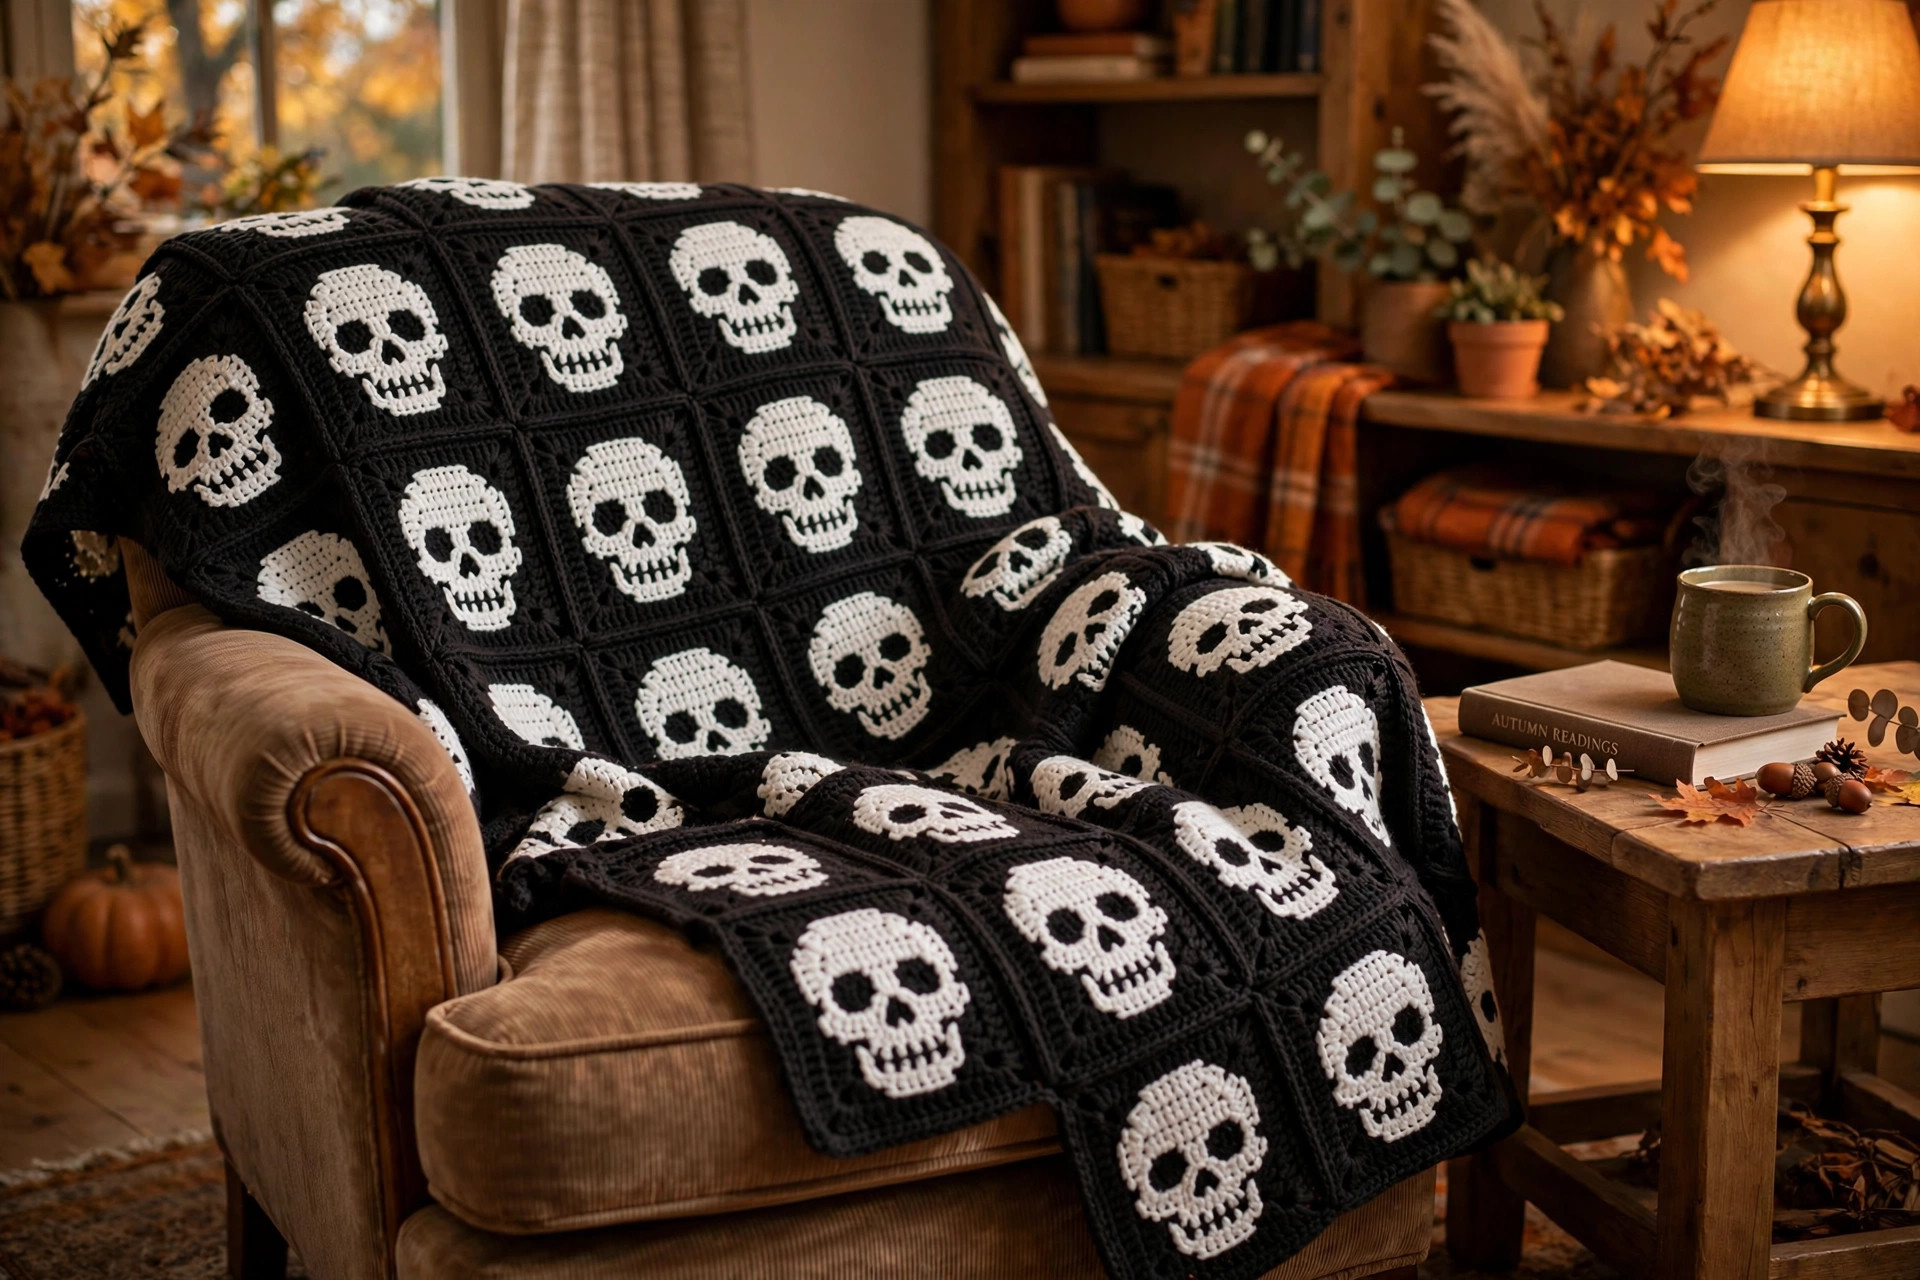
Check every skull face. Lay the blanket flat and walk around it: are all eye discs sewn flat and teeth lines snug? A thirty-second stitch now beats an unraveling tooth in November. Add an extra whipstitch pass on the eyes if the blanket is headed for a home with toddlers or pets.
Tame the joins. Steam any bumpy seam ridge lightly and press it flat with your palm while it cools — acrylic remembers steam, and the whole blanket relaxes into a proper drape.
The final drape test. Throw it over the back of your sofa, skulls upright, and photograph it. That finished-object photo is the one everyone will ask you for the pattern from.
Four fun variations to try next
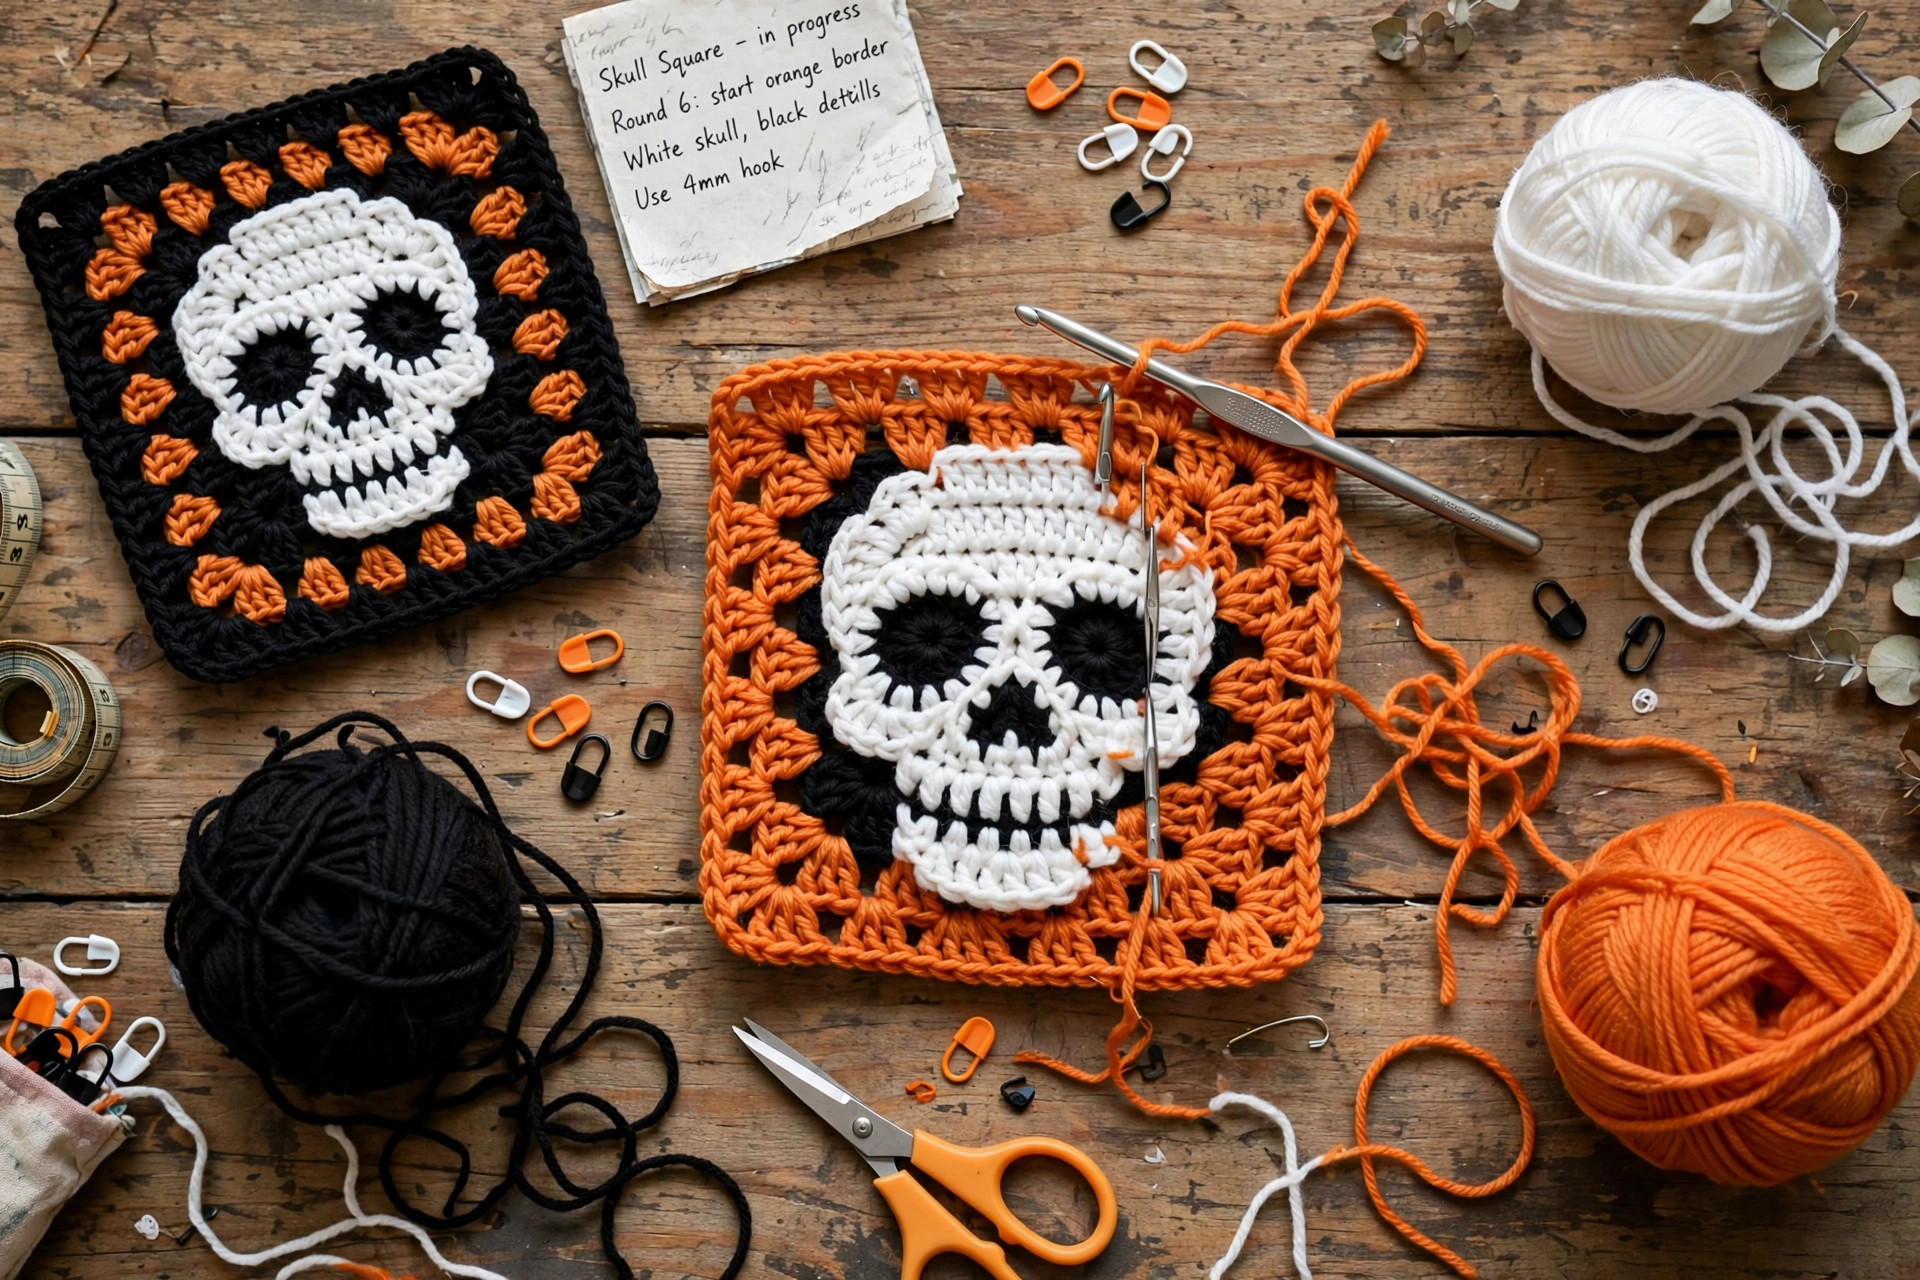
- Classic Halloween. Exactly as written — charcoal, bone white, pumpkin-orange border. Photograph it on the porch between two pumpkins and thank us later.
- Sugar-skull celebration. Embroider each face differently before squaring off — French-knot flowers around one eye, a heart on a forehead, swirls on a chin — and alternate background colors (teal, plum, marigold, charcoal) for a joyful Día de los Muertos-inspired throw.
- Soft spooky-cute. Dusty lilac or blush background, cream skulls, chocolate-brown eyes, cream border. The skulls read sweet rather than spooky — perfect for a first Halloween blanket or pastel-goth nursery.
- Single-skull pieces. One framed square is striking wall art; 4 squares make a cushion front, 6 make a table runner, and all of them are brilliant stash-busters for leftover yarn.
Spooky crafting pairs beautifully with our flip-face witch cat crochet pattern if you are building a full Halloween corner, and a handmade crochet garland strung above the sofa completes the scene without one more trip to the store.
Troubleshooting tips
- Your squares are all different sizes. Usually tension drift between sessions. Block every square to exactly 19 cm (7.5 in) before joining — blocking forgives about 5% difference, and the BLO join hides the rest.
- The skull looks like a plain white blob. The eye discs are probably too small, high, or close together. Re-sew them wider and lower (try a 12-stitch disc if your squares run big) — and do not skip the nose stitch; it matters more than you think.
- The medallion ruffles before squaring off. Work Rnds 2–5 tighter, or drop the skull hook to 4.5 mm. A slight cup flattens out; a wavy edge will fight the squaring round and pucker the corners.
- Corners will not stay square. You probably missed a corner increase, or your count drifted. The Rnd 1 count of 60 catches everything — count it out loud if you have to.
- The blanket curls after joining. Your joining tension is too tight. Re-do the seam looser, or go up a hook size just for joining. Steam-blocking flat for an hour also relaxes mild curl.
- You are running out of background yarn. Weigh a finished square and divide your remaining yarn by that weight to know exactly how many squares you can still make. One square fewer in each direction still makes a lovely throw.
- Dark yarn is hurting your eyes. Work charcoal rounds in daylight or under a bright lamp, put a white pillowcase under your work so stitch holes silhouette against it, and feel for stitch tops with your fingertip.
Frequently asked questions
Is this crochet skull blanket pattern really free?
Yes — the complete pattern is written out in full above, no cost and no signup. Saving it to Pinterest or sharing it with your crochet group is the kindest way to say thanks.
How long does the skull blanket take to make?
About 18–22 hours: roughly 30–40 minutes per square once the motif is memorized (the first square takes an hour — that is learning time), about 2 hours of joining, and an hour for border and finishing. At two squares an evening, allow about three relaxed weeks.
Can I sell blankets made from this pattern?
Yes — you may sell finished blankets in small batches at craft fairs, markets, and online, with credit to Little Loop Finds as designer and a link back here where possible. The pattern text and photos may not be redistributed or sold.
What is the best yarn for a skull blanket?
A smooth worsted-weight acrylic: affordable in blanket quantities, machine washable, and crisp enough to hold a graphic motif. A cotton-acrylic blend is a lovely upgrade for a heavier drape. Avoid fuzzy yarns — the skull's face needs clean edges.
Can I make this blanket bigger or smaller?
Easily — that is the joy of squares. Each square adds about 19 cm (7.5 in) per direction: 16 squares for a baby blanket, 30 for this throw, 54 for a single bed. Scale background yarn at roughly 19 g of charcoal per square.
Is the skull motif hard to crochet?
It looks far more complicated than it is: five standard increase rounds, four rows of plain single crochet for the jaw, and six-stitch eye discs. Only the squaring-off round asks for real attention, and it is fully written out. If you have made a granny square — or our star blanket — you already have every skill needed.
How do I wash the finished blanket?
Machine wash cold on gentle and tumble dry low, or lay flat to dry for the crispest squares. Acrylic softens noticeably after the first wash — most of us count that as a feature. Reshape corners while damp.
More free patterns to try
Keep the Halloween hooks busy. The flip-face witch cat is the perfect companion make for this blanket's corner of the couch, a cozy free crochet hat in leftover charcoal and orange uses up every scrap from this project, and if the motif bug has bitten you, the geometry of the star blanket will feel like coming home.
The box below contains an Etsy link. If you buy through it, we may earn a small commission at no extra cost to you. Learn more.
No time to make one?
Short on time? Find handmade crochet skull blankets from independent makers on Etsy.
Browse on Etsy (opens Etsy in a new tab)