Free Crochet Pattern Hippo
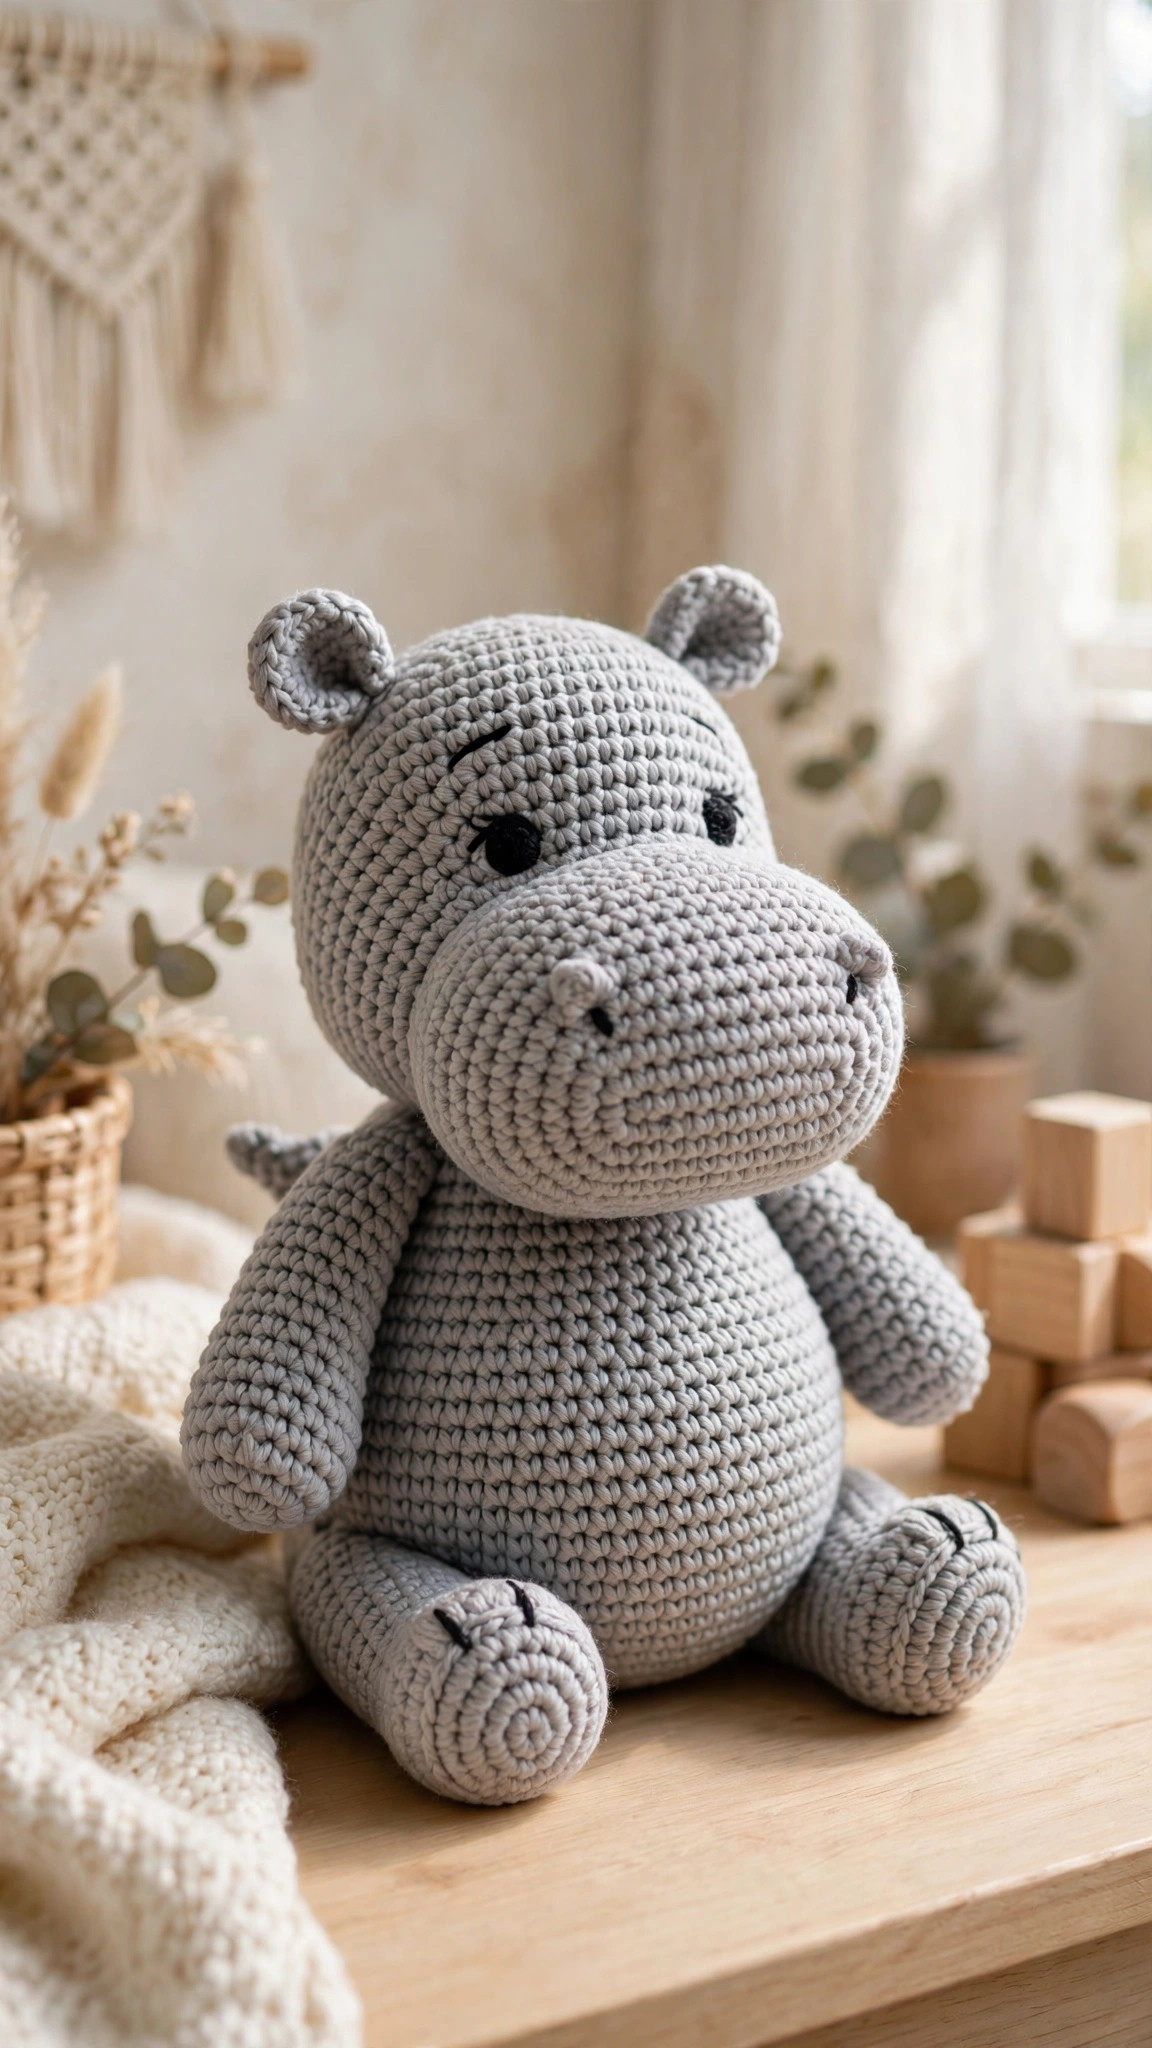
This chubby hippo is worked in simple single-crochet spirals from nine easy pieces, with a big rounded muzzle, tiny ears and a stubby tail. Full stitch counts for every round, plus a calm pin-and-sew assembly guide, make him a perfect first amigurumi.

Amigurumi · Crochet
- Finished size
- 7 in (18 cm) sitting
- Making time
- 4–5 hours
- Hook
- 3.5 mm (US E-4)
- Pieces
- 9 pieces + tail
- Skill
- Confident beginner
In this post
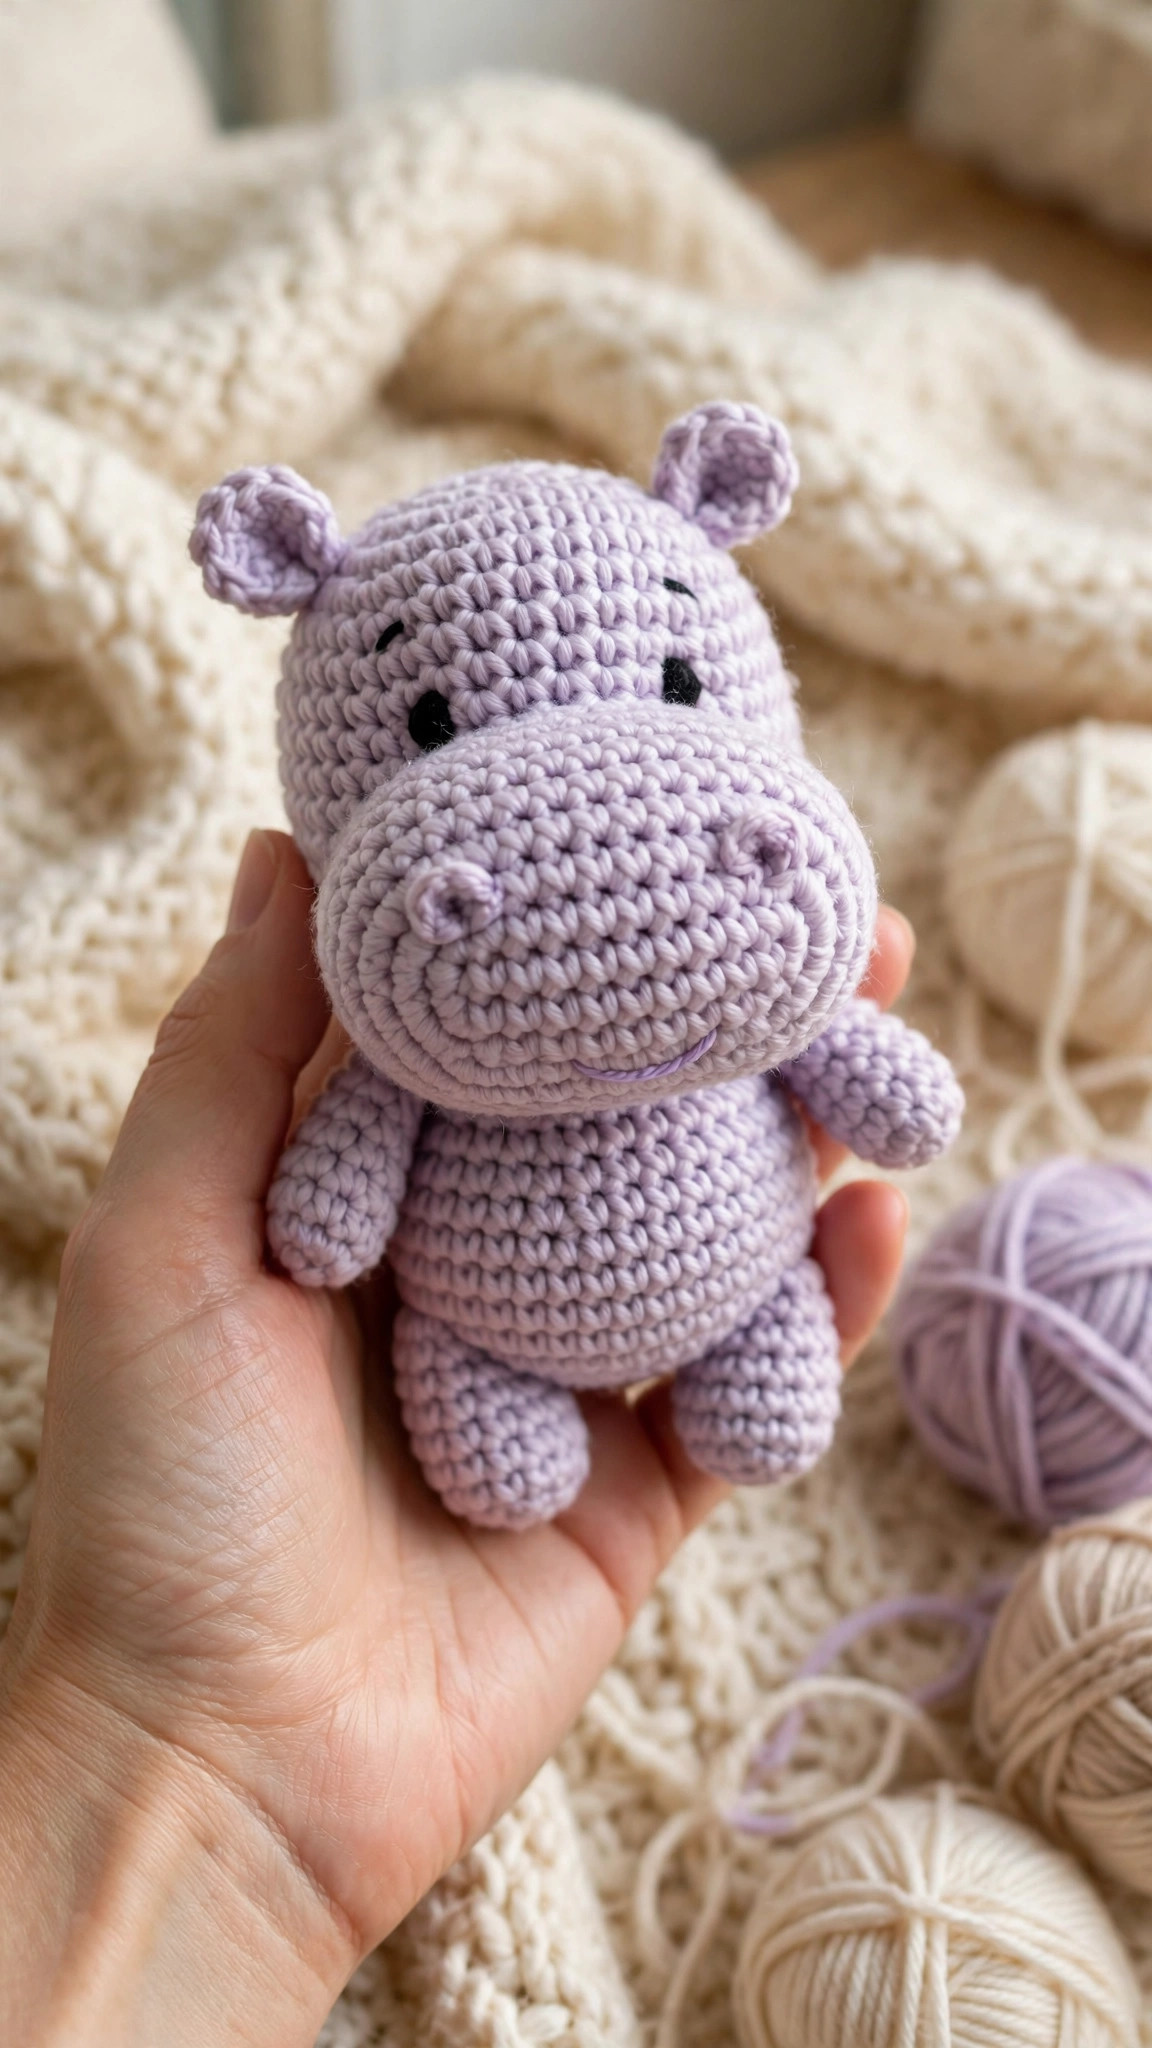
There is something about a hippo that just begs to be crocheted. All that lovely roundness, the wide friendly snout, the tiny ears perched on top — it is a shape that suits yarn perfectly. This free crochet pattern hippo turns a few simple spirals of single crochet into a chubby little companion with a big rounded muzzle, sweet embroidered nostrils and a stubby tail that wiggles when you give him a gentle squeeze. He sits happily on a nursery shelf, makes a thoughtful handmade gift, and is forgiving enough for your very first amigurumi project.
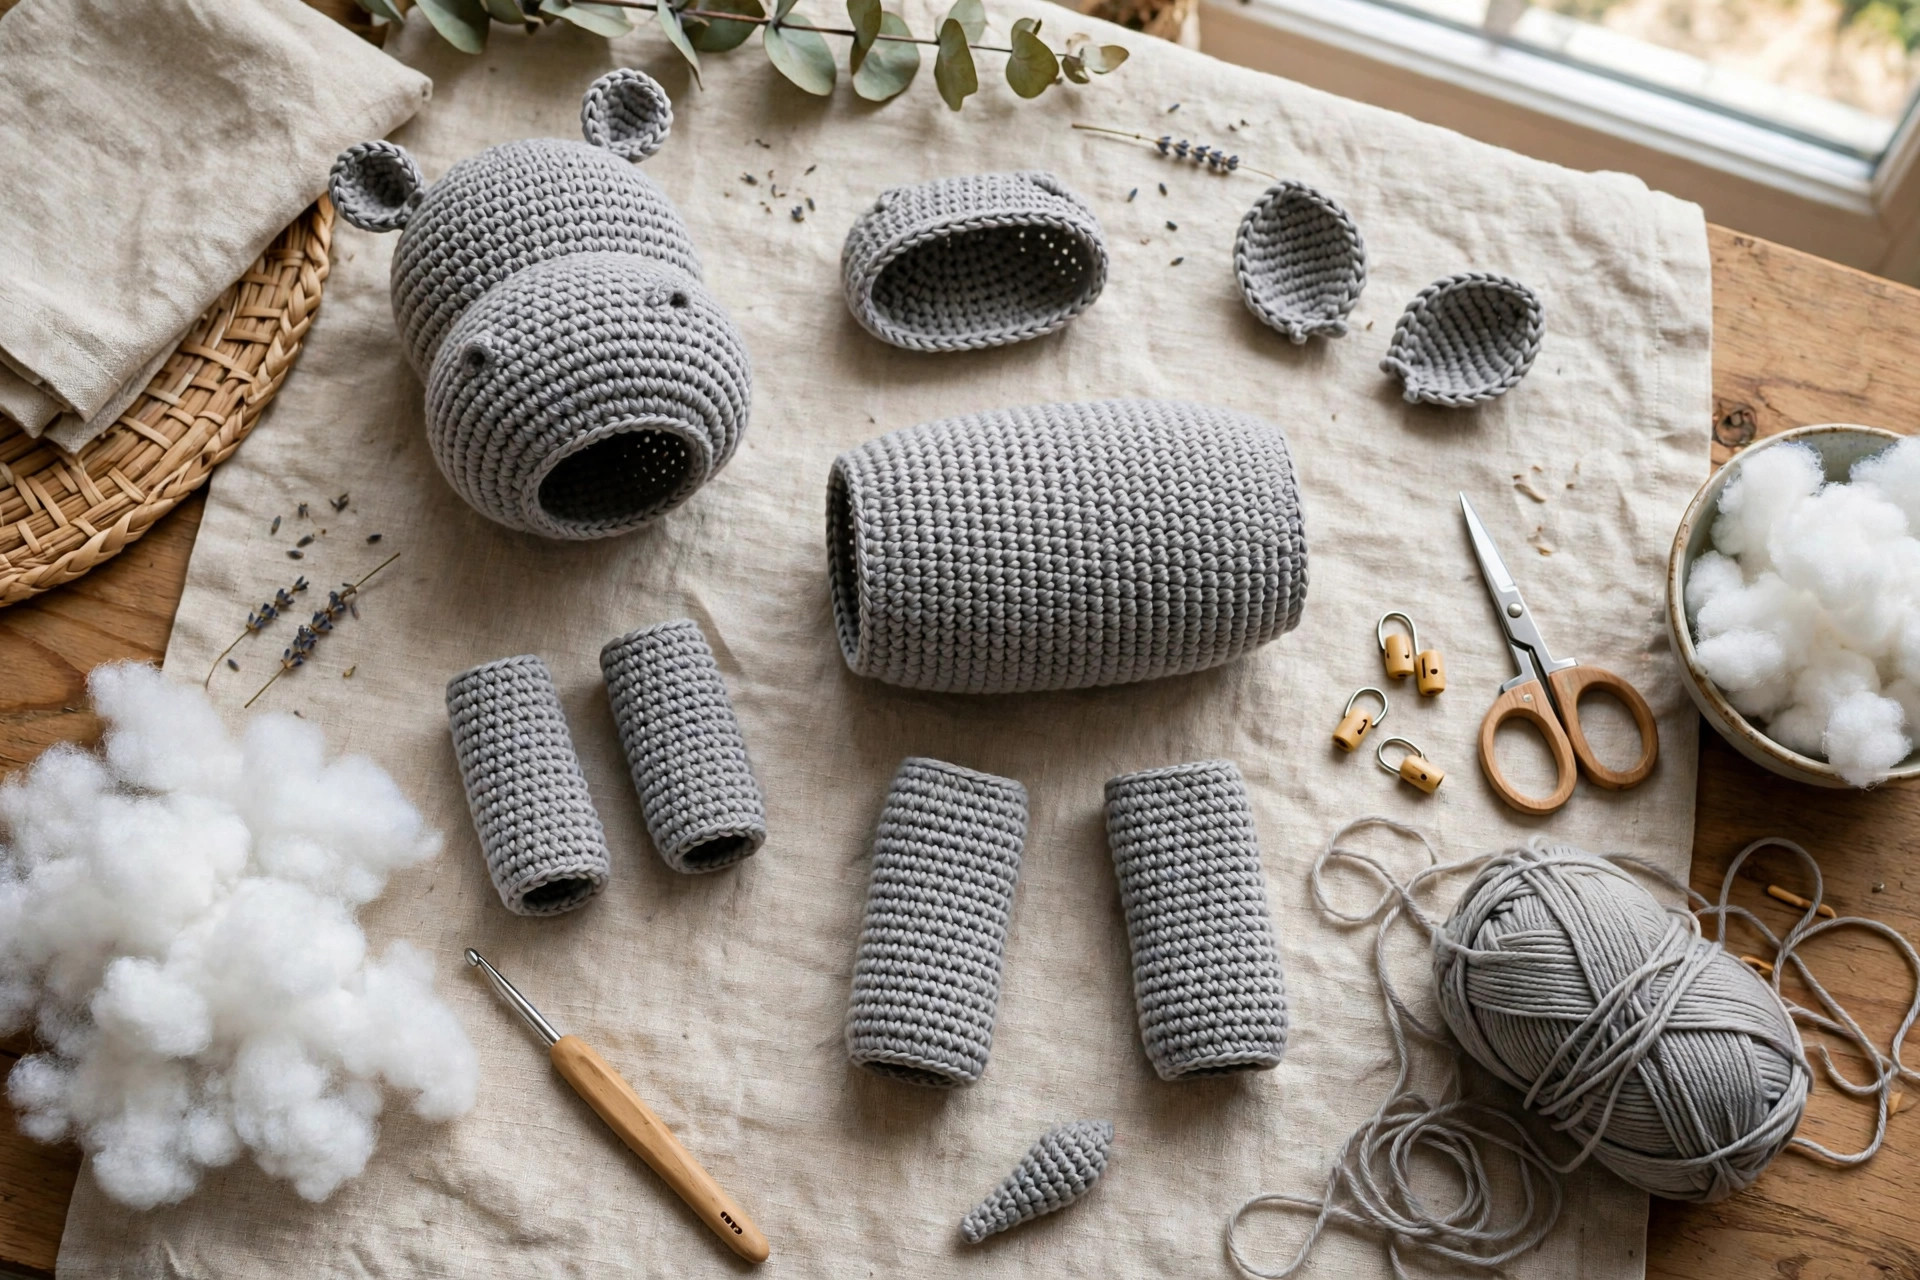
I designed this hippo to be genuinely beginner-friendly without looking basic. You will work the head, body, muzzle, two ears, two arms and two legs as separate pieces, stuff them as you go, and sew everything together at the end with a simple, stress-free assembly guide. There are no complicated stitches, no colour changes mid-round, and no tiny fiddly parts. Just single crochet, increases and invisible decreases, worked in continuous spirals so there are no seams to line up and no joins showing on the finished toy.
Work him in soft grey for a classic look, or try lavender, dusty pink or sage for a storybook feel. He uses less than one ball of yarn, so he is a great stash-busting project too.
Contents
- Why you'll love this hippo
- Materials you'll need
- Size, gauge and skill level
- Abbreviations — US terms
- The pattern (US terms)
- Finishing
- Tips
- FAQ
- Read next
Why you'll love this hippo
First, the shape does most of the work for you. A hippo is basically two friendly blobs and a very good snout, so you get a characterful animal from the simplest construction. Nine main pieces, each worked the same calm way, and suddenly you have a hippo.
Second, he is quick for a stuffed toy. Most pieces take twenty minutes or less, and the head and body are plain, meditative rounds of single crochet — perfect in front of a film or podcast.
Third, he is endlessly giftable. Make him in grey for a baby shower, in lavender for a birthday, or in a favourite colour for a friend who collects hippos. With embroidered eyes (see Tips), you can adapt him for younger children too.
Finally, he is a brilliant confidence-builder. You will practise the magic ring, spirals, increasing, invisible decreasing, stuffing and sewing up in one small project. If you enjoy this style, try our highland cow crochet pattern next.
Materials you'll need
You do not need anything exotic. One ball of smooth worsted-weight (aran) acrylic or cotton-blend yarn in your main colour, plus a small amount of a darker shade for the face, is the heart of the project. Acrylic holds stuffing well and keeps its shape. Avoid fluffy yarns for your first attempt — they hide your stitches.
| Supply | What to get |
|---|---|
| Main yarn | Worsted-weight (aran) yarn in soft grey or lavender, about 120 yards / 110 m (under one standard ball) |
| Contrast yarn | Small amount of dark grey or black yarn for nostrils and mouth embroidery |
| Optional accent yarn | Small amount of pale pink for inner ears and cheek blush, if you like |
| Crochet hook | 3.5 mm (US E-4) |
| Safety eyes | One pair of 9 mm black safety eyes with washers (or black yarn to embroider eyes) |
| Stuffing | Polyester toy stuffing, about 50 g |
| Stitch marker | One locking stitch marker or a short length of contrasting yarn |
| Yarn needle | Large-eye blunt tapestry needle for sewing and embroidery |
| Sewing pins | Long pins with large heads, for positioning pieces before sewing |
| Scissors | Small sharp scissors for trimming tails |
If you use chunkier yarn with a larger hook, your hippo will come out bigger; finer yarn makes him smaller. The proportions stay the same. Just keep the fabric dense so no stuffing peeks through.
Size, gauge and skill level
Finished size: Approximately 7 inches (18 cm) tall when sitting, and about 5 inches (13 cm) wide across the body, using worsted-weight yarn and a 3.5 mm hook as listed.
Gauge: Gauge is not critical, but fabric density is. Your circle should feel firm, with no holes between stitches. If you see gaps, go down a hook size.
Skill level: Confident beginner. You should be able to chain, single crochet, and work into a magic ring. Everything else is explained as you need it. This is a 2 out of 3 dots project: easy stitches, with sewing-up asking for a little patience.
Time needed: Around 4 to 5 hours. The head takes about an hour, the body forty-five minutes, and the small pieces about an hour. Stuffing and assembly take another hour. Spread it over two evenings if you like — just keep pieces together in one bag.
Abbreviations — US terms
This pattern uses US crochet terms throughout. If you usually work in UK terms, remember that a US single crochet is a UK double crochet.
| Abbreviation | Meaning |
|---|---|
| ch | chain |
| sc | single crochet |
| inc | increase — work 2 sc in the same stitch |
| dec | invisible decrease — insert hook into front loops of next 2 stitches, yarn over, pull through both loops, yarn over, pull through 2 loops on hook |
| mr | magic ring |
| st(s) | stitch(es) |
| rnd | round |
| rep | repeat |
| FO | fasten off |
Numbers in parentheses, like (42), are the stitch count for that round. Check them as you go. Work in continuous spirals unless told otherwise, moving your marker up each round.
The pattern (US terms)
Read through the pattern once before you begin. Make the head first, add the eyes and muzzle while it is still open, then make the body, ears, arms, legs and tail. Stuff in small handfuls, pushing it out to the edges. Pieces should feel plump and springy, not rock hard. The head and body need firm stuffing; arms, ears and tail need only a whisper, or none.
Head
Work in main colour, in a continuous spiral.
- Rnd 1: 6 sc in mr. (6)
- Rnd 2: Inc in each st around. (12)
- Rnd 3: (Sc, inc) rep around. (18)
- Rnd 4: (2 sc, inc) rep around. (24)
- Rnd 5: (3 sc, inc) rep around. (30)
- Rnd 6: (4 sc, inc) rep around. (36)
- Rnd 7: (5 sc, inc) rep around. (42)
- Rnds 8–14: Sc in each st around. (42) — 7 rounds in total
- Rnd 15: (5 sc, dec) rep around. (36)
- Rnd 16: Sc in each st around. (36)
- Rnd 17: (4 sc, dec) rep around. (30)
- Rnd 18: (3 sc, dec) rep around. (24)
Pause here — do not fasten off yet. This is the moment to add the eyes and attach the muzzle, while you can still reach inside the head easily.
Eye placement: Insert the safety eyes between rnds 10 and 11, spaced 7 stitches apart and centred on the front. The muzzle will sit just below them. Push the washers on firmly until they click. For a baby under three, skip safety eyes and embroider eyes with black yarn instead.
Now stuff the head firmly, shaping it into a round ball as you go, and continue:
- Rnd 19: (2 sc, dec) rep around. (18)
- Rnd 20: (Sc, dec) rep around. (12)
- Rnd 21: Dec around. (6)
FO, leaving a 12-inch (30 cm) tail. Weave through the front loops of the final 6 stitches, pull tight to close, and weave in the end.
Body
Work in main colour. The body is a squatter ball than the head, giving that lovely seated, chubby look.
- Rnd 1: 6 sc in mr. (6)
- Rnd 2: Inc in each st around. (12)
- Rnd 3: (Sc, inc) rep around. (18)
- Rnd 4: (2 sc, inc) rep around. (24)
- Rnd 5: (3 sc, inc) rep around. (30)
- Rnd 6: (4 sc, inc) rep around. (36)
- Rnds 7–12: Sc in each st around. (36) — 6 rounds in total
- Rnd 13: (4 sc, dec) rep around. (30)
- Rnd 14: Sc in each st around. (30)
- Rnd 15: (3 sc, dec) rep around. (24)
- Rnd 16: (2 sc, dec) rep around. (18)
Stuff the body firmly, adding a little extra in the lower half so he sits steadily without toppling backwards.
- Rnd 17: (Sc, dec) rep around. (12)
- Rnd 18: Dec around. (6)
FO with a 16-inch (40 cm) tail for sewing the body to the head — do not trim it short. Close the hole as for the head, keeping the sewing tail free.
If you like making plush friends in a set, this body shape is a close cousin of the one in our crochet panda bear pattern — try both and start a little shelf zoo.
Muzzle
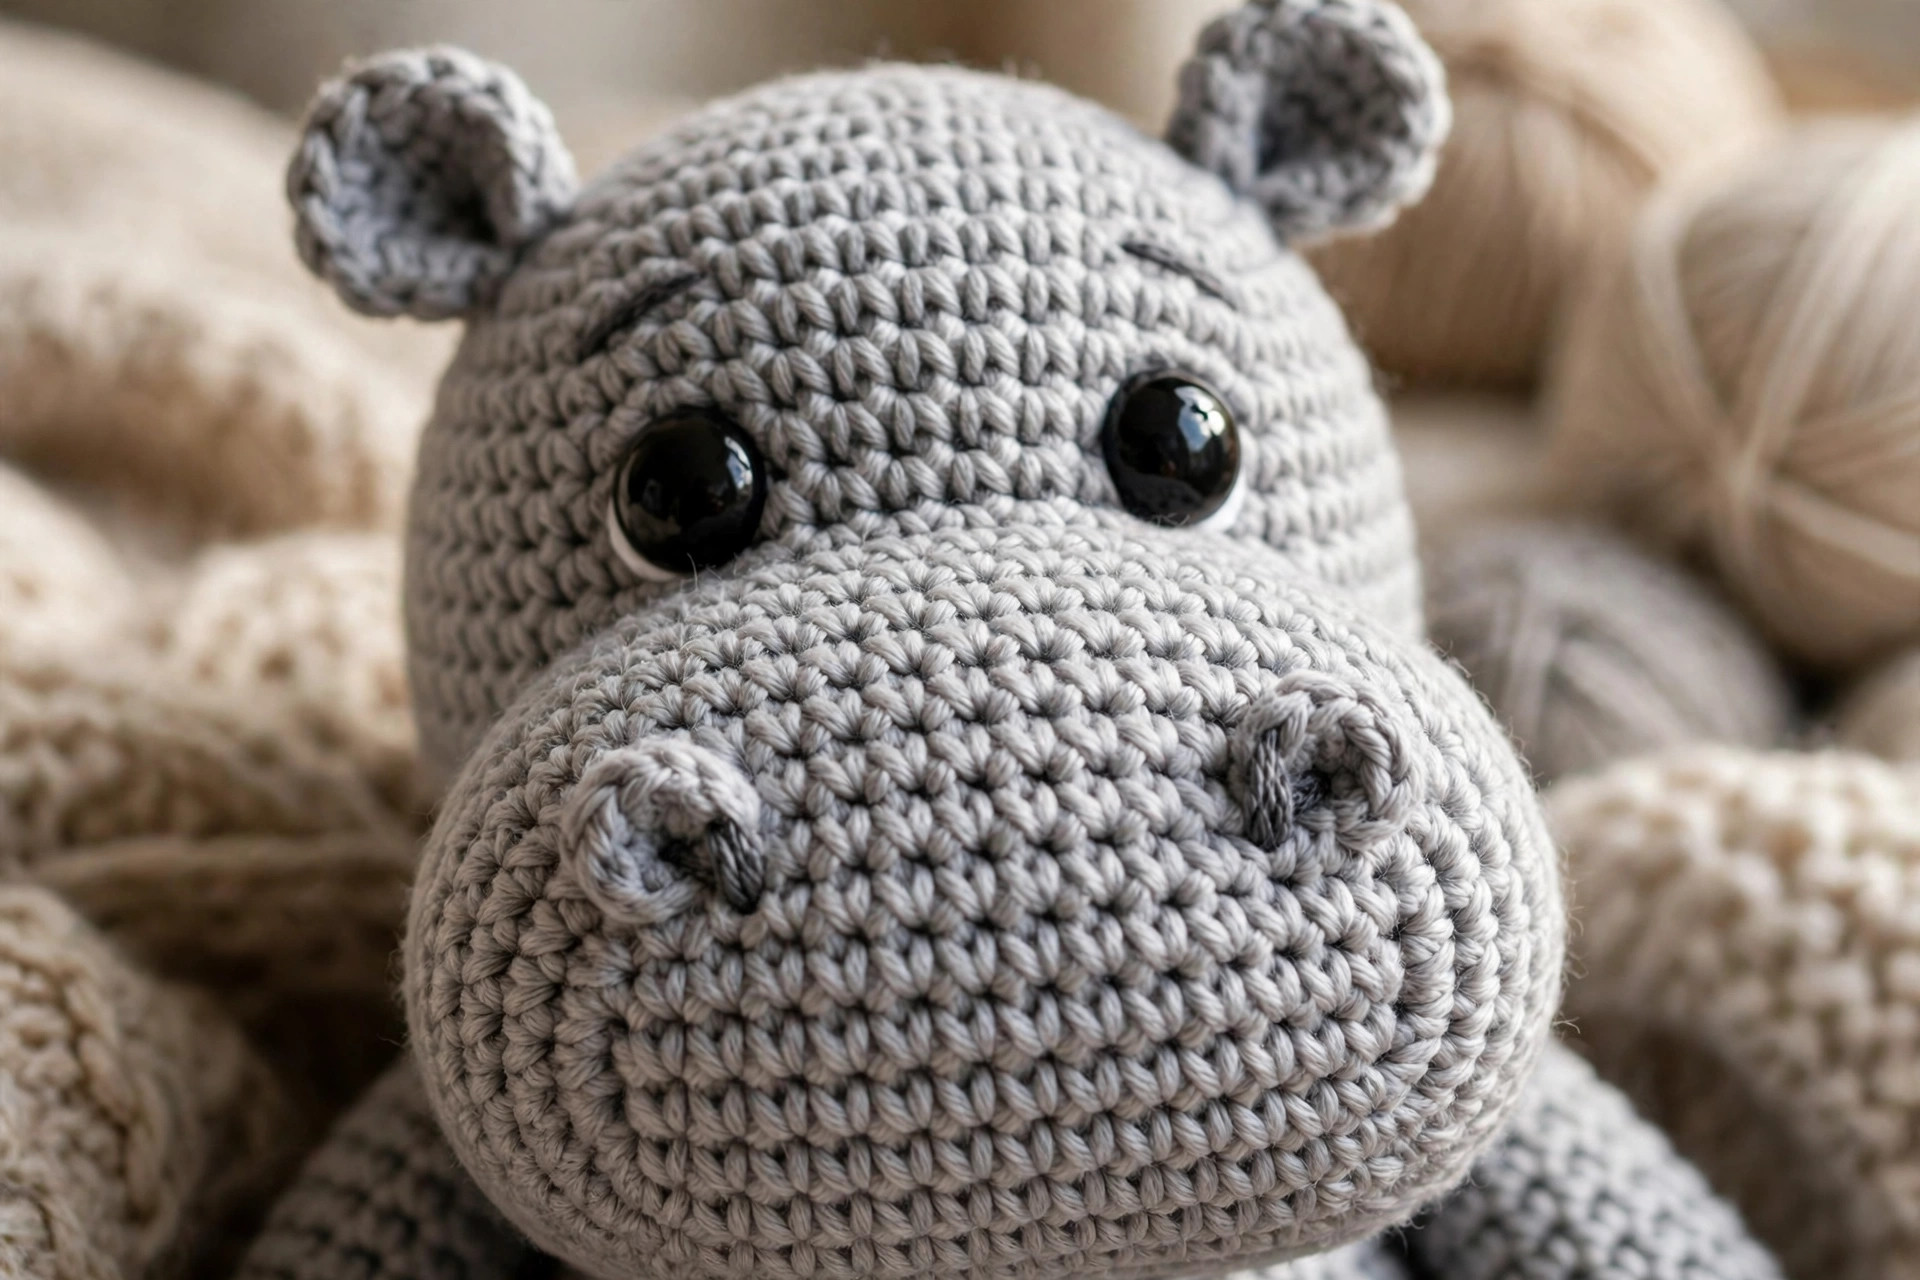
The muzzle is the star of this design: a flat oval that cups outwards for that wide, friendly snout. Work in main colour, or one shade lighter for a soft two-tone effect.
- Foundation: Ch 7.
- Rnd 1: Sc in 2nd ch from hook, sc in next 4 ch, 3 sc in last ch. Working down the other side of the chain, sc in next 4 ch, inc in last ch. (14)
- Rnd 2: Inc, sc in next 4 sts, inc in next 3 sts, sc in next 4 sts, inc in next 2 sts. (20)
- Rnd 3: (Sc, inc), sc in next 4 sts, (sc, inc) 3 times, sc in next 4 sts, (sc, inc) twice. (26)
- Rnd 4: Sc in each st around. (26)
- Rnd 5: Sc in each st around. (26)
FO, leaving a 16-inch (40 cm) tail for sewing. Add a light layer of stuffing behind the muzzle when you attach it, so it holds its rounded shape.
Nostrils and mouth: With dark yarn, embroider two nostrils on rnd 3 of the muzzle, about 4 stitches apart, before you sew it on. Two or three wraps of yarn over the same spot makes a nice raised dot. Add a short vertical stitch below the centre, plus a small smile if you like. Keep it simple — less embroidery reads as cuter.
Ears (make 2)
Work in main colour. For a subtle inner-ear hint, work only rnd 1 in pink.
- Rnd 1: 6 sc in mr. (6)
- Rnd 2: (Sc, inc) rep around. (9)
- Rnd 3: Sc in each st around. (9)
FO, leaving an 8-inch (20 cm) tail. Do not stuff. Flatten and pinch the bottom edge into a soft half-moon so the ear sits prettily on the head.
Arms (make 2)
Work in main colour, in a continuous spiral.
- Rnd 1: 6 sc in mr. (6)
- Rnd 2: (Sc, inc) rep around. (9)
- Rnds 3–5: Sc in each st around. (9) — 3 rounds in total
- Rnd 6: (Sc, dec) rep around. (6)
Add a pinch of stuffing to the lower half, then FO, leaving an 8-inch (20 cm) tail. Flatten the open end — you will sew through both layers when attaching.
Legs (make 2)
Short, sturdy legs help your hippo sit up proudly. Work in main colour.
- Rnd 1: 6 sc in mr. (6)
- Rnd 2: Inc in each st around. (12)
- Rnd 3: Sc in each st around. (12)
- Rnd 4: Sc in each st around. (12)
- Rnd 5: (2 sc, dec) rep around. (9)
Stuff lightly, keeping the base flat like a little foot. FO, leaving an 8-inch (20 cm) tail.
Tail
The quickest piece of all, and it adds so much character from behind.
- Rnd 1: 4 sc in mr. (4)
- Rnds 2–3: Sc in each st around. (4) — 2 rounds in total
FO, leaving a 6-inch (15 cm) tail. Do not stuff. For a cord-style tail, chain 5 and slip stitch back along the chain instead.
Finishing
Take assembly slowly and use your pins. Pin everything, check from the front, side and above, and only sew when you are happy. Moving a pin takes seconds; unpicking takes much longer.
Step 1 — Attach the muzzle. Centre the muzzle just below the eyes, its top edge roughly level with rnd 12 of the head. Pin, tuck a little stuffing behind it, then whipstitch around the edge, catching one muzzle stitch and one head stitch per pass. Add a touch more stuffing before closing if it looks flat.
Step 2 — Sew head to body. Sit the body upright and rest the head on top, slightly forward of centre. Pin, then sew around the join twice with the body's long tail. A double round is the simple fix for a wobbly head. Add extra stuffing at the neck before your final stitches if needed.
Step 3 — Add the ears. Pin one ear to each side of the top of the head, around rnds 4 to 5, angled slightly outwards and mirroring each other. Sew along the pinched bottom edge.
Step 4 — Attach the arms. Pin the arms to the sides of the body, just below the head join, angled slightly forwards. Sew through the flattened top into the body, going around twice.
Step 5 — Attach the legs. Pin the legs to the front lower edge of the body, evenly spaced, flat bases pointing forwards like seated feet. Sew securely around the top edge.
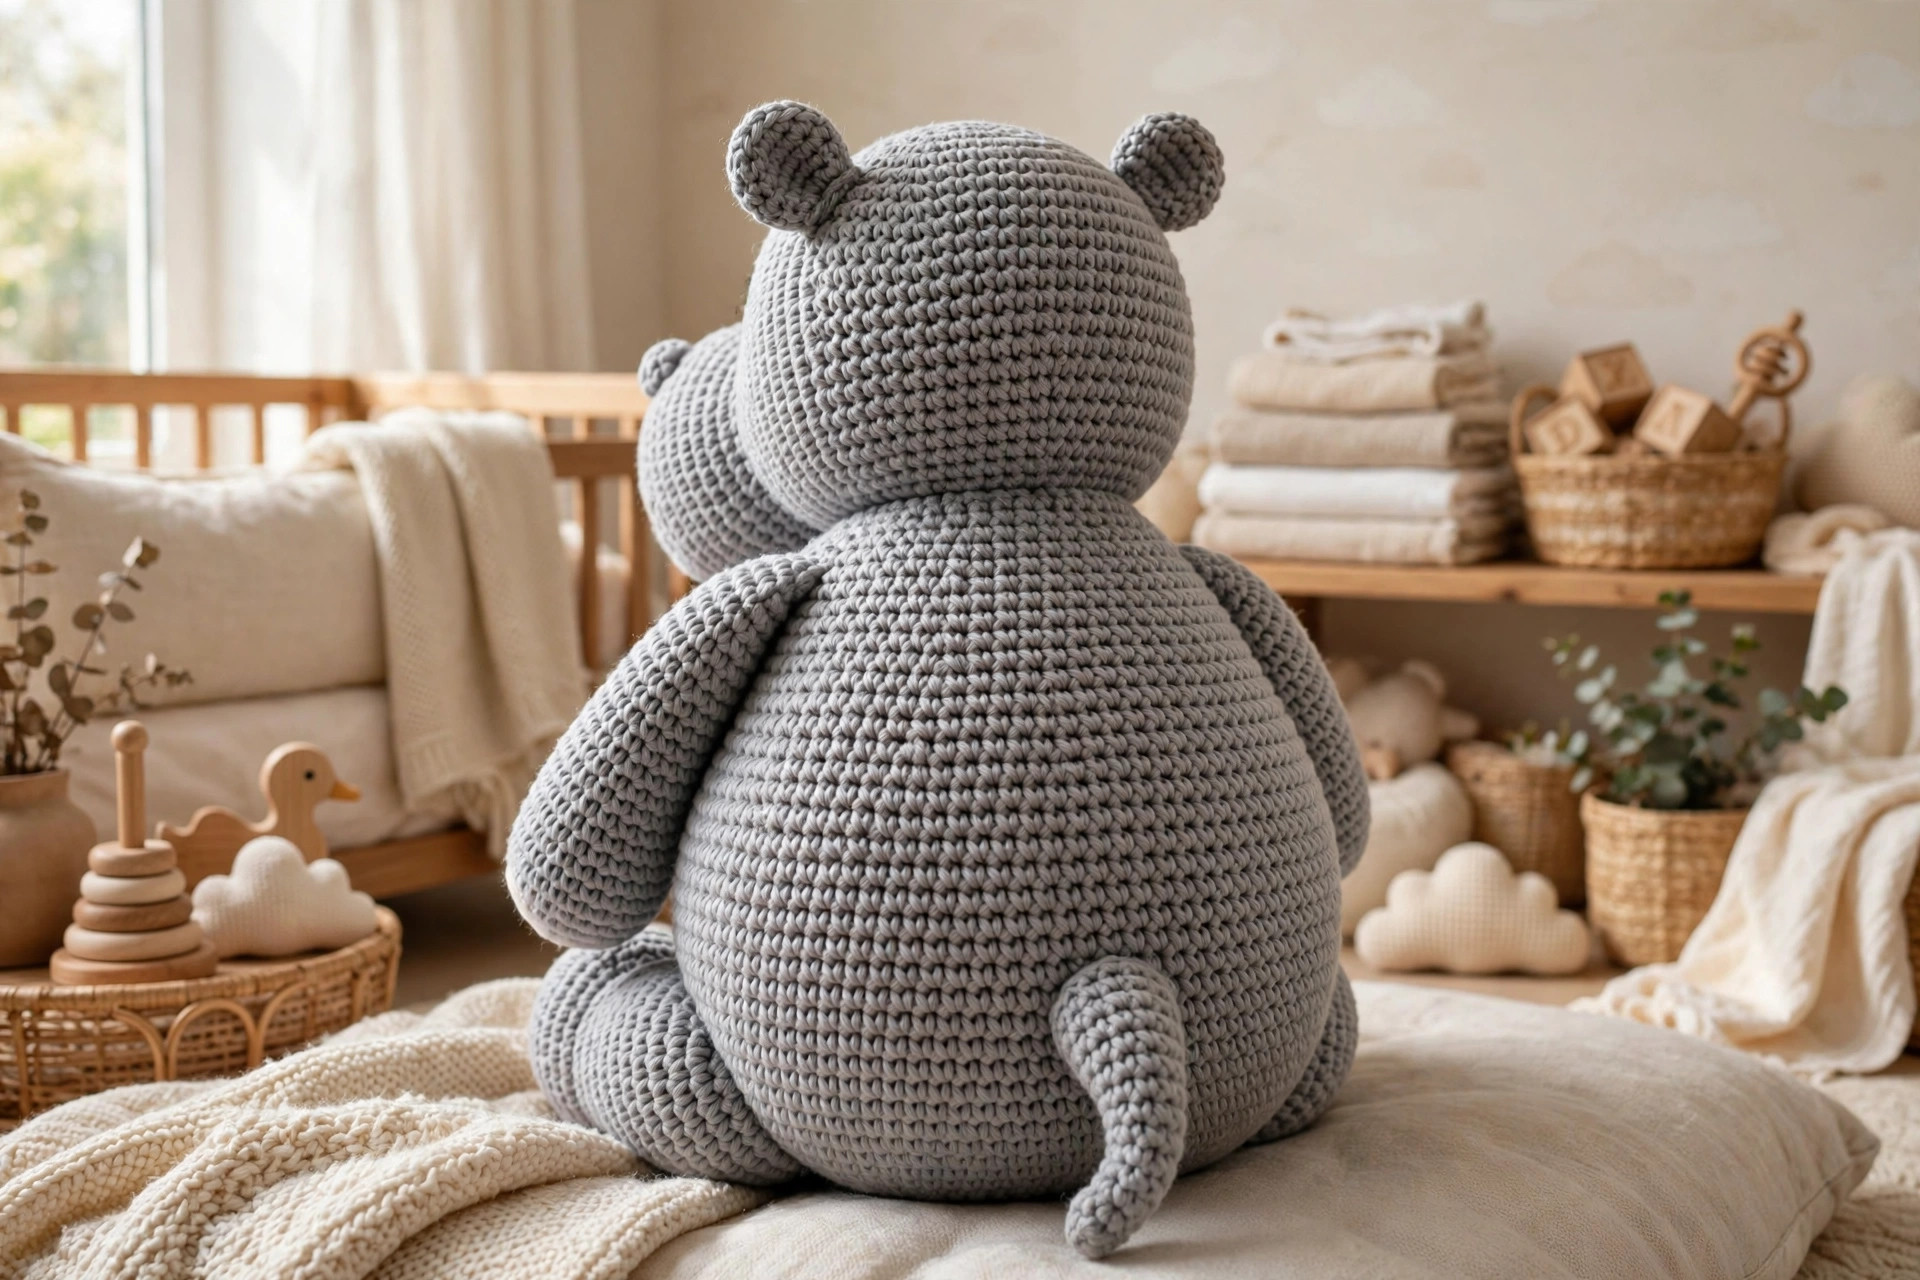
Step 6 — Add the tail. Sew the tail to the centre back of the body, about two rounds up from the base. A couple of extra stitches at the top of its base will keep it perky, not droopy.
Step 7 — Tidy up. Weave in every end through the toy two or three times, then trim close so it disappears inside. Fluff the muzzle and roll the hippo gently between your palms to even out the stuffing. Our floppy cat crochet pattern sits beautifully beside him at the same scale.
Tips
Keep tension snug. Amigurumi fabric should be tighter than blanket crochet. If stuffing shows through, drop down half a hook size. Your hands will adjust within a round or two.
Use your stitch marker religiously. In spirals there is no join to mark the round end. Move the marker up every single round, even — especially — when you feel confident.
Count shaped rounds. Mistakes almost always happen on increase and decrease rounds. Check your count against the number in parentheses each time and save yourself the frogging.
Stuff generously. Stuffing compresses with time and cuddles, so a hippo that feels almost too firm today will feel perfect in a month. Watch the muzzle and neck join — they go soft first.
Pin, look, then sew. Photograph your pinned hippo if you are unsure about placement — lopsided ears and wonky alignment are far easier to spot on a screen than in your hands.
Safety for little ones. Safety eyes are not suitable for under-threes. For a baby gift, embroider the eyes instead, double-knot all joins, and weave ends in securely.
Colour play. Grey and lavender are classics, but mint, butter yellow and peachy pink all look adorable. Work the muzzle and inner ears lighter for a gentle two-tone effect. For another quick companion make, try our free crochet cat pattern.
FAQ
Is this hippo pattern really suitable for beginners?
Yes, with one caveat: be comfortable with single crochet and a magic ring first. There are no tricky techniques in the rounds, and the Finishing section walks you through sewing up piece by piece. Many makers use this as their first amigurumi.
How much yarn does the hippo use?
About 120 yards (110 m) of worsted-weight yarn in the main colour — under one standard ball — plus a few yards of dark yarn for the face. Allow roughly 15 extra yards if you work the muzzle and inner ears in a contrast shade.
Can I make the hippo bigger or smaller?
Absolutely — every piece is a simple proportional shape. Use bulky yarn with a hook two to three sizes larger for a 10 to 12 inch hippo, or fingering-weight yarn with a 2 mm hook for a 3 inch mini. Scale the eyes too: 6 mm for mini, 12 mm for large.
Can I sell hippos I make from this pattern?
Yes. You are welcome to sell finished, handmade hippos at craft fairs and in your own online shop — a credit line to Little Loop Finds is appreciated. Please hand-make each toy rather than mass-producing, and follow local toy safety rules, including embroidered eyes for under-threes.
What can I make next if I loved this project?
If the amigurumi bug has bitten, keep the momentum going with another single-sitting animal. Our one-piece crochet teddy bear pattern is a lovely next step with even less sewing,.
How do I wash the finished hippo?
Hand-wash in lukewarm water with mild soap, press water out in a towel without wringing, reshape the muzzle and ears, and dry flat away from heat. Hand-washing keeps embroidered features crisp for longer.
The box below contains an Etsy link. If you buy through it, we may earn a small commission at no extra cost to you. Learn more.