Enchanted woodland nursery mobile crochet pattern
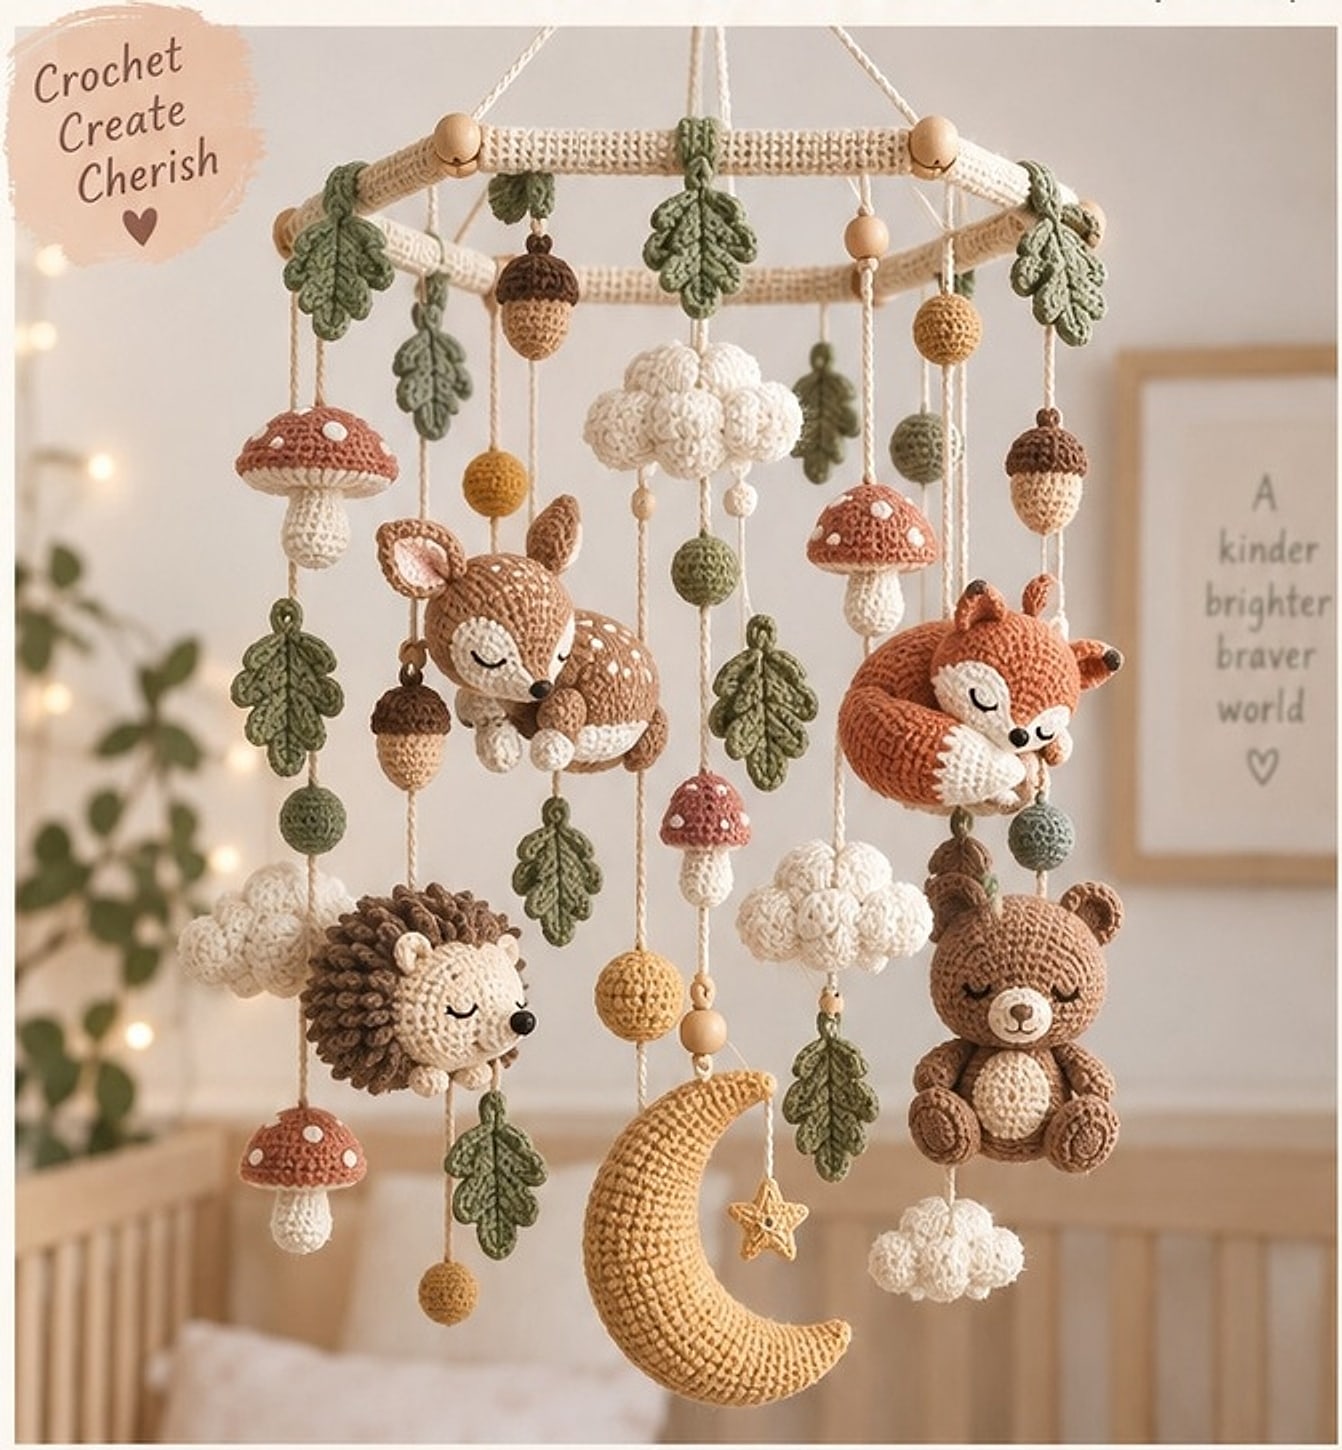
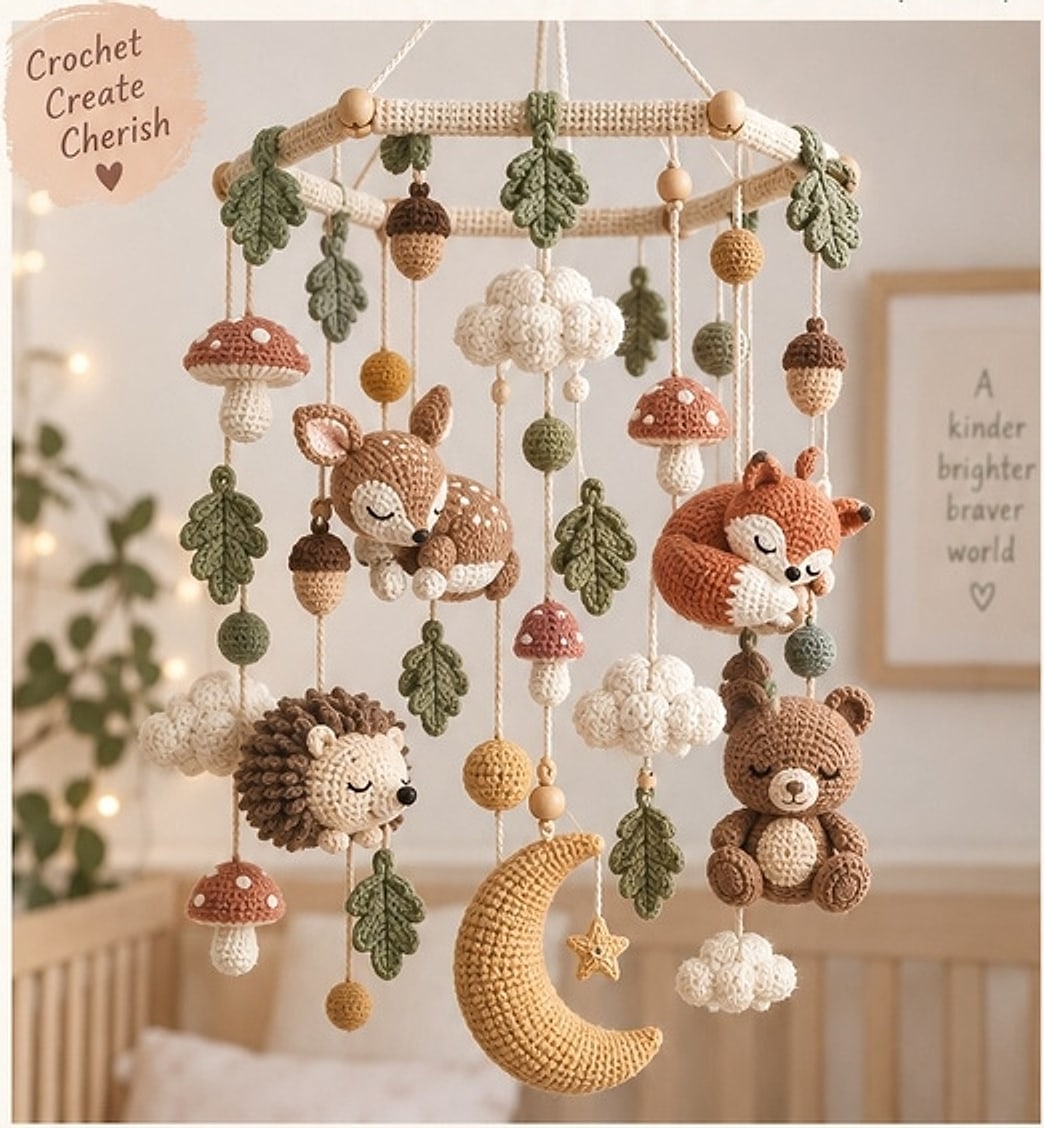
Five sleepy woodland friends cascade at staggered heights from a crochet-covered hexagonal frame, with oak leaves, acorns, mushrooms and clouds woven between them and a mustard crescent moon hanging lowest at the centre.

Nursery · Crochet
- Finished height
- 48–52 cm / 19–20.5 in
- Making time
- About 16–30 hours
- Hook
- 2.5 mm, sport/DK cotton
- Parts
- 10, five animals plus moon and accents
- Skill
- Intermediate
In this post
- At a Glance
- What's Included
- Materials, Yarn Palette and Tools
- Abbreviations
- Skill Level and Gauge
- Pattern Map
- Part 1 — Sleeping Fawn
- Part 2 — Curled Woodland Fox
- Part 3 — Small Hedgehog
- Part 4 — Floppy-Eared Rabbit
- Part 5 — Tiny Sitting Bear
- Part 6 — Dimensional Crescent Moon
- Part 7 — Oak Leaves and Tiny Acorns
- Part 8 — Mushrooms, Cloud Puffs and Spherical Accents
- Part 9 — Crochet-Covered Faceted Hexagonal Frame
- Part 10 — Suspension Cords and Cascade Map
- Final Assembly
- Helpful Tips for Success
- Common Mistakes to Avoid
- Finishing Touches
- Variations and Customization
- Final Notes and Copyright
Some nursery mobiles are a circle of toys. The Enchanted Woodland Nursery Mobile is a canopy. Five sleepy amigurumi friends — a sleeping fawn, a curled woodland fox, a small hedgehog, a floppy-eared rabbit and a tiny sitting bear — cascade at staggered heights from a crochet-covered hexagonal frame, with oak leaves, acorns, mushrooms, cloud puffs and tiny spheres woven between them, and a dimensional muted-mustard crescent moon hanging lowest at the centre to anchor the whole composition.
The palette is intentionally calm and organic: sage green, dusty terracotta, oatmeal, warm beige, muted mustard, cocoa brown and ivory. Sparingly used wooden beads provide clean Scandinavian structure without overpowering the crochet. Everything is written in US crochet terminology at an intermediate skill level, worked with firm amigurumi tension so stuffing never shows through.
This post walks through the entire pattern in order: materials and gauge, every character and accent with round-by-round instructions, the hexagonal frame, the exact hanging strand plan, and the final cascade assembly — plus tips, common mistakes, finishing and variations.
At a Glance
| Specification | Details |
|---|---|
| Finished overall height | Approx. 48–52 cm / 18.9–20.5 in |
| Frame width | Approx. 28 cm / 11 in point-to-point; 24 cm / 9.4 in across flats |
| Largest animal | Approx. 14 cm / 5.5 in tall |
| Crescent moon | Approx. 10–11 cm / 3.9–4.3 in |
| Yarn | Sport / DK weight cotton |
| Hook | 2.5 mm (use 2.25 mm only if stuffing shows through) |
| Skill level | Intermediate |
| Time | Approx. 24–30 hours for a beginner maker; 16–20 hours for an experienced maker |
| Construction | Five amigurumi friends, moon, botanical accents and a crochet-covered six-dowel hexagonal frame, finished as a balanced hanging cascade |
What's Included
- Step-by-step visual roadmap: the eight build stages from first character to final cascade
- Full materials list and yarn colour plan with yardage
- US abbreviations, gauge note and the special loop single crochet stitch
- Pattern map for all 10 parts
- Round-by-round instructions for the fawn, fox, hedgehog, rabbit and bear
- Dimensional crescent moon, oak leaves and acorns, mushrooms, cloud puffs and spherical accents
- Crochet-covered faceted hexagonal frame with dowel sleeves and join
- Exact suspension cords and hanging strand lengths for the cascade
- Final assembly, balance rule, tips, mistakes to avoid, finishing and variations
Skill level and techniques
This is an intermediate pattern. You'll use continuous spiral rounds, compact shaping, flat ears and leaves, loop stitch texture, colour changes, embroidery, frame covering, measured suspension cords and balance-focused assembly.
Materials, Yarn Palette and Tools

Yarn and colour plan — Sport / DK weight cotton
| Colour | Use | Approx. amount | Approx. length |
|---|---|---|---|
| Sage green | Frame accents, oak leaves, hanging spheres | 85 g | 187 m / 205 yd |
| Dusty terracotta | Fox, mushroom caps, fawn accents | 55 g | 121 m / 132 yd |
| Oatmeal | Fawn, hedgehog face, rabbit highlights | 70 g | 154 m / 168 yd |
| Warm beige | Rabbit, fawn body shading, neutral details | 55 g | 121 m / 132 yd |
| Muted mustard | Crescent moon, spheres, tiny accents | 40 g | 88 m / 96 yd |
| Cocoa brown | Bear, hedgehog spines, acorn caps | 60 g | 132 m / 144 yd |
| Ivory | Clouds, muzzles, fox tail tip, mushroom stems | 55 g | 121 m / 132 yd |
| Total | 420 g | 924 m / 1,010 yd |
Tools and notions
- 2.5 mm crochet hook; use 2.25 mm only if your stuffing shows through
- Polyester fiberfill, approx. 180–220 g total
- Optional 6 mm safety eyes for an alternate awake-face version; the pictured nursery version uses embroidery only
- Six smooth 12 cm / 4.7 in wooden dowels, 6–8 mm diameter, for the faceted frame
- 6–10 unfinished wooden beads, 12–16 mm, used only as structural accents
- Locking stitch markers, tapestry needle, sewing pins, sharp scissors, flexible tape measure
- Strong cotton cord for ceiling suspension
Yarn note: Quantities are deliberately rounded up. Exact usage changes with yarn brand, gauge and tension. If you substitute yarn or hook size, finished size and yardage will change.
Abbreviations
All terms are US crochet terminology.
| Abbreviation | Meaning |
|---|---|
| mr | Magic ring — adjustable loop for starting circular pieces |
| ch | Chain — yarn over and pull through the loop on the hook |
| sl st | Slip stitch — insert hook, yarn over, pull through stitch and loop |
| sc | Single crochet — insert hook, pull up loop, yarn over, pull through both loops |
| hdc | Half double crochet — yarn over, insert hook, pull up loop, yarn over, pull through all 3 loops |
| dc | Double crochet — yarn over, insert hook, pull up loop; yarn over / pull through 2 twice |
| inc | Increase — work 2 sc in the same stitch unless stated otherwise |
| dec | Invisible decrease — work next 2 stitches together through front loops |
| FLO / BLO | Front loop only / back loop only |
| st(s) | Stitch / stitches |
| FO | Fasten off — cut yarn and pull the tail through the final loop |
Skill Level and Gauge
| Item | Guidance |
|---|---|
| Skill level | Intermediate |
| Why | Continuous spiral rounds, compact shaping, flat ears/leaves, loop stitch texture, colour changes, embroidery, frame covering, measured suspension cords and balance-focused assembly |
| Gauge | 24 sc × 26 rounds = approx. 10 × 10 cm / 4 × 4 in with a 2.5 mm hook |
| Tension | Use firm amigurumi tension so stuffing does not show. Flat leaves and ears should remain flexible; frame sleeves should fit snugly over the dowels |
Always match gauge in the round before making a full set of characters. Even small changes in tension can affect fit, drape, yarn usage and how the cascade balances.
Special stitch — Loop Single Crochet (lsc)
Insert hook into the next stitch, wrap the working yarn around your left index finger to form a 1.5–2 cm loop, pull the yarn through the stitch while holding the loop, yarn over and complete a single crochet. The loop remains on the right side and forms the hedgehog spines. For the hedgehog, keep loops 1.5–2 cm long and consistent — uneven loops make the spine cap look shaggy rather than softly textured.
Pattern Map
| Part | Piece | Main colours |
|---|---|---|
| 1 | Sleeping Fawn | Oatmeal + warm beige + ivory |
| 2 | Curled Fox | Dusty terracotta + ivory + cocoa |
| 3 | Hedgehog | Oatmeal + cocoa |
| 4 | Floppy Rabbit | Warm beige + oatmeal + ivory |
| 5 | Sitting Bear | Cocoa + oatmeal |
| 6 | Crescent Moon | Muted mustard |
| 7 | Oak Leaves + Acorns | Sage + cocoa + oatmeal |
| 8 | Mushrooms + Clouds + Spheres | Terracotta + ivory + sage / mustard |
| 9 | Hexagonal Frame + Cords | Oatmeal + sage |
| 10 | Final Cascade Assembly | All colours |
Step-by-step visual roadmap
The written instructions are the authoritative stitch-by-stitch pattern. Use this quick map before starting:
| Step | Component | Visual goal |
|---|---|---|
| 1 | Sleeping Fawn | Rounded resting deer with embroidered sleepy face and tiny spots |
| 2 | Curled Fox | Terracotta fox shaped into a compact sleeping curl with an ivory tail tip |
| 3 | Hedgehog | Oatmeal face and cocoa loop-stitch spine cap for a soft textured silhouette |
| 4 | Floppy Rabbit | Warm beige bunny with long flexible ears and tucked nursery pose |
| 5 | Sitting Bear | Cocoa bear with oatmeal muzzle, seated legs and simple embroidered face |
| 6 | Moon + Forest Details | Mustard crescent, oak leaves, acorns, mushrooms, clouds and spheres |
| 7 | Faceted Frame | Six crochet-covered wooden dowels joined as a softly faceted hexagon |
| 8 | Final Cascade | Characters hang at varied heights with balanced visual weight from every angle |
Part 1 — Sleeping Fawn
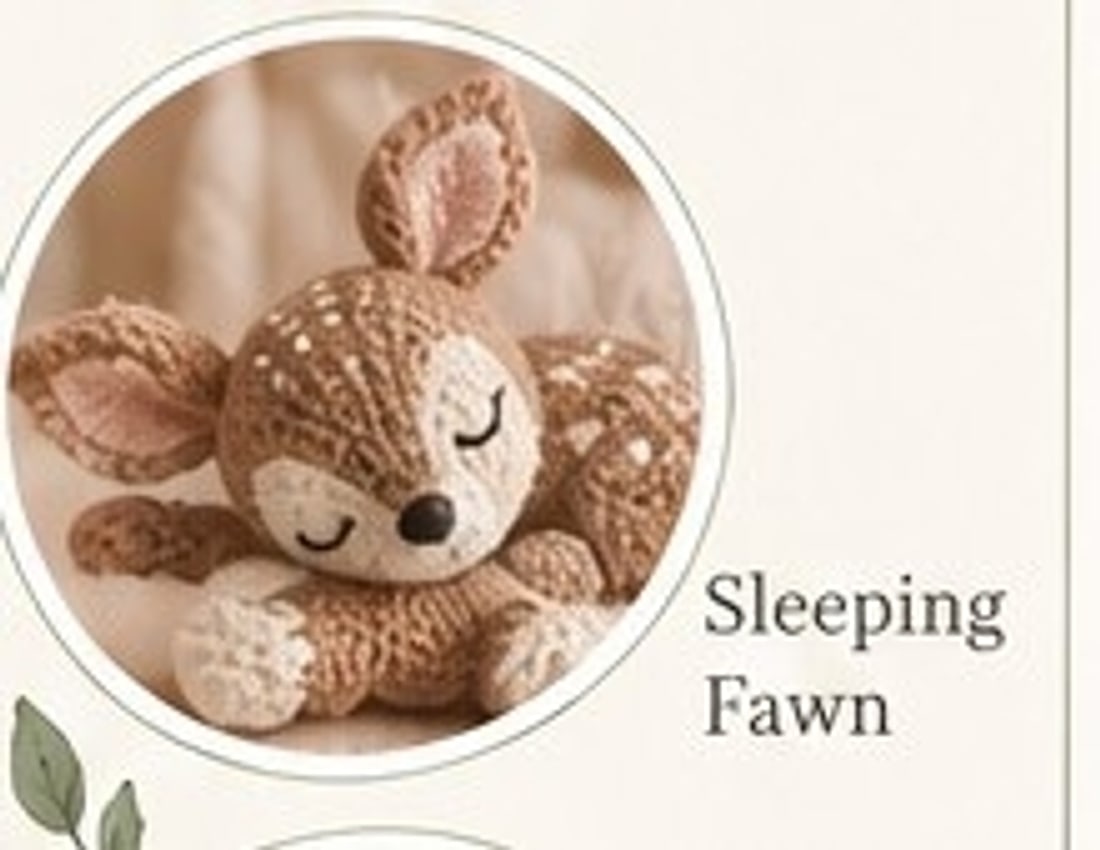
The fawn is worked in oatmeal, warm beige and ivory and finished as a long, low, sleeping shape with tiny tucked legs, softly pointed ears and understated back spots.
A. Head — Oatmeal
| Round | Instruction | Count |
|---|---|---|
| R1 | 6 sc in mr | 6 sts |
| R2 | Inc in each st around | 12 sts |
| R3 | (1 sc, inc) × 6 | 18 sts |
| R4 | (2 sc, inc) × 6 | 24 sts |
| R5 | (3 sc, inc) × 6 | 30 sts |
| R6–R10 | Sc around each round | 30 each |
| R11 | (3 sc, dec) × 6 | 24 sts |
| R12 | (2 sc, dec) × 6 | 18 sts |
| R13 | (1 sc, dec) × 6 | 12 sts |
| R14 | Dec × 6. FO with 25 cm / 10 in tail | 6 sts |
Stuff after Round 11. Embroider closed eyes between Rounds 7–8, each eye 3 stitches wide, with 5 stitches between the inner ends. Add a tiny cocoa nose centred between Rounds 9–10. The head should be a soft oval — slightly wider than it is tall.
B. Body — Warm Beige
| Round | Instruction | Count |
|---|---|---|
| R1 | 6 sc in mr | 6 |
| R2 | Inc × 6 | 12 |
| R3 | (1 sc, inc) × 6 | 18 |
| R4 | (2 sc, inc) × 6 | 24 |
| R5 | (3 sc, inc) × 6 | 30 |
| R6–R12 | Sc around each round | 30 each |
| R13 | (3 sc, dec) × 6 | 24 |
| R14 | (2 sc, dec) × 6 | 18 |
| R15 | (1 sc, dec) × 6 | 12 |
| R16 | Dec × 6. FO with 30 cm / 12 in tail | 6 |
The body should be longer than the head and slightly fuller through the middle, ready to rest horizontally.
C. Muzzle — Ivory
| Round | Instruction | Count |
|---|---|---|
| R1 | 6 sc in mr | 6 |
| R2 | Inc × 6 | 12 |
| R3 | Sc around | 12 |
| R4 | Dec × 6. FO with 20 cm / 8 in tail | 6 |
D. Ears — Make 2, Oatmeal
| Row | Instruction | Count |
|---|---|---|
| Row 1 | Ch 4; sc in 2nd ch and across. Ch 1, turn | 3 sts |
| Row 2 | Inc, 1 sc, inc. Ch 1, turn | 5 sts |
| Rows 3–5 | Sc across. Ch 1, turn | 5 each |
| Row 6 | Dec, 1 sc, dec | 3 sts |
FO each ear with a 20 cm / 8 in tail. Fold the base slightly before sewing.
E. Resting Legs — Make 4, Warm Beige
| Round | Instruction | Count |
|---|---|---|
| R1 | 6 sc in mr | 6 |
| R2 | Inc × 6 | 12 |
| R3–R5 | Sc around each round | 12 each |
| R6 | Dec × 6. FO with 20 cm / 8 in tail | 6 |
F. Tail — Oatmeal
| Round | Instruction | Count |
|---|---|---|
| R1 | 6 sc in mr | 6 |
| R2 | Inc × 6 | 12 |
| R3 | Sc around | 12 |
| R4 | Dec × 6. FO with 18 cm / 7 in tail | 6 |
Assembly checkpoint: Sew the muzzle centred over Head Rounds 8–11. Place ears over Rounds 4–6, bases 9 stitches apart. Sew the body to the lower back of the head, then place the four legs in two tucked pairs along Body Rounds 6–11. Embroider 8–10 tiny ivory back spots over Body Rounds 5–10. The finished fawn should read as sleeping and horizontal.
Part 2 — Curled Woodland Fox
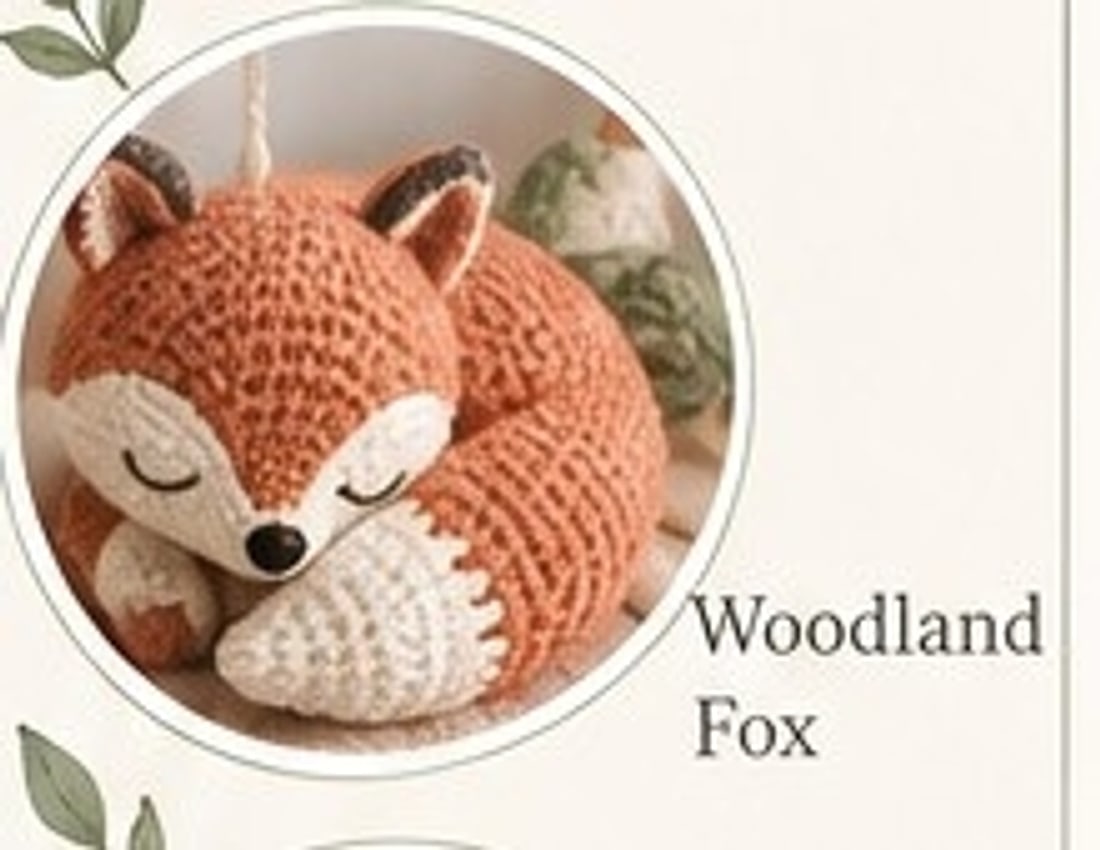
The fox is worked in dusty terracotta with an ivory tail tip and cocoa details, then curved into a compact sleeping curl. Do not overstuff the body: an overstuffed fox resists the C-shape and pulls the head away from the tail.
A. Head — Dusty Terracotta
| Round | Instruction | Count |
|---|---|---|
| R1 | 6 sc in mr | 6 |
| R2 | Inc × 6 | 12 |
| R3 | (1 sc, inc) × 6 | 18 |
| R4 | (2 sc, inc) × 6 | 24 |
| R5 | (3 sc, inc) × 6 | 30 |
| R6–R10 | Sc around each round | 30 each |
| R11 | (3 sc, dec) × 6 | 24 |
| R12 | (2 sc, dec) × 6 | 18 |
| R13 | (1 sc, dec) × 6 | 12 |
| R14 | Dec × 6. FO | 6 |
B. Body — Dusty Terracotta
| Round | Instruction | Count |
|---|---|---|
| R1 | 6 sc in mr | 6 |
| R2 | Inc × 6 | 12 |
| R3 | (1 sc, inc) × 6 | 18 |
| R4 | (2 sc, inc) × 6 | 24 |
| R5 | (3 sc, inc) × 6 | 30 |
| R6 | (4 sc, inc) × 6 | 36 |
| R7–R12 | Sc around each round | 36 each |
| R13 | (4 sc, dec) × 6 | 30 |
| R14 | (3 sc, dec) × 6 | 24 |
| R15 | (2 sc, dec) × 6 | 18 |
| R16 | (1 sc, dec) × 6 | 12 |
| R17 | Dec × 6. FO with 35 cm / 14 in tail | 6 |
C. Tail — Terracotta to Ivory Tip
| Round | Instruction | Count |
|---|---|---|
| R1 | 6 sc in mr — terracotta | 6 |
| R2 | Inc × 6 | 12 |
| R3 | (1 sc, inc) × 6 | 18 |
| R4–R13 | Sc around each round | 18 each |
| R14 | Change to ivory; sc around | 18 |
| R15 | (1 sc, dec) × 6 | 12 |
| R16–R18 | Sc around each round | 12 each |
| R19 | Dec × 6. FO with 30 cm / 12 in tail | 6 |
D. Ears — Make 2, Terracotta with Ivory Inner Stitching
| Row | Instruction | Count |
|---|---|---|
| Row 1 | Ch 4; sc in 2nd ch and across. Ch 1, turn | 3 |
| Row 2 | Inc, 1 sc, inc. Ch 1, turn | 5 |
| Rows 3–4 | Sc across. Ch 1, turn | 5 each |
| Row 5 | Dec, 1 sc, dec | 3 |
Embroider sleepy eyes across Head Rounds 7–8, 5 stitches apart at the inner corners. Add a cocoa nose at Round 10. Sew the head to Body Rounds 3–5. Curve the body into a C-shape and tack the side of the head gently to Body Round 10. Wrap the tail around the front of the body and tack the ivory tip near the opposite cheek. The fox should form a compact sleeping curl, with the ivory tail tip crossing the front without hiding the face.
Part 3 — Small Hedgehog
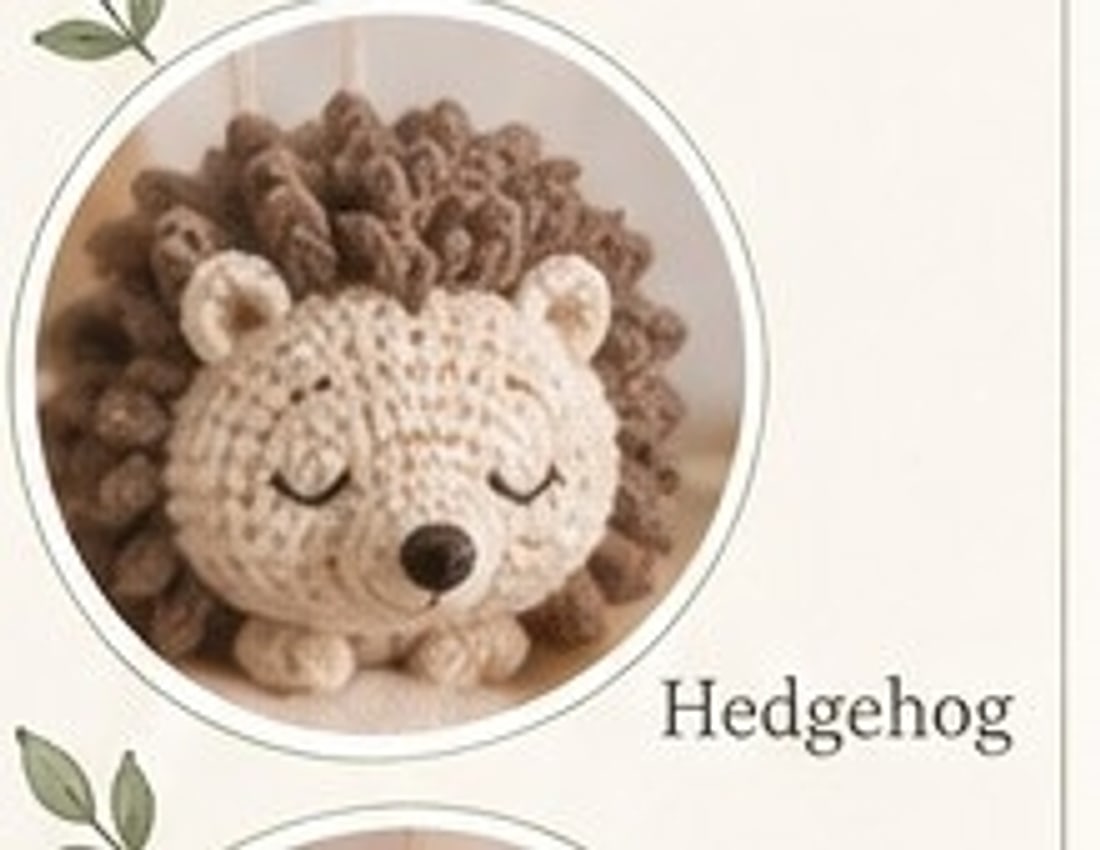
The hedgehog is the textured silhouette of the set: an oatmeal face and belly left visible, with a dense cocoa halo of soft loops over the back. Work the spine cap in loop single crochet (see the special stitch above) and keep every loop 1.5–2 cm long.
A. Body and Face — Oatmeal
| Round | Instruction | Count |
|---|---|---|
| R1 | 6 sc in mr | 6 |
| R2 | Inc × 6 | 12 |
| R3 | (1 sc, inc) × 6 | 18 |
| R4 | (2 sc, inc) × 6 | 24 |
| R5 | (3 sc, inc) × 6 | 30 |
| R6 | (4 sc, inc) × 6 | 36 |
| R7–R14 | Sc around each round | 36 each |
| R15 | (4 sc, dec) × 6 | 30 |
| R16 | (3 sc, dec) × 6 | 24 |
| R17 | (2 sc, dec) × 6 | 18 |
| R18 | (1 sc, dec) × 6 | 12 |
| R19 | Dec × 6. FO | 6 |
Stuff firmly after Round 14. Embroider closed eyes between Rounds 9–10 and a tiny cocoa nose centred at Round 12.
B. Spine Cap — Cocoa Brown
| Round | Instruction | Count |
|---|---|---|
| R1 | 6 sc in mr | 6 |
| R2 | Inc × 6 | 12 |
| R3 | (1 sc, inc) × 6 | 18 |
| R4 | (2 sc, inc) × 6 | 24 |
| R5 | (3 sc, inc) × 6 | 30 |
| R6 | (4 sc, inc) × 6 | 36 |
| R7 | Loop single crochet in each st around | 36 |
| R8 | Loop single crochet in each st around | 36 |
| R9 | Loop single crochet in each st around. FO with 45 cm / 18 in tail | 36 |
C. Feet — Make 4, Oatmeal
| Round | Instruction | Count |
|---|---|---|
| R1 | 6 sc in mr | 6 |
| R2 | Inc × 6 | 12 |
| R3–R4 | Sc around each round | 12 each |
| R5 | Dec × 6. FO | 6 |
Place the spine cap over the back half so its centre sits over Body Round 9. Sew around Round 9 of the cap, leaving the face and belly visible. Attach two front feet near Body Round 12 and two rear feet near Round 7, angled slightly outward. The hedgehog should look oval and low, with a clear oatmeal face area.
Part 4 — Floppy-Eared Rabbit
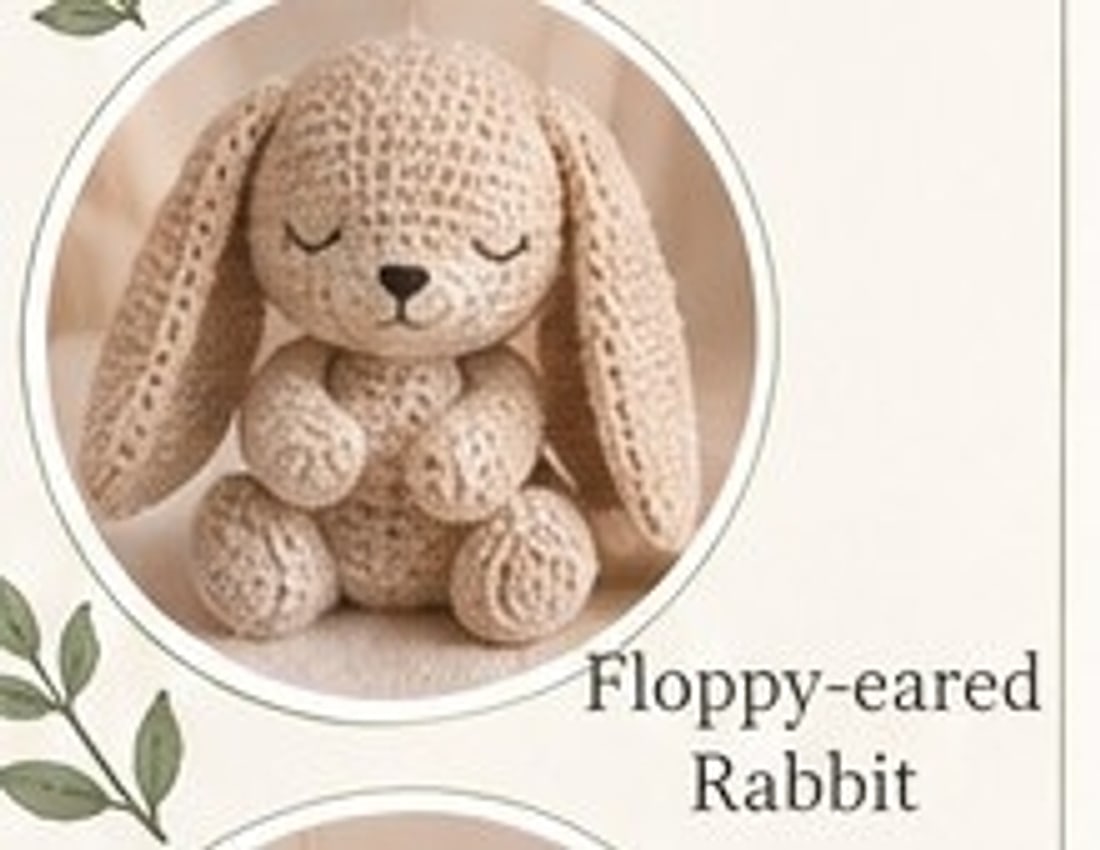
The rabbit is the vertical silhouette: warm beige head and long ears over an oatmeal body, with legs tucked forward in a seated pose. Sew the ears to drape, not to stand — attaching them too high or too stiffly flattens the character.
A. Head — Warm Beige
| Round | Instruction | Count |
|---|---|---|
| R1 | 6 sc in mr | 6 |
| R2 | Inc × 6 | 12 |
| R3 | (1 sc, inc) × 6 | 18 |
| R4 | (2 sc, inc) × 6 | 24 |
| R5 | (3 sc, inc) × 6 | 30 |
| R6–R10 | Sc around each round | 30 each |
| R11 | (3 sc, dec) × 6 | 24 |
| R12 | (2 sc, dec) × 6 | 18 |
| R13 | (1 sc, dec) × 6 | 12 |
| R14 | Dec × 6. FO | 6 |
B. Body — Oatmeal
| Round | Instruction | Count |
|---|---|---|
| R1 | 6 sc in mr | 6 |
| R2 | Inc × 6 | 12 |
| R3 | (1 sc, inc) × 6 | 18 |
| R4 | (2 sc, inc) × 6 | 24 |
| R5 | (3 sc, inc) × 6 | 30 |
| R6–R11 | Sc around each round | 30 each |
| R12 | (3 sc, dec) × 6 | 24 |
| R13 | (2 sc, dec) × 6 | 18 |
| R14 | (1 sc, dec) × 6 | 12 |
| R15 | Dec × 6. FO | 6 |
C. Long Ears — Make 2, Warm Beige
| Row | Instruction | Count |
|---|---|---|
| Row 1 | Ch 4; sc in 2nd ch and across. Ch 1, turn | 3 |
| Row 2 | Inc, 1 sc, inc. Ch 1, turn | 5 |
| Rows 3–10 | Sc across. Ch 1, turn | 5 each |
| Row 11 | Dec, 1 sc, dec. Ch 1, turn | 3 |
| Row 12 | Sc across. FO with 25 cm / 10 in tail | 3 |
D. Arms and Legs — Make 4, Oatmeal
| Round | Instruction | Count |
|---|---|---|
| R1 | 6 sc in mr | 6 |
| R2 | Inc × 6 | 12 |
| R3–R5 | Sc around each round | 12 each |
| R6 | Dec × 6. FO | 6 |
Embroider eyes between Head Rounds 7–8, 5 stitches between the inner ends. Add a tiny cocoa Y-shaped nose at Round 10. Sew ears to Head Rounds 4–5, bases 7 stitches apart, allowing them to hang freely. Sew the body below the head; place two arms at Body Rounds 5–7 and two seated legs at Rounds 9–12. The rabbit should hang vertically, with long flexible ears framing the head.
Part 5 — Tiny Sitting Bear
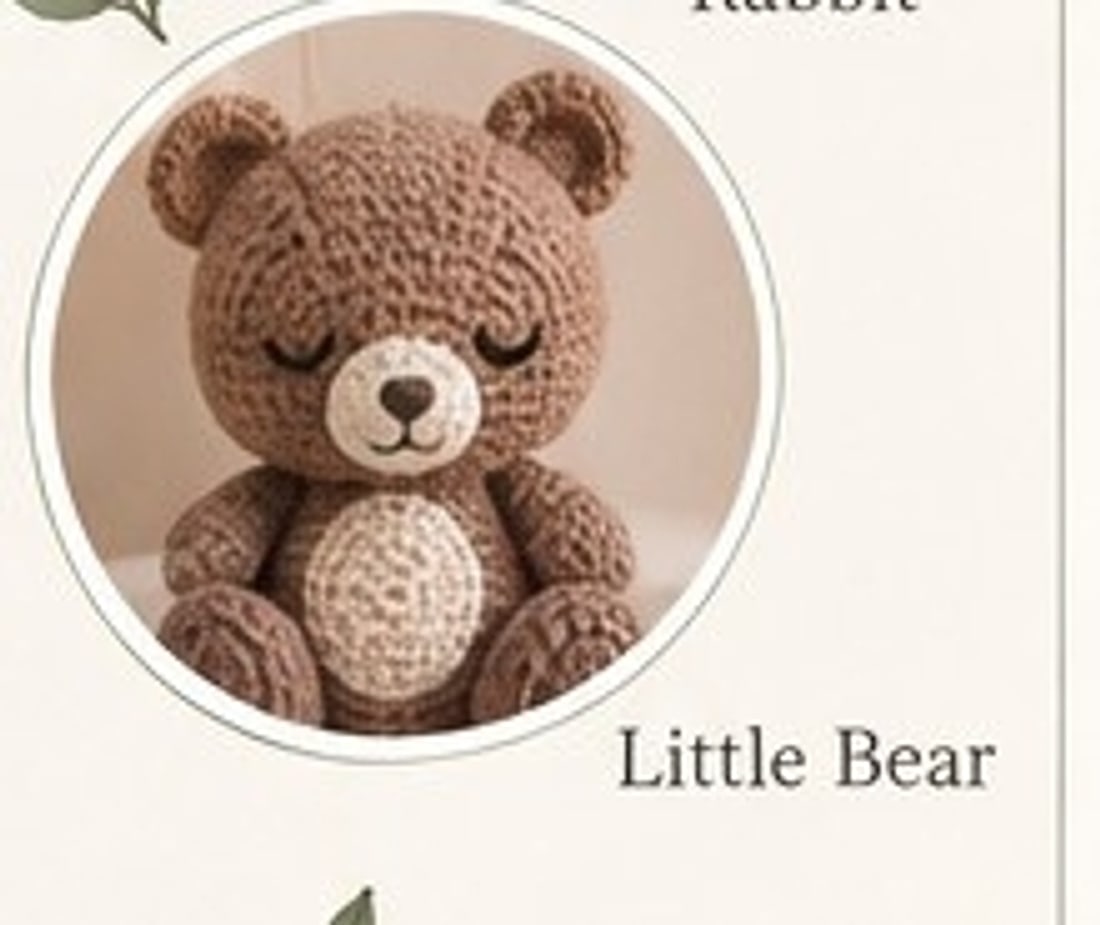
The bear is the most compact character in the set, worked in cocoa with an oatmeal muzzle. Set the legs forward so the finished piece sits stably in the cascade.
A. Head — Cocoa Brown
| Round | Instruction | Count |
|---|---|---|
| R1 | 6 sc in mr | 6 |
| R2 | Inc × 6 | 12 |
| R3 | (1 sc, inc) × 6 | 18 |
| R4 | (2 sc, inc) × 6 | 24 |
| R5 | (3 sc, inc) × 6 | 30 |
| R6 | (4 sc, inc) × 6 | 36 |
| R7–R11 | Sc around each round | 36 each |
| R12 | (4 sc, dec) × 6 | 30 |
| R13 | (3 sc, dec) × 6 | 24 |
| R14 | (2 sc, dec) × 6 | 18 |
| R15 | (1 sc, dec) × 6 | 12 |
| R16 | Dec × 6. FO | 6 |
B. Muzzle — Oatmeal
| Round | Instruction | Count |
|---|---|---|
| R1 | 6 sc in mr | 6 |
| R2 | Inc × 6 | 12 |
| R3 | (1 sc, inc) × 6 | 18 |
| R4 | Sc around | 18 |
| R5 | (1 sc, dec) × 6. FO | 12 |
C. Body — Cocoa Brown
| Round | Instruction | Count |
|---|---|---|
| R1 | 6 sc in mr | 6 |
| R2 | Inc × 6 | 12 |
| R3 | (1 sc, inc) × 6 | 18 |
| R4 | (2 sc, inc) × 6 | 24 |
| R5 | (3 sc, inc) × 6 | 30 |
| R6–R10 | Sc around each round | 30 each |
| R11 | (3 sc, dec) × 6 | 24 |
| R12 | (2 sc, dec) × 6 | 18 |
| R13 | (1 sc, dec) × 6 | 12 |
| R14 | Dec × 6. FO | 6 |
D. Ears — Make 2, Cocoa
| Round | Instruction | Count |
|---|---|---|
| R1 | 6 sc in mr | 6 |
| R2 | Inc × 6 | 12 |
| R3 | Sc around. FO, flatten | 12 |
E. Arms and Legs — Make 4, Cocoa
| Round | Instruction | Count |
|---|---|---|
| R1 | 6 sc in mr | 6 |
| R2 | Inc × 6 | 12 |
| R3–R5 | Sc around each round | 12 each |
| R6 | Dec × 6. FO | 6 |
Sew the muzzle centred across Head Rounds 10–13, stuffing lightly. Embroider sleepy eyes between Rounds 8–9 and a small dark nose on the muzzle. Ears sit across Rounds 4–6, bases about 10 stitches apart. Attach the body below the head and set the legs forward for a seated silhouette.
Part 6 — Dimensional Crescent Moon
Worked in muted mustard, the moon is a tapered stuffed tube that is then curved and secured into a crescent. This method keeps the shape soft and three-dimensional without wire. It hangs lowest in the finished mobile and is the largest central accent.
| Round | Instruction | Count |
|---|---|---|
| R1 | 6 sc in mr | 6 |
| R2 | Inc × 6 | 12 |
| R3 | (1 sc, inc) × 6 | 18 |
| R4 | (2 sc, inc) × 6 | 24 |
| R5–R7 | Sc around each round | 24 each |
| R8 | (2 sc, dec) × 6 | 18 |
| R9–R15 | Sc around each round | 18 each |
| R16 | (1 sc, dec) × 6 | 12 |
| R17–R21 | Sc around each round | 12 each |
| Closing | Dec × 6. FO with 40 cm / 16 in tail | 6 |
Stuff gradually but keep the inner curve side slightly softer, and more firmly along the outer curve — this makes the crescent bend naturally. After closing, bend the piece into a crescent so Round 21 points upward and inward. Use the long tail to place 4 hidden tacking stitches between the inner edges, approximately at Rounds 5, 9, 13 and 17. Embroider one closed eye over Rounds 10–11 and a tiny terracotta cheek 2 stitches below. The moon should curve smoothly into a plump crescent with a clear open inner space.
Part 7 — Oak Leaves and Tiny Acorns
Leaves should be flat, softly lobed and flexible. Acorns should be small enough to act as connectors rather than visual focal points.
A. Oak-Inspired Leaves — Make 12, Sage Green
| Row | Instruction | Count |
|---|---|---|
| Row 1 | Ch 3; 2 sc in 2nd ch from hook. Ch 1, turn | 2 |
| Row 2 | Inc in each st. Ch 1, turn | 4 |
| Row 3 | (1 sc, inc) × 2. Ch 1, turn | 6 |
| Row 4 | Sc across. Ch 1, turn | 6 |
| Row 5 | Dec, 2 sc, dec. Ch 1, turn | 4 |
| Row 6 | Dec × 2. Ch 1, turn | 2 |
| Row 7 | Dec | 1 |
Do not FO yet. Work a decorative lobe border down one edge: [sl st in edge, ch 2, sl st in same edge] at three evenly spaced row ends; repeat on the opposite edge for 6 small lobes total. Ch 4 for a stem, sl st back 3 chains, then FO with a 15 cm / 6 in tail.
B. Acorns — Make 8
Nut section — oatmeal or warm beige:
| Round | Instruction | Count |
|---|---|---|
| R1 | 6 sc in mr | 6 |
| R2 | Inc × 6 | 12 |
| R3 | (1 sc, inc) × 6 | 18 |
| R4–R7 | Sc around each round | 18 each |
| R8 | (1 sc, dec) × 6 | 12 |
| R9 | Dec × 6. FO | 6 |
Cap — cocoa brown:
| Round | Instruction | Count |
|---|---|---|
| R1 | 6 sc in mr | 6 |
| R2 | Inc × 6 | 12 |
| R3 | (1 sc, inc) × 6 | 18 |
| R4 | Sc around. Sl st, FO with 20 cm / 8 in tail | 18 |
Sew the cap over the top third of the nut. Add a 4-chain stem and sl st back 3 chains.
Part 8 — Mushrooms, Cloud Puffs and Spherical Accents
Keep accessory scale intentionally small: mushrooms about 5 cm / 2 in tall, clouds about 6–7 cm / 2.4–2.8 in wide, spheres about 3 cm / 1.2 in. Leaves, spheres and acorns double as balancing tools — add them where visual or physical weight needs correction instead of distributing them mechanically.
A. Mini Mushrooms — Make 5
Cap — dusty terracotta:
| Round | Instruction | Count |
|---|---|---|
| R1 | 6 sc in mr | 6 |
| R2 | Inc × 6 | 12 |
| R3 | (1 sc, inc) × 6 | 18 |
| R4 | (2 sc, inc) × 6 | 24 |
| R5 | Sc around | 24 |
| R6 | (2 sc, dec) × 6. FO with 25 cm / 10 in tail | 18 |
Stem — ivory:
| Round | Instruction | Count |
|---|---|---|
| R1 | 6 sc in mr | 6 |
| R2 | Inc × 6 | 12 |
| R3–R7 | Sc around each round | 12 each |
| R8 | Dec × 6. FO | 6 |
Stuff both lightly. Sew the cap over the stem top; embroider 4–6 tiny ivory dots on each cap.
B. Cloud Puffs — Make 3
Large centre puff, ivory:
| Round | Instruction | Count |
|---|---|---|
| R1 | 6 sc in mr | 6 |
| R2 | Inc × 6 | 12 |
| R3 | (1 sc, inc) × 6 | 18 |
| R4–R6 | Sc around each round | 18 each |
| R7 | (1 sc, dec) × 6 | 12 |
| R8 | Dec × 6. FO | 6 |
Small side puffs — make 4 per cloud:
| Round | Instruction | Count |
|---|---|---|
| R1 | 6 sc in mr | 6 |
| R2 | Inc × 6 | 12 |
| R3 | Sc around | 12 |
| R4 | Dec × 6. FO | 6 |
Sew four small puffs around one large centre puff to form each cloud.
C. Spherical Accents — Make 10 in Sage / Mustard
| Round | Instruction | Count |
|---|---|---|
| R1 | 6 sc in mr | 6 |
| R2 | Inc × 6 | 12 |
| R3 | (1 sc, inc) × 6 | 18 |
| R4–R5 | Sc around each round | 18 each |
| R6 | (1 sc, dec) × 6 | 12 |
| R7 | Dec × 6. FO | 6 |
Part 9 — Crochet-Covered Faceted Hexagonal Frame
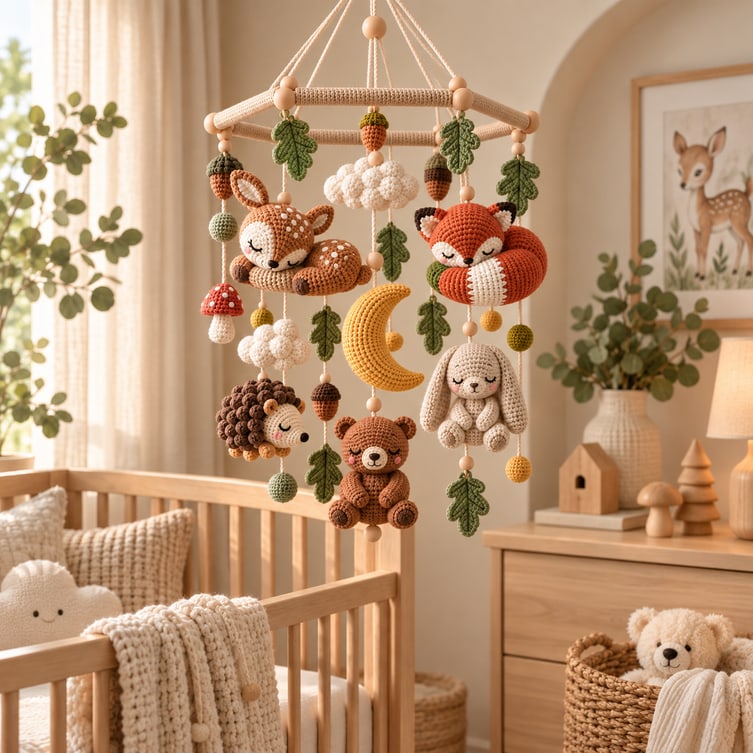
The frame reads as a soft faceted canopy, not a plain circle. The crochet is decorative: the hidden doubled cotton cord and the dowels carry the load. Do not rely on yarn alone to support the mobile.
A. Dowel Sleeves — Make 6 in Oatmeal
| Row | Instruction | Count |
|---|---|---|
| Foundation | Ch 9 | 8 working chains |
| Row 1 | Sc in 2nd ch from hook and across. Ch 1, turn | 8 |
| Rows 2–32 | Sc across. Ch 1, turn | 8 each |
| Row 33 | Sc across. Ch 1, turn | 8 |
| Row 34 | Sc across. FO with 35 cm / 14 in tail | 8 |
Wrap each rectangle tightly around one 12 cm dowel and whipstitch the long edges together. Leave both wooden ends visible by approx. 3–4 mm.
B. Hexagon Join
- Lay the six covered dowels into a regular hexagon on a flat surface.
- At each corner, lash the two dowel ends together with 40 cm / 16 in of doubled strong cotton cord using 8 tight figure-eight wraps plus 2 square knots.
- Cover each joint with a small sage crochet band: ch 7, sc in 2nd ch and across (6 sts); work 8 rows of 6 sc; wrap the band around the joint and sew closed.
- Check that all six sides remain equal and the frame lies flat before adding suspension cords.
Assemble and level the hexagonal frame before attaching any crochet decoration — a flat frame at the start prevents endless balancing later.
Part 10 — Suspension Cords and Cascade Map
A. Top Suspension — 3 Support Cords
| Piece | Instruction | Count |
|---|---|---|
| Cord 1–3 (make 3) | Ch 81; sl st in 2nd ch from hook and back across. FO | 80 sl sts each |
| Main hanger | Ch 121; sl st in 2nd ch from hook and back across. FO | 120 sl sts |
Attach the three support cords to alternating hexagon corners. Bring their upper ends together through one 16 mm wooden bead. Tie them securely around the main hanger loop. The frame should hang level before any decorations are added.
B. Exact Hanging Strand Plan
| Strand | Piece | Finished cord length | Position |
|---|---|---|---|
| A | Sleeping fawn | 23 cm / 9.1 in | Front-left upper |
| B | Curled fox | 31 cm / 12.2 in | Front-right lower |
| C | Hedgehog | 35 cm / 13.8 in | Left-rear lower |
| D | Rabbit | 26 cm / 10.2 in | Right-rear upper |
| E | Sitting bear | 38 cm / 15 in | Right side, lowest animal |
| F | Crescent moon | 44 cm / 17.3 in | True centre, lowest focal element |
| G | Cloud puff | 18 cm / 7.1 in | Rear upper |
| H | Cloud puff | 29 cm / 11.4 in | Left mid-level |
| I | Cloud puff | 34 cm / 13.4 in | Right mid-level |
For each hanging strand, crochet a chain until it measures the stated finished length under light tension, then sl st back along the full chain to make a stable cord. This measured-length method is exact and compensates for individual chain gauge. FO with 20 cm / 8 in tails at both ends.
Before final knotting, hang the empty frame and all primary strands temporarily. The moon must sit lowest at centre, and no two animal heads should line up at exactly the same height — the design depends on a staggered canopy, so hanging all five animals at similar heights is the fastest way to lose the effect.
C. Accessory Garlands
Make 6 short garlands, each 18–30 cm / 7.1–11.8 in, using a mix of one leaf + one sphere, one acorn + one leaf, or one mushroom + one sphere. Keep no more than one wooden bead on any single garland.
Final Assembly
- Finish all embroidery before attaching any hanging cords. Check that every animal face is centred and symmetrical.
- Complete each animal assembly: fawn horizontal, fox curled, hedgehog low and oval, rabbit vertical, bear seated. Weave all structural yarn tails securely into dense stitch paths.
- Assemble the six-sided frame and confirm it hangs level from the three top support cords before adding weight.
- Attach primary strand A (fawn) to the front-left facet, B (fox) to front-right, C (hedgehog) to left-rear, D (rabbit) to right-rear and E (bear) to the right-side facet. Use two passes through the frame sleeve and a hidden square knot beneath the crochet cover.
- Attach moon strand F to a reinforced three-cord centre junction made from the alternating hexagon corners. The moon should finish about 6–8 cm / 2.4–3.1 in below the lowest animal.
- Add cloud strands G–H–I into the open visual gaps, never directly behind an animal face from the main viewing angle.
- Add six accessory garlands around the remaining frame points. Distribute oak leaves at different rotations so the silhouette reads naturally from all sides.
- Use only 6–10 wooden beads total. Place them near frame attachment points or between two lightweight crochet accents; do not load several beads onto one strand — beads are heavier than the crochet accents and can tilt the mobile.
- Pin-before-you-sew check: step back 1–2 m / 3–6 ft. Rotate the mobile 360 degrees and check level frame, height variation, empty-space balance and whether the moon remains visually centred.
- Once balanced, reinforce every frame knot with a second knot and a small hidden hand-sewn tack through the crochet sleeve. Trim only after final inspection.
Helpful Tips for Success
- Keep the five animal silhouettes deliberately different. If all bodies are stuffed equally round, the mobile loses the intended forest-character variety.
- Stuff the moon lightly along the inner curve and more firmly along the outer curve; this makes the crescent bend naturally without wire.
- For the hedgehog, keep loop stitches 1.5–2 cm long and consistent. Uneven loops make the spine cap look shaggy rather than softly textured.
- Assemble and level the hexagonal frame before attaching any crochet decoration. A flat frame at the start prevents endless balancing later.
- Treat leaves, spheres and acorns as balancing tools. Add them where visual or physical weight needs correction instead of distributing them mechanically.
Common Mistakes to Avoid
- Overstuffing the curled fox body, which makes it resist the C-shape and pulls the head away from the tail.
- Attaching the rabbit ears too high or too stiffly; they should drape from Head Rounds 4–5 and remain soft.
- Putting too many wooden beads on one side of the frame; beads are heavier than the crochet accents and can tilt the mobile.
- Hanging all five animals at similar heights. The design depends on a staggered canopy, with the moon clearly lowest.
- Using yarn alone to join the dowels. Structural joints must include strong doubled cotton cord beneath the decorative crochet bands.
Finishing Touches
- Weave each yarn end through at least 4–5 cm / 1.5–2 in of dense stitches, change direction once, then trim.
- Finger-shape ears, tail tips, leaf lobes and the moon curve. Lightly steam only flat leaves from a distance; do not steam stuffed pieces directly.
- Use cocoa embroidery for sleepy eyes and noses; keep line weight delicate so the faces stay nursery-soft.
- Check every hanging connection by gently supporting the frame and applying a light downward tug to each strand individually.
- For selling photography, capture one full vertical mobile image, one 45-degree angle, one detail collage of the animals, one close-up of a frame joint and one scale photo in a neutral nursery setting.
Variations and Customization
- Colour story: Swap sage + terracotta for dusty blue + oatmeal, blush clay + cream, or olive + caramel while keeping the moon as the warm focal accent.
- Larger version: Use worsted / aran cotton with a 3.5–4.0 mm hook. Keep stitch counts unchanged; increase dowel length to 15 cm / 5.9 in and re-balance cord lengths proportionally.
- Add-ons: Make extra acorns, a tiny owl appliqué or a second cloud. Keep any new add-on under approx. 10 g so the frame remains easy to balance.
Final Notes and Copyright
Thank you for choosing the Enchanted Woodland Nursery Mobile pattern. The quiet forest palette, sleepy little characters and moonlit cascade are designed to bring a gentle handmade feeling to nursery styling, gift-making or your craft table.
Pattern use: This written pattern, stitch counts, page layout, diagrams and branded PDF are for the purchaser's personal use only. Do not copy, resell, redistribute, upload, translate for distribution or reproduce the digital pattern as your own. You may sell finished physical mobiles made from this pattern in small handmade quantities. Credit is required in listings or product descriptions, for example: "Pattern by [Your Shop Name]." Mass production and resale of the digital pattern are not permitted.
Safety reminder: A nursery mobile is decorative. Suspend it securely from an appropriate ceiling fixing and keep the finished mobile, cords, wooden beads and hanging components permanently outside a child's reach. Remove the mobile when a child can push up, sit or otherwise reach it from the sleep space.
Before selling finished mobiles, crochet one full sample in your chosen yarn, confirm gauge and finished measurements, level and balance-check the empty frame, and complete the nursery safety review one final time.
Happy crocheting — and may this little woodland canopy bring peaceful dreams.
The box below contains an Etsy link. If you buy through it, we may earn a small commission at no extra cost to you. Learn more.
No time to make one?
Find handmade crochet nursery mobiles from independent makers on Etsy.
Browse on Etsy (opens Etsy in a new tab)