Highland cow crochet pattern: fluffy amigurumi coo
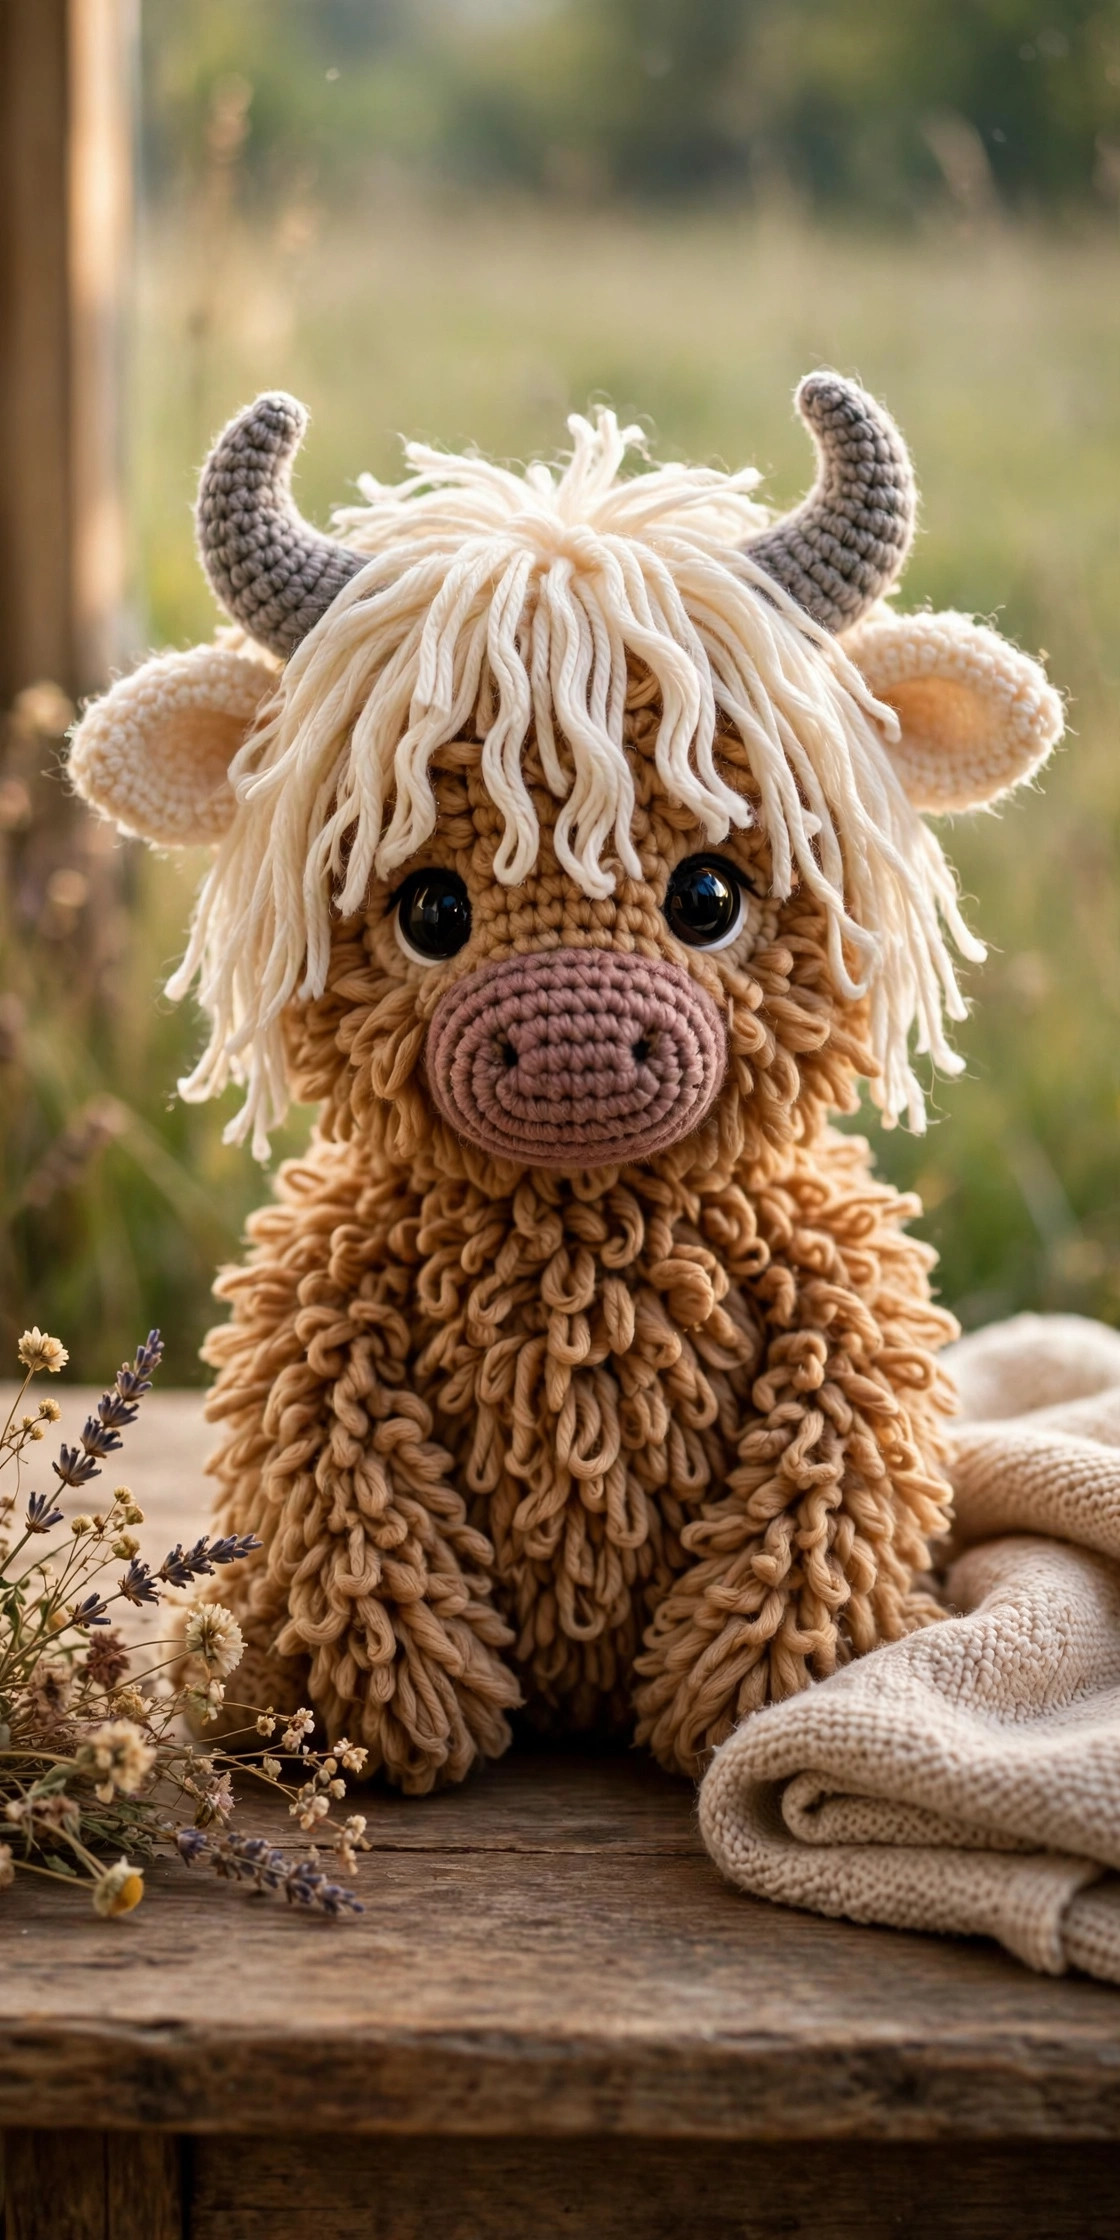
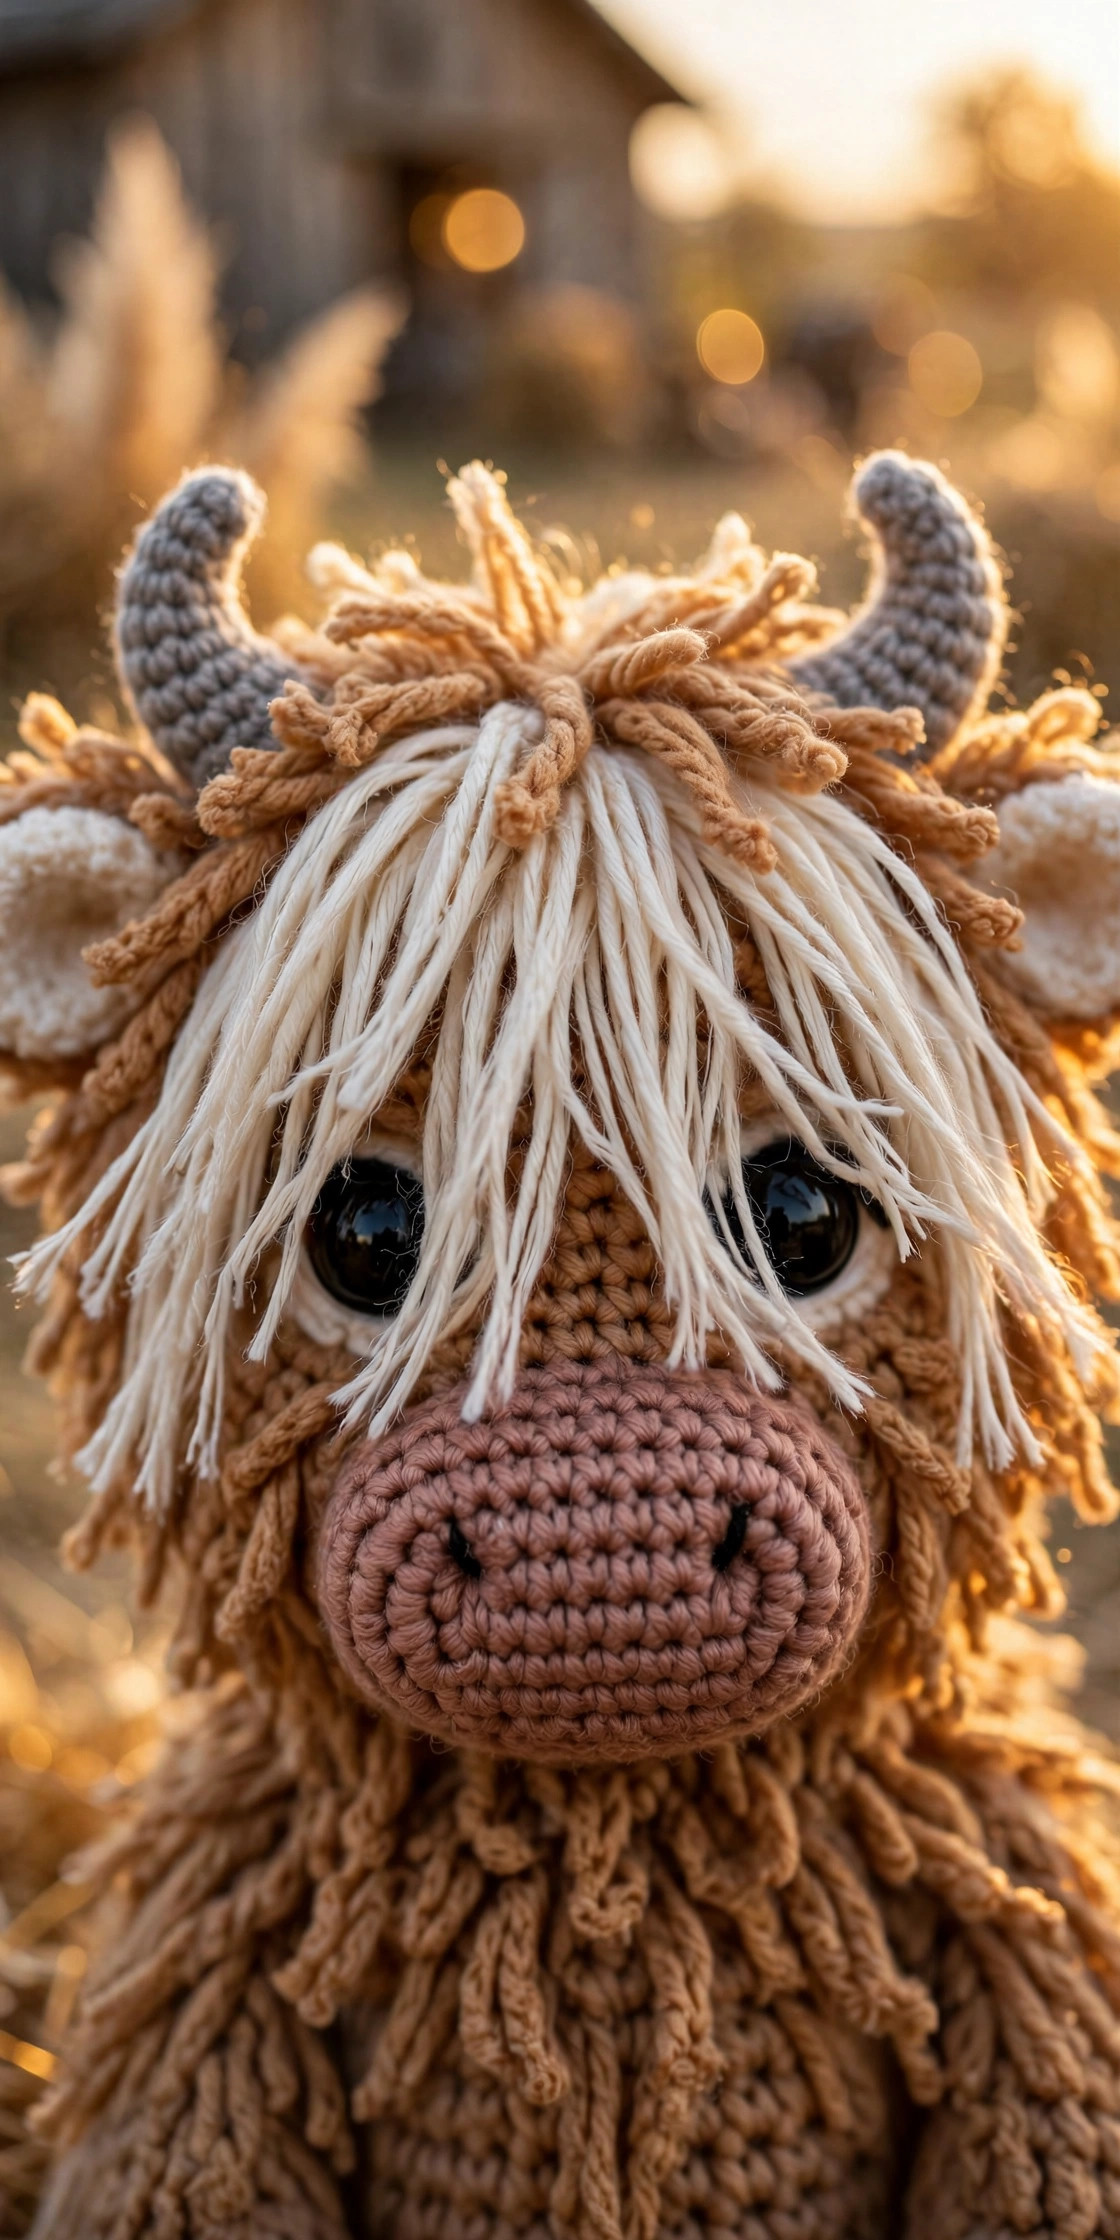
A fluffy Highland coo with cream loop-stitch bangs falling over her eyes, little curved grey horns, and a big squashy pink muzzle — worked in simple single-crochet spirals plus easy loop stitches from 11 small pieces you sew together over one cozy weekend.

Amigurumi · Crochet
- Finished size
- About 15 cm / 6 in tall
- Making time
- About 4–5 hours
- Hook
- 3.5 mm, worsted-weight yarn
- Pieces
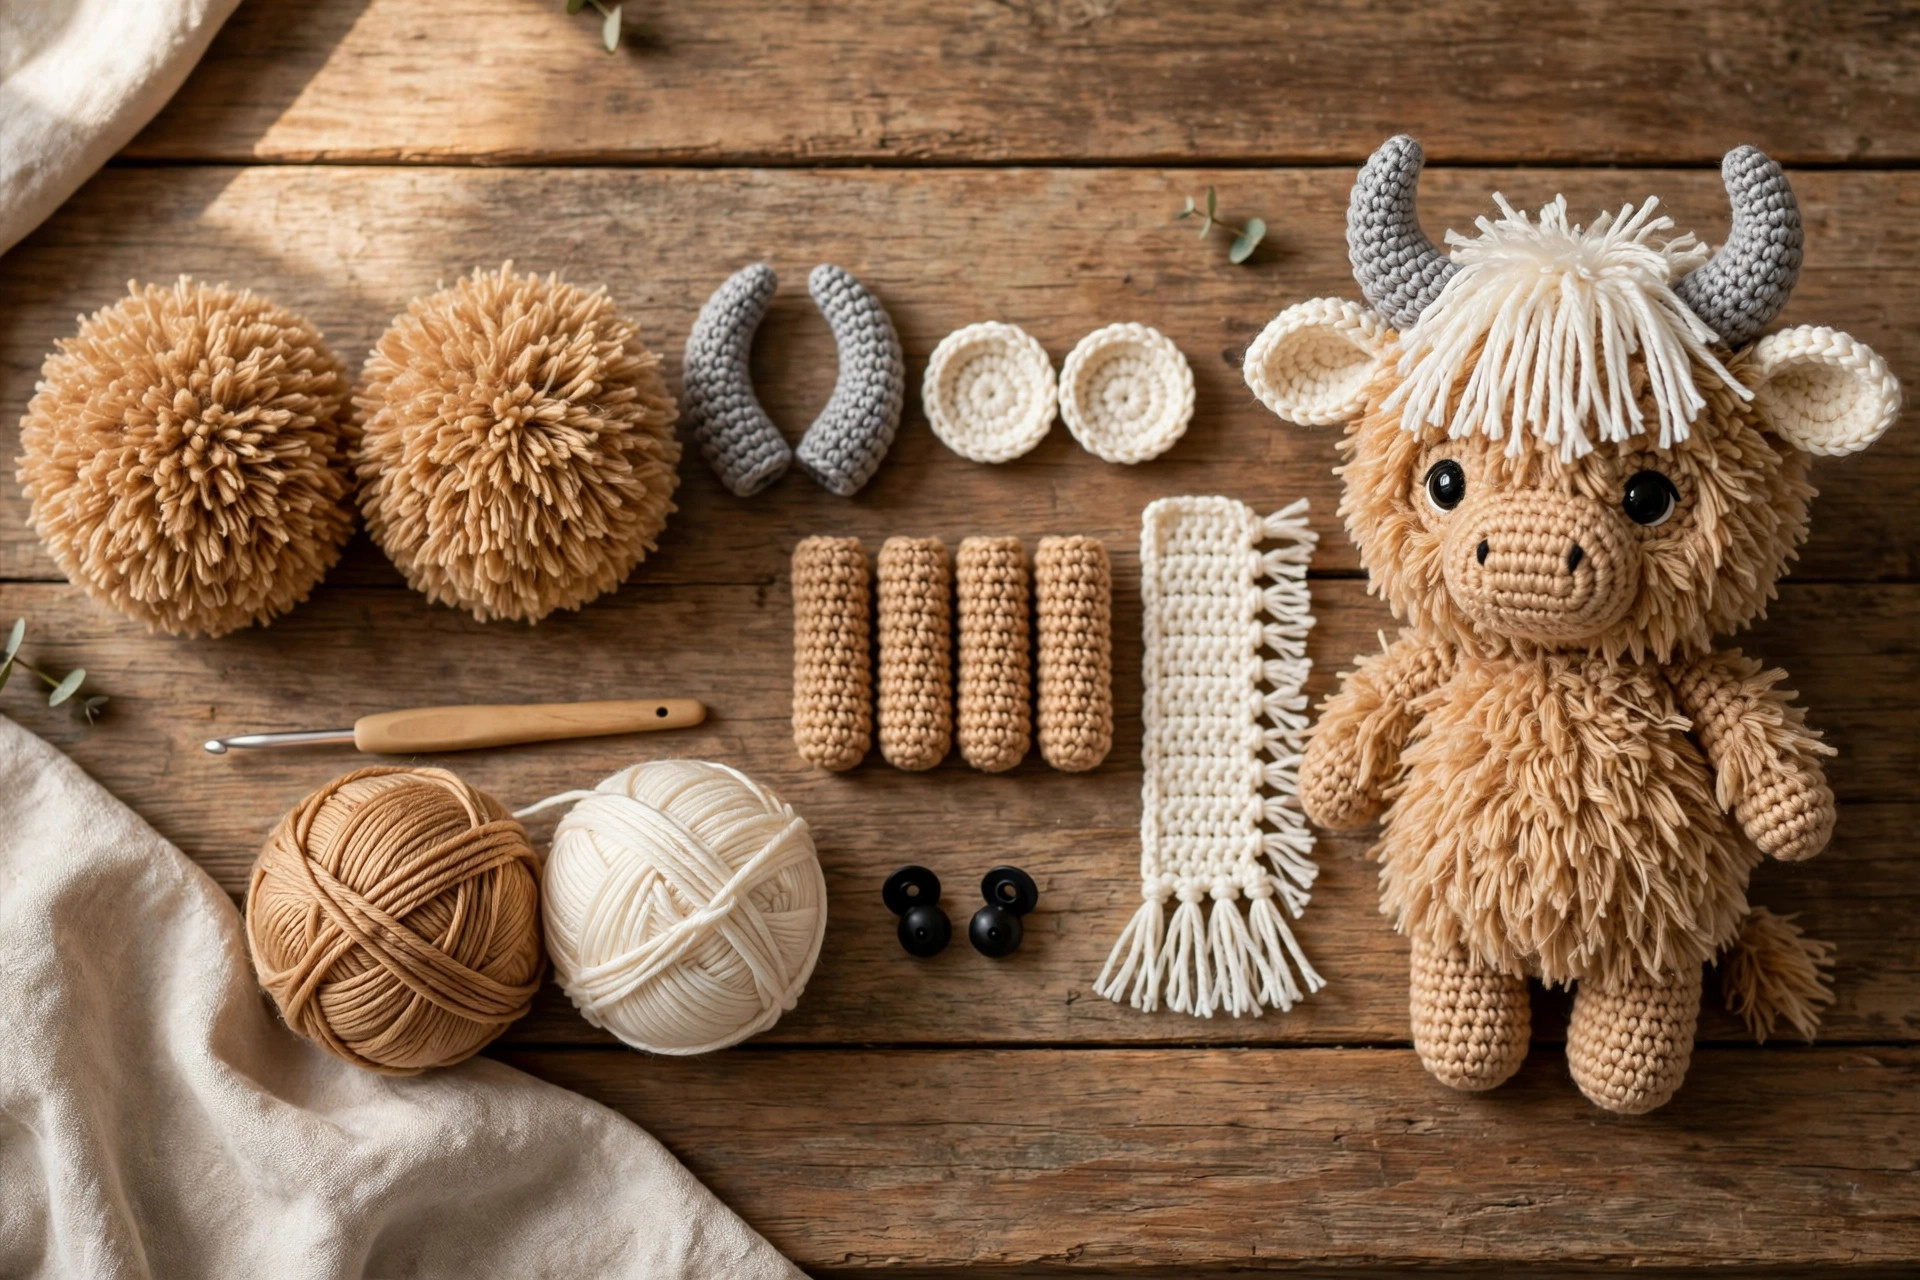
- 11 pieces to assemble
- Skill
- Beginner
In this post
If the internet has taught us one thing, it's that highland cows — shaggy, sleepy-eyed, impossibly cute — belong everywhere, including your crochet basket. This original highland cow crochet pattern gives you a fluffy amigurumi Highland coo with that signature cream fringe falling over her eyes, little curved grey horns, and a big squashy pink muzzle that begs to be booped. The shaggy coat is done with simple loop stitches (easier than they look, I promise), the head sits proudly on a sturdy body, and she stands all on her own.
Why you'll love this highland cow crochet pattern
Most highland cow patterns fall into two traps: they skip the shag entirely (leaving you with a smooth cow that reads "brown blob"), or they bury you in fiddly fur yarn that's miserable to work with. This design uses a third path — loop stitches in ordinary worsted-weight yarn. Every shaggy loop is just a lengthened single crochet, so you get that gloriously fluffy Highland coat with zero specialty yarn and stitch definition you can actually see while you work.
The head is a clean classic amigurumi sphere with standard increase math, which means smooth, predictable shaping — no weird lumps where the muzzle attaches. The fringe is a separate little panel of loop "bangs" that you sew on and trim, which is the secret behind that signature windswept look: you control the length, the sweep, and exactly how much of her eyes peek through. And because every piece is small, it's a perfect slow-evenings project — start with the horns one night, wake up with a cow by the weekend.
Materials you'll need
| Supply | What to get |
|---|---|
| Main yarn | Worsted-weight (#4) acrylic or cotton in caramel tan/brown, about 100 g |
| Fringe yarn | Worsted-weight cream or ivory, about 30 g |
| Horn yarn | Worsted-weight light grey, about 15 g |
| Muzzle yarn | Worsted-weight dusty pink or mauve, about 20 g |
| Crochet hook | 3.5 mm (E-4) |
| Safety eyes | 12 mm black, one pair |
| Stuffing | Polyester fiberfill, a good handful |
| Notions | Tapestry needle, stitch markers, scissors |
A quick note on yarn choice: smooth worsted acrylic is the ideal pick here — it holds the loop stitches crisply and keeps the shag from matting. Avoid fluffy "fur" or eyelash yarns for this project; they fight the loop-stitch technique and hide your stitch counts. If you only have a 4.0 mm hook, that's fine too; your coo will just come out a touch bigger and floppier.
Size, gauge and skill level
- Finished size: about 15 cm (6 in) tall sitting, 10 cm (4 in) wide.
- Gauge: not critical for amigurumi — what matters is that your fabric is tight enough that stuffing doesn't peek through. If you can see daylight between your stitches, drop down a hook size. As a rough guide, 4 single crochets should measure about 2.5 cm (1 in).
- Skill level: confident beginner. You should know the magic ring, single crochet, increase, decrease, and the loop stitch (explained below — it takes five minutes to learn). Everything else is explained round by round.
If this is your first amigurumi, the crochet cat is a slightly simpler warm-up that teaches the same spiral techniques — many of our readers make the cat first, then the cow.
Loop stitch refresher: insert your hook into the next stitch, wrap the yarn around your index finger to make a loop about 2 cm long, yarn over and pull the loop through the stitch (two loops on hook plus the finger loop), yarn over and pull through all loops on the hook. Done — one shaggy loop. Keep your loops roughly the same length; a little wobble looks natural, but wild variation looks scruffy.
Abbreviations — US terms
| Abbreviation | Meaning |
|---|---|
| MR | magic ring |
| sc | single crochet |
| lp | loop stitch (lengthened sc, ~2 cm loop) |
| inc | increase (2 sc in the same stitch) |
| dec | decrease (sc 2 together — invisible decrease recommended) |
| st(s) | stitch(es) |
| ch | chain |
| R | round |
| FO | fasten off |
A note on decreases: the invisible decrease (insert hook in front loop only of the next two stitches, yarn over, pull through both loops, yarn over, pull through two loops) keeps your fabric smooth with no little bumps. Use it everywhere this pattern says "dec" and your coo's head will look professionally finished.
The pattern (US terms)
Work in continuous spirals unless noted. Mark the first stitch of each round with a stitch marker and move it up as you go. The stitch count at the end of every round is in parentheses — count your stitches, especially on the head. Ten seconds of counting now saves ten minutes of frogging later.
Head — tan
The head is worked smooth so the muzzle sits cleanly against it; the shag comes from the body and fringe.
- R1: MR, 6 sc (6)
- R2: inc in each st (12)
- R3: [sc, inc] × 6 (18)
- R4: [2 sc, inc] × 6 (24)
- R5: [3 sc, inc] × 6 (30)
- R6: [4 sc, inc] × 6 (36)
- R7: [5 sc, inc] × 6 (42)
- R8–R12: sc in each st around (42) — 5 rounds even
- R13: [5 sc, dec] × 6 (36)
- R14: [4 sc, dec] × 6 (30)
- Insert the safety eyes between R10 and R11, 9 stitches apart. Push the washers on firmly — they should click. Start stuffing the head now, while the opening is wide.
- R15: [3 sc, dec] × 6 (24)
- R16: [2 sc, dec] × 6 (18)
- R17: [sc, dec] × 6 (12)
- R18: dec × 6 (6). FO, thread the tail through the front loops of the remaining stitches, pull tight, and weave in.
Tip: stuff the head firmly but not drum-tight. Over-stuffing stretches the stitches and shows the fiberfill; under-stuffing gives you a lumpy, sad face. Aim for the firmness of a tennis ball.
Body — tan, worked in loop stitch
This is where the shag happens. Work every round below in lp (loop stitch) instead of plain sc — your body will bloom into a gloriously fluffy Highland coat as you go.
- R1: MR, 6 sc (6) — plain sc for a tidy base
- R2: lp-inc in each st (12) — work increases as loop stitches
- R3: [lp, lp-inc] × 6 (18)
- R4: [2 lp, lp-inc] × 6 (24)
- R5: [3 lp, lp-inc] × 6 (30)
- R6: [4 lp, lp-inc] × 6 (36)
- R7–R11: lp in each st around (36) — 5 rounds even
- R12: [4 lp, lp-dec] × 6 (30)
- R13: [3 lp, lp-dec] × 6 (24)
- R14: [2 lp, lp-dec] × 6 (18)
- Stuff firmly — really pack it, the loops eat a lot of fiberfill.
- R15: [lp, lp-dec] × 6 (12)
- R16: lp-dec × 6 (6). FO, close and weave in as for the head.
The loops make counting tricky, so count by feeling for the stitch tops with your fingertip rather than by sight. If you lose your place, it's nearly impossible to tell one loop round from the next — your stitch marker is doing the heavy lifting here.
Muzzle — dusty pink
- R1: MR, 6 sc (6)
- R2: inc in each st (12)
- R3: [sc, inc] × 6 (18)
- R4: [2 sc, inc] × 6 (24)
- R5: [3 sc, inc] × 6 (30)
- R6–R7: sc in each st around (30) — 2 rounds even
- FO, leaving a long tail (about 40 cm / 16 in) for sewing.
Horns — grey, make 2
- R1: MR, 4 sc (4)
- R2: sc in each st around (4)
- R3: [sc, inc] × 2 (6)
- R4: sc in each st around (6)
- R5: [2 sc, inc] × 2 (8)
- R6–R7: sc in each st around (8) — 2 rounds even
- FO, leaving a long tail. Stuff very lightly (a pinch) so the horn holds its shape without going rigid.
Ears — cream, make 2
- R1: MR, 6 sc (6)
- R2: [sc, inc] × 6 (12)
- R3–R5: sc in each st around (12) — 3 rounds even
- R6: [sc, dec] × 6 (8)
- FO, leaving a long tail. Do not stuff — flatten each ear gently and you'll fold the base slightly when sewing for that floppy Highland-ear look.
Legs — tan, make 4
- R1: MR, 6 sc (6)
- R2: [sc, inc] × 6 (12)
- R3–R6: sc in each st around (12) — 4 rounds even
- FO, leaving a long tail. Stuff the two back legs firmly (they're the sitting base) and the two front legs lightly.
Fringe panel — cream
Worked flat in rows. This becomes the bangs.
- Ch 16.
- Row 1: sc in 2nd ch from hook and in each ch across (15)
- Rows 2–6: ch 1, turn, sc in each st across (15) — 5 rows even
- Row 7 (fringe edge): ch 1, turn, [sc in next st, ch 12, sc in same st] repeat across — 15 hanging loops. FO, leaving a long tail for sewing.
- Give the loops a gentle tug to even them out. You'll trim them to length after sewing (see Finishing touches).
Assembly — the order that actually matters
- Muzzle first. Pin the muzzle to the lower front of the head, centered between and below the eyes, with its top edge around R11 of the head. Sew with small whipstitches, tucking a pinch of fiberfill behind it as you close so it stays softly rounded and proud of the face.
- Nostrils. With a strand of dark brown yarn, embroider two short vertical lines on the muzzle, about 6 stitches apart — simple straight stitches, 2 stitches tall. These read as nostrils at a glance and give the face its gentle cow expression.
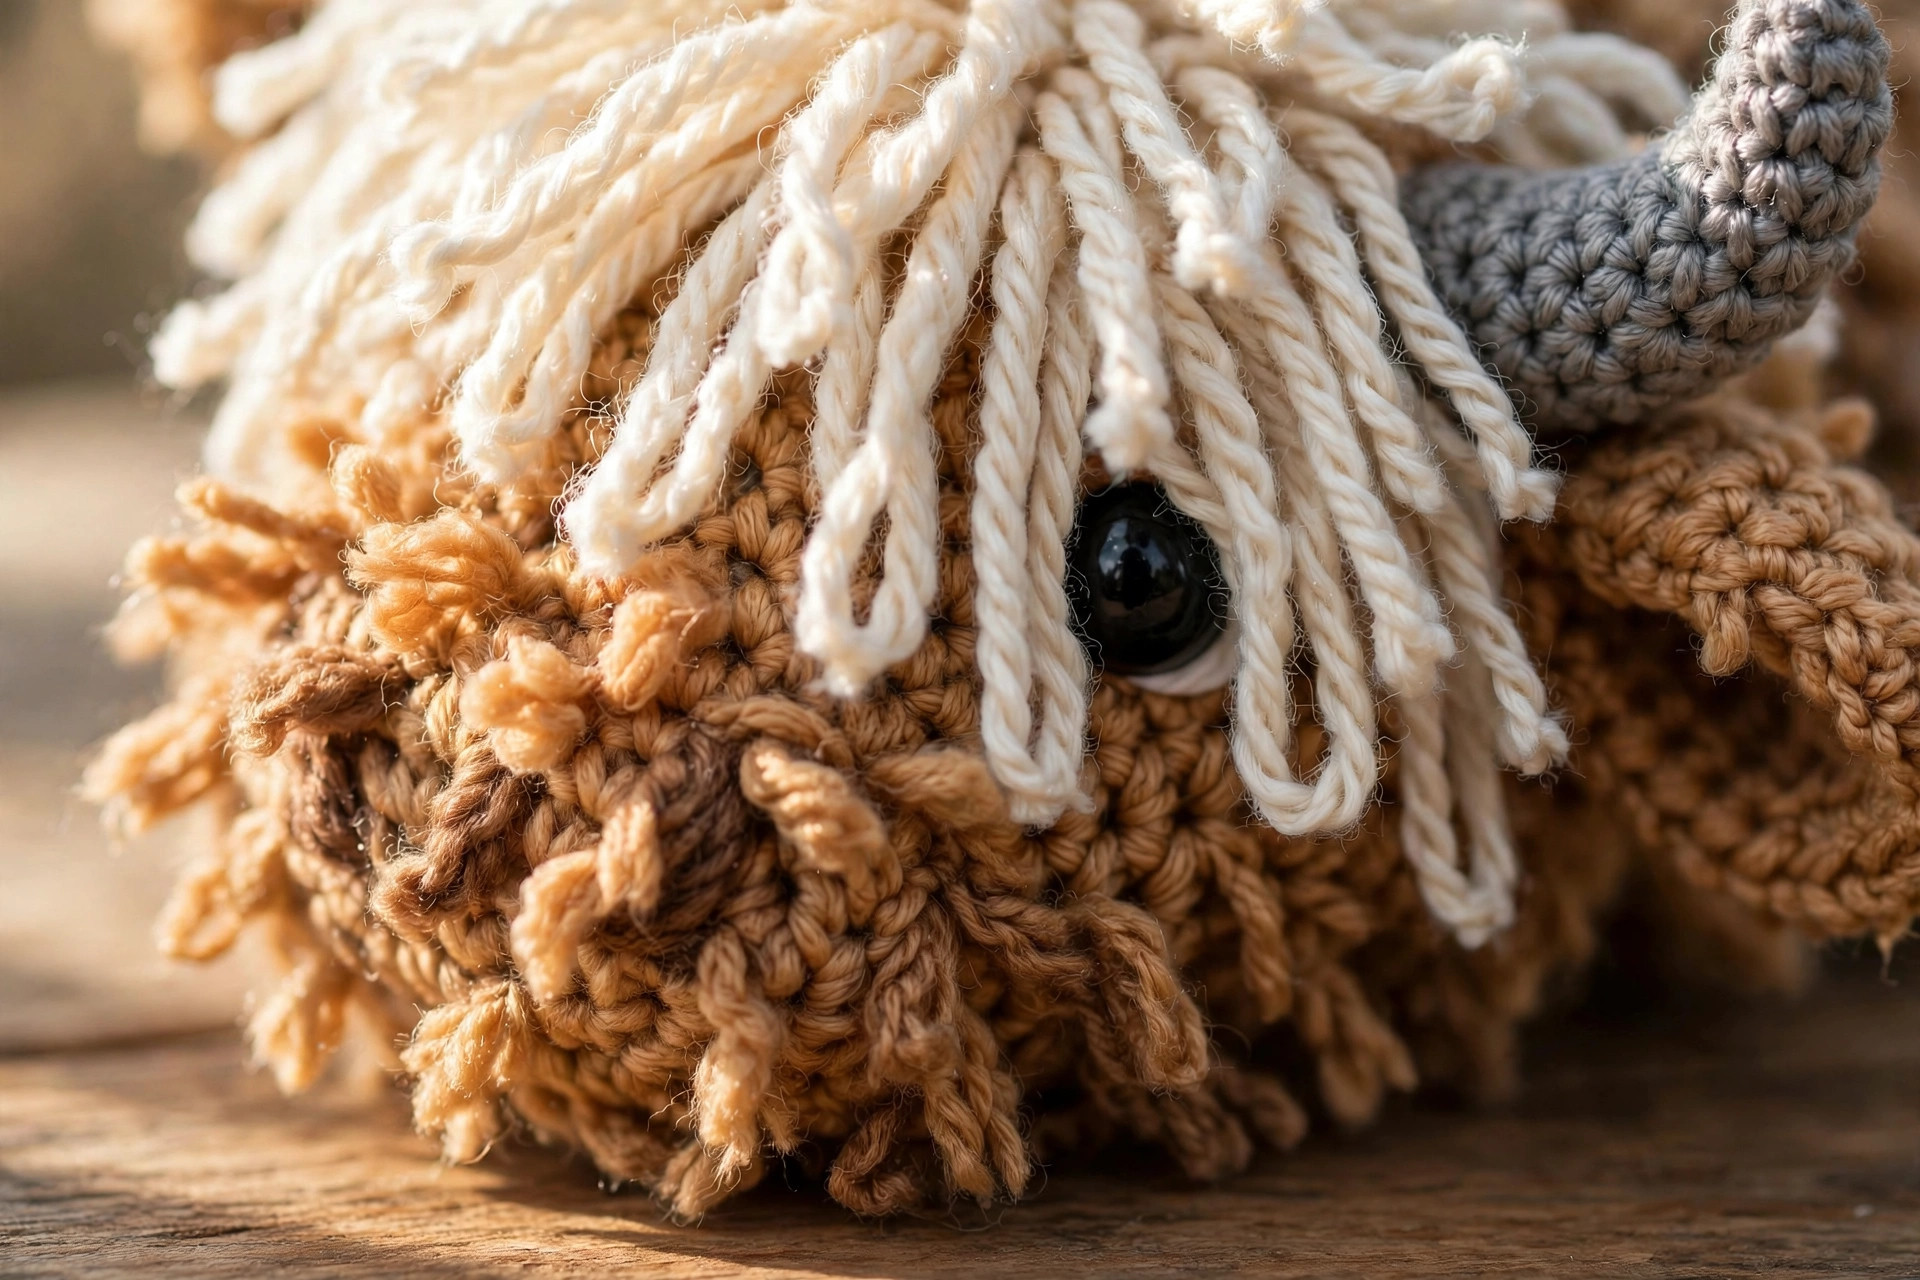
- Fringe. Lay the fringe panel across the forehead above the eyes (Row 1 edge at the top of the head, fringe loops hanging down over the face). Sew the panel's top edge to the head with the long tail, then trim the hanging loops so they just brush the tops of the eyes — the classic Highland peek-a-boo. Comb the loops out gently with your fingers.
- Horns. Curve each horn slightly inward, then sew to the head just behind and above the fringe panel, about 8 stitches apart, angled outward like a real coo's horns. Sew around the base twice — horns take abuse, so make this join strong.
- Ears. Fold the base of each ear slightly and pin them just below and outside the horns. Sew around the base. The ears should peek out from under the fringe — adorable and very Highland.
- Head to body. Center the head on top of the body (the body's R16 opening faces up into the head). Using a long strand of tan yarn, sew around the join, then go around a second time for security. Pack extra stuffing into the neck before closing the last few stitches so the head doesn't wobble.
- Legs. Sew the two back legs to the base of the body, toes pointing forward — these are what she sits on. Sew the two front legs to the sides of the body around R10–R11, angled slightly outward. Set her down: she should sit upright on her own. If she tips backward, nudge the back legs a few millimeters forward.
Finishing touches
This is where a good cow becomes a great cow. Take fifteen unhurried minutes here; it's the difference between "homemade" and "handmade."
Sculpt the fringe. This is the single most impactful step. With the fringe sewn on, trim the loops at a slight angle — longer at the sides, shorter in the middle — so the fringe frames the eyes instead of swallowing them. Then take your fingers and gently separate each loop's strands for a soft, windswept look. Step back and look at her straight-on: both eyes should peek through clearly.
Fluff the coat. The loop stitches on the body will be a bit squashed from handling. Spend a couple of minutes teasing them outward all over the body with your fingers or a wide-tooth comb. Go gently — you're fluffing, not brushing. The transformation is dramatic: flat loops become a cloud.
Tidy the muzzle. If the muzzle looks a little deflated after sewing, unpick two stitches at the bottom, tuck in a bit more fiberfill, and re-close. A plump muzzle is the whole personality of a Highland cow face.
Three cute variations to try next
Once you've made one coo, you'll understand why Highland cow collectors are a thing. Same pattern, three personalities:
- Snow-white Highland coo. Work the head, body and legs in cream instead of tan, keep the fringe cream and the horns grey. She looks like she just wandered out of a Scottish snowstorm — stunning in photos against dark backgrounds.
- Midnight black coo. Use dark brown or black for the body, cream for the fringe, and light grey horns. Dramatic, striking, and the fringe contrast is gorgeous. This is the colorway to make if you're planning to post yours on Pinterest.
- Big snuggly coo. Make the whole cow in chunky chenille yarn with a 5.5 mm hook, skipping the loop stitches (chenille is shaggy enough on its own) and working the body in plain sc. You'll get a gloriously squishy 25 cm cow that doubles as a cushion — a reader-favorite upgrade.
And if this project gave you the amigurumi bug, the celestial leaf dragon uses the same spiral techniques at a bigger, showpiece scale, while the crochet cat is the perfect palate-cleanser between big shaggy projects.
Troubleshooting tips
- The loop stitches are all different lengths. Completely normal on your first try. After finishing the body, trim the longest outliers with scissors — nobody can tell once the coat is fluffed. By your second cow your loops will be beautifully even.
- You can see stuffing through the stitches. Your tension is too loose or your hook is too big. The head and muzzle especially need dense fabric. Switch to a 3.25 mm hook for the smooth pieces, or consciously tighten up.
- The head wobbles on the neck. Almost always an under-stuffed neck. Unpick three or four stitches of the head-body join, pack in more fiberfill, and re-sew with two full passes.
- The fringe swallows the eyes. You skipped the trim. Pin the fringe back, trim so the loops just brush the eye tops, then comb out. Highland cows are supposed to peek through their bangs — that's the whole look.
- She won't sit upright. The back legs are the tripod. Reposition them slightly forward and re-sew, and make sure they're stuffed firmly — soft back legs collapse under the body's weight.
- The horns flop sideways. They need a strong base join and that pinch of stuffing. Unpick, add a touch more fiberfill, and sew the base down with two full rounds of whipstitches, slightly tilting each horn outward.
- The muzzle looks sunken. Tuck more fiberfill behind it before you finish the last few sewing stitches — a plump, proud muzzle is the face's centerpiece.
Frequently asked questions
Is this highland cow crochet pattern really free?
Yes — the complete pattern above is free, no email signup, no PDF purchase required. If you'd like to support the site, sharing the post or saving it on Pinterest is the kindest thank-you.
What skill level is this pattern?
Confident beginner. If you can crochet a magic ring and single crochet in the round, you have almost every skill this pattern needs. The only new technique is the loop stitch, and the five-minute refresher above will get you there — it's genuinely just a lengthened single crochet.
How long does it take to make?
About 4–5 hours total: roughly 2.5–3 hours of crocheting (the loop-stitch body is the slowest part), 45 minutes of assembly and sewing, and 15–30 minutes of fringe trimming and fluffing. It's a perfect weekend project.
Can I sell the finished cows I make?
Yes! You may sell finished cows made from this pattern in small batches (craft fairs, Etsy, gifts). Please credit Little Loop Finds as the pattern designer with a link back to this page. The pattern text and photos themselves may not be redistributed, republished, or sold.
Can I use a different yarn weight?
Absolutely. Use the hook size recommended on your yarn label minus 0.5 mm (so the fabric stays tight), and your cow will simply come out bigger or smaller. Chunky chenille with a 5.5 mm hook makes a gloriously squishy 25 cm coo — see the Big snuggly coo variation above.
Is this cow safe for babies and toddlers?
With two changes, yes: embroider the eyes instead of using safety eyes (two simple French knots or satin-stitch ovals), and skip the horns or sew them on extra-securely with no stuffing gap. Safety eyes are secure for older children and adults but are still small parts, so use your judgment for under-threes.
More free patterns to try
If this coo was fun, keep the hook moving. The crochet cat is the ideal next amigurumi — same spiral techniques, half the pieces. The little lamb baby snuggle gift set pairs an amigurumi lamb with a lovey and hat for the ultimate baby gift, the woodland nursery mobile turns small plushies like this cow into nursery decor, the star blanket makes a gorgeous backdrop for photographing your amigurumi, and the autumn acorn granny square is a quick stash-buster for practicing your tension between bigger projects.
The box below contains an Etsy link. If you buy through it, we may earn a small commission at no extra cost to you. Learn more.
No time to make one?
Short on time? Find handmade crochet highland cows from independent makers on Etsy.
Browse on Etsy (opens Etsy in a new tab)