Crochet Elf Hat Pattern: Long Tail, Jingle Bell Tip
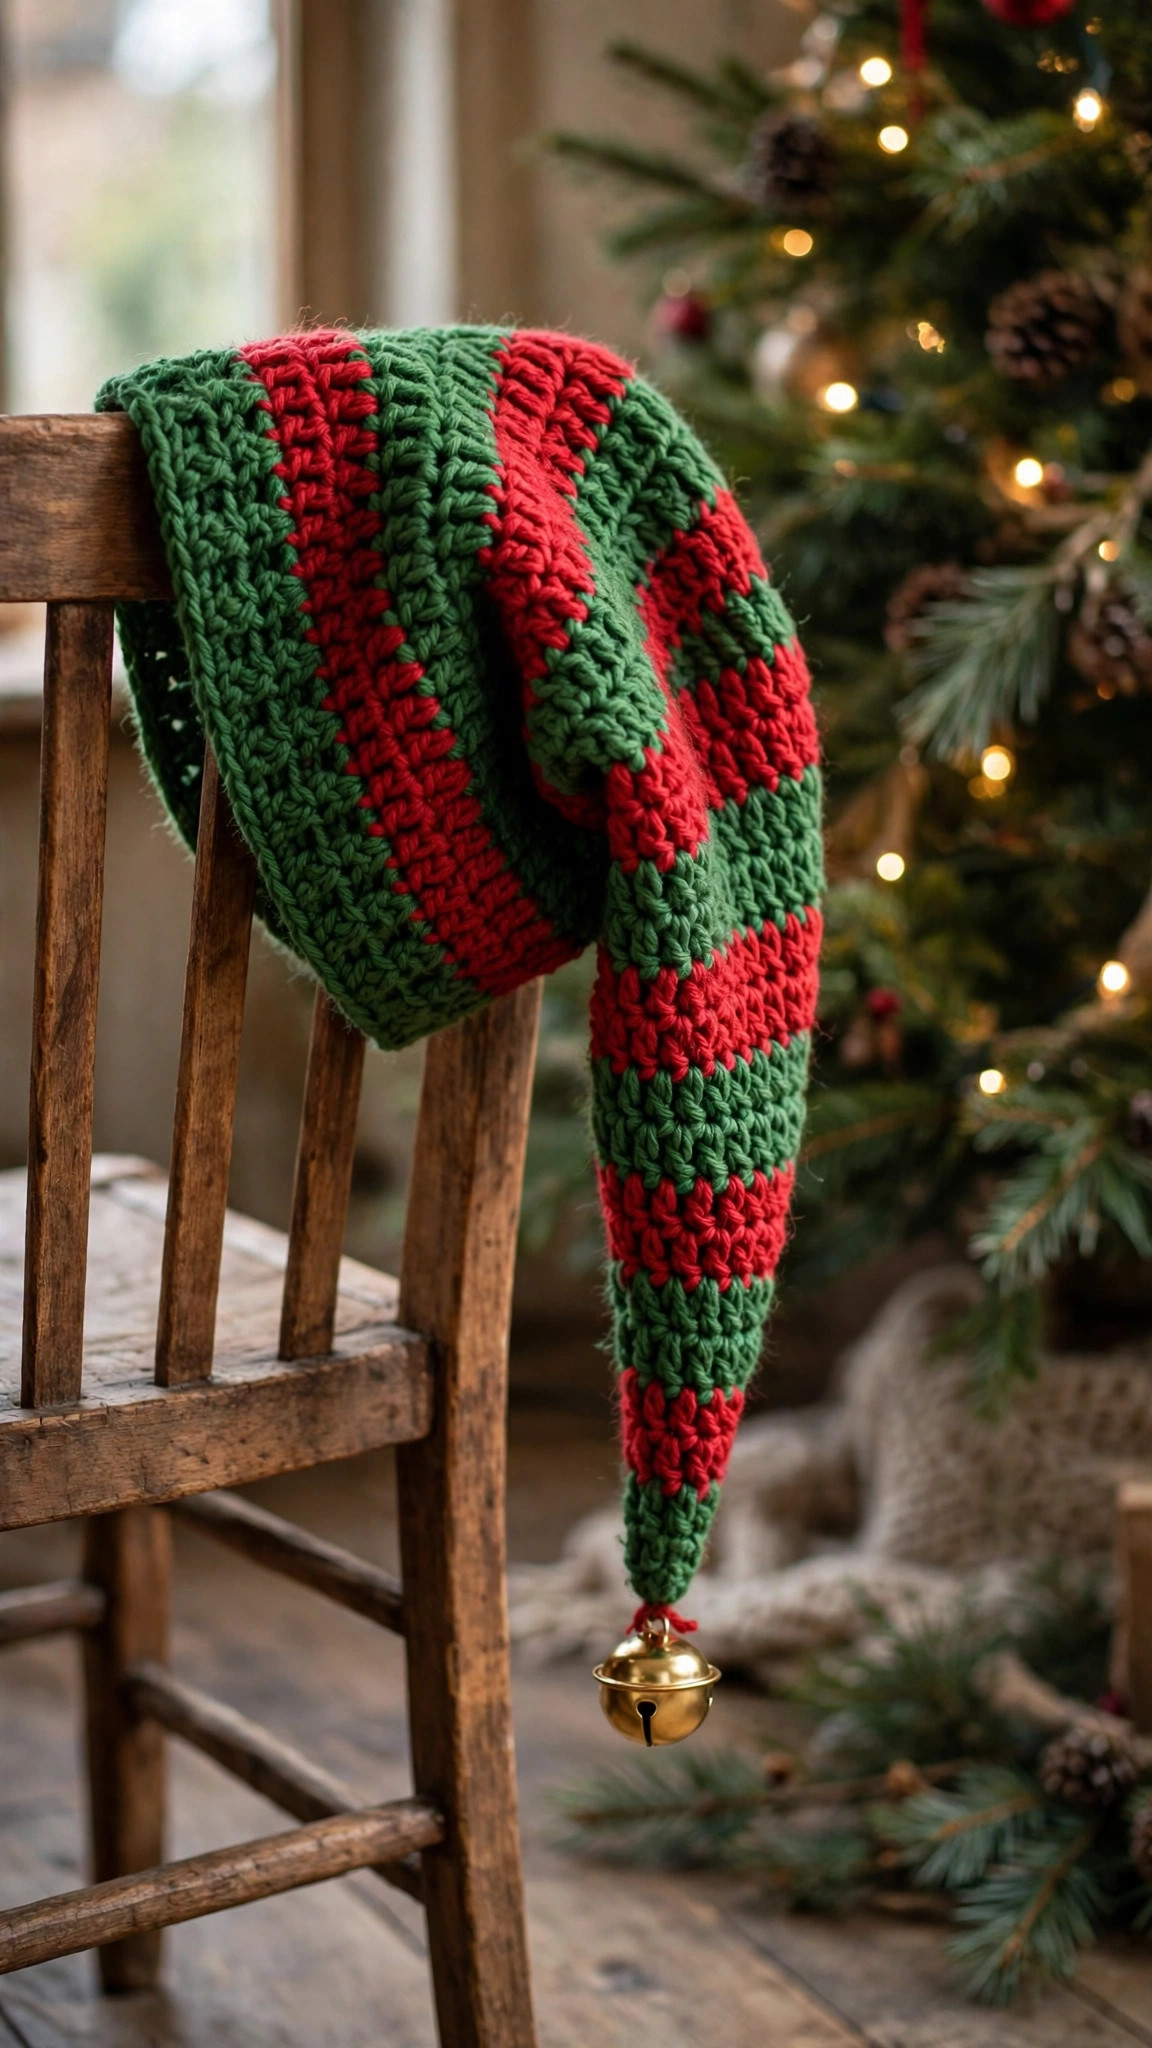
A long, floppy elf hat worked top-down from the very tip of its tail — slow green increases, red and white stripe bands, a stretchy red ribbed brim, and a jingle bell (or quiet pompom) to finish, in toddler, child and adult sizes.

Christmas · Crochet
- Finished size
- Toddler, child and adult sizes
- Making time
- About 2–3 hours
- Hook
- 5.0 mm, worsted-weight yarn
- Construction
- Top-down, one piece plus extras
- Skill
- Easy
In this post
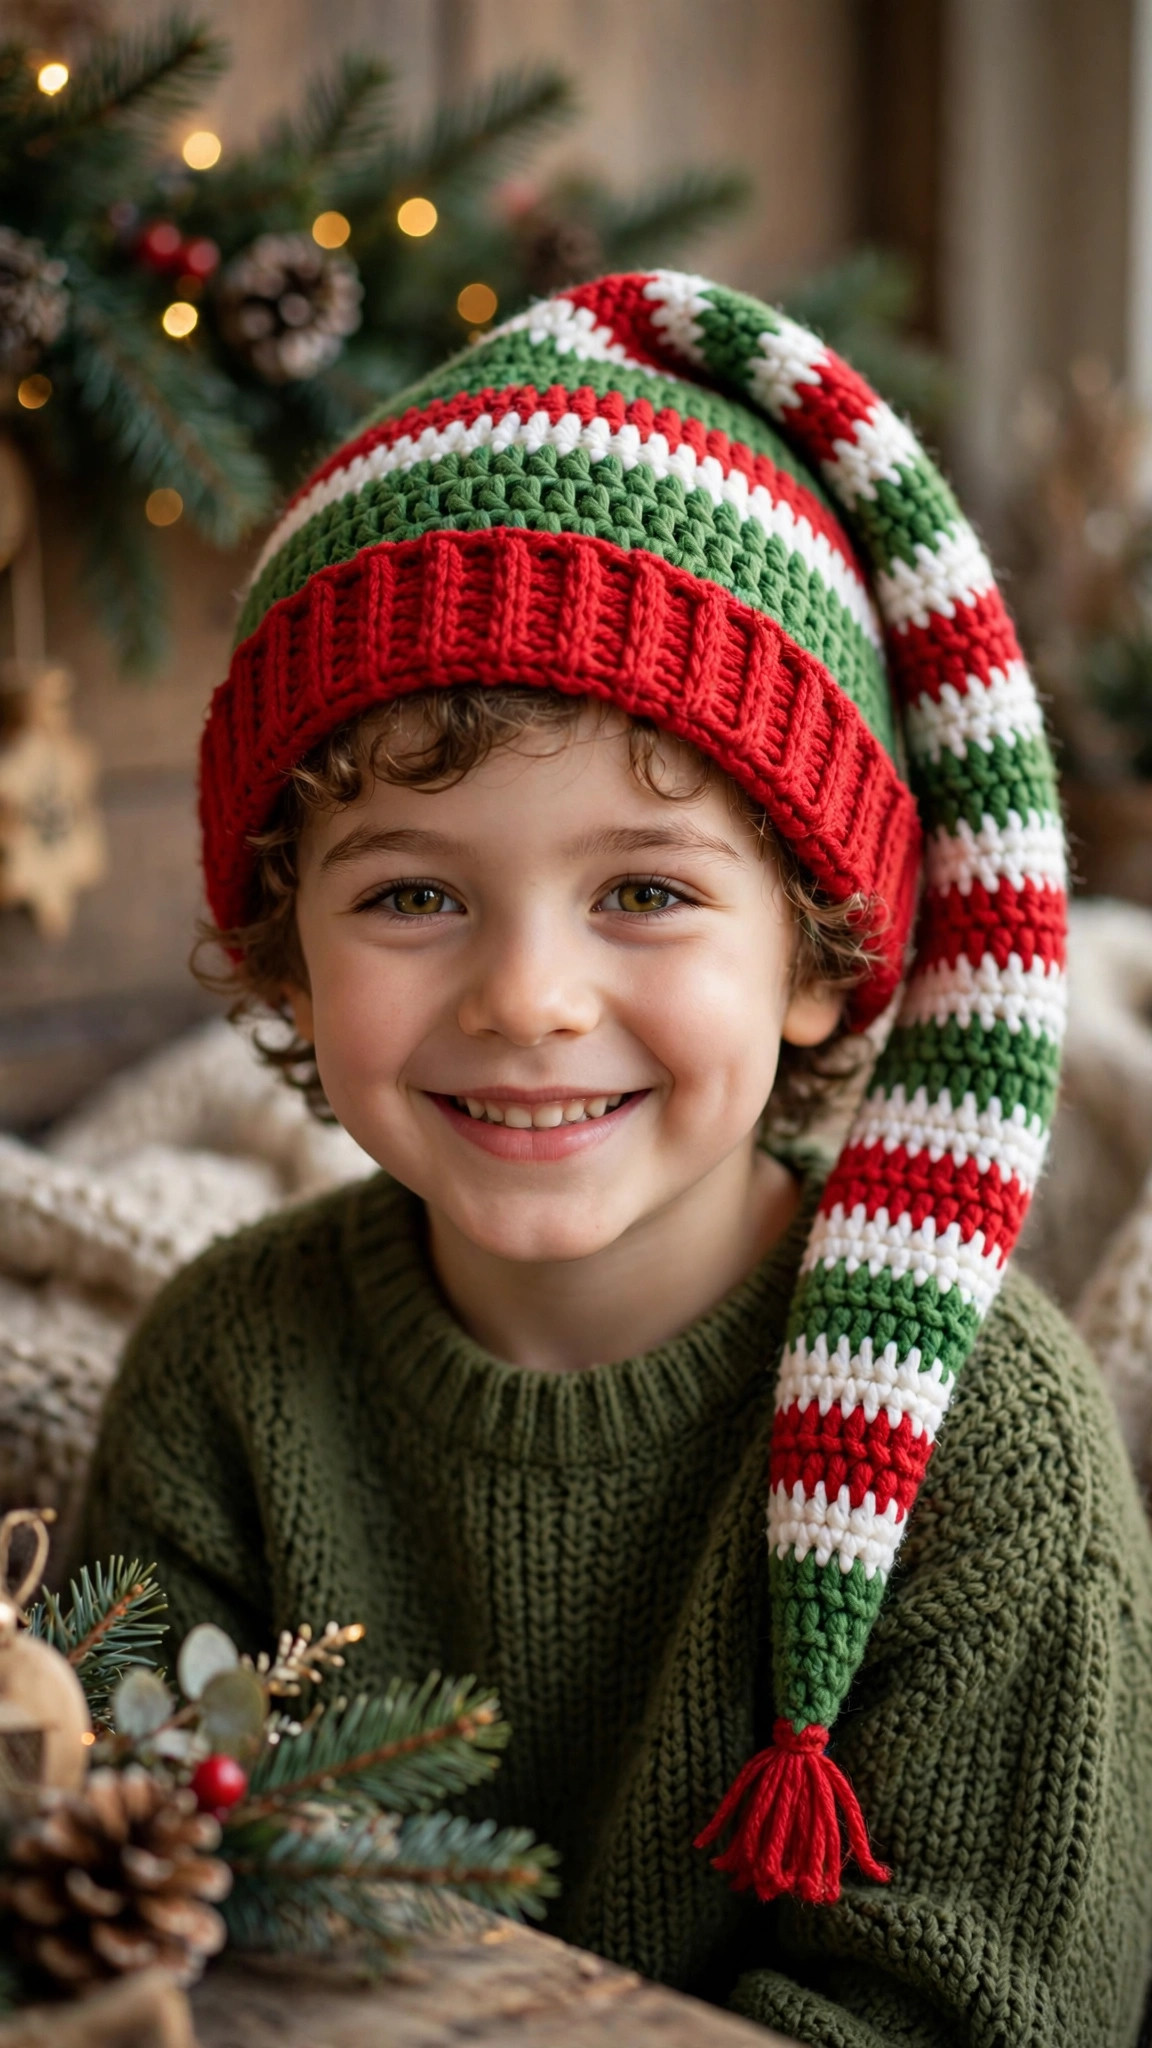
Some hats keep your ears warm. This one announces you. Our crochet elf hat pattern has a gloriously long, floppy tail that starts right at the tip, sways as you walk, ends in a jingle bell, and sits on a cosy red ribbed brim that actually stays put. It is green, it is stripy, it is completely over the top — and it takes one relaxed evening or two to make, in toddler, child or adult size. This is an original Little Loop Finds design, worked top-down in half double crochet with our own stitch math. You begin with six stitches at the tip of the tail and increase so slowly that the tail stays long and narrow for thirty rounds before the hat widens for the head. Red and white stripe bands ring the tail, and the brim is worked last, in red post-stitch ribbing — so there is no sewing the hat itself together at all. The jingle bell (or a pompom, for quieter elves) and optional pointy ear cuffs are the only add-ons, both ten-minute jobs.
Make one for the school concert, a matching set for the family photo, or a basketful for a Christmas market stall. Warn the wearer either way: people will smile at them in shops.
Contents
- Why you'll love this elf hat
- Materials you'll need
- Size, gauge and skill level
- Abbreviations — US terms
- The pattern (US terms)
- Finishing and assembly
- Tips for an elf hat with real swish
- FAQ
- What to crochet next
Why you'll love this elf hat
First, the proportions are right. Many elf hats go wrong two ways: the tail is too short and stubby, or it widens so fast it looks like a wizard hat that lost its nerve. This pattern increases by just three stitches at a time, with rounds to breathe between, all the way up the tail. The result is a long, gently tapering cone that drapes over a shoulder or hangs down a back like it means it — the silhouette everyone pictures when they say "elf hat."
Second, it is genuinely easy. The whole hat is half double crochet. The only other skills are a magic ring, an increase, and front and back post double crochet for the brim — which sounds fancy and is not: you work around the post of the stitch below instead of into its top. If you can make a plain beanie, you can make this hat.
Third, it is sized like a real hat, not a photo prop. Three sizes with proper head circumferences, a stretchy ribbed brim with negative ease so it grips gently, tail-length options, and a brim that folds up — giving you a second, shorter fit for in-between heads.
Finally, it is pure Christmas joy for very little yarn. One adult hat uses about 110 grams of green plus scraps of red and white you probably already own. Pair it with our free crochet Santa hat pattern for the whole North Pole workshop in one weekend, or try our free elf crochet pattern as a matching companion piece.
Materials you'll need
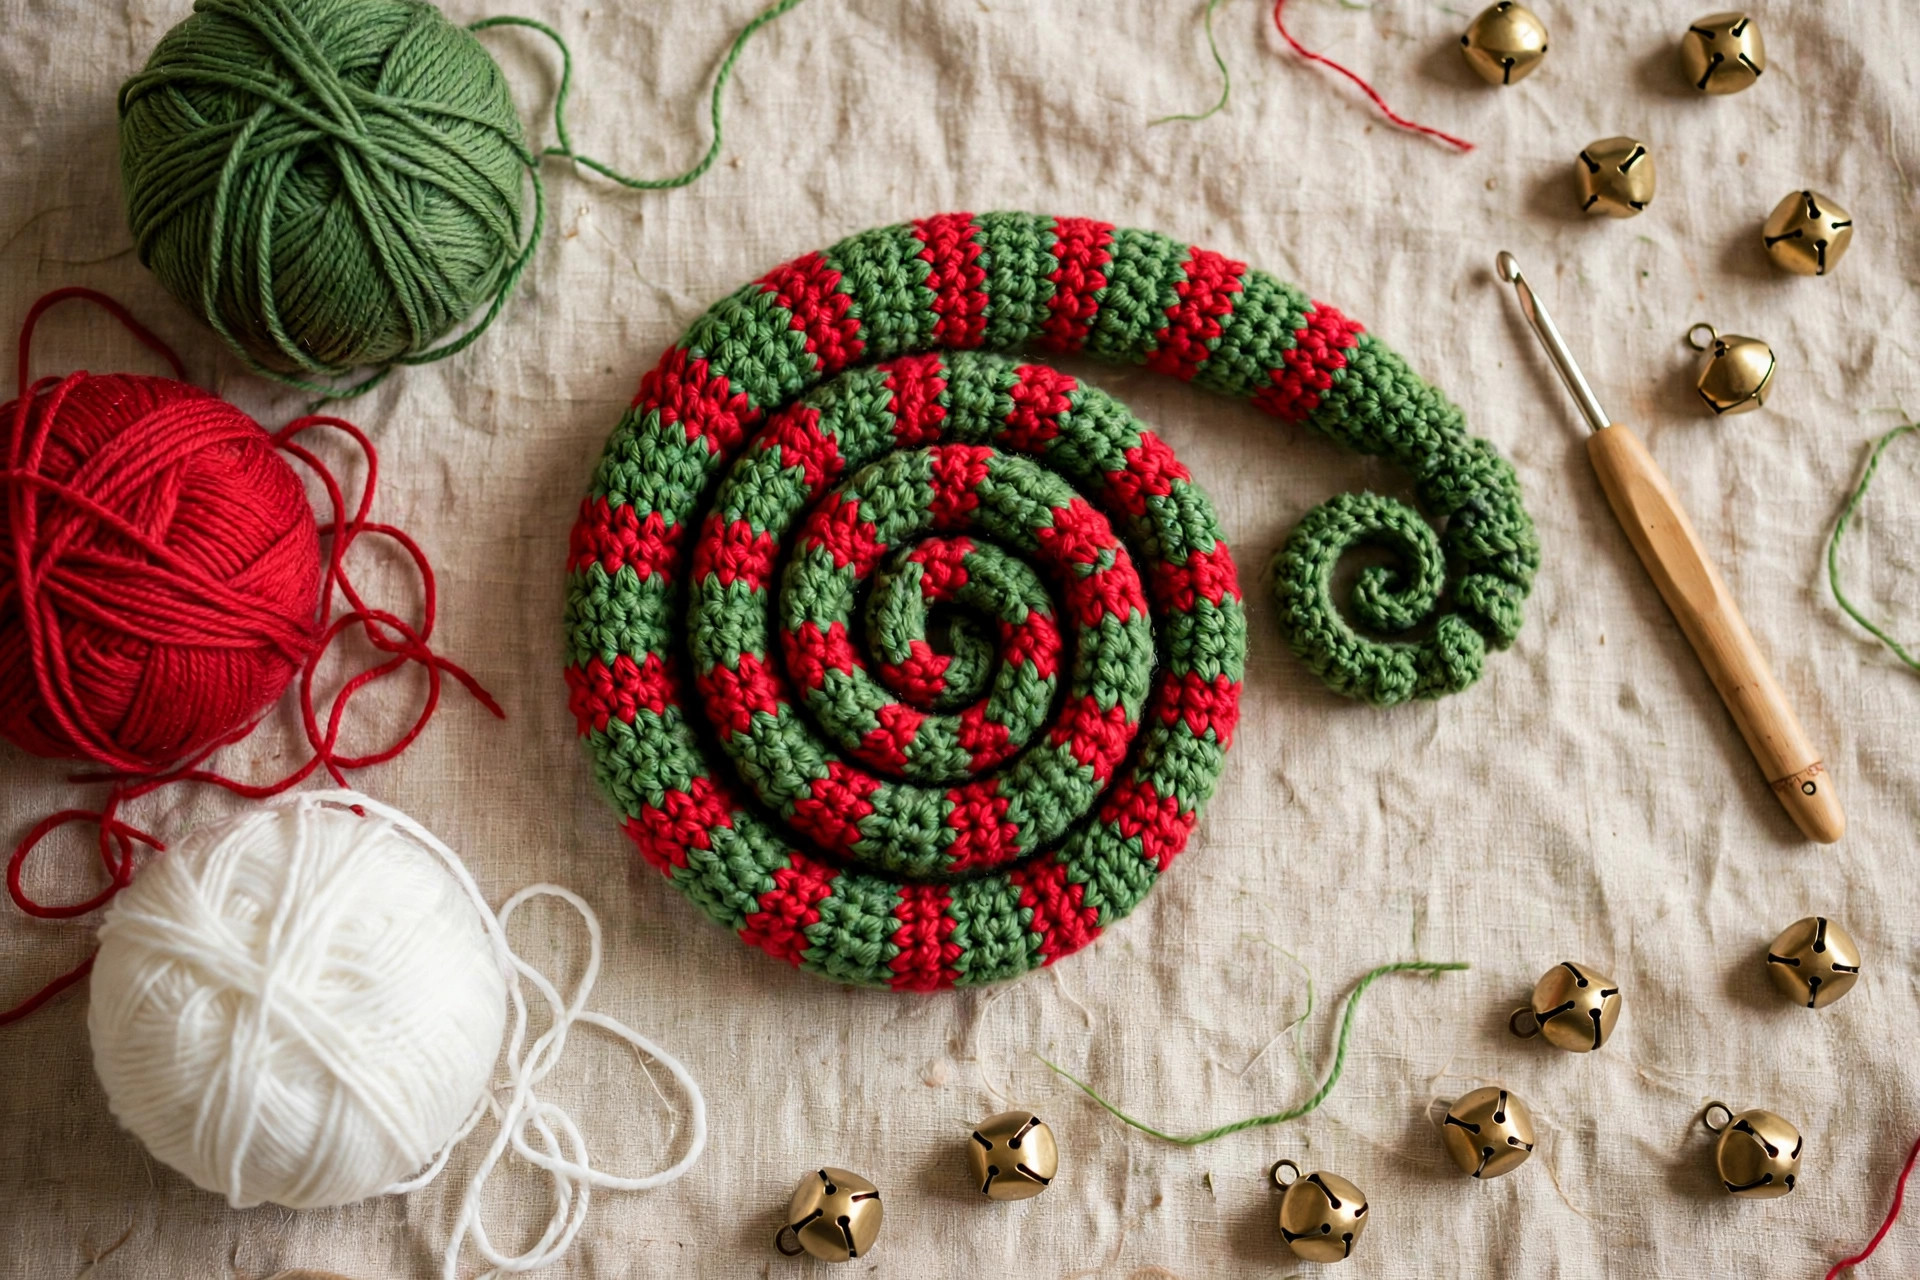
Worsted-weight yarn is the sweet spot here: thick enough that the hat grows quickly and holds its shape, fine enough that the tail still drapes instead of standing to attention. A smooth acrylic or acrylic-wool blend is ideal — it slides easily, washes well, and comes in exactly the bright, storybook green an elf hat demands. Save fluffy yarn for another project; you want to see every stitch top clearly.
| Supply | What to get |
|---|---|
| Main yarn | Worsted weight (category 4) in bright green, about 80 g / 160 yards (toddler), 95 g / 190 yards (child), 110 g / 220 yards (adult) |
| Contrast yarn A | Worsted weight in red, about 35 g / 70 yards, for stripes and brim |
| Contrast yarn B | Worsted weight in white, about 10 g / 20 yards, for stripes |
| Ear yarn (optional) | Small amount of worsted yarn in beige, peach or pink for the ear cuffs |
| Hook | 5.0 mm (US H-8) crochet hook |
| Bell or pompom | One 20–25 mm jingle bell with a hanging loop, or a 5 cm (2 in) pompom in red or white |
| Notions | Yarn needle, stitch marker, scissors, tape measure |
| Optional | Pins for the ear cuffs, strong thread and a sewing needle for the bell |
A note on the bell: choose one with a proper loop, not a slit-only craft bell, so you can sew through the loop several times. For under-threes, skip the bell and use the pompom — see the safety note in Tips.
Size, gauge and skill level
Skill level: Easy. You need a magic ring, half double crochet, an increase, and front and back post double crochet for the brim — all explained below. There are no decreases in the hat itself. If this is your first hat, our free crochet hat pattern basics are a friendly warm-up.
Sizes and head circumference: Toddler fits about 46–48 cm (18–19 in), child about 51–53 cm (20–21 in), adult about 56–58 cm (22–23 in). Brim stitch counts are 54 (toddler), 60 (child) and 66 (adult) — check yours before the brim. The ribbing stretches by several centimetres, so if a head falls between sizes, choose the smaller one.
Finished length: From tail tip to the bottom of the unfolded brim, about 43 cm (17 in) toddler, 46 cm (18 in) child and 49 cm (19.5 in) adult, in classic tail length.
Gauge: 12 half double crochet stitches and 9 rows measure 10 cm (4 in) with a 5.0 mm hook. Gauge sets the circumference here: too loose and the brim slides over eyebrows, too tight and it perches. Swatch, and if your count is off, change hook size — 5.5 mm if your fabric is coming up small, 4.5 mm if big — rather than fighting your tension for forty rounds.
Tail-length options: Classic length is written into the rounds below. For a short tail (better for toddlers, and under a coat hood), skip the R15–R17 and R23–R25 plain-round groups; counts do not change, only length. For an extra-long tail, add up to six plain rounds at the 24-stitch stage, after Round 25.
Abbreviations — US terms
US terms throughout. (UK note: a US half double crochet is a UK half treble, and a US double crochet is a UK treble.)
| Abbreviation | Meaning |
|---|---|
| MR | magic ring |
| hdc | half double crochet |
| dc | double crochet |
| sc | single crochet |
| inc | increase — 2 hdc in the same stitch |
| fpdc | front post double crochet |
| bpdc | back post double crochet |
| st(s) | stitch(es) |
| rnd(s) | round(s) |
| FO | fasten off |
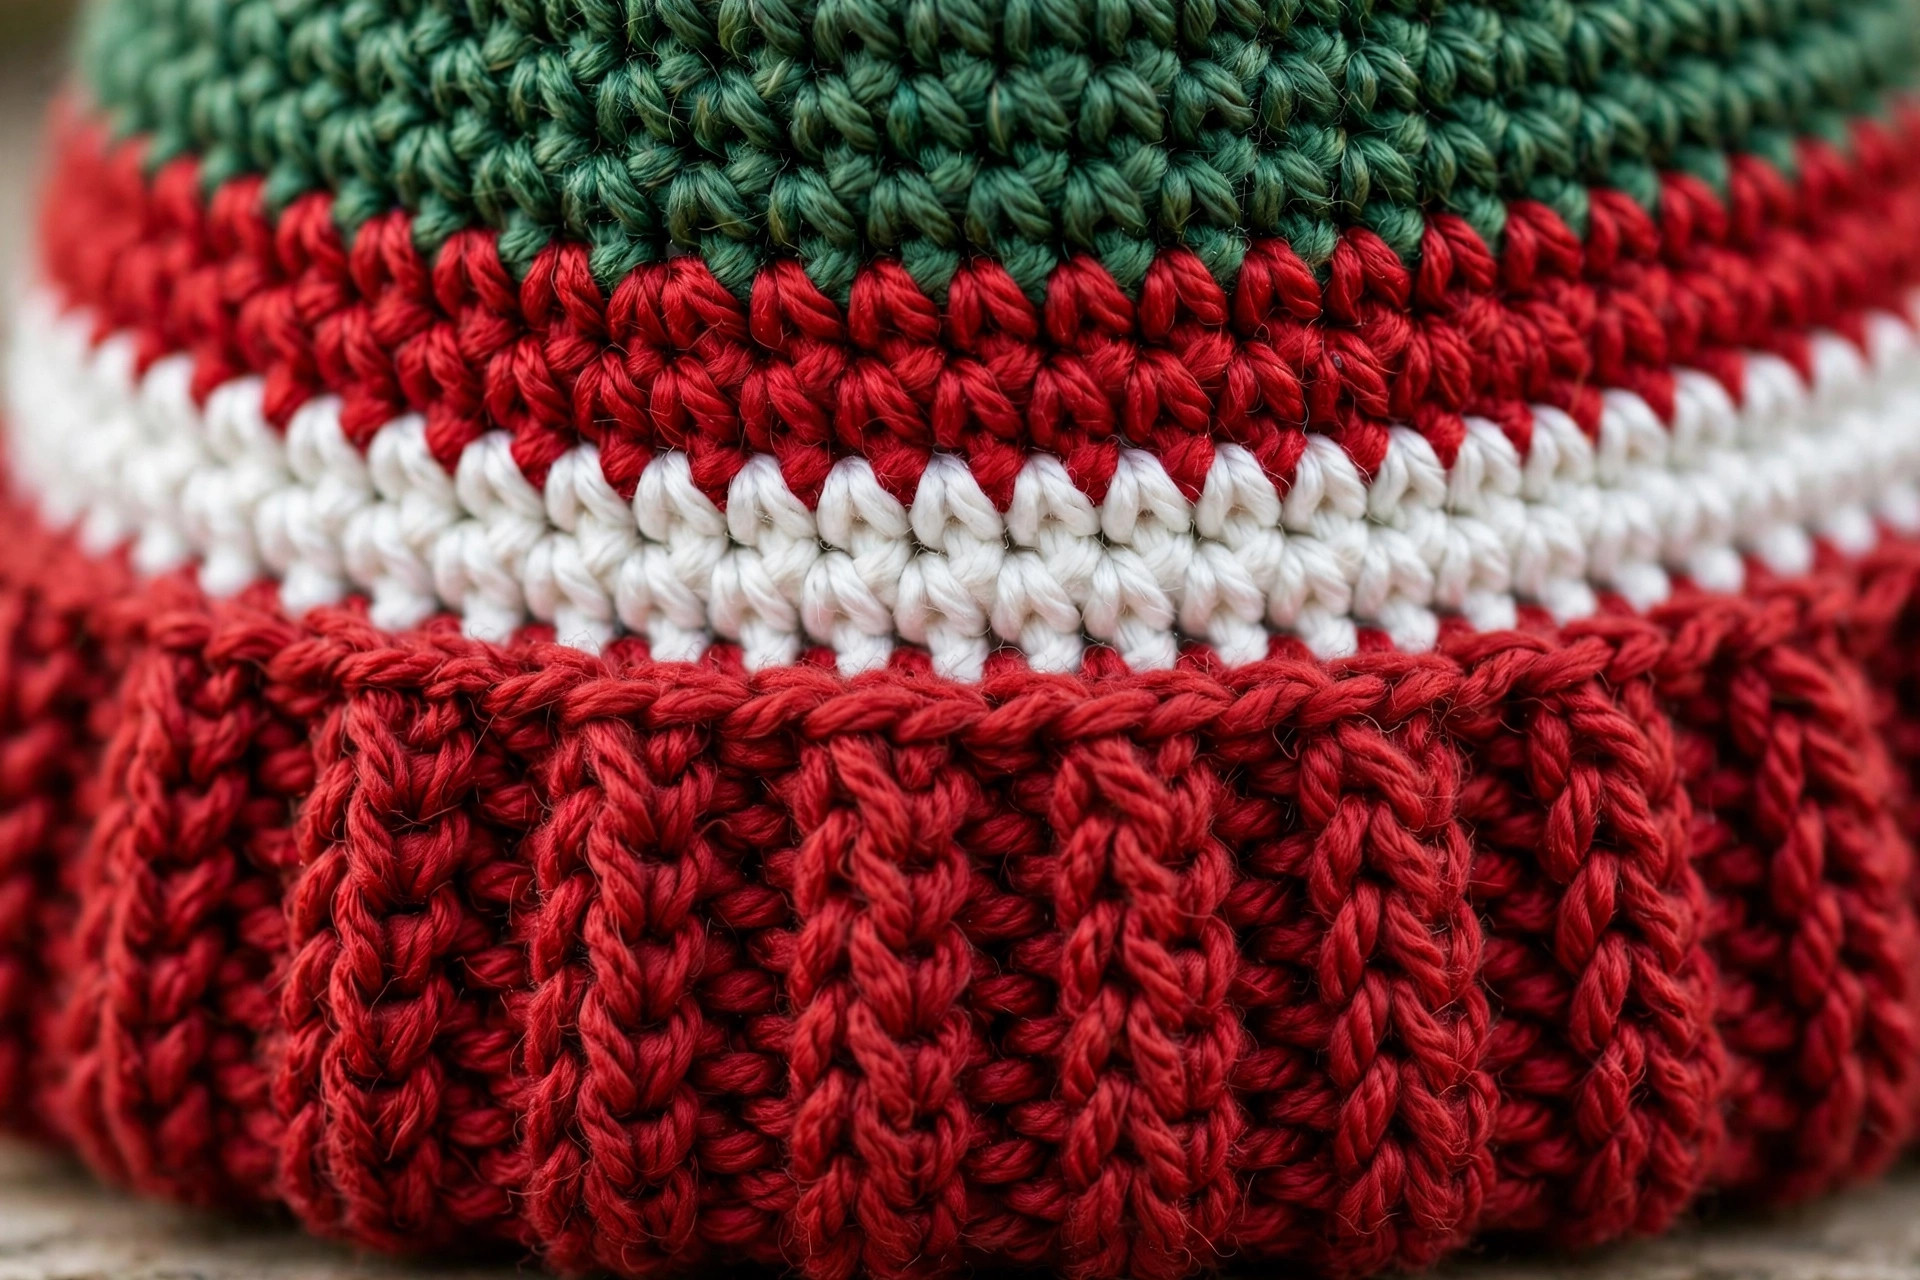
Front post double crochet (fpdc): Yarn over, insert your hook from front to back to front around the post of the stitch below, pull up a loop, then finish the double crochet as usual. Back post double crochet (bpdc) is the same from the back. Alternating the two makes the stretchy, knitted-look ribbing.
A note on rounds: Work in continuous spirals — do not join or turn. Mark the first stitch of each round and move the marker up as you go. The bold number is your stitch count for that round. Half double crochet spirals lean gently as they grow — normal, and invisible on a floppy tail once worn.
The pattern (US terms)
Work the whole hat in one piece, top-down: tip first, tail second, head third, brim last. Rounds 1 to 36 are the same for every size; the pattern then splits by size, clearly marked. Colours are given round by round for the stripe bands — everywhere else, work in green. To change colour neatly, work the last yarn over of the final stitch in the old colour with the new colour.
The tip and the long tail — all sizes, in green unless stated
The increases here are deliberately stingy — three stitches at a time, then rounds to breathe. That slow growth is the secret of the long, swishy tail, so resist hurrying it.
- R1: MR, 6 hdc (6)
- R2: hdc around (6)
- R3: [hdc, inc] × 3 (9)
- R4–R5: hdc around (9)
- R6: [2 hdc, inc] × 3 (12)
- R7–R9: hdc around (12)
- R10: [3 hdc, inc] × 3 (15)
- R11: In red, hdc around (15) — stripe band 1 begins
- R12: In white, hdc around (15)
- R13: In green, hdc around (15)
- R14: [4 hdc, inc] × 3 (18)
- R15–R17: hdc around (18)
- R18: [5 hdc, inc] × 3 (21)
- R19: In red, hdc around (21) — stripe band 2 begins
- R20: In white, hdc around (21)
- R21: In green, hdc around (21)
- R22: [6 hdc, inc] × 3 (24)
- R23–R25: hdc around (24) — extra-long tail? Add up to 6 more plain rounds here, still (24)
- R26: [7 hdc, inc] × 3 (27)
- R27: In red, hdc around (27) — stripe band 3 begins
- R28: In white, hdc around (27)
- R29: In green, hdc around (27)
- R30: [8 hdc, inc] × 3 (30)
Stretch the tail out: at gauge it should measure roughly 33 cm (13 in) from the tip. The drama comes from length, not width.
The head section — all sizes, in green
Now the hat widens faster — six stitches per increase round, one plain round between — turning the corner from "tail" to "hat."
- R31: [4 hdc, inc] × 6 (36)
- R32: hdc around (36)
- R33: [5 hdc, inc] × 6 (42)
- R34: hdc around (42)
- R35: [6 hdc, inc] × 6 (48)
- R36: hdc around (48)
Size split — check your size before you continue
Toddler only:
- R37: [7 hdc, inc] × 6 (54)
- R38–R40: hdc around (54) — go straight to the brim
Child only:
- R37: [7 hdc, inc] × 6 (54)
- R38: hdc around (54)
- R39: [8 hdc, inc] × 6 (60)
- R40–R42: hdc around (60) — go straight to the brim
Adult only:
- R37: [7 hdc, inc] × 6 (54)
- R38: hdc around (54)
- R39: [8 hdc, inc] × 6 (60)
- R40: hdc around (60)
- R41: [9 hdc, inc] × 6 (66)
- R42–R44: hdc around (66) — go straight to the brim
Try the hat on before the brim if you can. The edge should reach roughly to the tops of the ears; the brim adds about 5 cm (2 in), so a touch long beats a touch short. Need a deeper fit? Add one plain round now, in green, at your size's count.
The ribbed brim — all sizes, in red
Change to red on the last yarn over of the final green stitch. The first brim round is double crochet, to set up the posts; after that you work around the posts, joining each round with a slip stitch and chaining 2 — the one place in the pattern where you join.
- Brim R1: dc in each st around — 54 (toddler), 60 (child), 66 (adult)
- Brim R2: [fpdc, bpdc] repeated around — 54 (60, 66)
- Brim R3: [fpdc, bpdc] repeated around, matching posts below — 54 (60, 66)
- Brim R4: [fpdc, bpdc] repeated around — 54 (60, 66)
- Brim R5: [fpdc, bpdc] repeated around — 54 (60, 66)
FO, leaving a tail of about 20 cm (8 in) to weave in. The brim should spring back when stretched and sit about 5 cm (2 in) deep. Wear it down for a cosy fit, or fold it up once for the classic elf look — folding also tightens the fit for a slightly smaller head.
Finishing and assembly
The hat itself needs no sewing — just ends to tidy and a tip to decorate.
1. Weave in the ends. There are a few more than usual because of the stripe bands. Weave each end back and forth at least three times inside the fabric, on the inside of the tail, then trim. A loose end will show against the green, so do not rush this.
2. Add the jingle bell. Thread your needle with a double length of green yarn (or strong thread). Pass it through the bell's loop, then through the closed magic-ring tip, and repeat at least four times. Knot firmly inside the tip and bury the ends. Shake and tug gently — it should jingle freely but not swing loose. Alternatively, sew on a 5 cm (2 in) pompom in red or white the same way.
3. Make the optional pointy ear cuffs (make 2, in beige, peach or pink). These little flattened cones sit on the brim where the ears are, points up, so elf ears seem to poke out from under the hat.
- R1: MR, 4 sc (4)
- R2: [sc, inc] × 2 (6)
- R3: [2 sc, inc] × 2 (8)
- R4: sc in each st around (8)
FO, leaving a long tail. Do not stuff. Flatten each cone into a neat point, and sew the open edge to the brim, centred over where an ear would sit — roughly a quarter of the way around from the back on each side. Pin both on and check in a mirror first; they should mirror each other.
4. Final shape. No blocking needed — this hat is meant to flop. Curl the tail into its favourite curve, fold the brim, and your elf is ready.

Tips for an elf hat with real swish
Count at the increase rounds, relax on the plain ones. A miscount in the tail's slow increases quietly changes every later count, including the brim. Check the bold totals at Rounds 10, 18, 26 and 30; on plain rounds, a stray stitch can be absorbed next increase round.
Keep the colour changes at the back. Spirals drift, so the stripe joins travel slowly around the tail. Arrange the tail so the join line runs underneath, out of photo view.
Mind your tension on the tail. It is a long tube of meditative stitching, and most people's stitches tighten as they settle in — or loosen as they speed up. Either is fine if gradual; a sudden ridge where your tension changed overnight is the only version that shows. Use the stripe bands as checkpoints.
Choose your tip decoration honestly. A bell is the classic finish and genuinely delightful — for about a day. For everyday December wear, a pompom is quieter and softer in the wash. Market sellers: bell for display, pompom swap at the till.
Safety note for small children. For under-threes, skip the bell (a small part), choose the short tail so it cannot wrap or catch, and sew a pompom on with extra passes, checking it with a firm tug before every wear.
FAQ
Is this crochet elf hat pattern really free and original?
Yes. It is a complete, original Little Loop Finds design with its own stitch math, published in full here in all three sizes. Make as many as you like for yourself, gifts and seasonal selling — see the last question.
How long does an elf hat take to make?
About 2 to 3 hours for the adult size, less for the smaller ones. The thirty tail rounds are narrow — most have fewer than 25 stitches — so the tail takes well under an hour. The head, brim and extras take about the same again.
Can I make the tail shorter or longer?
Yes — the pattern is built for it. Short tail: drop the R15–R17 and R23–R25 plain-round groups. Extra-long: add up to six plain rounds at the 24-stitch stage after Round 25. Neither change alters a stitch count.
What yarn works best for this elf hat?
A smooth worsted-weight acrylic or acrylic-wool blend. It keeps the tail draping properly, shows the stripes crisply, and washes well. Avoid slippery yarn for the brim — post-stitch ribbing grips best with a little friction.
My hat is coming up too big (or too small) — what went wrong?
Almost certainly gauge. At 12 stitches to 10 cm, being one stitch out changes the adult brim circumference by roughly 5 cm. Measure your swatch honestly and change hook size rather than forcing your tension. The ribbed brim forgives about half a size either way.
How do I wash a finished elf hat?
Remove a metal bell first — ten seconds to snip and re-sew, and metal bells dislike soaking. Hand wash in cool water with mild detergent, squeeze gently in a towel, reshape, and dry flat away from heat. A pompom tip can stay on; fluff it once dry.
Can I sell elf hats I make from this pattern?
Yes — you may sell finished hats made by hand from this pattern in small quantities, crediting Little Loop Finds as the designer. Please do not republish the pattern text and photos themselves.
What to crochet next
The workshop is open — keep the green yarn out:
- Dress the other end of the outfit with a crochet Christmas stocking pattern — same palette, same easy pace.
- Go full mischief with a grinch hat crochet pattern free for the family member who insists they are "not a Christmas person."
- Swap the point for floppy corners with a free crochet jester hat pattern — the natural next step after this brim.
Happy crocheting — may your hat steal every December photo.
The box below contains an Etsy link. If you buy through it, we may earn a small commission at no extra cost to you. Learn more.
No time to make one?
Short on time? Find handmade crochet elf hats from independent makers on Etsy.
Browse on Etsy (opens Etsy in a new tab)