Free elf crochet pattern: shelf-sitter Christmas elf
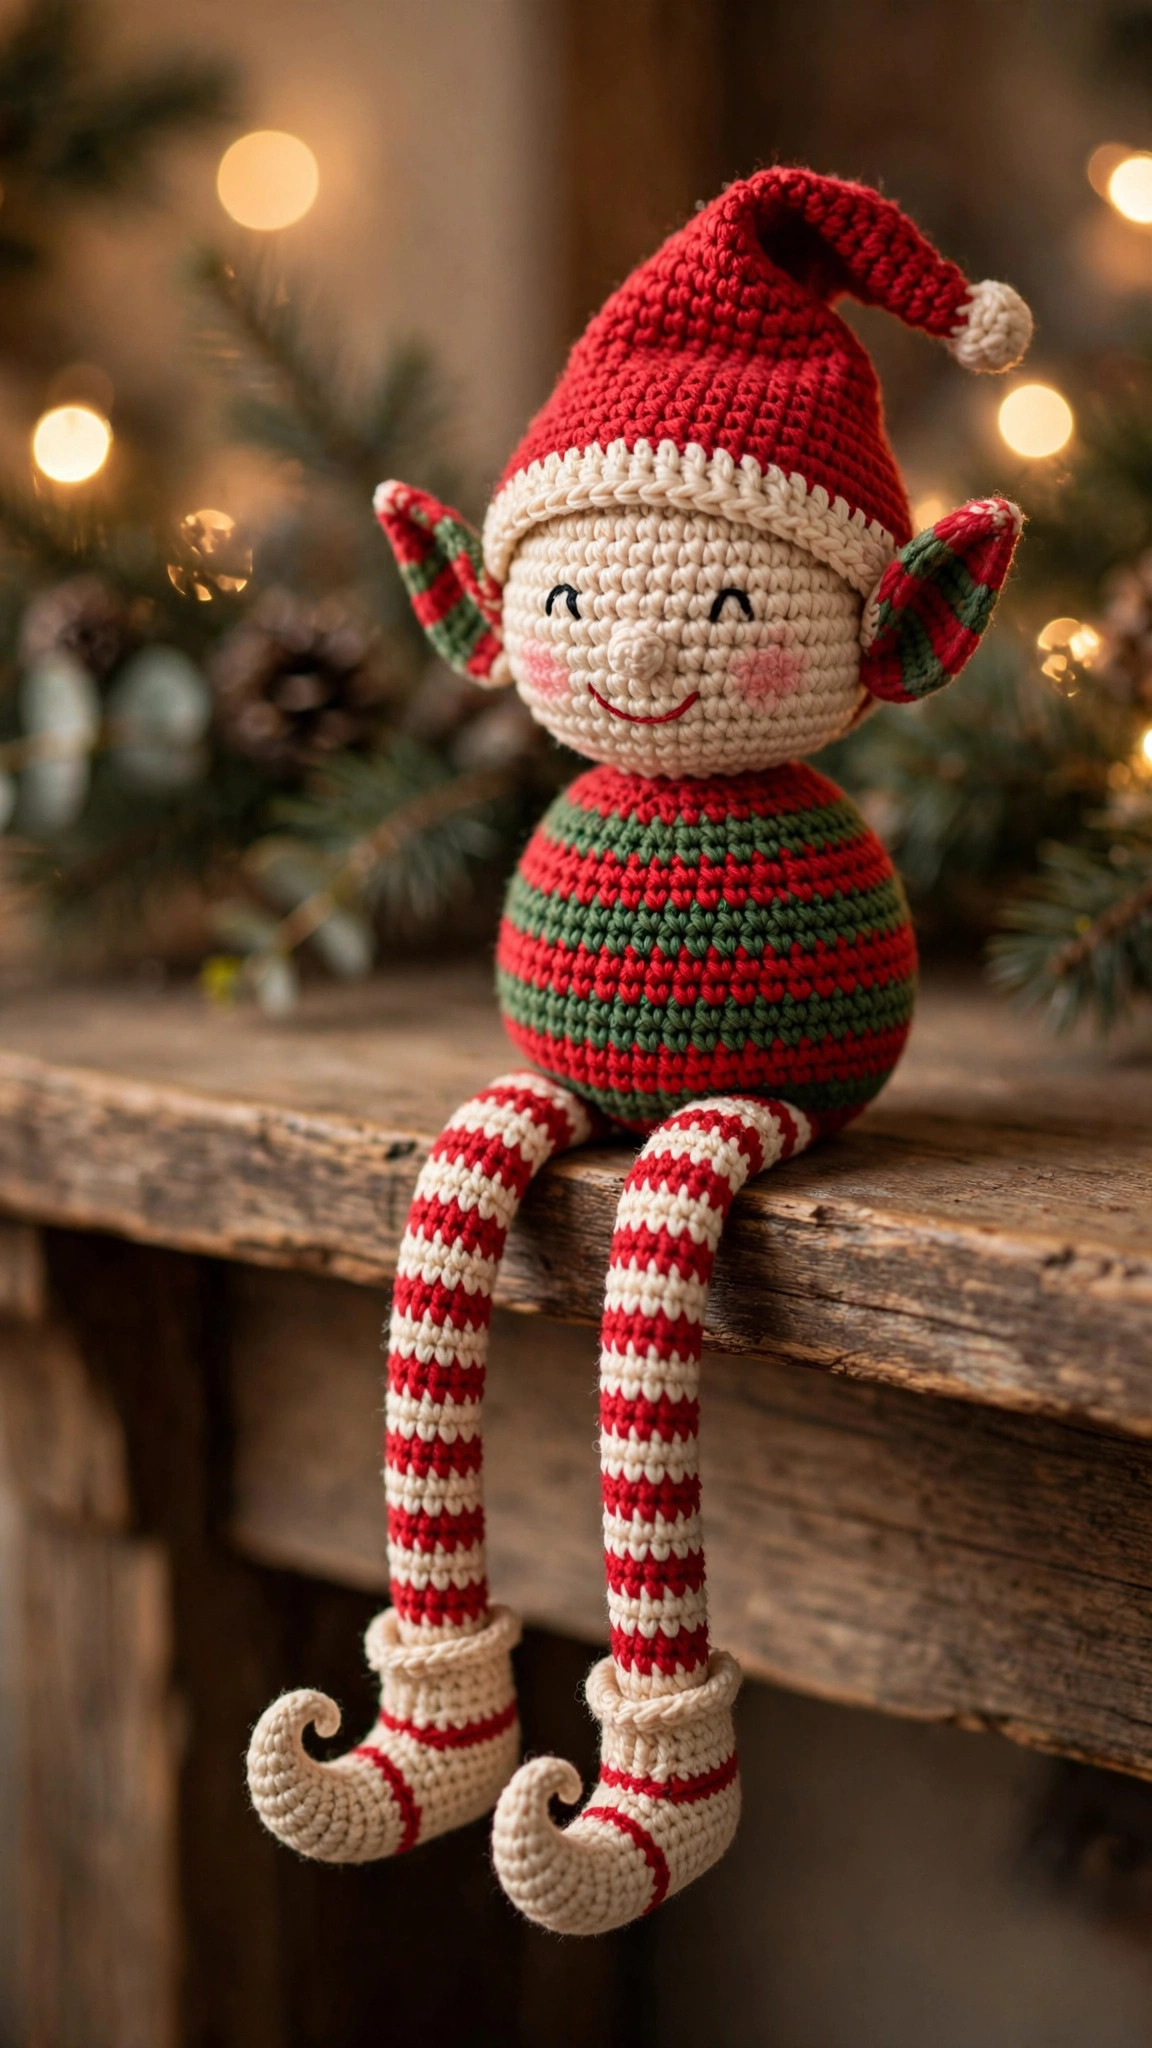
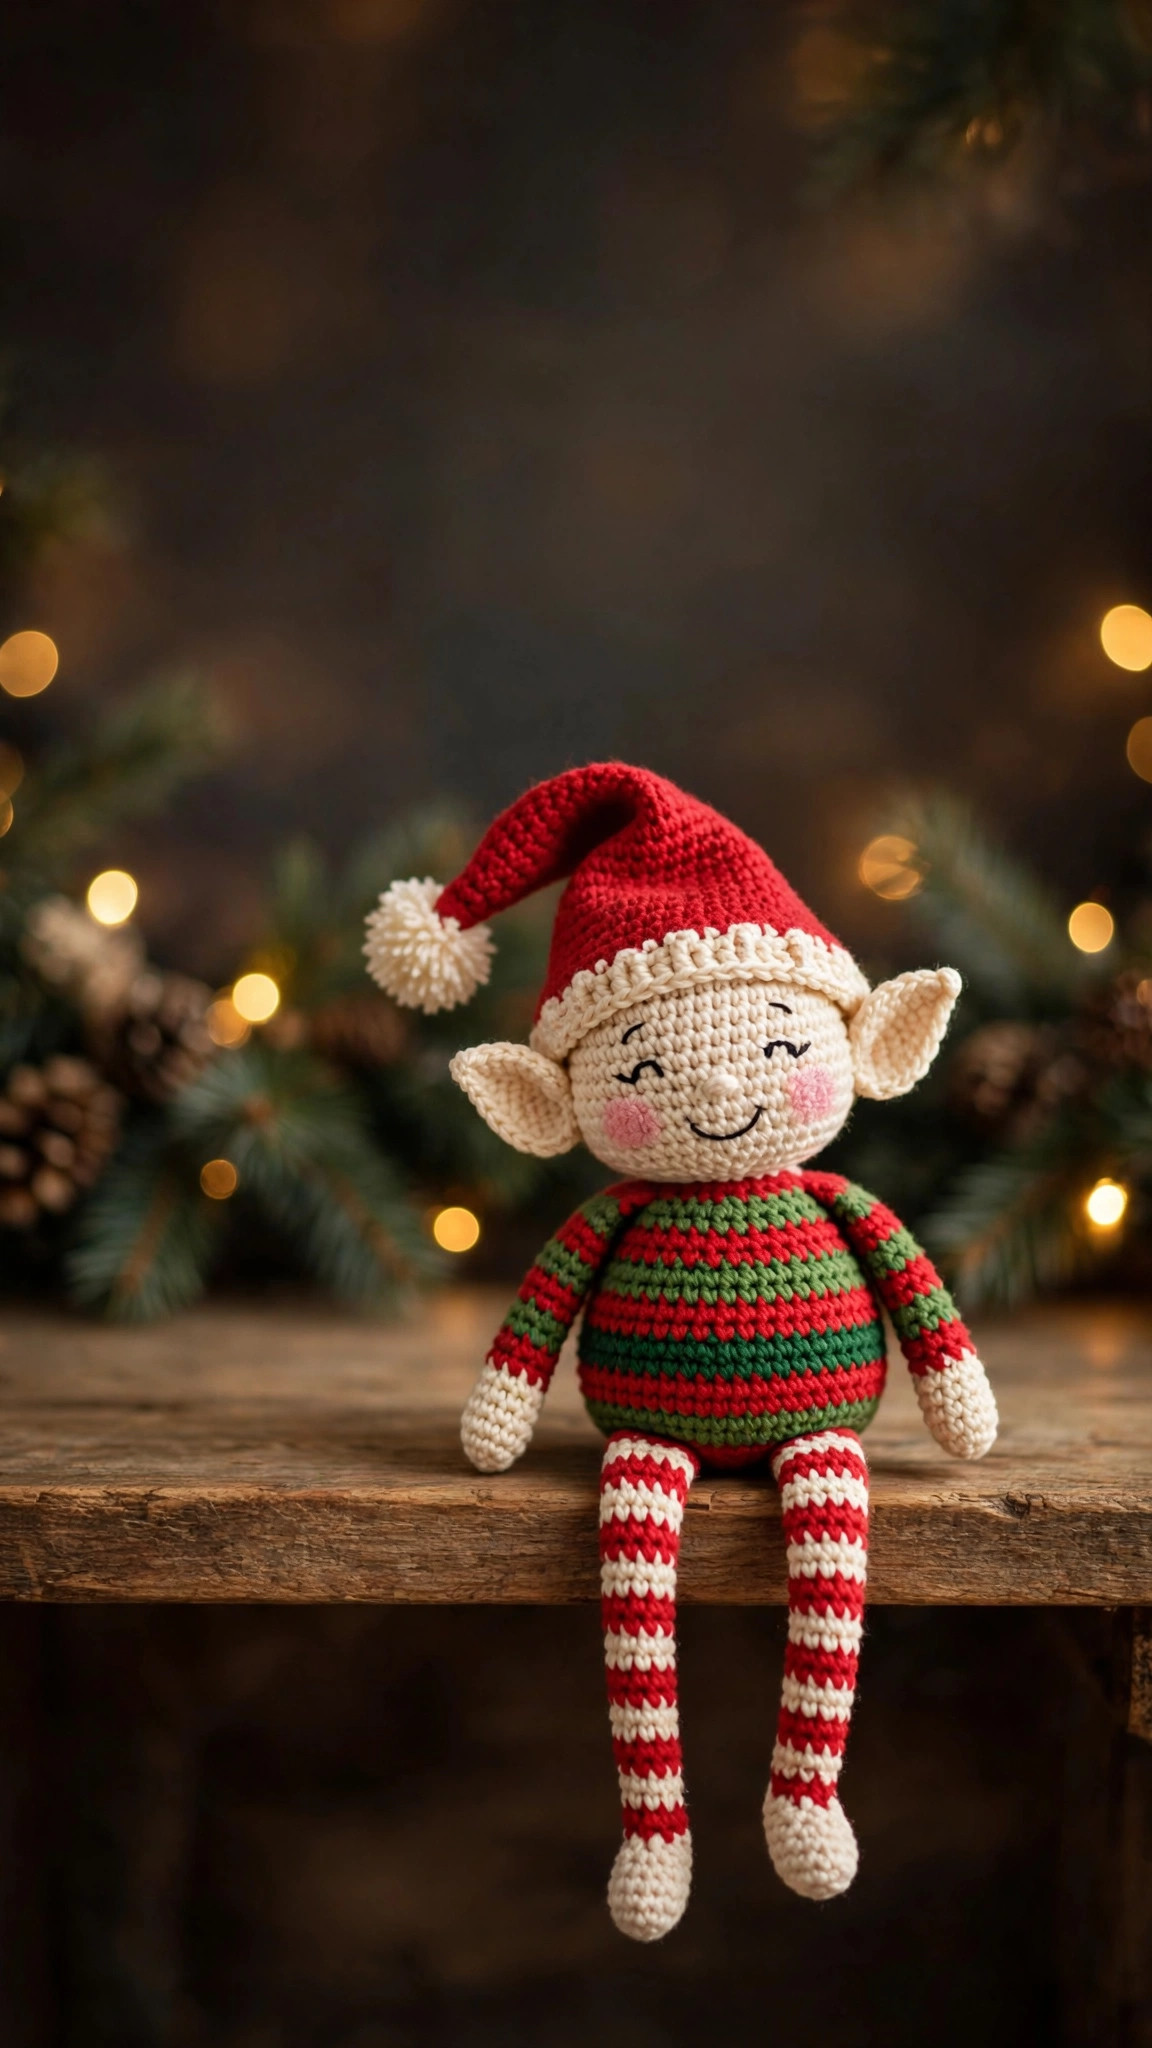
A cheerful shelf-sitter Christmas elf, about 30 cm tall seated, with long striped legs made to dangle over a shelf edge, a round festive body, pointy crocheted ears, embroidered rosy cheeks and a tall floppy pointed hat — worked in simple single-crochet spirals with two-round stripes.

Amigurumi · Crochet
- Finished size
- About 30 cm / 12 in seated
- Making time
- About 5–6 hours
- Hook
- 3.5 mm, worsted-weight yarn
- Pieces
- 8 pieces to assemble
- Skill
- Beginner
In this post
Every October the Christmas yarn comes out of the cupboard and the mantel starts looking bare. This free elf crochet pattern is the answer to both: a shelf-sitter elf, about 30 cm (12 in) tall seated, with long striped legs made to dangle over a shelf edge, a round stripy body, pointy crocheted ears, rosy embroidered cheeks and a tall floppy pointed hat. He is designed from the start to sit — no wobbling, no propping — legs swinging free over your mantel, bookshelf or windowsill.
Make him in October: a few relaxed evenings, festive oddments of red, green and cream from your stash, and a genuinely charming handmade gift. Fully original, in US terms, with a stitch count on every round — the stripes, the weighted seat and the dangling legs do all the clever work.
Why you'll love this free elf crochet pattern
Most crocheted elves are designed to stand or hang, which on a real shelf means one thing: they fall over. This one is engineered to sit — firmly stuffed base, legs attached at the front so they hang straight down, and an optional pouch of poly pellets in the seat as an anchor. Perch him once and he stays perched: through December, through curious cats, through enthusiastic dusting.
The long legs are the whole personality of the pattern, and they're wonderfully simple: plain striped tubes with a shaped shoe at the bottom. No joints, no wire, no fiddly toes — the stripes carry the look, and a tiny optional pom on each shoe tip finishes them. Worked separately, they can be lengthened or shortened for deep bookshelves or narrow ledges.
Then the hat: a tall, slowly-tapered cone folded over at the tip and tacked down for that classic mischievous-elf flop, finished with a soft pom-pom. Pair him with a handmade crochet Christmas stocking on the same mantel for a full handmade shelf scene from stash yarn.
Materials you'll need
| Supply | What to get |
|---|---|
| Red yarn | Worsted-weight (#4) acrylic, about 60 g — body stripes, hat, sleeves, shoes |
| Green yarn | Worsted-weight (#4) acrylic, about 40 g — body stripes |
| Cream yarn | Worsted-weight (#4) acrylic, about 40 g — body stripes, hat brim, leg stripes, pom-pom |
| Skin-tone yarn | Worsted-weight (#4) in peach or light tan, about 40 g — head, ears, nose, hands |
| Blush yarn | Small amount of pink yarn or floss for the rosy cheeks |
| Crochet hook | 3.5 mm (E-4) |
| Safety eyes | 9 mm black, one pair (or embroider the eyes instead) |
| Stuffing | Polyester fiberfill, about 100 g |
| Optional weight | 2–3 tbsp poly pellets or dry rice in a tied pouch (a cut-off stocking works) |
| Notions | Tapestry needle, stitch markers, scissors, optional pom-pom maker |
Smooth worsted acrylic is ideal — crisp stripes and the classic Christmas colors this elf wants. Avoid fuzzy yarns for the head: a smooth face lets the embroidered cheeks show. Any skin tone works.
Size, gauge and skill level
- Finished size: about 30 cm (12 in) tall seated, from shelf edge to the fold of the hat; body about 13 cm (5 in) tall, legs dangling about 20 cm (8 in) below the shelf edge.
- Gauge: not critical for amigurumi. What matters is tight, even fabric — if you can see stuffing through your stitches, drop to a 3.25 mm hook. As a guide, 5 sc should measure about 2.5 cm (1 in).
- Skill level: confident beginner. You need the magic ring, single crochet, increase, invisible decrease and simple color changes. The stripes change every two rounds — an easy rhythm to settle into.
If this is your very first amigurumi, the one piece crochet teddy bear is a gentle warm-up with the same spiral shaping.
Abbreviations — US terms
| Abbreviation | Meaning |
|---|---|
| MR | magic ring |
| sc | single crochet |
| BLO | back loop only |
| inc | increase (2 sc in the same stitch) |
| dec | decrease (invisible decrease recommended) |
| st(s) | stitch(es) |
| ch | chain |
| R | round |
| FO | fasten off |
A note on color changes: change color in the last yarn-over of the final stitch before the new color — pull the new color through the last two loops. Carry the unused yarn loosely up the inside of the work; on a stuffed toy it never shows, and it saves a mountain of ends.
The pattern (US terms)
Work in continuous spirals unless noted. Mark the first stitch of each round and move the marker up as you go. The stitch count at the end of every round is in parentheses — count as you go, especially on the hat, where one missed increase leans the whole cone.
Body — red, green and cream stripes
The body is worked from the base up in two-round stripes: red, green, red, cream, green, then red. Change colors in the last yarn-over of the round before each new color (ends of R7, R9, R11, R13, R15).
- R1: with red, MR, 6 sc (6)
- R2: inc in each st (12)
- R3: [sc, inc] × 6 (18)
- R4: [2 sc, inc] × 6 (24)
- R5: [3 sc, inc] × 6 (30)
- R6: [4 sc, inc] × 6 (36)
- R7: sc in each st around (36) — change to green in the last st
- R8–R15: sc in each st around, working 2 rounds each in green, then red, then cream, then green (36 every round) — changing colors at the end of R9, R11 and R13
- R16: red, sc in each st around (36)
- R17: red, [4 sc, dec] × 6 (30)
- R18: red, [3 sc, dec] × 6 (24)
- If you're weighting the seat, drop the pellet pouch in now, settle it flat against the base, then stuff firmly around and above it.
- R19: [2 sc, dec] × 6 (18)
- R20: [sc, dec] × 6 (12)
- R21: dec × 6 (6). FO, close through the front loops and weave in.
Sitting tip: set the body down before closing. The base should sit flat. If it rocks, push stuffing from the center out toward the rim — a well-packed rim makes a well-behaved elf.
Head — skin tone
- R1: MR, 6 sc (6)
- R2: inc in each st (12)
- R3: [sc, inc] × 6 (18)
- R4: [2 sc, inc] × 6 (24)
- R5: [3 sc, inc] × 6 (30)
- R6: [4 sc, inc] × 6 (36)
- R7: [5 sc, inc] × 6 (42)
- R8–R14: sc in each st around (42) — 7 rounds even
- Insert the safety eyes between R11 and R12, 8 stitches apart; push washers on until they click.
- R15: [5 sc, dec] × 6 (36)
- R16: [4 sc, dec] × 6 (30)
- R17: [3 sc, dec] × 6 (24)
- Start stuffing now, while the opening is wide — firm, but not drum-tight.
- R18: [2 sc, dec] × 6 (18)
- R19: [sc, dec] × 6 (12)
- R20: dec × 6 (6). FO, close and weave in as for the body.
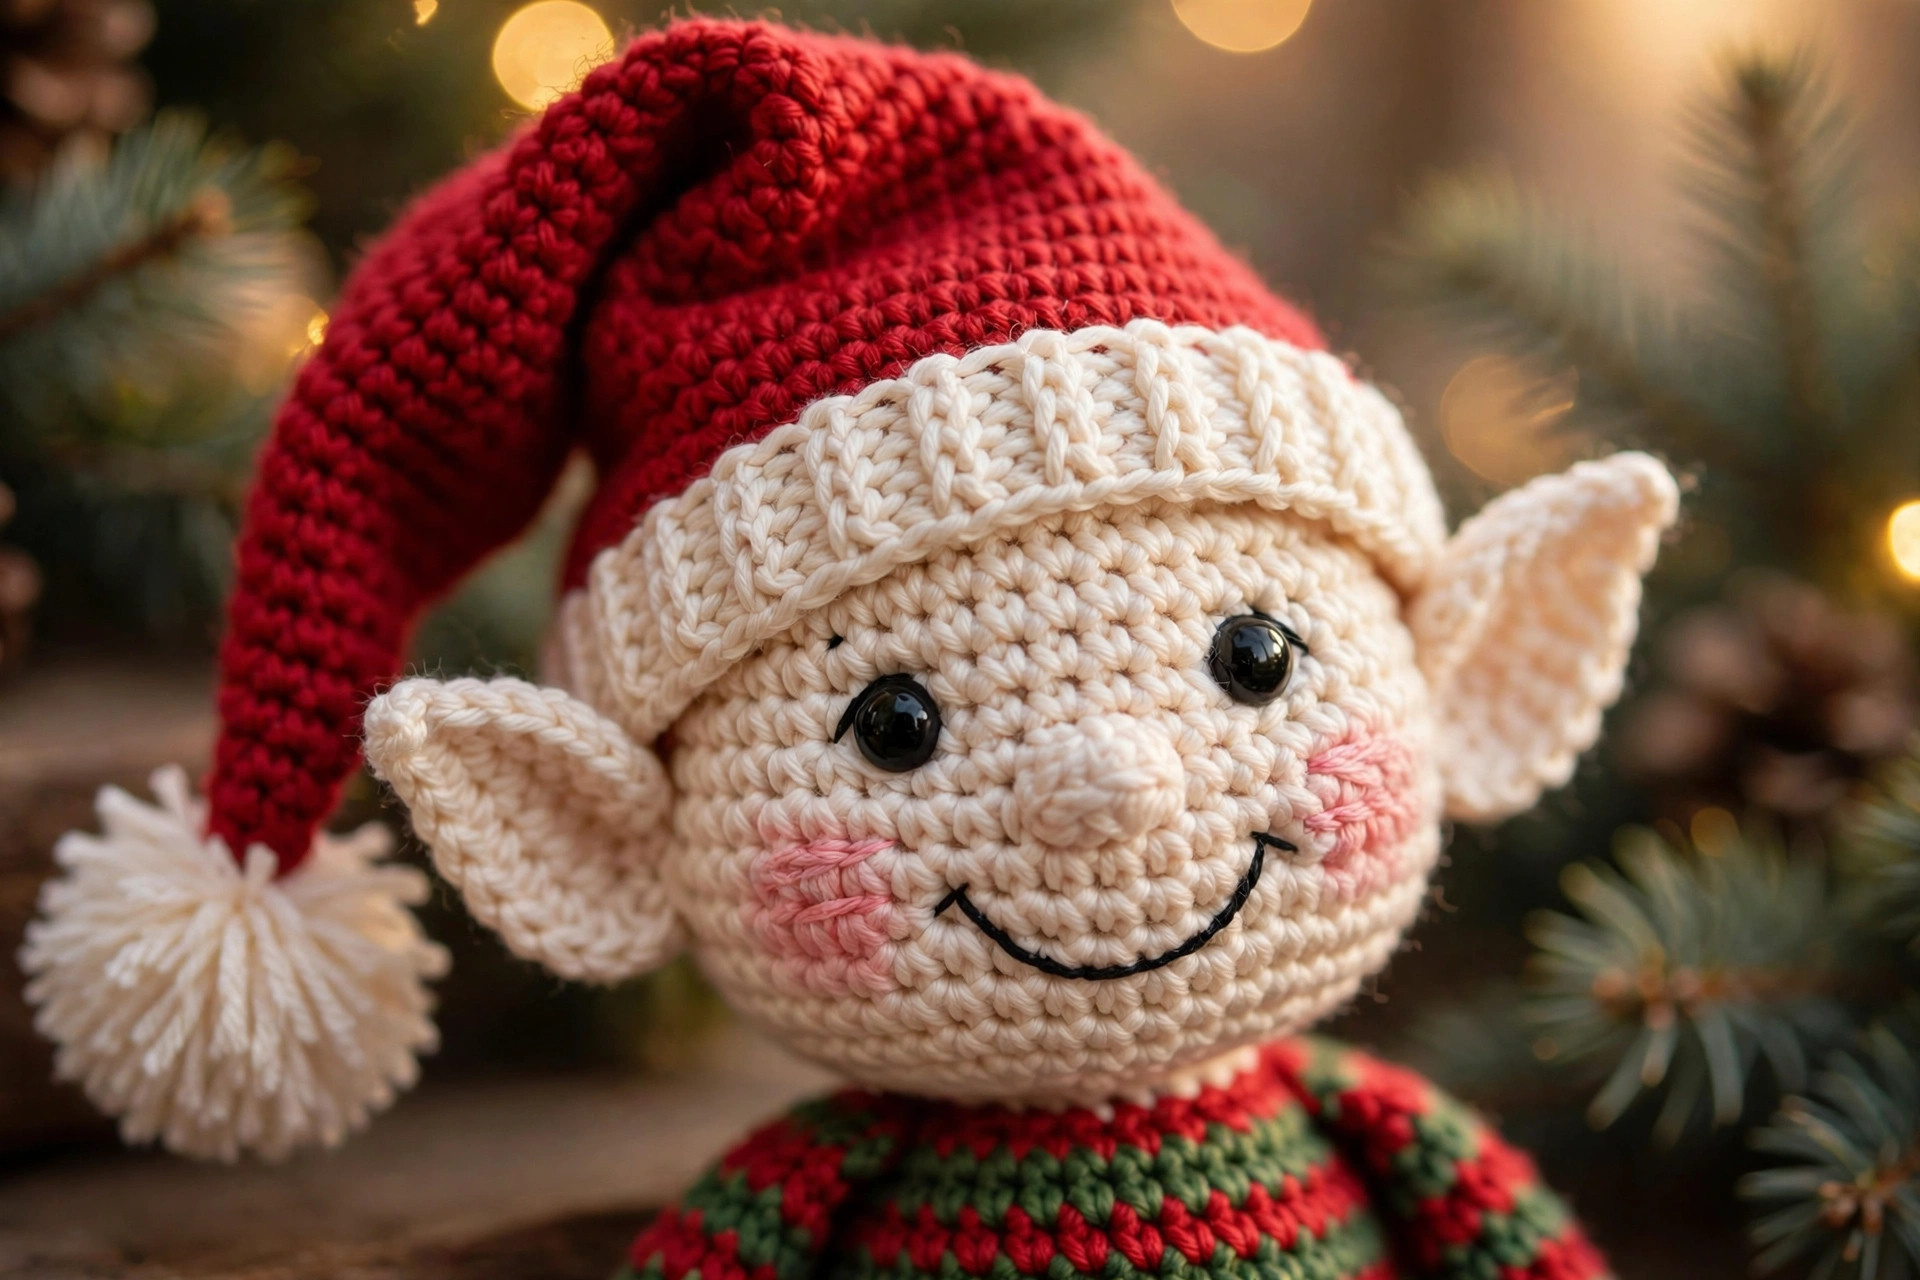
Nose (skin tone): R1: MR, 6 sc (6). R2: sc in each st (6). Add a pinch of stuffing, dec × 3 (3), FO leaving a tail. Sew the nose to the center of the face, just below and between the eyes, around R12–R13.
The face: with blush pink yarn, embroider two round cheeks — a small satin-stitch oval or three short straight stitches — under each eye, about 3 stitches out from the nose. With dark yarn, add a small smile: one curved stitch under the nose, worked twice. These cheeks make the elf — don't skip them.
Ears — skin tone, make 2
Worked from the pointy tip outward:
- R1: MR, 4 sc (4)
- R2: [sc, inc] × 2 (6)
- R3: sc in each st (6)
- R4: [2 sc, inc] × 2 (8)
- R5–R6: sc in each st (8)
- R7: [2 sc, dec] × 2 (6)
- R8: [sc, dec] × 2 (4)
- FO, leaving a long tail. Do not stuff; pinch the base flat for sewing.
Arms — skin tone and red, make 2
Each arm starts as a skin-tone hand, then a red sleeve:
- R1: with skin tone, MR, 6 sc (6)
- R2: [sc, inc] × 3 (9)
- R3–R4: sc in each st (9)
- R5: change to red in the last st of R4, sc in each st (9)
- R6–R12: red, sc in each st (9)
- R13: [sc, dec] × 3 (6)
- FO, leaving a long tail. Stuff the hand end only; the sleeve stays soft.
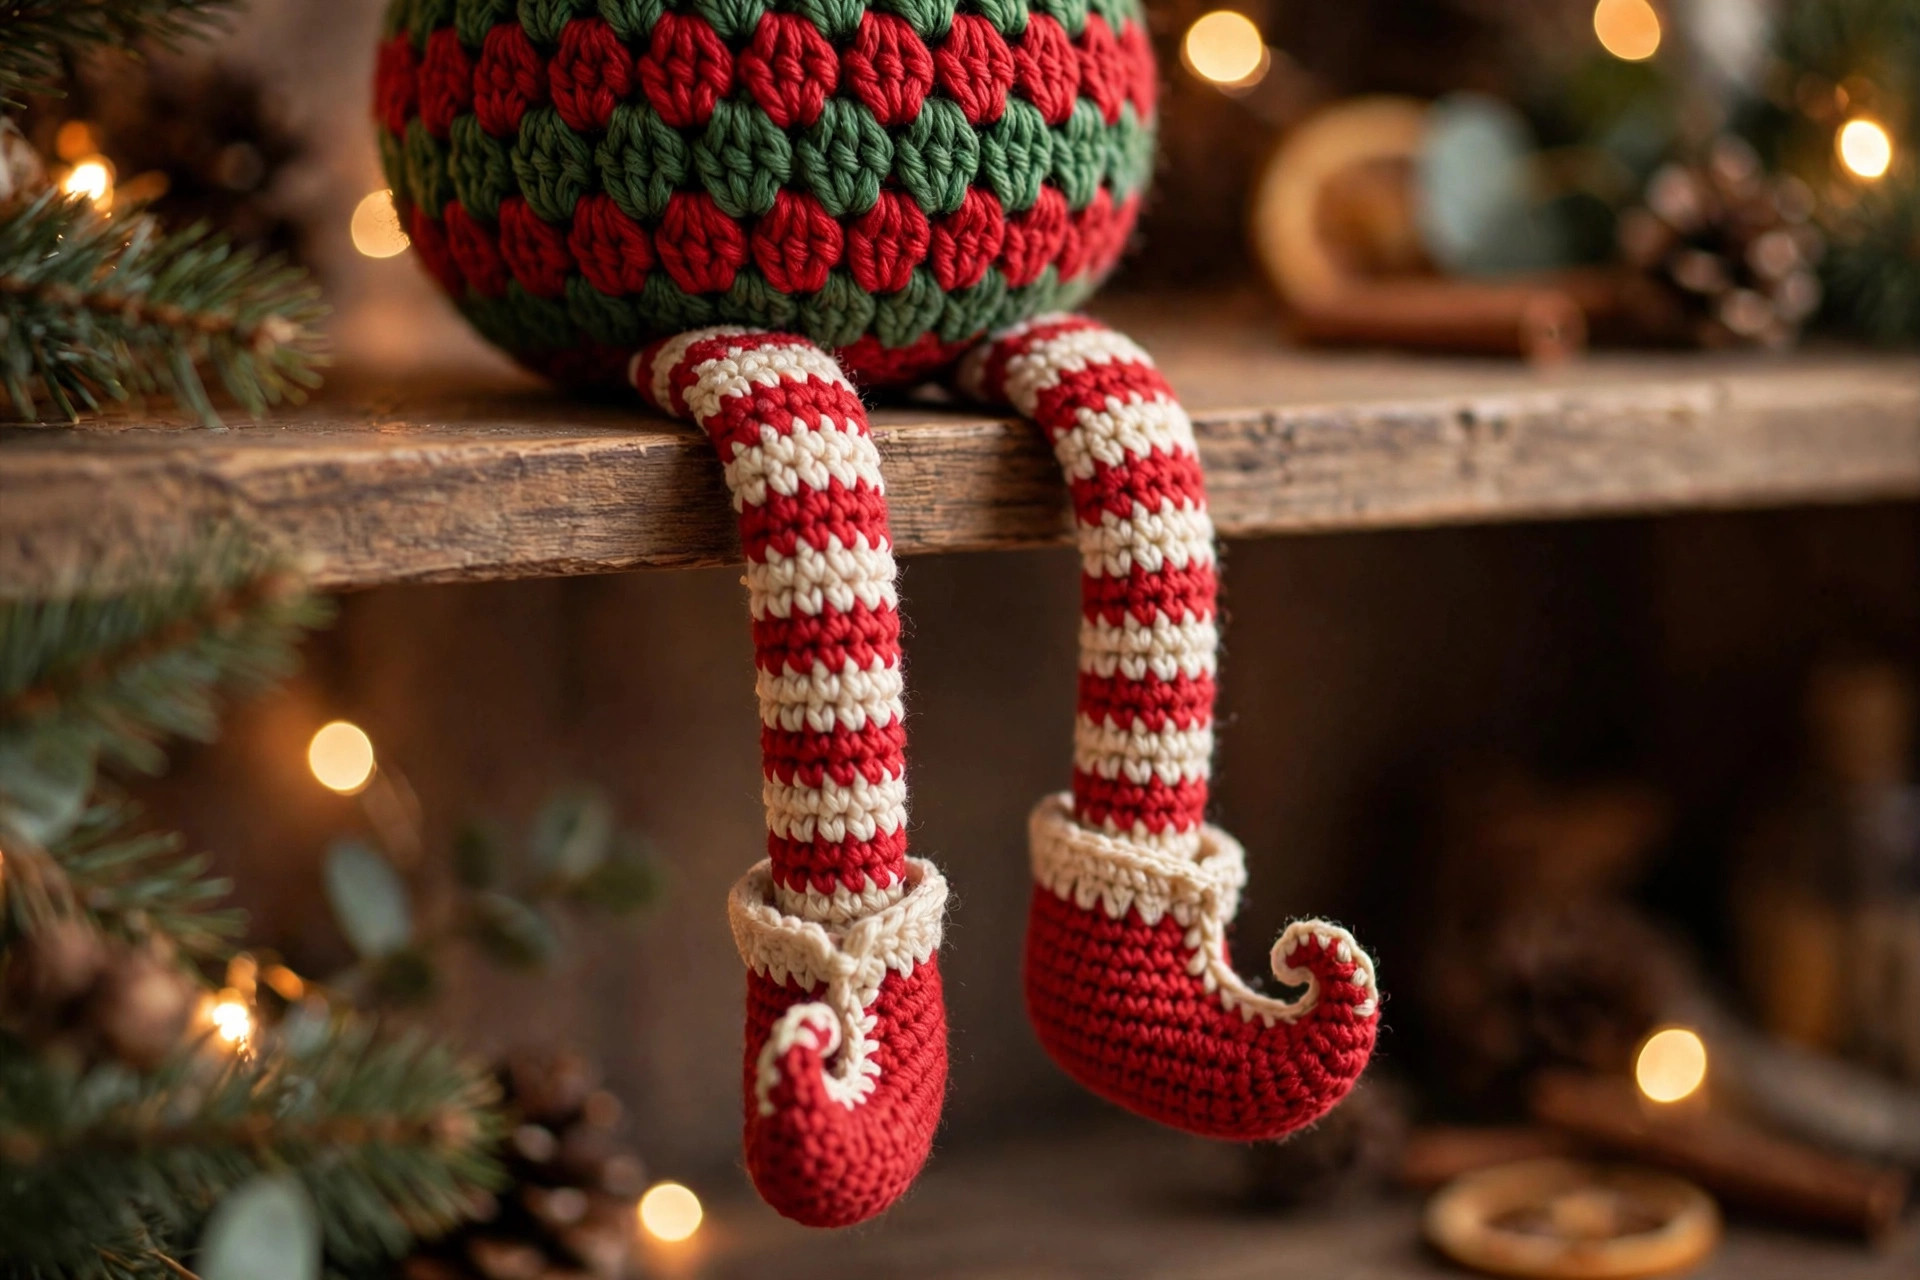
Legs — shoes in red, legs in red and cream stripes, make 2
These are the stars of the pattern — take them one at a time and make two the same. Each leg is worked from the shoe upward, no pieces to join mid-leg.
- R1: with red, MR, 6 sc (6)
- R2: inc in each st (12)
- R3: [sc, inc] × 6 (18)
- R4: BLO sc in each st (18) — this creates the crisp edge of the shoe sole
- R5: sc in each st (18)
- R6: 6 sc, dec × 3, 6 sc (15) — the decreases shape the toe at the front
- R7: sc in each st (15)
- R8: change to cream in the last st of R7, sc in each st (15)
- R9–R22: sc in each st around, working 2 rounds each in this color order: red, cream, red, cream, red, cream, red (15 every round) — changing color in the last st of R10, R12, R14, R16, R18, R20
- R23: [3 sc, dec] × 3 (12)
- FO, leaving a long tail (about 30 cm / 12 in) for sewing.
Stuff the shoe firmly. Stuff the leg only lightly, stopping about 3 cm (1 in) from the top: an over-stuffed leg sticks out at an angle instead of dangling, and dangling is the entire point. For extra swing, drop a teaspoon of poly pellets into the shoe first.
Hat — red with cream brim
The cone. Worked from the tip down: alternate one increase round of [(n) sc, inc] × 2 with one even round, adding one plain sc before each increase every time.
- R1: MR, 6 sc (6)
- R2: sc in each st (6)
- R3: [2 sc, inc] × 2 (8)
- R4: sc in each st (8)
- R5: [3 sc, inc] × 2 (10), then one even round (10)
- Then continue alternating increase and even rounds through these stitch totals — 12, 14, 16, 18, 20, 22, 24, 26, 28, 30, 32, 34, 36, 38, 40, 42 — ending on an even round of 42. FO, leaving a tail for sewing to the brim.
The brim (cream), worked flat: Ch 43. Row 1: sc in 2nd ch from hook and in each ch across (42). Rows 2–4: ch 1, turn, sc in each st across (42). FO, leaving a long tail. Join the short ends to form a band, then sew the cone's open edge to one long edge of the band, stitch for stitch. Fold the cone tip over to one side, tack it down with two stitches, and sew a cream pom-pom (bought, maker-made, or a small crochet ball) right at the folded tip.
Finishing touches
Assembly order matters more than sewing skill here — work in this sequence and everything lands in the right place.
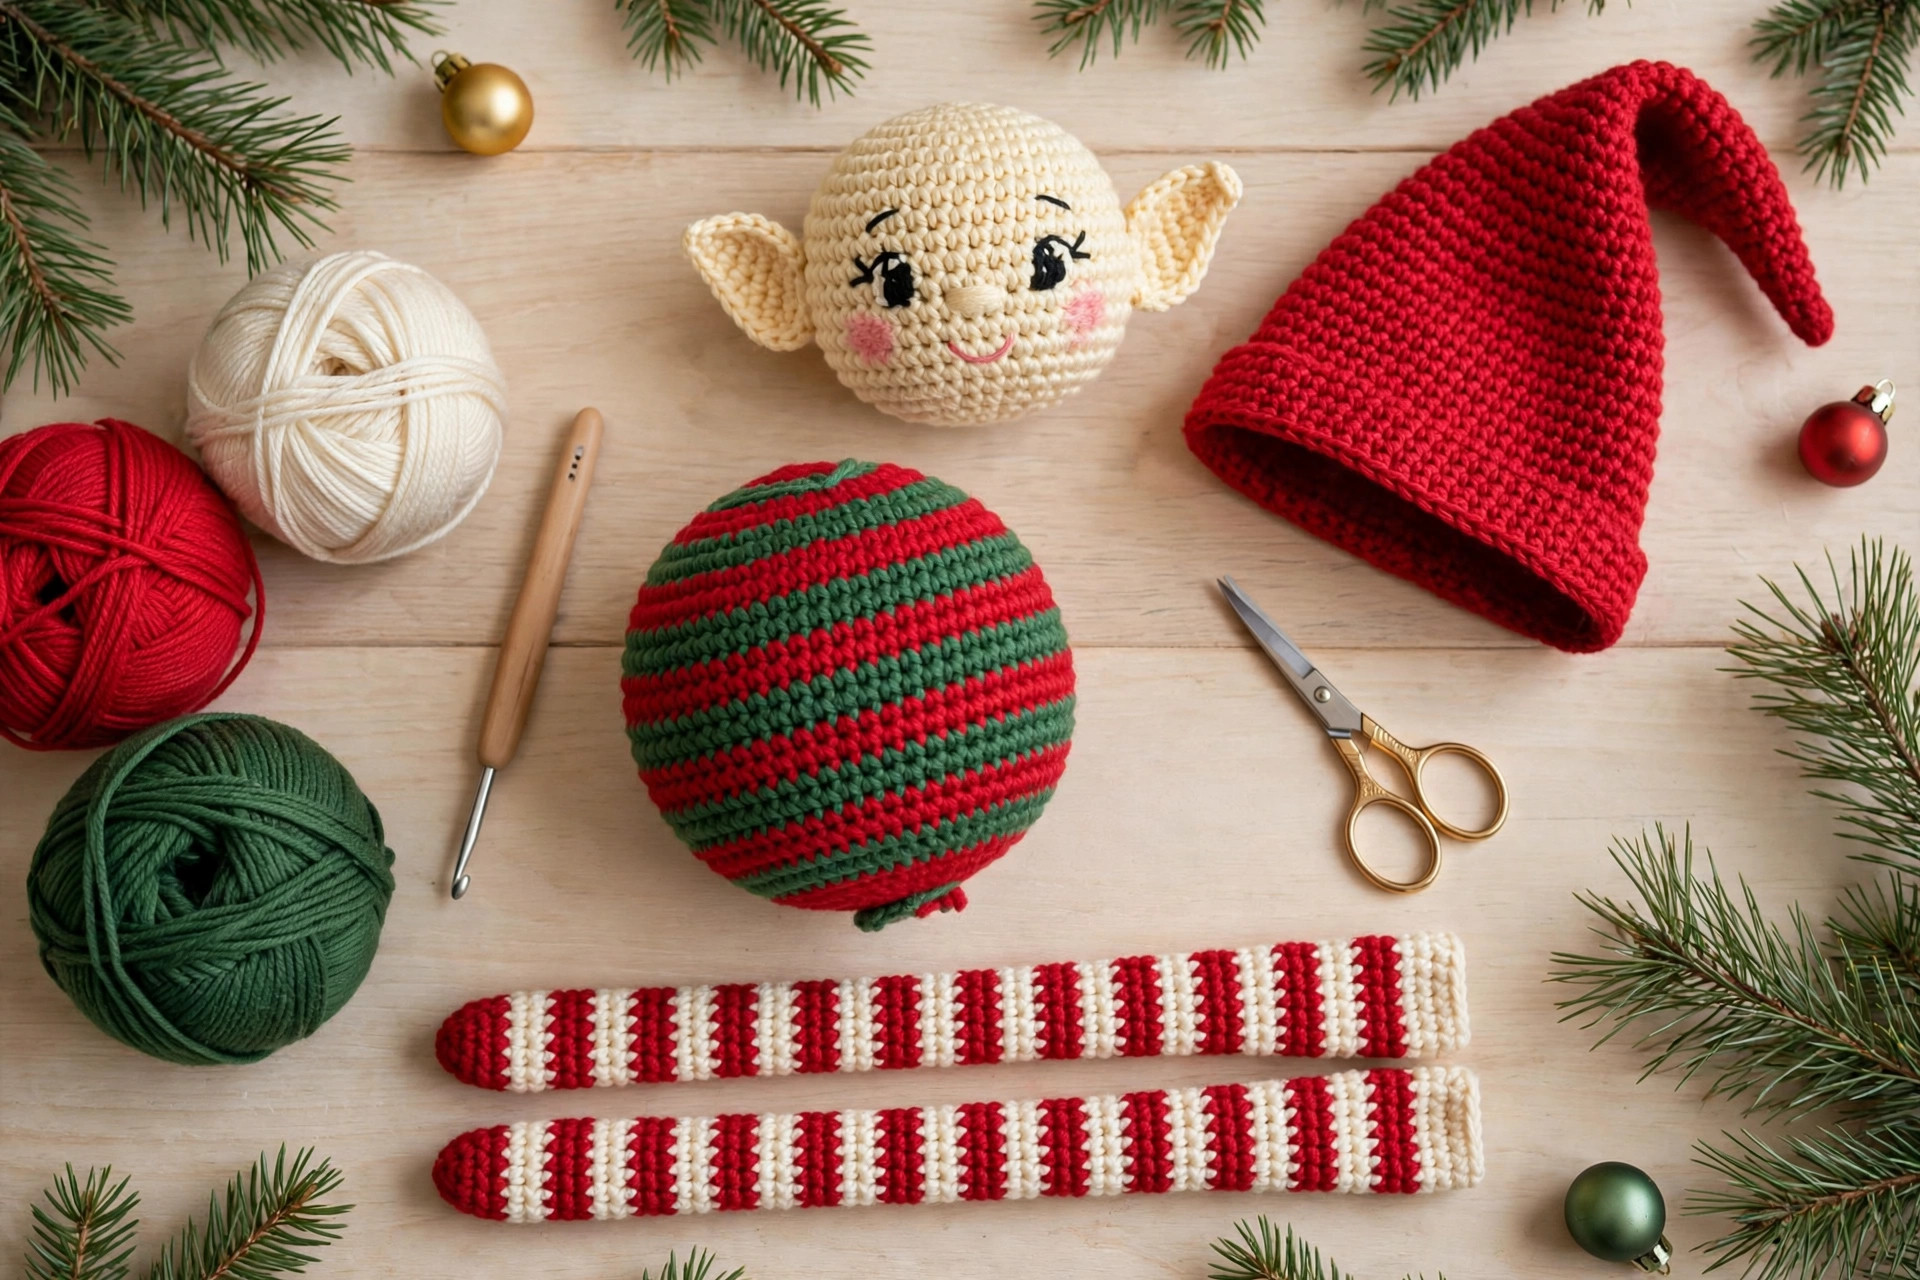
- Legs first. Pin both legs to the front-bottom of the body, side by side, toes pointing forward and slightly down, and sew each on with two full passes of whipstitches. Set the body on the table edge and check the legs hang parallel before you commit — the whole elf is judged by this pose.
- Head to body. Center the head on the body and sew around the join twice, packing extra stuffing into the neck as you close. A firm neck stops the festive lean by Boxing Day.
- Ears. Sew one ear to each side of the head at about R10–R11 height, points tipping upward and slightly out. Pinch each base flat so the ears read clearly against the brim.
- Arms. Sew the arms to the sides of the body just below the head join, angled slightly forward. The unstuffed sleeves rest softly instead of sticking out.
- Hat last. Slip the hat on at a slight tilt, brim just above the ears, and tack it with three or four small stitches. A removable hat is fun — until one closing door sends it behind the sofa until January.
The sitting test: place your finished elf on the shelf edge, legs hanging free, and nudge the shelf. He should sit steady, legs swinging gently. If he tips forward, add seat weight or move the legs a few millimeters forward and re-sew one pass. Two minutes here buys a whole season of perfect perching.
Three cute variations to try next
One elf is never quite enough. Same pattern, new personalities:
- Girl elf with a scalloped skirt. Before attaching the head, crochet a skirt onto the body: join green yarn around R13, ch 1, work one round of sc (36), one round of [sc, inc] × 18 (54), then a scallop round: [skip 1, 5 dc in next st, skip 1, sc in next st] × 13. Finish with a cream bow at the waist — she looks utterly delighted with herself.
- Vintage pastels. Swap red for dusty rose pink and green for sage, keeping the cream — a softer, cottage-Christmas elf that suits Scandinavian-style decor and photographs beautifully.
- Tall-drink-of-water elf. Add two extra red/cream stripe repeats to each leg for an extra-long dangle — perfect for deep bookshelves where standard legs look stubby. Display him beside a crocheted christmas garland for a full handcrafted mantel scene.
Troubleshooting tips
- The stripes have a visible "jog" where each round starts. Normal with spiral stripes — place the join at the back and keep tension even. A jog nobody sees without picking the elf up doesn't exist.
- The legs point outward instead of dangling. They're over-stuffed near the top. Pull the stuffing from the top 3 cm of each leg and re-sew. Legs should be floppy above and firm in the shoe.
- He tips forward off the shelf. Re-pin the legs a few millimeters forward and add the pellet pouch in the seat — the two fixes together cure nearly every tipping elf.
- The face looks flat or expressionless. It's almost always the cheeks. Make the embroidered ovals a touch bigger and place them slightly lower and wider — under and outside each eye. And make sure the smile curves up; a straight smile reads as worried.
- The ears disappeared under the hat. Sew the ears on before fitting the hat, and position the brim just above the ear tops. If the hat sits too low, the elf goes from "mischievous" to "mystery."
Frequently asked questions
Is this free elf crochet pattern really free?
Yes — the complete pattern above is free, with no signup and nothing to buy; it's written for the blog only. Saving or pinning the post is the kindest thank-you.
How long does it take to make the elf?
About 5–6 hours: the legs take about 2.5 hours, body and head about 1.5, the hat about 1, and assembly plus the sitting test about an hour. Start in October and he's shelf-ready long before the tree goes up.
What skill level is this pattern?
Confident beginner. The stitches are all basic single crochet, the color changes come every two rounds in a steady rhythm, and the only new skills are the BLO shoe edge and the slow-increase cone.
Can I sell the finished elves I make?
Yes! Sell finished elves in small batches — craft fairs, market stalls, Etsy shops — with credit to Little Loop Finds as the designer and a link back to this page. The pattern text and photos may not be redistributed or sold.
Is this elf safe for babies and toddlers?
With two changes, yes: embroider the eyes (French knots or satin-stitch ovals) instead of safety eyes, and skip the pellet weighting or seal it in a tied, double-layered pouch.
Can I make the elf in different sizes?
Yes. DK yarn with a 2.75 mm hook makes a tree-ornament elf (shorten the legs by two stripe repeats); chunky yarn with a 5 mm hook makes a giant floor-sitter. The stitch math works at any scale.
More free patterns to try
Keep the Christmas hook moving. The crochet Christmas stocking hangs beside him on the same mantel, the christmas spiral ornaments and christmas patchwork snowman tree fill the tree above, and the crochet garland drapes across the whole shelf scene. For a softer giftable amigurumi, the one piece crochet teddy bear uses the same spiral techniques.
The box below contains an Etsy link. If you buy through it, we may earn a small commission at no extra cost to you. Learn more.
No time to make one?
Short on time? Find handmade crochet Christmas elves from independent makers on Etsy.
Browse on Etsy (opens Etsy in a new tab)