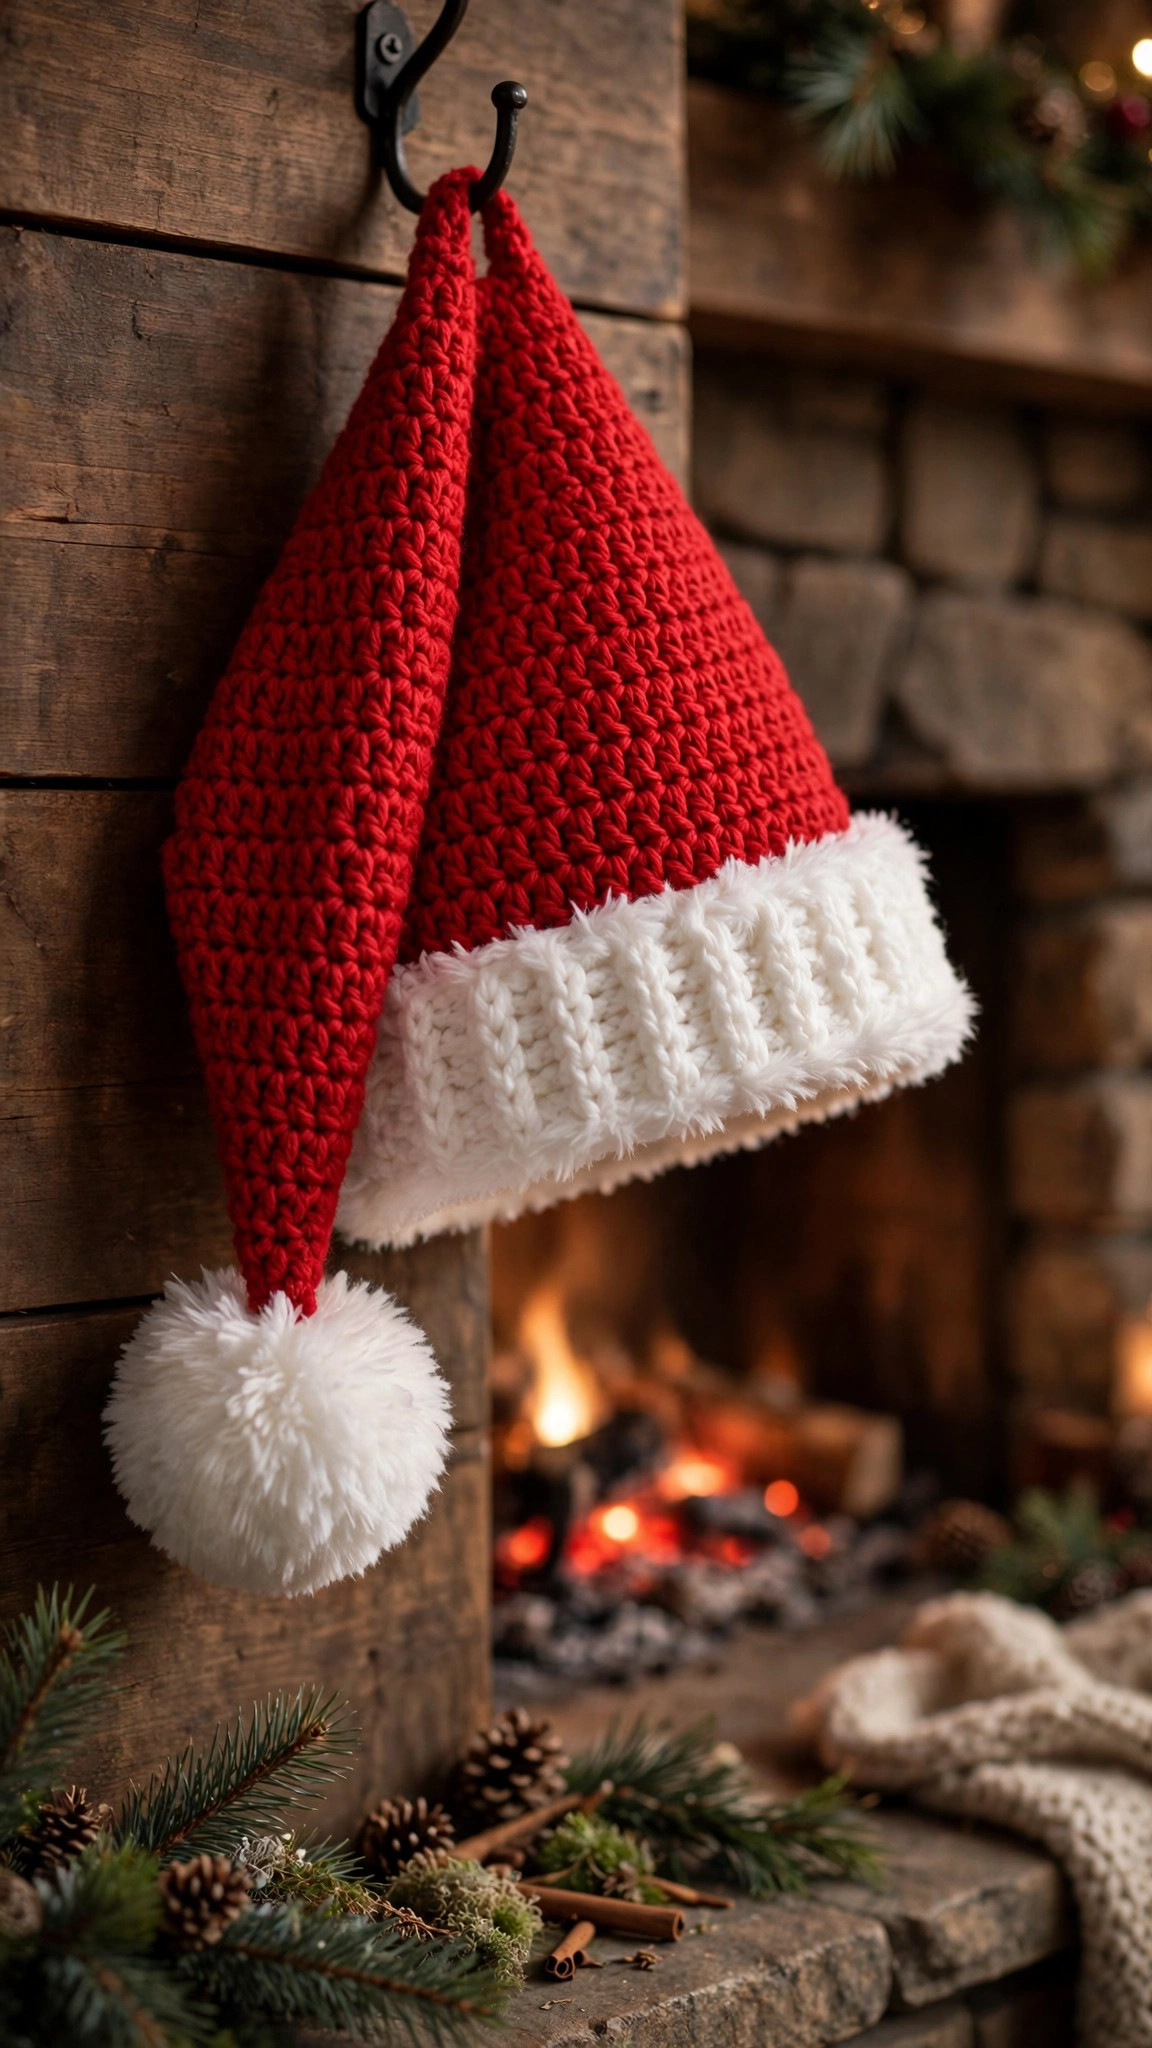
Free Crochet Santa Hat Pattern: Classic, Cozy & Quick
A classic Santa hat worked from the tip down in easy half double crochet — a long, floppy red cone on a slow increase schedule, a wide white brim folded up into a cosy cuff, and a soft pompom at the point, with full stitch counts for baby, child and adult sizes.

Christmas · Crochet
- Finished size
- Baby, child & adult — up to 17 in long
- Making time
- About 2–3 hours
- Hook
- 5.0 mm, worsted-weight yarn
- Sizes
- 3 sizes — 48 / 60 / 72 stitches
- Skill
- Easy
In this post
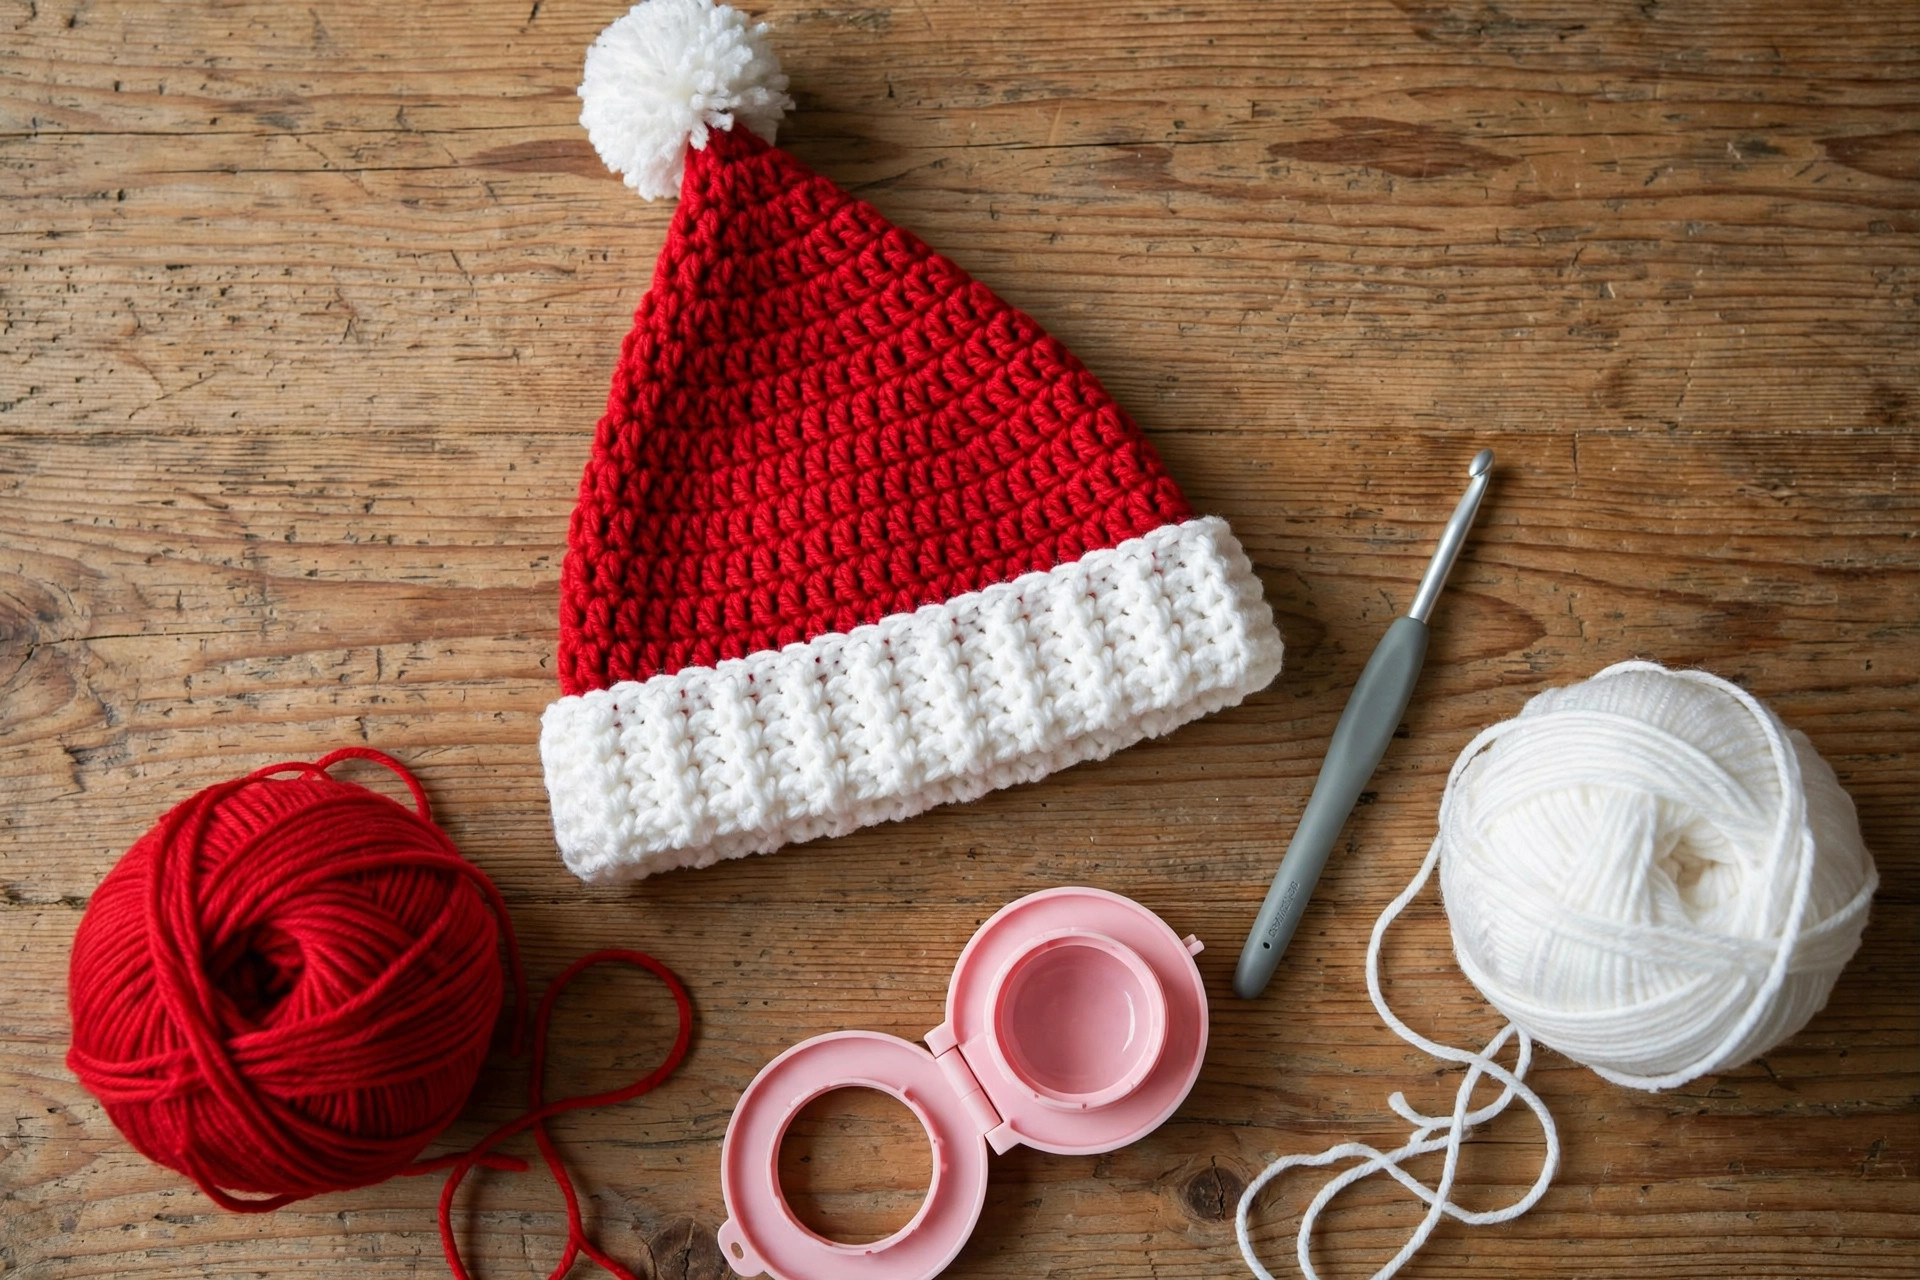
Every December someone says, "We should all wear Santa hats this year," and suddenly you need a hat that fits a real head, looks festive in photos, and does not slide off halfway through the school concert. This free crochet Santa hat pattern is the one we reach for: a classic red cone with a long, floppy tip, a wide white brim folded up into a cosy cuff, and a soft pompom that swings when you walk. No panels to sew — just one hat worked from the tip down in half double crochet rounds.
This is an original Little Loop Finds design, written with our own slow increase schedule so the cone grows long before it grows wide. That one decision makes the hat read as "Santa" instead of "pointy party hat". Every round has its stitch count written out, and there are three sizes — baby, child and adult — so you can work a matching set in a single weekend.
Contents
- Why you'll love this Santa hat
- Materials you'll need
- Size, gauge and skill level
- Abbreviations — US terms
- The pattern (US terms)
- Finishing and assembly
- Tips for a Santa hat that looks right
- FAQ
- What to crochet next
Why you'll love this Santa hat
First, the flop is built in. A Santa hat lives or dies by its tip, and quick patterns that increase too fast give you a stiff cone that stands up like a traffic cone. Here the increases are spread out — one increase round followed by two plain rounds — so the hat grows in length far faster than in width. The result is a long, soft point that folds over to one side the moment you put the hat on, exactly as a Santa hat should.
Second, it is genuinely quick. Half double crochet is taller than single crochet, so the rounds stack up fast, and the plain rounds need no counting. An adult hat is an evening and a bit; a baby hat can be finished, brim and all, during one Christmas film.
Third, the brim does three jobs at once. The wide white band is worked in chunky yarn, then folded up and caught in place with a few stitches. Folding gives a clean edge with no raw ends on show, warmth over the ears, and a soft frame for the face that photographs beautifully — and it hides the colour-change join completely.
Finally, one pattern fits the whole photo: baby for a first-Christmas picture, child for concerts and parties, adult for whoever has been volunteered to hand out the presents. If pointy festive hats are your thing, our crochet elf hat pattern uses a similar long cone with a cheerful striped twist.

Materials you'll need
Worsted-weight red yarn does the heavy lifting. Choose a smooth acrylic or acrylic-wool blend with a little body — the cone needs substance to flop softly rather than collapse flat. Chunky white yarn gives the brim its plush, snowy look with no special stitches; the pattern also notes a loop stitch option for real fluff. Buy a little extra red: a long cone uses more yarn than a standard beanie.
| Supply | What to get |
|---|---|
| Main yarn | Worsted weight (category 4) in classic red — baby 70 g / 140 yards, child 95 g / 190 yards, adult 120 g / 240 yards |
| Brim yarn | Chunky weight (category 5) in white, about 40 g / 55 yards — or worsted white for the loop stitch option |
| Pompom yarn | Small amount of white yarn, about 10 g, or a scrap for the crocheted ball option |
| Hook | 5.0 mm (US H-8) crochet hook for the hat body; 5.5 mm (US I-9) for the chunky brim |
| Notions | Yarn needle with a large eye, stitch marker, sharp scissors, tape measure |
| Optional | Pompom maker (6.5 cm / 2.5 in works well), pins, a small jingle bell for the elf variation |
Avoid very slippery yarns like mercerised cotton for your first hat: a grippy acrylic or wool blend holds its shape far better, so the tip flops in one elegant curve instead of sliding about.
Size, gauge and skill level
Skill level: Easy. You need a magic ring, chain, half double crochet and a simple increase, plus slip stitch joins. If you can work a basic beanie, you can make this hat. Our grinch hat crochet pattern shows the same top-down idea in green.
Sizes and head circumferences: Baby fits a head of about 14–16 in (35.5–40.5 cm) and finishes at 48 stitches around the body. Child fits about 19–20 in (48–51 cm) and finishes at 60 stitches. Adult fits about 22–23 in (56–58.5 cm) and finishes at 72 stitches. The hat measures roughly 1 in (2.5 cm) smaller than the head — gentle negative ease keeps a tall hat in place.
Finished length: From tip to the bottom of the folded brim, about 13 in (33 cm) for baby, 15 in (38 cm) for child and 17 in (43 cm) for adult.
Gauge: 14 half double crochet stitches and 10 rounds measure about 4 in (10 cm) with a 5.0 mm hook and worsted yarn. Gauge matters because the stitch counts are the sizing: if your fabric is looser than gauge, your hat comes out a size bigger, so check after a few inches and drop to a 4.5 mm hook if the cone grows too fast.
Abbreviations — US terms
US terms throughout. (UK note: a US half double crochet is a UK half treble crochet, and a US single crochet is a UK double crochet.)
| Abbreviation | Meaning |
|---|---|
| MR | magic ring |
| ch | chain |
| sl st | slip stitch |
| sc | single crochet |
| hdc | half double crochet |
| inc | increase — 2 hdc in the same stitch |
| st(s) | stitch(es) |
| rnd(s) | round(s) |
| FO | fasten off |
Half double crochet reminder: Yarn over, insert hook, yarn over and pull up a loop (3 loops on hook), yarn over and pull through all 3. Keep the yarn over relaxed — tight half double crochet is the main cause of cones that curl.
A note on rounds: The cone is worked in joined rounds, not a spiral. Join each round with a slip stitch to the first half double crochet, then chain 1; the chain 1 does not count as a stitch. Joining keeps the increase columns straight — a spiral would slowly twist the shaping around a cone this long. Mark the first stitch anyway. The bold number is your stitch count for that round.
The pattern (US terms)
Work the hat from the tip down: cone, even body rounds, white brim, pompom. All three sizes follow the same rounds — you simply stop increasing at your size's stitch count, marked in bold as you go.
The cone — all sizes, red yarn, 5.0 mm hook
The rhythm never changes: one increase round, then two plain rounds. Each increase round adds 6 stitches. The tip is fiddly for about ten minutes; after that, this is the most relaxing crochet there is.
- R1: MR, ch 1, 6 hdc into the ring, join (6)
- R2: inc in each st around, join (12)
- R3–R4: hdc around, join (12) — 2 rounds even
- R5: [hdc, inc] × 6, join (18)
- R6–R7: hdc around, join (18) — 2 rounds even
- R8: [2 hdc, inc] × 6, join (24)
- R9–R10: hdc around, join (24) — 2 rounds even
- R11: [3 hdc, inc] × 6, join (30)
- R12–R13: hdc around, join (30) — 2 rounds even
- R14: [4 hdc, inc] × 6, join (36)
- R15–R16: hdc around, join (36) — 2 rounds even
- R17: [5 hdc, inc] × 6, join (42)
- R18–R19: hdc around, join (42) — 2 rounds even
- R20: [6 hdc, inc] × 6, join (48) — BABY: stop increasing here
- R21–R22: hdc around, join (48) — 2 rounds even
- R23: [7 hdc, inc] × 6, join (54) — skip for baby
- R24–R25: hdc around, join (54) — 2 rounds even
- R26: [8 hdc, inc] × 6, join (60) — CHILD: stop increasing here (skip for baby)
- R27–R28: hdc around, join (60) — 2 rounds even
- R29: [9 hdc, inc] × 6, join (66) — adult only
- R30–R31: hdc around, join (66) — 2 rounds even
- R32: [10 hdc, inc] × 6, join (72) — ADULT: stop increasing here
Pause and measure across the opening, doubled for the circumference: it should sit about an inch smaller than the head, and the point should already be long enough to flop. If it still stands up, your tension is firm — it softens with wearing and steam, so do not change the rhythm.
The body — even rounds, red yarn
These plain rounds give the hat its depth over the ears before the brim takes over:
- Baby (48 sts): 3 even rounds of hdc (48)
- Child (60 sts): 3 even rounds of hdc (60)
- Adult (72 sts): 4 even rounds of hdc (72)
Fasten off the red — the folded brim covers this join completely.
The brim — white chunky yarn, 5.5 mm hook
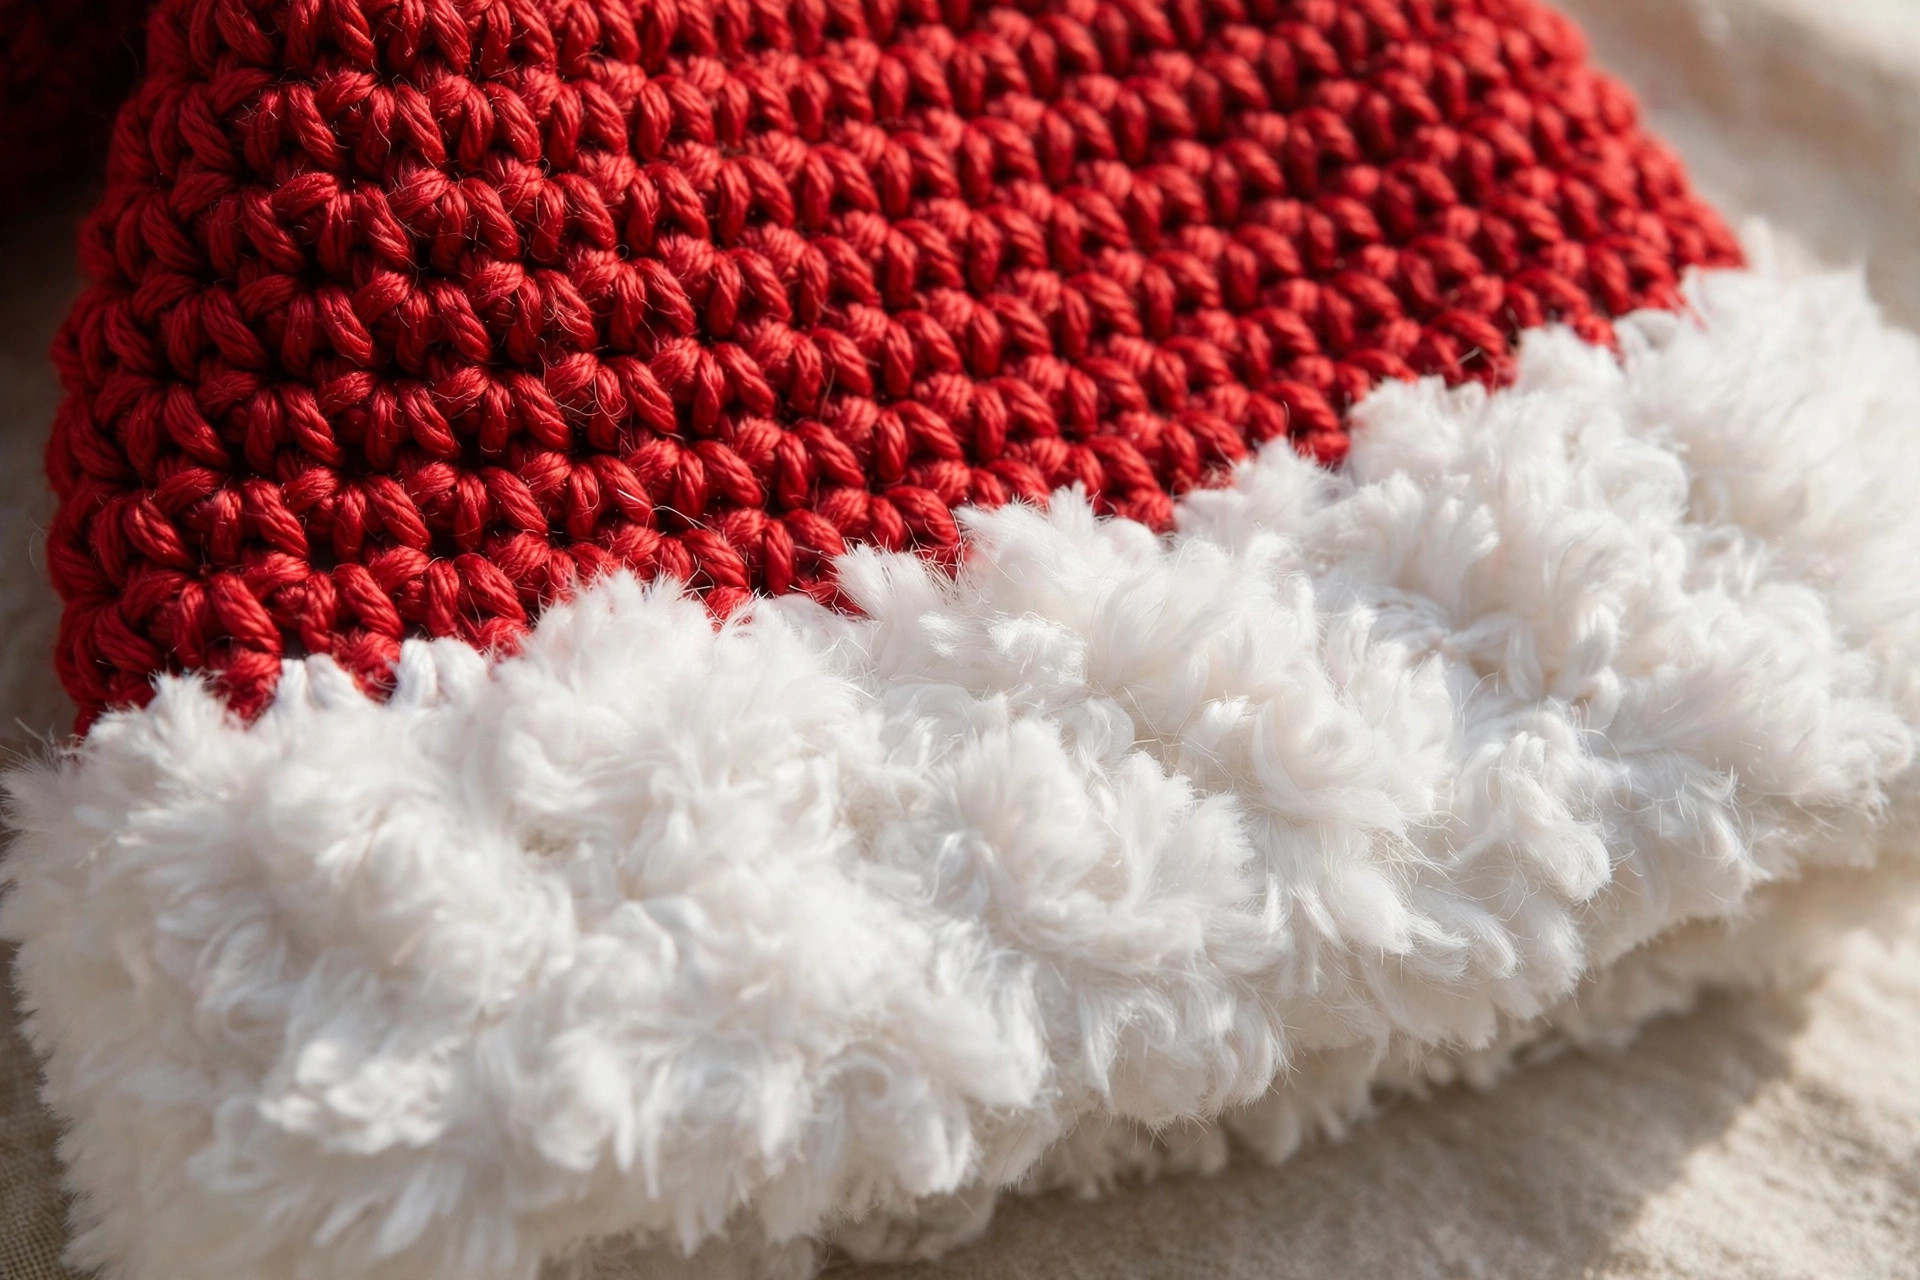
The brim is worked downwards from the last red round, then folded up: a band twice as deep as the finished cuff, so the edge against the forehead is a soft fold with no stitches to rub.
- B1: Join white chunky yarn in any stitch of the last red round. Ch 1, sc around, join (48 / 60 / 72)
- B2–B7: Ch 1, sc around, join (48 / 60 / 72) — 6 rounds even, for a folded cuff of about 2.5 in (6.5 cm)
- For a deeper, extra-cosy cuff, work B2–B9 instead — 8 rounds even — and fold accordingly.
FO, leaving a 12 in (30 cm) tail. Fold the band up over the outside of the hat, fold at the bottom edge, level all around. Catch the band's top edge to the red body with one small stitch every 5 or 6 stitches — enough to hold it without puckering — then weave the end in inside the fold.
Fluffy loop stitch option: For real fluff, work the brim in worsted white yarn with the 5.0 mm hook using loop stitch: wrap the yarn once around your index finger as you pull up each loop, leaving a loop of about 1 in (2.5 cm) on the outside, secured by the stitch. Work the same rounds, fold loops-out, and brush gently with a clean, dry toothbrush to separate them. Slower, but pure Father Christmas beard energy.
The pompom — white yarn
A yarn pompom is the classic finish. Wrap white yarn around a 6.5 cm (2.5 in) pompom maker, or around four fingers held together, about 120 times. Slide the wraps off, tie a separate length of yarn tightly around the middle — twice around, double knot — cut all the loops, fluff, and trim into a neat sphere of about 2.5–3 in (6.5–7.5 cm). Leave the tying tails long: they attach the pompom.
Crocheted ball option: For a pompom that survives enthusiastic toddlers and washing machines, crochet a ball instead. White worsted yarn, 5.0 mm hook: R1: MR, 6 sc (6); R2: inc in each st (12); R3: [sc, inc] × 6 (18); R4–R5: sc in each st (18); R6: [sc, dec] × 6 (12) — stuff firmly now; R7: dec × 6 (6). FO, close the hole with the tail, and keep a long end for sewing.
Variations — striped elf style, tree topper and pets
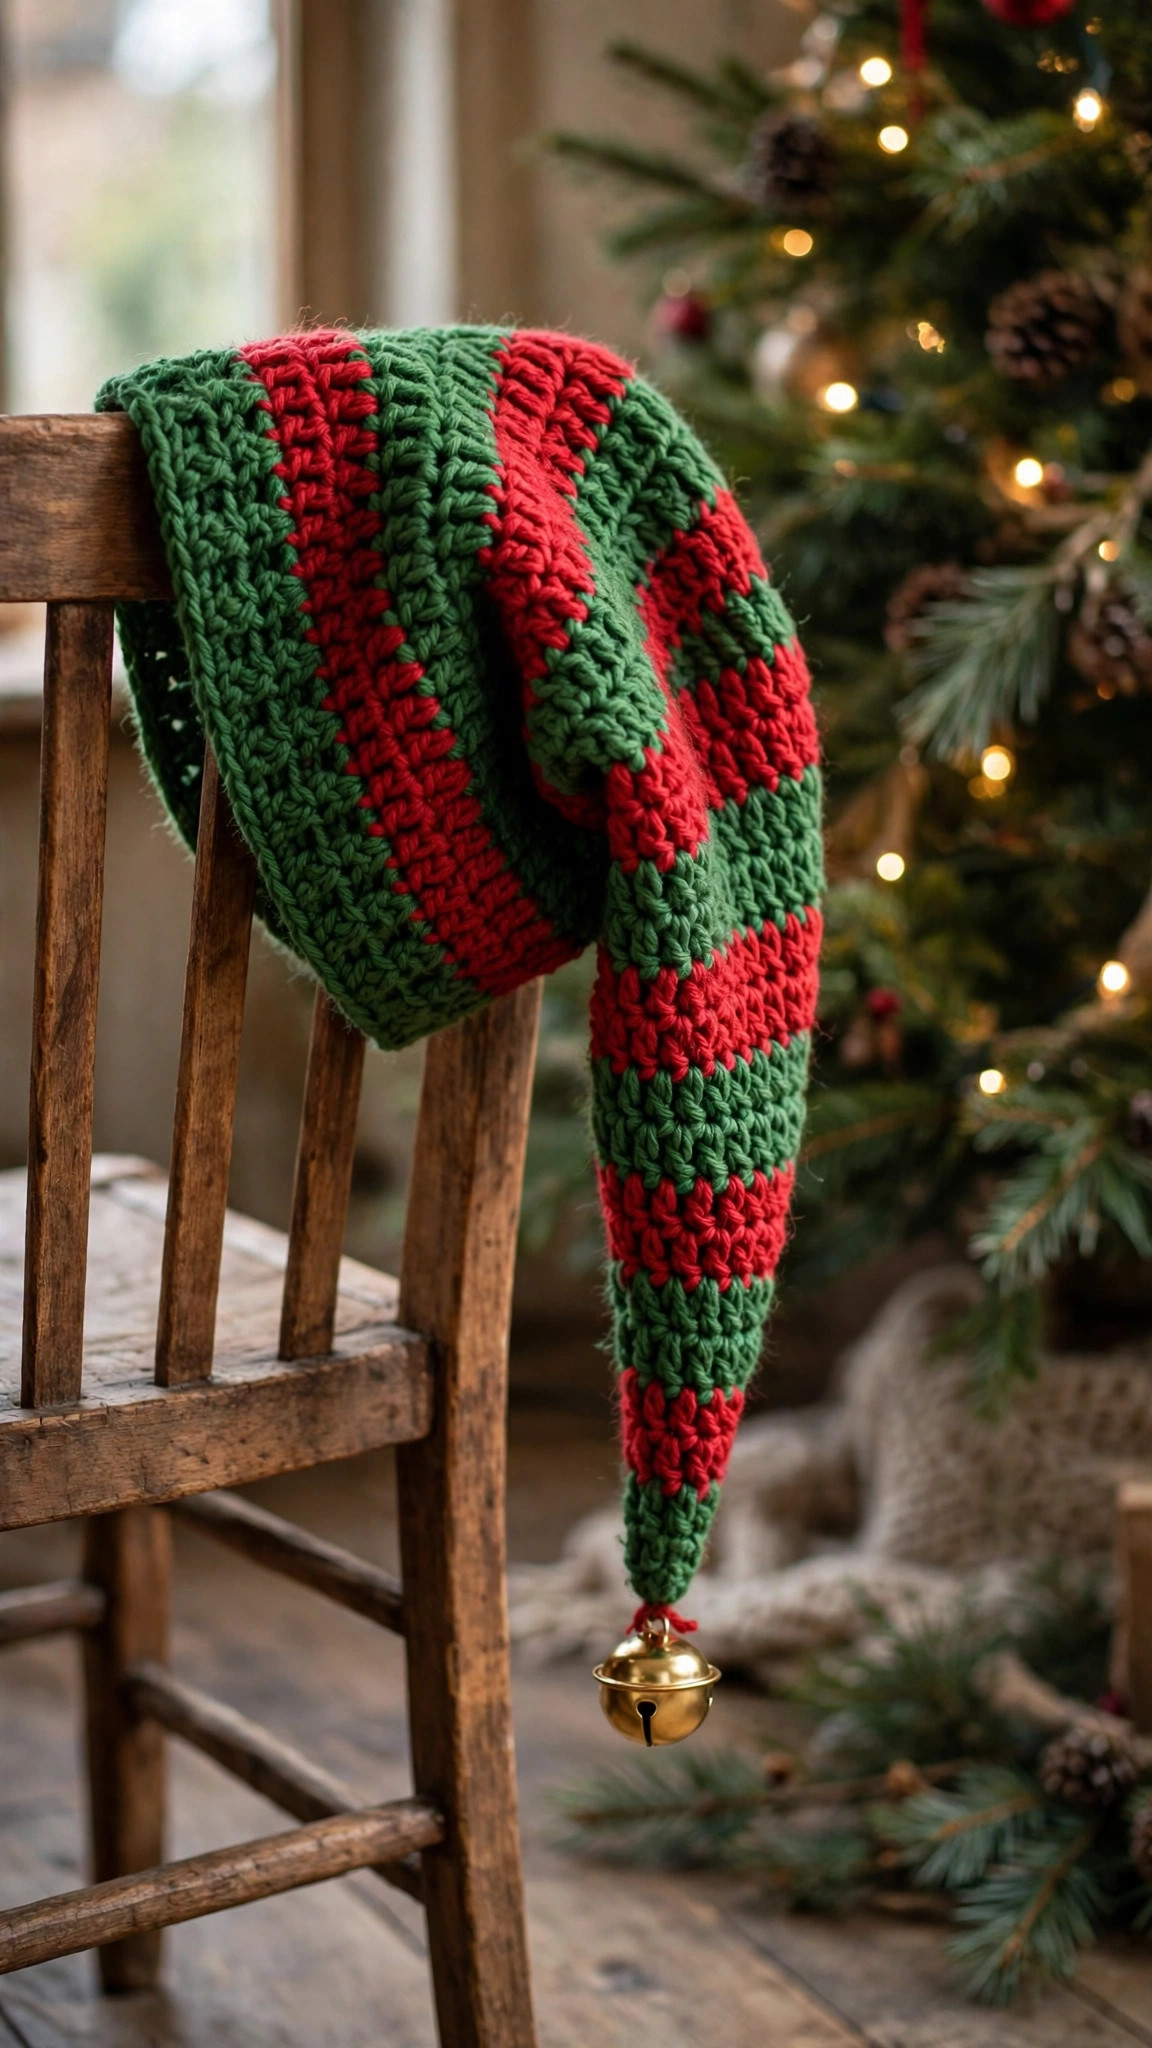
Striped elf-style variation: Keep the same rounds and counts, but change colour every increase cycle: Rounds 1–4 in green, Rounds 5–7 in red, and so on, alternating bands all the way down, then a green brim folded a little shallower. The slow schedule gives wide, handsome stripes instead of thin rings. Finish with the crocheted ball in red — or sew a small jingle bell to the tip for a hat that announces itself.
Mini tree-topper and pet size: Stop increasing at Round 8, at 24 stitches, work 2 even rounds, then a white worsted brim (5.0 mm hook, single crochet), 4 rounds, folded up, and a tiny pompom of 40 wraps around two fingers. About 6 in (15 cm) long. For pets, add thin ties or soft elastic under the brim, and use it only for a quick supervised photo — most cats have strong opinions about hats, and they are entitled to them.
Finishing and assembly
The hat is in one piece, so finishing is about the details that make it look shop-bought.
1. Weave in every end properly. Travel at least 1 in (2.5 cm) through the stitches one way with your yarn needle, then back another, before trimming. Half double crochet is open, so a short pass will creep out in the wash.
2. Fold and settle the tip. Put the hat on and flop the tip to one side. Where the fold falls, pinch the cone and, if you like, add one tiny stitch through both layers inside to hold it. Optional, but the hat then photographs with that perfect swoop every time.
3. Attach the pompom. Thread the tying tails (or the ball's long end) through the very tip of the cone, outside to inside, and knot firmly inside — or sew the ball down with several passes around its base. The pompom sits right on the point, so when the tip flops it hangs like a bauble.
4. Check the brim fold. Run your fingers around the brim and nudge it level, tacking stitches hidden inside. One last try-on, adjust the fold, done.

Tips for a Santa hat that looks right
Respect the plain rounds. They feel endless around Round 18, and they are the entire secret. Skipping them gives a short, wide cone that reads as a wizard hat in red. For a shorter hat, stop at an earlier size's counts — never compress the rhythm itself.
Count at the increase rounds only. On plain rounds, trust your marker. On increase rounds, count twice: a missed increase shows up three rounds later as a cone that leans, and it is far easier to fix on the round where it happened.
Mind the join. Always join into the first half double crochet, not the chain 1, and pull the slip stitch snug. A loose join leaves a ladder of holes up the cone's back. Wear the join at the back and it disappears.
Steam, do not press. A few passes of steam, hat held in shape, relaxes the stitches and encourages the flop. Never iron acrylic — it can melt the fibres and kill the bounce.
Size down for stretchy yarn. Wool-blend worsted stretches more than acrylic and can relax by up to an inch with wearing. If your red is very springy, consider the child counts for a smaller adult head.
Washing and storage. Hand wash cool, or machine wash gentle inside a pillowcase, then dry flat with the tip arranged in its flop. Store flat or loosely stuffed with tissue — never hanging by the tip, which stretches the first rounds by January.
FAQ
Is this Santa hat pattern really free and original?
Yes — a complete, original Little Loop Finds design with its own increase schedule and stitch counts for all three sizes, published in full here. Make as many as you like for yourself, family and gifts.
How long does a crochet Santa hat take to make?
About 2 to 3 hours for adult, 90 minutes for child, an hour for baby. The brim takes about 20 minutes and the pompom 10 — most of the time is the cone's relaxing plain rounds.
What yarn works best for a Santa hat?
A smooth worsted acrylic or acrylic-wool blend in red, plus chunky white yarn for the brim. Acrylic holds the cone's shape and washes well after party season. Choose a true bright red: burgundy reads almost brown in photos.
Can I make the hat longer or shorter?
Yes. For a longer, extra-floppy tip, add one extra plain round after each increase round from Round 11 onwards — the counts stay the same, only the length grows. For a shorter hat, follow a smaller size's counts rather than removing rounds.
My cone is curling or leaning to one side — what went wrong?
A slight lean usually means an increase was missed or doubled on one side; check your count at the last increase round. Curling at the tip early on is normal and flattens as the cone grows. Strong spiralling means the joins are drifting — join into the first stitch, not the chain, every round.
Can I sell Santa hats I make from this pattern?
Yes — you may sell finished hats made by hand from this pattern in small quantities, crediting Little Loop Finds as the designer. Please do not copy or republish the pattern text and photos themselves.
What to crochet next
Your hat deserves a whole festive shelf to match:
- Fill it with presents: our crochet Christmas stocking pattern uses the same worsted yarn and hangs beautifully by the fireplace.
- Add a frosty friend with this free snowman crochet pattern — he looks wonderful wearing a mini version of this very hat.
- Protect the table with these crochet Christmas coasters — a fast, giftable evening project.
Happy crocheting — may your tip flop perfectly, your pompom swing merrily, and your family photo come out first time this year.
The box below contains an Etsy link. If you buy through it, we may earn a small commission at no extra cost to you. Learn more.
No time to make one?
Short on time? Find handmade crochet Santa hats from independent makers on Etsy.
Browse on Etsy (opens Etsy in a new tab)