Free crochet jester hat pattern: three points & bells
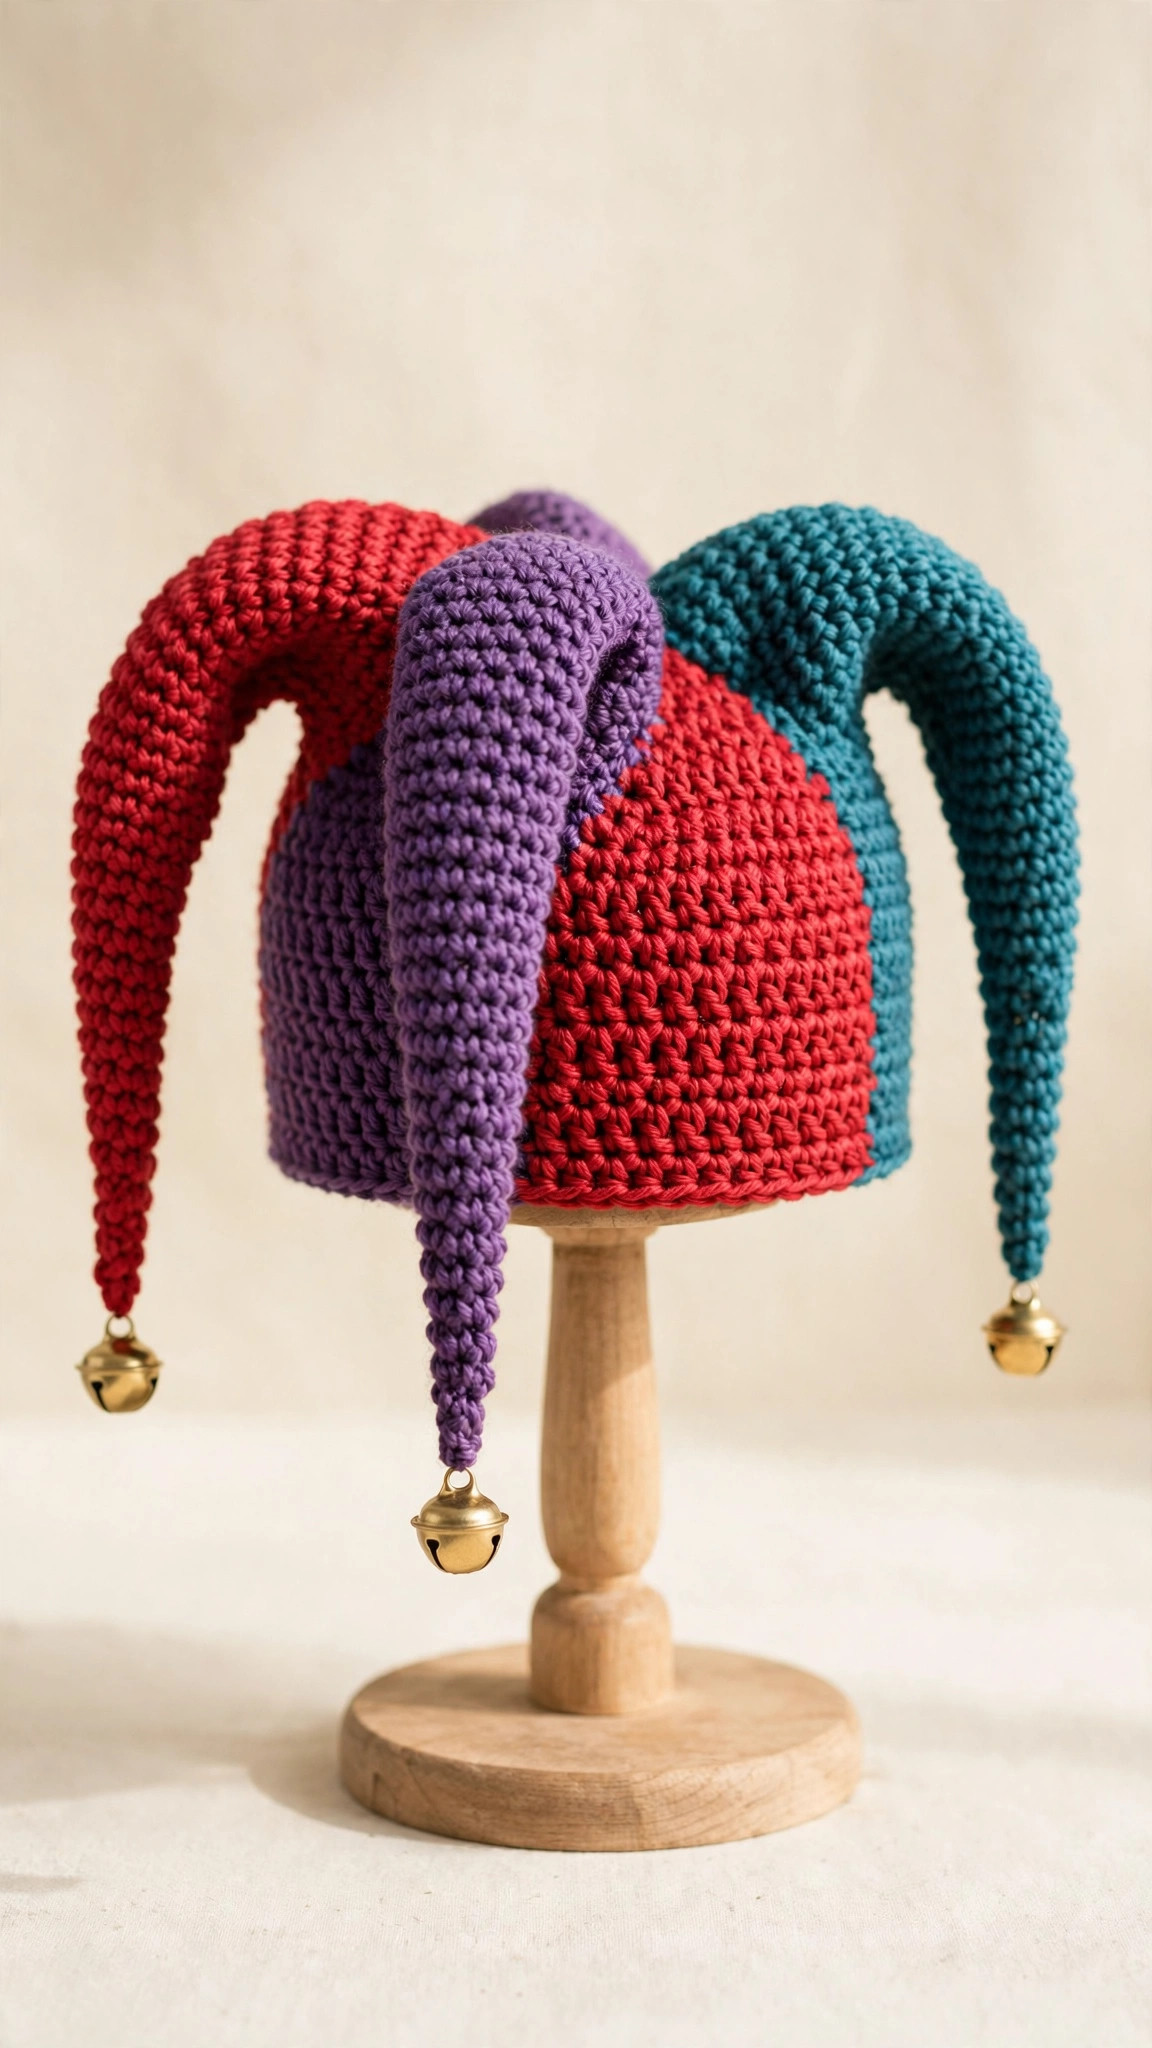
A bottom-up jester hat with a stretchy ribbed brim and a smooth fitted crown that splits into three long tapered points, each tipped with a jingle bell or pompom — worked in plain single crochet with a simple decrease ladder, in sizes from toddler to adult large.

Hats · Crochet
- Sizes
- Toddler to adult large
- Making time
- About 3–4 hours
- Hook
- 5.0 mm, worsted-weight yarn
- Points
- 3 points, bells or pompoms
- Skill
- Beginner
In this post
Some hats keep your ears warm. This one starts a party. This free crochet jester hat pattern gives you a snug ribbed brim, a smooth fitted crown, and then — the whole point, literally — the top splits into three long, droopy points, each finished with a jingle bell (or a fluffy pompom, if your household prefers its fun quieter). It is the hat I reach for every carnival, every dress-up day, and every "costumes encouraged" birthday.
The construction is friendlier than it looks. You work the whole hat bottom-up in simple single crochet: a stretchy ribbed brim, plain even rounds for the body, then you divide the top round into three equal sections and crochet each point separately, decreasing gently so it tapers and flops. No shaping wizardry, no sewing curved pieces at odd angles — just counting, three colours if you want them, and bells at the end. Sizes run from toddler to adult large, so the whole family can match at the fair. Be that family.
Why you'll love this free crochet jester hat pattern
Most novelty hat patterns are secretly just a plain beanie with decorations sewn on afterwards — the points are floppy tubes stitched to a finished hat, and they show it: they sit at odd angles, twist in the wash, and pull the crown out of shape the first time a kid yanks one. This design grows the points straight out of the crown itself. Each point is a continuation of the body stitches, so it leans and bounces exactly where a jester point should, with no seam to fail at the worst possible moment (which, in my experience, is always mid-parade).
The maths is the other quiet joy here. Every size has a stitch count divisible by three, so splitting for the points is never a fudge — count off three equal sections, mark them, and go. Decreases inside each point happen every other round in a simple repeating pattern, so the points taper slowly, droop beautifully instead of standing up like traffic cones, and finish at exactly six stitches, ready for a bell.
It is also a brilliant stash project. Each point in a different colour uses up those part-balls of worsted we all pretend we will find a use for, and the finished hat is the opposite of a drawer-filler: it gets worn to carnivals, fairs, games, parties and every Halloween until the bells fall off. Mine is on its fourth year. The bells have not fallen off.
Materials you'll need
| Supply | What to get |
|---|---|
| Colour A (brim + body) | Worsted-weight (#4) acrylic, about 70 g — purple in the sample |
| Colour B (point 1 + trim) | Worsted-weight (#4) acrylic, about 30 g — red in the sample |
| Colour C (point 2) | Worsted-weight (#4) acrylic, about 30 g — teal in the sample |
| Colour D (point 3, optional) | Worsted-weight (#4) acrylic, about 30 g — gold; or reuse Colour B |
| Crochet hook | 5.0 mm (H-8) |
| Jingle bells | 3 bells, 20–25 mm, with a loop for sewing — or yarn for 3 pompoms |
| Notions | Tapestry needle, stitch markers (at least 4), scissors, measuring tape |
A note on yarn: smooth worsted acrylic is the sweet spot. It gives the points enough body to hold their taper while still drooping, survives costume boxes, and washes clean after fairground food incidents. Cotton works too, with a crisper, heavier point. Avoid very soft, drapey yarns for the points; they collapse into sad little socks. Love a soft yarn? Use it for brim and body, keep a sturdier acrylic for the points. One-colour version? Fine too — just buy 150 g of one colour and ignore the colour changes.
Size, gauge and skill level
- Sizes: Toddler (head 43–46 cm / 17–18 in), Child (50–52 cm / 19.5–20.5 in), Adult (56–60 cm / 22–23.5 in) and Adult Large (61–64 cm / 24–25 in). Written for Adult, with other sizes in the table and brackets.
- Finished measurements (Adult): about 60 cm (23.5 in) around the brim (it stretches), 19 cm (7.5 in) from brim to the point split, each point about 16 cm (6.5 in) long.
- Gauge: 12 sc and 14 rounds = 10 cm (4 in) in single crochet with a 5.0 mm hook. Gauge matters here — the point split depends on your stitch count — so make the swatch. Coming out small? Go up a hook size before you start, not halfway through the body.
- Skill level: confident beginner. You need single crochet, back loop only, the invisible decrease, and working in continuous spirals. Everything is explained as you go.
Choosing your size honestly: measure around the head at forehead level, over the ears, tape snug but not tight. Jester hats sit best slightly generous — the ribbed brim does the gripping, and a little ease lets the points bounce instead of being dragged flat. Between sizes? Size up for adults, down for toddlers (toddlers remove loose hats with extreme prejudice). First hat in the round? Our classic free crochet hat pattern is a great warm-up.
The split, explained before you start: at the top of the body you will have a round divisible by three — 54, 63, 72 or 81 stitches. Divide them into three equal groups with markers, then crochet one group at a time in its own little spiral, decreasing every other round, while the other two groups wait on hold.
Abbreviations — US terms
| Abbreviation | Meaning |
|---|---|
| ch | chain |
| sc | single crochet |
| BLO | back loop only |
| dec | decrease (sc 2 together — invisible decrease recommended) |
| st(s) | stitch(es) |
| R | round |
| FO | fasten off |
A note on decreases: use the invisible decrease wherever this pattern says "dec" — hook into the front loop only of the next two stitches, yarn over, pull through both loops, yarn over, pull through the two loops on your hook. On the points it keeps the taper smooth with no little holes, which matters because the points are what everyone stares at.
The pattern (US terms)
Work the body in continuous spirals — do not join rounds. Mark the first stitch of every round and move the marker up as you go. Stitch counts are in parentheses; counting is not optional here, because the split only works if your final body round is exactly right. A stitch or two out? Troubleshooting has the fix.
Size numbers at a glance:
| Size | Brim rows | Body stitches | Stitches per point |
|---|---|---|---|
| Toddler | 54 | 54 | 18 |
| Child | 63 | 63 | 21 |
| Adult | 72 | 72 | 24 |
| Adult Large | 81 | 81 | 27 |
Ribbed brim — Colour A
The brim is worked flat in back-loop single crochet — those lovely stretchy ribs — then joined into a band. It should look too small when you finish: ribbing stretches a lot, and that stretch keeps the hat on during actual jestering.
- Ch 11. (A brim about 7 cm / 2.75 in deep. For a deeper, fold-back brim, ch 15 and follow everything else the same.)
- Row 1: sc in 2nd ch from hook and in each ch across (10)
- Row 2: ch 1, turn, sc in BLO of each st across (10)
- Repeat Row 2 until you have 72 rows for Adult — 54 (Toddler), 63 (Child), 81 (Adult Large). Count by the rib ridges: each ridge is two rows.
- Join: fold the strip so the first and last rows meet, and slip stitch through both layers across the 10 stitches to seam it into a band, seam at the back. Do not fasten off — the body is worked straight out of the top edge, one single crochet into the end of each row.
Body — Colour A, worked in the round
- R1: ch 1, sc into the end of each brim row around (72 for Adult — 54 Toddler, 63 Child, 81 Adult Large). Place your round marker in the first stitch.
- R2–R15: sc in each st around (72) — 14 rounds even. The hat should now measure about 17–19 cm (6.75–7.5 in) from brim bottom to working round — right at the crown, where a beanie would start decreasing. Toddler: R2–R12 (11 rounds even). Child: R2–R13 (12 rounds). Adult Large: R2–R16 (15 rounds).
- Colour pop round (optional but very jester): switch to Colour B for the final body round, sc in each st around (72). This little stripe under the points makes the colour changes look deliberate.
Now count your stitches. Seriously. Then divide: place a marker after stitch 24 and after stitch 48 (Adult). Toddler: after 18 and 36. Child: after 21 and 42. Adult Large: after 27 and 54. Three equal sections — the future points.
Point 1 — Colour B
Work this point in its own spiral, using only section 1's stitches; the other sections just wait. (Nervous? Run scrap yarn through sections 2 and 3 as a holder.) Join Colour B at section 1's first stitch, or continue if you worked the colour pop round in B.
- P1: sc in each st of section 1 (24 for Adult — 18 Toddler, 21 Child, 27 Adult Large). At the end of the section, do not continue into section 2 — spiral back into section 1's first stitch instead. The point now grows up on its own. A little gap at the base between sections is normal; you will close it in Finishing.
- P2: [6 sc, dec] × 3 (21)
- P3: sc in each st around (21)
- P4: [5 sc, dec] × 3 (18)
- P5: sc in each st around (18)
- P6: [4 sc, dec] × 3 (15)
- P7: sc in each st around (15)
- P8: [3 sc, dec] × 3 (12)
- P9: sc in each st around (12)
- P10: [2 sc, dec] × 3 (9)
- P11: sc in each st around (9)
- P12: [sc, dec] × 3 (6)
- P13: sc in each st around (6). FO, leaving a 25 cm (10 in) tail. Thread the tail through the front loops of the 6 stitches, pull tight to close, and weave in.
Other sizes, same ladder: start at the rung matching your section. Toddler (18 sts): begin at "[4 sc, dec] × 3". Child (21 sts): begin at "[5 sc, dec] × 3". Adult Large (27 sts): work [7 sc, dec] × 3 (24) plus one even round first, then join at "[6 sc, dec] × 3". Every size ends at 6 stitches with the same taper.
To stuff or not to stuff: unstuffed points flop completely and swing when you walk — maximum jester energy, and my default. A marble-sized pinch of fiberfill in just the base gives a bouncier, upright cartoon point.
Point 2 — Colour C
Join Colour C at the first stitch of section 2 (right after your first placed marker). Work exactly as Point 1, same ladder for your size. FO and close the same way.
Point 3 — Colour A or D
Join your third colour at section 3's first stitch and work exactly as Point 1. FO and close. You now have three glorious tapered points and two or three small gaps at their bases — not a mistake, just the one bit of sewing this hat asks for, and it takes two minutes.
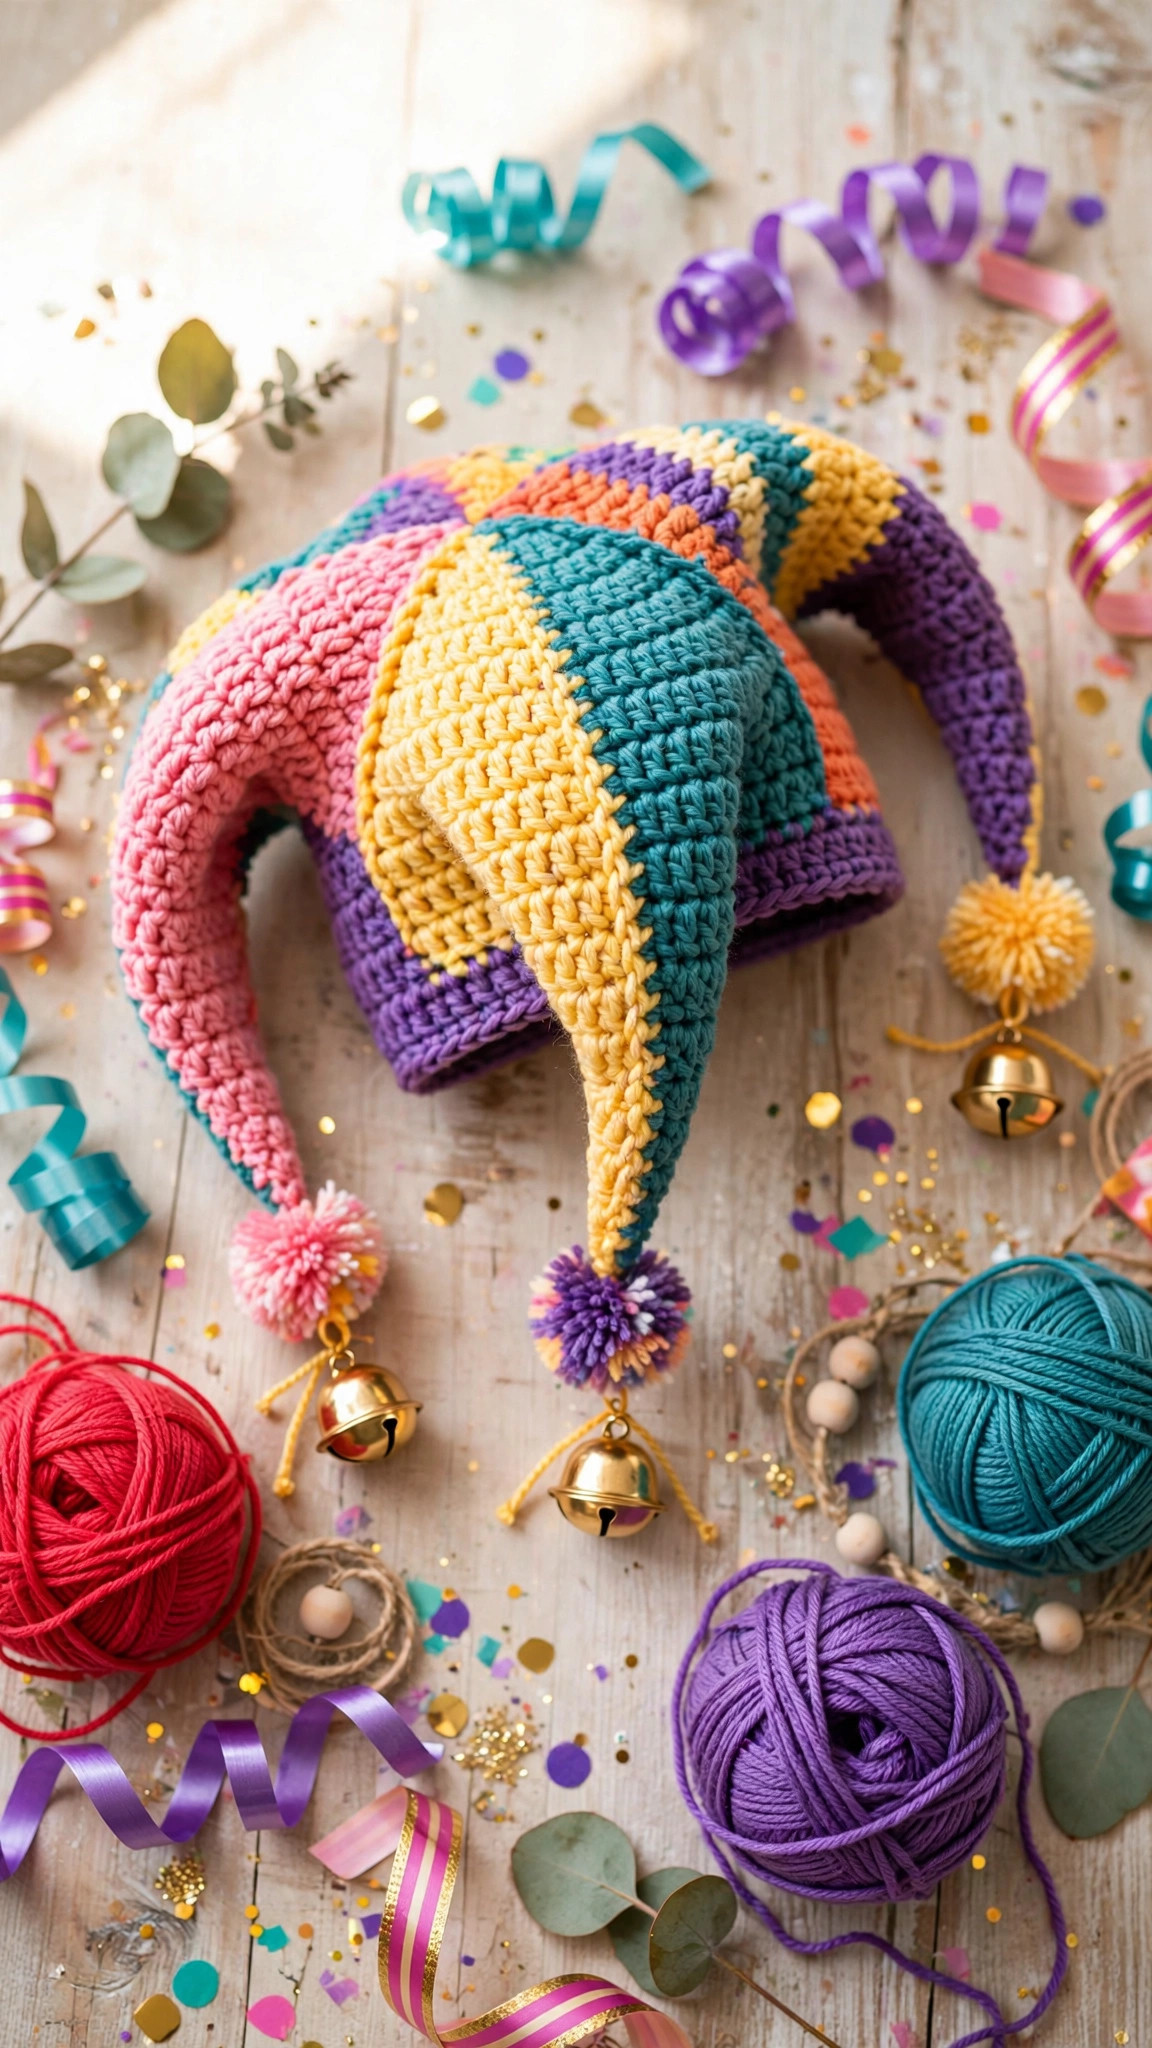
Finishing touches
Close the base gaps. Thread a tapestry needle with Colour A. At each point's base, where the sections separated, you will see a small V-shaped gap. Sew it closed with 3–4 neat whipstitches from inside the hat, pulling just snug — not tight, or the crown puckers. Repeat for all three gaps and weave in every end.
Attach the bells. The moment it becomes a jester hat. Thread a double strand of your sturdiest yarn through the closed tip of a point, through the bell's loop, and back through the tip, then knot firmly inside the point where the knot never shows. Give it a proper tug test — bells on jester hats live a hard life. Repeat for all three. Safety note: for under-threes, skip bells entirely (small parts) and use pompoms, sewn on with many stitches.
Or make pompoms. Wrap yarn about 60 times around three fingers (or use a 45 mm pompom maker), tie tightly in the middle with a double strand, cut the loops, trim into a ball, and sew to the tip through that tight centre tie. Pompoms give a softer, storybook look and survive the wash better than bells.
Shape the droop. Steam is your friend: use a garment steamer or hold the hat carefully over a steaming kettle, arrange the points at the angles you like, and let them cool in position. Unstuffed acrylic points take a set beautifully.
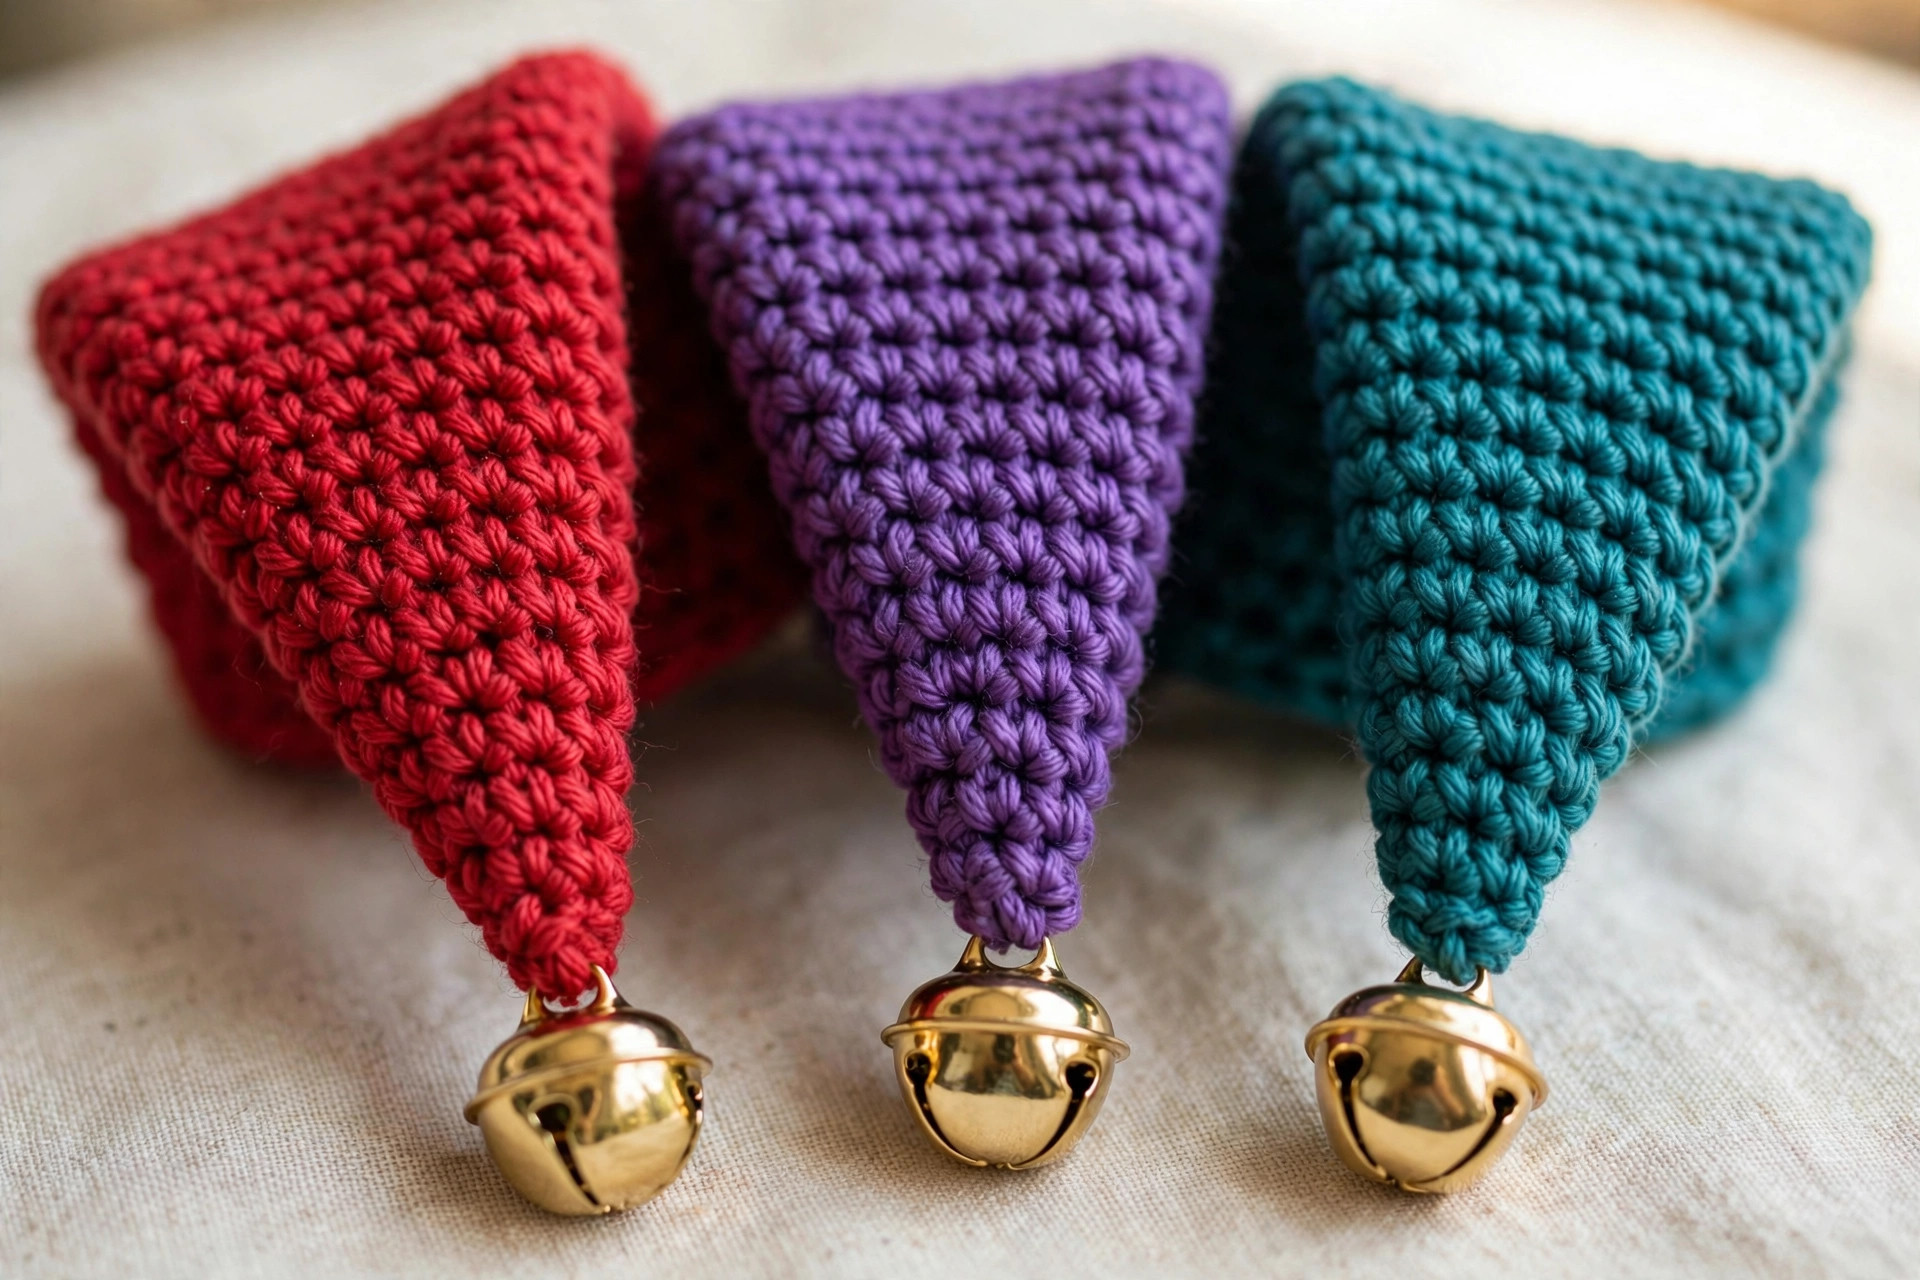
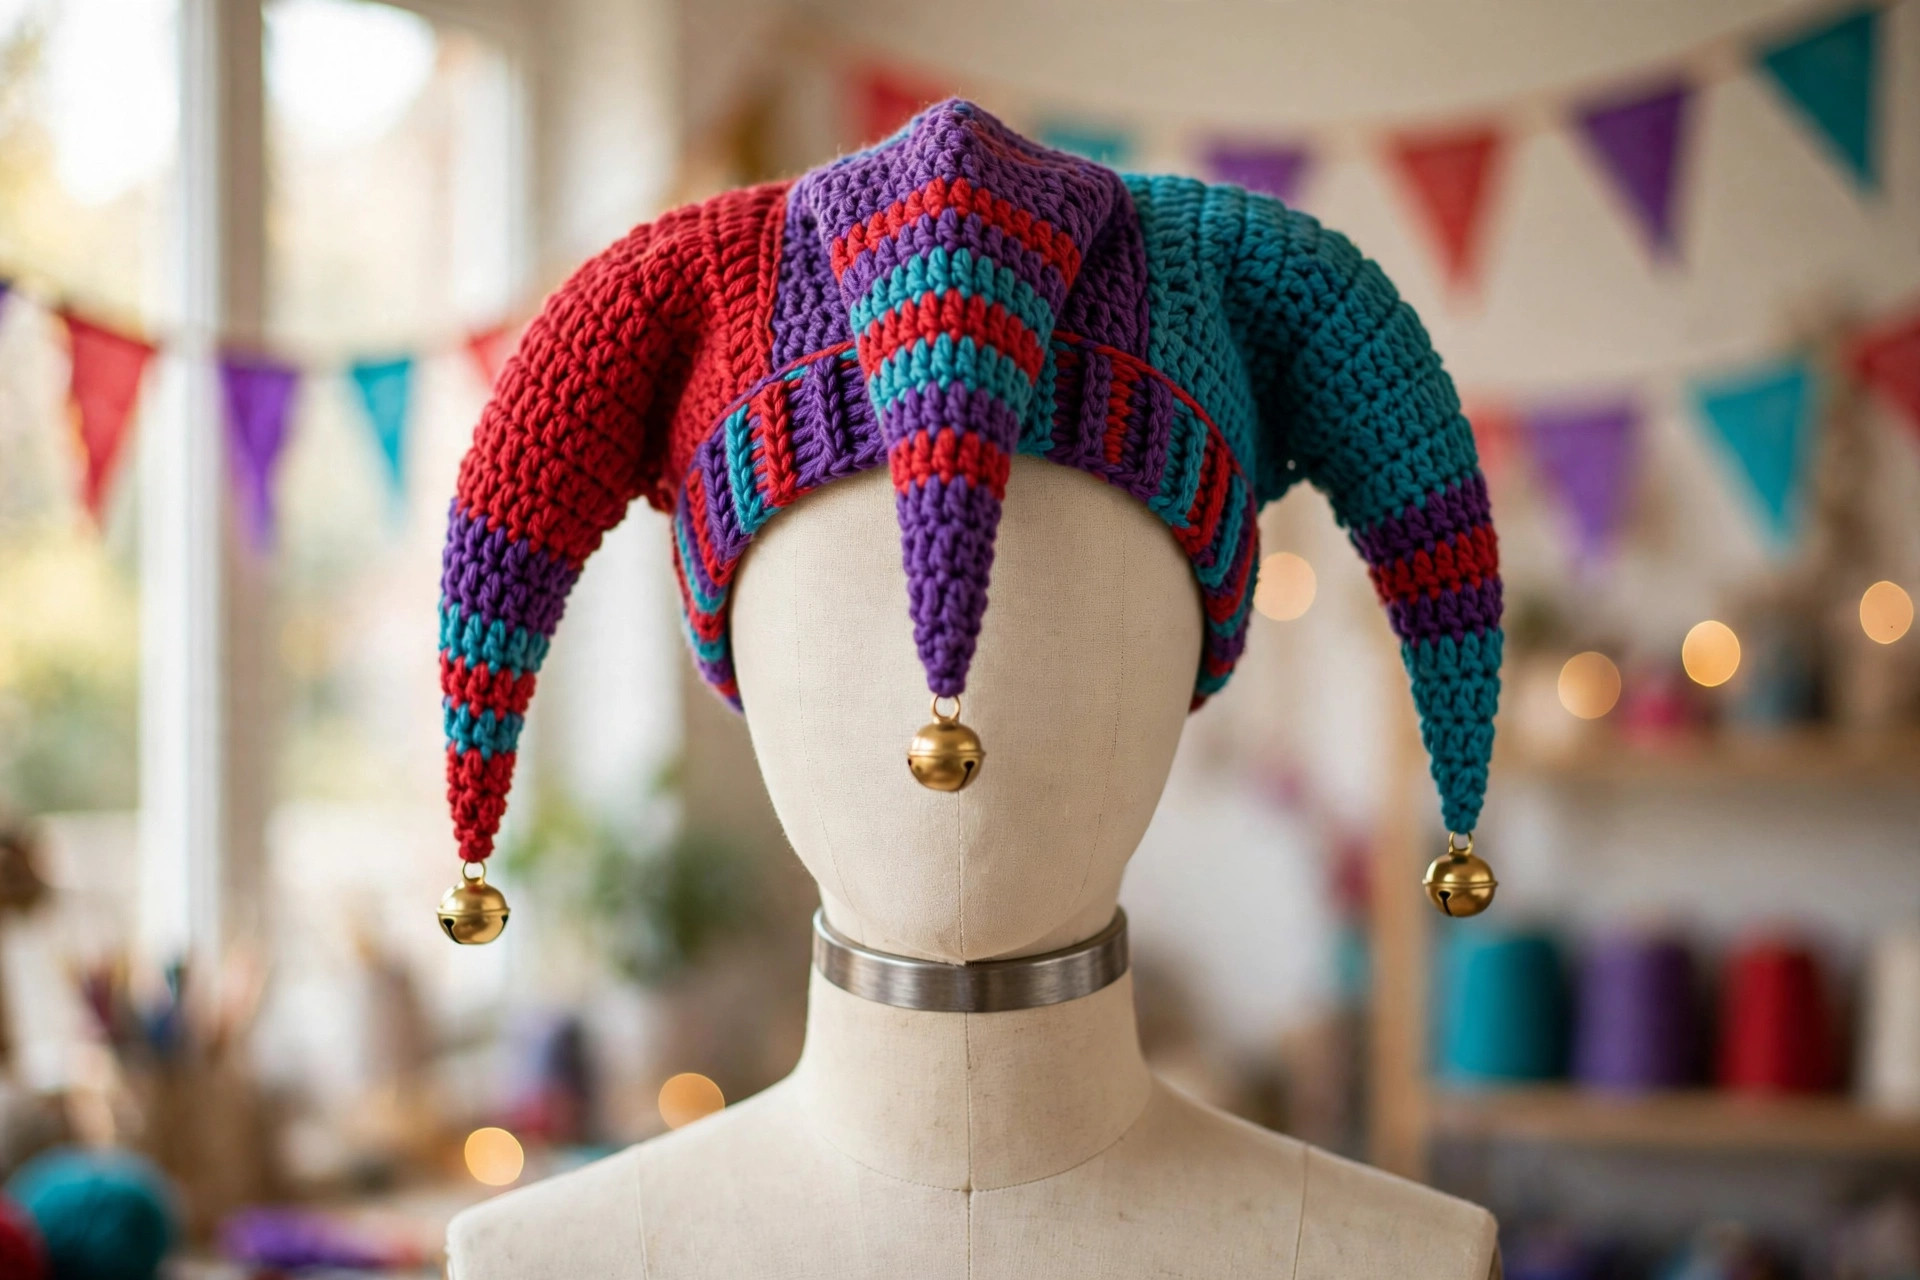
Three fun variations to try next
- The classic two-tone fool. Work points 1 and 3 in Colour B and point 2 in Colour A, and split the brim too — first half of the rows in A, second half in B — for that iconic half-and-half look, readable from across a fairground.
- The elf crossover. All three points in green, each shortened by stopping the ladder two rungs early (finish at 9 stitches, one even round, then close), with pompoms instead of bells. You are now wonderfully close to our free elf crochet pattern — make both and let the wearer choose their December destiny.
- The team-spirit hat. Points in your team's colours, brim in the darkest shade, pompoms for stadium safety rules. The ribbed brim even stretches over a thin beanie on cold game days — double-hatted, double warm, zero regrets.
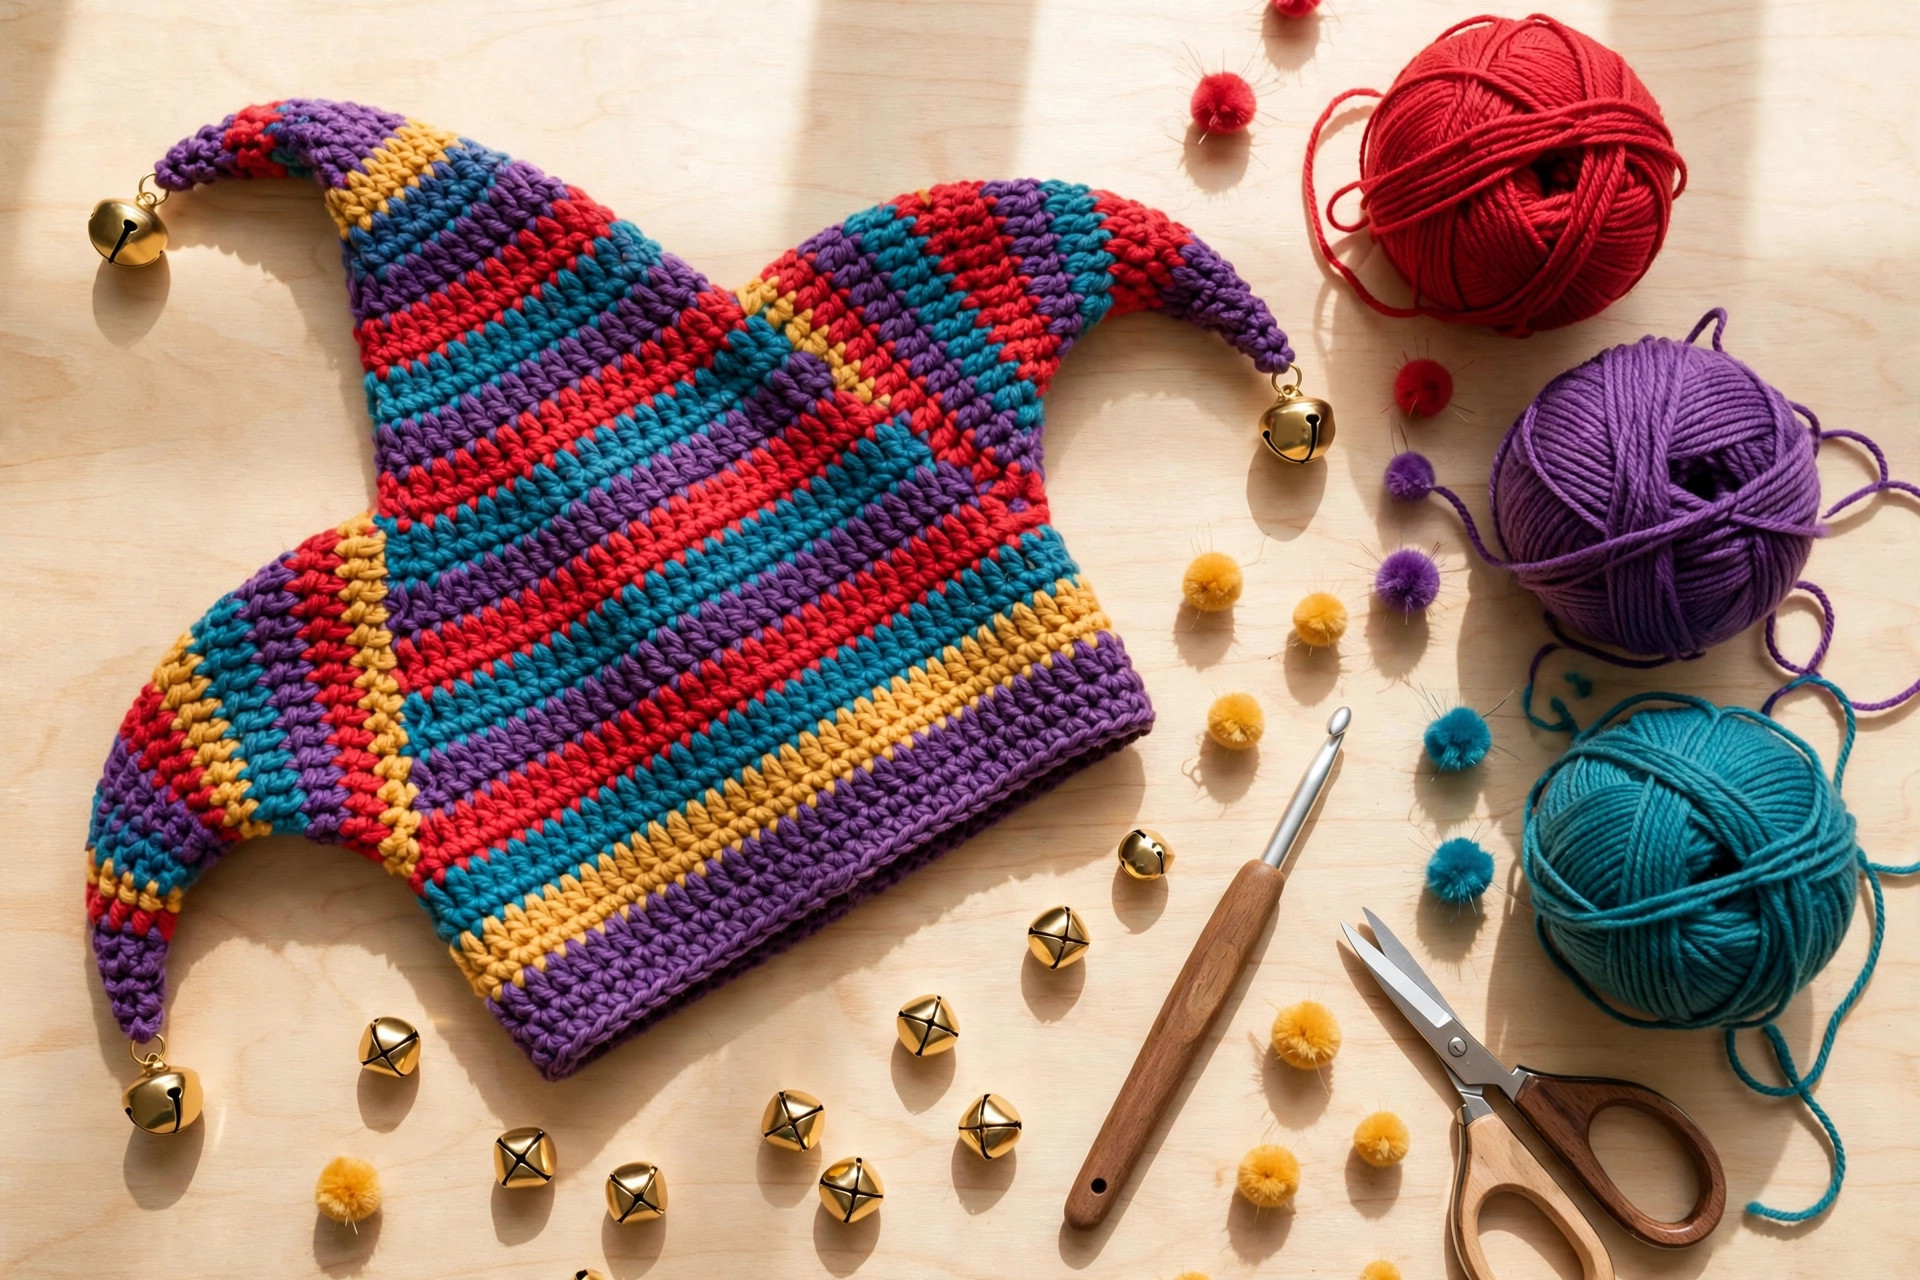
Troubleshooting tips
- My points stand straight up instead of drooping. Usually the yarn is stiff, or the points are stuffed too firmly. Unstuff, steam, and bend them as they cool. A longer point droops more — next hat, add one extra even round before each decrease round for extra flop.
- I have the wrong stitch count at the split. One stitch out? Quietly add or skip a stitch in the last body round — nobody will ever know. Three or more out means gauge drift; frogging back to where the count was right is honestly faster than fudging, because uneven sections make visibly uneven points.
- One point twists like a corkscrew. A stitch was stolen from the neighbouring section in the first point round. Unpick round P1, recount, and rework it a touch looser.
- The base gaps look huge. They always look alarming before sewing and invisible after. Wider than about 1 cm? The first point round was probably too tight. Sew from the inside with Colour A, adding one extra stitch across the widest part of the V.
- The brim is too loose or too tight. Brim row count is your sizing dial. Too loose: remove 3–4 rows. Too tight: add 3. Your body stitch count changes by the same amount, so adjust the sections to stay divisible by three.
- My bells keep coming off. You are tying, not sewing. A bell needs yarn passed through its loop and the hat tip at least three times, knotted inside the point. For hard-loved children's hats, pompoms are the sturdier choice.
Frequently asked questions
Is this jester hat crochet pattern really free?
Yes — the complete pattern is right here, all four sizes, no signup, nothing held back.
How long does this hat take to make?
About 3–4 hours for adult size: 45 minutes for the brim, an hour for the body, 25–30 minutes per point, 15 minutes finishing. Toddler size is a one-evening make. Add the free leg warmer crochet pattern and you have a full carnival costume by Sunday.
Can I sell jester hats I make from this pattern?
Yes — finished hats may be sold in small batches at fairs, markets and online. Please credit Little Loop Finds as the designer with a link back to this page. The pattern text and photos may not be copied, republished or sold.
What if I want two points — or four?
Two points: divide the body round in half and work the same ladder — a classic court-jester silhouette. Four points: use the 72-stitch adult body and divide by four (18 per point, ladder starting at "[4 sc, dec] × 3"). Narrower points taper faster, so start a rung down.
Are the bells safe for babies and toddlers?
The hat itself, yes — but swap bells for pompoms for under-threes, sewn on with many firm stitches through their centre ties. Bells are small parts, and toddler jester hats live a very chewed life.
Can I use a different yarn weight?
Yes, with one rule: at your new gauge, the finished body round must have a stitch count divisible by three that fits your head. Chunky yarn with a 6.5 mm hook makes a fabulously oversized, extra-floppy hat — swatch, measure, and keep the size table's proportions. The ladder maths stays the same.
How do I wash the finished hat?
Hand-wash, or machine-wash gentle in a mesh bag with cool water. Reshape the points while damp and dry flat. Bells may dull over many washes — a quick polish with a dry cloth brings them back.
More free patterns to try
Costume box looking sparse? The crochet cowboy hat is this hat's straight-faced sibling for rodeos, and the crochet dinosaur hat turns the same bottom-up body into a roaring good time for kids.
The box below contains an Etsy link. If you buy through it, we may earn a small commission at no extra cost to you. Learn more.
No time to make one?
Short on time? Find handmade crochet jester hats from independent makers on Etsy.
Browse on Etsy (opens Etsy in a new tab)