Free crochet bandana pattern: sunbeam ridge kerchief
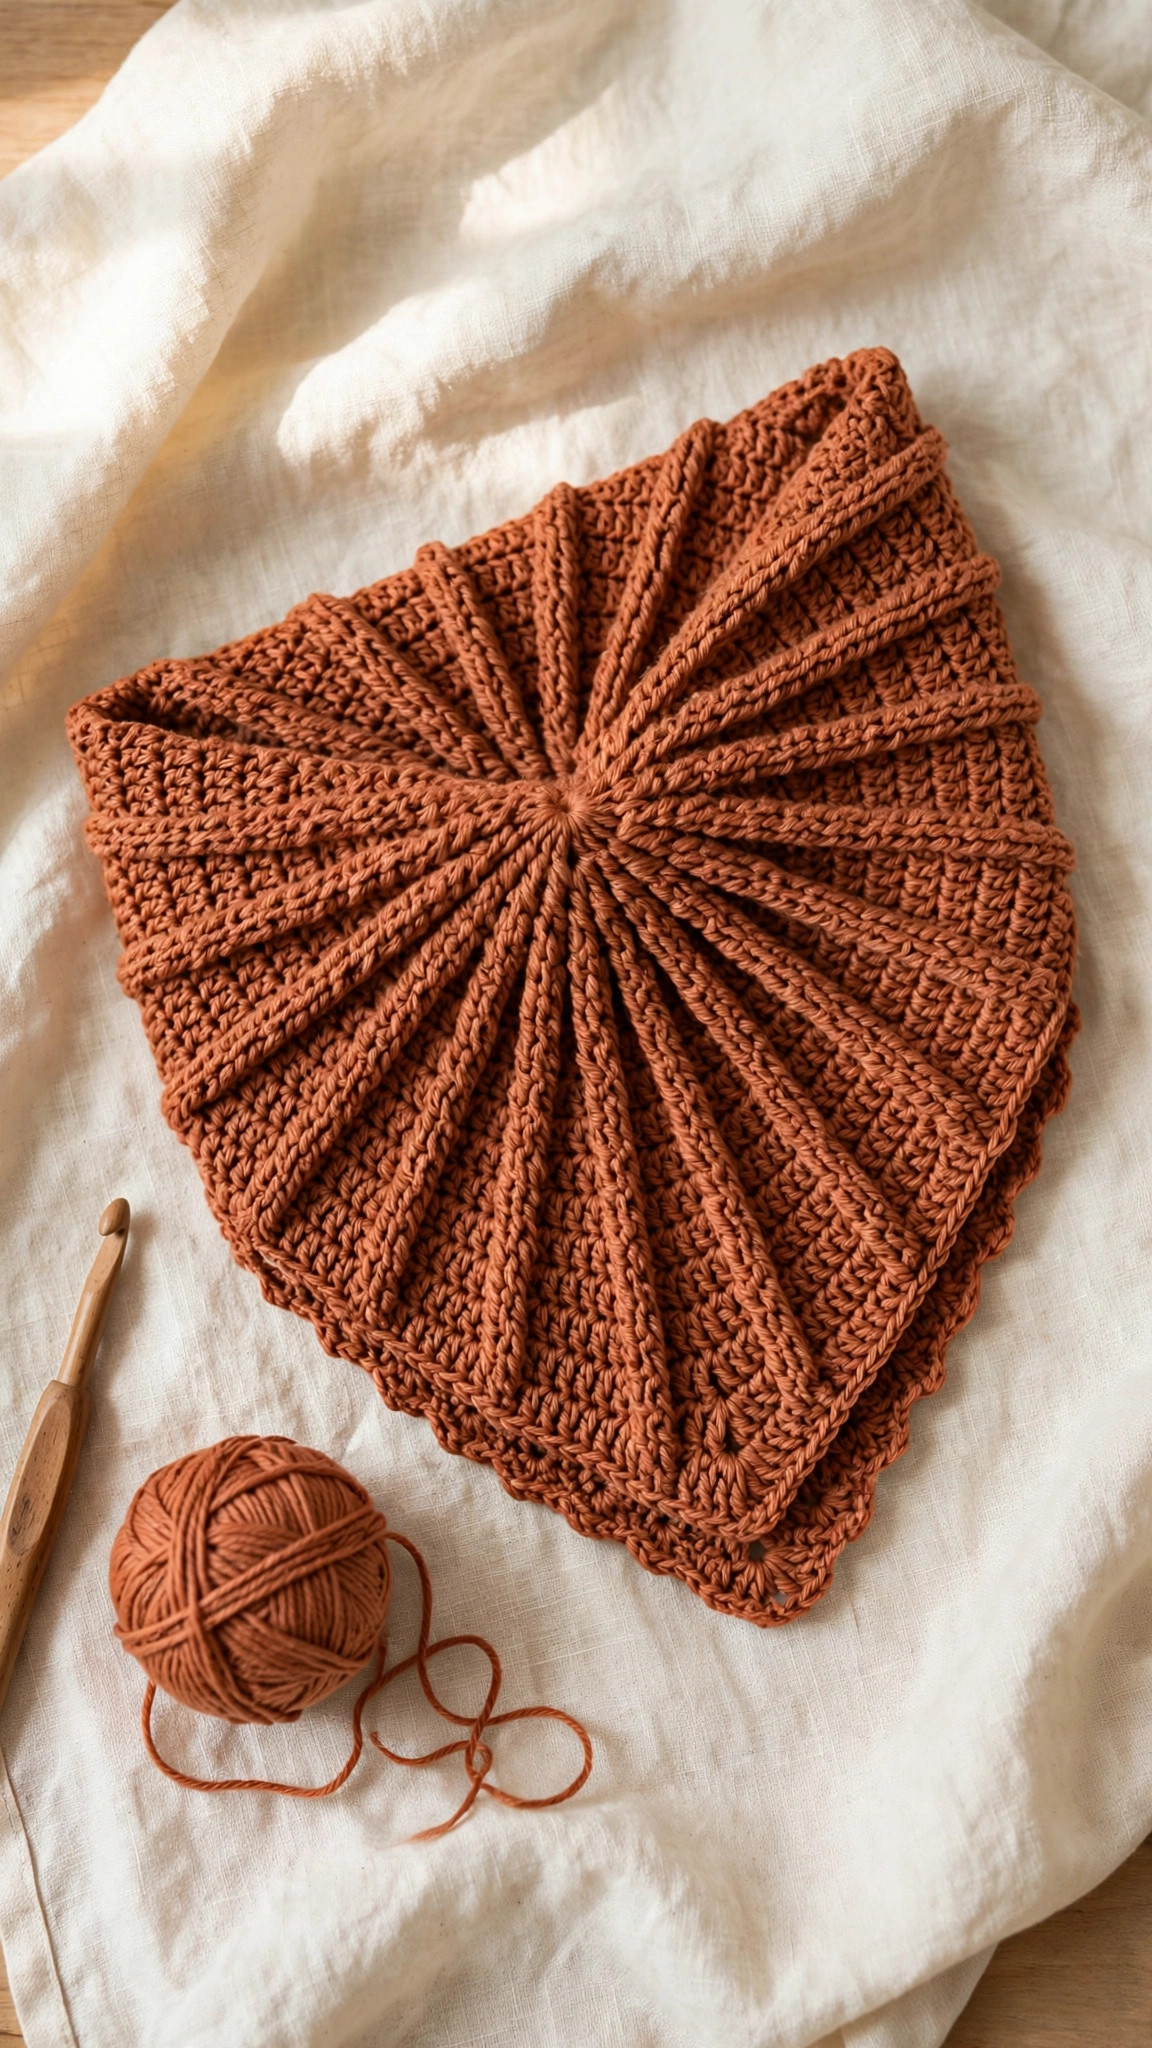
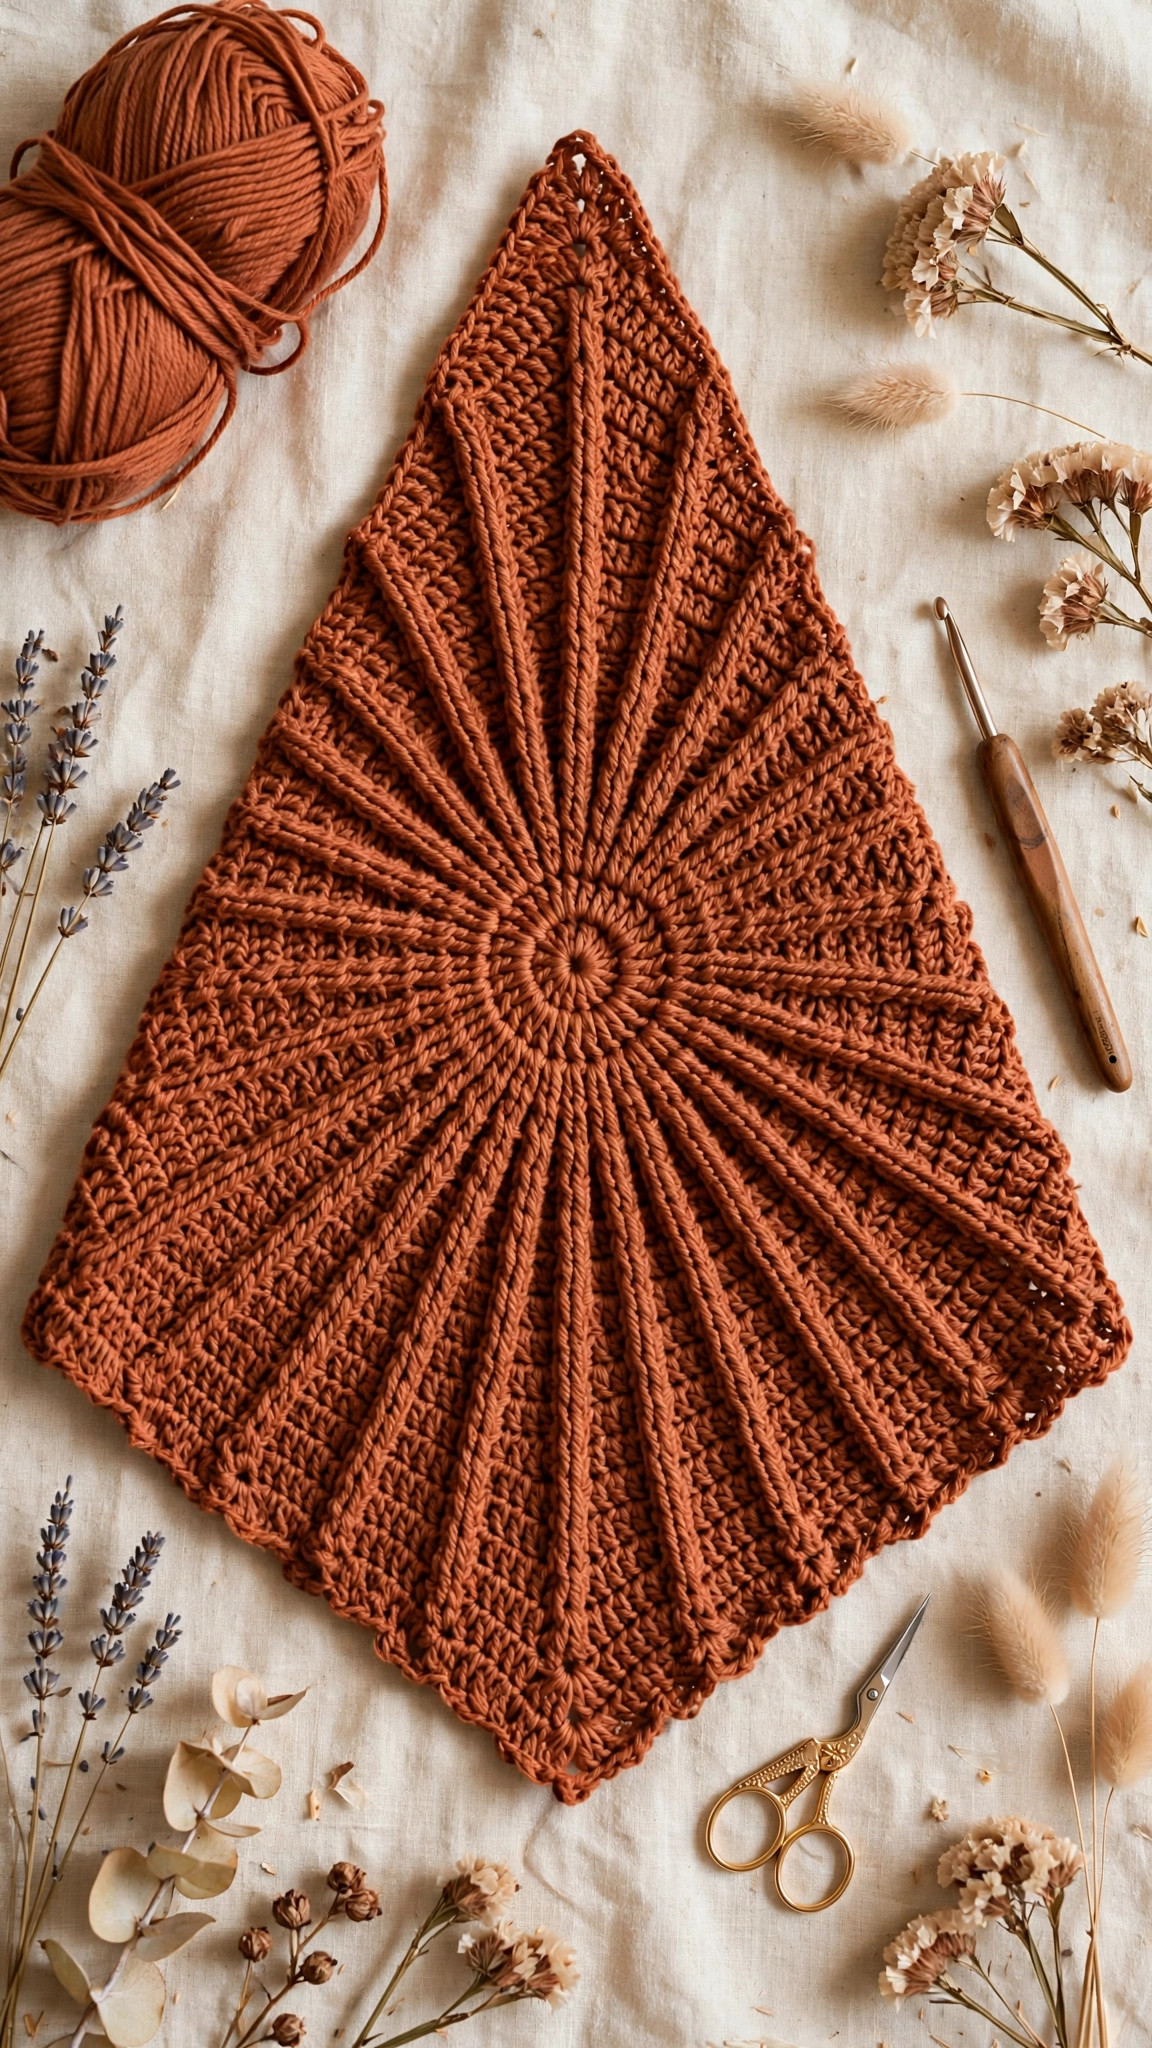
A terracotta triangle kerchief with raised sunbeam ridges radiating across smooth double crochet, finished with a neat edging and two long tie straps — an original advanced-beginner design you can crochet in one relaxed afternoon.

Wearables · Crochet
- Finished size
- About 58 × 24 cm / 23 × 9.5 in
- Making time
- About 3–4 hours
- Hook
- 5.0 mm, worsted-weight cotton
- Rows
- 19 rows + edging + 2 ties
- Skill
- Advanced beginner
In this post
If you've been hunting for a crochet bandana pattern that's actually free, actually wearable, and doesn't look like every other granny-triangle kerchief on the internet — meet the Sunbeam Ridge Bandana. It's a top-down triangle worked in smooth double crochet, interrupted every few rows by a raised front-post ridge that radiates across the fabric like sunbeams. The result looks far more intricate than it is: if you can double crochet, you can learn the one new stitch (front-post double crochet) in about five minutes.
Why you'll love this free crochet bandana pattern
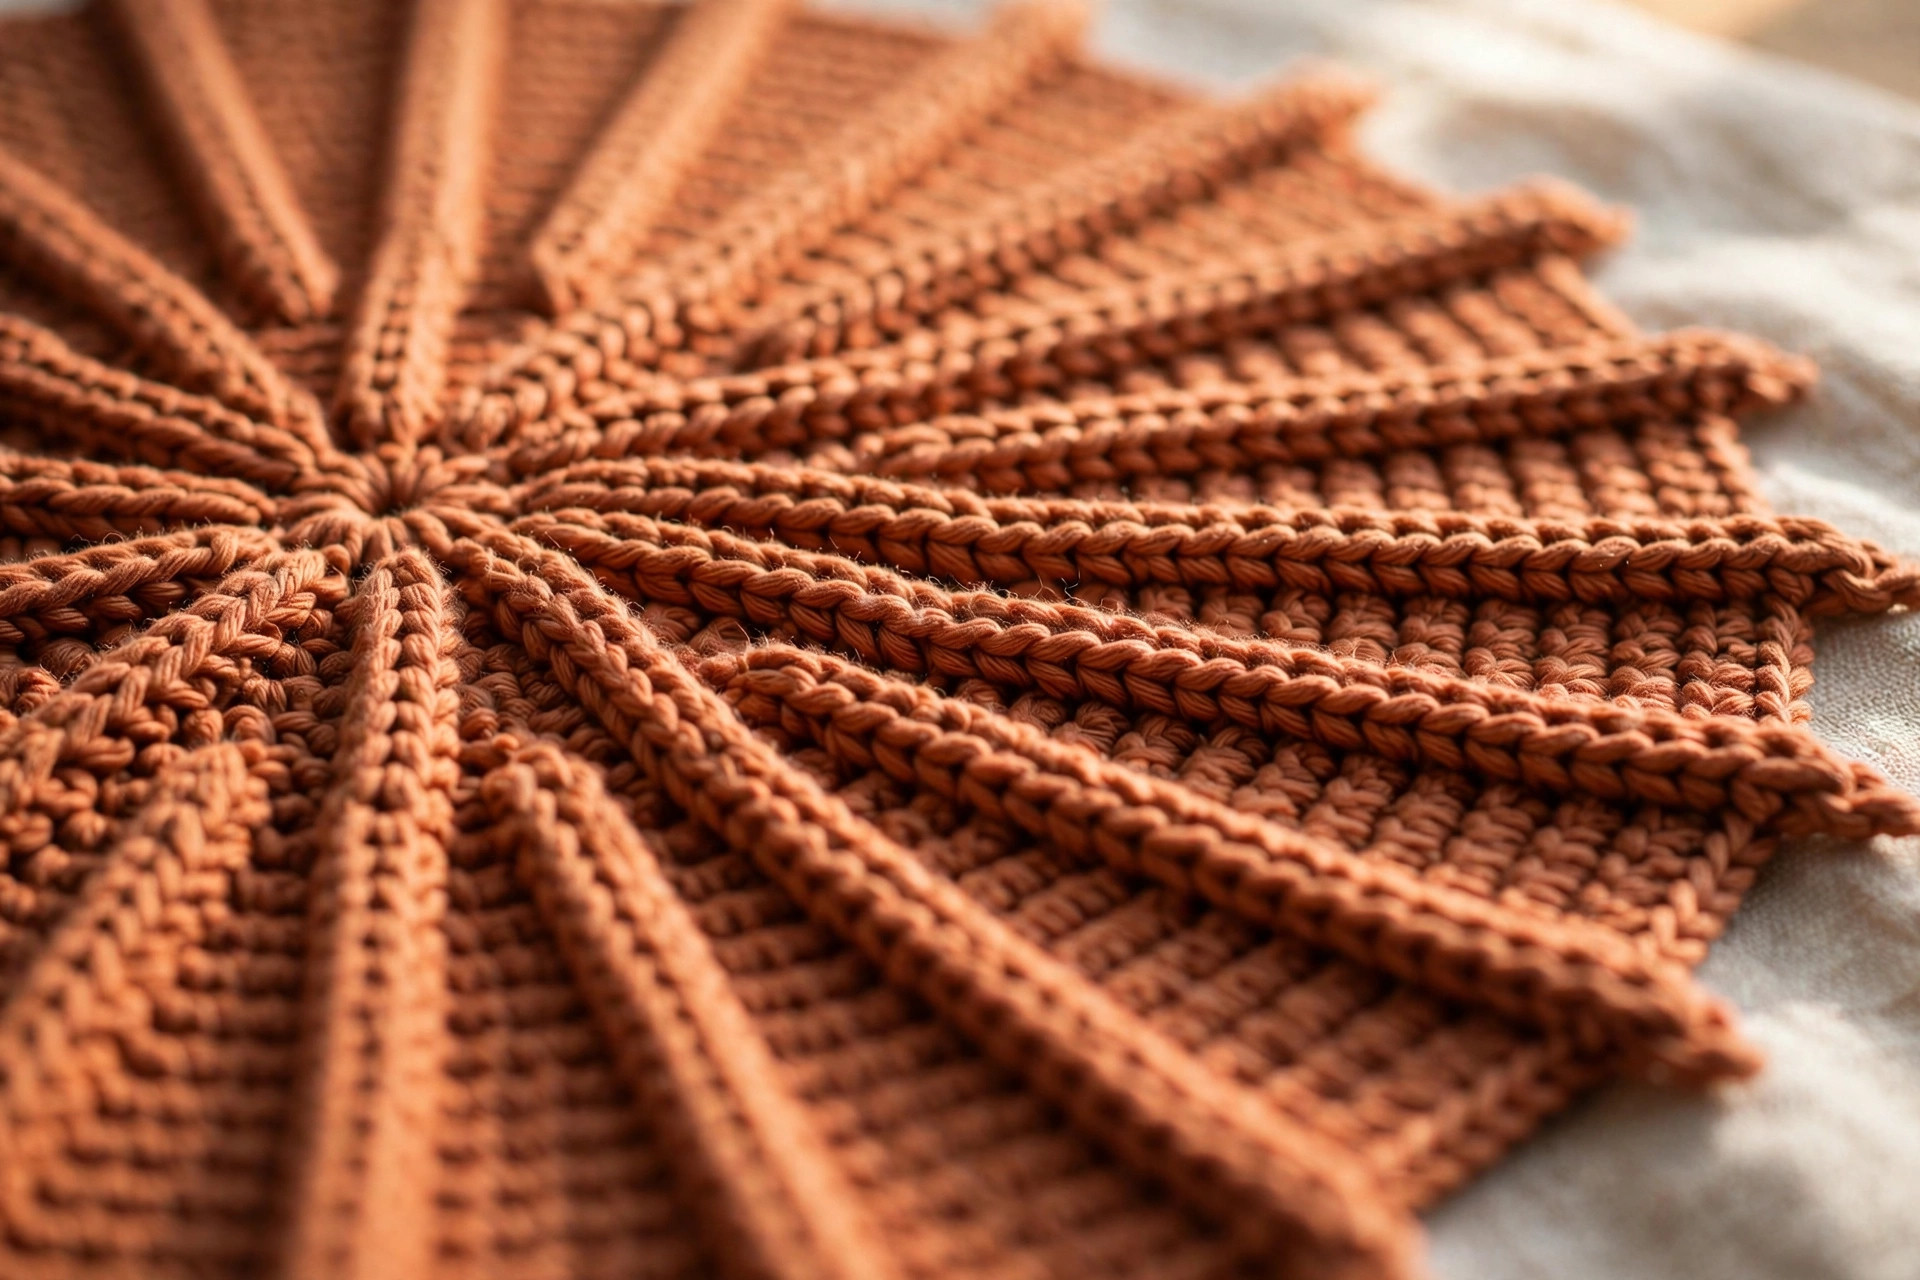
Most free bandana patterns give you two choices: a plain double-crochet triangle (fast, but a bit boring) or a lacy motif that takes a whole weekend and fits nobody. The Sunbeam Ridge was designed to split the difference. The shaping is the simplest triangle math there is — four extra stitches per row, every row, with the count printed at the end of each section so you always know exactly where you stand. The "sunbeam" texture comes from front-post double crochet rows spaced through the body: each ridge row pops forward from the fabric and catches the light, which is what gives the finished kerchief that radiant, almost pleated look.
It's also a genuinely practical make. Cotton yarn means it actually stays on your head instead of sliding off like acrylic sometimes does, the tie straps fit any head size (no measuring, no math), and the whole thing uses about one skein of worsted-weight yarn. Make one for yourself this evening; make three more as gifts and you'll still have weekend left.
Materials you'll need
| Supply | What to get |
|---|---|
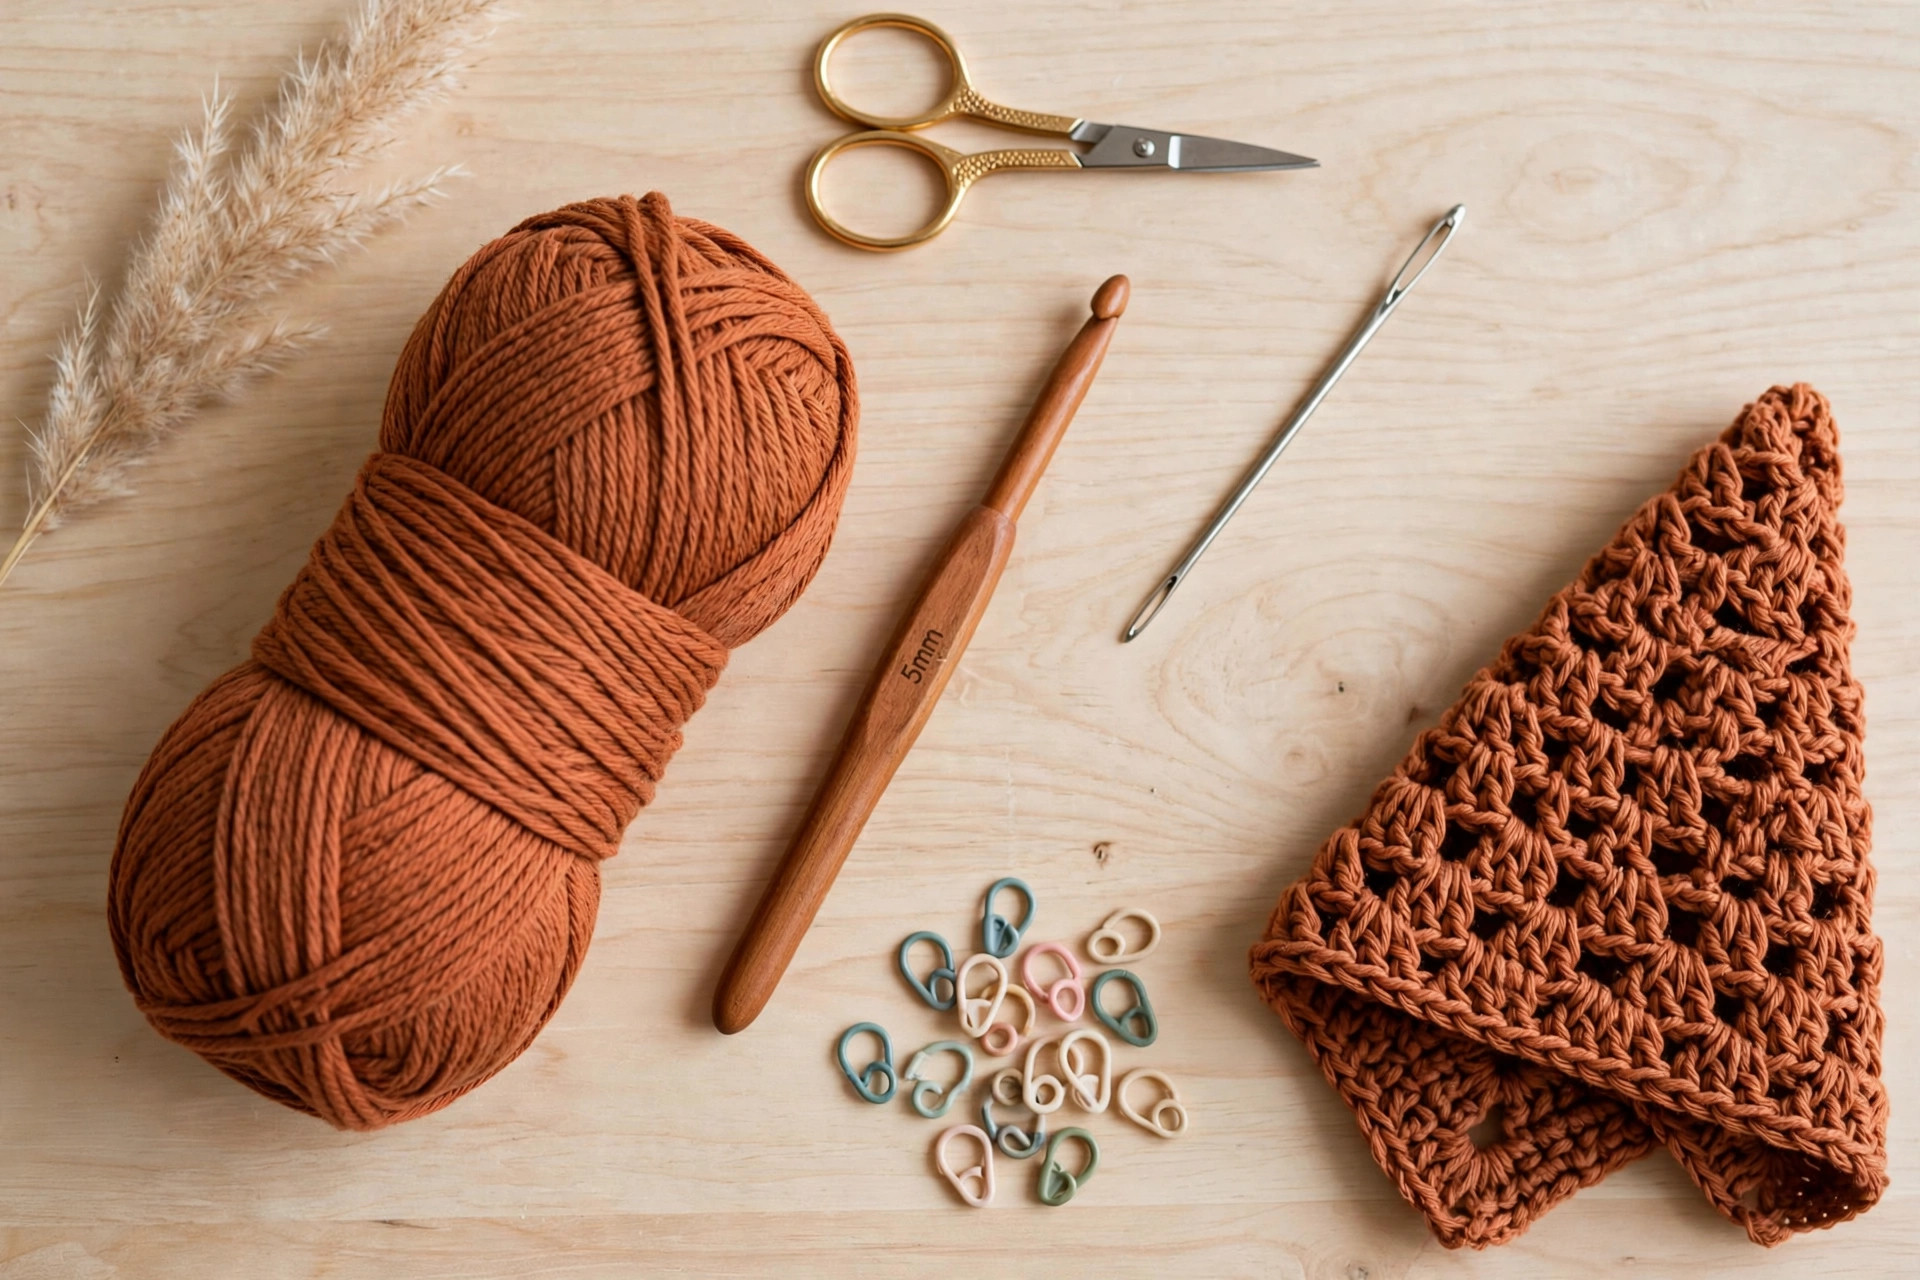
| Main yarn | Worsted-weight (#4) cotton or cotton blend, about 100 g / 165 m (180 yd); one skein |
| Crochet hook | 5.0 mm (H-8) |
| Notions | Tapestry needle, scissors, 2 stitch markers (optional, for the point) |
A quick note on yarn choice: cotton is the star pick for bandanas — it breathes, it grips your hair instead of sliding, and the front-post ridges show up crisply. A cotton-acrylic blend is a fine second choice and softens with washing. Pure acrylic works but can feel warm and slippery on the head; if that's all you have, go down to a 4.5 mm hook for a denser fabric. Solid or tonal colors show the ridge texture best — busy variegated yarns hide it.
Size, gauge and skill level
- Finished size: about 58 cm (23 in) wide along the top edge × 24 cm (9.5 in) deep from top edge to point, plus two 45 cm (18 in) tie straps. Fits most adults and teens; see the FAQ for resizing.
- Gauge: 13 dc × 8 rows = 10 cm (4 in) with a 5.0 mm hook. Gauge isn't critical here — the ties adjust the fit — but if your bandana is coming out much smaller or larger than stated, check the troubleshooting section before row 8, while it's still quick to restart.
- Skill level: advanced beginner. You should be comfortable with chains, double crochet, and increasing. The only "new" stitch is the front-post double crochet (FPdc), and it's just a double crochet worked around the post of a stitch instead of into its top — the abbreviations table walks you through it.
If front-post stitches are completely new to you, practice the FPdc on a small swatch first: chain 16, work 3 rows of dc, then one row of FPdc across. Five minutes of swatching will make the ridge rows feel automatic. And if you fall in love with wearable crochet, our crochet shawl pattern uses the same top-down triangle shaping at a bigger, drapier scale.
Abbreviations — US terms
| Abbreviation | Meaning |
|---|---|
| ch | chain |
| sl st | slip stitch |
| sc | single crochet |
| dc | double crochet |
| FPdc | front-post double crochet: yarn over, insert hook from front to back to front around the post of the indicated stitch, yarn over, pull up a loop, and complete as a normal double crochet |
| st(s) | stitch(es) |
| sp | space |
| RS | right side |
A note on the FPdc: the stitch below is worked exactly like a double crochet — the only difference is where the hook goes. Instead of inserting under the top two loops of the stitch, you slide the hook horizontally behind its tall post, from the front of the work. The post gets pushed forward, which is what creates the raised ridge. Keep your tension relaxed on FPdc rows; yanking them tight makes the fabric pucker.
The pattern (US terms)
The bandana is worked top-down in rows, starting at the bottom point of the triangle and growing toward the long top edge. Turn at the end of every row. The stitch count at the end of each section is in parentheses — this triangle grows by exactly 4 stitches per row, so a quick count every few rows keeps the edges perfectly straight. Place a stitch marker in the ch-2 point space if you like; it makes the corner easy to spot.
Foundation triangle — rows 1–3
- R1: Ch 4, work (dc, ch 2, 2 dc) in the 4th ch from the hook. Turn. (4 dc) — the starting ch-3 counts as your first dc, and the ch-2 forms the point of the triangle.
- R2: Ch 3 (counts as dc), dc in same st, dc in each st across to the ch-2 sp, (dc, ch 2, dc) in the ch-2 sp, dc in each st across, 2 dc in the last st. Turn. (8 dc)
- R3: Repeat R2. Turn. (12 dc)
Tip: R2 is the only row shape you need to memorize — "increase at both edges, work a (dc, ch 2, dc) corner at the point." Every plain row in this pattern is R2.
Sunbeam ridge rows
A ridge row is R2 with one change: work FPdc instead of dc in every stitch between the edge increases and the corner. The edges and the corner stay in regular dc so the shaping stays clean.
- R4 (ridge): Ch 3 (counts as dc), dc in same st, FPdc in each st across to the ch-2 sp, (dc, ch 2, dc) in the ch-2 sp, FPdc in each st across, 2 dc in the last st. Turn. (16 sts)
- R5–R7: Repeat R2 (plain double crochet). (20, 24, 28 dc)
- R8 (ridge): Repeat R4. (32 sts)
- R9–R11: Repeat R2. (36, 40, 44 dc)
- R12 (ridge): Repeat R4. (48 sts)
- R13–R15: Repeat R2. (52, 56, 60 dc)
- R16 (ridge): Repeat R4. (64 sts)
- R17–R19: Repeat R2. (68, 72, 76 dc)
After R19, do not fasten off — the edging continues with the working yarn.
How to check your work: lay the triangle flat after R12. The point should sit centered, the two slanted edges should be mirror images, and the ridge rows should run in straight horizontal lines. If one edge is growing faster than the other, you've added an extra increase on one side — count back to the last correct row and rework.
Edging
- R20: Ch 1, sc evenly down the first slanted side (about 2 sc in the end of each row — 38 sc), work (sc, ch 2, sc) in the ch-2 point space, sc evenly up the second slanted side (38 sc), then sc in each st across the long top edge (76 sc). Join with a sl st to the first sc. Fasten off and weave in the end.
The edging tidies the row ends and gives the slanted sides a firm edge that won't stretch out of shape with wear.
Tie straps — make 2
Join yarn with a sl st in the corner stitch at either end of the top edge.
- Ch 90 (about 45 cm / 18 in). Sl st in the 2nd ch from the hook and in each ch across (89 sl sts). Fasten off, leaving a 15 cm (6 in) tail.
- Thread the tail on a tapestry needle and sew the base of the strap firmly to the bandana corner with several small stitches, then weave in all ends.
Repeat at the other top corner.
Tip: if you prefer chunkier ties, work sc instead of sl st back along the chain. It uses a little more yarn and takes a few minutes longer, but the straps feel sturdier and match the bandana's texture.
Finishing
Weave in every end with a tapestry needle, working tails through the backs of stitches for at least 5 cm so nothing escapes in the wash. Give the bandana a light blocking: soak it in lukewarm water for 10 minutes, gently squeeze (never wring) in a towel, lay flat with the triangle shaped neatly, and let it dry completely. Blocking opens up the FPdc ridges and evens out the edges — it's the single biggest difference between "homemade" and "handmade" for this project.
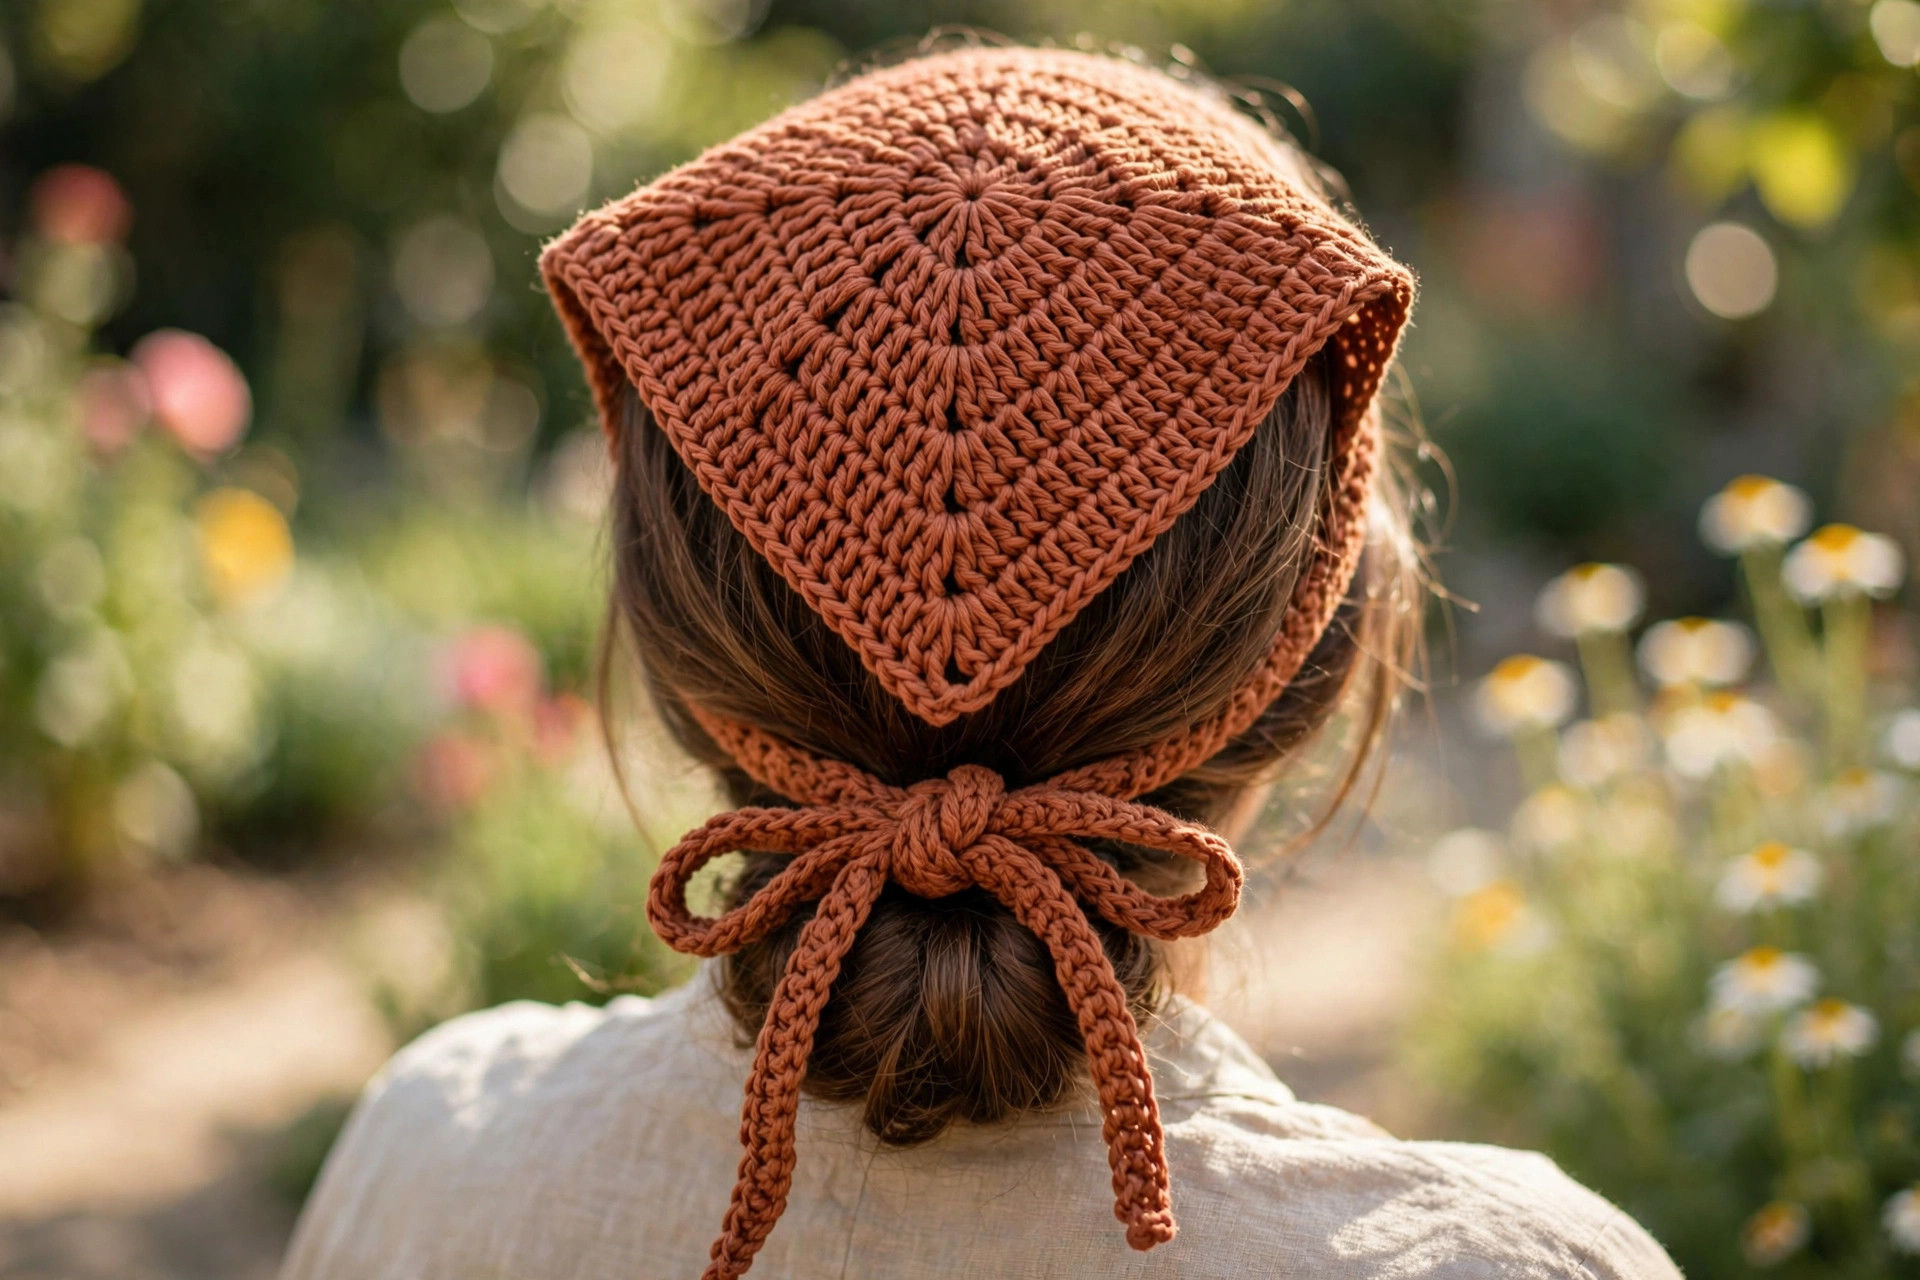
To wear: center the long edge across your forehead or hairline, bring the point over the crown toward the back, cross the straps under your hair, and tie in a bow. The triangle should cup the back of your head; if it feels shallow, you want the larger size in the FAQ.
Three cute variations to try next
The same triangle, three personalities:
- Two-tone sunbeam. Work the four ridge rows (R4, R8, R12, R16) in a contrasting color and everything else in your main color. Cream ridges on terracotta, or mustard ridges on sage green — the contrast makes the sunbeam texture glow. Carry the unused color loosely up the edge or cut and weave in; only four color changes, so it's painless.
- Child size. Stop after R15 (60 sts — about 46 cm / 18 in wide and 19 cm / 7.5 in deep), work the edging, and make the ties ch 70 instead of 90. Perfect for kids around ages 4–10.
- Festival stripes. Work every 4-row block (3 plain + 1 ridge) in a different color for a bold striped kerchief. Five colors, zero ends to weave if you carry them up the side — just crochet over the carried strands in the edging row.
And if this project gave you the wearables bug, the crochet shawl pattern grows the same triangle idea into a full-size wrap, while the crochet doily patterns collection is the place to practice fancy stitch textures on small, quick motifs.
Troubleshooting tips
- The triangle point drifts off-center. You missed a corner (dc, ch 2, dc) or worked it in the wrong space. The point space is the ch-2 from the previous row — mark it with a stitch marker until you can spot it by eye.
- One slanted edge is longer than the other. Uneven edge increases: one side got "2 dc in last st" while the other didn't. Count both halves (each should be exactly half the total); frog back to the last row where they matched.
- The ridge rows pucker or ripple. Your FPdc tension is tighter than your dc tension — extremely common. Consciously work the FPdc rows a touch looser, or go up half a hook size for ridge rows only.
- The top edge flares or cups. Usually a gauge drift: most crocheters tighten up as they get into a rhythm. If the top edge is noticeably narrower than the math says it should be, your later rows are tighter — block aggressively, or rework with attention to even tension.
- The bandana won't stay on. Two fixes: cotton yarn grips far better than acrylic, and wearing the long edge slightly back from the hairline (rather than right at it) gives the ties more to hold. A light starching also helps for costume or festival wear.
- The tie straps twist into spirals. The sl-st return row was worked too tightly. Rework the strap with relaxed slip stitches, or switch to the sc-back variation in the Tips note — it lies flat every time.
Frequently asked questions
Is this crochet bandana pattern really free?
Yes — the complete pattern above is free, no email signup, no PDF purchase required. If you'd like to support the site, sharing the post or saving it on Pinterest is the kindest thank-you.
What skill level is this pattern?
Advanced beginner. If you can chain and double crochet confidently, you have 95% of what you need — the only new technique is the front-post double crochet, which is a small variation on the dc you already know. A crocheter who has finished two or three simple projects will be comfortable here.
How long does it take to make?
About 3–4 hours total: roughly 2.5 hours of crocheting, 20 minutes for the edging and ties, and 10 minutes of finishing and weaving in ends. It's an ideal weekend-afternoon or two-evenings project.
What yarn works best for a crochet bandana?
Worsted-weight cotton is the best all-rounder: breathable, good stitch definition for the ridges, and it grips hair so the bandana stays put. Cotton blends are a close second. Avoid very slippery yarns (silky bamboo, some acrylics) unless you go down a hook size — a bandana that slides off defeats the purpose.
Can I sell the finished bandanas I make?
Yes! You may sell finished bandanas made from this pattern in small batches (craft fairs, Etsy, gifts). Please credit Little Loop Finds as the pattern designer with a link back to this page. The pattern text and photos themselves may not be redistributed, republished, or sold.
How do I make it bigger or smaller?
Each 4-row block (3 plain rows + 1 ridge row) adds 16 stitches — about 12 cm (4.75 in) of width and 5 cm (2 in) of depth. For a larger kerchief, add one or two blocks before the edging (R20–R23 pattern: repeat R2, R2, R2, R4). For a smaller one, stop a block early — the child size in the variations section stops after R15.
More free patterns to try
If this kerchief was fun, keep the hook moving. The crochet shawl pattern takes the same triangle shaping full-size, the autumn acorn granny square is a quick stash-buster for practicing textured stitches between wearables, the star blanket makes a gorgeous gift to pair with a matching bandana, the crochet doily patterns collection levels up your lace skills on small motifs, and the flip-face witch cat is pure fun if you want a break from wearables entirely.
The box below contains an Etsy link. If you buy through it, we may earn a small commission at no extra cost to you. Learn more.
No time to make one?
Short on time? Find handmade crochet bandanas from independent makers on Etsy.
Browse on Etsy (opens Etsy in a new tab)