Crochet Headphone Cover Pattern (Cute + Protective)
Make cute, protective crochet covers for your headphone earcups with this free pattern, including cat ear and daisy variations.

Accessories · Crochet
- Finished size
- Fits 3.5 to 4.5 in earcups
- Making time
- 45 min to 1 hour per cover
- Hook
- US G-6 (4.0 mm)
- Set
- Basic cover plus 3 variations
- Skill
- Beginner
In this post
- Key Takeaways
- Table of Contents
- Why Crochet Your Headphone Covers
- Finished Size, Skill Level, and Time
- Materials You Need
- Measure Your Earcups First
- Abbreviations (US Terms)
- Part 1: The Basic Earcup Cover
- Part 2: The Drawstring Back
- Part 3: Cat Ear Covers
- Part 4: Daisy and Granny Variations
- Fitting Covers to Different Headphone Styles
- Troubleshooting Fit Problems
- Care Instructions
- Frequently Asked Questions
Your headphones go everywhere with you, so why should they look boring? This crochet headphone cover pattern turns plain black earcups into something adorable, colorful, and genuinely useful. These little slip-on covers protect your ear pads from sweat, makeup, and wear, and they swap out in seconds when you want a new look. Rainbow stripes for Monday, cat ears for Friday, daisies for the weekend.
This is an original Little Loop Finds design, written in US terms and completely free. The basic cover is a simple circle worked in rounds that stretches over your earcup, with a drawstring back so one size fits most over-ear headphones. Once you have the basic circle down, the fun variations (cat ears, flowers, granny squares) are just decorations on top. If you can crochet a flat circle, you can make these.
Key Takeaways
- Free original pattern: this crochet headphone cover pattern is a Little Loop Finds original design, written in US terms, and completely free.
- Cute and practical: the covers protect ear pads from sweat and wear while making your headphones look adorable.
- One size fits most: the drawstring back cinches down to fit most over-ear headphone models.
- Beginner friendly: worked in simple rounds with increases you already know from hats and coasters.
- Endless variations: stripes, cat ears, daisies, and granny square designs are all included.
Table of Contents
- Why Crochet Your Headphone Covers
- Finished Size, Skill Level, and Time
- Materials You Need
- Measure Your Earcups First
- Abbreviations (US Terms)
- Part 1: The Basic Earcup Cover
- Part 2: The Drawstring Back
- Part 3: Cat Ear Covers
- Part 4: Daisy and Granny Variations
- Fitting Covers to Different Headphone Styles
- Troubleshooting Fit Problems
- Care Instructions
- Frequently Asked Questions
Why Crochet Your Headphone Covers
Replacement ear pads are not cheap, and the faux leather ones flake and peel with shocking speed. A washable crochet cover is the cheapest insurance policy your headphones will ever get. They absorb the sweat and oils that break pads down, they come off in seconds for washing, and they cost pennies in yarn.
Then there is the fun part. Headphones are basically jewelry you wear on your head for hours a day, and the default look is corporate black. A pair of pastel rainbow covers, or cheeky cat ears, or a daisy garden completely changes the vibe. They are also a fantastic gift: every gamer, student, commuter, and work-from-home friend you know owns headphones, and nobody has covers like these.
Finished Size, Skill Level, and Time
- Finished size: the basic cover fits earcups 3.5 to 4.5 inches in diameter; the pattern includes notes for sizing up or down.
- Skill level: Beginner to Easy. You need chains, slip stitches, single crochet, half double crochet, and double crochet, plus basic increases in the round.
- Time: about 45 minutes to 1 hour per cover once you know the pattern, so a matching pair is an evening project.
Materials You Need
| Item | What to get |
|---|---|
| Yarn | Worsted weight (medium 4) cotton or cotton blend, about 50 yards per pair of covers |
| Hook | US G-6 (4.0 mm), or the size that gives you a firm fabric |
| Notions | Tapestry needle, scissors, stitch markers, tape measure |
| For drawstring | The same yarn, or a contrasting color |
Cotton is the best choice here because it breathes, it washes well, and it does not pill against your skin the way acrylic can. A cotton blend with a little stretch is even better. Avoid wool for covers you will wear in warm weather, and skip anything fuzzy that will shed onto dark clothing. If you are making a matching set with other accessories, our crochet phone case pattern uses the same cotton-friendly approach.
Measure Your Earcups First
Grab your headphones and a tape measure before you pick up the hook. Measure the diameter of one earcup across its widest point. Most over-ear models land between 3.5 and 4.5 inches. Write that number down, because the pattern below is written for a 4-inch earcup and tells you exactly where to add or remove rounds for other sizes.
Also note whether your earcups are round or oval. Round cups use the pattern as written. Oval cups need a slightly different shape: work the basic circle, then add two extra rounds of even stitches on two opposite sides to elongate it. We will cover the details in the fitting section.
Abbreviations (US Terms)
- ch = chain
- sl st = slip stitch
- sc = single crochet
- hdc = half double crochet
- dc = double crochet
- inc = increase (2 sts in the same st)
- st = stitch
- rep = repeat
- BLO = back loop only
Part 1: The Basic Earcup Cover
This circle should end up about half an inch wider than your earcup so it stretches on snugly. Work in continuous rounds with a stitch marker, or join each round if you prefer a cleaner look.
Round 1: Make a magic ring. Ch 1, work 8 sc into the ring, pull closed. (8 sts)
Round 2: Inc in each st around. (16 sts)
Round 3: Sc in the next st, inc in the next st. Repeat around. (24 sts)
Round 4: Sc in the next 2 sts, inc in the next st. Repeat around. (32 sts)
Round 5: Sc in the next 3 sts, inc in the next st. Repeat around. (40 sts)
Round 6: Sc in the next 4 sts, inc in the next st. Repeat around. (48 sts)
At this point the circle should measure about 4 inches across in worsted weight cotton. For a 3.5-inch earcup, stop after Round 5. For a 4.5-inch earcup, add one more round: sc in the next 5 sts, inc in the next st for 56 stitches.
Round 7 (the side wall): Ch 1, sc in BLO in each st around. This creates a crisp ridge that folds over the edge of the earcup. Work 2 more rounds of plain sc (through both loops) for the wall. Try the cover on your earcup now; it should stretch over the pad and sit just past its edge.
Fasten off and weave in the starting tail. Keep the ending tail for now; it anchors the drawstring round.
Part 2: The Drawstring Back
The drawstring is what turns a crocheted disc into a cover that stays put. It cinches the back of the cover behind the earcup so it cannot pop off.
- With the cover on the earcup (or off, whichever is easier), join a new strand of yarn with a sl st in any stitch of the last wall round.
- Ch 3, then work 1 dc in each st around, join with a sl st to the top of the ch-3. This round of taller stitches creates a little channel.
- Ch 60 to 80 for the drawstring cord itself, or cut a separate piece of yarn about 24 inches long.
- Weave the cord in and out of the dc round like a shoelace, using a tapestry needle.
- Slip the cover onto the earcup, pull the cord snug behind the pad, and tie it in a bow. Tuck the bow behind the earcup where it will not show.
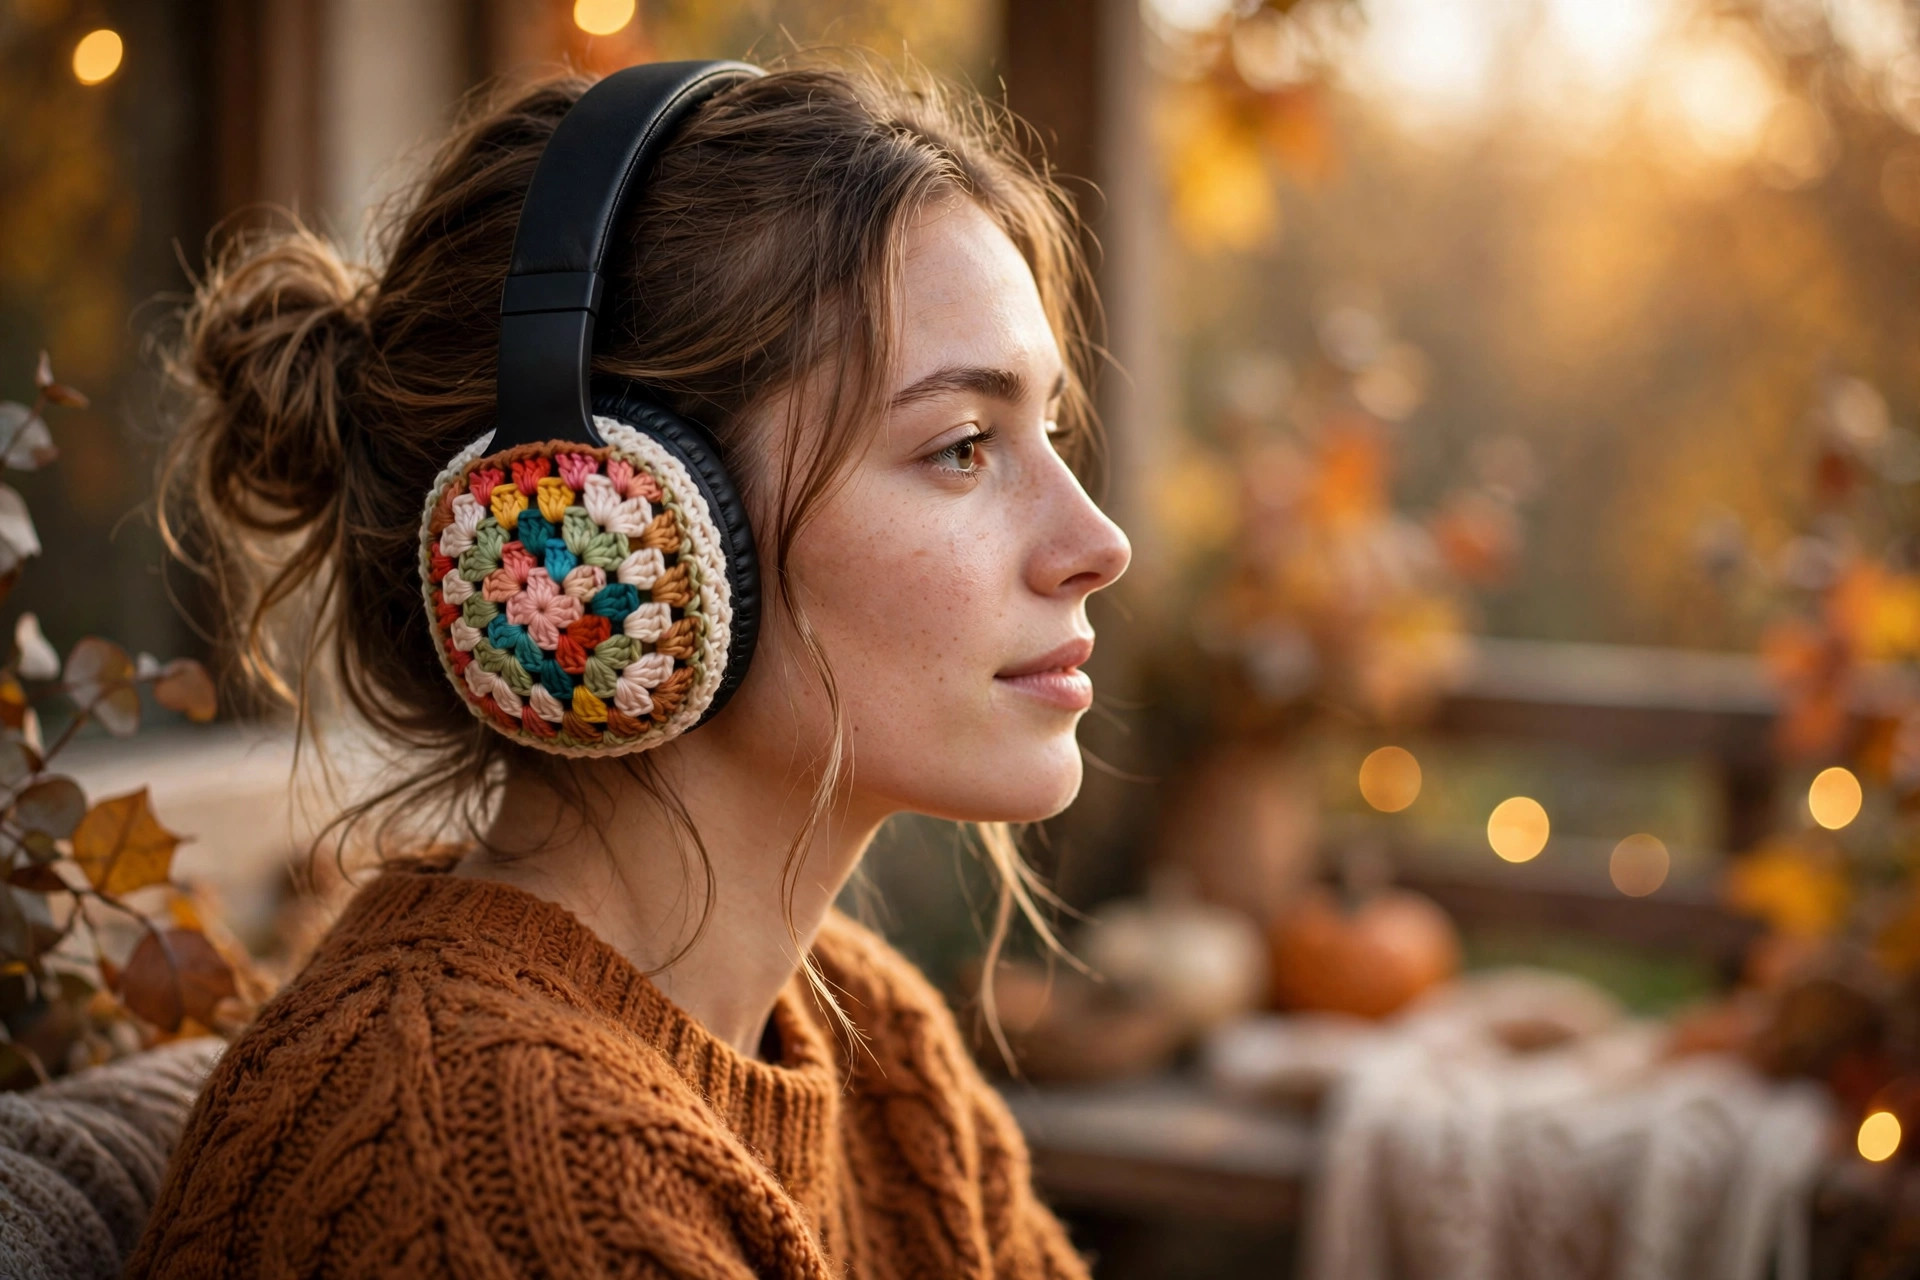
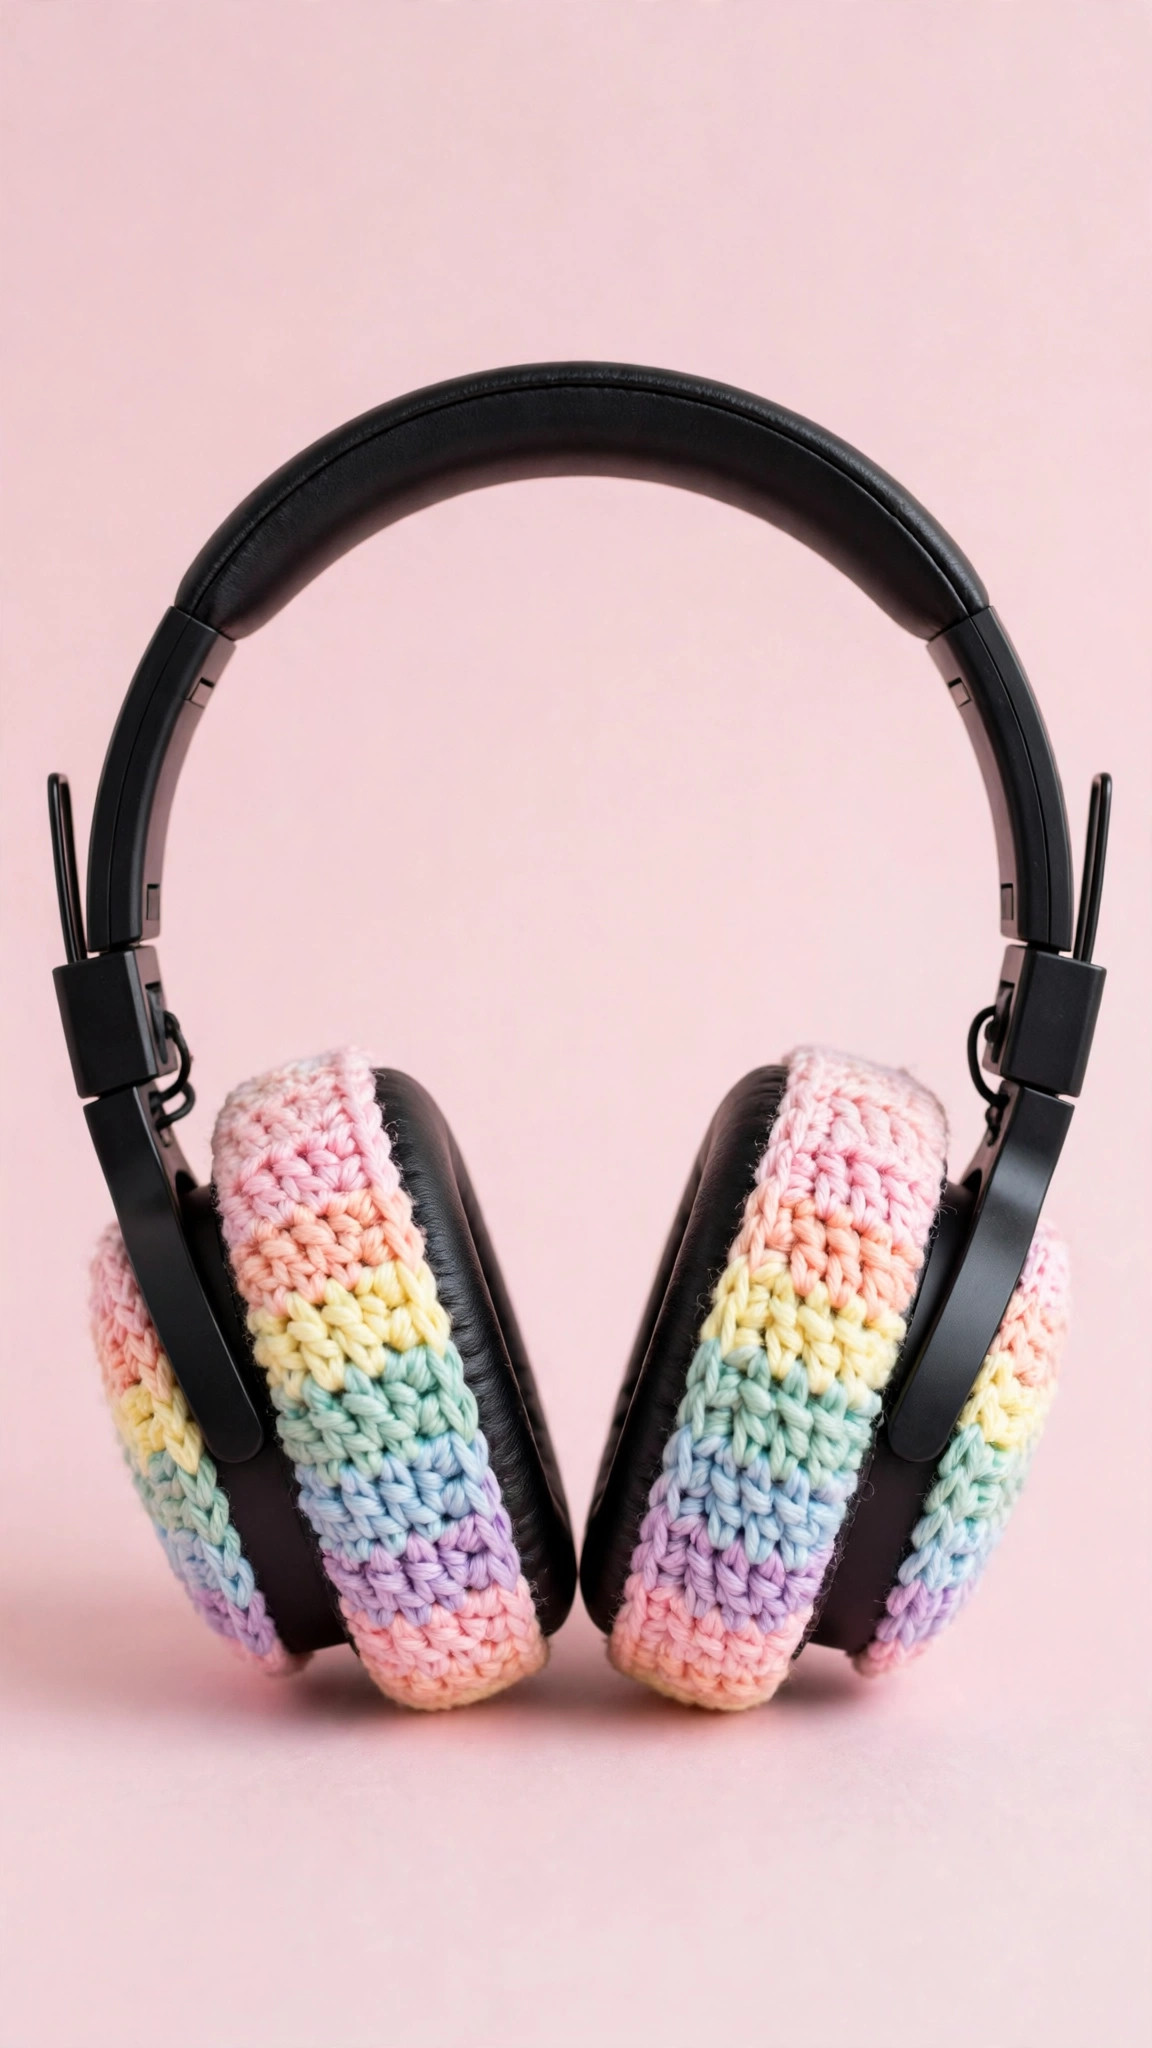
Make a second cover the same way, and you have a matching pair. For a striped look like the rainbow version in the photos, change colors every 1 to 2 rounds of the circle. Carry the unused color up the inside if the stripes are close together to avoid a forest of ends.
Part 3: Cat Ear Covers
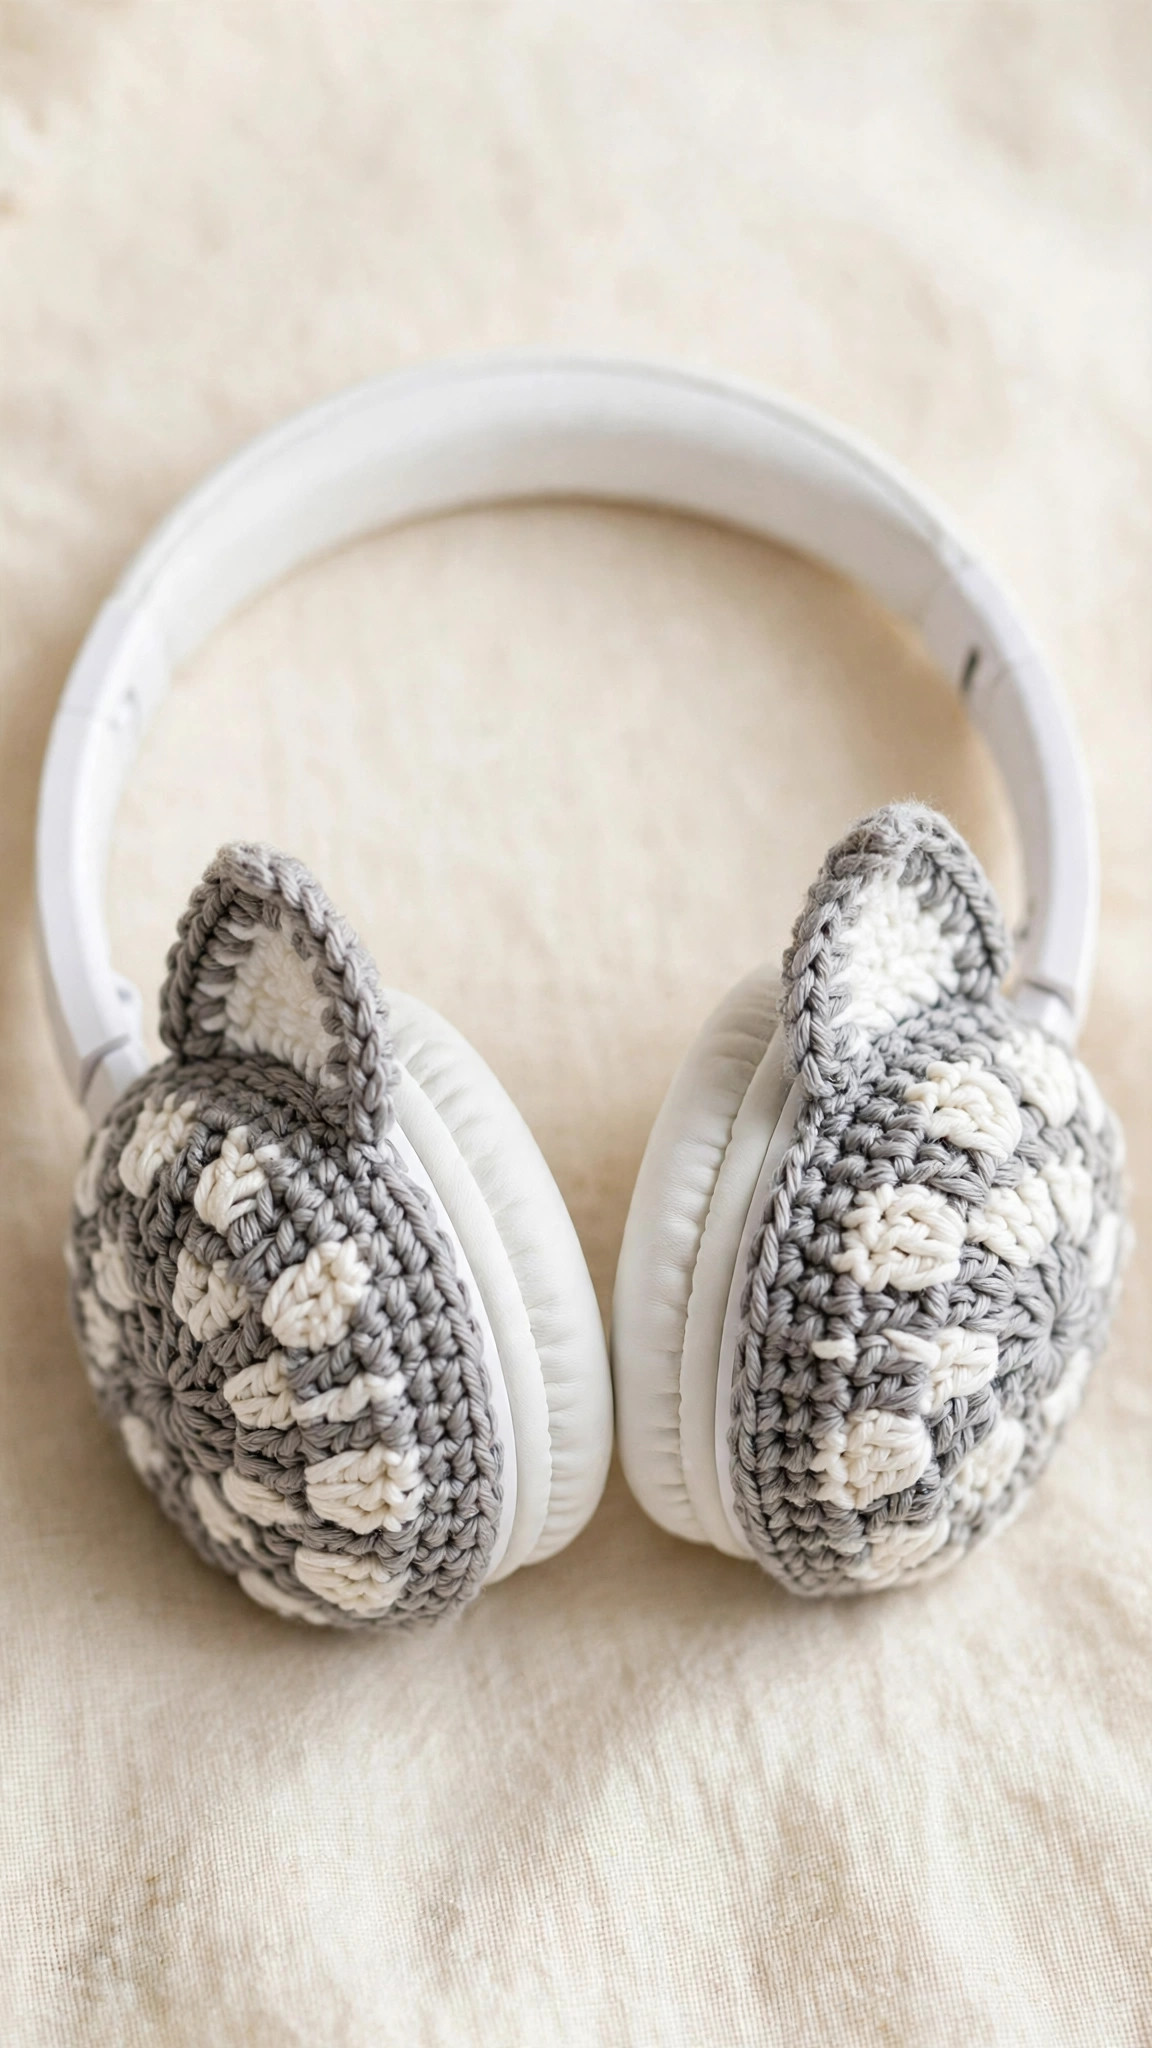
Cat ears are the whole reason half the internet wants these covers, and they are almost embarrassingly easy. Make the basic cover in any color, then add two little triangle ears.
One ear:
- Ch 2. Work 2 sc in the second ch from the hook, ch 1, turn. (2 sts)
- Row 2: Inc in each st, ch 1, turn. (4 sts)
- Row 3: Sc across, ch 1, turn. (4 sts)
- Row 4: Inc in the first st, sc in the next 2 sts, inc in the last st, ch 1, turn. (6 sts)
- Row 5: Sc across, ch 1, turn. (6 sts)
- Row 6: Sc2tog, sc in the next 2 sts, sc2tog. Fasten off, leaving a long tail for sewing. (4 sts)
Make two ears. For an inner-ear accent, crochet a smaller triangle in pink or white (stop after Row 3 of the same pattern) and sew it centered on the larger ear. Then sew the ears to the top outer edge of each cover, angled slightly outward for maximum cuteness.
Positioning matters: put the ears toward the top of the cover as worn, about 1.5 inches apart. Try the headphones on and check in a mirror before you sew anything down. If cat ears are your whole aesthetic, our free crochet cat hat patterns will keep the theme going.
Part 4: Daisy and Granny Variations
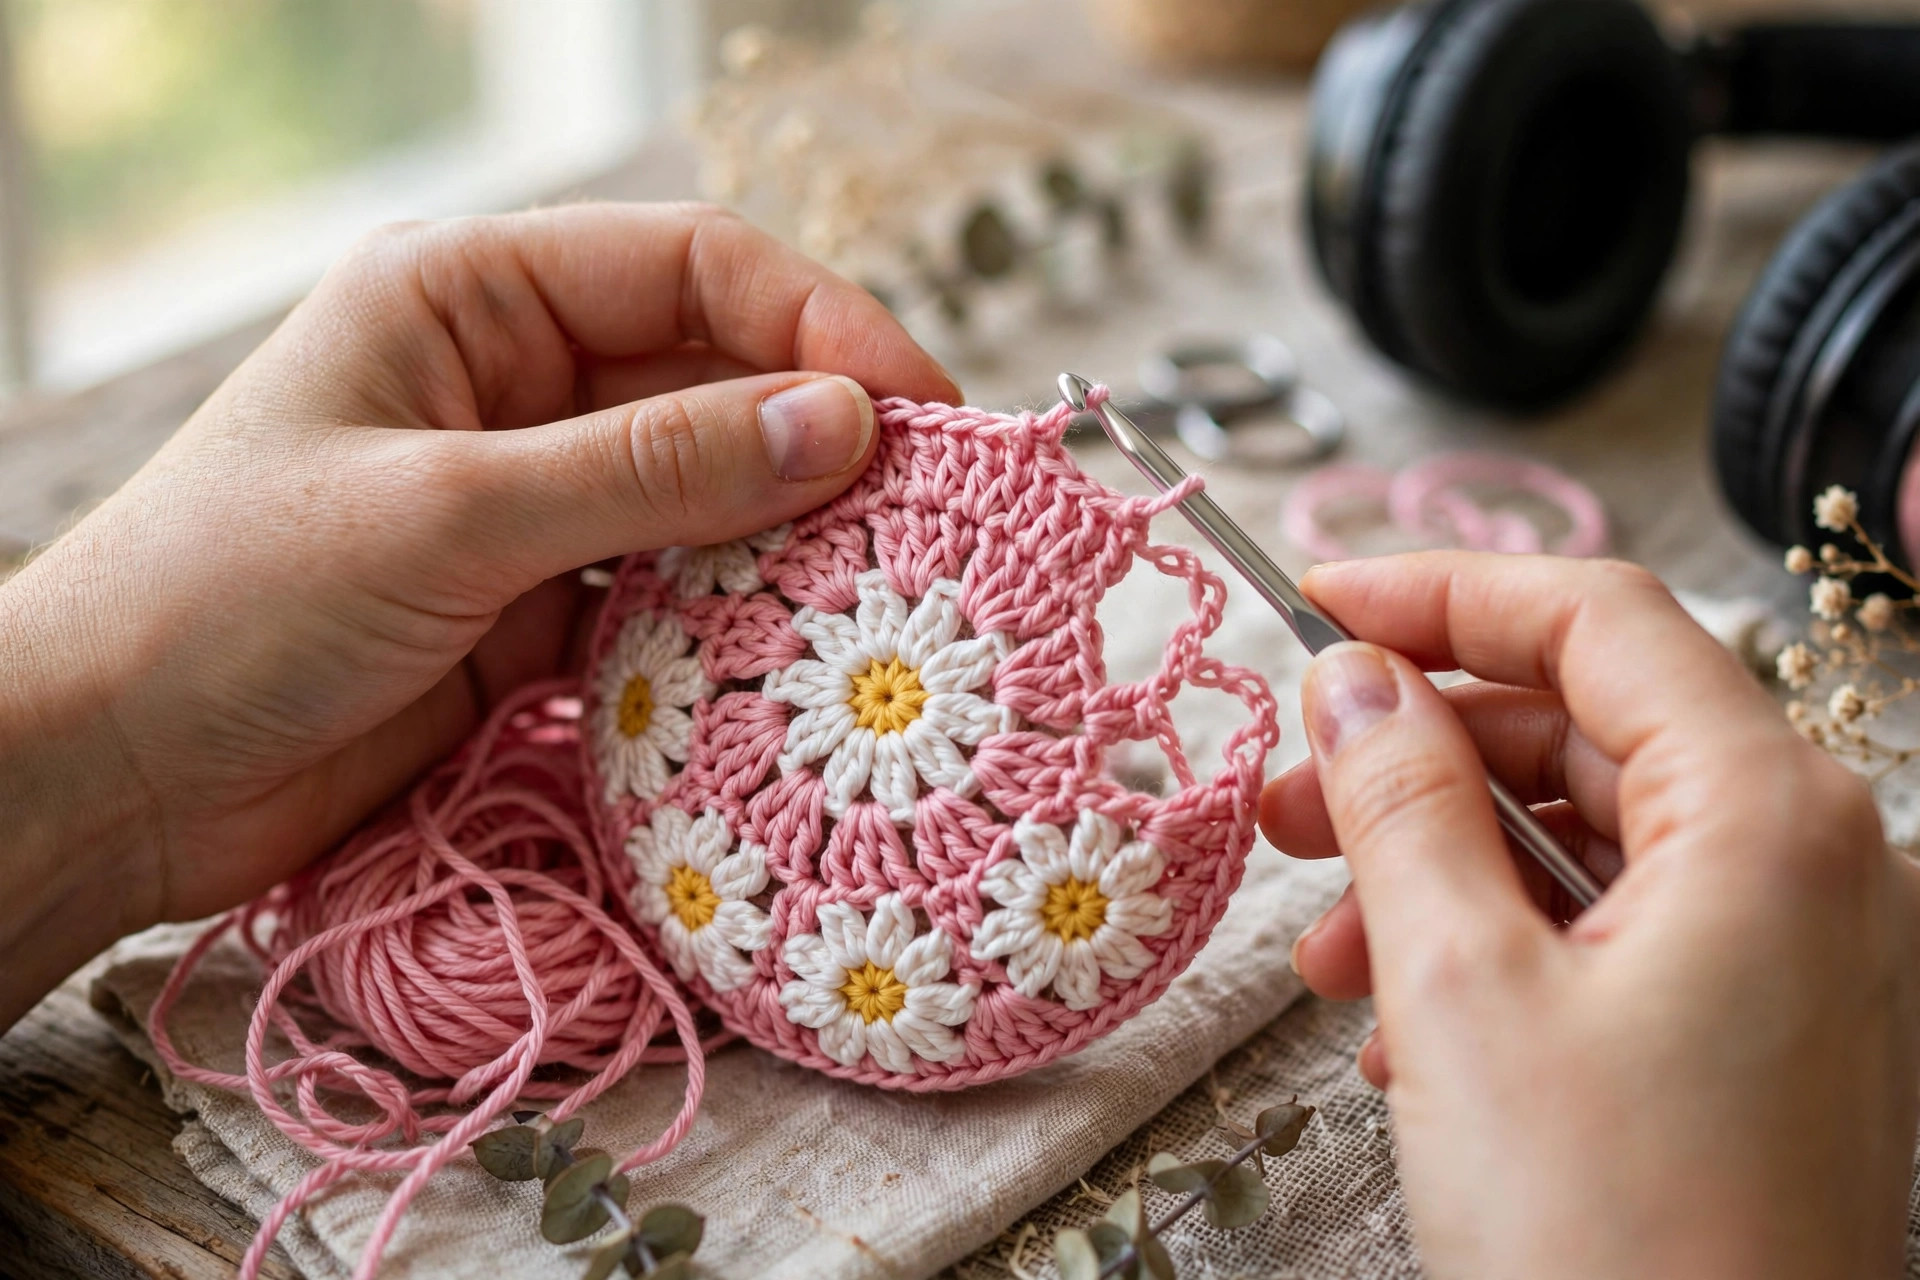
Daisy covers: Work the basic circle in your petal color for Rounds 1 to 4, then switch to green or background color for the remaining rounds. After finishing, embroider or surface-crochet simple white daisies onto the front: five chain-3 loops around a French knot center makes a perfect little flower. Scatter three to five daisies per cover.
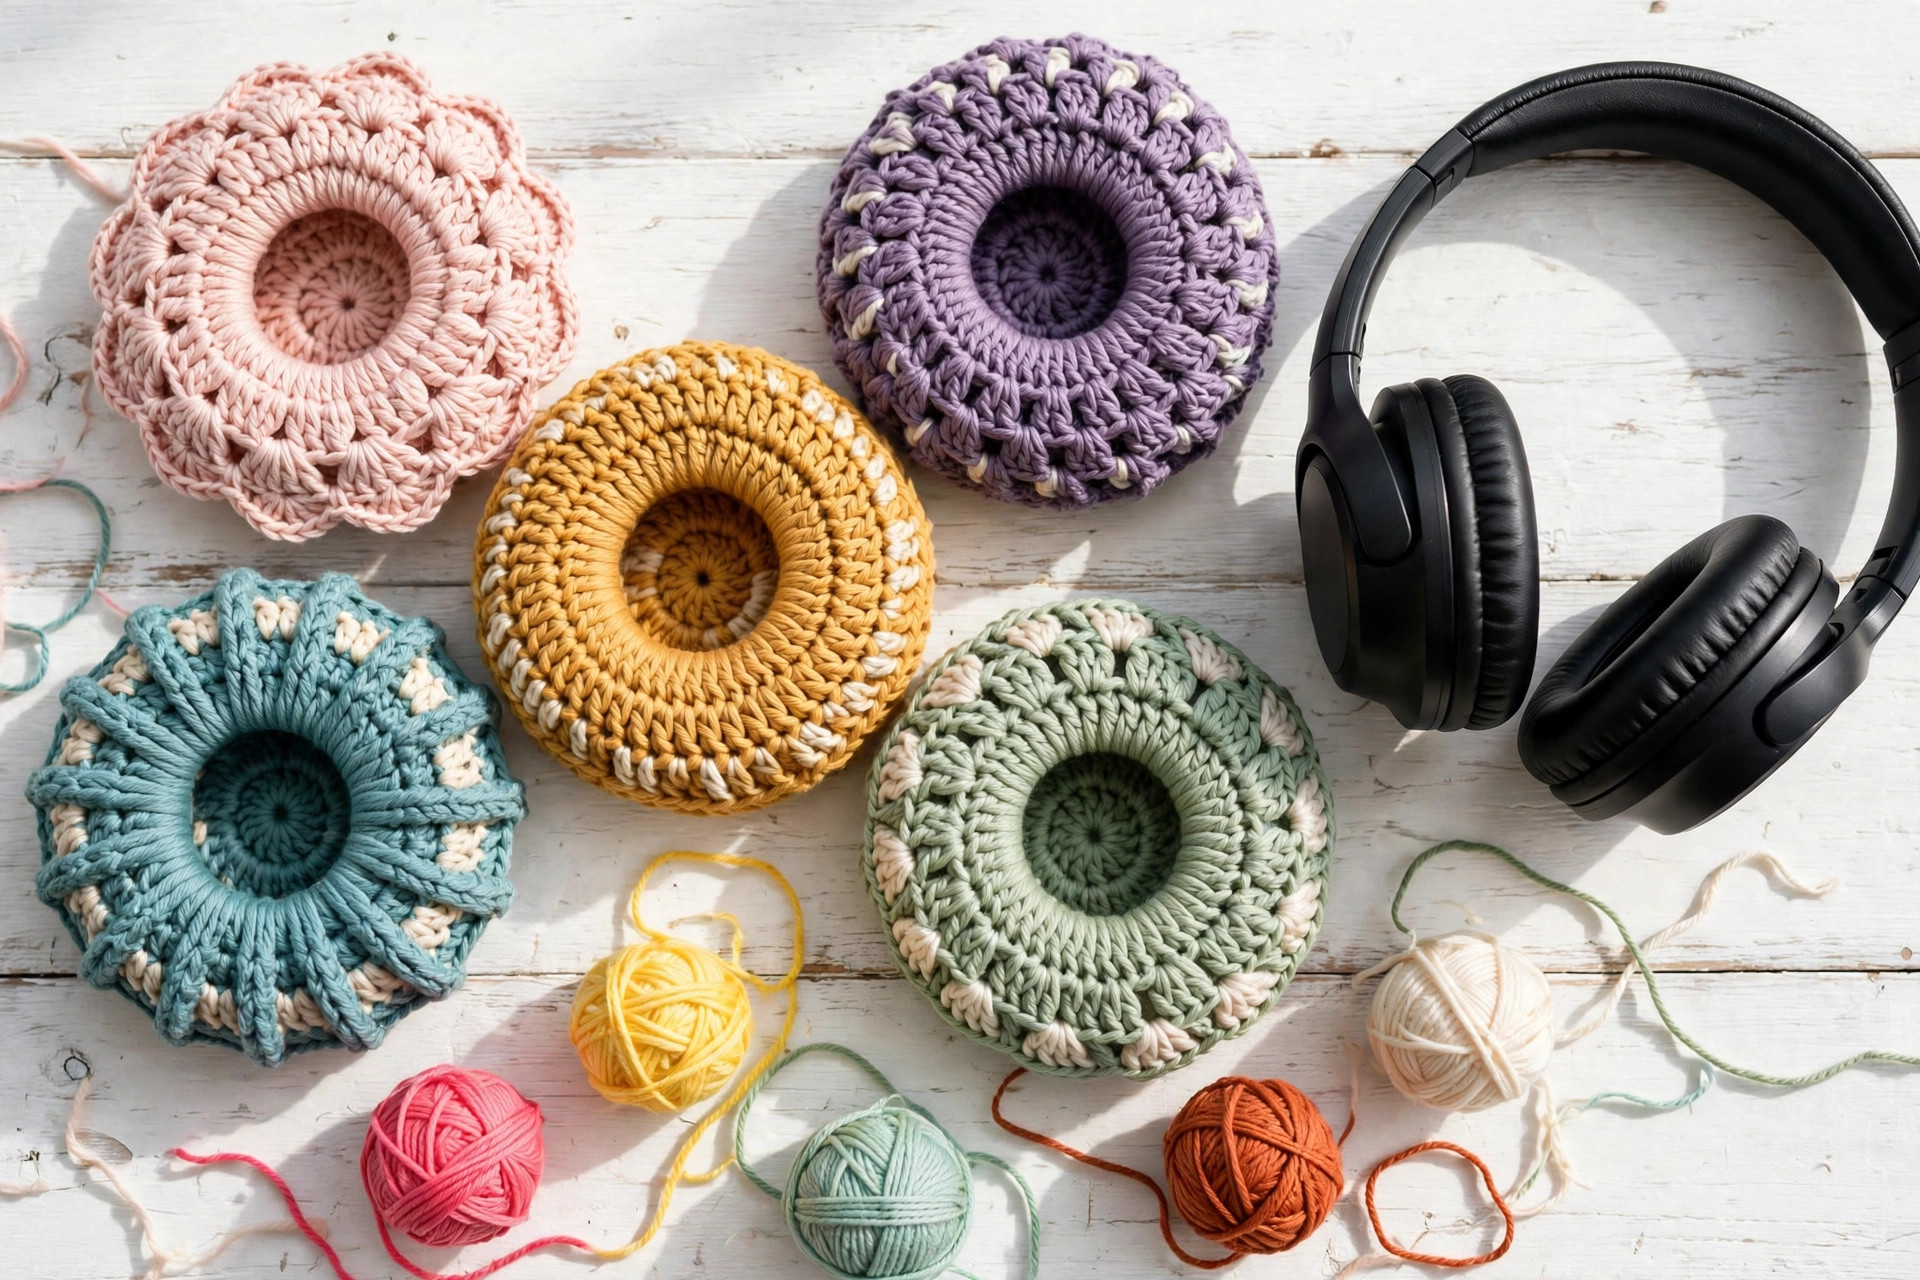
Granny square covers: For square-ish earcups, or just for the look, make a granny square instead of a circle. Work a classic granny square to the width of your earcup, then add the same side wall (sc in BLO around all four sides, 2 to 3 rounds) and the drawstring round. The multicolor granny version in the photos uses one round per color and joins with the wall in a neutral shade.
Striped covers: Change color every round for a bold rainbow, or every two rounds for softer bands. The trick to clean stripes in the round is joining each round with a sl st and starting the new color with a standing stitch, which avoids the little jog that continuous rounds make.
Embroidered covers: Keep the base cover solid and add personality with surface embroidery: a lightning bolt, your initials, tiny stars, or a simple smiley face in contrasting yarn. This is the fastest way to personalize a gift.
Fitting Covers to Different Headphone Styles
- Round over-ear (most gaming headsets): use the pattern as written.
- Oval over-ear (studio monitors): work the circle, then add shaping rounds: mark two opposite points on the circle and work 2 extra rounds of even sc, increasing only at the marked points, to stretch the circle into an oval.
- On-ear (smaller pads): stop the circle 2 rounds earlier than the pattern calls for and work a shorter wall (1 to 2 rounds).
- Extra deep pads: add 1 to 2 more wall rounds so the cover reaches past the thick pad edge.
- Earbuds and in-ear: this pattern is designed for over-ear models only. For earbuds, a tiny drawstring crochet dice pouch style bag keeps them safe in your pocket instead.
If your headphones have buttons or touch controls on the outside of the earcup, leave the cover off that spot or work the front of the cover in a very open mesh (ch-2, skip 1, sc) so controls still respond through the fabric. Test the controls with the cover on before you commit.
Troubleshooting Fit Problems
- Cover pops off: the drawstring is not snug enough, or the circle is too big. Tighten the cord firmly, or frog back one increase round and rework the wall.
- Cover will not stretch over the pad: your fabric is too tight. Go up half a hook size and rework the circle; cotton needs room to stretch.
- Wavy, ruffled edge: too many increase rounds for your earcup size. Remove the last increase round and check the fit again.
- Drawstring cord pulls out: weave the cord through twice, or work the dc channel round in a tighter tension. A cord with a knotted end on each side cannot escape.
- Cover muffles the sound: the fabric is too thick or doubled over the speaker. Use a lighter yarn weight for the front circle, or work the first 3 rounds in a lacier stitch pattern.
- Ears flop over: the ear triangles are too tall. Work one fewer row, or stiffen them with a light starching before sewing them on.
Care Instructions
Hand wash the covers in cool water with mild soap whenever they look grimy, which for daily use is about every two to three weeks. Squeeze gently, never wring, and reshape the circle while damp. Air dry flat, and do not put them in the dryer; heat shrinks cotton and can warp the fit. Remove the covers before storing headphones in a tight case so the ears and decorations do not get crushed. Make two pairs and rotate them so you always have a clean set ready, just like pillowcases.
Frequently Asked Questions
Will these covers fit my headphones?
The pattern fits most over-ear headphones with earcups between 3.5 and 4.5 inches in diameter, which covers the majority of popular models. The fitting section explains how to size up, size down, and adapt for oval cups. Measure your earcups first and you will know exactly which round to stop at.
Do crochet covers affect sound quality?
A single layer of worsted weight cotton over the ear pad has almost no effect on sound. If you notice muffling, the cover is probably too thick or bunched over the driver; rework the front in a lighter yarn or a lacier stitch. Never cover built-in microphones or control buttons with dense fabric.
What is the best yarn for headphone covers?
Cotton or a cotton blend is best because it breathes against your skin, washes well, and holds its shape. Acrylic works but pills faster and feels warmer. Avoid fuzzy, eyelash, or very textured yarns; they shed and trap heat.
How do I wash crocheted headphone covers?
Untie the drawstring, slip the covers off, and hand wash in cool water with mild soap. Reshape while damp and air dry flat. Do not machine dry them. They wash just like socks and come out fresh every time.
Can I make these for earbuds instead?
This pattern is sized for over-ear headphones. Earbuds need a different approach entirely, and a small drawstring pouch is the better project for keeping them safe. That said, the circle technique here is great practice for any round project.
Can I sell finished covers made from this pattern?
Yes, you are welcome to sell finished headphone covers you make from this free pattern at craft fairs or online. Please do not redistribute the pattern text or photos, and a credit link back to this page is appreciated.
How can I stop the covers from sliding around?
A snug drawstring is the main fix: pull the cord firmly and tie it in a bow behind the pad. If they still shift, the circle is slightly too large, so frog back one increase round. A thin strip of silicone grip dots on the inside of the wall also helps on very smooth pads.
Your headphones are about to become the cutest thing in the room. And if you are on a roll with small practical makes, our sleep mask pattern is the perfect travel companion project, the chapstick holder pattern clips right onto your bag, and the bag charm patterns add the same handmade personality to everything you carry.