Crochet panda bear pattern: free amigurumi panda
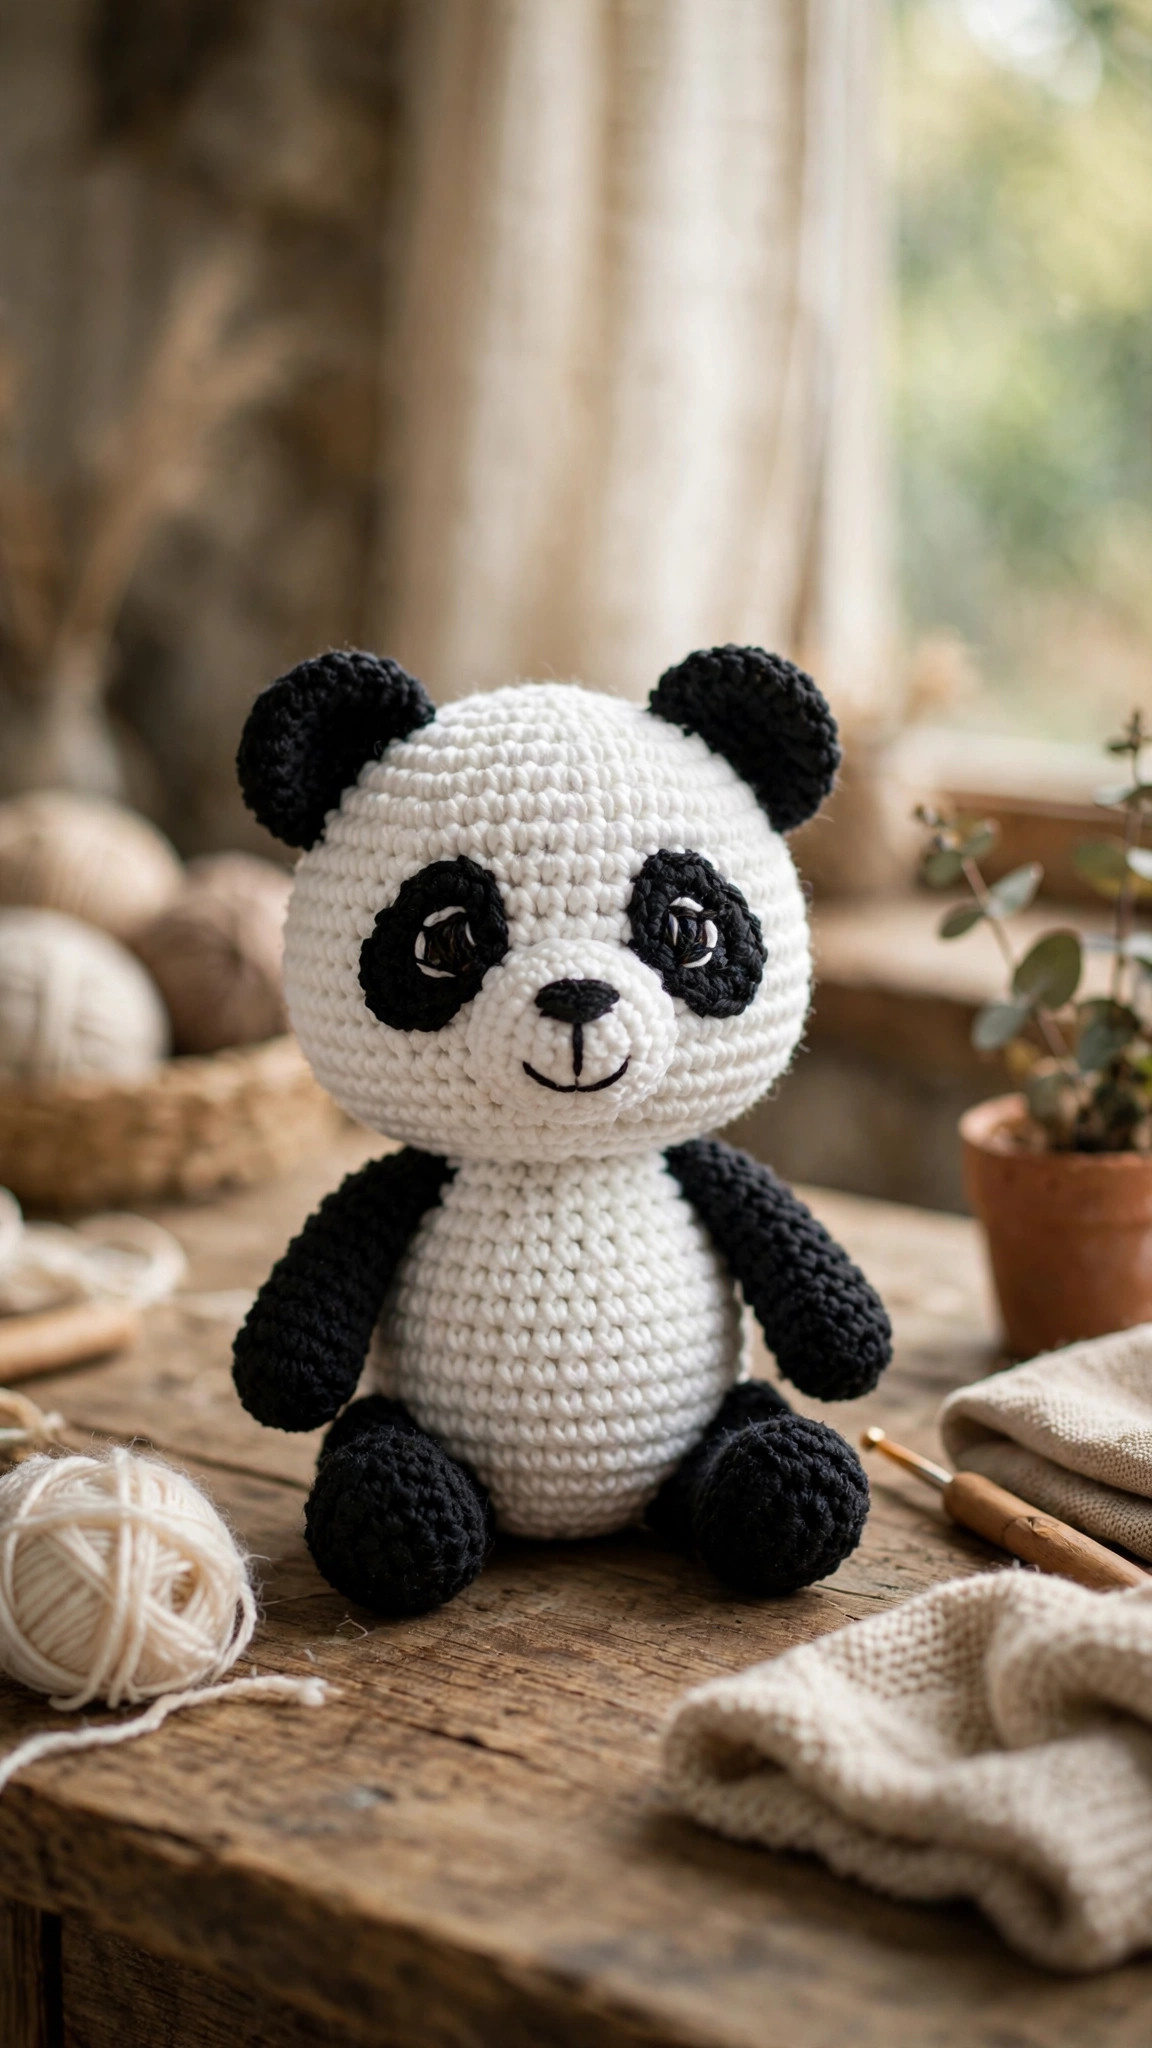
A squishy little panda with a round white head and body, neat black ears, oval eye patches and an embroidered nose and smile — worked in seamless single-crochet spirals with no colorwork from 11 small pieces you sew together over one cozy weekend.

Amigurumi · Crochet
- Finished size
- About 13 cm / 5 in tall
- Making time
- About 3–4 hours
- Hook
- 3.5 mm, worsted-weight yarn
- Pieces
- 11 pieces to assemble
- Skill
- Beginner
In this post
There is a reason the crochet panda is one of the most-searched amigurumi projects on the internet: black and white does all the colorwork for you. This original crochet panda bear pattern gives you a squishy little panda with a round white head and body, neat black ears, oval eye patches, chunky black arms and feet, and an embroidered nose and smile — all in seamless single-crochet spirals, no color changes mid-round. If you can crochet a sphere, you can make this panda.
Why you'll love this crochet panda bear pattern
Pandas are the perfect beginner amigurumi because the design does the heavy lifting. There are no tricky color joins or intarsia rounds — the head and body are worked in plain white, and all the black details (ears, patches, arms, legs) are separate small pieces sewn on at the end. That means you crochet in blissful single-color spirals, and the panda's face appears almost magically at the assembly stage. Readers tell us this is the project that finally made sewing pieces together feel fun instead of scary.
The shaping is all classic amigurumi math — smooth, predictable spheres with standard increase and decrease rounds — so there are no surprise lumps and no stitches you haven't met before. And because the eyes are embroidered onto the patches instead of using plastic safety eyes, the finished toy is fully soft and safe for toddlers to cuddle, which makes it an excellent handmade baby gift.
Materials you'll need
| Supply | What to get |
|---|---|
| Main yarn | Worsted-weight (#4) acrylic or cotton in white, about 80 g |
| Contrast yarn | Worsted-weight (#4) in black, about 50 g |
| Embroidery yarn | A few meters of dark brown or black yarn (or embroidery floss) for the nose, mouth and eyes |
| Crochet hook | 3.5 mm (E-4) |
| Stuffing | Polyester fiberfill, a good handful |
| Notions | Tapestry needle, stitch markers, scissors, pins |
A quick note on yarn choice: smooth worsted acrylic is the ideal pick — it gives crisp stitch definition, the white stays bright, and the black won't bleed onto the white pieces when you sew them together. If you only have a 4.0 mm hook, that's fine; your panda will come out a touch bigger and softer. Just make sure your stitches are tight enough that no fiberfill peeks through — white yarn shows every wisp of stuffing.
Size, gauge and skill level
- Finished size: about 13 cm (5 in) tall sitting, 9 cm (3.5 in) wide.
- Gauge: not critical for amigurumi — what matters is dense fabric. Crochet a few rounds of the head and squeeze it: if you can see stuffing between stitches, drop to a 3.25 mm hook. As a rough guide, 4 single crochets should measure about 2.5 cm (1 in).
- Skill level: true beginner. You need the magic ring, single crochet, increase, decrease, and simple embroidery stitches (satin stitch and backstitch, both explained below). Every round is spelled out with the stitch count in parentheses.
If this is your very first amigurumi, the easy beginner crochet patterns collection is a great place to warm up — many readers make something small from that roundup first, then come back to the panda with total confidence.
Abbreviations — US terms
| Abbreviation | Meaning |
|---|---|
| MR | magic ring |
| sc | single crochet |
| inc | increase (2 sc in the same stitch) |
| dec | decrease (sc 2 together — invisible decrease recommended) |
| st(s) | stitch(es) |
| ch | chain |
| R | round |
| FO | fasten off |
A note on decreases: the invisible decrease (insert your hook under the front loop only of the next two stitches, yarn over, pull through both front loops, yarn over, pull through the two loops on your hook) leaves no little bump in the fabric. Use it everywhere the pattern says "dec" and the panda's white head will look perfectly smooth.
The pattern (US terms)
Work in continuous spirals unless a section says otherwise. Mark the first stitch of each round with a stitch marker and move it up as you go. The stitch count at the end of every round is in parentheses — count, especially on the head and body. Ten seconds of counting now saves ten minutes of frogging later.
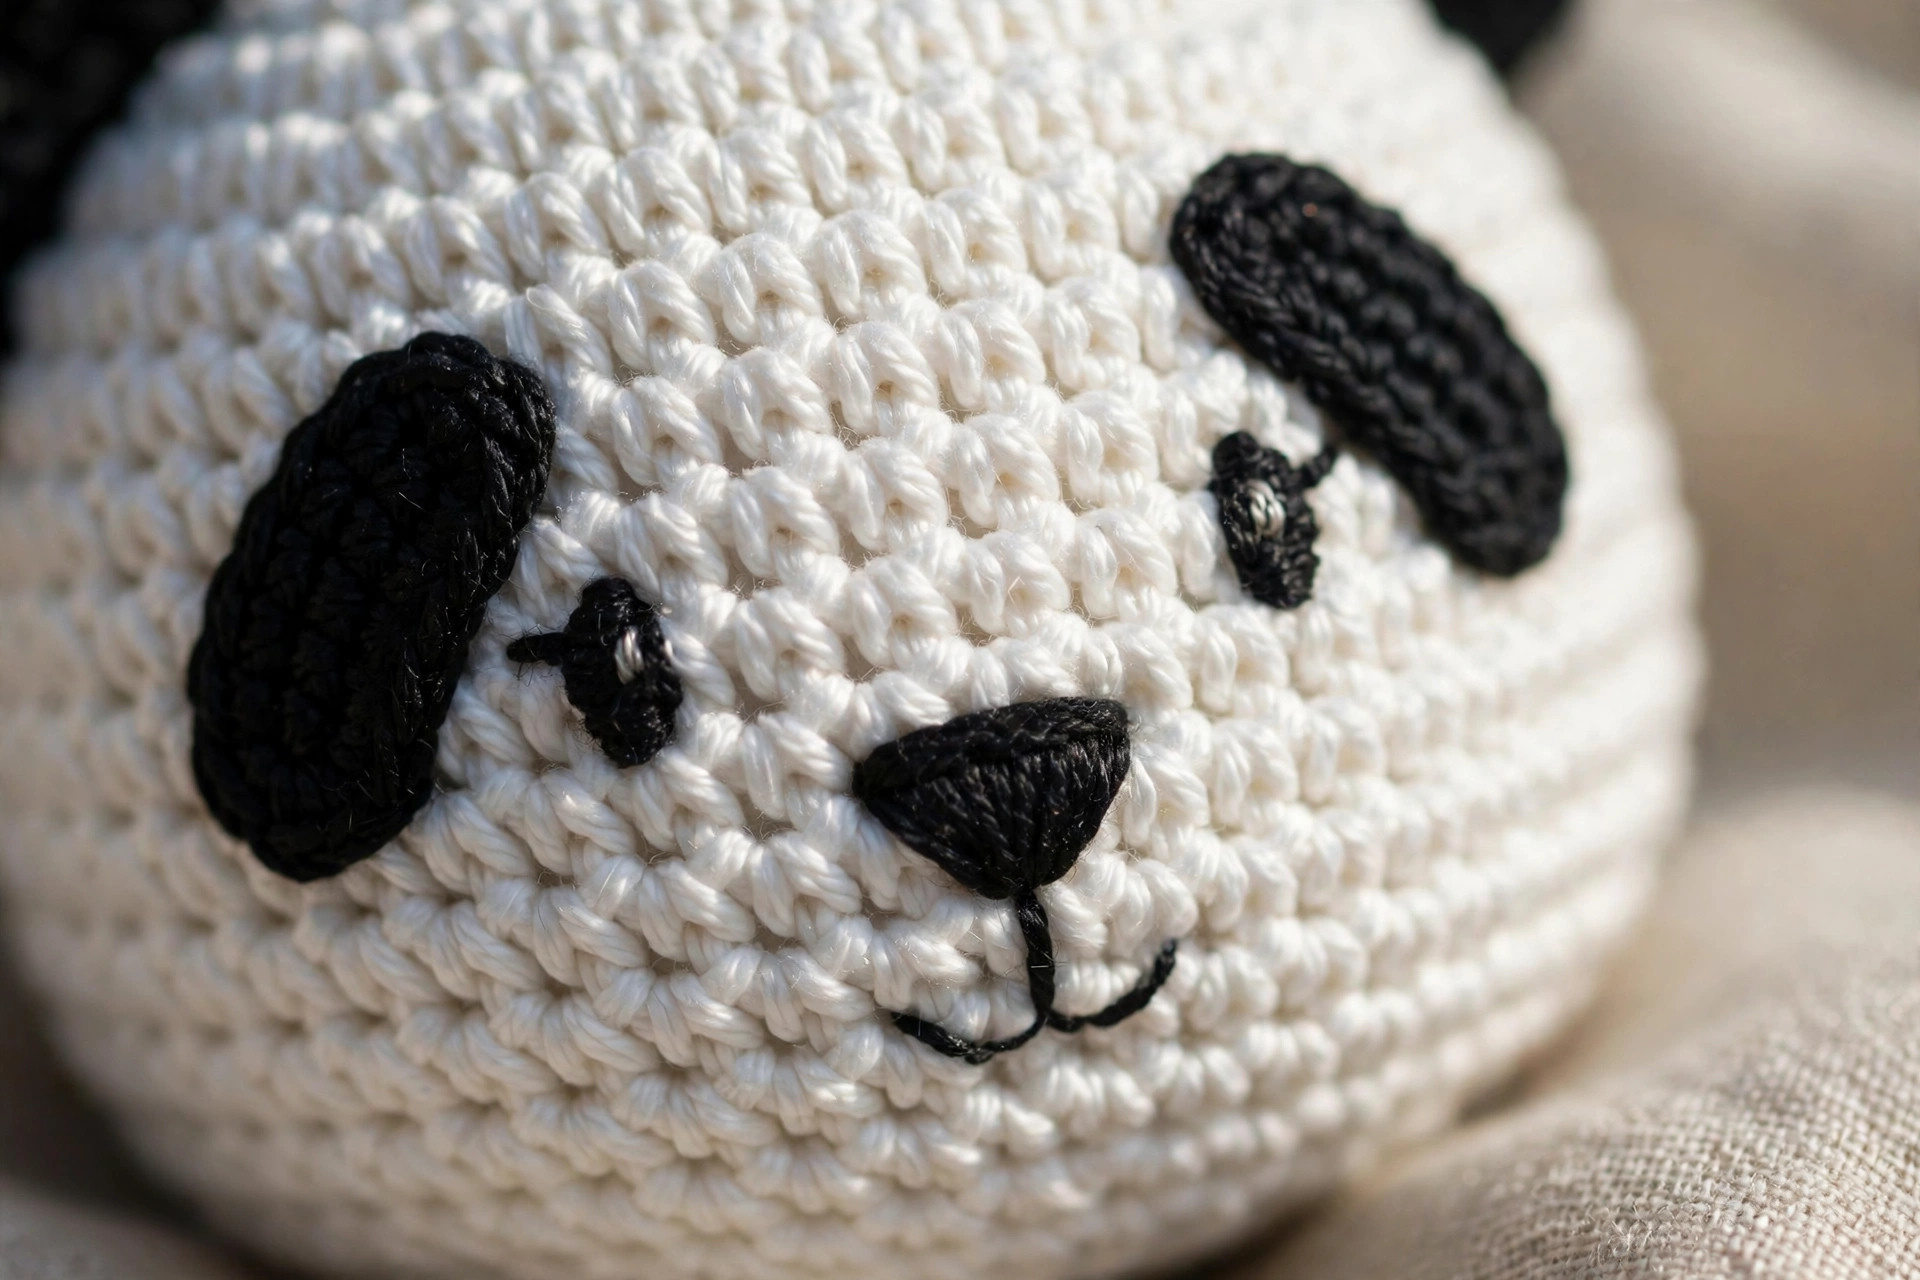
Head — white
- R1: MR, 6 sc (6)
- R2: inc in each st (12)
- R3: [sc, inc] × 6 (18)
- R4: [2 sc, inc] × 6 (24)
- R5: [3 sc, inc] × 6 (30)
- R6: [4 sc, inc] × 6 (36)
- R7: [5 sc, inc] × 6 (42)
- R8–R13: sc in each st around (42) — 6 rounds even
- R14: [5 sc, dec] × 6 (36)
- R15: [4 sc, dec] × 6 (30)
- Start stuffing the head now, while the opening is wide — pack it firmly.
- R16: [3 sc, dec] × 6 (24)
- R17: [2 sc, dec] × 6 (18)
- R18: [sc, dec] × 6 (12)
- R19: dec × 6 (6). FO, thread the tail through the front loops of the remaining stitches, pull tight, and weave in.
Tip: aim for tennis-ball firmness. Over-stuffed heads stretch the white stitches and show fiberfill; under-stuffed heads give you a lumpy face that won't hold the patches smoothly.
Body — white
- R1: MR, 6 sc (6)
- R2: inc in each st (12)
- R3: [sc, inc] × 6 (18)
- R4: [2 sc, inc] × 6 (24)
- R5: [3 sc, inc] × 6 (30)
- R6: [4 sc, inc] × 6 (36)
- R7–R11: sc in each st around (36) — 5 rounds even
- R12: [4 sc, dec] × 6 (30)
- R13: [3 sc, dec] × 6 (24)
- R14: [2 sc, dec] × 6 (18)
- Stuff firmly — the body is the sitting base, so pack it generously.
- R15: [sc, dec] × 6 (12)
- R16: dec × 6 (6). FO, close and weave in as for the head.
Ears — black, make 2
- R1: MR, 6 sc (6)
- R2: inc in each st (12)
- R3: [sc, inc] × 6 (18)
- R4–R5: sc in each st around (18) — 2 rounds even
- R6: [sc, dec] × 6 (12)
- R7: sc in each st around (12)
- FO, leaving a long tail (about 30 cm / 12 in) for sewing. Do not stuff — flatten each ear into a little disc; the slight curl at the base will cup the head nicely when sewn.
Eye patches — black, make 2
These are worked as flat ovals. They tilt on the face like a real panda's markings, so make both identically — the tilt comes from placement, not from the piece.
- Ch 6.
- R1: sc in the 2nd ch from the hook, sc in the next 3 ch (4 sc along one side), 3 sc in the last ch (corner), then working along the other side of the chain: sc in the next 3 ch, 2 sc in the last ch (12)
- R2: [sc, inc] × 6 (18)
- FO, leaving a long tail for sewing. Lay the patch flat and give it a gentle stretch into an oval — it should be roughly 4 cm (1.5 in) long.
Arms — black, make 2
- R1: MR, 6 sc (6)
- R2: [sc, inc] × 6 (12)
- R3–R5: sc in each st around (12) — 3 rounds even
- R6: [sc, dec] × 6 (8)
- R7–R8: sc in each st around (8) — 2 rounds even
- FO, leaving a long tail. Stuff the rounded top (R1–R3) lightly and leave the rest unstuffed so the arms lie flat against the body.
Legs — black, make 2
These double as the panda's feet and its sitting base, so shape and stuffing matter.
- R1: MR, 6 sc (6)
- R2: inc in each st (12)
- R3: [sc, inc] × 6 (18)
- R4–R6: sc in each st around (18) — 3 rounds even
- R7: [sc, dec] × 6 (12)
- R8: sc in each st around (12)
- FO, leaving a long tail. Stuff firmly and evenly — these are what the panda sits on, so soft legs mean a tipsy panda.
Tail — white
- R1: MR, 6 sc (6)
- R2: [sc, inc] × 6 (12)
- R3: sc in each st around (12)
- R4: [sc, dec] × 6 (8)
- FO, leaving a long tail. Stuff lightly with a pinch of fiberfill and flatten slightly — pandas have famously tiny tails, so keep it cute and small.
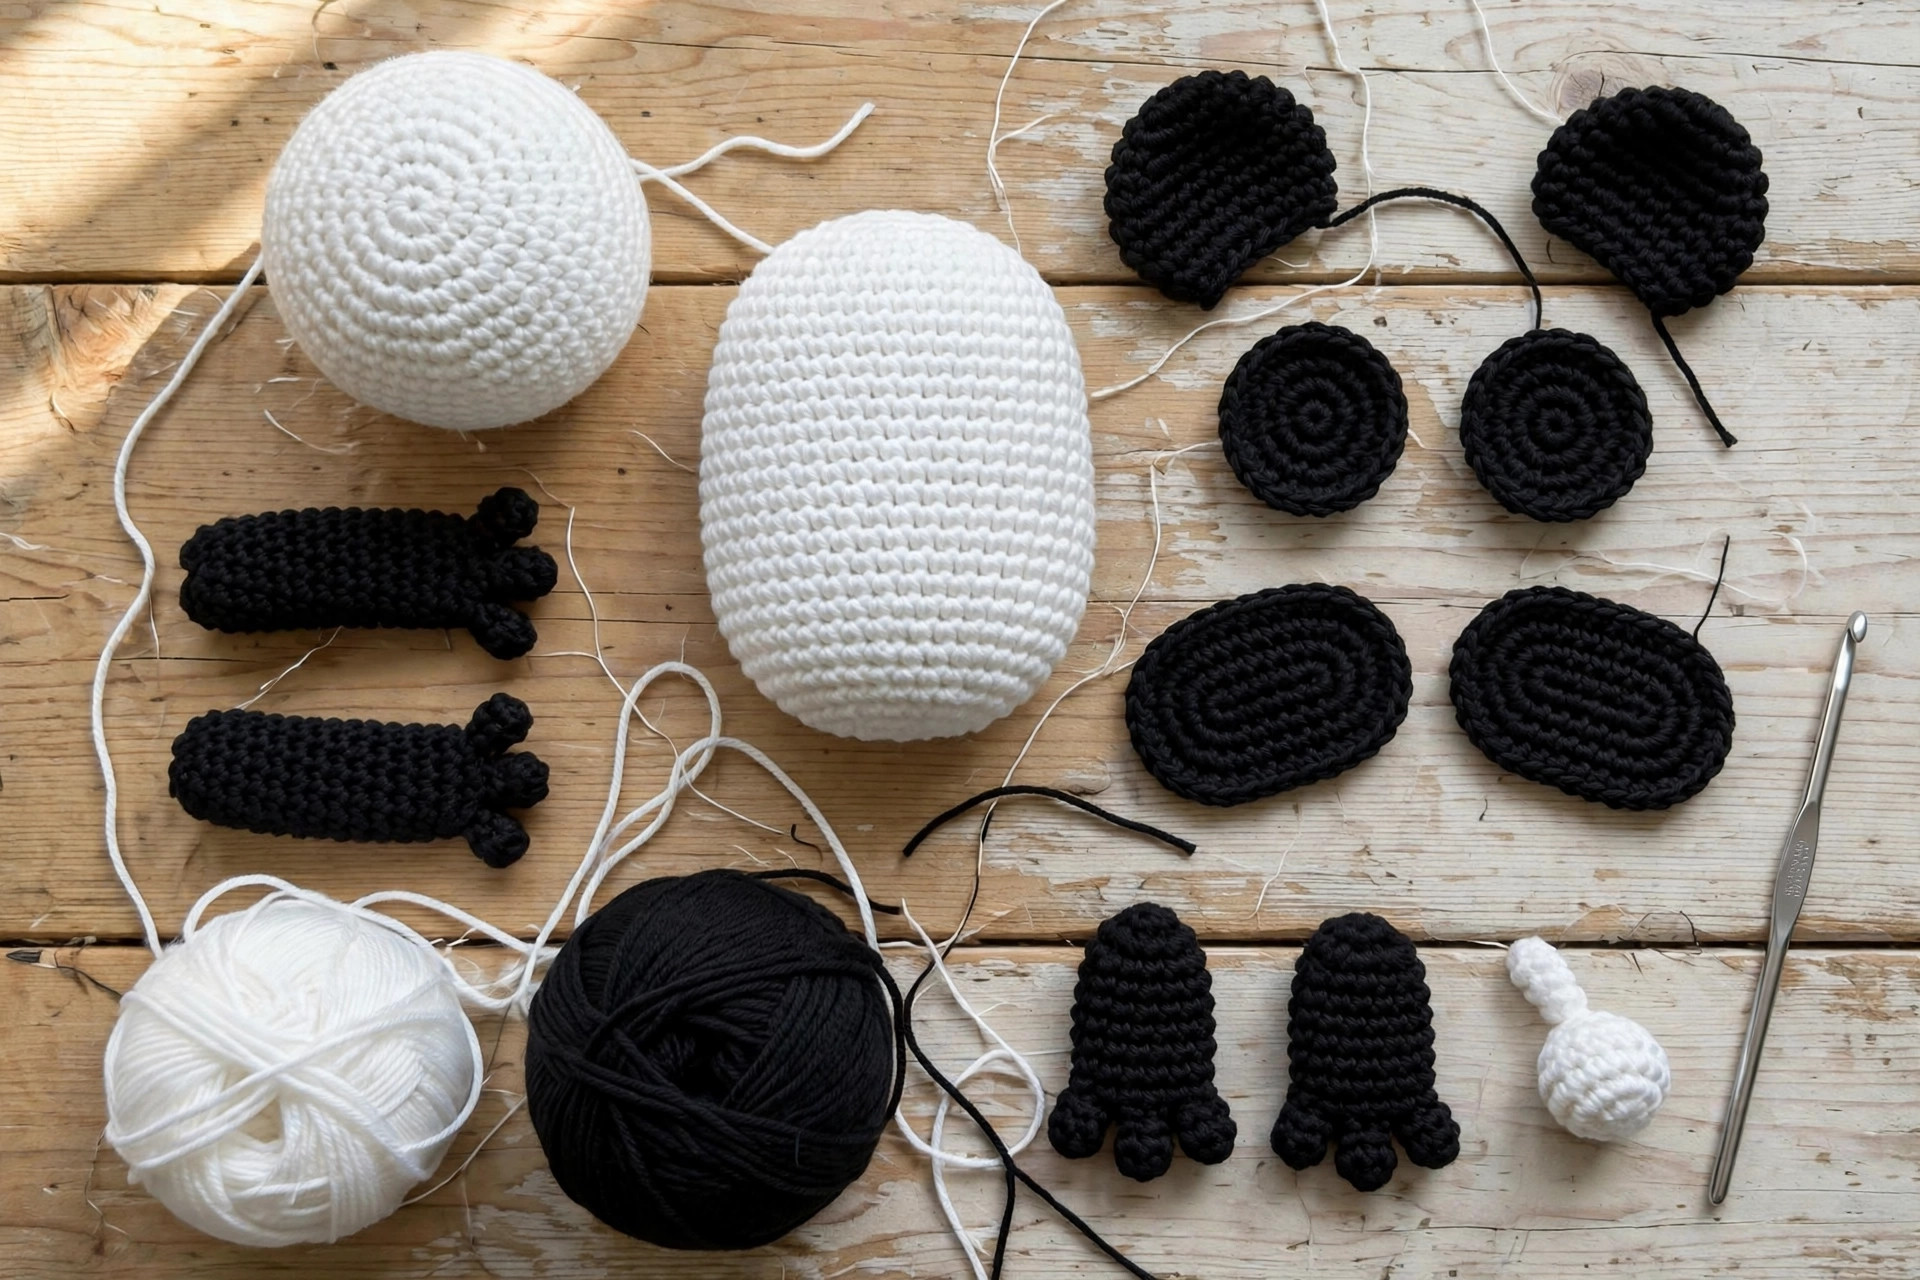
Assembly — the order that actually matters
- Eye patches first. Pin the two patches to the front of the head, tilted slightly inward (tops closer together than bottoms, like a real panda's markings), with their inner edges about 4 stitches apart and centered around rounds R9–R11 of the head. Sew around each patch with small whipstitches in black yarn, tucking the edge just under as you go so no white shows through the seam.
- Embroider the eyes. On each patch, embroider a small eye with your dark brown or black yarn: a satin-stitch oval about 4 stitches wide and 3 stitches tall, positioned on the outer-upper area of the patch. Satin stitch is just straight stitches laid side by side until the shape is filled — keep your tension even and don't pull so tight that the patch puckers. Add a single white French-knot or tiny straight stitch highlight if you like; it gives the panda a lively, awake look.
- Nose and mouth. With dark brown yarn, embroider an inverted triangle nose on the head between and just below the patches: outline a triangle about 4 stitches wide and 3 stitches tall, then fill it with satin stitch. From the bottom point of the nose, backstitch a short vertical line down 2 stitches, then two little curved lines sweeping outward — the classic panda smile. Step back and check the symmetry before you tie off.
- Ears. Pin the ears to the top sides of the head, roughly above the outer edge of each eye patch. The flattened base should cup the curve of the head. Sew around the base with the long black tail, going around twice — ears get grabbed by little hands, so make this join strong.
- Head to body. Center the head on top of the body (the body's R16 opening faces up into the head). Using a long strand of white yarn, sew around the join, then go around a second time. Before closing the last few stitches, pack extra stuffing into the neck so the head doesn't wobble.
- Arms. Sew the unstuffed end of each arm to the sides of the body around R8–R9, angled slightly forward so the paws peek out beside the belly. A few whipstitches are enough — the arms are light.
- Legs. Sew the legs to the front base of the body, toes pointing forward and slightly outward, about 4 stitches apart. These are the tripod the panda sits on — stuff them firmly and sew the join securely. Set the panda down: it should sit upright on its own. If it tips backward, nudge both legs a few millimeters forward and re-sew.
- Tail. Sew the little tail to the back of the body, centered low around R5–R6. A few whipstitches in white is all it takes.
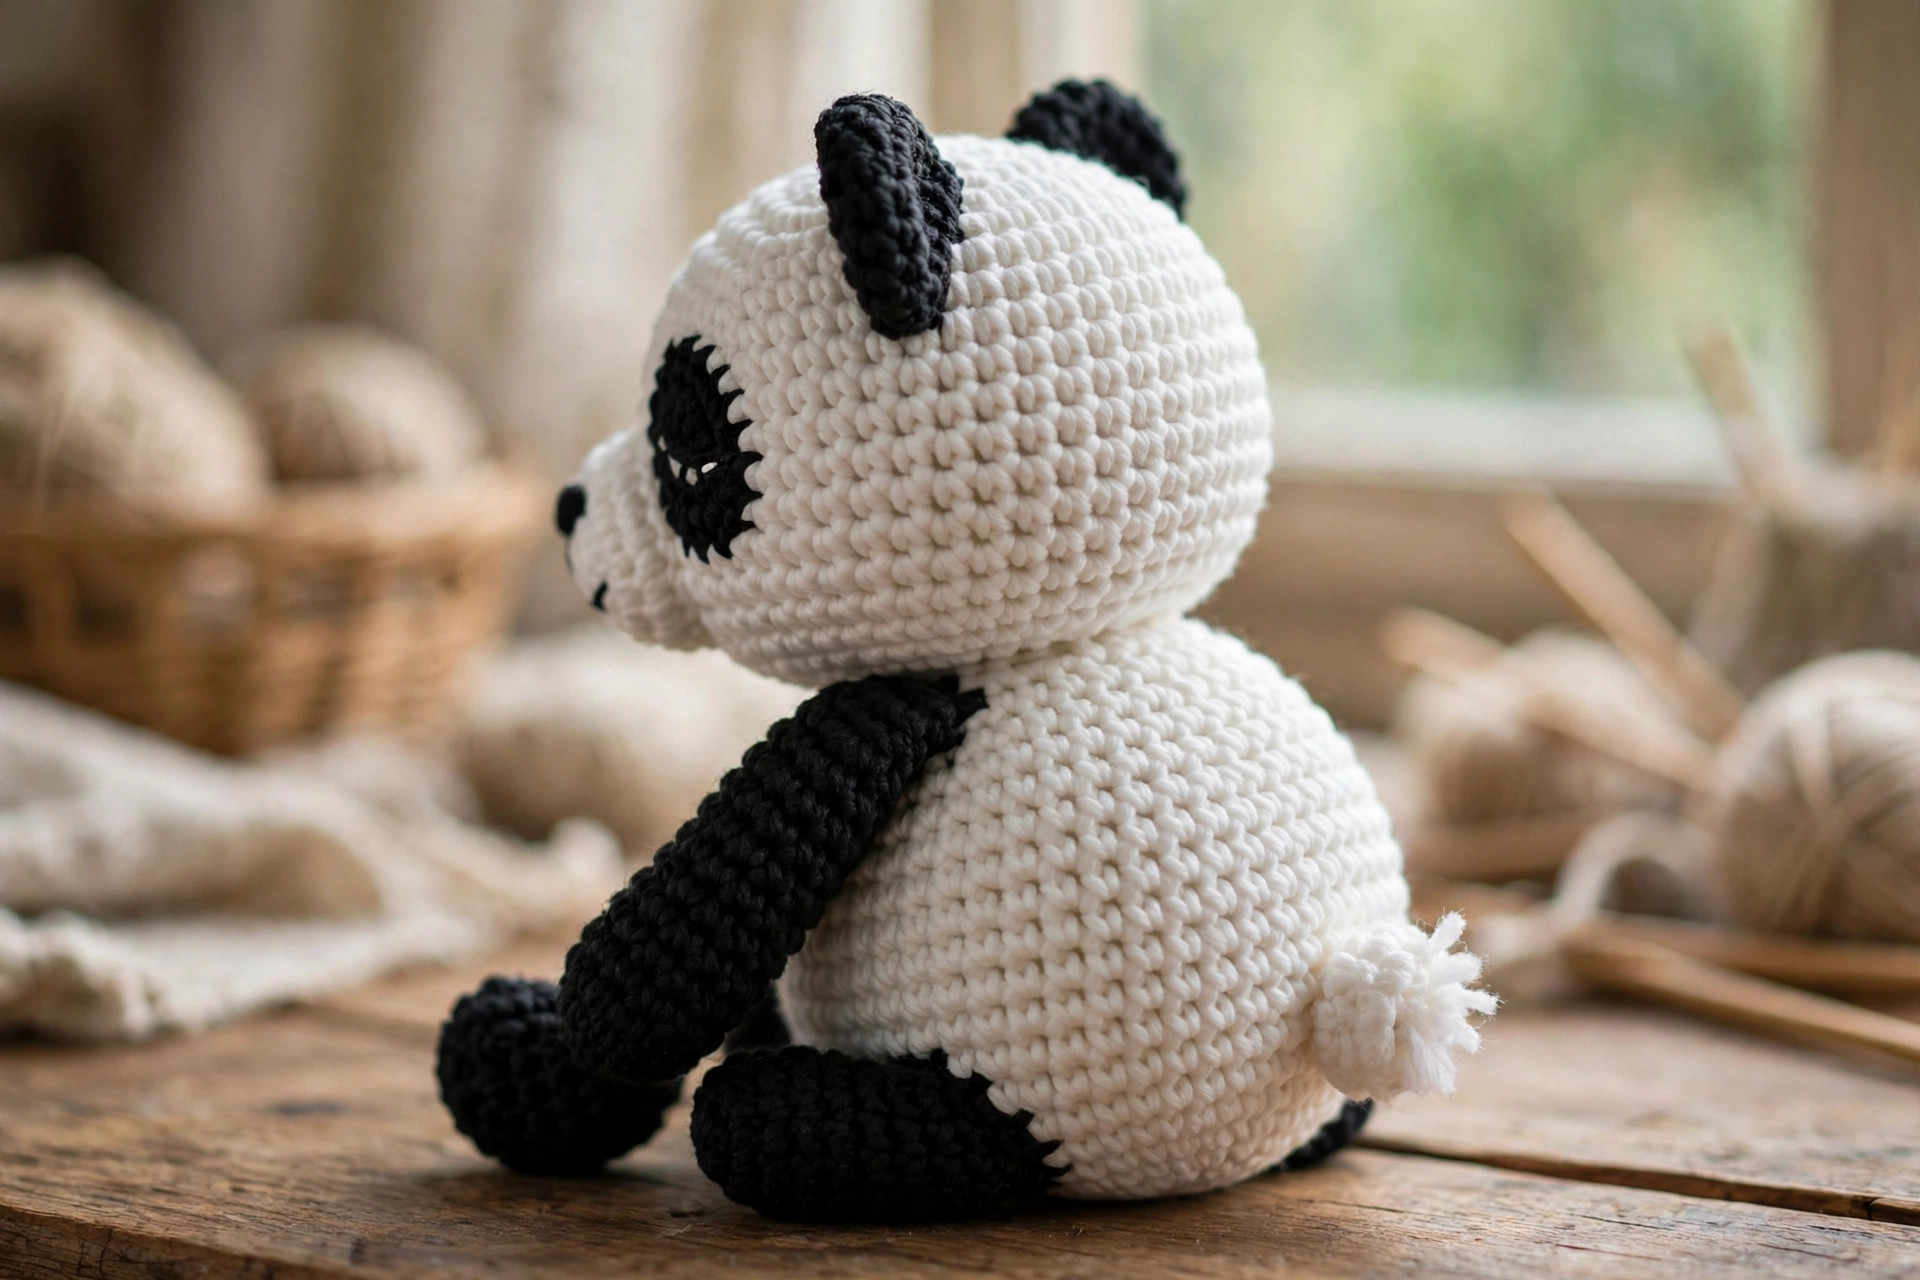
Finishing touches
This is where a good panda becomes a great panda. Take ten unhurried minutes here — it's the difference between "homemade" and "handmade."
Check the face symmetry. Hold the panda at arm's length and look straight at the face. Are the patches mirror images? Is the nose centered? Tiny asymmetries are charming, but a nose that's visibly off-center will bug you forever. Embroidery is easy to unpick at this stage — fix it now, not after gifting.
Tidy the seams. Run your tapestry needle under any whipstitches that look loose, especially around the ears and legs. Give every yarn tail a final weave-in through the stuffing (not just across the surface) and snip close — nothing ruins a photo like a stray tail poking out of a seam.
Groom the white yarn. White shows everything. Roll a lint roller over the finished panda to pick up stray fibers from the black pieces. It takes two minutes and makes the black-and-white contrast pop in photos.
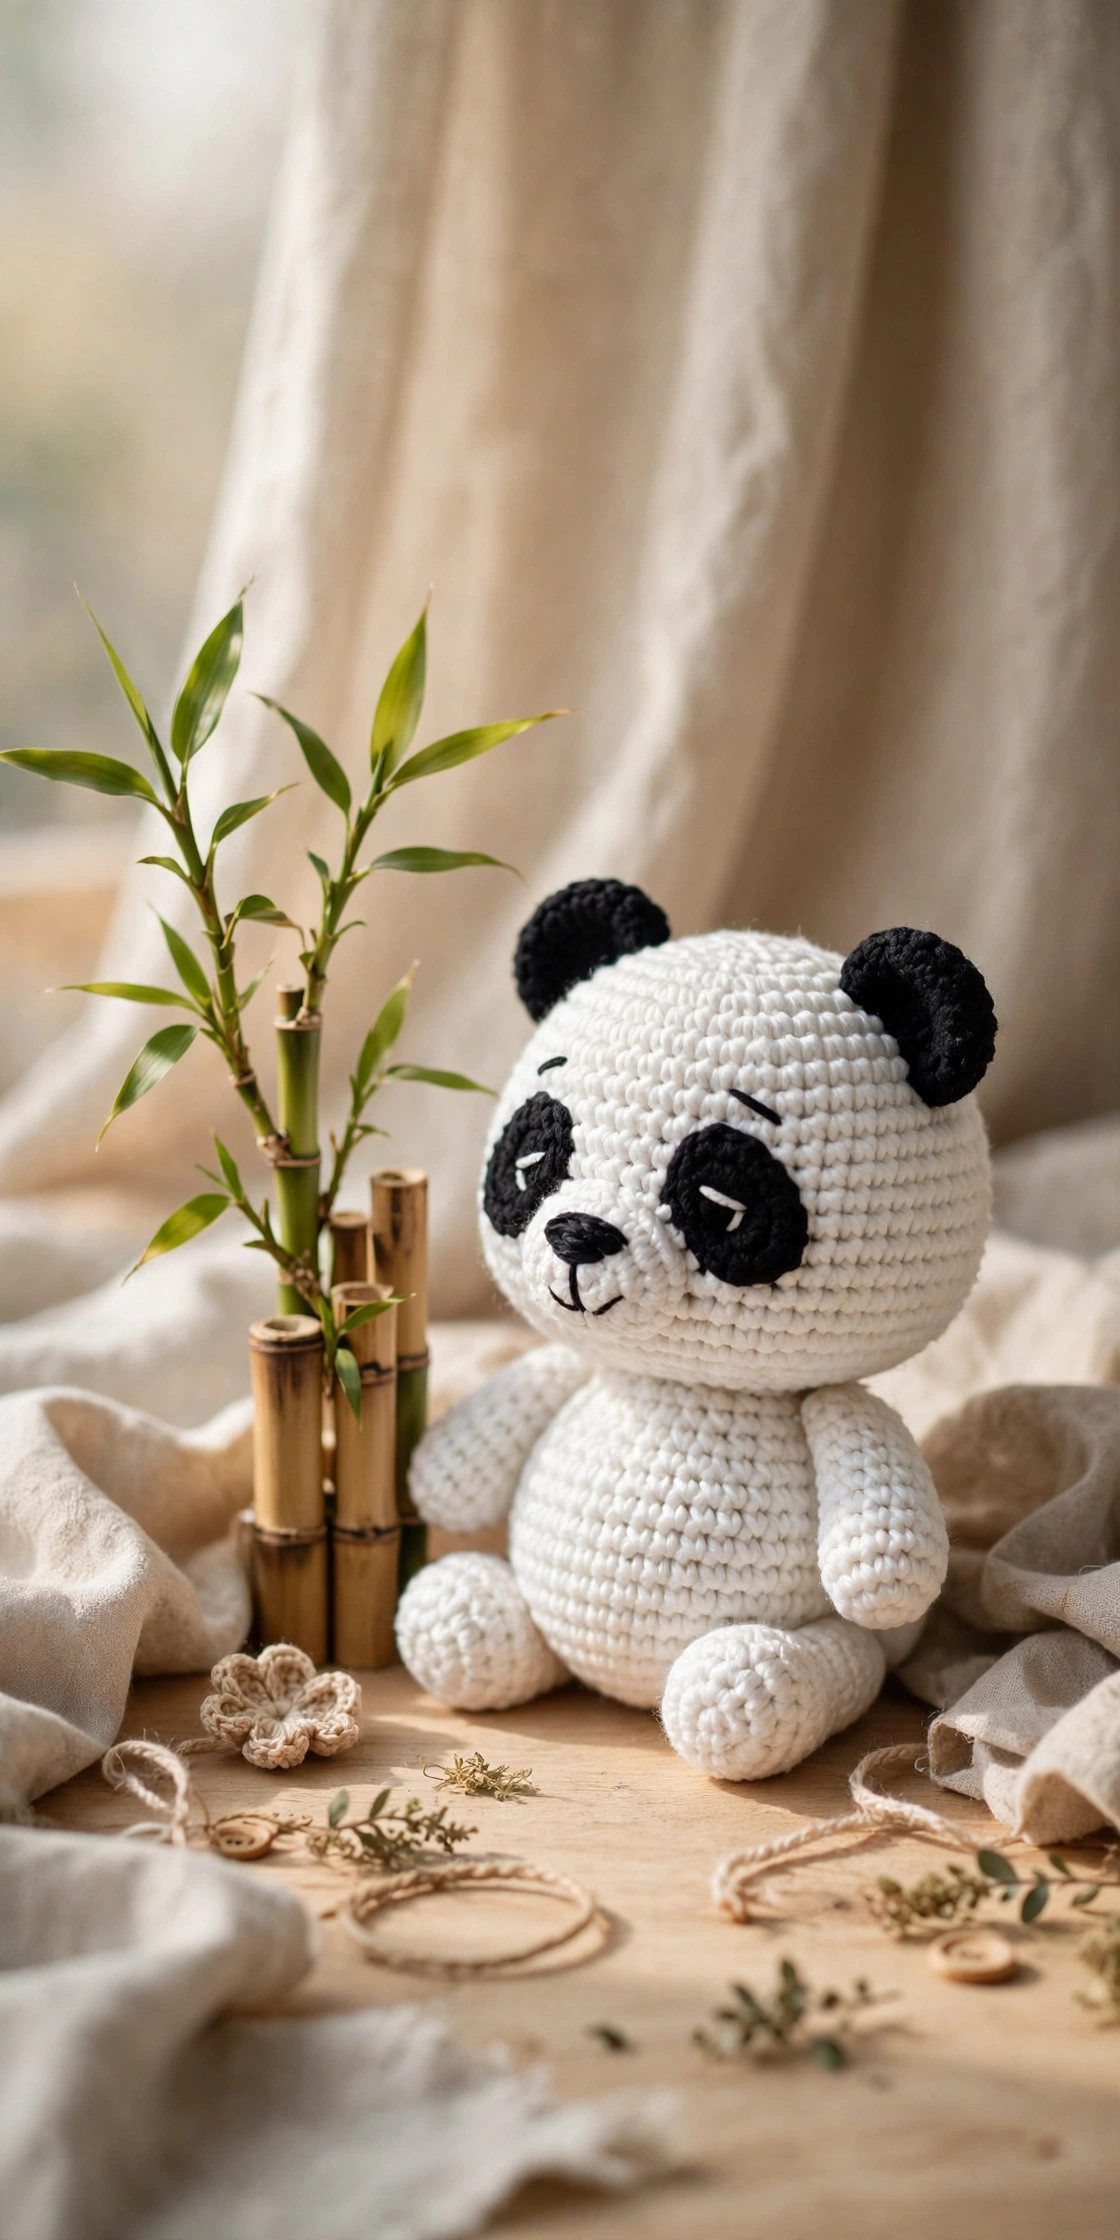
Three cute variations to try next
Once you've made one panda, you'll understand why panda collectors are a thing. Same pattern, three personalities:
- Sleepy baby panda. Work the whole panda as written, but embroider the eyes as simple curved lines (like closed happy eyes) instead of ovals, and skip the mouth — just the nose. The result looks peacefully napping and is unbelievably giftable for baby showers.
- Giant squishy panda. Make the entire panda in chunky chenille yarn with a 5.5 mm hook. You'll get a gloriously huggable 25 cm panda that doubles as a cushion — add one extra increase round to the patches (R3: [2 sc, inc] × 6 = 24) so the face stays proportional.
- Panda with a bamboo snack. Crochet a tiny bamboo stalk: with green yarn, ch 12, sc in each ch, then work 6 rounds of 12 sc in a tube, stuff lightly, and add two small leaves (ch 8, sc back along the chain). Tuck it into the panda's arm when you sew the arm on — instant storytelling in photos.
And if this project gave you the amigurumi bug, the highland cow uses the same spiral techniques with a fun loop-stitch twist, while the crochet cat is a quicker palate-cleanser between bigger plushies. For a bigger challenge, the celestial leaf dragon takes these same skills to showpiece scale.
Troubleshooting tips
- The eye patches pucker when you embroider the eyes. Your satin stitches are too tight. Loosen up and let the yarn sit on the surface of the patch rather than pulling it into the stuffing. If a patch is badly puckered, it's faster to re-crochet it (it's only two rounds) than to fight the embroidery.
- You can see white stuffing through the black pieces. Black yarn hides a multitude of sins, but loose tension still shows. The ears and arms especially need dense fabric — drop to a 3.25 mm hook for the black pieces if you see daylight between stitches.
- The head wobbles on the neck. Almost always an under-stuffed neck. Unpick three or four stitches of the head-body join, pack in more fiberfill, and re-sew with two full passes.
- The panda won't sit upright. The legs are the tripod. Make sure they're stuffed firmly (soft legs collapse), reposition them slightly forward, and check the body itself is packed generously — a floppy body shifts the center of gravity.
- The patches look lopsided. Pin both patches before sewing either one, then check from arm's length. The classic panda tilt is tops-together, bottoms-apart — if one patch is straight and the other tilted, the face looks confused.
- The embroidered nose looks messy. Fill it with neat parallel satin stitches all running the same direction, and outline the triangle first so you have a boundary to fill to.
Frequently asked questions
Is this crochet panda bear pattern really free?
Yes — the complete pattern above is free, no email signup, no PDF purchase required. If you'd like to support the site, sharing the post or saving it on Pinterest is the kindest thank-you.
What skill level is this pattern?
True beginner. If you can crochet a magic ring and single crochet in the round, you have every skill you need — plus basic embroidery for the face, explained in the assembly steps.
How long does it take to make?
About 3–4 hours: 2–2.5 hours of crocheting, 30–45 minutes of assembly, 15 minutes of face embroidery.
Can I sell the finished pandas I make?
Yes! You may sell finished pandas made from this pattern in small batches (craft fairs, Etsy, gifts). Please credit Little Loop Finds as the pattern designer with a link back to this page. The pattern text and photos themselves may not be redistributed, republished, or sold.
Can I use safety eyes instead of embroidering?
You can — 9 mm safety eyes inserted through the patches before sewing them on work well. But embroidered eyes make the panda fully soft and safe for babies and toddlers. For gifts to under-threes, embroidery is the safer choice.
What yarn works best for the black and white contrast?
Smooth worsted-weight acrylic or cotton in true white and true black. Avoid fuzzy or textured yarns — they blur the crisp edges that make a panda read as a panda.
More free patterns to try
If this panda was fun, keep the hook moving. The highland cow is the ideal next amigurumi — same spiral techniques with a shaggy loop-stitch twist. The crochet cat is a quicker plushie fix using the same skills, the flip-face witch cat adds a playful reversible surprise for Halloween-season gifting, the celestial leaf dragon takes your amigurumi to showpiece scale, and the easy beginner crochet patterns roundup has plenty of small wins for practicing between bigger projects.
The box below contains an Etsy link. If you buy through it, we may earn a small commission at no extra cost to you. Learn more.
No time to make one?
Short on time? Find handmade crochet pandas from independent makers on Etsy.
Browse on Etsy (opens Etsy in a new tab)