Floppy Cat Crochet Pattern: Ragdoll-Style Amigurumi
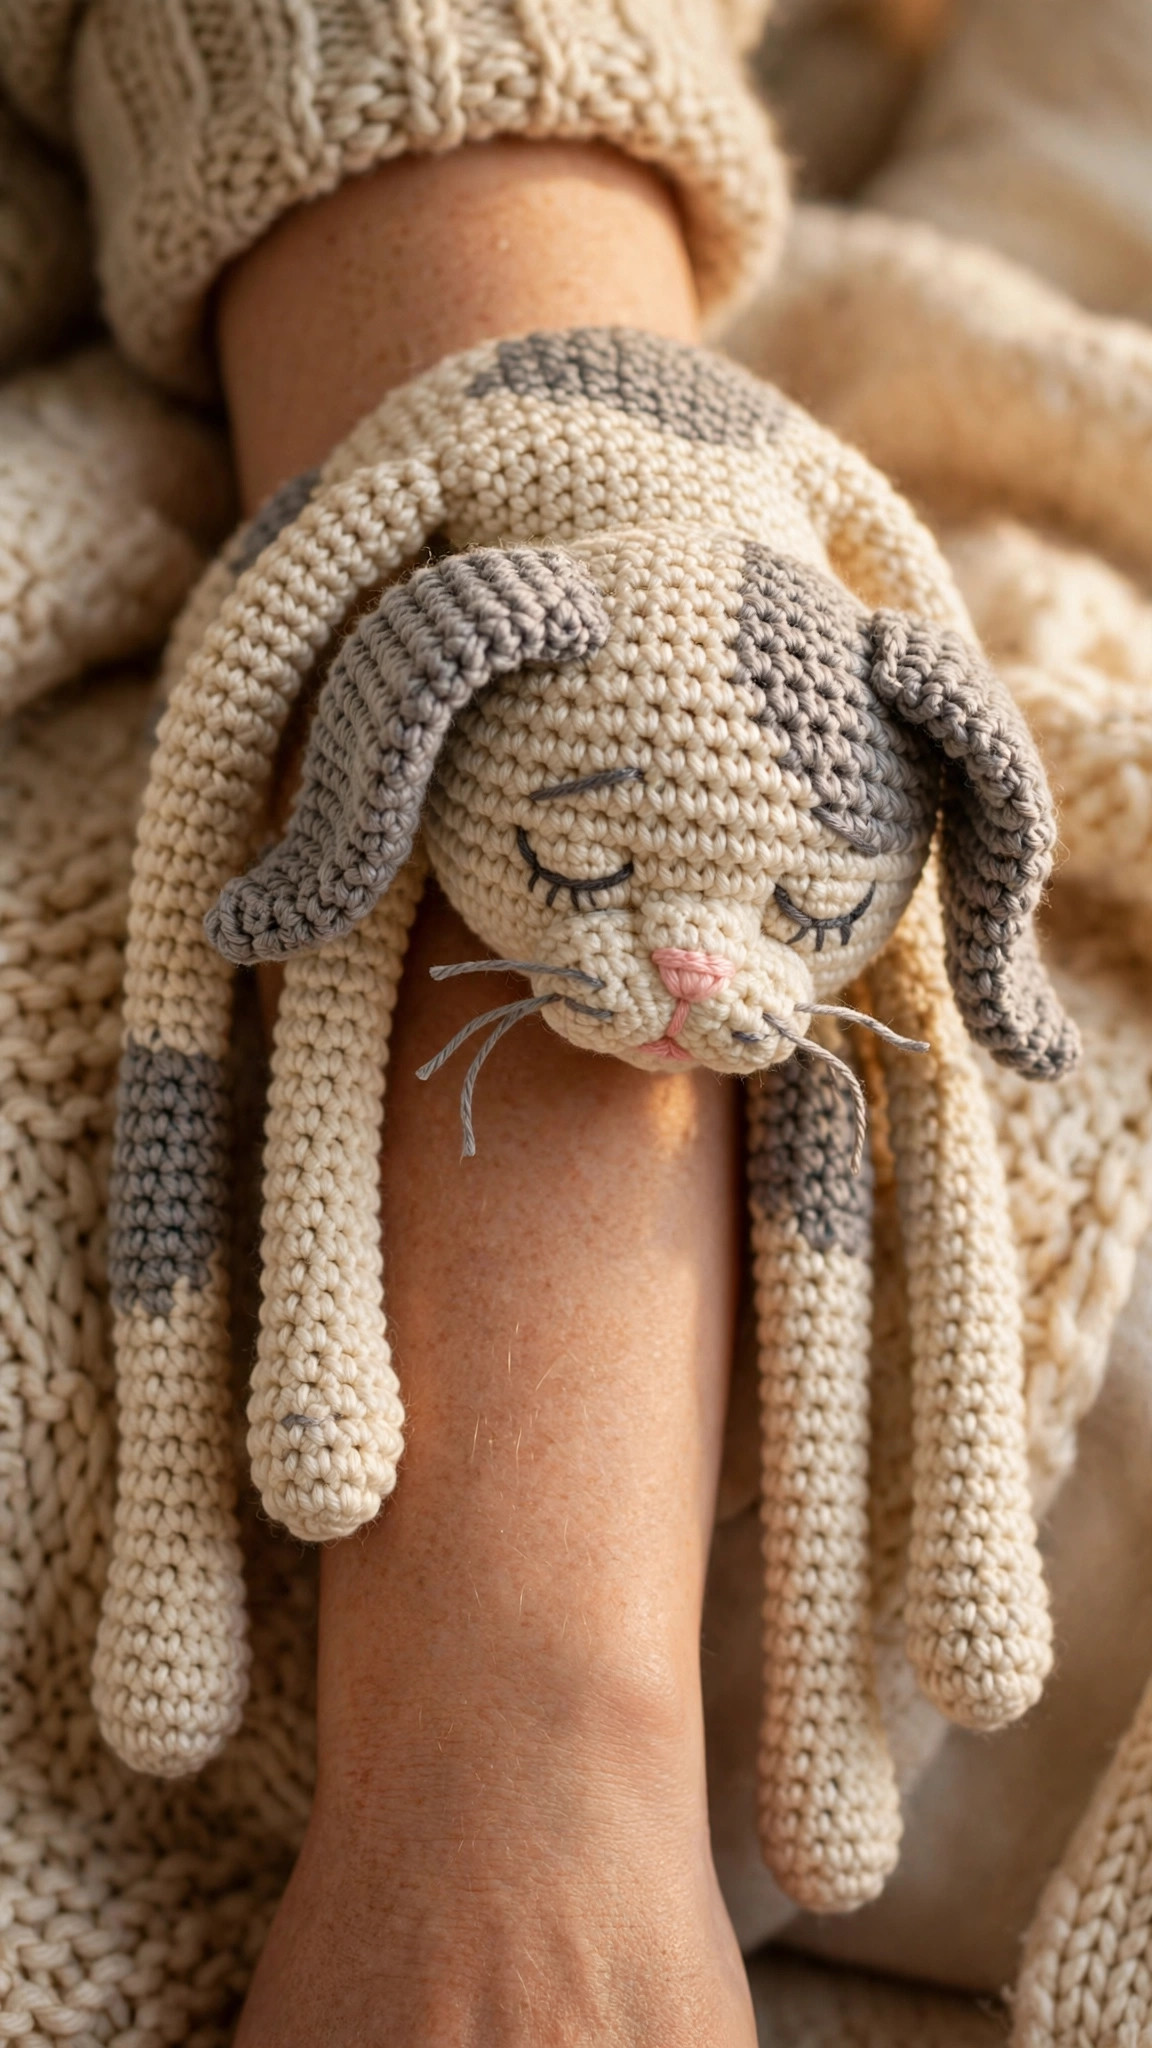
A ragdoll-style floppy cat with long dangly limbs, a soft oversized head tipped sleepily forward, and embroidered closed eyes — worked in simple single-crochet spirals from 9 small pieces, with the flop built into the stuffing and the seams.

Amigurumi · Crochet
- Finished size
- About 38 cm / 15 in draped
- Making time
- About 5–6 hours
- Hook
- 3.5 mm, worsted-weight yarn
- Pieces
- 9 pieces to assemble
- Skill
- Beginner
In this post
There is a special kind of cat that never sits up straight, never poses, and never holds a position for more than three seconds: the ragdoll cat. Pick one up and it goes gloriously limp, melting over your arm like a warm sock full of pudding. This free floppy cat crochet pattern captures exactly that energy — a ragdoll-style amigurumi with a soft, oversized head, long dangly limbs, and the unmistakable flop of a cat that has never once worried about anything.
If you have already made the classic sitting cat from my crochet cat pattern free post, think of this one as its laid-back cousin. The construction is completely different: instead of a firm, upright body, the floppy cat uses minimal stuffing, deliberately loose joints, and extra-long arms, legs, and tail so it drapes, flops, and spills over whatever it is lying on. It is the kind of project that makes people pick it up and immediately dangle it over the back of their hand — and then refuse to put it down.
The whole cat works up in about five to six hours from nine small pieces, all in simple single-crochet spirals with US terminology. You will need only basic stitches — single crochet, increases, and decreases — plus a little patience with sewing, because the secret to the flop is entirely in how the pieces join. Every stitch count below is original to this design.
This is a wonderful gift make. It suits a nursery shelf, a reading-nook chair, or the arms of someone who needs a soft thing to hold. Kids adore it because the long limbs are perfect for tiny hands to swing.
Table of Contents
- Head - Floppy Ears (make 2) - Body - Arms (make 2) - Legs (make 2) - Tail - Belly Patch (optional)
- Finishing and Assembly
- Tips for the Perfect Flop
- Key Takeaways
- Frequently Asked Questions
- More Patterns You Will Love
Materials
- Yarn: Worsted-weight (#4) acrylic or cotton-blend yarn. Main color (MC): soft grey — about 90 g. Contrast color (CC): cream or white — about 30 g. A few yards of dark brown or black for the embroidered face, and a scrap of pink for the nose.
- Hook: 3.5 mm (US E-4). Amigurumi works best with a hook one or two sizes smaller than the yarn label suggests, so your stitches are tight and no stuffing peeks through.
- Stuffing: About 60 g of polyester fiberfill. You will use far less than you think — restraint is the whole trick here.
- Eyes: Embroidered with dark yarn (sleepy closed eyes are the classic ragdoll look). Safety eyes are an option, but for a toy that will be squeezed and draped, embroidery is softer and safer.
- Notions: Stitch marker, yarn needle with a large eye, scissors, pins for positioning pieces before sewing.
For yarn choice, a standard soft acrylic gives the best drape. Very stiff cotton holds the flop less gracefully. Avoid fuzzy or novelty yarns — you want to count stitches easily on those skinny 8- and 9-stitch rounds.
Finished Size
Draped flat, head to tail tip: about 38 cm (15 in). The head measures roughly 9 cm (3.5 in) across, the body about 10 cm (4 in) long, and each leg stretches to 11 cm (4.25 in). Because the limbs are only lightly stuffed, the cat compresses and stretches a little depending on how it is posed — that squishiness is a feature, not a bug. Made with the same hook and worsted yarn, every floppy cat comes out roughly this size; switching to DK weight and a 3 mm hook shrinks it to a pocket-sized 28 cm version.
Gauge
18 single crochet stitches and 20 rounds = 10 cm (4 in) in spiral single crochet with a 3.5 mm hook. Gauge is not critical for a stuffed toy — what matters is that your fabric is dense enough that the fiberfill does not show through. If you can see stuffing between stitches, go down half a hook size. If your hands work tightly, check the head after round 6: it should measure about 5 cm across. A little larger or smaller is fine; the limbs will still flop beautifully.
Abbreviations
This pattern uses US crochet terms.
- MR — magic ring
- sc — single crochet
- inc — increase (2 sc in the same stitch)
- dec — invisible decrease (single crochet two stitches together through the front loops)
- ch — chain
- sl st — slip stitch
- st(s) — stitch(es)
- rnd — round
- rep — repeat
- [ ] — total stitch count at the end of the round
- ( ) × n — repeat the instructions in parentheses n times
Work all pieces in continuous spirals unless stated otherwise. Move your stitch marker up at the start of each round.
The Pattern
Read through the whole pattern once before you start, especially the assembly section — the floppy effect depends on how the pieces are stuffed and sewn, and a few steps are easier if you plan ahead. Stuff each piece as you go, following the notes: most of the drape comes from leaving the upper halves of the limbs empty.
Head
With MC.
- Rnd 1: 6 sc in MR [6]
- Rnd 2: inc × 6 [12]
- Rnd 3: (1 sc, inc) × 6 [18]
- Rnd 4: (2 sc, inc) × 6 [24]
- Rnd 5: (3 sc, inc) × 6 [30]
- Rnd 6: (4 sc, inc) × 6 [36]
- Rnds 7–12: sc in each st around [36]
- Rnd 13: (4 sc, dec) × 6 [30]
- Rnd 14: (3 sc, dec) × 6 [24]
- Begin stuffing firmly — the head is the one piece that should be plump, since it anchors the whole design.
- Rnd 15: (2 sc, dec) × 6 [18]
- Rnd 16: (1 sc, dec) × 6 [12]
- Finish stuffing, adding a little extra to round out the cheeks.
- Rnd 17: dec × 6 [6]
Fasten off, thread the tail through the front loops of the remaining 6 stitches, and pull closed. Weave in the end. The finished head is a soft, slightly wide sphere — set it aside.
Floppy Ears (make 2)
With MC. These are worked as long, tapering flaps that fold over at the tip — the signature ragdoll-ear silhouette.
- Rnd 1: 6 sc in MR [6]
- Rnd 2: (1 sc, inc) × 3 [9]
- Rnd 3: (2 sc, inc) × 3 [12]
- Rnd 4: (3 sc, inc) × 3 [15]
- Rnds 5–9: sc in each st around [15]
- Rnd 10: (3 sc, dec) × 3 [12]
- Rnd 11: (2 sc, dec) × 3 [9]
- Rnd 12: sc in each st around [9]
Do not stuff the ears. Flatten the opening and fasten off, leaving a long tail for sewing. The ear should measure about 7 cm long and flop naturally when you hold it upright — if yours stands stiff, work one more plain round before the decreases to lengthen it.
Body
With MC. The body is deliberately small and tapered — a ragdoll cat is mostly head and limbs, with the body acting as a soft connector between them.
- Rnd 1: 6 sc in MR [6]
- Rnd 2: inc × 6 [12]
- Rnd 3: (1 sc, inc) × 6 [18]
- Rnd 4: (2 sc, inc) × 6 [24]
- Rnd 5: (3 sc, inc) × 6 [30]
- Rnds 6–9: sc in each st around [30]
- Rnd 10: (3 sc, dec) × 6 [24]
- Rnds 11–13: sc in each st around [24]
- Rnd 14: (2 sc, dec) × 6 [18]
- Stuff the bottom half (rounds 1–8) softly — just enough to give it shape. Leave rounds 9–14 nearly empty so the neck end stays collapsible.
- Rnd 15: (1 sc, dec) × 6 [12]
- Rnd 16: dec × 6 [6]
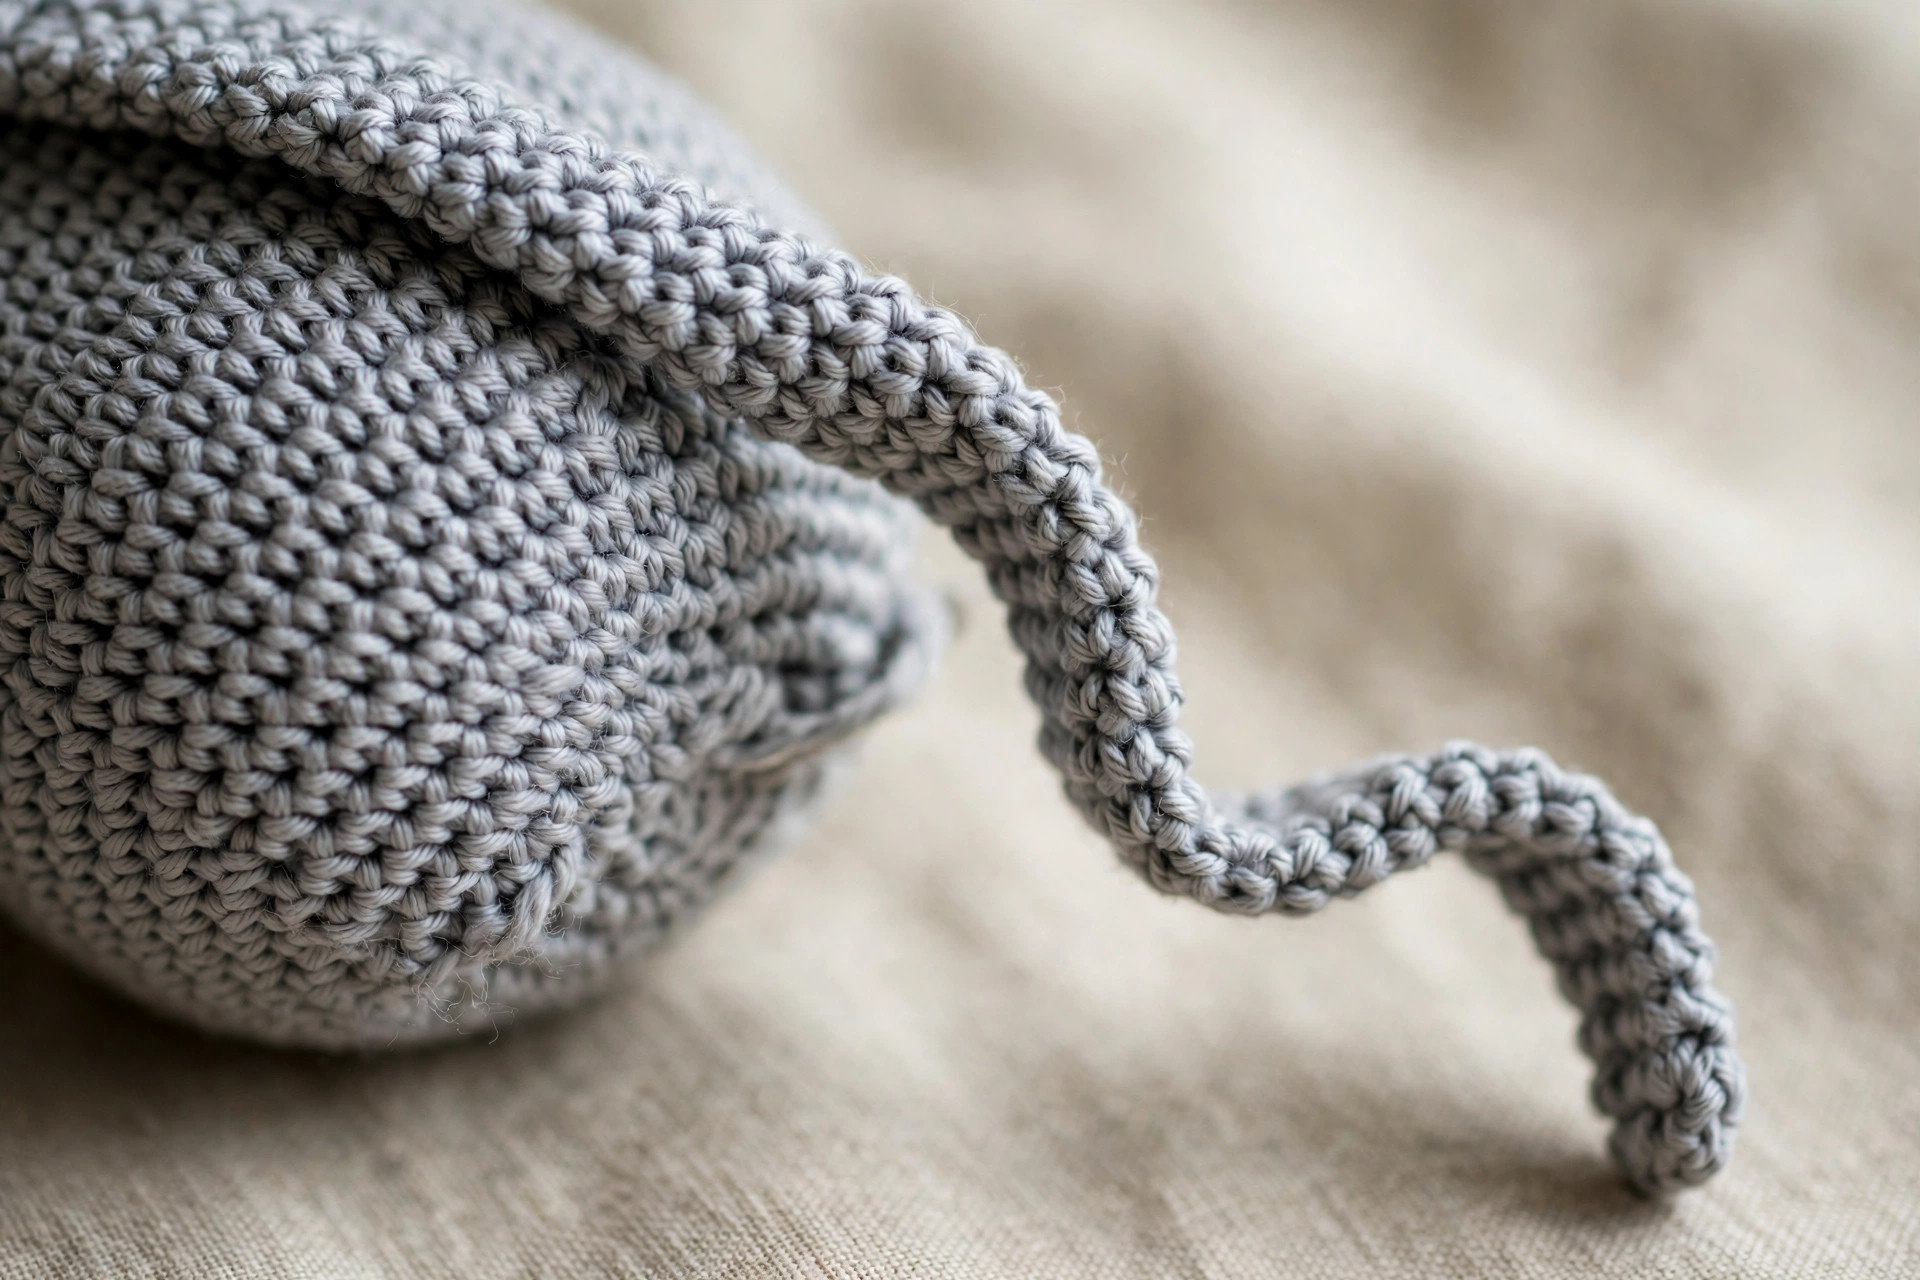
Fasten off and close the same way as the head. The body should feel like a soft little pear that squishes flat when you press it — if it bounces back firmly, you have overstuffed. Pull out a little fiberfill now; you will thank yourself at assembly.
Arms (make 2)
With MC. These are the front limbs — long, skinny, and barely stuffed.
- Rnd 1: 6 sc in MR [6]
- Rnds 2–3: sc in each st around [6]
- Rnd 4: (2 sc, inc) × 2 [8]
- Rnds 5–16: sc in each st around [8]
Stuff only the last 4 rounds (the paw end) with a tiny pinch of fiberfill — barely enough to round the tip. Leave rounds 1–12 completely empty. Fasten off, leaving a long tail for sewing. Each arm is about 9 cm long and should bend limply in the middle when you hold it by one end.
Legs (make 2)
With MC. The back legs are a touch thicker and longer than the arms.
- Rnd 1: 6 sc in MR [6]
- Rnd 2: (1 sc, inc) × 3 [9]
- Rnds 3–18: sc in each st around [9]
Stuff only rounds 14–18 (the paw end) lightly, with just enough fiberfill to give the foot a soft shape. Leave rounds 1–13 empty. Fasten off with a long tail. Each leg is about 11 cm long — the longest piece on the cat, and the main source of the dramatic drape.
Tail
With MC. A long, gently tapering tail that curls if you let it.
- Rnd 1: 6 sc in MR [6]
- Rnd 2: (2 sc, inc) × 2 [8]
- Rnds 3–20: sc in each st around [8]
Stuff the last 5 rounds lightly and leave the rest empty. Fasten off with a long tail. The empty upper portion lets the tail flop over furniture edges and curl naturally instead of sticking out straight.
Belly Patch (optional)
With CC. A soft cream oval sewn to the front of the body adds a lovely two-tone touch.
- Rnd 1: 6 sc in MR [6]
- Rnd 2: inc × 6 [12]
- Rnd 3: (1 sc, inc) × 6 [18]
- Rnd 4: (2 sc, inc) × 6 [24]
- Rnd 5: sc in each st around [24]
Fasten off, leaving a tail for sewing. Do not stuff — it lies flat against the body. You can also embroider a few cream "socks" on the paws instead, or skip the contrast color entirely for a sleek all-grey cat.
Finishing and Assembly
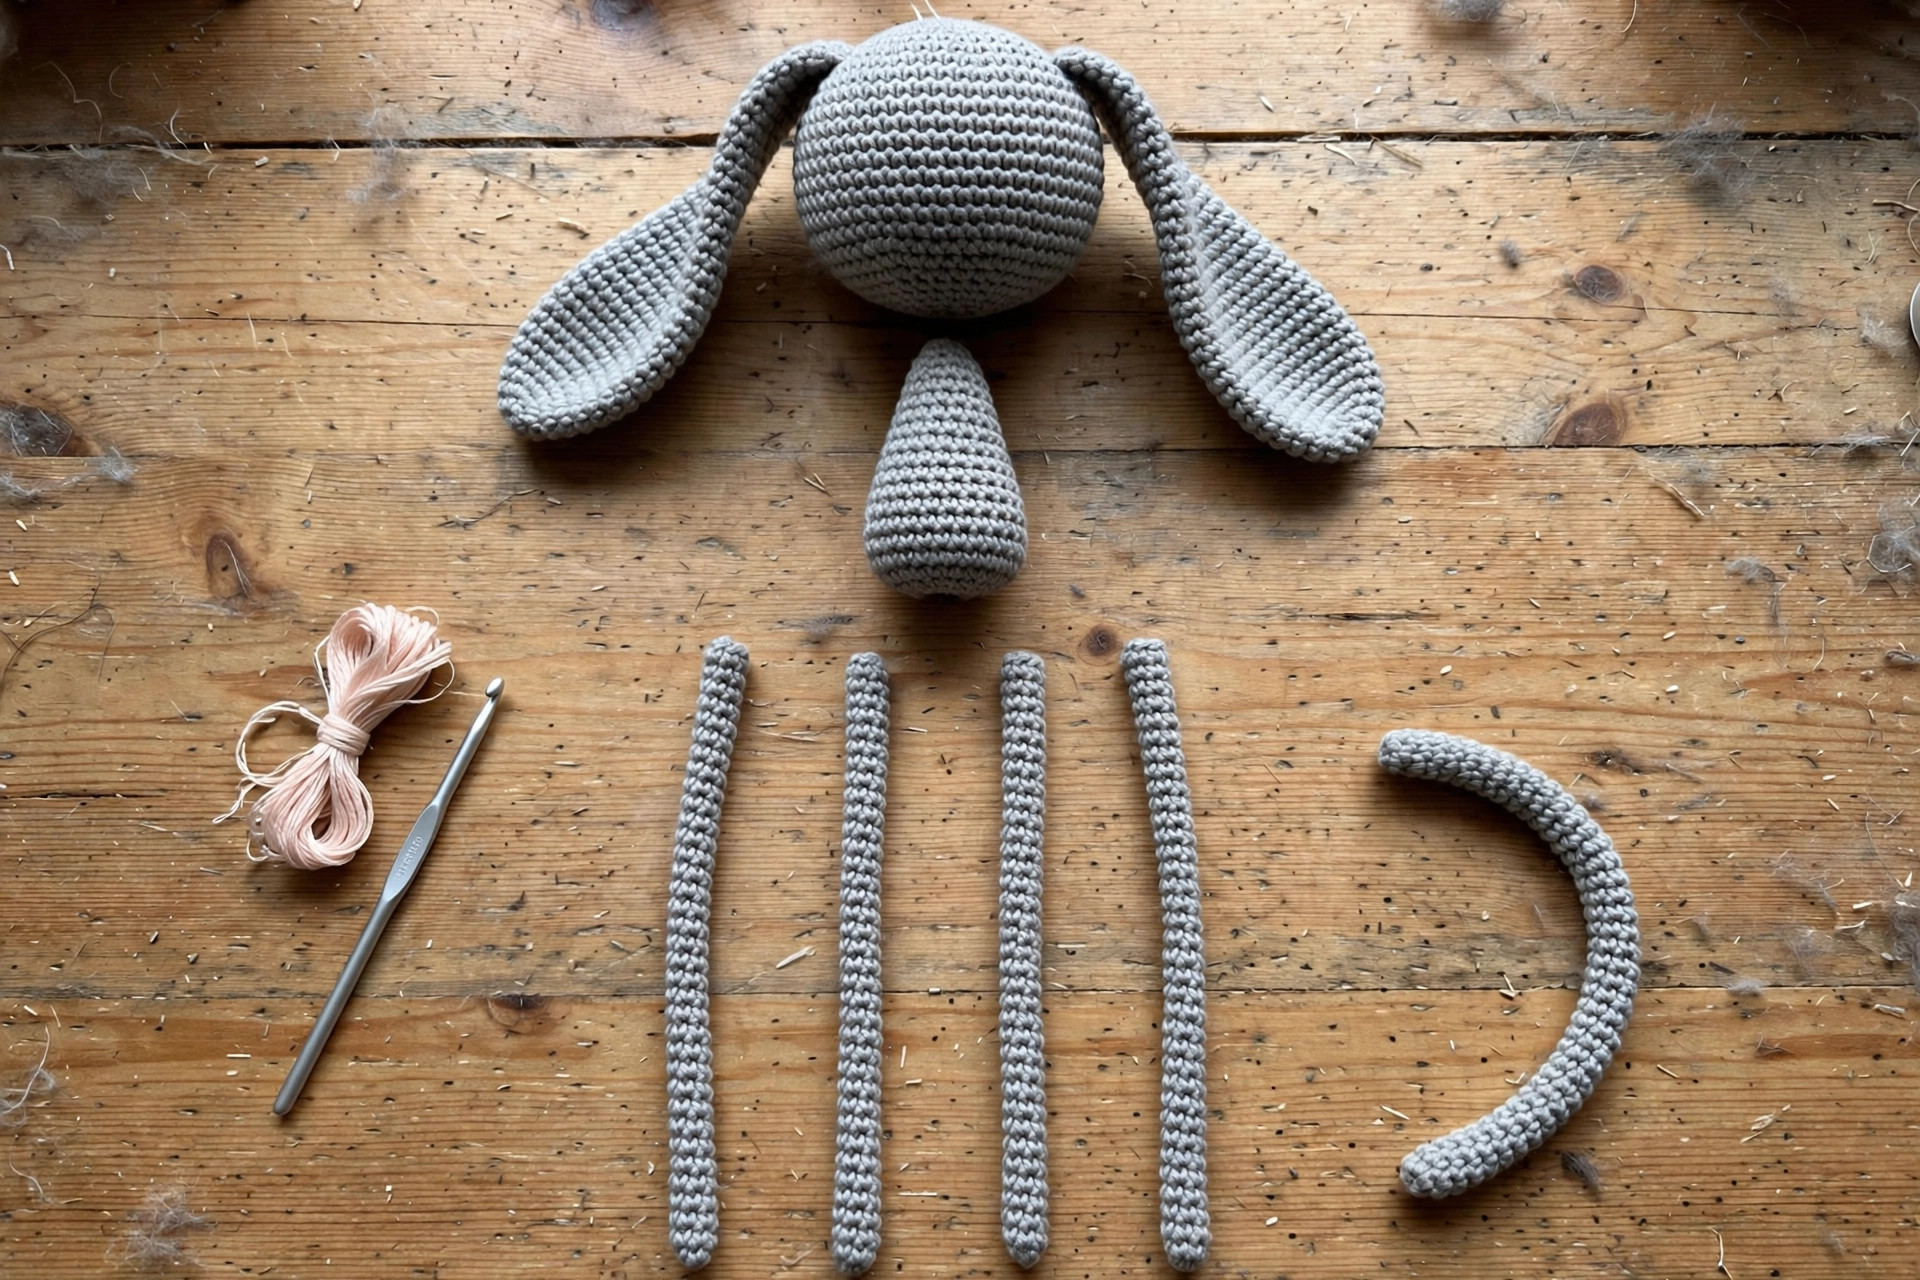
Lay out all nine pieces and pin everything before you sew a single stitch — positioning is what sells the flop.
- Face: Embroider the face on the head before attaching it to the body. Center it between rounds 9 and 12: two gentle downward-curving arcs for sleepy closed eyes, about 8 stitches apart, a small pink triangle nose below and between them, and three short whisker lines on each cheek if you like.
- Ears: Pin the ears to the top of the head at roughly the 10 o'clock and 2 o'clock positions, 4 stitches apart. Sew them on with the long tails, then let the tips fold forward over the face. Tack each tip down with one tiny stitch about halfway down the ear so the fold stays put permanently.
- Head to body: Sew the head to the narrow (round 16) end of the body, tipping it forward about 15 degrees so the chin tucks toward the chest. This forward tip is essential — a head sewn straight-on looks alert, while a tipped head looks drowsy. Use the body's remaining tail and sew through both layers twice around for security.
- Arms: Sew the arms to the upper sides of the body, about 2 rounds below the head. Attach with just a few stitches through the top 3 rounds of the arm so the joint stays loose and the arm swings freely. Angle them slightly forward.
- Legs: Sew the legs to the lower sides of the body, near the wide base. Again, sew through only the top 3–4 rounds of each leg so the long empty section hangs and swings. Angle them slightly outward for that classic ragdoll sprawl.
- Tail: Sew the tail to the back of the body base, letting it fall to one side. If you want a permanent curl, tack the tail tip to the body's side with one stitch.
- Belly patch: If you made one, center it on the front of the body and whipstitch it down all around.
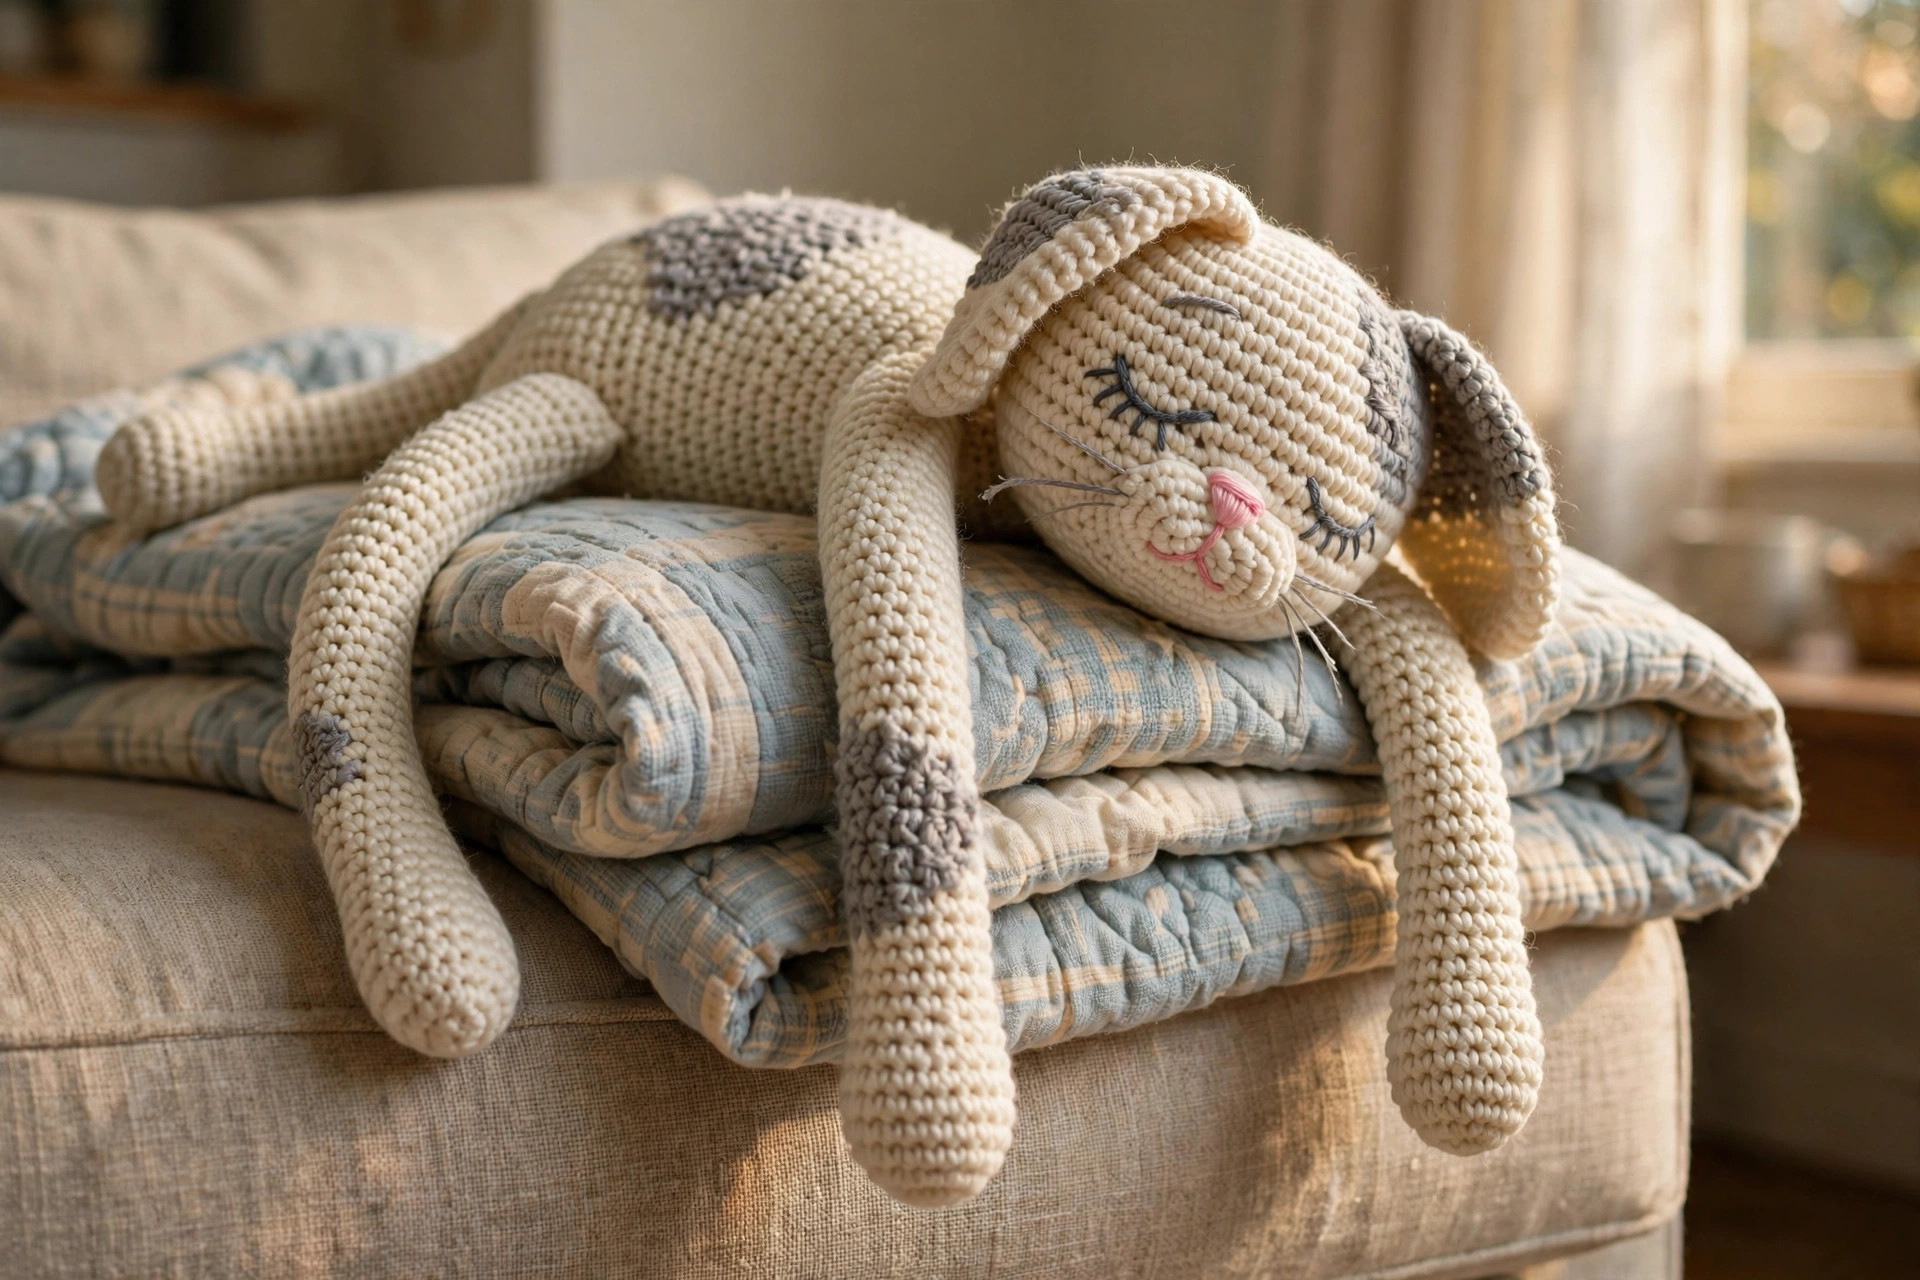
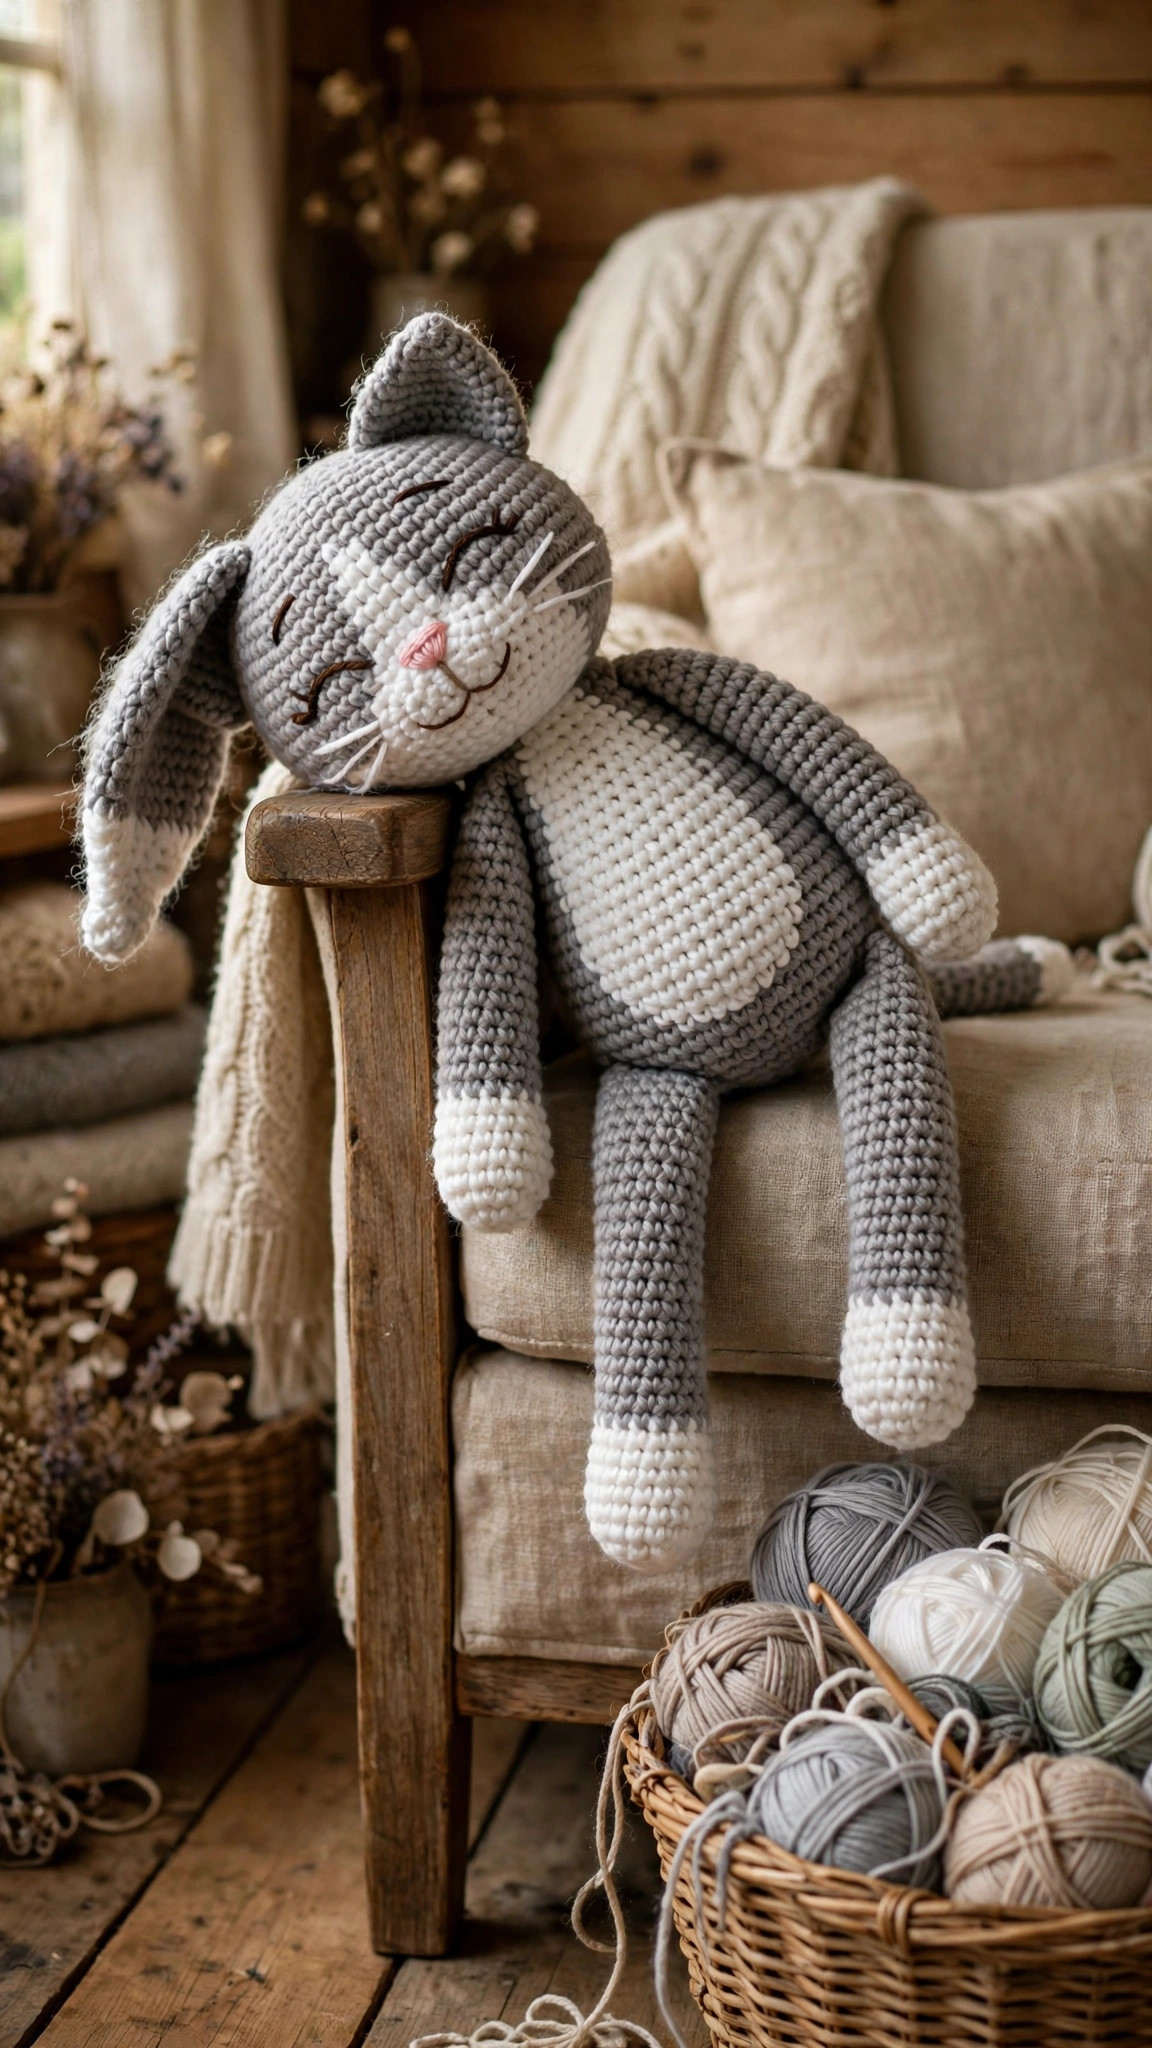
Weave in every end securely, then give the cat its first flop: drape it over your forearm and adjust the limbs until it hangs the way you like. The limbs will "learn" their drape after a day or two of posing.
Tips for the Perfect Flop
- Understuff, then understuff again. Every beginner overstuffs their first floppy cat. If a limb holds its shape when you let go of it, pull out half the fiberfill and try again. The limbs should collapse under their own weight.
- Keep the joints loose. Sewing limbs on with a deep, tight seam defeats the design. A few stitches through the top rounds only — think of it as tacking, not grafting.
- Tip the head forward. Fifteen degrees of chin-tuck is the difference between "alert cat" and "cat that fell asleep mid-thought."
- Block the ears with your fingers. After sewing, fold each ear tip forward and pinch the crease for a minute. The fold will hold, and the tiny tacking stitch locks it in.
- Embroider, don't glue. Felt or glued features peel off a toy that gets draped and squeezed. Embroidered eyes survive years of flopping.
- A contrast belly is worth it. The cream patch takes ten minutes and makes the finished cat look twice as designed.
- Make a pair. One floppy cat draped over a bookshelf is cute; two tangled together on a sofa arm is a photograph waiting to happen. The second one works up faster because you already know the rhythm of those long leg rounds.
- This floppy cat crochet pattern is a ragdoll-style amigurumi with long, lightly-stuffed limbs designed to drape and dangle.
- Nine pieces, all single-crochet spirals in US terms: head, 2 ears, body, 2 arms, 2 legs, tail, plus an optional belly patch.
- The flop comes from technique, not magic: minimal stuffing, loose joints, and a forward-tipped head.
- Finished size is about 38 cm (15 in) draped, using worsted yarn and a 3.5 mm hook.
- Embroidered sleepy eyes keep it soft and safe for little hands.
- It pairs perfectly with the upright crochet cat pattern free post — make both for a complete cat duo.
Frequently Asked Questions
Is this floppy cat pattern suitable for beginners? Yes, with one caveat: the stitches are all beginner-level (single crochet, increases, decreases), and the rounds are short. The intermediate part is the assembly — pinning, positioning, and sewing loosely take a little judgment. If you have finished one or two amigurumi before, you will be fine. If this is your very first project, start with my easy beginner crochet patterns to build confidence first.
How is this different from the regular crochet cat pattern? The crochet cat pattern free is a classic upright sitting cat with a firmly stuffed body. This floppy version is a ragdoll-style design with a smaller body, an oversized head, much longer limbs, deliberate under-stuffing, and loose joints so it drapes instead of sitting. Different construction, different stitch counts — they are companion patterns, not variations.
Why do my cat's legs stick out straight instead of flopping? Two usual culprits: too much stuffing in the legs, or the legs sewn on with too deep a seam. Pull out fiberfill until the leg collapses when held horizontally, and re-sew through only the top 3–4 rounds. The empty upper section of each leg is what creates the drape.
Can I use safety eyes instead of embroidering the face? You can, but embroidered closed eyes suit the sleepy ragdoll look better and keep the toy fully soft — nice if it is for a child. If you do use safety eyes, insert them between rounds 10 and 11, about 8 stitches apart, before closing the head.
What yarn works best for a floppy amigurumi? A soft standard acrylic in worsted weight is ideal: it has enough body to hold stitch definition but enough give to drape. Stiff cottons make the limbs spring back instead of flopping. Whatever you choose, use a hook 1–2 sizes smaller than the label recommends so the fabric is dense.
How long does it take to make? About five to six hours total: roughly three hours of crocheting (those long leg rounds are meditative) and one to two hours of embroidery and assembly. An excellent weekend project — start Saturday morning, gift it Sunday afternoon.
Can I sell finished cats made from this pattern? Yes — finished items made from this free pattern may be sold in small batches (craft fairs, Etsy shops, gifts for friends). Please credit Little Loop Finds as the pattern designer with a link back to this page. The written pattern itself may not be redistributed, copied, or sold.
More Patterns You Will Love
If this floppy friend made you smile, here are more cozy makes from the Little Loop Finds collection:
Happy crocheting — and may your cat flop exactly as dramatically as a real ragdoll would.
The box below contains an Etsy link. If you buy through it, we may earn a small commission at no extra cost to you. Learn more.
No time to make one?
Short on time? Find handmade crochet floppy cats from independent makers on Etsy.
Browse on Etsy (opens Etsy in a new tab)