Crochet dinosaur hat pattern: spiky dino beanie for kids
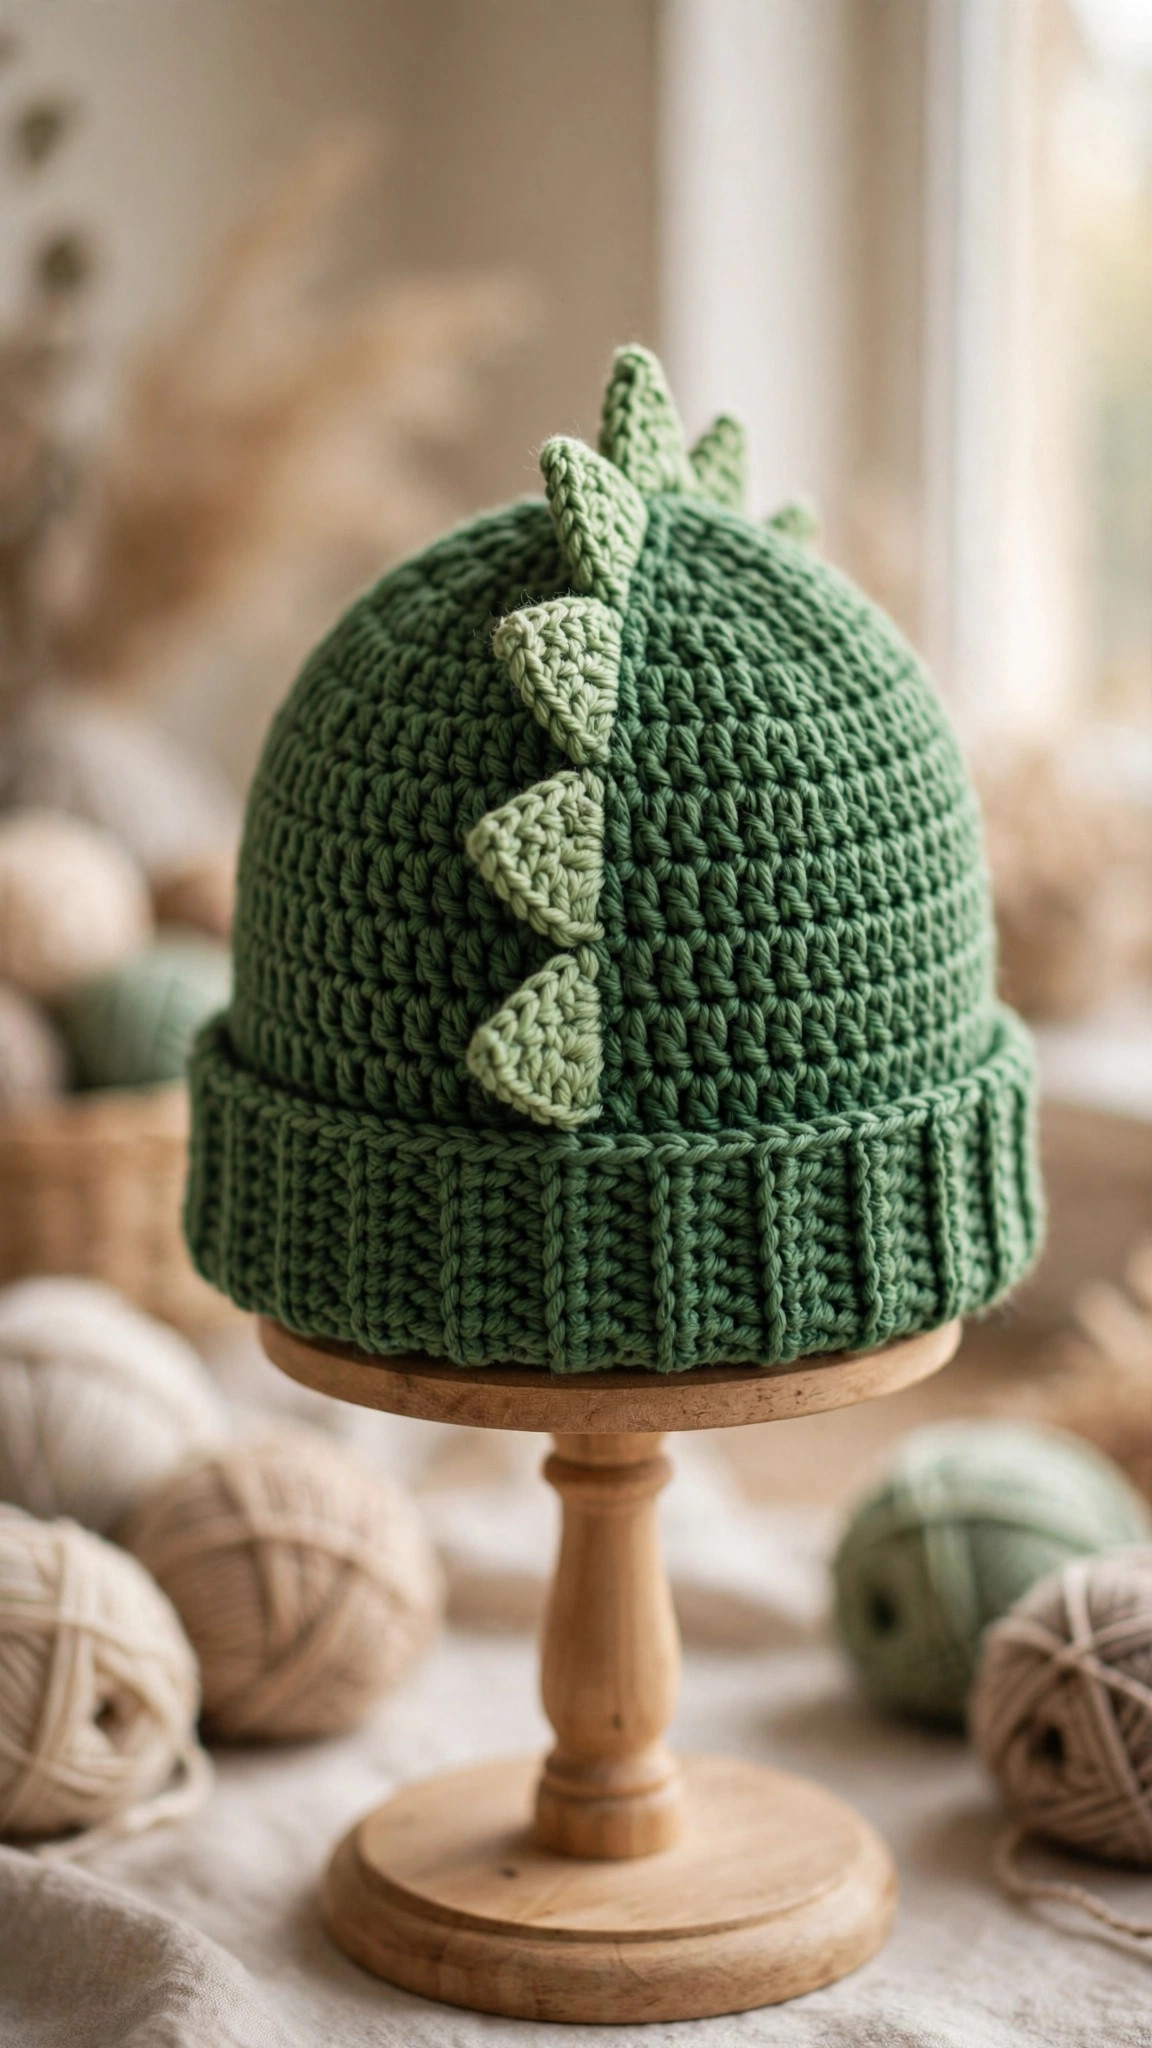
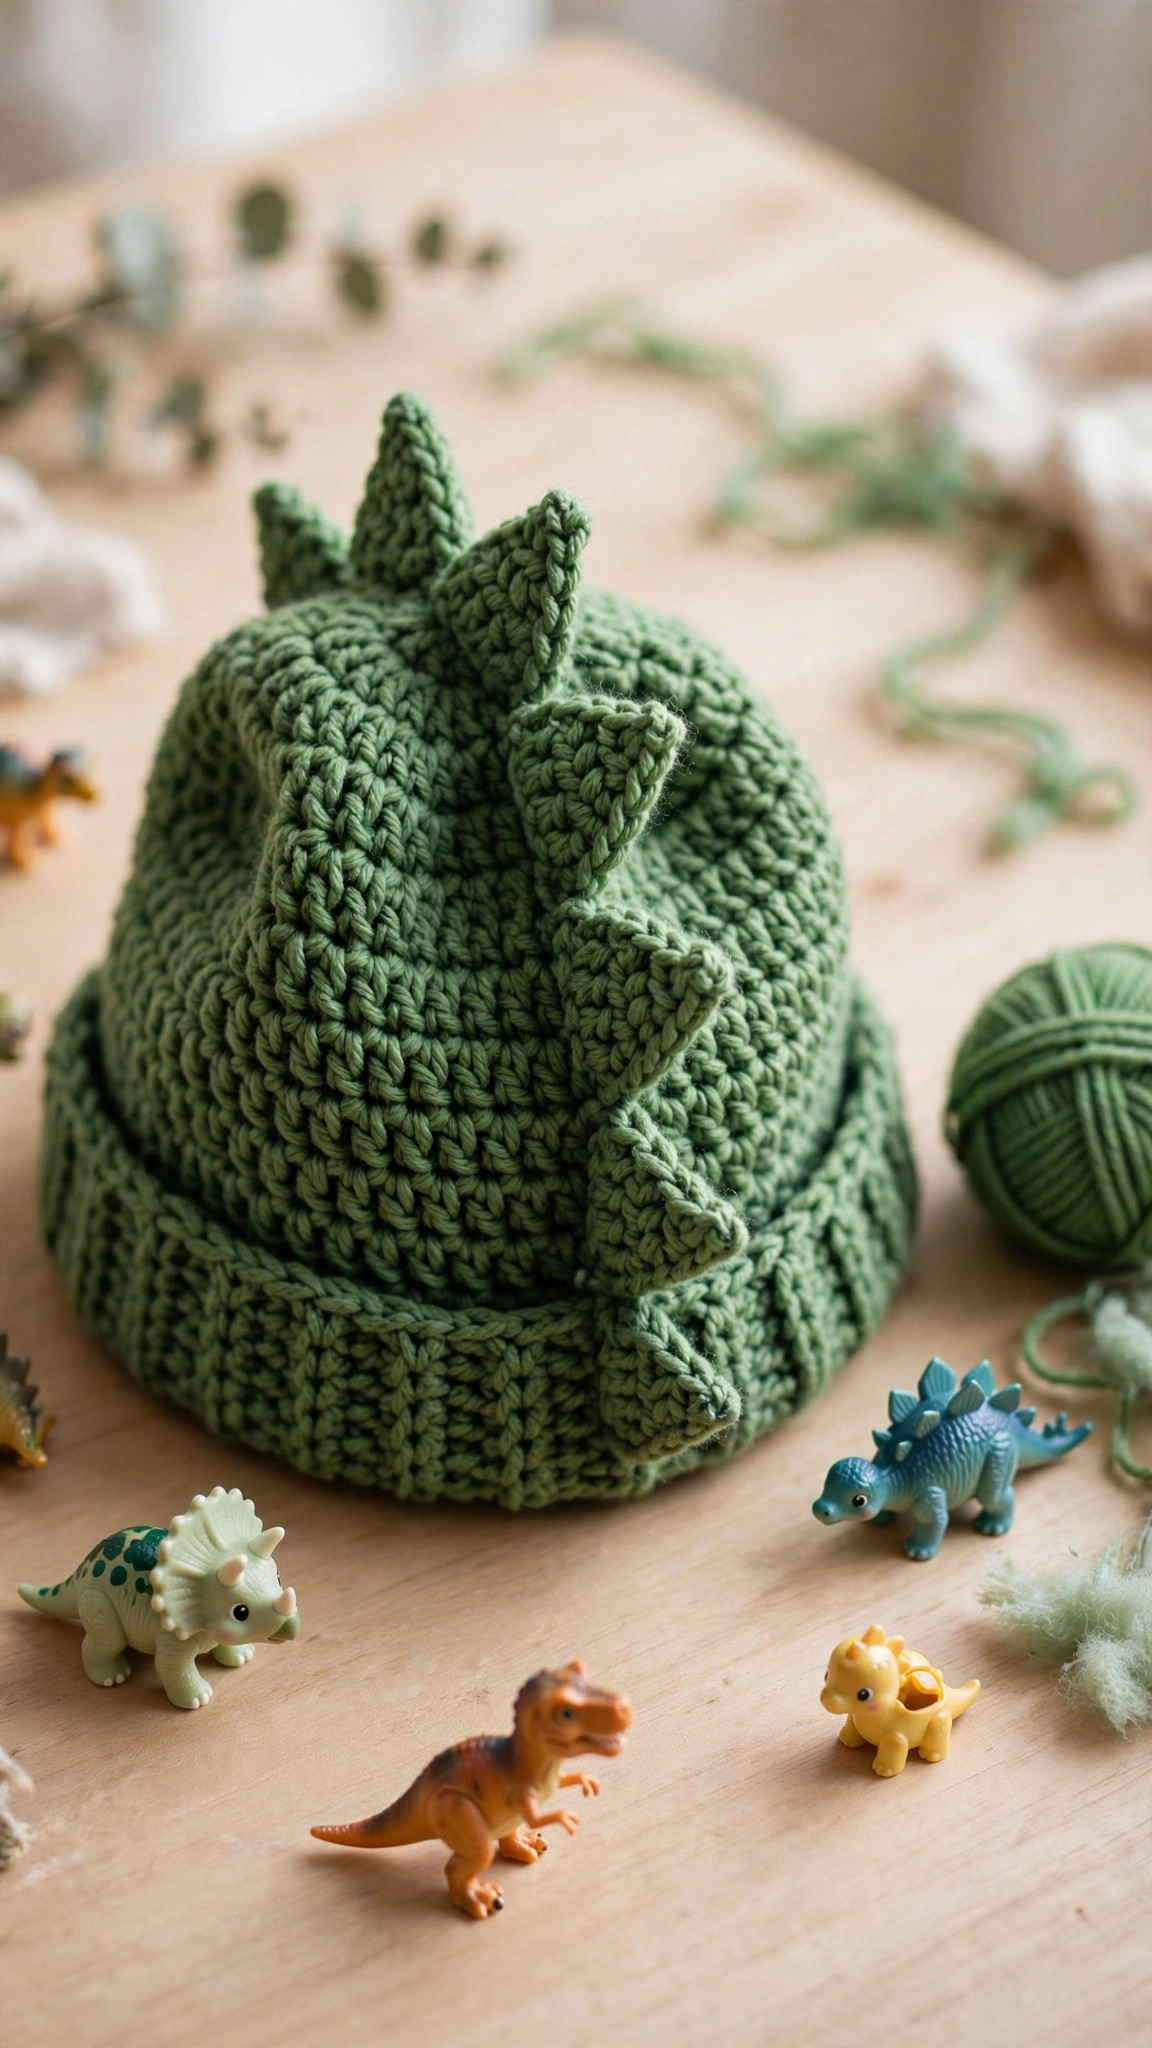
A cozy kids' dinosaur beanie worked top-down in double crochet, with a proud row of triangular spikes down the center and sleepy appliqué eyes — an original design in three sizes from toddler to adult that crochets up in one evening.

Kids · Crochet
- Finished size
- 3 sizes: 42 / 50 / 55 cm around
- Making time
- About 3–4 hours
- Hook & yarn
- 5.0 mm, worsted-weight yarn
- Skill
- Beginner — double crochet in the round
- Skill
- Beginner
In this post
Every kid goes through a dinosaur phase — the trick is being ready for it. This original crochet dinosaur hat pattern turns that obsession into the coziest thing they'll own all winter: a soft beanie worked top-down in the round, finished with a proud row of triangular dino spikes marching down the center and a pair of sleepy appliqué eyes on the front. It looks like a proper costume piece but crochets up like a plain beanie, which means you get all the "ROAR!" drama with none of the fiddly amigurumi assembly.
The whole hat is worked in double crochet, so it flies off the hook — the toddler size is a genuine single-evening make. The spikes are tiny flat triangles you whipstitch on afterward — five minutes each — and the sleepy eyes are two little white circles with a simple embroidered curve. No colorwork, no sewing pieces together, no counting tiny rounds. Just one beanie, one row of spikes, and one very happy small human stomping around the living room.
Table of contents
- Why you'll love this crochet dinosaur hat pattern
- Materials you'll need
- Size, gauge and skill level
- Abbreviations — US terms
- The pattern
- Finishing touches
- Variations to try
- Troubleshooting tips
- Frequently asked questions
- More free patterns to try
Why you'll love this crochet dinosaur hat pattern
Most dinosaur hat patterns fall into one of two camps: the "ten separate pieces sewn together and stuffed" camp, or the "vague blob with felt triangles glued on" camp. This design takes a third path — everything structural is one continuous piece of crochet, and all the dino personality comes from seven or fewer tiny sewn-on bits. The result reads unmistakably "dinosaur" from across the playground but the construction is honestly just a beanie with decorations.
The top-down construction is the real gift here. You start at the crown and increase outward, which means you can try the hat on a head (or measure against a head circumference) at any point and adjust — no frogging back to a foundation chain because you guessed the starting width wrong. The crown uses clean, standard increase math, so it lies flat and round with no ruffling or cupping, and the body is plain double crochet all the way down: fast, stretchy, and forgiving of slightly uneven tension.
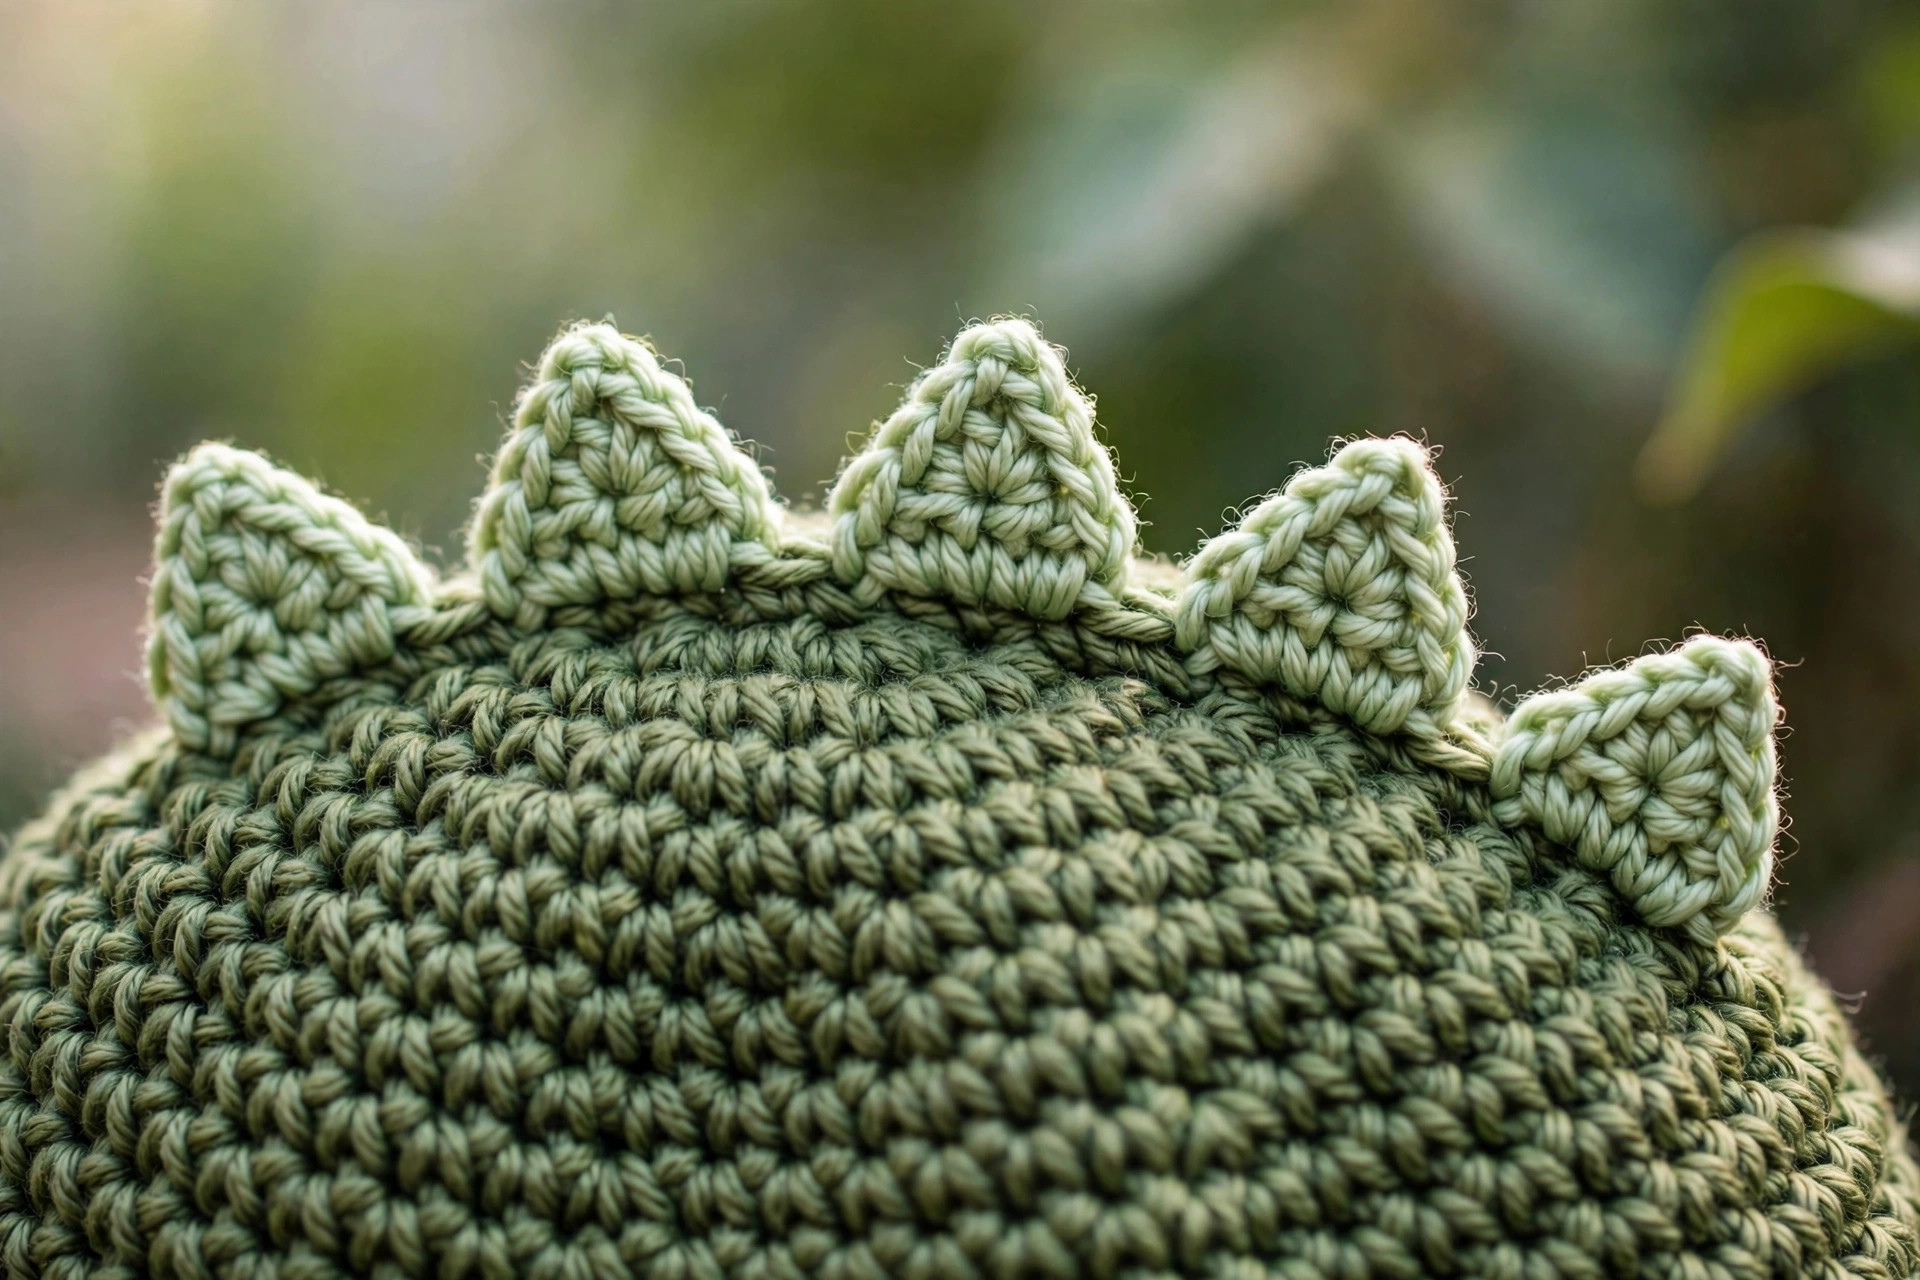
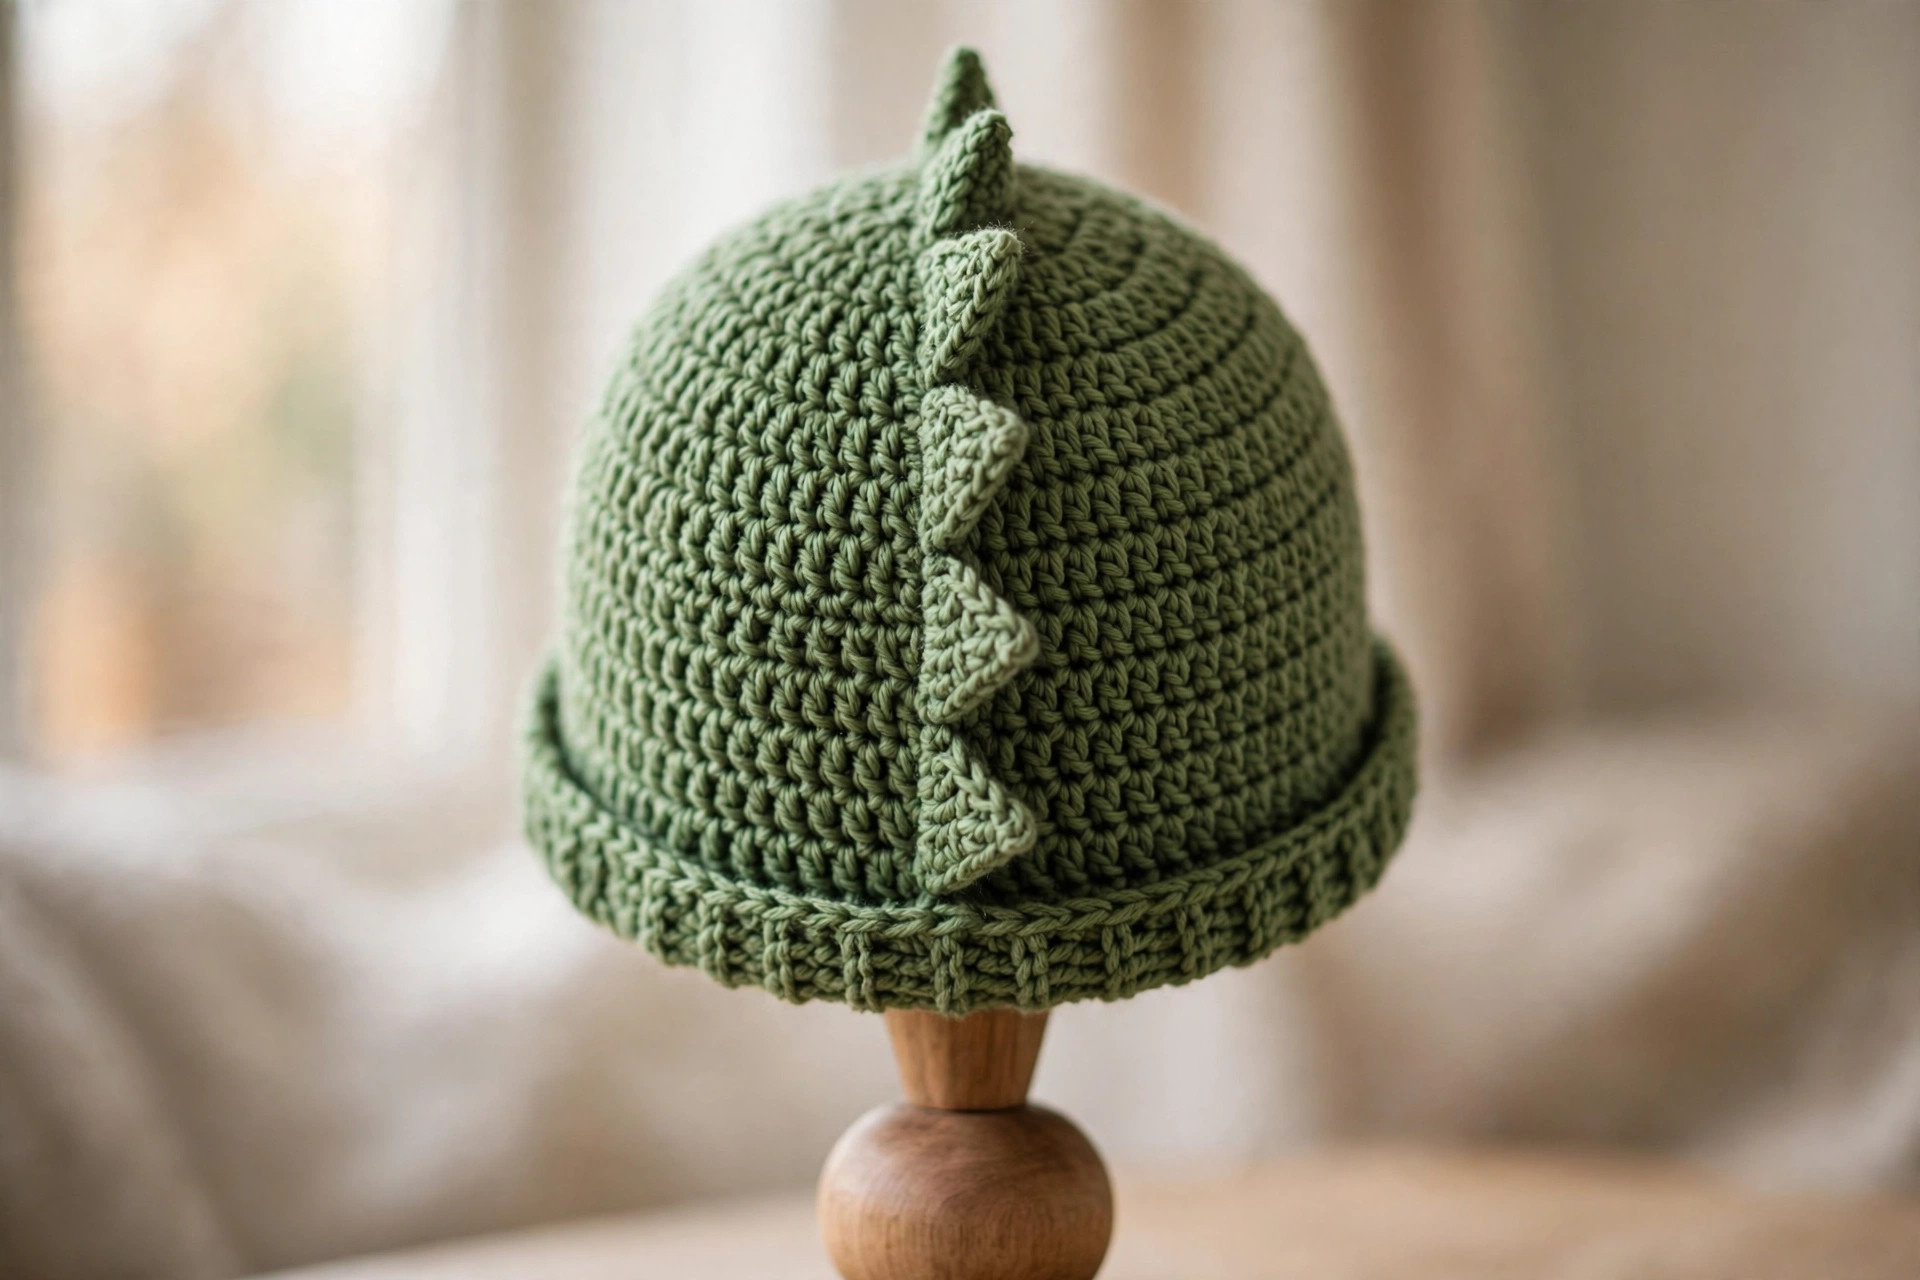
The spikes are where the magic happens, and they're almost embarrassingly simple. Each one is a flat triangle worked in five short rows of single crochet — small enough to finish while the kettle boils. Sewn in a straight line down the center of the hat with their points facing up, they stand upright like proper dino plates. Kids lose their minds over them — and adults keep "borrowing" the teen/adult size.
Materials you'll need
| Supply | What to get |
|---|---|
| Main yarn (toddler / child / teen-adult) | Worsted-weight (#4) acrylic in dino green, about 100 g / 130 g / 160 g |
| Spike yarn | Worsted-weight in a lighter or contrasting green, about 25 g |
| Eye yarn | Worsted-weight white, about 10 g, plus a strand of black for embroidery |
| Crochet hook | 5.0 mm (H-8) |
| Notions | Tapestry needle, stitch markers, scissors |
A quick note on yarn choice: a smooth, bouncy acrylic is the ideal pick here — it keeps the double crochet stitches even, the spikes stand up crisply, and the finished hat survives the washing machine (because a kid's dinosaur hat will meet mud). Avoid very dark greens for a first hat; mid-tone greens let you see your stitches clearly while you work. Cotton works too but has less stretch, so check your gauge a touch more carefully.
Size, gauge and skill level
- Toddler (fits 44–48 cm / 17–19 in head): 42 cm (16.5 in) around × 17 cm (6.75 in) tall, 50 stitches around, 5 spikes.
- Child (fits 50–54 cm / 20–21.25 in head): 50 cm (19.75 in) around × 19 cm (7.5 in) tall, 60 stitches around, 6 spikes.
- Teen/Adult (fits 54–58 cm / 21.25–23 in head): 55 cm (21.75 in) around × 21 cm (8.25 in) tall, 66 stitches around, 7 spikes.
- Gauge: 12 double crochet stitches = 10 cm (4 in) with a 5.0 mm hook. The body is stretchy, so being half a centimeter off won't ruin anything — but check the crown against the measurements above after the increase rounds, because the crown sets the whole hat's width.
- Skill level: beginner. You should know how to double crochet in joined rounds and work a magic ring. Everything else — the ribbed brim, the spikes, the eyes — is explained stitch by stitch.
If you've never made a hat before, the free crochet hat pattern is the same top-down beanie construction without the dino extras — a perfect confidence-builder before you add spikes.
Measuring tip: wrap a tape measure around the widest part of the head, just above the eyebrows and ears. Pick the size whose "fits" range contains that number. Between sizes? Size down — crochet stretches with wear, and a slightly snug hat stays on a wriggly toddler far better than a loose one.
Abbreviations — US terms
| Abbreviation | Meaning |
|---|---|
| MR | magic ring |
| dc | double crochet |
| sc | single crochet |
| inc | increase (2 dc in the same stitch) |
| sc2tog | single crochet 2 together (decrease) |
| fpdc | front post double crochet |
| bpdc | back post double crochet |
| st(s) | stitch(es) |
| ch | chain |
| sl st | slip stitch |
| R | round |
| FO | fasten off |
A note on the turning chain: the ch-3 at the start of each round counts as your first double crochet. Join every round with a slip stitch into the top of the starting ch-3. This keeps the seam nearly invisible and your stitch counts honest.
The pattern (US terms)
Work in joined rounds: ch 3 (counts as dc), work the round, join with a sl st to the top of the ch-3. The stitch count at the end of every round is in parentheses — count, especially through the crown increases. The crown math is shared across all three sizes; each size simply stops increasing at a different round.
Crown — all sizes
- R1: MR, ch 3 (counts as dc), 9 dc into the ring, join (10)
- R2: ch 3, dc in same st, 2 dc in each st around, join (20)
- R3: ch 3, dc in same st, [dc in next st, 2 dc in next st] × 10, join (30)
- R4: ch 3, dc in same st, [dc in next 2 sts, 2 dc in next st] × 10, join (40)
- R5: ch 3, dc in same st, [dc in next 3 sts, 2 dc in next st] × 10, join (50)
- Toddler: stop increasing here. Your crown should measure about 13.5 cm (5.25 in) across.
- R6: ch 3, dc in same st, [dc in next 4 sts, 2 dc in next st] × 10, join (60)
- Child: stop increasing here. Your crown should measure about 16 cm (6.25 in) across.
- R7 (teen/adult only): ch 3, [dc in next 9 sts, 2 dc in next st] × 6, join (66)
- Teen/Adult: stop increasing here. Your crown should measure about 17.5 cm (7 in) across.
Crown check: lay the circle flat and measure across the middle. If it's more than 1 cm off the number above, your tension differs from the gauge — switch hook sizes (up if too small, down if too big) rather than fighting it through the body.
Body — work even
Now work straight rounds with no increases until the hat reaches the target length, measuring from the very top of the crown:
- Toddler: R6–R10: dc in each st around (50) — 5 rounds even, until the piece measures 13 cm (5 in) from the top.
- Child: R7–R12: dc in each st around (60) — 6 rounds even, until the piece measures 15 cm (6 in) from the top.
- Teen/Adult: R8–R14: dc in each st around (66) — 7 rounds even, until the piece measures 17 cm (6.75 in) from the top.
The hat will look a little short at this stage — the ribbed brim adds the last couple of centimeters. Trust the tape measure, not your eyes.
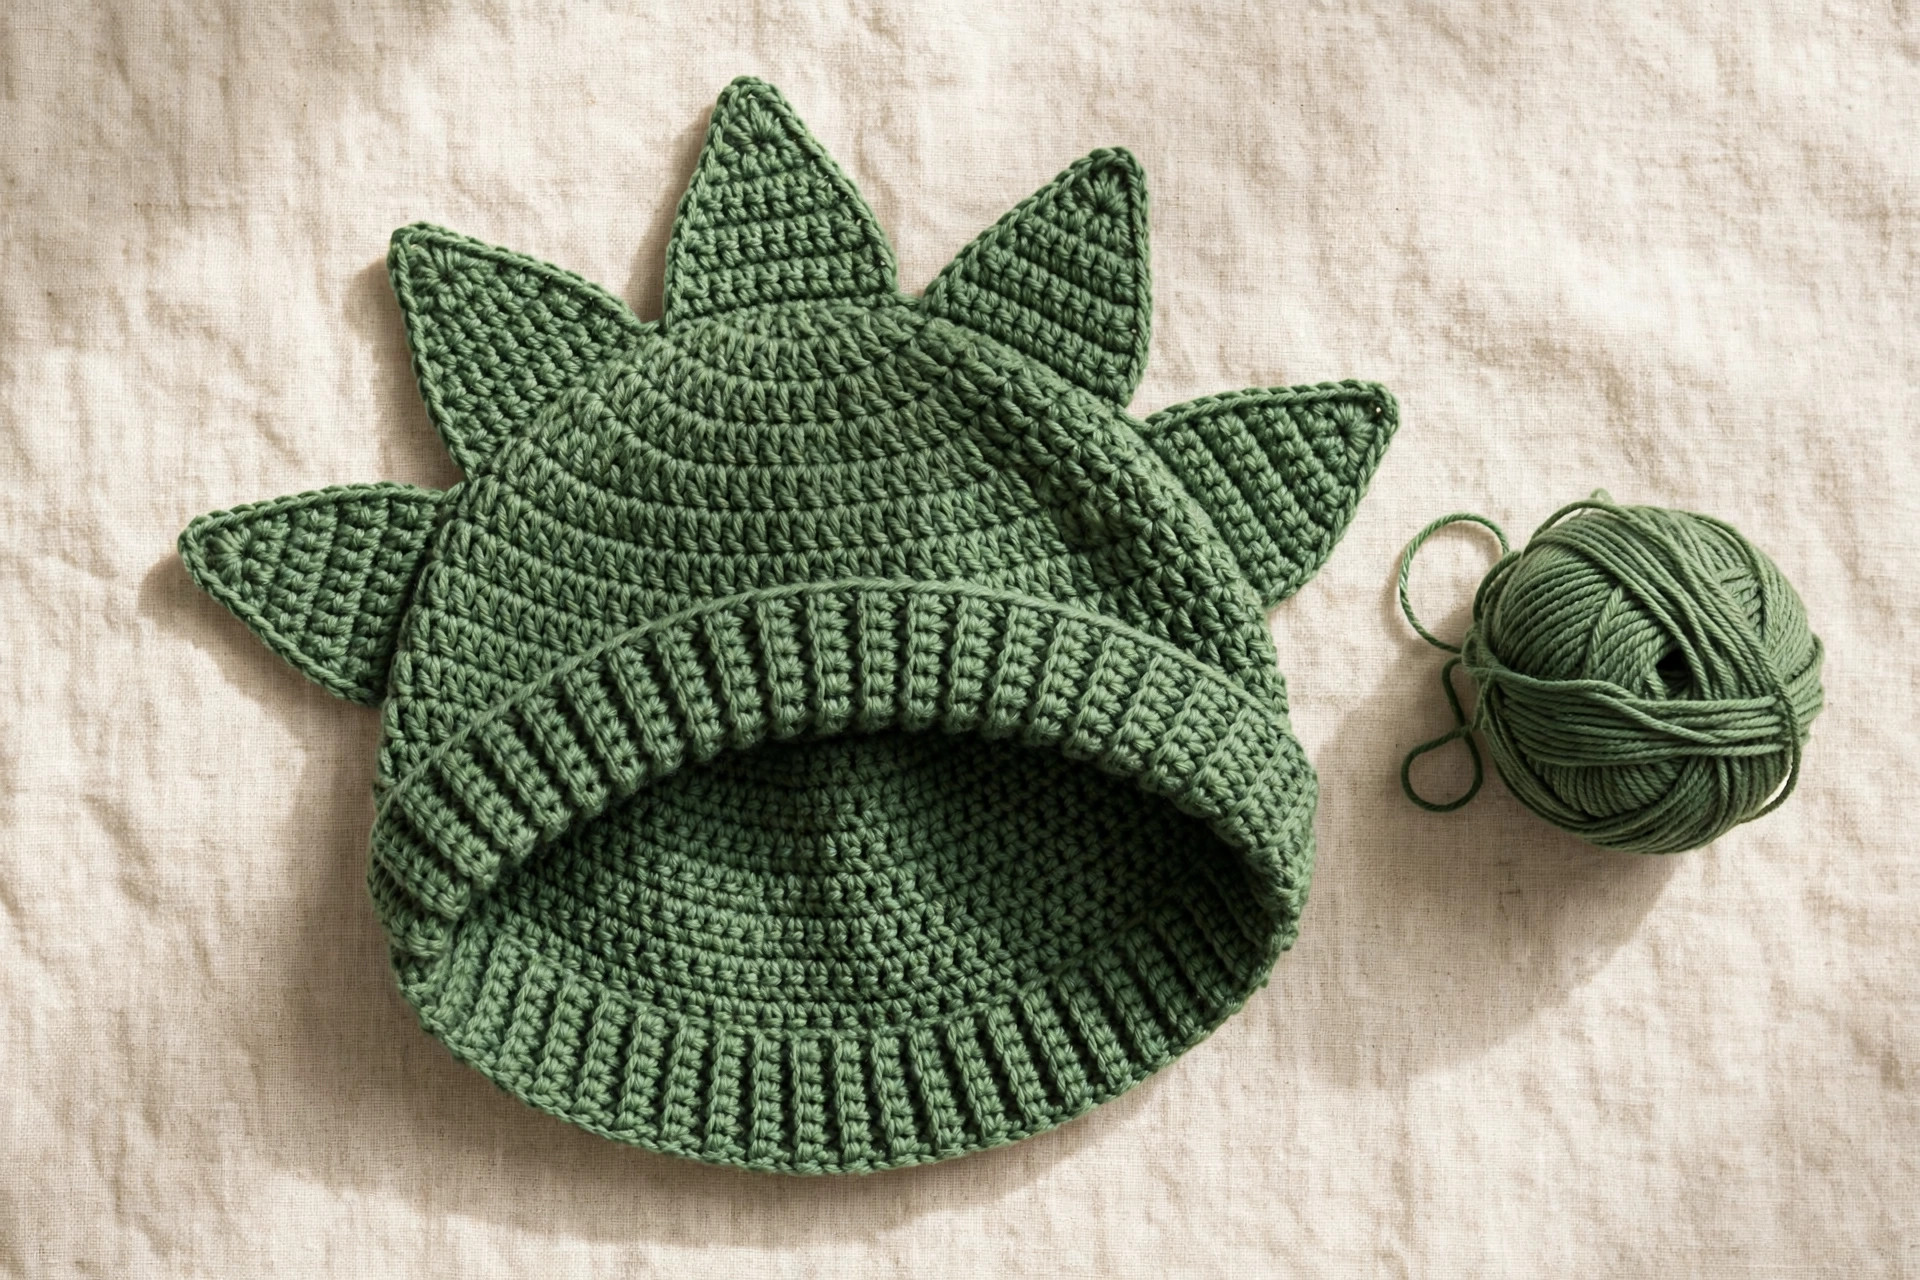
Ribbed brim — all sizes
Two rounds of post-stitch ribbing give the brim that classic stretchy finish and stop the edge from flaring:
- Brim R1: ch 2 (does not count as a st), [fpdc around next st, bpdc around next st] repeat around, join with sl st to first fpdc (50 / 60 / 66).
- Brim R2: ch 2, [fpdc around next fpdc, bpdc around next bpdc] repeat around, join (50 / 60 / 66).
FO and weave in the end. All three stitch counts are even, so the ribbing lines up perfectly on every size.
Spikes — make 5 (toddler), 6 (child) or 7 (teen/adult)
Worked flat in the spike color. Each triangle takes about five minutes:
- Ch 2.
- Row 1: 2 sc in 2nd ch from hook (2), turn.
- Row 2: ch 1, 2 sc in each st across (4), turn.
- Row 3: ch 1, sc in each st across (4), turn.
- Row 4: ch 1, sc2tog twice (2), turn.
- Row 5: ch 1, sc2tog (1). FO, leaving a 25 cm (10 in) tail for sewing.
Attaching the spikes: find the center back line of the hat (opposite the round join — the join becomes the center back seam). Starting about 2 cm above the brim, whipstitch the base row of each spike to the hat along that center line, points facing up toward the crown, spacing them evenly up to about 3 cm below the crown's edge. Sew just the bottom row of each triangle down — the rest of the triangle stands upright on its own like a proper dino plate. For extra-sturdy spikes that survive playground duty, run a second line of whipstitches through the base.
Sleepy eyes — make 2
The drowsy little eyes are what turn this from "hat with triangles" into a character:
- R1: with white, MR, 6 sc (6).
- R2: [sc in next st, 2 sc in next st] × 3 (9). Sl st to first st, FO, leaving a tail for sewing.
- With black yarn and your tapestry needle, embroider a gentle downward-curving arc across the middle of each circle — three or four small backstitches in a "u" shape. That's the closed, sleepy eye.
- Sew one eye to the front of the hat just above the brim, about 4–5 cm apart (closer together on the toddler size). The front is opposite your spike line.
Size adjustments
Between sizes or working with a different yarn? The math is forgiving: each extra crown increase round adds 10 stitches (about 8 cm / 3 in of circumference). To go bigger, add one more increase round following the established rhythm ([5 dc, inc] × 10 for an in-between, or another [9 dc, inc] × 6 style round); to go smaller, stop one round earlier. Then add or remove body rounds until the length matches — roughly one round per 1.5 cm (0.6 in). Keep the spike count proportional: about one spike per 8–9 cm of center-line length.
Finishing touches
Weave in every end before you sew anything on — it's much harder to chase tails once the spikes are attached. Block the hat lightly if your edges curl: dampen it, smooth it flat, and let it dry. This takes ten minutes of active effort and makes the ribbing sit beautifully.
Sew the spikes first, then the eyes, checking placement as you go: put the hat on a ball, a bowl, or a willing head and look at it straight-on before you commit the last few stitches. Spikes should march in a straight center line; eyes should sit level with each other just above the brim. Step back like you're photographing it — if it looks right in a photo, it looks right in person.
Variations to try next
Once you've made one dino hat, the playground will place orders. Same pattern, three new personalities:
- Stegosaurus plates. Work the spikes in a bold contrast color — mustard yellow on forest green is the classic — and make each spike one row taller (repeat Row 3 twice before decreasing). Bigger plates, bolder dino.
- Sleepy pastel dino. Make the whole hat in a soft sage or mint, spikes in cream, and skip the black embroidery — use a matching green for the eye curves instead. Dreamy, gentle, and very giftable for babies (embroider the eyes directly onto the hat instead of sewing on circles for under-threes).
- T-Rex tiny arms. Add two miniature "arms" (MR, 5 sc, 3 rounds even, FO) sewn to the sides of the hat just above the brim. Scientifically useless, comedically perfect — kids adore them.
And if this project gave you the costume-hat bug, the flip-face witch cat is another character hat with a clever twist, the crochet dragon uses the same spike technique at amigurumi scale, and the crochet headband is a one-evening project for using up the leftover green.
Troubleshooting tips
- The crown is ruffling like a lettuce leaf. Too many increases for your tension. Frog back to R3 and switch to a smaller hook, or skip the R2 doubling pattern's rhythm — most often this means your gauge is looser than 12 dc per 10 cm.
- The crown is cupping into a bowl. Too few increases — your stitches are tighter than gauge. Go up half a hook size and re-check the flat measurement after R5.
- The hat is too tight to pull on. Check two things: did you stop increasing at the right round, and is your brim ribbing too tight? Post stitches run snug — consciously loosen up on the brim rounds. If the body is genuinely too small, add one more increase round (see Size adjustments).
- The spikes flop over sideways. They're sewn too loosely at the base. Unpick, then whipstitch the entire base row firmly, catching the hat fabric with every stitch. A second pass of stitching makes them playground-proof.
- You can see a visible seam spiral. You're probably joining into the wrong stitch. Always join with a slip stitch into the top of the starting ch-3, and make sure the ch-3 counts as your first dc of the next round — not an extra stitch.
- The eyes look cross-eyed. Pin both eyes in place and look at the hat straight-on before sewing either one down. About 4–5 cm apart, level with each other, and centered on the front — five seconds of pinning saves a lopsided face.
- The brim edge flares out. The ribbing rounds were worked too loosely, or the body is a touch too long. Try the hat on: if the length is right, just rework the two brim rounds with slightly tighter tension.
Frequently asked questions
Is this crochet dinosaur hat pattern really free?
Yes — the complete pattern above is free, no email signup, no purchase required. If it makes a small human roar with delight, saving the post on Pinterest is the kindest thank-you.
What skill level is this pattern?
Beginner. If you can double crochet in the round and work a magic ring, you have every skill this pattern needs. The ribbed brim uses front and back post stitches — just double crochets worked around the post — and the easy beginner crochet patterns collection has more practice projects at this level.
How long does it take to make?
About 3–4 hours: 2–2.5 for the hat itself, 30–45 minutes for the spikes, 15–20 for the eyes and finishing. The toddler size is a genuine one-evening project.
Which size should I make?
Measure around the head above the eyebrows and pick the matching "fits" range; between sizes, size down, as crochet stretches. Toddler fits most 2–4 year olds, child ages 5–10, teen/adult most teens and adults.
Can I use a different yarn weight?
Yes, with a gauge check. Use your yarn label's hook size, measure your double-crochet gauge, and compare crown rounds to the flat measurements above — stop increasing when the circle measures right. Bulky yarn makes a gloriously chunky dino; expect to stop increasing a round earlier.
Can I sell the finished hats I make?
Yes! You may sell finished hats made from this pattern in small batches (craft fairs, Etsy, gifts). Please credit Little Loop Finds as the pattern designer with a link back to this page. The pattern text and photos themselves may not be redistributed, republished, or sold.
How do I wash the finished hat?
Machine wash cold on gentle, lay flat to dry — hence the acrylic recommendation. Finger-fluff the spikes after washing. Hand wash wool and reshape while damp.
More free patterns to try
Keep the hook moving. The free crochet hat pattern is the plain-beanie base this dino hat is built on — perfect for gifts in every color. The crochet cat teaches the same spiral techniques in amigurumi form, the crochet headband is a stash-busting one-evening make, and the easy beginner crochet patterns collection rounds up more projects at exactly this skill level.
The box below contains an Etsy link. If you buy through it, we may earn a small commission at no extra cost to you. Learn more.
No time to make one?
Short on time? Find handmade crochet dinosaur hats from independent makers on Etsy.
Browse on Etsy (opens Etsy in a new tab)