Free crochet frock patterns: baby & girl dress in 4 sizes
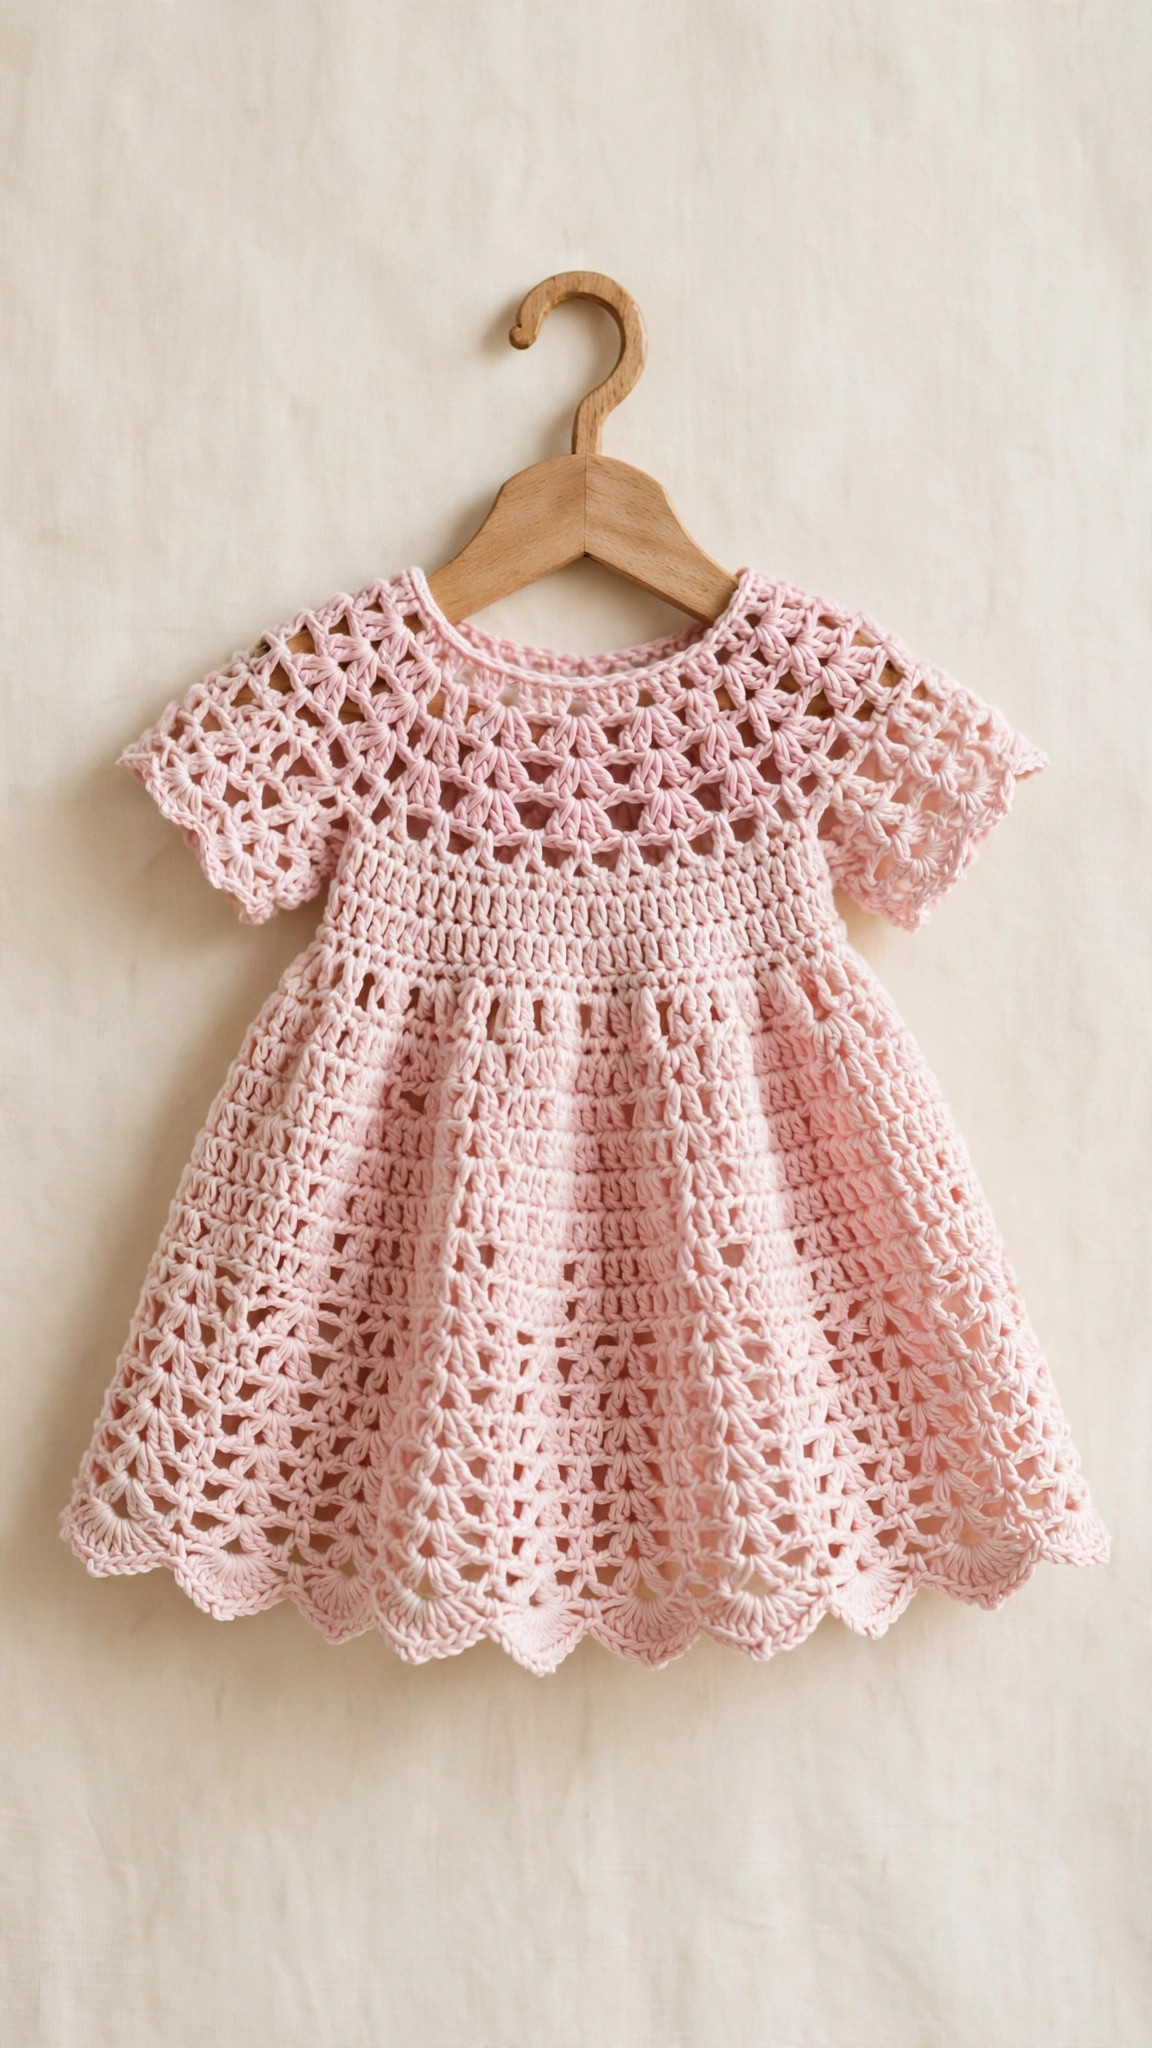
A sweet top-down crochet frock with a tidy button-back yoke, a gently flared skirt worked in a simple shell rhythm, tiny cap sleeves and a scalloped hem — in four sizes from newborn to 4T, with every stitch count worked out for you.

Baby & Kids · Crochet
- Finished sizes
- 0–6 mo to 4T, chest 16–21 in
- Making time
- About 3–5 hours
- Hook
- 4.0 mm, DK-weight yarn
- Sizes
- 4 sizes in one pattern
- Skill
- Beginner
In this post
There is something magical about a little handmade frock. It twirls, photographs beautifully, and becomes the outfit everyone asks about — "did you really make that?" This original pattern gives you exactly that dress: a neat top-down yoke you can try on as you go, a gently flared skirt with a sweet shell rhythm, tiny cap sleeves and a soft scalloped hem. No seaming, and no wrestling a dress over a wiggly baby's head thanks to a simple back button placket.
Work it in pastel for a newborn gift, cream for a christening, or coral or mint for everyday twirling. Once the yoke is divided the stitch pattern is calm and repetitive — a lovely evening project where a little dress appears almost by itself.
Why you'll love this free crochet frock pattern
Many baby dress patterns look adorable in the photo, then fight you: neckline too wide, armholes pinching, skirt a stiff tube. This frock is designed fit-first. Because the yoke is worked top-down, you can check the fit before committing to the skirt — if it sits wide, work one fewer increase row. That control is why confident beginners succeed with this dress first try.
The skirt flare is built into the stitch rhythm rather than forced with constant increases, so it drapes instead of belling out. Shell rounds add movement and texture with no lace chart to follow. Cap sleeves are worked directly onto the armholes — no separate pieces, no sewing. The back placket opens flat for easy dressing, and the two smallest sizes use well under 200 grams of yarn. Pair the frock with the matching baby bonnet for a complete handmade outfit.
Materials you'll need
| Supply | What to get |
|---|---|
| Main yarn | DK / light-worsted (#3) acrylic, cotton or acrylic-cotton blend, about 100 g (0–6 mo), 125 g (6–12 mo), 175 g (2T), 225 g (4T) |
| Contrast yarn (optional) | DK in a coordinating shade for the hem edging and button band, about 25 g |
| Crochet hook | 4.0 mm (G-6) |
| Buttons | 3 small buttons, about 11–13 mm, flat and smooth-edged |
| Notions | Tapestry needle, stitch markers (at least 4), scissors, measuring tape |
| Optional | 60 cm (24 in) of narrow ribbon for a waist tie, and a blocking mat or clean towel |
A quick note on yarn: softness and washability come first for baby skin. Smooth acrylic or acrylic-cotton DK holds the shell definition and washes easily. Avoid very slippery yarns for your first frock — a little grip helps the yoke increases stay put. For gifts, cotton-acrylic is the safest choice.
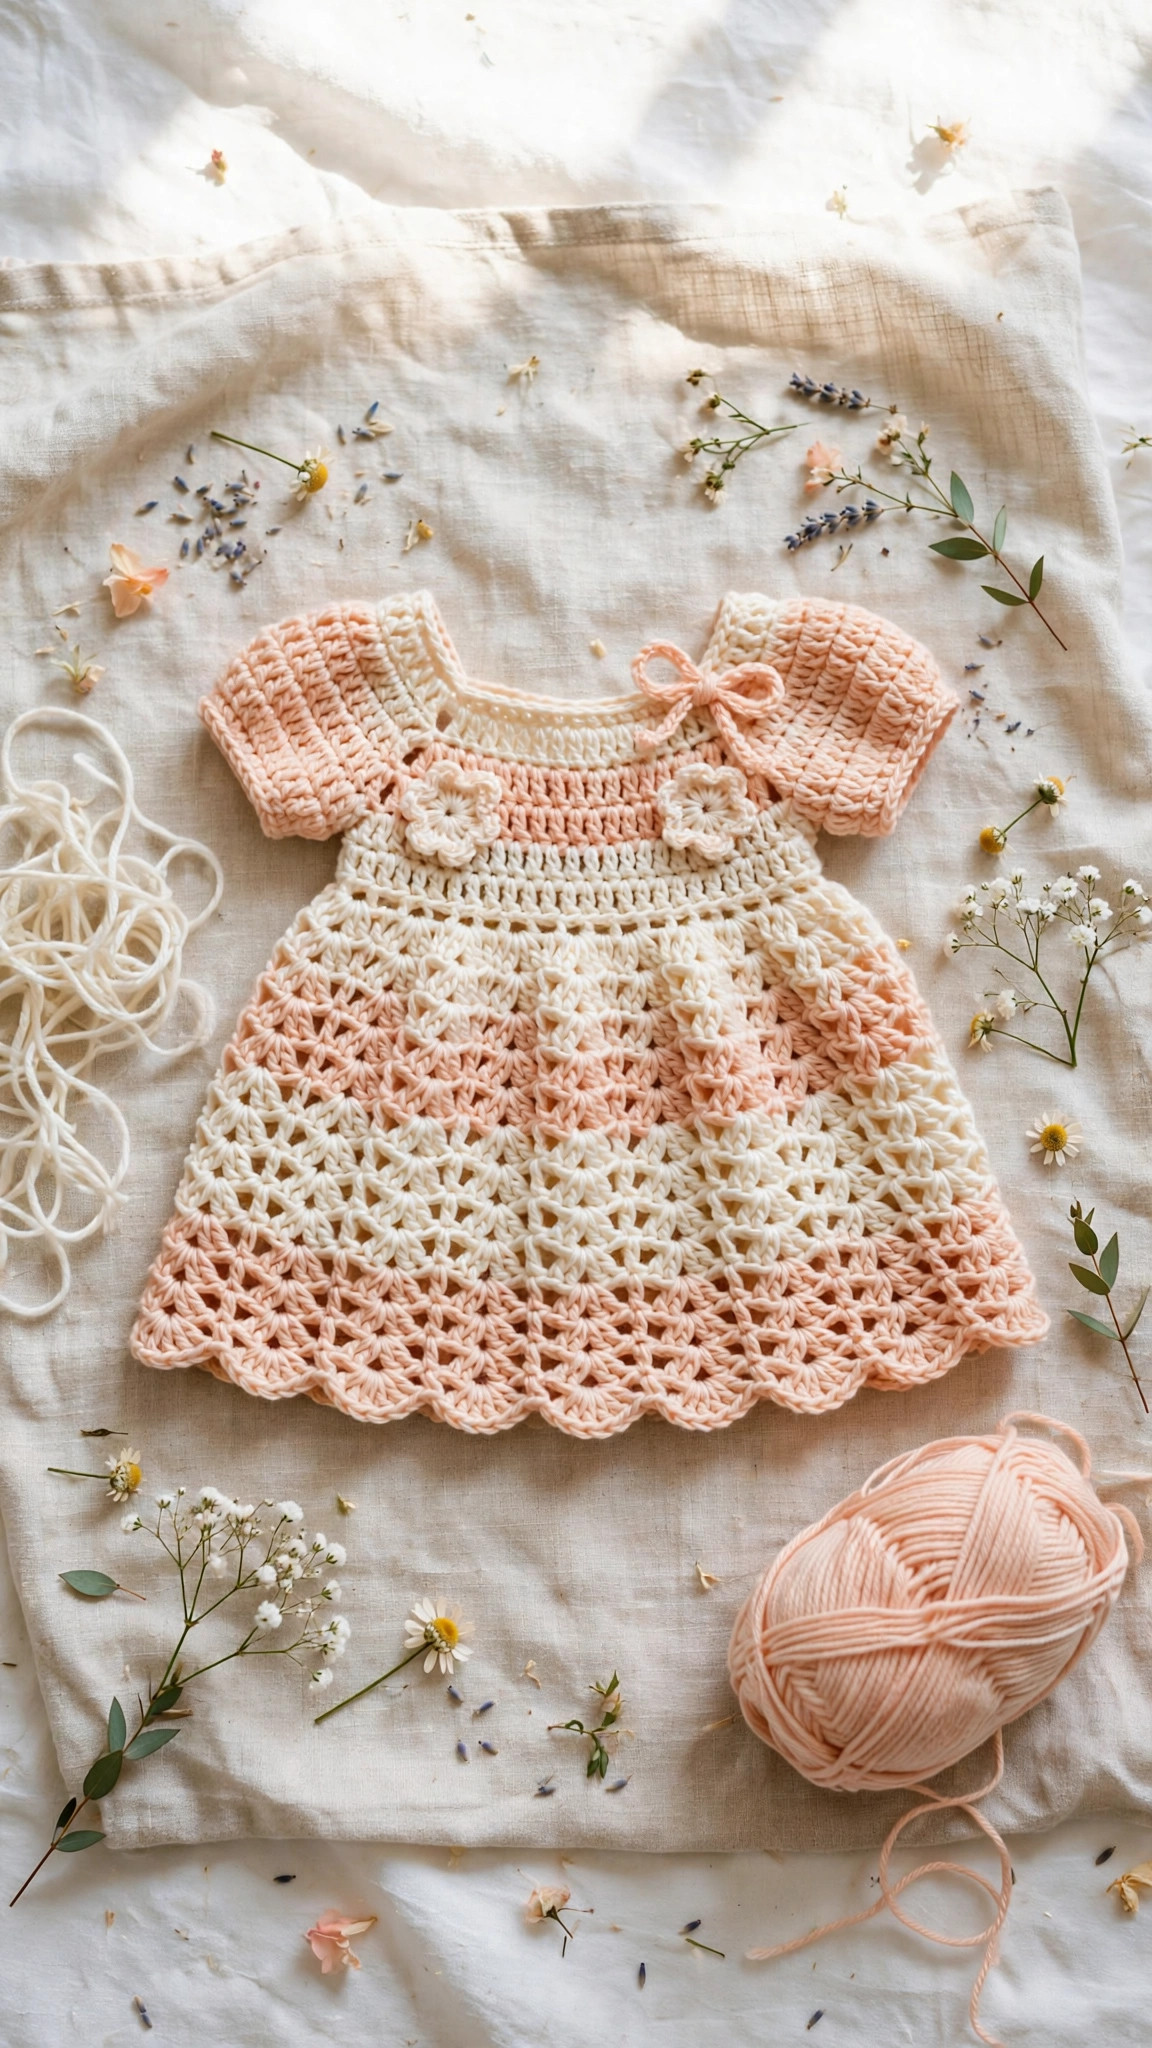
Size, gauge and skill level
- Finished sizes: 0–6 months, 6–12 months, 2 years (2T) and 4 years (4T). Instructions are written for the smallest size first, with the other sizes in brackets like this: 48 [56, 64, 72]. When only one number appears, it applies to all sizes.
- Gauge: 16 double crochet stitches × 9 rows = 10 cm (4 in) in double crochet with a 4.0 mm hook. Gauge genuinely matters for a garment — make the swatch. If your swatch is too small, go up a hook size; too big, go down.
- Skill level: confident beginner. You should be comfortable chaining, working single and double crochet, and counting stitches. Every special stitch is explained, and the skirt rhythm is memorised by the second round.
| Size | Chest to fit | Finished chest | Yoke starting chain | Stitches after yoke | Skirt length (underarm to hem) | Total length |
|---|---|---|---|---|---|---|
| 0–6 mo | 40.5 cm / 16 in | 43 cm / 17 in | 48 | 84 dc | 18 cm / 7 in | 33 cm / 13 in |
| 6–12 mo | 43 cm / 17 in | 46 cm / 18 in | 56 | 96 dc | 20 cm / 8 in | 38 cm / 15 in |
| 2T | 48 cm / 19 in | 51 cm / 20 in | 64 | 108 dc | 24 cm / 9.5 in | 46 cm / 18 in |
| 4T | 53 cm / 21 in | 56 cm / 22 in | 72 | 120 dc | 28 cm / 11 in | 53 cm / 21 in |
Choose size by chest measurement, not age. Between sizes? Make the larger one — with the ribbon tie cinched it will be loved for two seasons. For a gift, 6–12 months is the sweet spot. Finished measurements include about 2.5 cm (1 in) of positive ease.
Abbreviations — US terms
| Abbreviation | Meaning |
|---|---|
| ch | chain |
| st(s) | stitch(es) |
| sc | single crochet |
| dc | double crochet |
| sl st | slip stitch |
| inc | increase (2 dc in the same stitch) |
| shell | 5 dc worked into the same stitch |
| sk | skip |
| rep | repeat |
| RS / WS | right side / wrong side |
A note on turning chains: the ch-2 at the start of a row or round counts as the first double crochet, and stitch counts in parentheses include it. Count at the end of every yoke row — the increases only line up from the correct total.
The pattern (US terms)
The frock is worked in one piece from the neck down. The yoke is worked in rows so the back stays open as a button placket. You will then skip (set aside) the sleeve stitches, join under the arms, and work the skirt in rounds to the hem. Cap sleeves and edging are added last. Read the pattern through once before starting.
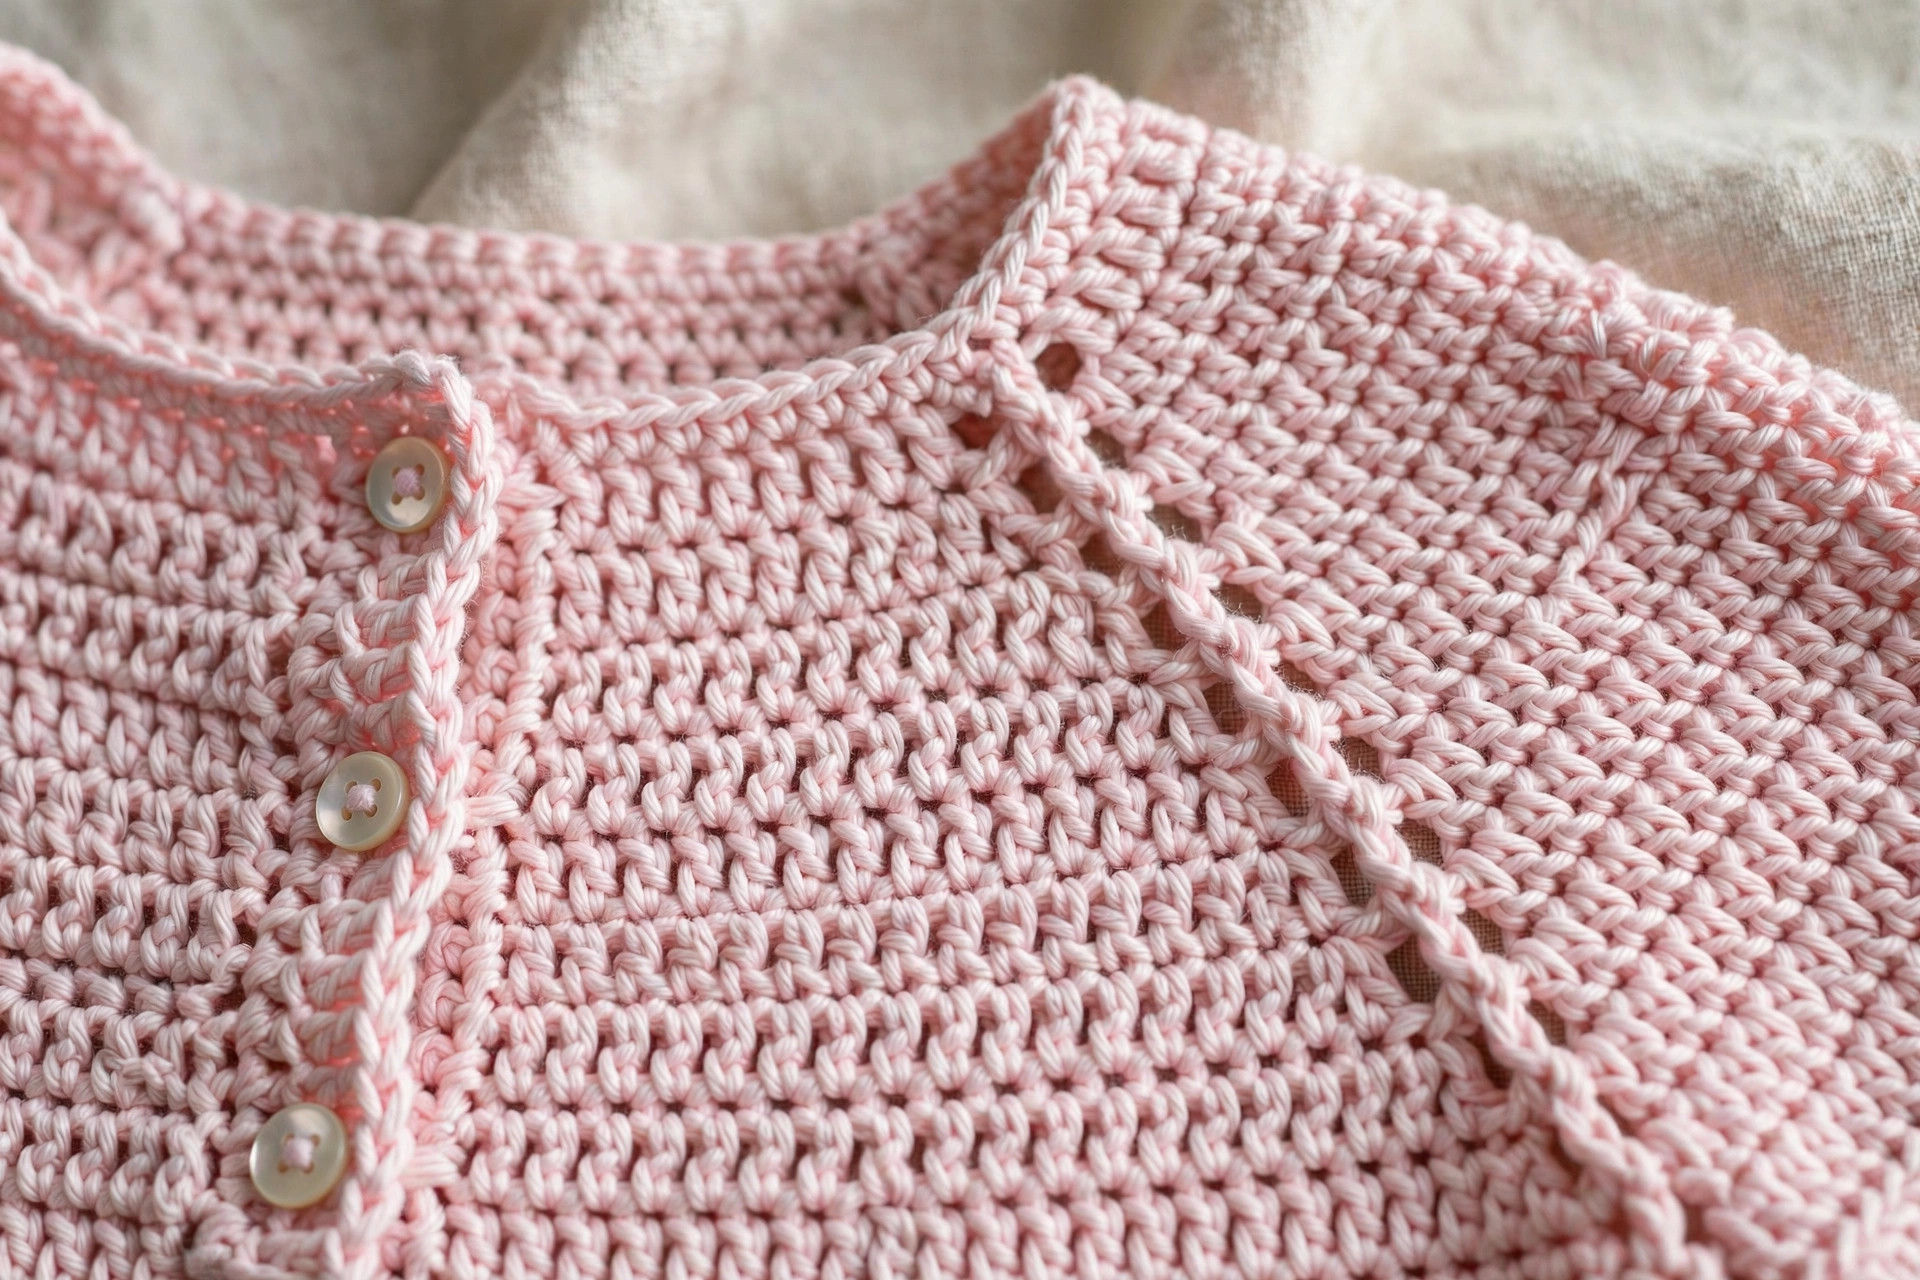
Yoke — worked in rows
With main yarn and a 4.0 mm hook, ch 49 [57, 65, 73]. The extra chain is your turning chain and does not count as a stitch.
- Row 1 (RS): dc in 3rd ch from hook and in each ch across, placing a marker in the stitches that will become the four increase points as follows: work 7 [8, 9, 10] dc for the right back, marker; 8 [9, 10, 11] dc for the right sleeve, marker; 18 [20, 22, 26] dc for the front, marker; 8 [9, 10, 11] dc for the left sleeve, marker; 7 [8, 9, 10] dc for the left back. (48 [56, 64, 72] dc, counting the turning chain as one dc at the row start — adjust your first dc placement so the total is exact.)
- Row 2: ch 2 (counts as dc), turn, dc in each st up to the marked st, work 3 dc in the marked st (this is your increase point), move the marker up into the centre stitch of those 3 dc. Repeat at each of the 4 markers, dc to end. (56 [64, 72, 80] dc)
- Rows 3–6 [3–7, 3–8, 3–9]: repeat Row 2, increasing 8 stitches on every row at the 4 marked points. After the final increase row you will have 88 [104, 120, 136] dc in total across the row, and the yoke should measure about 9 [10, 11.5, 13] cm (3.5 [4, 4.5, 5] in) from the neck edge, measured straight down the front.
- Row 7 [8, 9, 10] (divide row): ch 2, turn, dc across the back stitches up to the first marker, ch 2 [2, 3, 3] for the underarm, skip all sleeve stitches up to the second marker, dc across the front, ch 2 [2, 3, 3] for the second underarm, skip the remaining sleeve stitches, dc across the final back section. The sleeve stitches are now set aside and will not be worked until the cap sleeves at the end. Your working stitch count for the body is now 84 [96, 108, 120] sts including the underarm chains.
Check the joined body against the size table — within about a centimetre is fine, as crochet relaxes with wear. Much smaller means tight gauge: add one more increase row before dividing; the shell rhythm absorbs the 8 extra stitches easily.
Skirt — worked in rounds
Work in rounds without turning, joining each round with a sl st into the top of the starting ch-2. The gentle flare comes from one early increase round, then from the shell rounds themselves.
- Round 1: ch 2, dc in each st and each underarm ch around. (84 [96, 108, 120] dc)
- Round 2 (increase): ch 2, [dc in next 6 [7, 8, 9] sts, 2 dc in next st] rep around. (96 [108, 120, 132] dc)
- Round 3: ch 2, dc in each st around. (96 [108, 120, 132] dc)
- Round 4 (shell round): ch 2, dc in next st, [sk 2 sts, shell (5 dc) in next st, sk 2 sts, dc in next st] rep around, ending with a shell placed evenly before the join. Do not stress about symmetry at the join — a plain round follows and hides everything.
- Rounds 5–6: ch 2, dc in each st around. On Round 5, work into the centre stitch of each shell only — a neat trick that keeps the skirt from flaring too fast and returns your count to 96 [108, 120, 132] dc.
- Rounds 7–14 [7–16, 7–20, 7–24]: repeat Rounds 4–6 (one shell round, two plain rounds) until the skirt measures 18 [20, 24, 28] cm (7 [8, 9.5, 11] in) from the underarm, ending after a plain round. Adjust length freely: two extra rounds for a tall toddler, two fewer for a crawling baby.
- Final round (hem): ch 1, [sc in next 2 sts, shell in next st worked as 5 dc, sc in next 2 sts, sk 1 st] rep around, join with sl st. This gives the soft scalloped edge in the photographs. Fasten off and weave in the end.
For a fuller party skirt, repeat Round 2's increase pattern once more after Round 6. As written, the gentle flare drapes softly and uses less yarn — kinder for everyday wear.
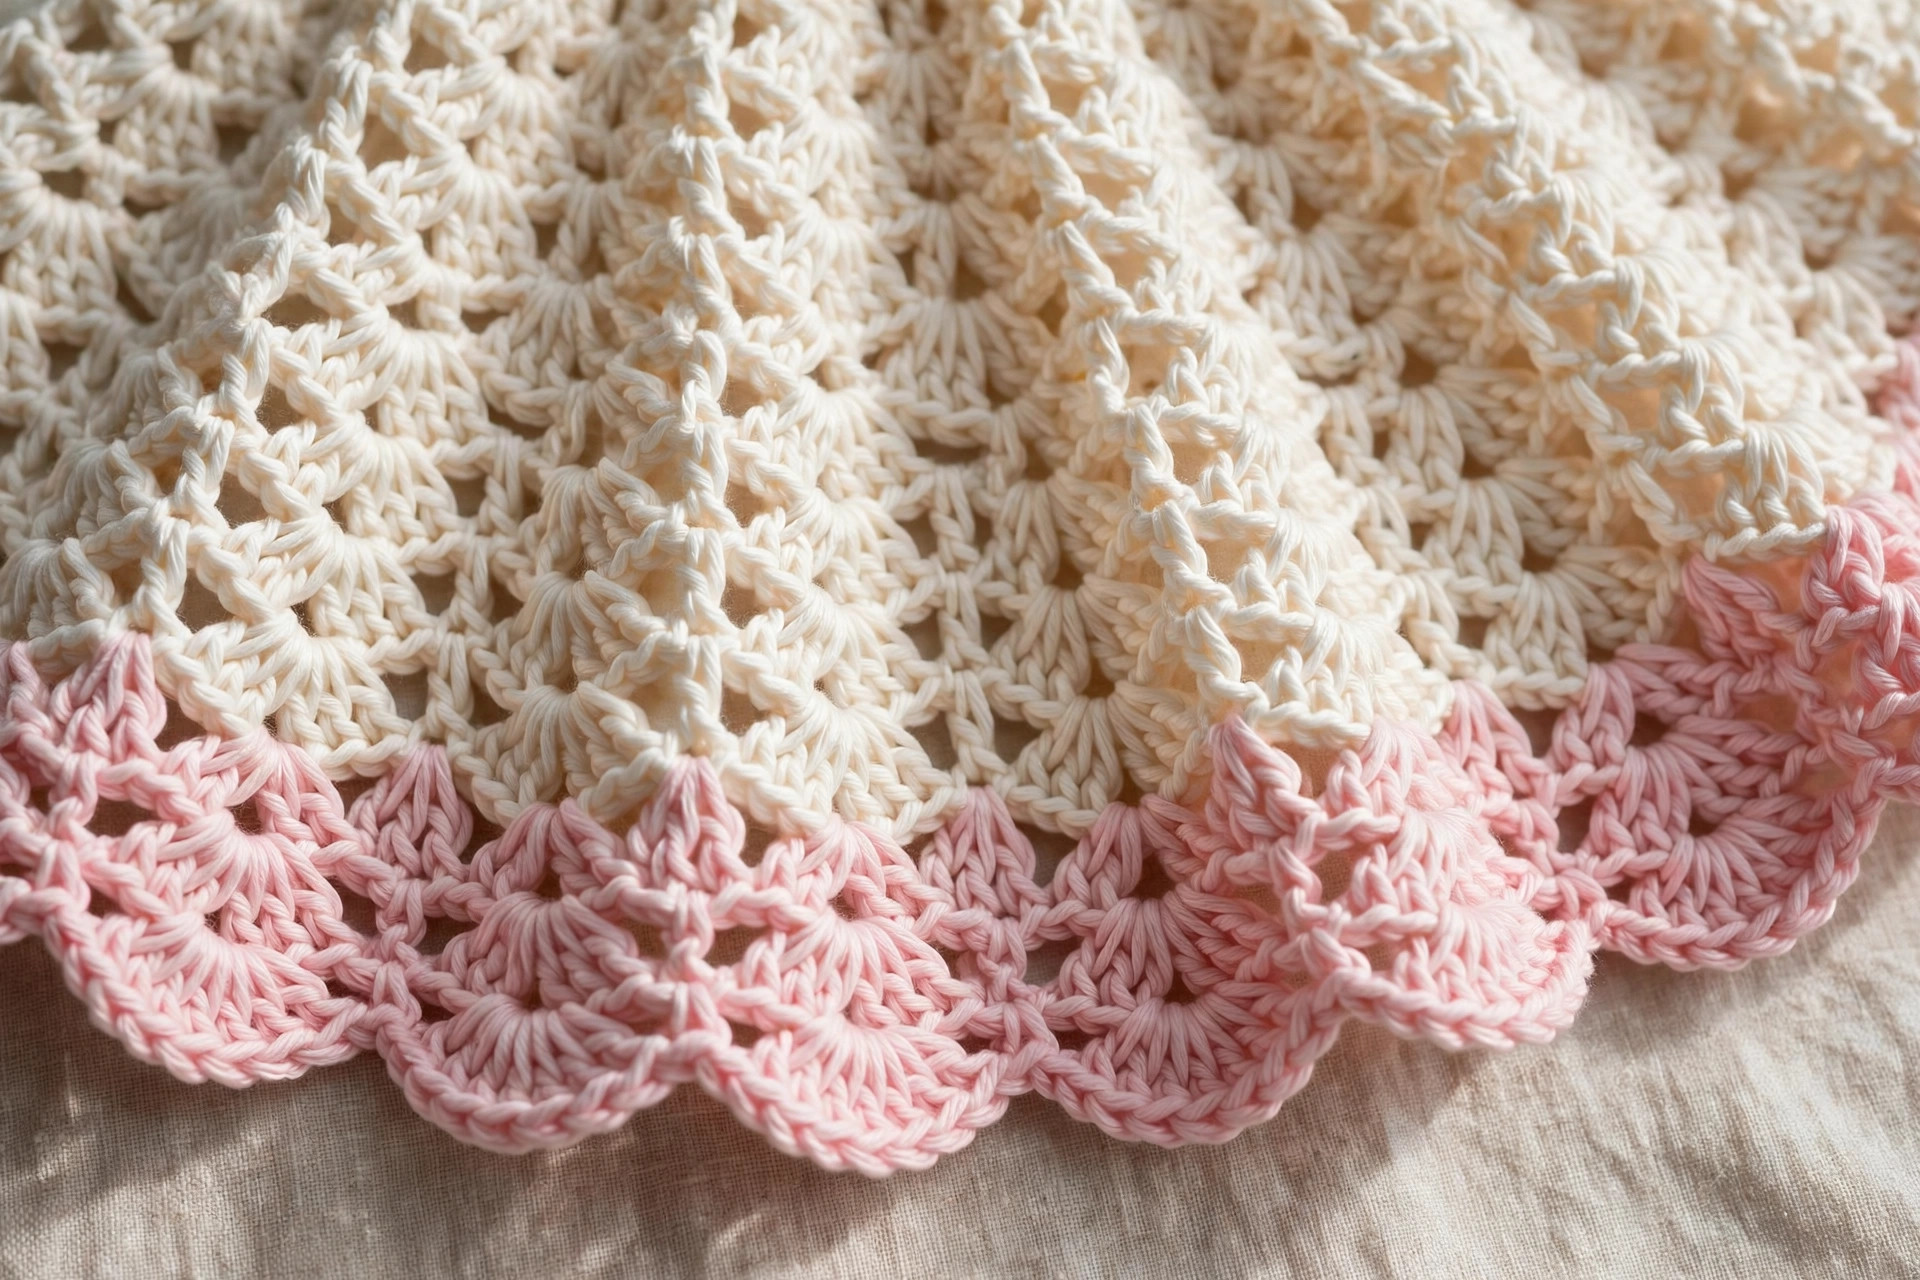
Sleeves — cap sleeves worked onto the armholes
Rejoin your yarn at the centre underarm of one armhole, right side facing.
- Round 1: ch 2, work 24 [28, 32, 36] dc evenly around the armhole opening, working into the set-aside sleeve stitches and picking up 2 [2, 3, 3] dc across the underarm chains, join with sl st. (24 [28, 32, 36] dc)
- Round 2: ch 1, [sc in next 3 sts, shell in next st, sc in next 3 sts, sk 1 st] rep around for a matching scalloped cuff, join with sl st. Fasten off and weave in.
- Repeat for the second sleeve. That is it — no sewing, and the scallop echoes the hem so the dress looks designed rather than assembled.
For a sleeveless summer frock, skip the cap sleeves and work one round of sc around each armhole plus a round of reverse single crochet. For cooler weather, work two extra plain dc rounds before the scallop for a three-quarter sleeve.
Neck and back edging — the button placket
With the right side facing, rejoin yarn at the bottom of the right back opening.
- Button band: work sc evenly up the right back edge (about 1 sc per row end), placing 3 buttonholes on the left back edge as follows: work sc evenly down the left edge, and at the heights of the neck, mid-yoke and divide row, work [ch 2, sk 2 row ends] instead of sc to form a loop buttonhole.
- Neck edging: continue around the neckline with 1 round of sc, working 3 sc into each corner to keep it flat, then join and fasten off. In contrast yarn this detail frames the face beautifully.
- Sew the 3 buttons opposite the buttonholes, passing through each at least six times — buttons on baby clothes must be absolutely secure. Check them before every wear; for babies under six months, hidden snaps under decorative buttons are a safer option.
Finishing touches
Weave in every end in two directions so tails cannot work loose in the wash. Then block gently: soak in lukewarm water with a drop of mild soap for fifteen minutes, roll in a towel to press out water, and lay flat, coaxing the skirt into its flare and pinning the scalloped hem into soft waves. Blocking opens the shells, flattens the yoke and gives the frock its drape.
Thread the optional ribbon through the round just below the yoke and tie a small bow. For babies who chew everything, skip the ribbon or sew it firmly at the side seams. Finally, hold your frock up and give it a twirl — you made a dress, from a ball of yarn.
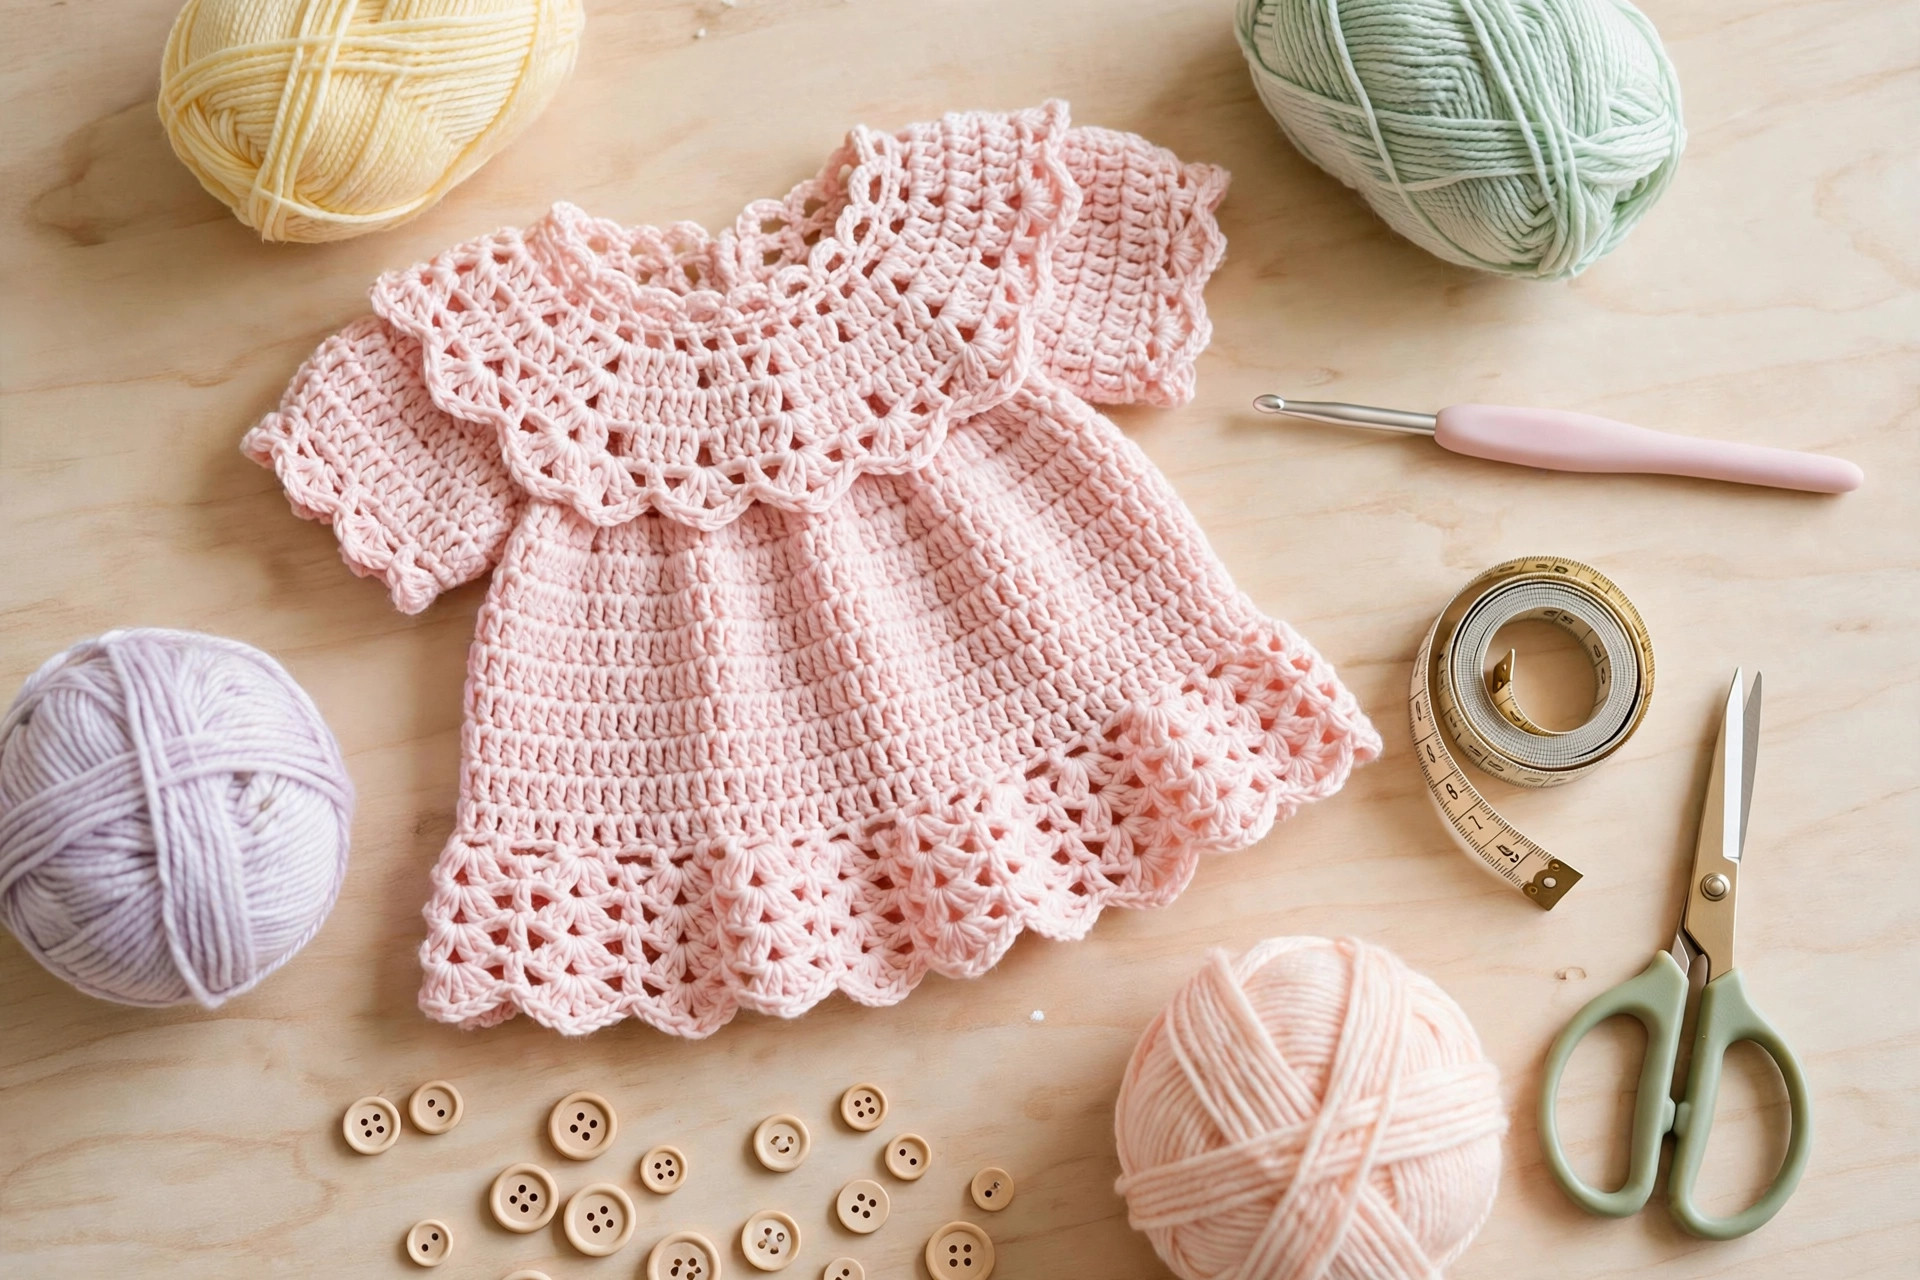
Three sweet variations to try next
Once you have made one frock, the pattern becomes a template. Same yoke, three different dresses:
- The christening frock. Work the dress in cream cotton, extend the skirt by four rounds, and add a second shell round at the hem. Pair it with the little lamb baby snuggle gift set for a naming-day gift worth keeping.
- The colour-block party frock. Yoke in one colour, skirt in a second, hem and button band in a third — coral with cream and mint photographs beautifully.
- The cosy winter frock. Use an acrylic-wool blend, extend the sleeves, and work the skirt in plain double crochet with just the final scallop. The free crochet hat in the same yarn makes the matching set.
And when you are ready to dress the grown-ups too, the crochet circle vest uses a similar top-down, try-it-on-as-you-go logic at adult scale, while the crochet shawl is the perfect lightweight layer to throw over your own shoulders at the same family party.
Troubleshooting tips
- The yoke curls at the edges. A little curl in the first rows is normal and disappears with blocking. If it persists, your starting chain is too tight — remake it with a larger hook, then switch back.
- The armholes look too big. Too many underarm chains is the usual culprit. Work a decrease over each extra chain in the first skirt round, and sew two small stitches closed at each underarm when finishing.
- The skirt flares too much (or not enough). Too much: you worked into every shell stitch instead of just the centre stitch. Not enough: add the extra increase round described above.
- Your stitch counts drift. Mark the first stitch of every round and move it up. One lost stitch per round is twelve by the hem.
- The button band gapes. Add a fourth button midway, or sew a tiny hidden snap between buttons.
- The neckline is too wide. Work a decrease at each shoulder in the neck edging round, or thread fine ribbon through the neck edge and tie a small bow at the back.
Frequently asked questions
Are these free crochet frock patterns really free?
Yes — the complete pattern above is free, with all four sizes and stitch counts included. Sharing the post or saving it on Pinterest is the kindest thank-you.
What skill level do I need for this crochet frock?
Confident beginner. If you can chain and work single and double crochet, you can make this dress. The yoke increases are simply three double crochets in one marked stitch, the skirt is a three-round rhythm, and there is no sewing together of body pieces.
How long does one frock take to make?
About 3 hours for 0–6 months, rising to around 5 hours for 4T. The yoke is slowest because of the counting; the skirt flies by. Most makers finish a baby size over two evenings.
Can I sell frocks made from this pattern?
Yes — you may sell finished frocks in small batches at craft fairs, markets and online shops. Please credit Little Loop Finds with a link back to this page. The pattern text and photographs may not be copied or sold.
What yarn can I substitute?
Any DK (#3) yarn meeting the gauge will work. Cotton blends give crisp shells; acrylic blends give softness and easy washing. Always swatch — two yarns labelled DK can differ by a whole size.
Is this frock safe for newborns?
Yes, with sensible care: sew buttons on firmly and check them before every wear (or use hidden snaps), skip the ribbon tie under six months, and choose a soft, non-shedding yarn.
How do I wash a handmade crochet frock?
Machine wash gentle and cool in a mesh bag, or hand wash, then dry flat. A light steam refreshes the shells after storage.
More free patterns to try
If this little dress gave you the garment bug, keep going. The baby bonnet is the natural companion piece and uses the same shell edging, the little lamb baby snuggle gift set builds a whole handmade gift around a baby make, and when you are ready for an adult project with the same try-on-as-you-go confidence, the crochet circle vest is waiting for you.
The box below contains an Etsy link. If you buy through it, we may earn a small commission at no extra cost to you. Learn more.
No time to make one?
Short on time? Find handmade crochet baby dresses from independent makers on Etsy.
Browse on Etsy (opens Etsy in a new tab)