Crochet Turtle Patterns: Easy Amigurumi Turtle Plush
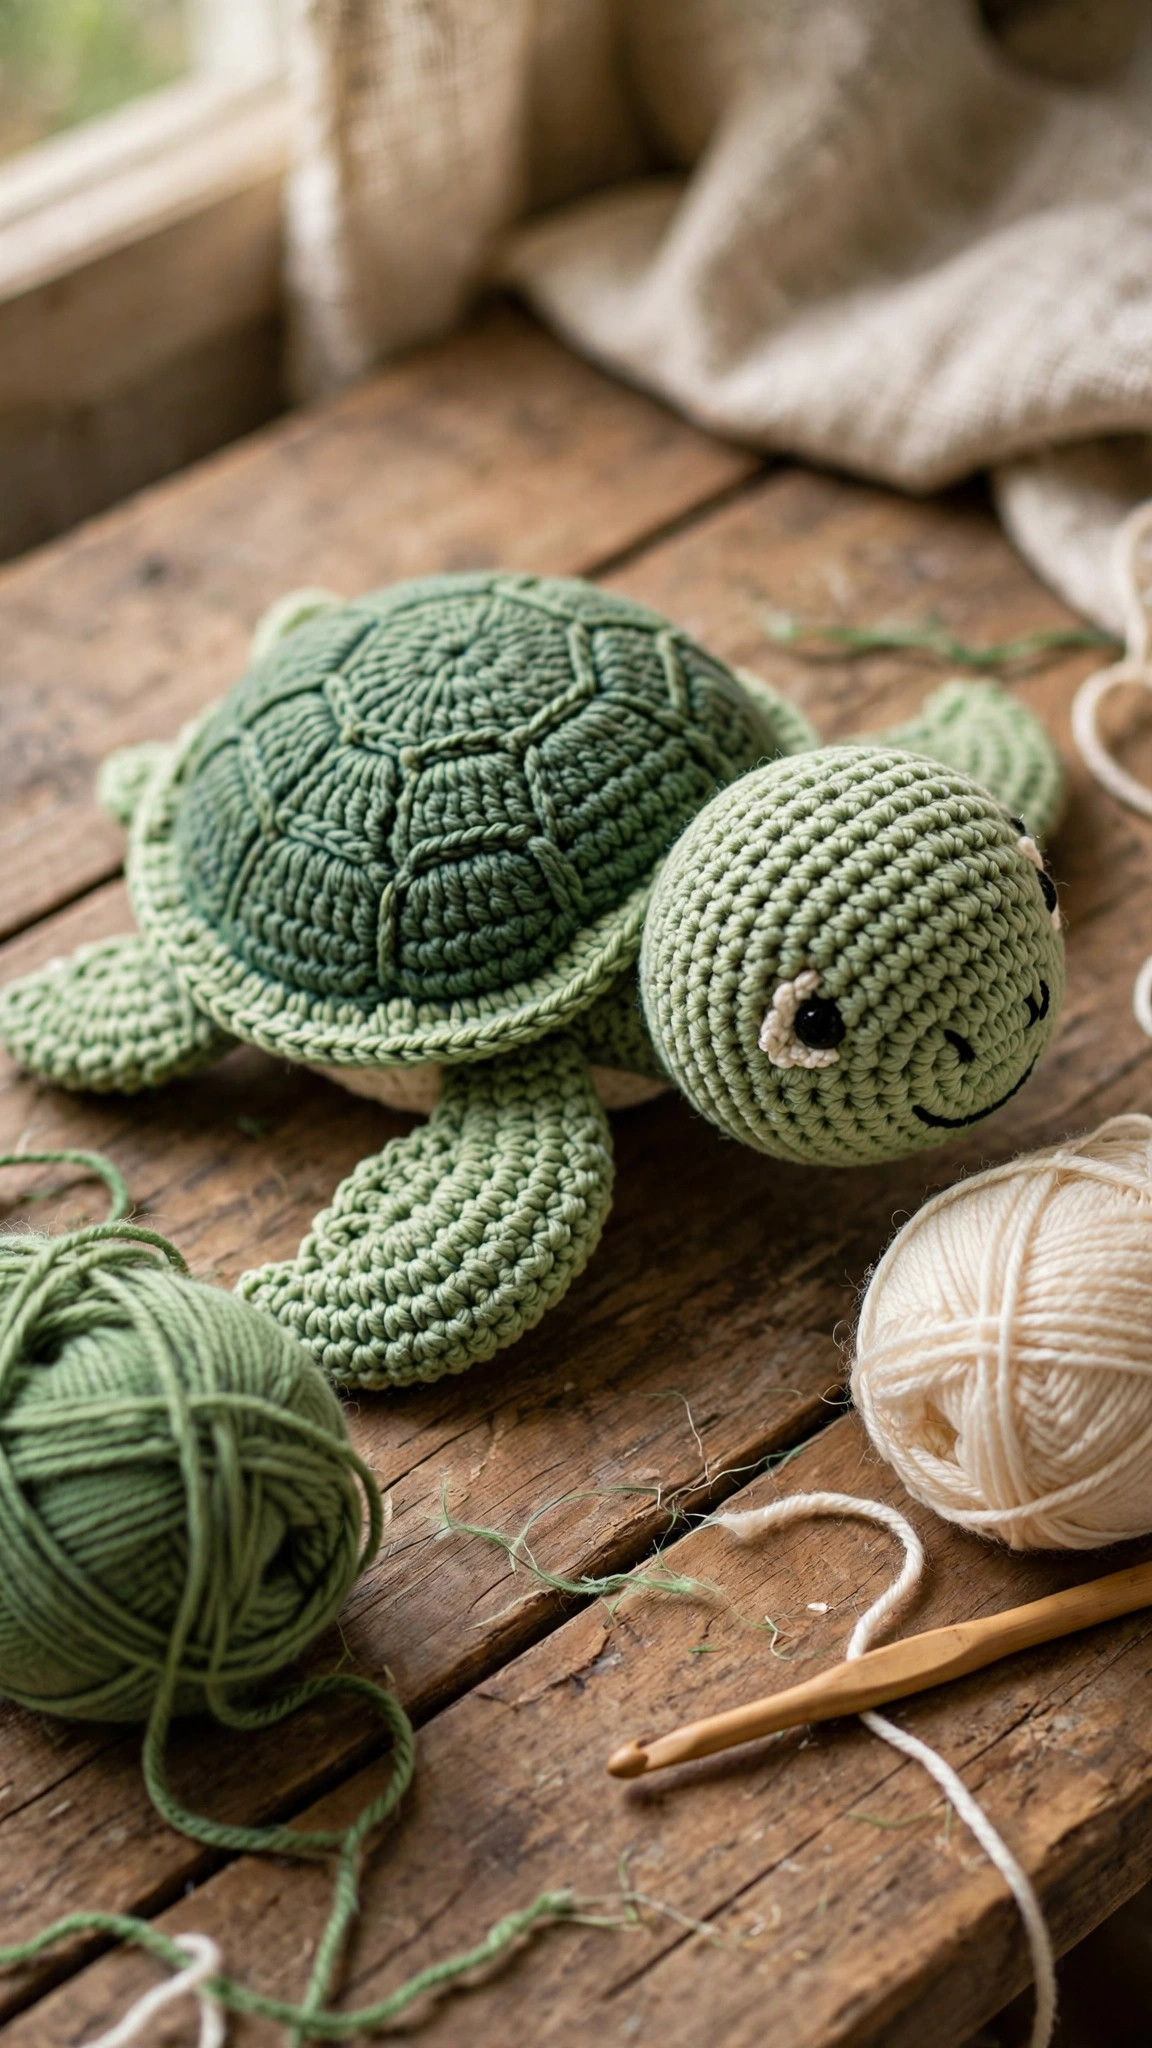
A free original amigurumi turtle pattern in US terms: textured green shell, cream belly, optional hexagon panel, and easy single crochet shaping.

Amigurumi · Crochet
- Finished size
- About 7 in long
- Making time
- About 3 hours
- Hook
- 4.0 mm, worsted yarn
- Pieces
- Shell, belly, head, flippers
- Skill
- Easy
In this post
- Table of contents
- Why you'll love this crochet turtle pattern
- Materials you'll need
- Size, gauge and skill level
- Abbreviations, US terms
- The crochet turtle pattern (US terms)
- Finishing touches and assembly
- Tips and tricks
- Variations to try next
- Troubleshooting tips
- Frequently asked questions
- More free patterns to try
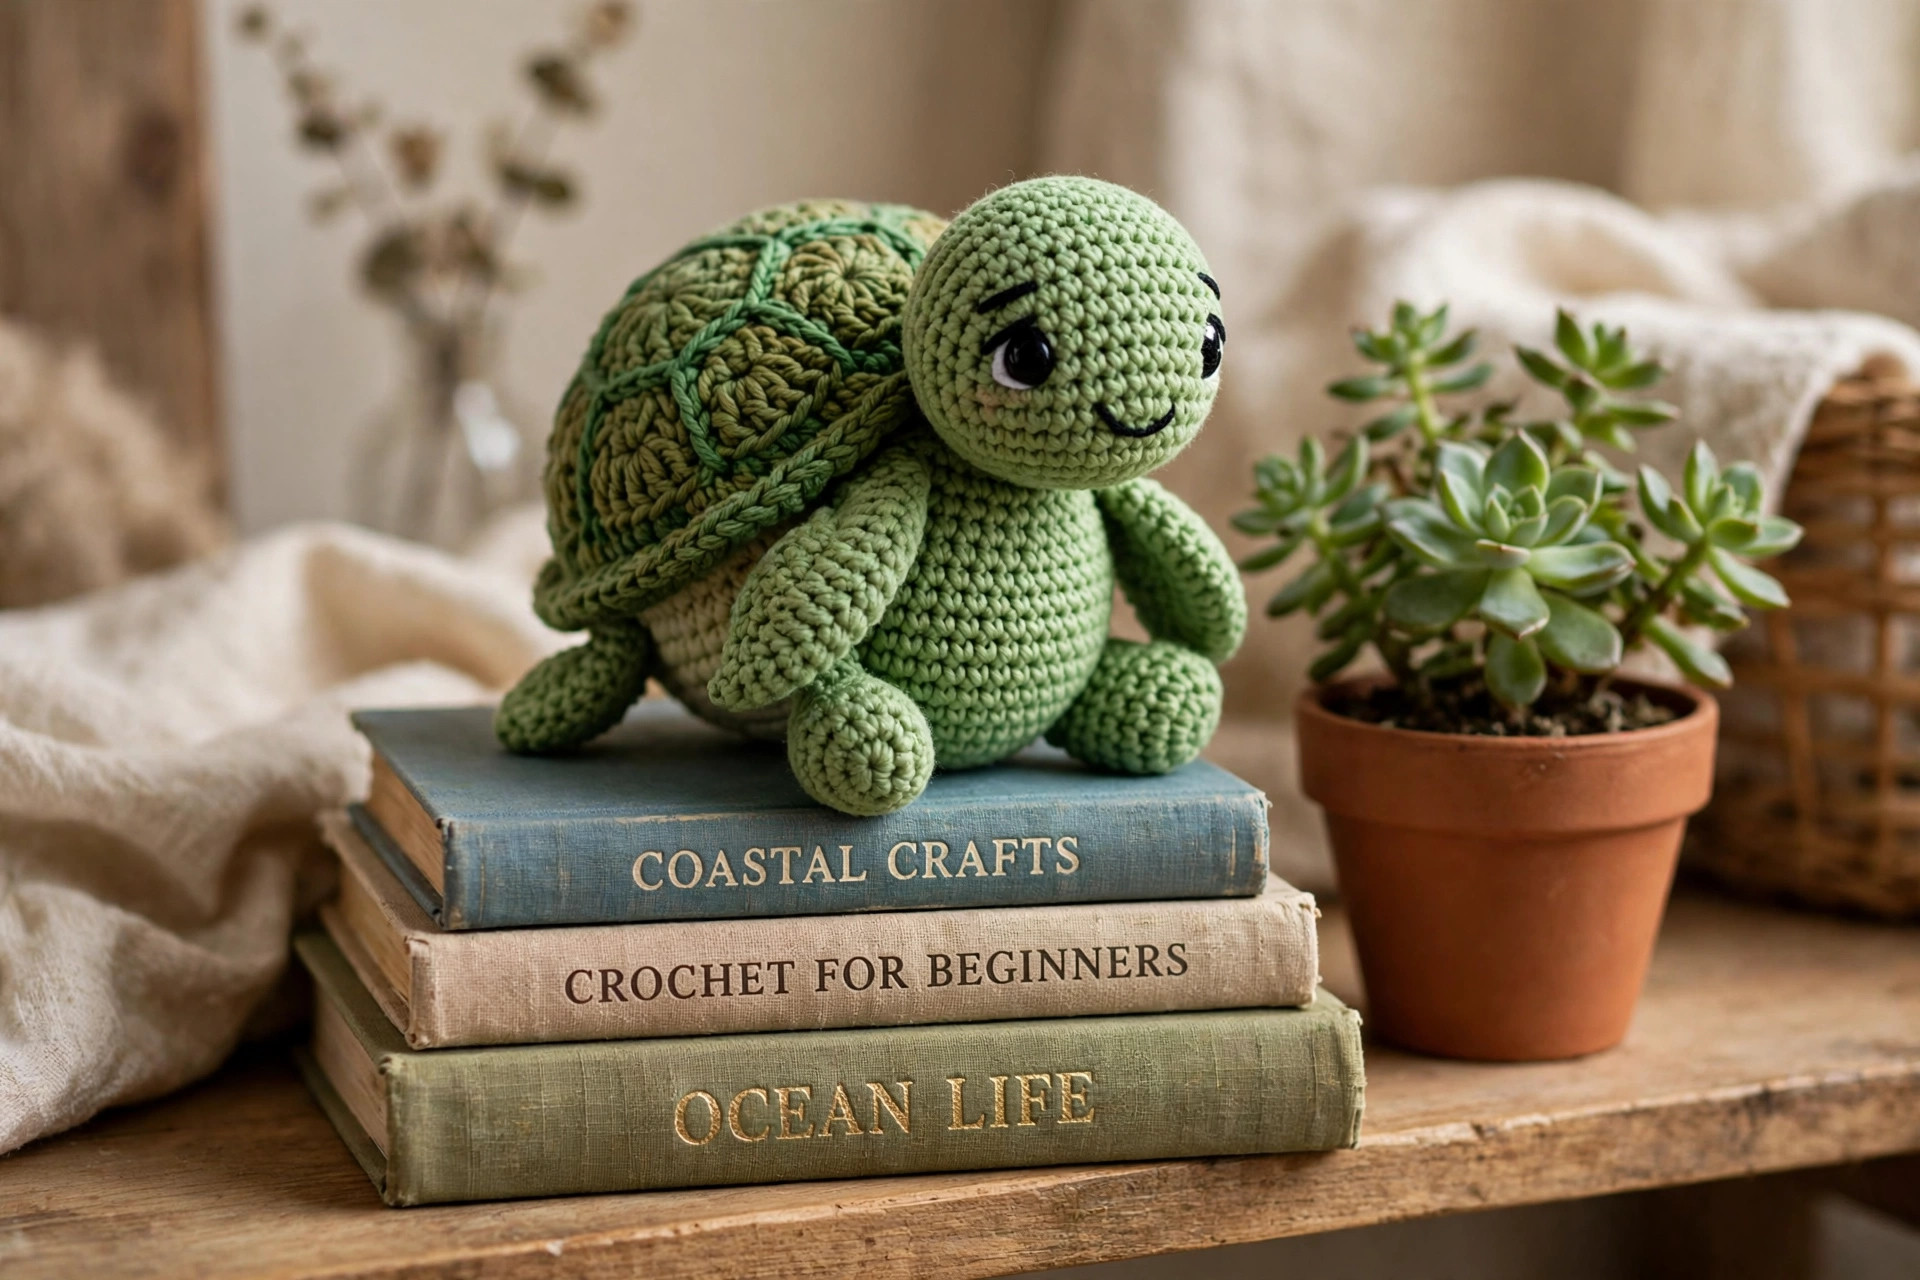
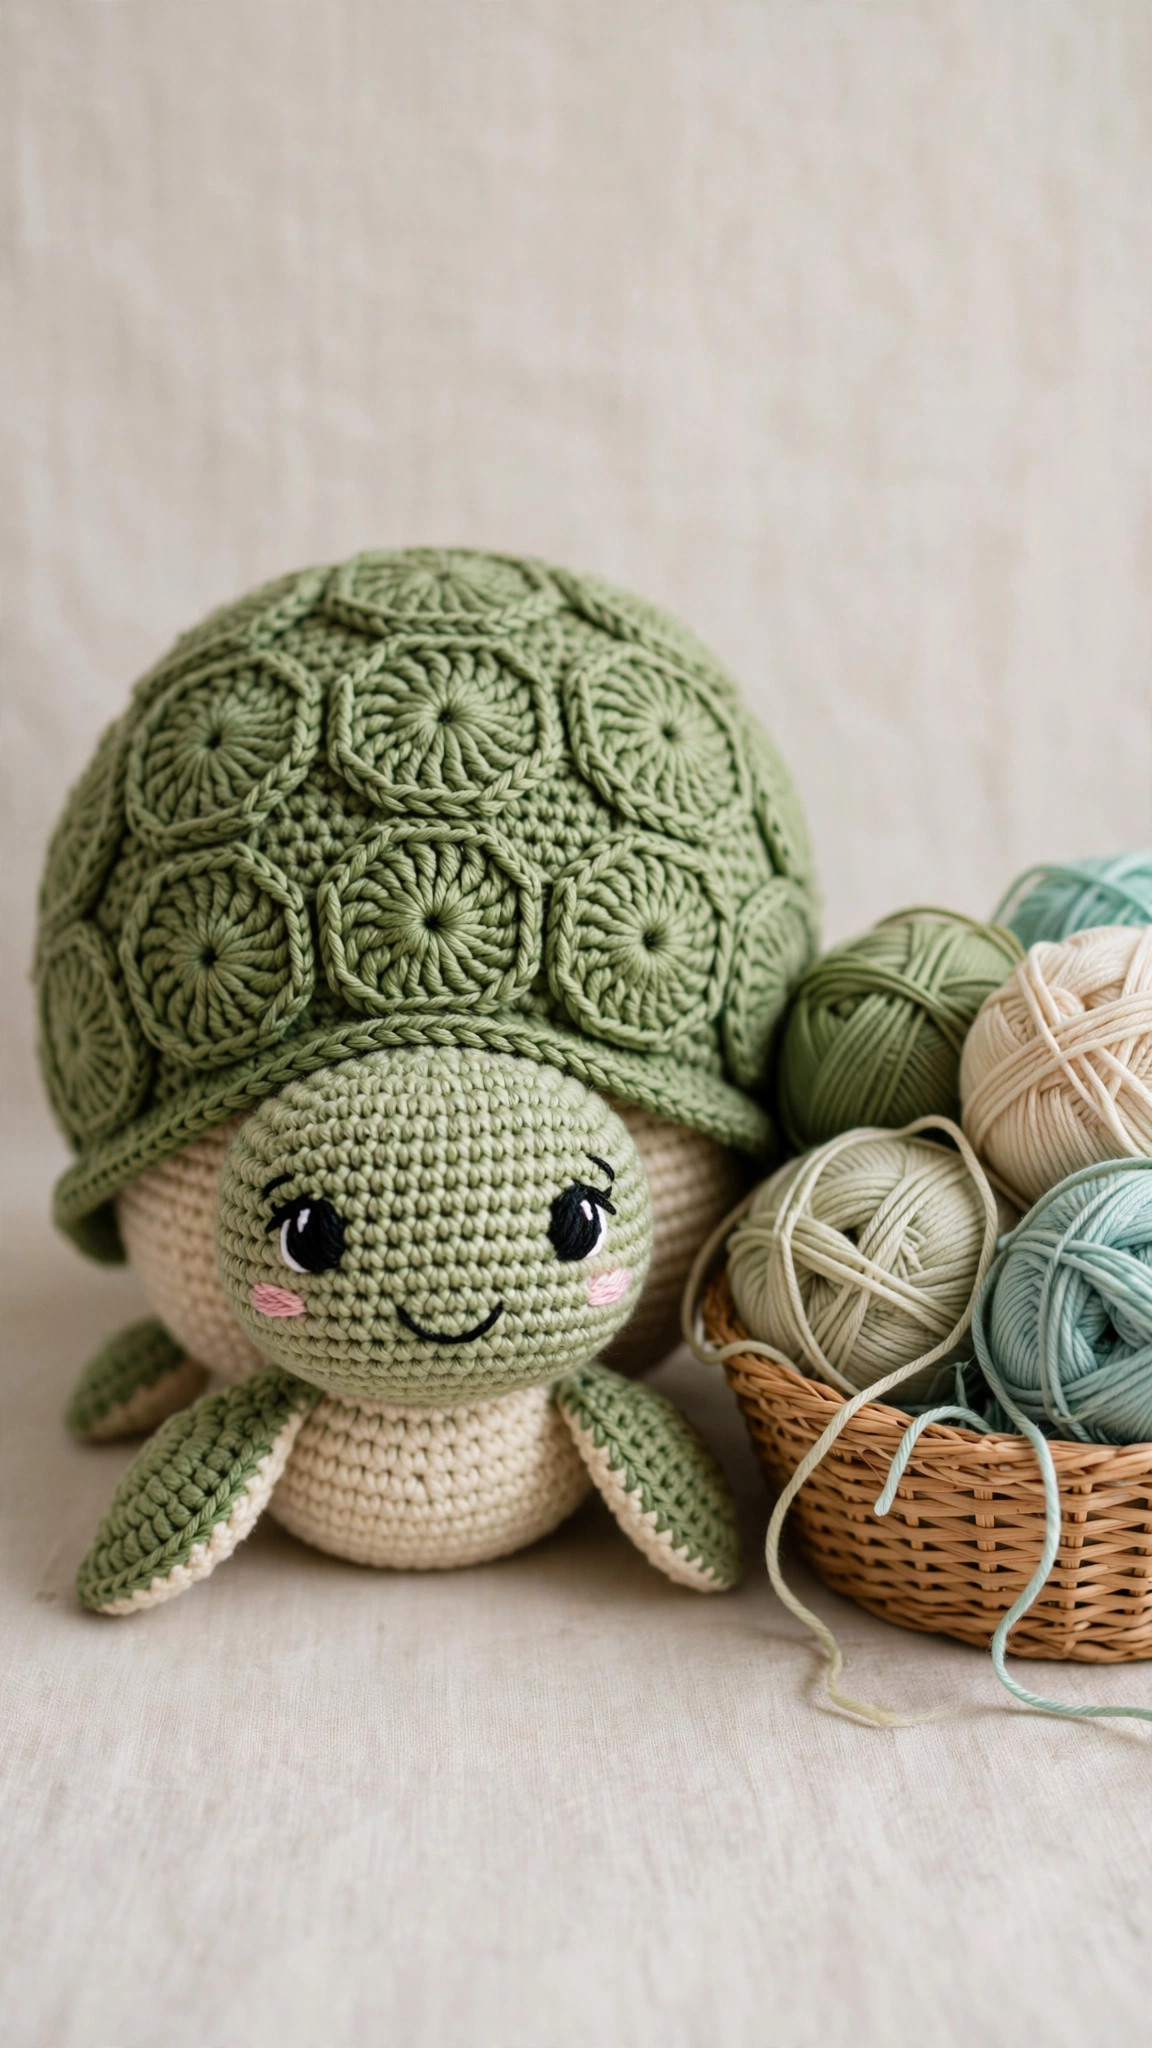
Amigurumi turtles have a special kind of charm. They are slow, sweet, and just the right shape for crochet: a round shell, a smiling head, and four little flippers that are impossible not to love. This free crochet turtle pattern is an original Little Loop Finds design, written in US terms, and it works up in about three hours with basic stitches.
The turtle measures about 7 inches long, which makes it the perfect size for a shelf, a child's bed, or a gift bag. The shell is worked as a smooth dome with an optional hexagon panel on top for that classic tortoise look, and the cream belly gives it a lovely two-tone finish. Everything is single crochet, so if you have made one amigurumi before, you can absolutely make this one.
The full free pattern is below, row by row.
Table of contents
- Why you'll love this crochet turtle pattern
- Materials you'll need
- Size, gauge and skill level
- Abbreviations, US terms
- The crochet turtle pattern (US terms)
- Finishing touches and assembly
- Tips and tricks
- Variations to try next
- Troubleshooting tips
- Frequently asked questions
- More free patterns to try
Why you'll love this crochet turtle pattern
Turtles are one of the best first amigurumi projects because the shapes are so forgiving. The shell is just a dome, the head is a ball, and the flippers are tiny tubes. Nothing has to be perfectly symmetrical to look adorable, which takes all the pressure off. If your rounds drift a stitch or two, the turtle simply looks a little more handmade, which is the whole point.
The design is also endlessly giftable. Turtles suit every age and every occasion: baby showers, birthdays, beach-themed parties, or a get-well gift for someone who needs a slow-and-steady reminder. Make one in classic green, or a rainbow of shells for a nursery shelf or craft fair table.
Construction is straightforward: you crochet the shell, belly, head, four flippers, and tail separately, stuff as you go, and sew everything together. The sewing is minimal and the pieces are small, so assembly takes about twenty minutes. If you enjoy small plush projects, our mini amigurumi patterns collection is full of quick makes in the same spirit, and the crochet octopus plush makes a perfect sea-buddy for this turtle.
Materials you'll need
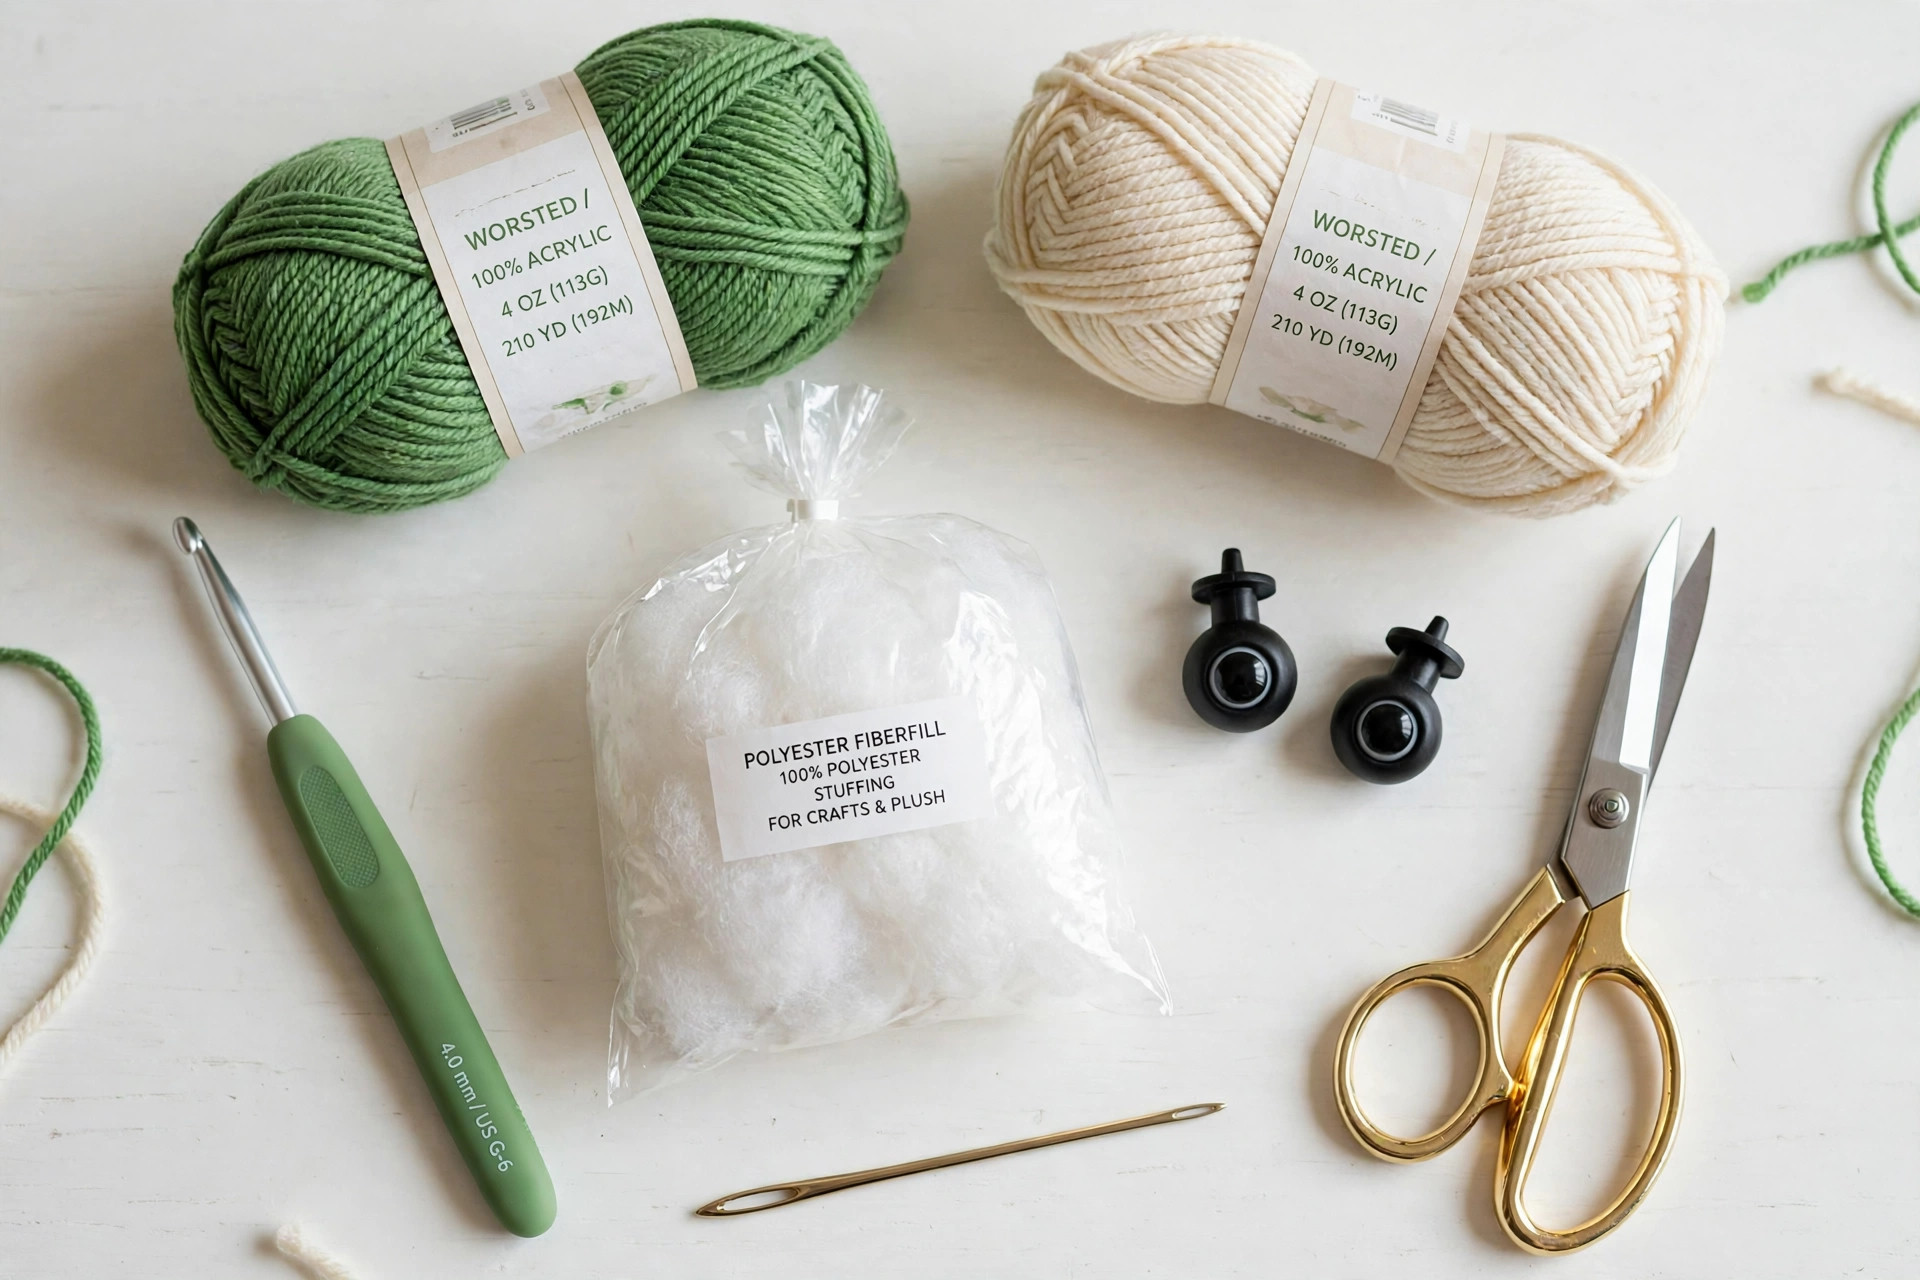
| Supply | What to get |
|---|---|
| Green yarn | Worsted-weight (#4) yarn in a turtle green, about 90 yds / 82 m (shell, head, flippers, tail) |
| Cream yarn | Worsted-weight (#4) yarn in cream or pale yellow, about 40 yds / 37 m (belly) |
| Dark green yarn | A small amount of darker green worsted yarn for the optional hexagon shell panel |
| Crochet hook | 4.0 mm (G) |
| Safety eyes | Two 8 mm black safety eyes with washers |
| Stuffing | Polyester fiberfill, about 2-3 oz |
| Tapestry needle | For sewing pieces together and weaving in ends |
| Notions | Scissors, stitch markers, pins for positioning pieces before sewing |
Choose a green with a little warmth to it, like sage, moss, or classic kelly green: flat neon greens can look harsh in amigurumi. The cream belly should contrast clearly with the shell, so avoid pale greens that blur the two-tone effect. Acrylic or an acrylic blend is ideal here because it holds stuffing well and survives enthusiastic hugging. If this turtle is for a baby or toddler, skip the safety eyes and embroider the eyes with black yarn instead.
A note on the hook: 4.0 mm with worsted yarn gives a tight fabric with no stuffing showing through. If you can see fiberfill between your stitches, drop to a 3.75 mm hook. Amigurumi should always be worked a hook size or two smaller than the yarn label suggests.
Size, gauge and skill level
The turtle is worked in continuous (spiral) rounds: do not join at the end of each round. Place a stitch marker in the first stitch of every round and move it up as you go. Stitch counts are given in brackets at the end of each round.
| Measurement | Finished size |
|---|---|
| Length (nose to tail) | About 7 in / 18 cm |
| Width (flipper to flipper) | About 5 in / 13 cm |
| Height (shell top to belly) | About 3.5 in / 9 cm |
| Approx. making time | About 3 hours |
- Finished size: about 7 inches (18 cm) long and 5 inches (13 cm) wide, a huggable shelf-sitting size. The pattern is easy to scale: work with DK yarn and a 3.25 mm hook for a mini about 5 inches long, or chunky yarn and a 5.5 mm hook for a jumbo about 10 inches.
- Gauge: gauge is not critical for amigurumi, but aim for about 18 sc and 20 rounds = 4 in (10 cm) with a 4.0 mm hook. The real test is the fabric: it should be dense enough that stuffing does not show through.
- Skill level: easy. You should know how to work a magic ring, single crochet, increase, and decrease. The sewing is simple whipstitch, and the optional hexagon panel is just two short rounds.
If this is your first amigurumi, the shell is the perfect practice piece: it is a plain dome with no fiddly shaping, and any small wobbles disappear under the stuffing.
Abbreviations, US terms
| Abbreviation | Meaning |
|---|---|
| MR | magic ring |
| ch | chain |
| sc | single crochet |
| inc | increase: 2 sc in the same stitch |
| dec | decrease: single crochet 2 stitches together (invisible decrease recommended) |
| st(s) | stitch(es) |
| R | round |
| sl st | slip stitch |
| FO | fasten off |
| [ ] | total stitch count at the end of the round |
A note on decreases: use the invisible decrease (insert the hook through the front loops of the next two stitches, yarn over, pull through both loops, yarn over, pull through two loops). It keeps the shell smooth with no little gaps, which matters on a stuffed toy.
The crochet turtle pattern (US terms)
Work every piece in continuous rounds with a stitch marker in the first stitch. Stuff firmly as you go: amigurumi should feel solid, not squishy, so add more fiberfill than feels natural, then add a little more.
The shell (green)
The shell is a dome worked from the top down.
- R1: MR, 6 sc in ring. [6]
- R2: inc in each st around. [12]
- R3: (sc, inc) x6. [18]
- R4: (2 sc, inc) x6. [24]
- R5: (3 sc, inc) x6. [30]
- R6: (4 sc, inc) x6. [36]
- R7-R12: sc in each st around. [36] (6 rounds, no shaping)
- R13: (4 sc, dec) x6. [30]
- R14: (3 sc, dec) x6. [24]
Stuff the shell firmly now, shaping it into a smooth dome. FO and weave the tail inside the shell: the belly will cover this edge.
The belly (cream)
- R1: MR, 6 sc in ring. [6]
- R2: inc in each st around. [12]
- R3: (sc, inc) x6. [18]
- R4: (2 sc, inc) x6. [24]
FO with a long tail, about 24 inches, for sewing. Do not stuff the belly: it sits flat against the shell opening.
The head (green)
- R1: MR, 6 sc in ring. [6]
- R2: inc in each st around. [12]
- R3: (sc, inc) x6. [18]
- R4-R6: sc in each st around. [18] (3 rounds)
- R7: (sc, dec) x6. [12]
Attach the safety eyes now, between R4 and R5, about 5 stitches apart, before you stuff: it is much harder to position them once the head is full. Stuff firmly.
- R8: dec x6. [6]
FO, thread the tail through the front loops of the remaining 6 stitches, pull closed, and weave in.
The flippers (green, make 4)
Front flippers (make 2):
- R1: MR, 6 sc in ring. [6]
- R2: (sc, inc) x3. [9]
- R3-R5: sc in each st around. [9] (3 rounds)
- R6: (sc, dec) x3. [6]
Stuff lightly, flatten the flipper, and FO with a long tail. Whipstitch the opening closed.
Back flippers (make 2):
- R1: MR, 6 sc in ring. [6]
- R2: (sc, inc) x3. [9]
- R3-R4: sc in each st around. [9] (2 rounds)
- R5: (sc, dec) x3. [6]
Stuff lightly, flatten, and FO with a long tail. Whipstitch the opening closed.
The tail (green)
- R1: MR, 5 sc in ring. [5]
- R2-R3: sc in each st around. [5] (2 rounds)
FO with a tail for sewing. No stuffing needed: the tail is tiny.
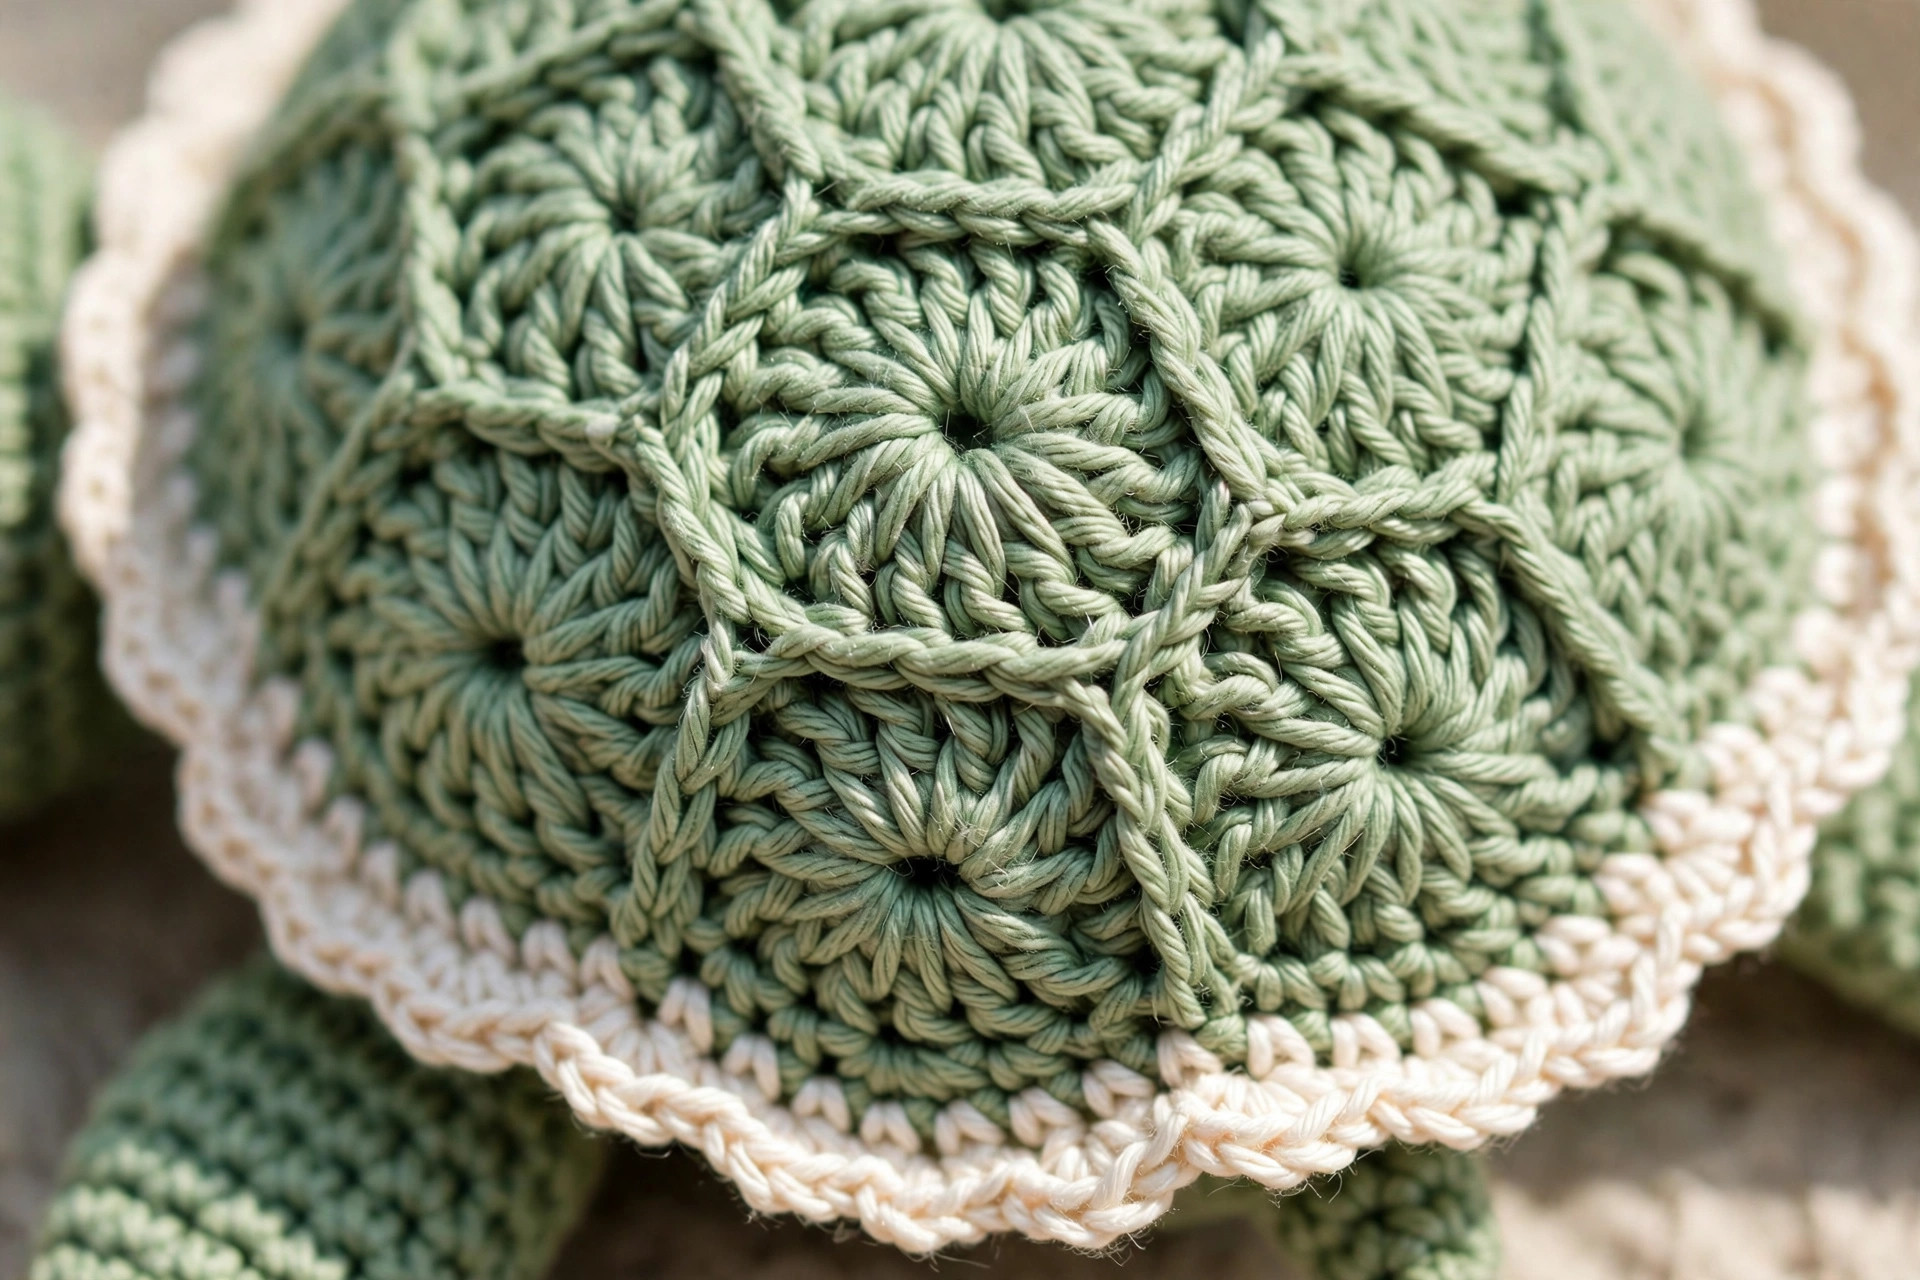
Optional hexagon shell panel (dark green)
This little panel sits on top of the shell and gives the classic tortoise-shell look.
- R1: MR, ch 1, (sc, ch 1) x6 in ring, sl st to first sc. [6 sc, 6 ch-1 spaces]
- R2: sl st into first ch-1 space, ch 1, (2 sc, ch 1) in each ch-1 space around x6, sl st to first sc. [12 sc]
FO with a tail and sew the hexagon flat onto the top centre of the shell.
Finishing touches and assembly
Sew the belly to the shell. Pin the cream belly circle over the shell opening, right side facing out. Using the long tail, whipstitch around the edge through both layers, adding a little more stuffing just before you close the final inch so the turtle feels plump. Knot securely inside and weave in the end.
Attach the head. Pin the head to the front of the shell, tilted very slightly upward so the turtle looks cheerful rather than sleepy. Sew around the base of the head with small whipstitches, going through the shell fabric twice for strength: this joint takes the most handling.
Position the flippers. Pin the two larger front flippers on either side of the head, angled slightly forward like little arms. Pin the two smaller back flippers on either side near the rear. Sew each flipper along its flattened top edge with three or four whipstitches. Step back and check the symmetry before you commit: a flipper sewn a quarter inch off will bug you forever.
Add the tail. Sew the tail to the back centre of the shell, just above where the belly meets the shell. Two or three stitches is plenty.
Sew the hexagon panel. Centre the dark green hexagon on top of the shell and sew it down with matching yarn, stitching under each ch-1 corner so the edges lie flat. If you prefer a subtler look, skip the panel: the plain dome is lovely on its own.
Weave every end. Run each tail through nearby stitches for at least 2 inches, changing direction once so it locks. Trim flush. On a toy that will be handled, over-secure rather than under-secure.
Give the turtle a once-over. Roll it gently in your hands to distribute the stuffing evenly, fluff the shell back into a dome, and check that no fiberfill peeks through anywhere. Done: meet your new slow friend.
Tips and tricks
Small details that make this turtle look professionally made:
Stuff in layers, not lumps. Add a small handful of fiberfill at a time and press it into the curves with your fingertip or the blunt end of the hook. One big wad of stuffing always leaves lumps: layers give you that smooth, shop-bought roundness.
Mark your rounds religiously. In spiral amigurumi there is no join to tell you where a round ends. Move the stitch marker up every single round, and count your stitches at the end of every increase and decrease round. Catching a 35 instead of a 36 early saves an evening of frogging.
Position with pins first. Every piece gets pinned before a single sewing stitch goes in. Check the turtle from the front, the side, and above: flippers that look even from the front can be wildly crooked from above.
Keep the eyes level. Measure the eye placement with your hook: lay the hook across the face and check both eyes sit the same number of rounds down. Eyes one round apart are the most common reason a face looks "off," and you will never unsee it.
Use the invisible decrease on the shell. Standard decreases leave small gaps that stuffing loves to escape through. The invisible decrease (front loops only) keeps the dome perfectly smooth.
Variations to try next
One turtle is a project. A pond of them is a collection:
- Sea turtle. Work the shell in teal or ocean blue and the belly in pale sand colour, and add the hexagon panel in a darker teal. Pair it with our crab crochet pattern and crochet octopus plush for a full under-the-sea set.
- Tortoise. Use brown and tan yarn, make the hexagon panel larger (add a third round of (3 sc, ch 1) in each space), and embroider simple wrinkles on the head with brown yarn.
- Rainbow nursery set. Make three turtles in pastel pink, mint, and lavender with white bellies. They look wonderful lined up on a nursery shelf, and the pattern is quick enough to finish all three in a weekend.
- Keychain mini. Follow the pattern in DK yarn with a 3.0 mm hook, skip the safety eyes in favour of embroidery, and add a keychain ring through the top of the shell. A perfect craft fair impulse buy.
- Sleepy baby turtle. Close the eyes with two tiny curved embroidered lines instead of safety eyes, and work the head tilted slightly downward. Irresistible as a baby shower gift.
Troubleshooting tips
- Stuffing shows through the stitches. Your fabric is too loose. Switch to a smaller hook (3.75 mm or 3.5 mm) and keep your tension snug: amigurumi fabric should be almost stiff.
- The shell looks pointy instead of domed. You stuffed before finishing the decrease rounds, or the stuffing is packed into the top. Redistribute the fiberfill downward and let the dome settle: it should be widest around R7-R12.
- The head wobbles on its joint. You sewed through too few stitches. Undo it and re-sew, passing the needle through the shell fabric at least twice around the head base, and pull each stitch snug.
- The belly puckers around the edge. The belly circle is slightly too small or your whipstitches are pulling too tight. Ease the stitches: catch the belly edge loosely and let the circle sit flat before tightening.
- The flippers stick out at odd angles. You sewed them while the turtle was lying flat. Always pin flippers with the turtle sitting upright in its final pose, then sew.
- The magic ring at the shell top keeps opening. After closing the ring, weave the tail through the first-round stitches twice in opposite directions before trimming: one pass is never enough on a stuffed piece.
- The hexagon panel curls up at the edges. Your R2 is too tight. Work the (2 sc, ch 1) corners loosely, or block the hexagon flat with a quick steam before sewing it on.
Frequently asked questions
Is this crochet turtle pattern really free?
Yes, the complete pattern above is free, with no email signup and no PDF purchase required.
What skill level is this turtle pattern?
Easy. If you can work a magic ring, single crochet, increase, and decrease, you have every skill this pattern needs. The sewing is simple whipstitch.
How long does it take to crochet the turtle?
About 3 hours total: roughly 1 hour for the shell and belly, 1 hour for the head, flippers, and tail, and 30 to 45 minutes for stuffing and assembly.
How much yarn do I need?
About 90 yards of green worsted and 40 yards of cream worsted, plus a few yards of dark green for the optional panel. One skein of each main colour is plenty, with yarn left over.
Can I make the turtle bigger or smaller?
Yes. The pattern scales cleanly: use DK yarn with a 3.25 mm hook for a mini about 5 inches long, or chunky yarn with a 5.5 mm hook for a jumbo about 10 inches. Keep the same round counts and just change the yarn weight.
Is this turtle safe for babies?
With embroidered eyes instead of safety eyes, yes. Safety eyes are not recommended for children under three because they can work loose. Embroider the eyes with black yarn in a simple French knot or satin stitch, and make sure all ends are woven in securely.
Can I sell finished turtles made from this pattern?
Yes! You may sell finished turtles made from this pattern in small batches (craft fairs, markets, gifts). Please credit Little Loop Finds as the pattern designer.
More free patterns to try
If this little reptile was fun, the pond is full. Our crochet lizard pattern uses the same beginner amigurumi skills with a completely different shape, and the gummy bear crochet pattern is another small, quick plush with big gift appeal. For a feathered friend, the free crochet duck pattern pairs beautifully with the turtle on a nursery shelf.