Crochet Lace Edgings Free Patterns: 3 Easy Trims
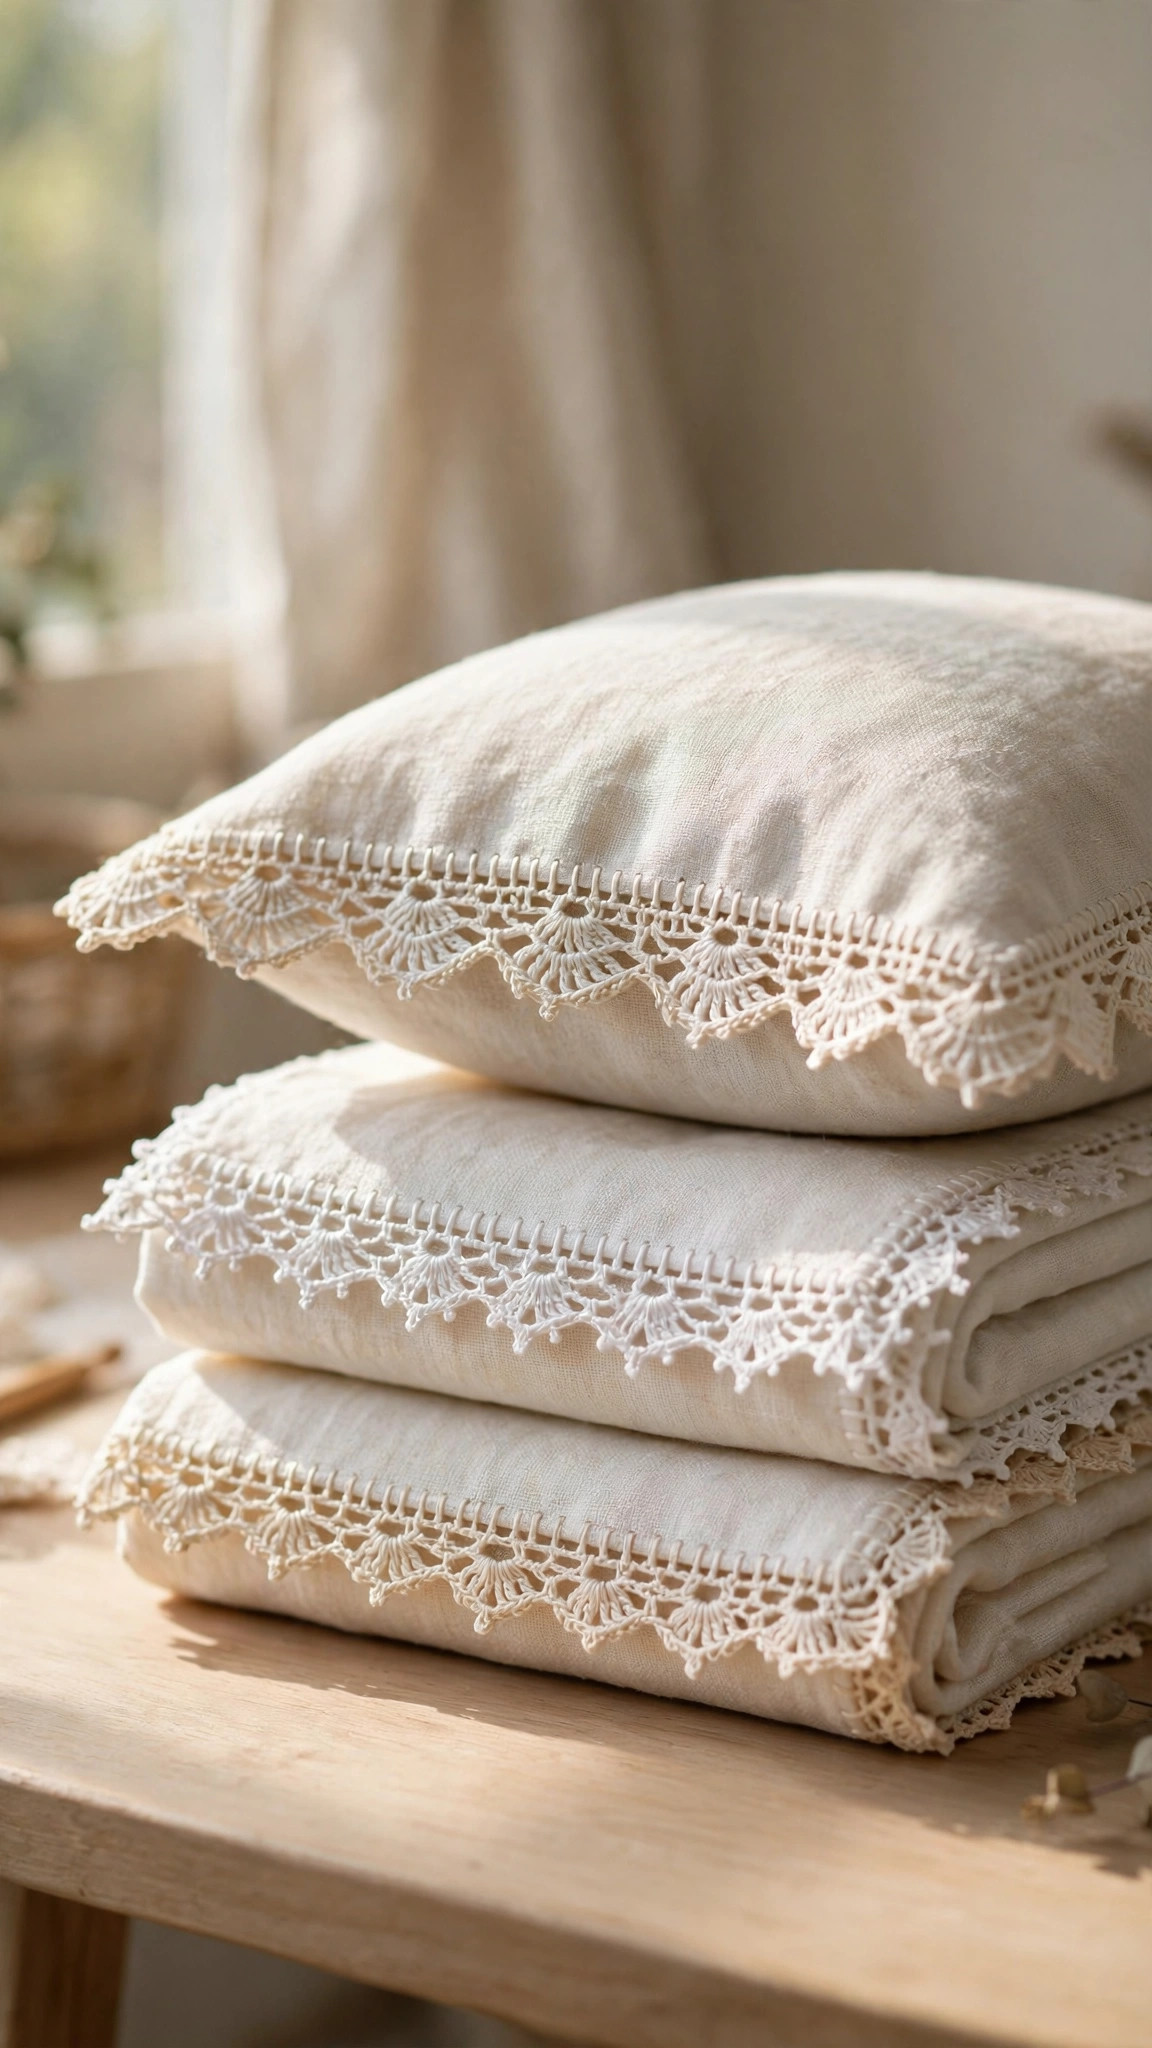
Two rows of lace turn a plain towel, pillowcase or blanket into something boutique-made. This free set gives you three original edgings — a classic shell, a picot fan and a V-stitch scallop — each with its stitch multiple stated, so the repeat fits any project perfectly.

Lace & Edgings · Crochet
- Finished size
- 1–1.5 in deep, any length
- Making time
- Under 1 hour per towel
- Hook
- 4 mm (US G-6) for DK cotton
- Pieces
- 3 edging patterns
- Skill
- Easy
In this post
A plain towel is just a towel — until you add two inches of lace along the hem. Then it becomes the thing guests ask about, and a simple blanket looks boutique-made. Lace edgings are the smallest project with the biggest payoff in crochet, and this collection gives you three of them, free, with every stitch counted and every repeat explained.
An edging is not a whole new skill. It is one or two short rows worked into a foundation you already have — a blanket edge, a pillowcase hem, or a row of single crochet you add yourself. If you can chain, single crochet and double crochet, you can make every trim here today, with leftover yarn, in an afternoon.
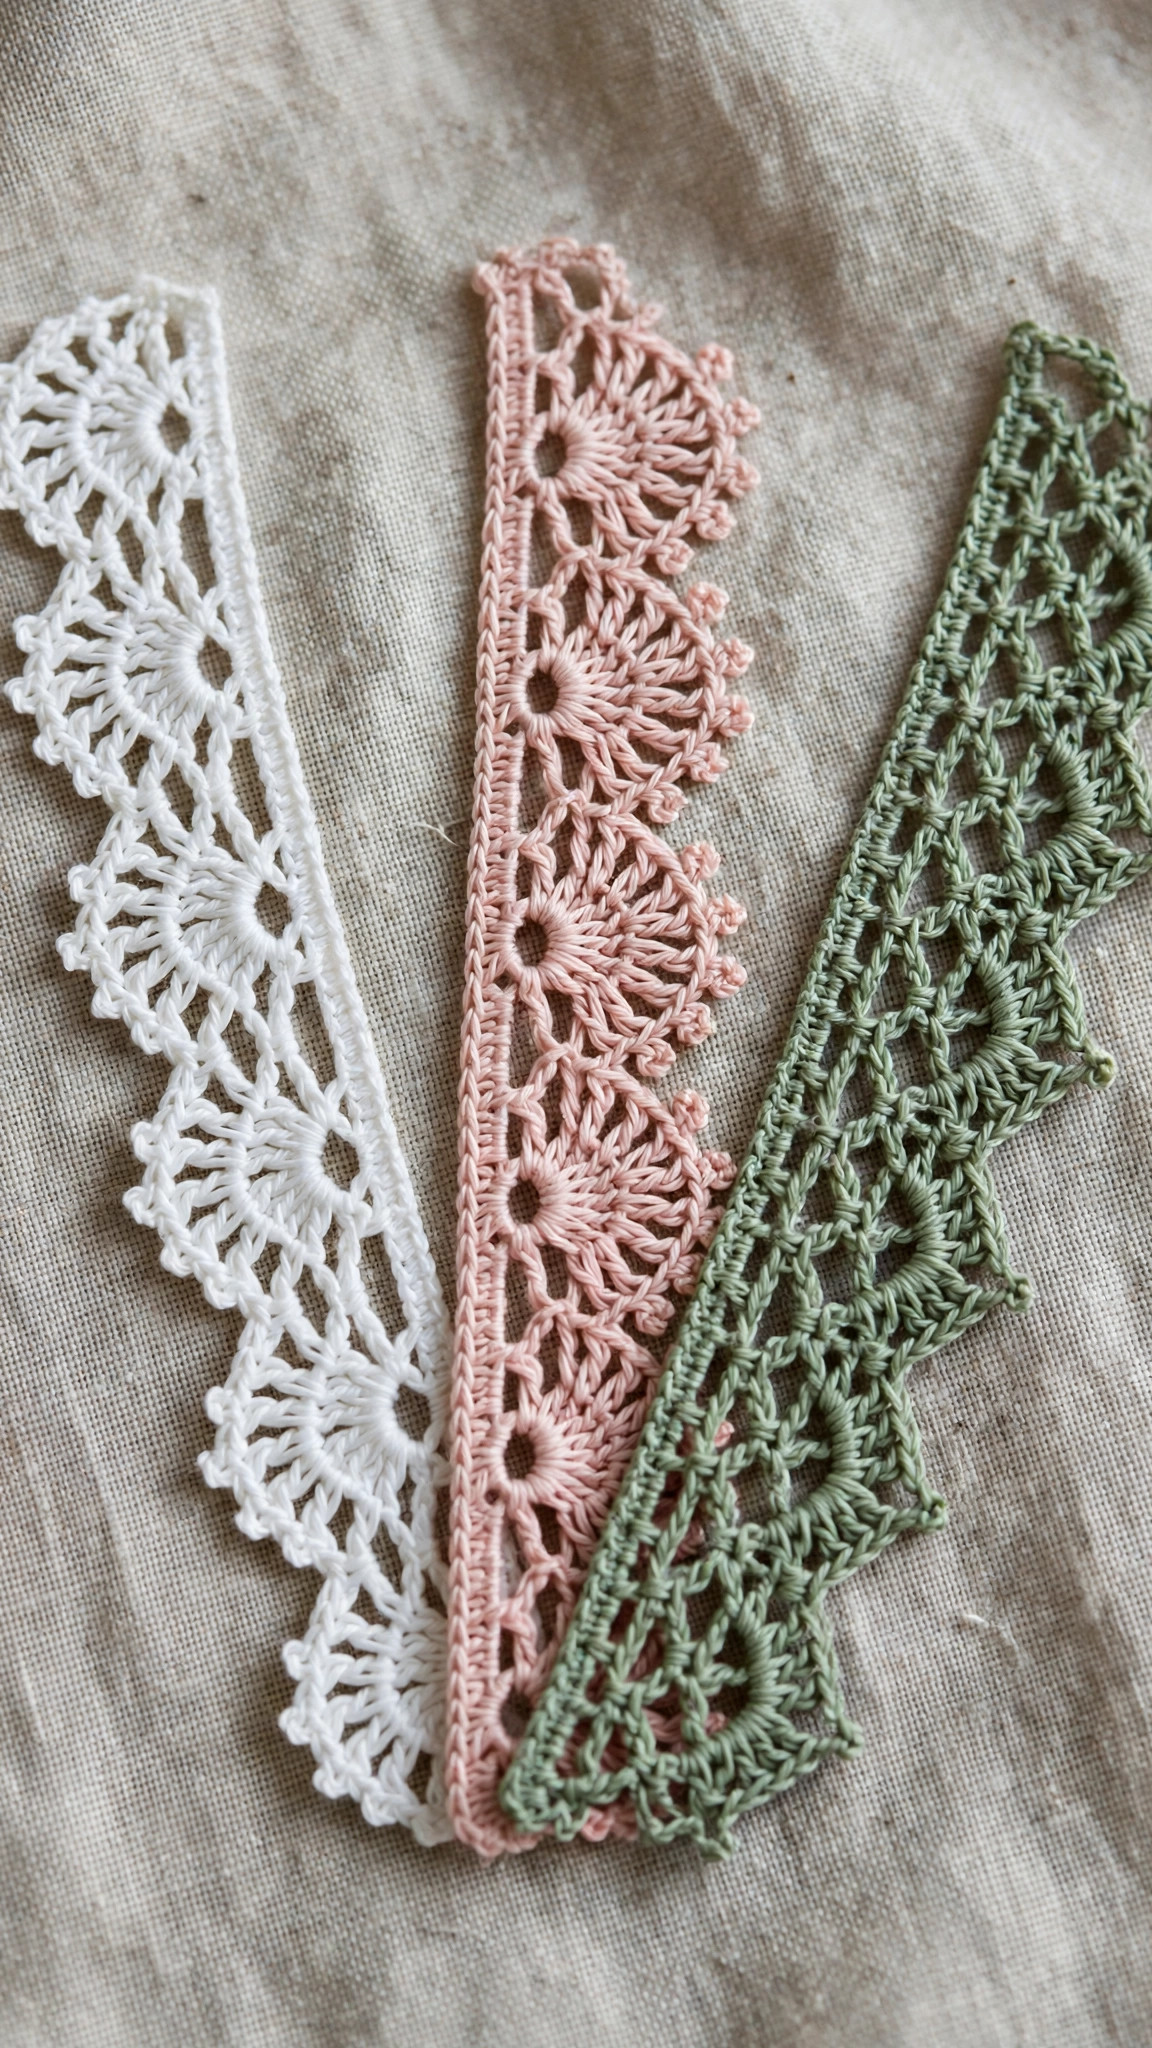
This set includes three original edgings. The Classic Shell Edging is the timeless scallop for towels, blankets and baby knits. The Picot Fan Edging is lighter and lacier, made for pillowcases and table linens. The V-Stitch Scallop Edging is the fastest, with a bold, drapey finish for shawls and throws. Each one states its stitch multiple up front, so you can fit it to any project — no guessing, no frogging at the corner because the repeat did not land.
Contents
- Why you'll love these lace edgings
- Materials you'll need
- Size, gauge and skill level
- Abbreviations — US terms
- Before you start: foundation rows and stitch multiples
- The patterns (US terms)
- Finishing: blocking and sewing on your edging
- Tips for neat, professional lace edgings
- FAQ
- What to crochet next
Why you'll love these lace edgings
First, they rescue plain projects. A basic blanket, a store-bought towel, a sale-bin pillowcase — all are one edging away from looking handmade and intentional, because the lace does the decorating and the main project stays blissfully simple. If you enjoy that transformation, you will also love our crochet doily patterns free collection, which uses the same stitches on a bigger canvas.
Second, they are true stash projects, and fast ones. A towel hem takes a few yards of yarn and under an hour: each edging is only two rows deep, the first building the shape, the second refining it. That odd half-ball of dishcloth cotton or leftover fingering yarn finally has a home.
Finally, they teach you lace without the commitment of a lace project. Shells, fans, V-stitches and picots are the building blocks of almost all crochet lace — learn them here, where a mistake costs six stitches of frogging, and bigger lace, including the crochet shawl pattern free, becomes far less intimidating.
Materials you'll need
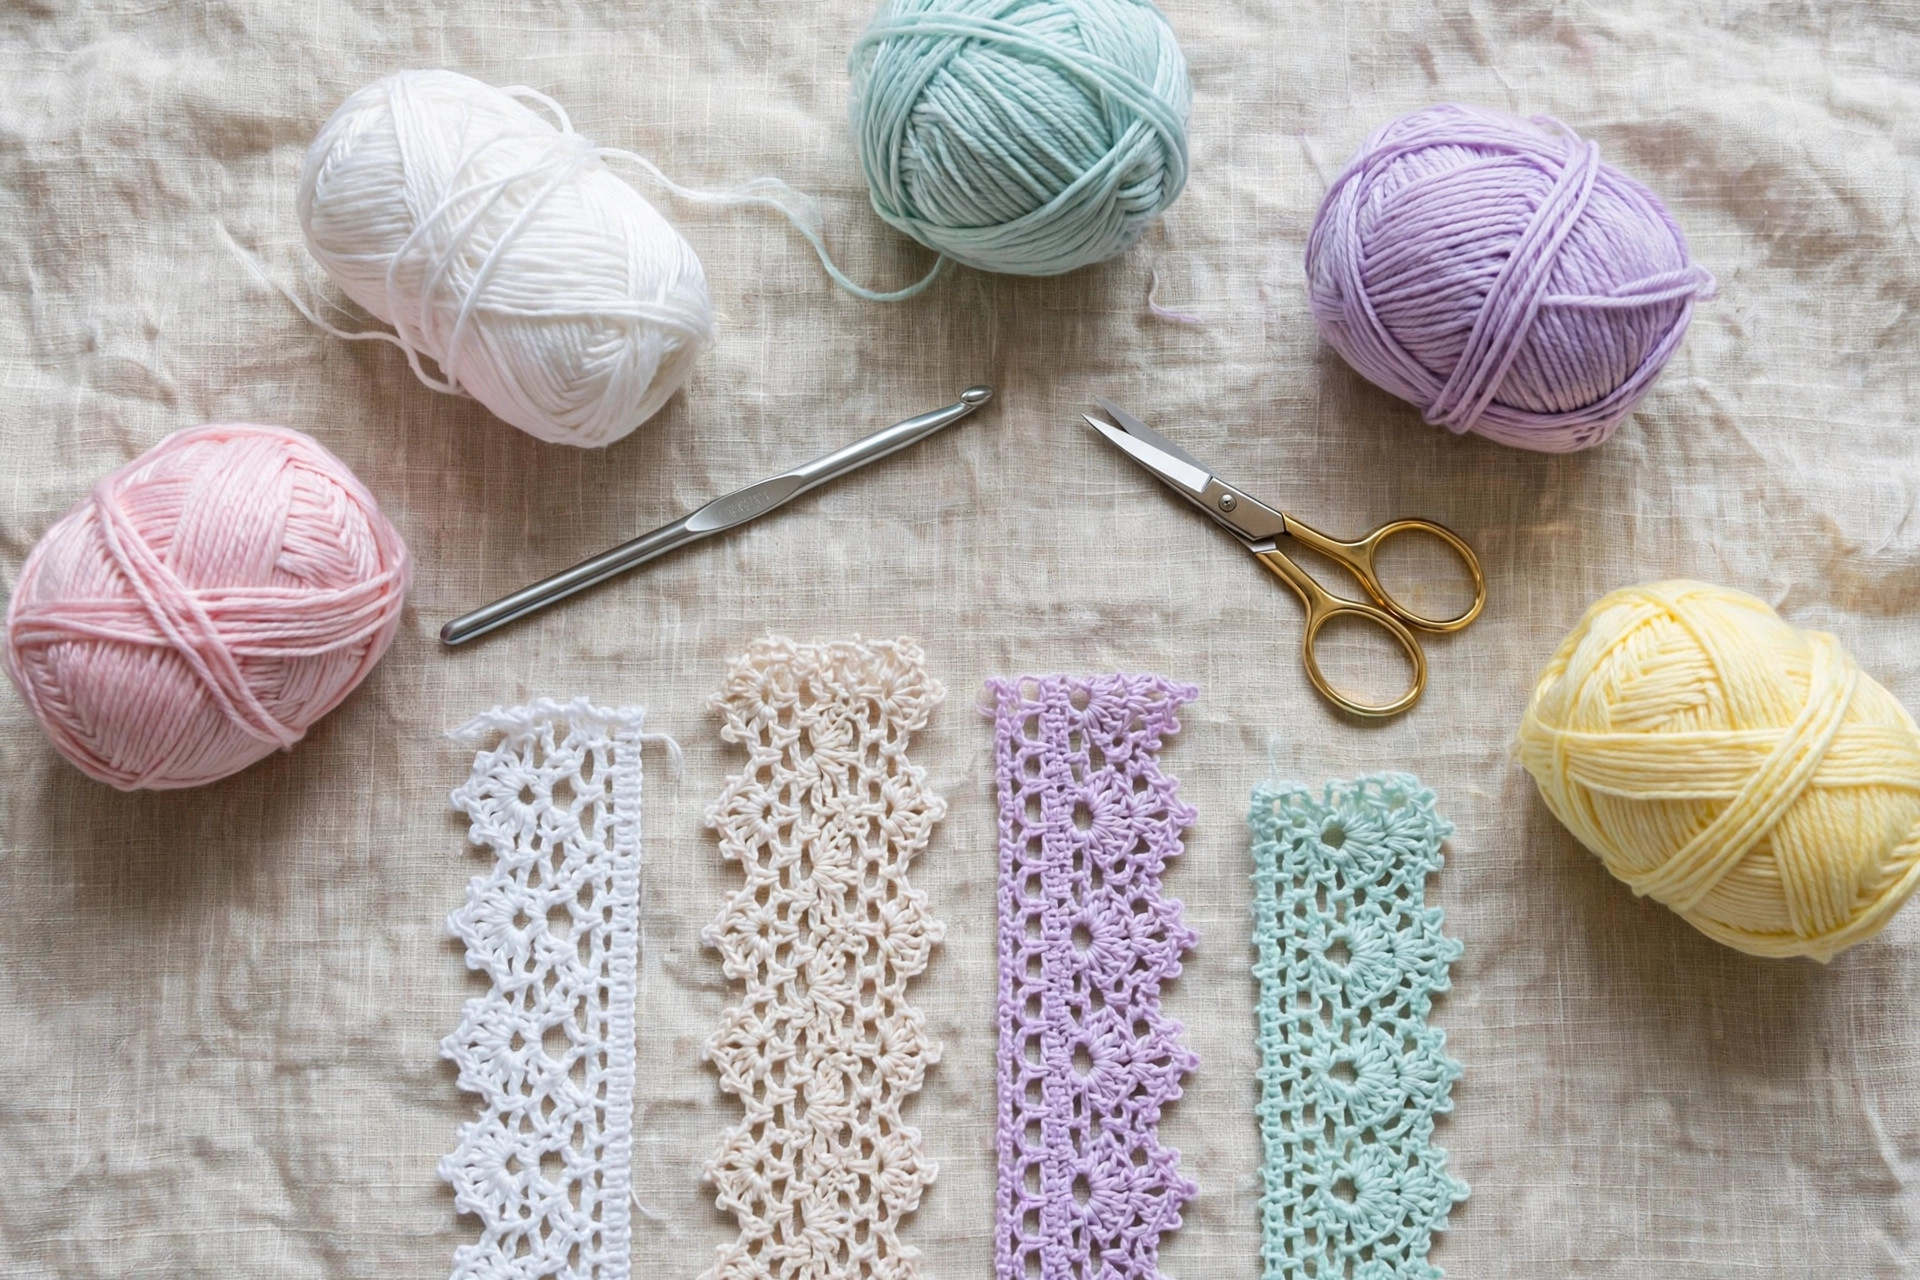
You can work these edgings in almost any yarn, but cotton is the classic choice: crisp definition, beautiful blocking, and a firm edge that acrylic softens. For towels and dishcloths use worsted or DK cotton; for pillowcases and linens, try fingering cotton or size 10 thread for a finer, heirloom look.
| Supply | What to get |
|---|---|
| Yarn or thread | Cotton in your chosen weight. Approx. 25–40 yds / 23–37 m per yard of edging in DK cotton; a 12 in / 30.5 cm towel hem uses roughly 12–18 yds |
| Crochet hook | Match your yarn: 3.5 mm (US E-4) fingering, 4 mm (US G-6) DK, 5 mm (US H-8) worsted, or 1.5 mm steel for size 10 thread |
| Yarn needle | Large-eye blunt needle for weaving in ends |
| Scissors | Small, sharp |
| Measuring tape | For measuring edges and checking repeats |
| Rustproof pins and blocking board or towel | For pinning lace open while it dries |
| Fabric item to trim (optional) | Plain towel, pillowcase, blanket, table runner or garment hem |
| Sewing needle and thread (optional) | Only for sewing a separately worked edging onto fabric |
Size, gauge and skill level
Skill level: Easy. You need chain, slip stitch, single crochet and double crochet. The only extra technique is the picot in the second edging, explained stitch by stitch where it appears. Corners, multiples and foundation rows are all spelled out, making this a friendly first lace project.
Finished width: The Classic Shell measures about 1 inch (2.5 cm) deep in DK cotton, the Picot Fan about 1.25 inches (3.2 cm), and the V-Stitch Scallop about 1.5 inches (3.8 cm). In size 10 thread, all three shrink to roughly half those depths.
Gauge: Gauge is not critical here — what matters is the repeat count, not the ruler. Still, work a test strip of 25 foundation stitches, measure one repeat, and multiply it across your edge before committing. Two minutes of maths prevents a beautiful trim ending three stitches short of the corner. Length is entirely up to you: each pattern states its multiple, gives a worked example, and explains corners.
Abbreviations — US terms
This pattern uses US terms throughout.
| Abbreviation | Meaning |
|---|---|
| ch | chain |
| sl st | slip stitch |
| sc | single crochet |
| dc | double crochet |
| sk | skip |
| st(s) | stitch(es) |
| sp | space |
| rep | repeat |
| RS / WS | right / wrong side |
Special stitch — shell: 5 dc worked into the same stitch or space.
Special stitch — fan: (2 dc, ch 2, 2 dc) worked into the same stitch.
Special stitch — V-stitch (V-st): (dc, ch 1, dc) worked into the same stitch or space.
Special stitch — picot: Ch 3, sl st into the first ch of those 3 — the little loop is the picot.
Before you start: foundation rows and stitch multiples
Every edging here is worked over a foundation row of single crochet. Trimming a crocheted project, you may already have a neat edge to work into; if not — or if you are trimming fabric — start with the foundation below. This row is ninety percent of a good edging: the lace rows are easy, but they only repeat evenly if the foundation obeys the multiple.
Foundation row (for crocheted items): Right side facing, join yarn at a corner. Ch 1, then work sc evenly along the edge: 1 sc in each stitch across a stitch edge, about 3 sc for every 2 row-ends along a row edge, adjusting so your total lands on the multiple you need. Work 3 sc into each corner so the edging can turn.
Foundation row (for fabric): Two good options. Neatest: blanket-stitch along the hem with your yarn or thread first — about 4 stitches per inch for DK cotton, 6 to 8 per inch for thread — then work 1 sc into each loop. Quicker: work the edging separately as a strip (see Finishing) and sew it on. A cotton towel with a woven hem band is wonderfully forgiving, much like the friendly fabric of our crochet dishcloths free patterns.
Understanding multiples: A multiple of 6 + 1 means your count must be a number of sixes, plus one extra stitch: 25, 31, 37, 61, 121. The extra stitch anchors the final repeat, so the pattern begins and ends symmetrically. Count your foundation twice. Lace forgives many things, but not arithmetic.
Worked examples used below: All three edgings are written for a foundation of 121 sc — about 24 inches (61 cm) in DK cotton. The shell and V-stitch use 20 repeats of 6, + 1; the picot fan uses 15 repeats of 8, + 1. To resize, change the number of repeats; the rows stay identical.
The patterns (US terms)
Work all three edgings with the right side facing throughout — neither lace row requires turning. Fasten off after the final row, leaving a 6 inch (15 cm) tail for weaving in, or a long tail for sewing a separate strip.
1. Classic Shell Edging — multiple of 6 + 1
This is the edging most people picture when they hear "crochet lace trim": plump, even scallops, each a five-double-crochet shell anchored by a single crochet on either side. Sturdy enough for weekly-washed towels, tidy enough for baby clothes, and so rhythmic your hands learn it in two repeats.
Row 1 (foundation): Ch 1, sc in first st and in each st across: 121 sc. (Or use a foundation prepared as described above, ending with a multiple of 6 + 1.)
Row 2 (shell row): Ch 1, sc in first sc. Sk next 2 sc, 5 dc in next sc (shell made), sk next 2 sc, sc in next sc. Rep from * to * across, finishing with a sc in the last stitch. You will have 20 shells, each separated by a sc anchor.
Row 3 (optional picot finish): Ch 1, sc in first sc. Ch 3, sl st in first ch (picot made), sc in each of next 2 dc, picot, sc in each of next 2 dc, picot, sc in next sc anchor. Rep from * to * across. This adds three picots per scallop — left edge, centre and right edge. Fasten off.
Corners: At a corner 3-sc group, work the shell into the centre sc of the three, with a sc anchor either side. The shell fans around the turn and lies flat without extra stitches.
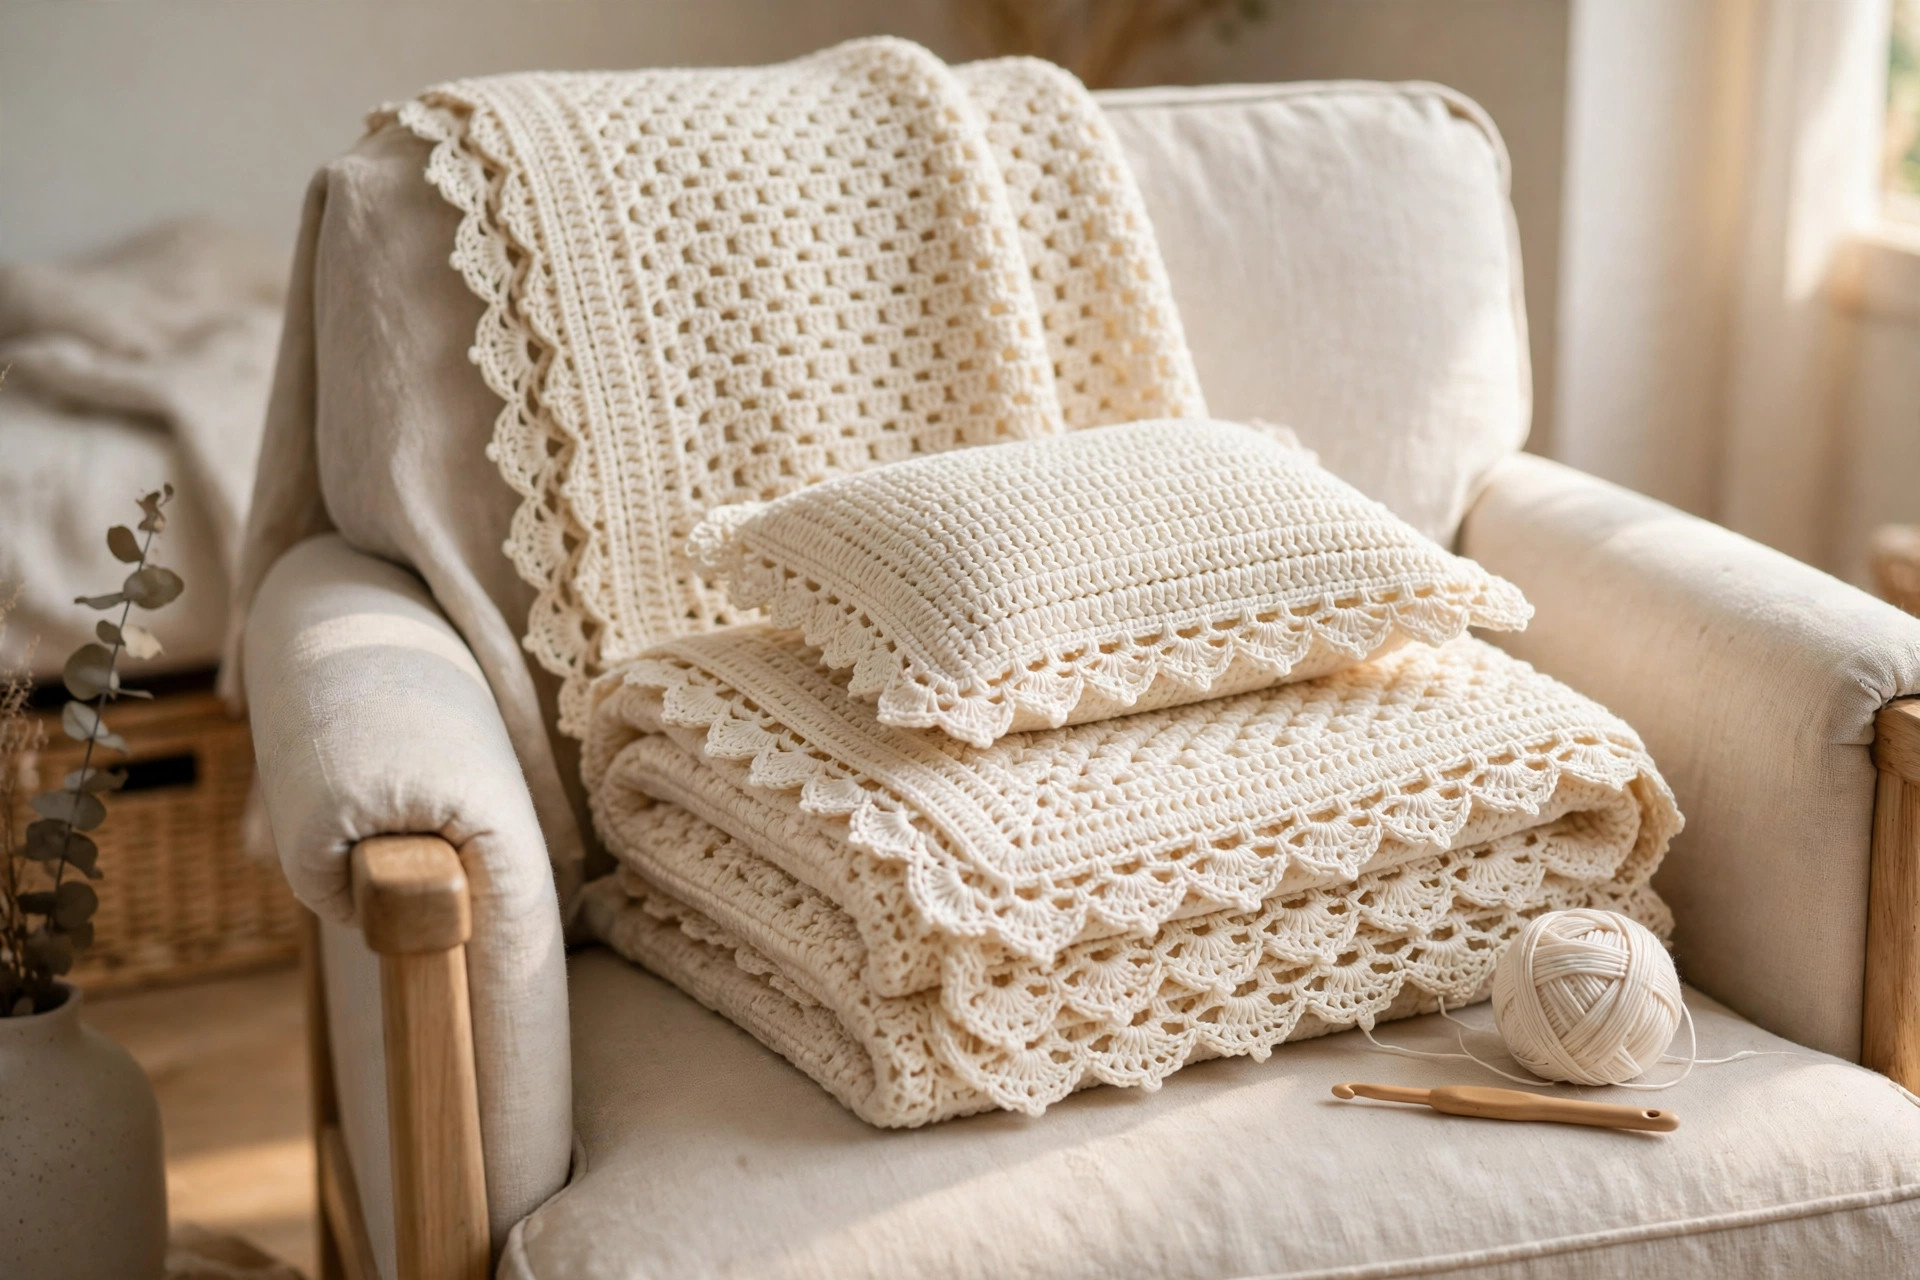
Best for: Blankets and throws (it echoes the borders on our easy crochet patterns for blankets), hand towels, washcloths, and the hem of a simple crocheted skirt or dress.
2. Picot Fan Edging — multiple of 8 + 1
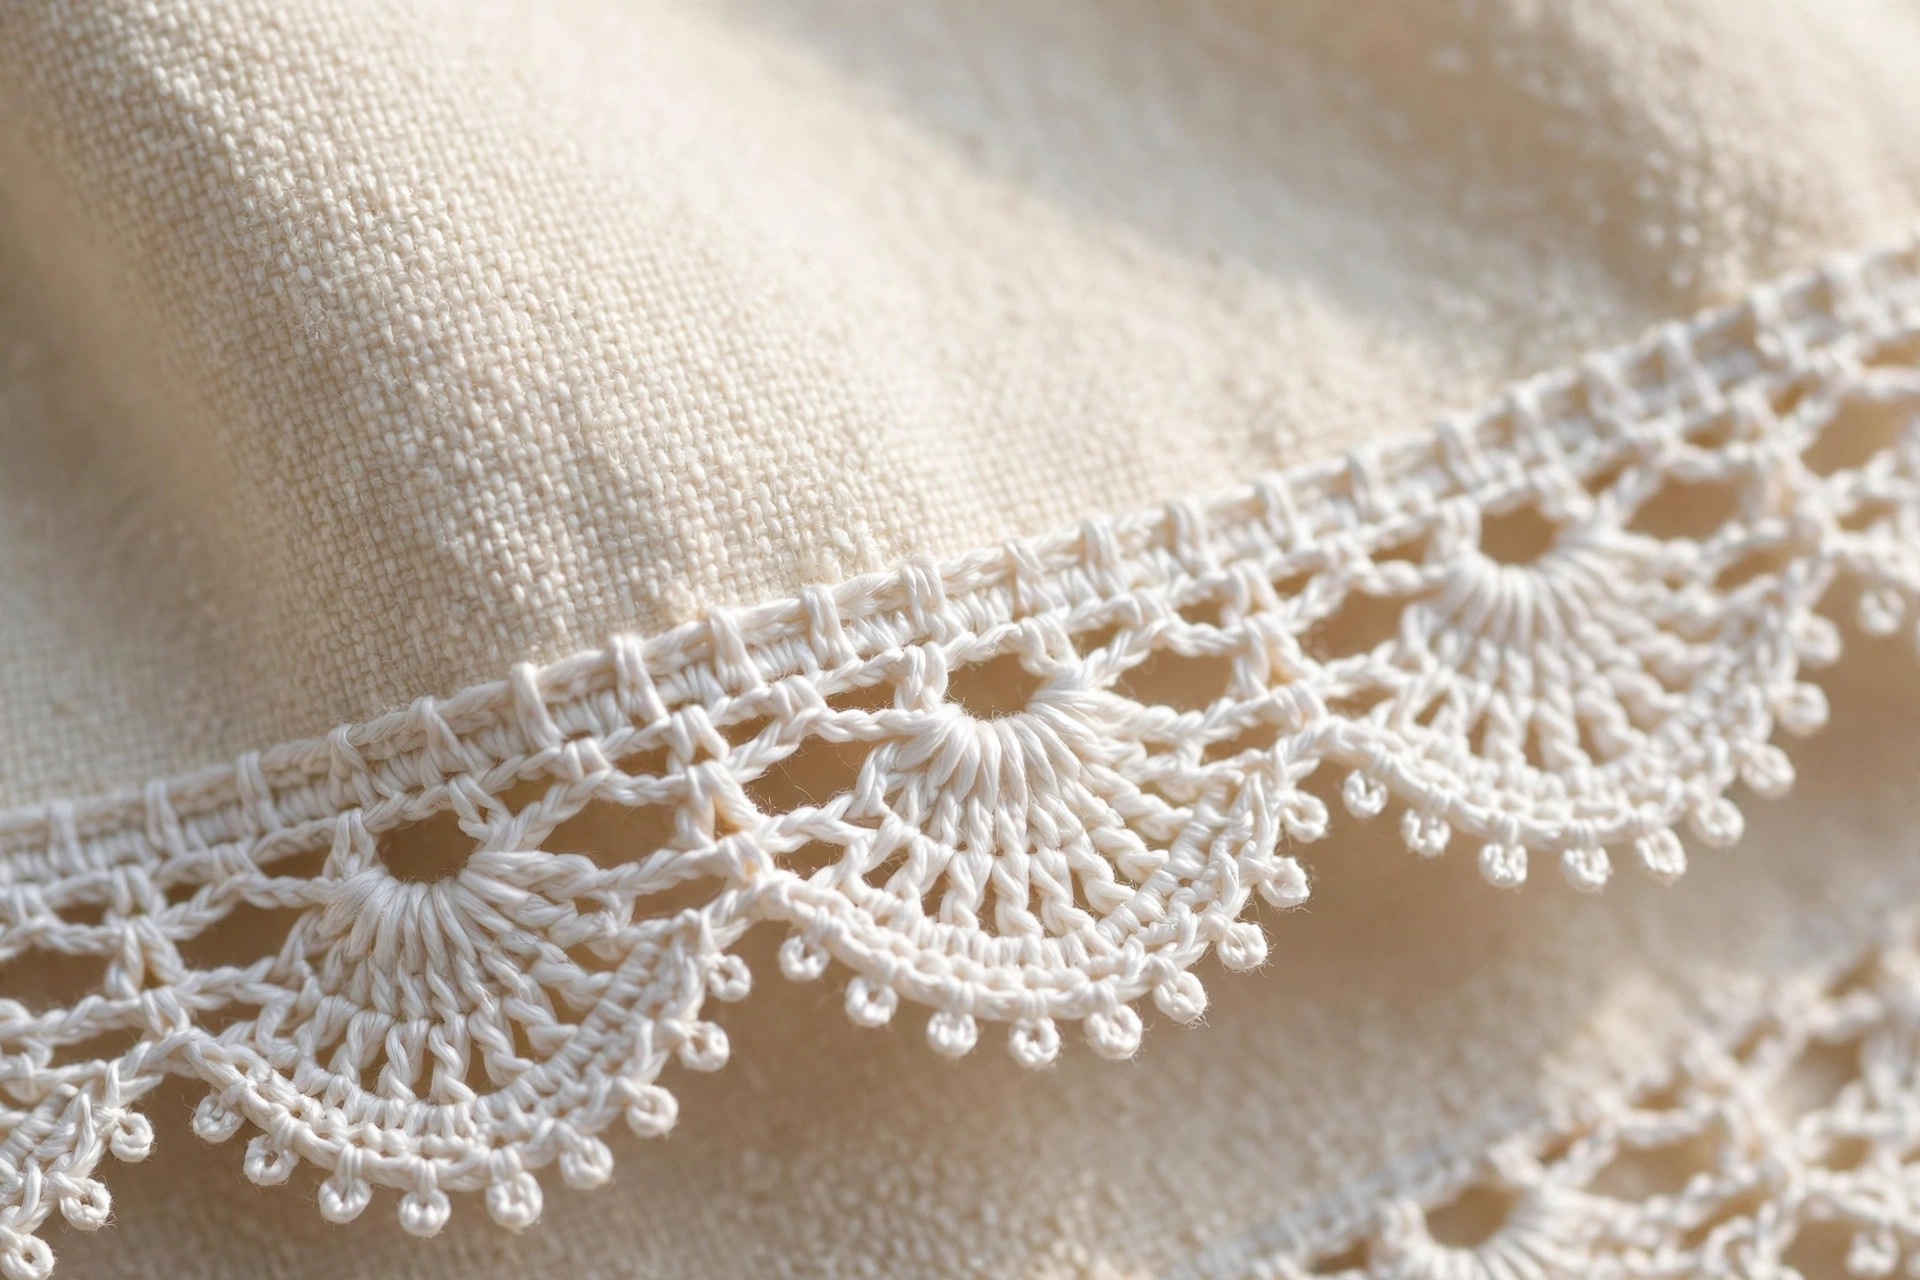
Where the shell is plump and cosy, the picot fan is airy and fine. Open fans sit between single crochet anchors, and the second row dresses each fan with a trio of picots — that unmistakable vintage-linen look. Choose it for pillowcases and table runners: in thread it is heirloom quality, in fingering cotton a pretty modern trim for a summer top.
Row 1 (foundation): Ch 1, sc in first st and in each st across: 121 sc. (Multiple of 8 + 1: 15 repeats, + 1.)
Row 2 (fan row): Ch 1, sc in first sc. Sk next 3 sc, (2 dc, ch 2, 2 dc) in next sc (fan made), sk next 3 sc, sc in next sc. Rep from * to * across, ending with a sc in the last stitch: 15 fans.
Row 3 (picot row): Ch 1, sc in first sc. Working into the next fan: sc in first dc, picot, sc in next dc. Then work (sc, picot, sc) into the ch-2 sp at the top of the fan. Sc in next dc, picot, sc in last dc of the fan. Sc in next sc anchor. Rep from * to * across, ending with a sc in the last stitch. Each fan now carries three picots — one on each side and one at its peak. Fasten off.
Corners: Work a fan into the centre sc of the corner 3-sc group, then continue the repeat down the next side. The fan's natural spread opens around the corner beautifully; if it cups slightly, blocking will flatten it.
Best for: Pillowcases, guest towels, table runners like those in our crochet table runners free patterns, handkerchief hems, christening blankets, and the neckline of a plain top.
3. V-Stitch Scallop Edging — multiple of 6 + 1
The V-stitch scallop is the drama queen of the set — the deepest edging, the fastest to work, and the one with the most movement. A row of open V-stitches goes in first, then each V is filled with a generous scallop. The result drapes rather than sits, perfect for shawls and throws — and the wide spacing makes it the most economical with yarn.
Row 1 (foundation): Ch 1, sc in first st and in each st across: 121 sc. (Multiple of 6 + 1: 20 repeats, + 1.)
Row 2 (V-stitch row): Ch 4 (counts as dc + ch 1), dc in first sc — first V-st made at the edge. Sk next 2 sc, sc in next sc, sk next 2 sc, V-st in next sc. Rep from * to * across, ending with a V-st in the last sc: 21 V-stitches.
Row 3 (scallop row): Ch 1, work 7 dc into the ch-1 sp of the first V-st (scallop made). Sc into the next sc anchor, 7 dc into the ch-1 sp of the next V-st. Rep from * to * across, ending with 7 dc in the final V-st. Fasten off. Seven double crochets in one small space is what creates that lush, wavy, almost ruffled edge.
Corners: Work the corner V-st into the centre sc of the corner group and treat it like any other V in Row 3. Its scallop opens wider than the others — exactly what a corner needs to lie flat.
Best for: Shawls and wraps, scarf ends, throw blankets — including a soft lovey blanket crochet pattern for a nursery — curtain bottoms, and the lower edge of a cardigan or poncho.
Finishing: blocking and sewing on your edging
Lace is not finished when the last stitch is worked — it is finished when it is blocked. Fresh off the hook, scallops curl, picots hide and fans sit half-closed. Blocking opens every stitch and turns "homemade" into "handmade."
Weaving in: Weave each tail along the foundation row for at least 2 inches (5 cm), change direction once, and trim close. For thread, weave shorter sections in two directions — one pass works loose in the wash.
Blocking: Soak the edging (or the whole item, if washable) in lukewarm water for ten minutes. Press the water out in a towel — never wring lace — then lay it flat and pin each scallop, fan and picot point out to its full shape until dry. Cotton holds a block well; for acrylic, pin and steam lightly, holding the iron above the stitches.
Sewing on a separate strip: Pin the strip to the fabric edge, overlapping by the depth of the foundation row, and sew with matching thread using small whip stitches through the foundation row only — about 4 per inch — easing it around corners. Press flat from the wrong side. For longer trims, join strips by slip stitching the foundation rows together before working the lace across the join; it disappears under the shells.
Tips for neat, professional lace edgings
Count the foundation, not the lace. Most edging problems are foundation problems. If a repeat ends mid-air, recount the single crochet row and quietly add or remove a stitch or two spread across it. Nobody sees an adjusted foundation; everybody sees a squished final shell.
Keep your anchors firm. The little sc stitches between shells and fans are the bones of the edging — work them snugly. Loose anchors make lace wave; firm anchors give that crisp, even rhythm of good shop-bought trim.
Match the fibre to the job. The edging must survive the same laundry as the item: cotton on cotton softens together wash after wash, while a wool trim on a hot-washed towel will felt. When in doubt: cotton on cotton.
Test on a scrap first. Before trimming the good pillowcase, work two repeats onto a scrap and check depth, drape and colour in daylight.
FAQ
How do I add a crochet edging to a fabric towel or pillowcase?
Either blanket-stitch along the hem with your yarn or thread, then work one single crochet into each loop, or work the edging separately as a strip and sew it on. Adjust the single crochet count to the multiple you need — 6 + 1 or 8 + 1 — then work the lace rows as written.
What is a stitch multiple, and why does it matter?
It tells you how many foundation stitches one full repeat uses. A multiple of 6 + 1 means a number of sixes plus one extra stitch — 37, 61 or 121, for example. If the count is right, every repeat lands perfectly; if not, the last repeat will not fit, so always count first.
Which yarn or thread is best for lace edgings?
Cotton, in almost every case: crisp definition, firm blocking, and it washes well. Use DK or worsted cotton for towels and blankets, fingering cotton for garments, and size 10 thread with a steel hook for fine heirloom trims.
Can a beginner really make these edgings?
Yes — these are ideal first lace projects. Every design uses only chain, single crochet and double crochet, plus one optional picot explained step by step. Start with the Classic Shell Edging on a washcloth: a finished result within the hour.
How do I stop my edging from curling or waving?
It nearly always traces back to the foundation: too many stitches and the lace ruffles, too few and it cups. Recount, adjust the foundation, keep your anchors firm, then block the edging flat — pinning every scallop and picot while it dries fixes most remaining waviness.
How much yarn does a lace edging use?
Very little. In DK cotton, one yard of edging takes roughly 25 to 40 yards (23 to 37 metres) — the V-stitch scallop uses the least, the picot fan the most. A hand towel hem uses about 12 to 18 yards, so these are perfect for leftover part-balls.
Do I have to block a crochet lace edging?
For the best result, yes — and it takes minutes. Unblocked lace hides its own pattern: picots close up, fans fold, scallops curl. A soak, pins through every point, and time to dry opens the design up completely.
What to crochet next
The box below contains an Etsy link. If you buy through it, we may earn a small commission at no extra cost to you. Learn more.
No time to make one?
Short on time? Find handmade lace trims and edgings on Etsy.
Browse on Etsy (opens Etsy in a new tab)