Soap Saver Crochet Pattern (Free Mesh Pouch)
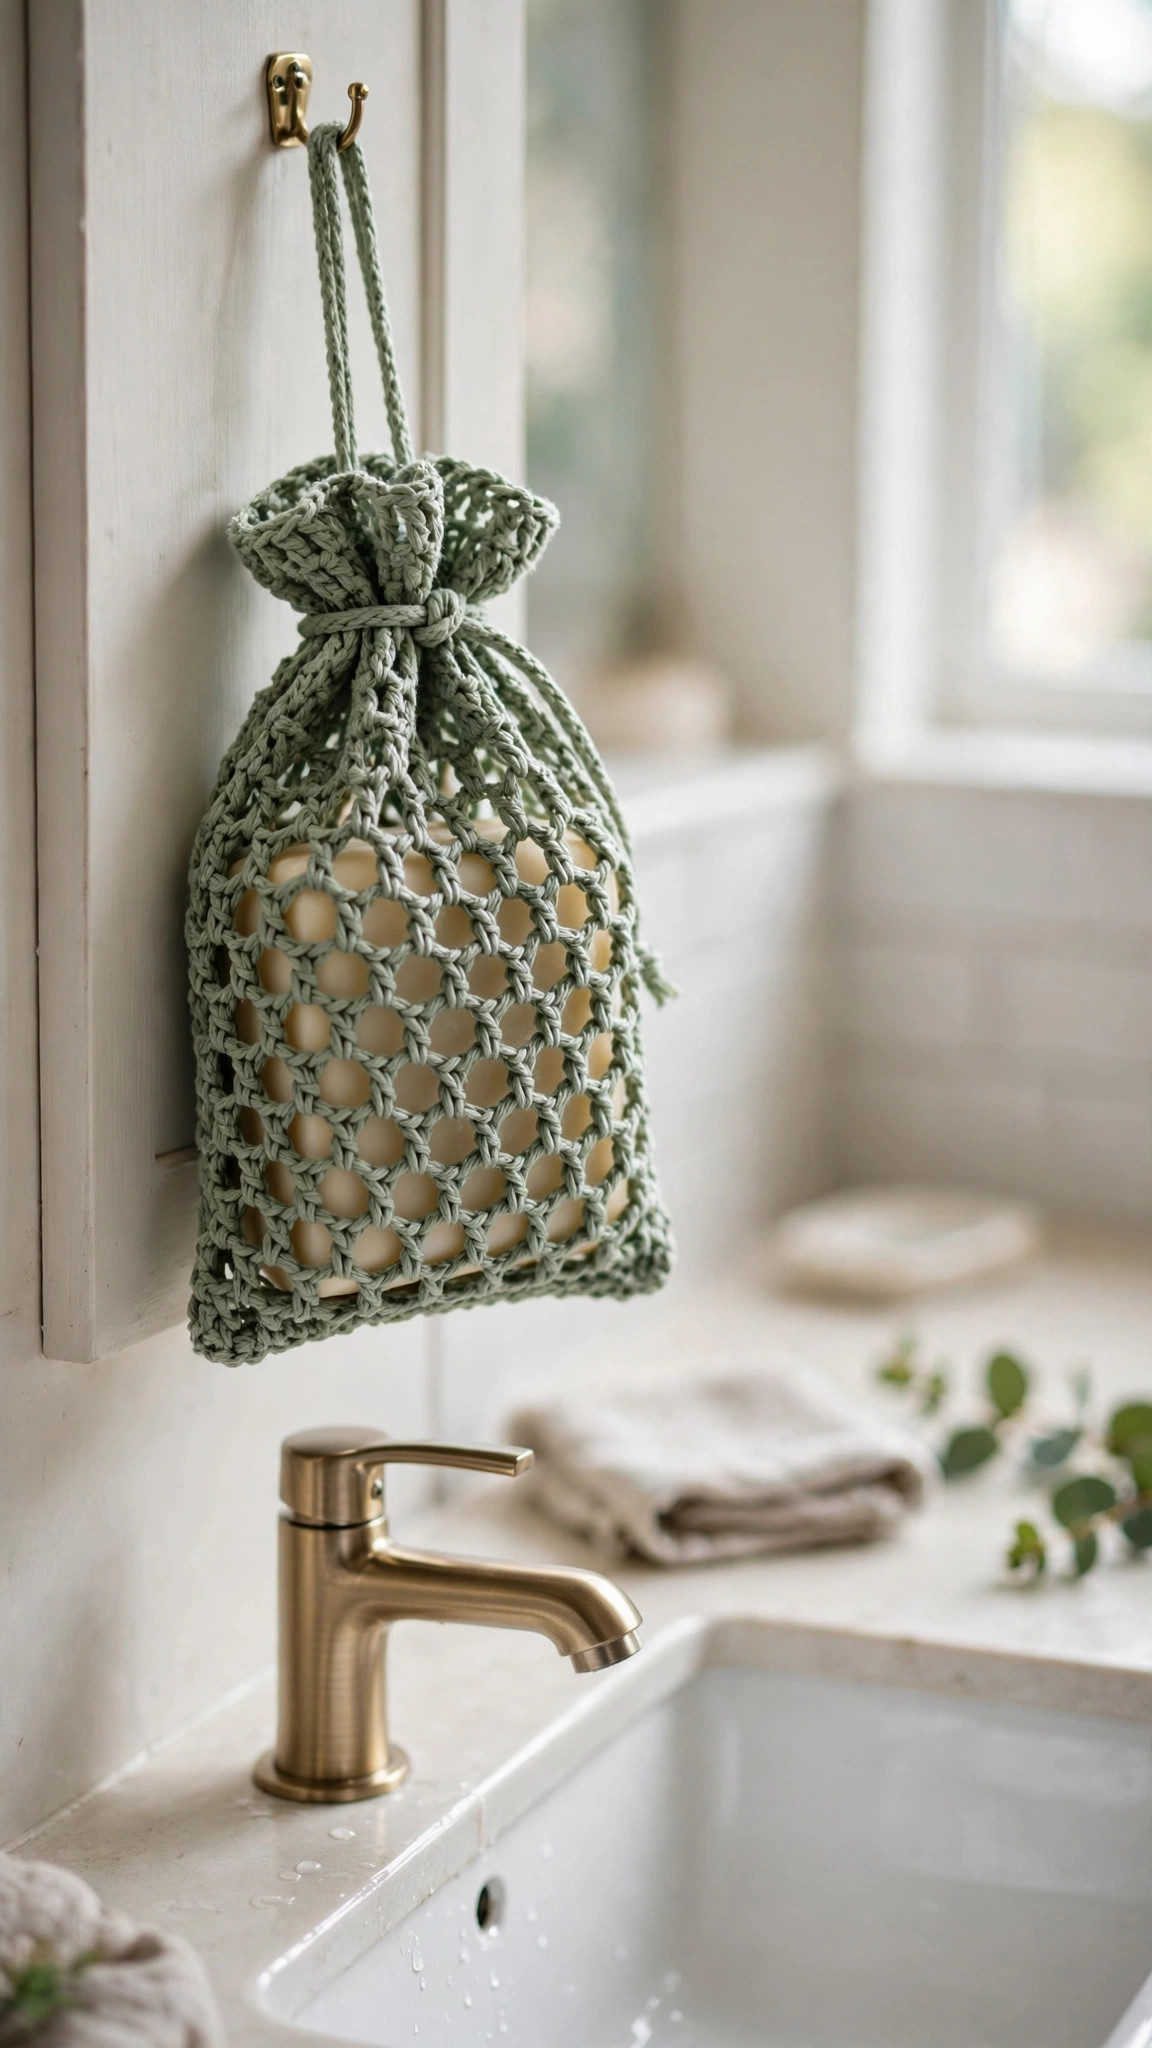
Crochet a mesh soap saver pouch that holds a bar of soap, with a drawstring top, in about ninety minutes, then hang it in the shower.

Patterns · Crochet
- Finished size
- 4.5 in tall
- Making time
- 1.5 hours
- Hook
- US H-8 (5.0 mm)
- Set
- Pouch, drawstring
- Skill
- Easy
In this post
- Key Takeaways
- Table of Contents
- Why You Will Love This Soap Saver
- Finished Size, Skill Level, and Time
- Materials You Need
- Abbreviations (US Terms)
- Gauge and Sizing Notes
- Part 1: The Base
- Part 2: The Mesh Body
- Part 3: The Top Edge, Drawstring, and Finishing
- Variations: Colors, Sizes, and Uses
- Troubleshooting a Pouch That Will Not Fit the Soap
- Care Instructions
- Frequently Asked Questions
A soap saver is a small mesh pouch that holds a bar of soap, and this free soap saver crochet pattern makes one you will reach for every single day. Slip a bar inside, pull the drawstring closed, and use it in the shower like a washcloth. The mesh gently exfoliates, the soap lathers beautifully, and the little slivers that usually slip down the drain get used up instead of wasted. It works up in about ninety minutes.
This is an original Little Loop Finds design, written in US terms and completely free. The base is a flat circle worked in single crochet, the body is an open mesh stitch that lets water flow through, and the top edge has an eyelet round for a simple chain drawstring. If you can crochet a magic ring and a chain space, you can crochet this soap saver.
A quick note on scope: this post is about one specific soap saver, a mesh pouch with a drawstring that holds a standard bar of soap for shower use. It is not a soap dish cover or a solid bag. If you want another bath time make, our free crochet scrubby patterns are quick textured rounds that pair perfectly with this pouch.
Key Takeaways
- Free original pattern: a Little Loop Finds original design, written in US terms, and completely free.
- A mesh pouch for a bar of soap: an open mesh body that lathers well and gently exfoliates.
- Beginner friendly: single crochet, chain spaces, and one simple drawstring.
- A ninety minute project: one soap saver takes about 1.5 hours.
- Three ways to use it: in the shower, at the bathroom sink, and as a small gift set.
Table of Contents
- Why You Will Love This Soap Saver
- Finished Size, Skill Level, and Time
- Materials You Need
- Abbreviations (US Terms)
- Gauge and Sizing Notes
- Part 1: The Base
- Part 2: The Mesh Body
- Part 3: The Top Edge, Drawstring, and Finishing
- Variations: Colors, Sizes, and Uses
- Troubleshooting a Pouch That Will Not Fit the Soap
- Care Instructions
- Frequently Asked Questions
Why You Will Love This Soap Saver
A bar of soap is a lovely thing until it gets small, slippery, and impossible to hold. A soap saver fixes that problem in the prettiest way. The bar stays inside the pouch, your hands stay on the mesh instead of chasing a wet sliver, and the last little piece gets used instead of thrown away.
A soap saver is also one of the most satisfying quick projects in crochet. The mesh stitch looks impressive and works up fast, the whole pouch uses less than one small ball of cotton yarn, and you can finish one in a single evening. Make one in sage green for your own shower, or a set of three in matching colors as a gift. Our crochet dishcloths free patterns make a sweet matching set for the bathroom.
Finished Size, Skill Level, and Time
- Finished size: about 4.5 inches tall and 3.5 inches wide, made to fit a standard bar of soap about 3.5 inches long.
- Skill level: Easy. You need a magic ring, single crochet, double crochet, chain spaces, and a chain drawstring.
- Time: about 1.5 hours per pouch: 20 minutes for the base, 45 minutes for the mesh body, 25 minutes for the top edge and drawstring.
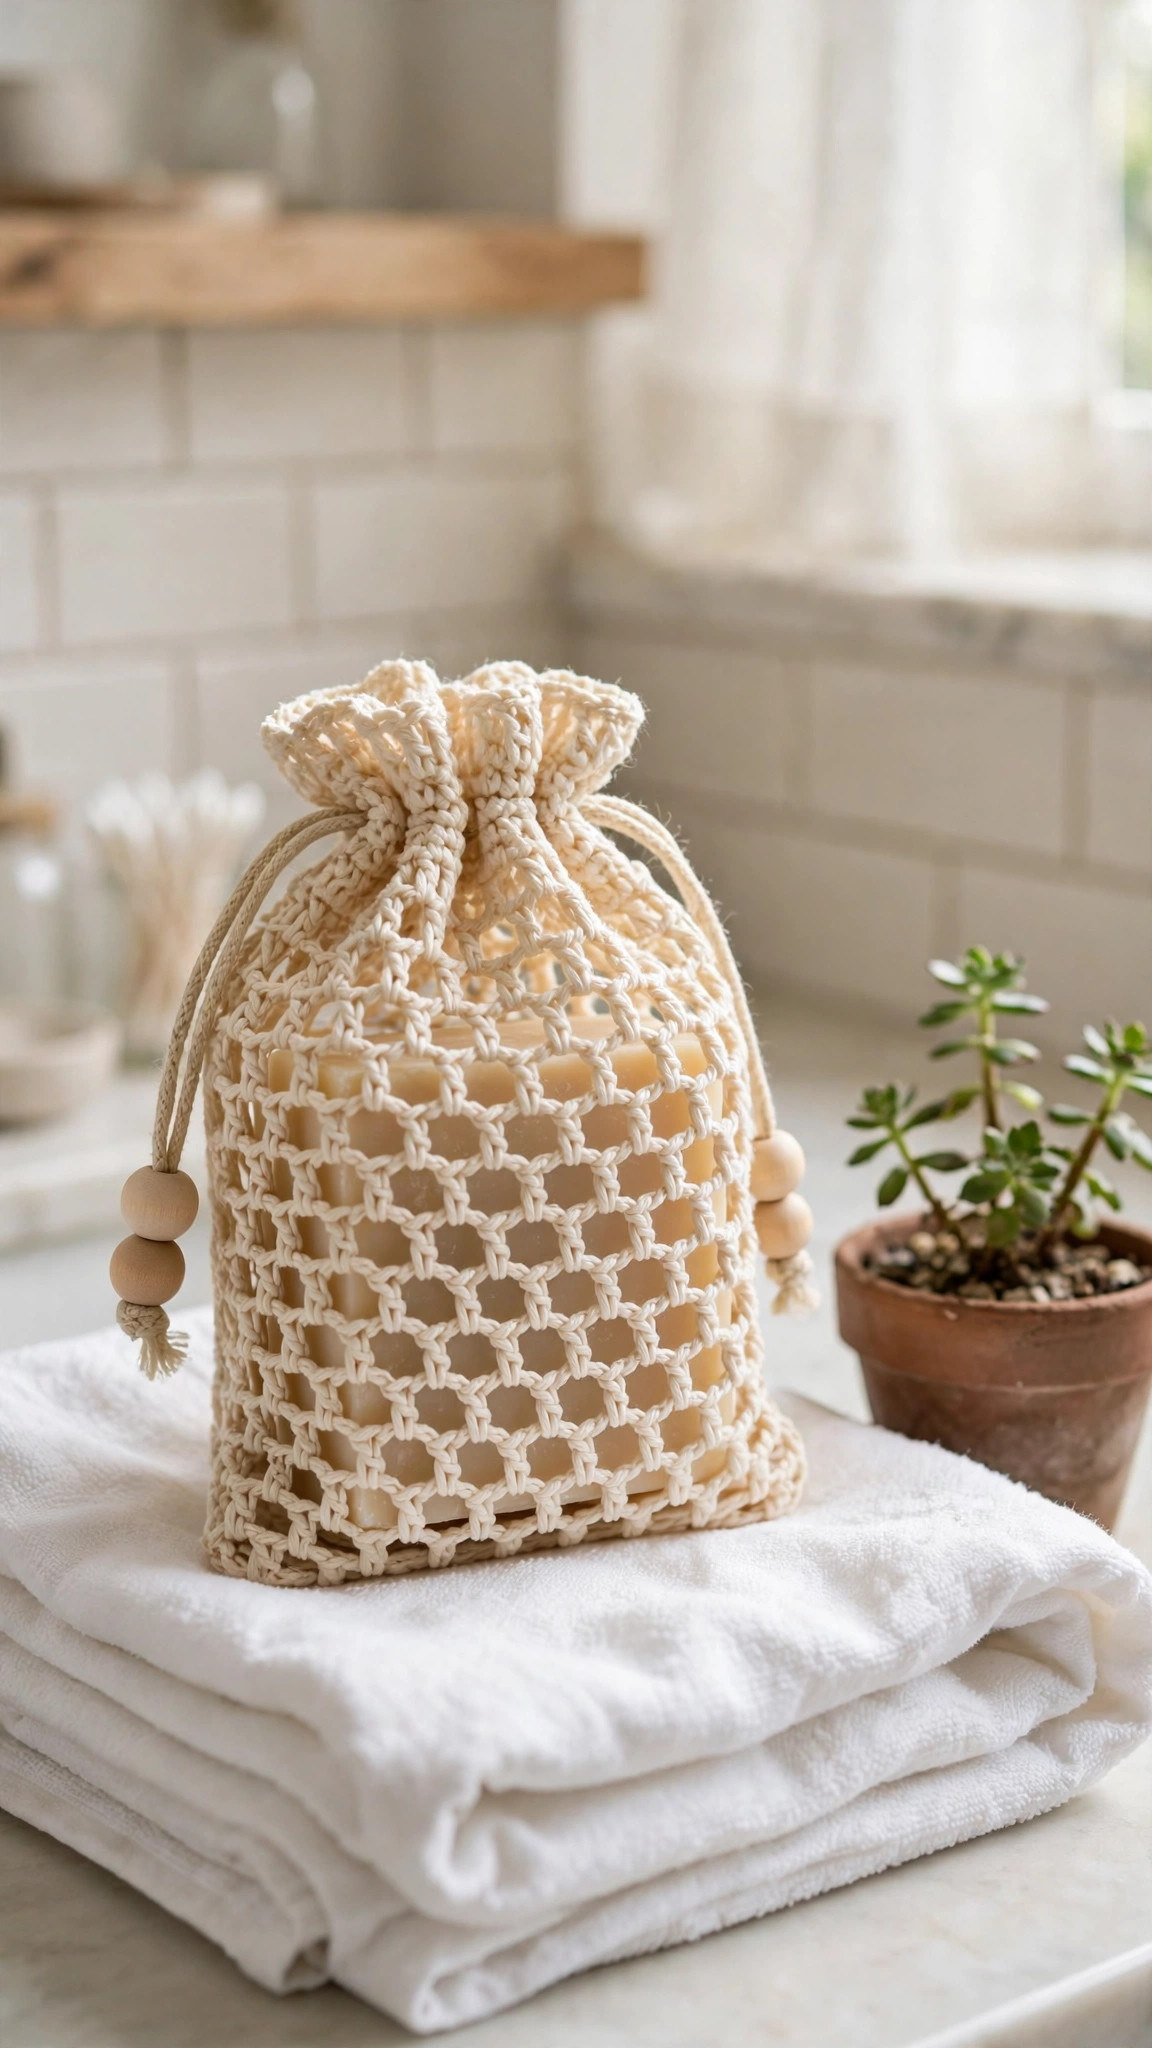
Materials You Need
| Item | What to get |
|---|---|
| Yarn | Worsted weight (size 4) 100 percent cotton yarn, 50 yards, in sage green or any color you like |
| Hook | US H-8 (5.0 mm), or the size that gives you the gauge below |
| Notions | Tapestry needle, scissors, stitch marker, one wooden bead about 0.75 inches wide (optional, for the drawstring ends) |
Cotton yarn is the best choice for a soap saver because it absorbs water, dries well, and stands up to daily use in the shower. A smooth worsted weight cotton gives you clean, even mesh and a pouch that holds its shape when wet. Choose a soft sage green, cream, or dusty blue for a calm bathroom look, or a bright coral for a cheerful gift. Avoid acrylic yarn for this project, because acrylic does not absorb water and feels slippery when wet. Avoid fuzzy or eyelash yarns too, because they hide the mesh and trap soap residue.
Abbreviations (US Terms)
- ch = chain
- sl st = slip stitch
- sc = single crochet
- dc = double crochet
- inc = increase (2 sc in the same stitch)
- sk = skip
- sp(s) = space(s)
- st(s) = stitch(es)
- rep = repeat
Gauge and Sizing Notes
Gauge matters less here than in a garment, but it still matters, because the base must be wide enough for your bar of soap. Work a swatch of 12 sc stitches and 12 rows. It should be about 4 inches square. If it is wider, go down a hook size. If it is narrower, go up a hook size.
Measure your bar of soap before you start. A standard bar is about 3.5 inches long and 2.25 inches wide, and this pattern fits that size with a little room to spare. If your bar is larger, work one extra increase round on the base before you start the mesh, and add one extra mesh round to the body. Count your stitches at the end of every base round, because a missed increase makes the base lopsided and the pouch will lean. Place a stitch marker in the first stitch of each round and move it up as you go.
Part 1: The Base
The base is a flat circle worked in the round, and it needs to be firm and flat so the pouch stands up in the shower. Work it in single crochet with a slightly tighter tension than usual, and check after every round that it still lies flat on the table.
The Base Circle
With your cotton yarn, make a magic ring.
- Rnd 1: 6 sc in the ring. (6 sts)
- Rnd 2: inc in each st around. (12 sts)
- Rnd 3: (sc, inc) 6 times. (18 sts)
- Rnd 4: (2 sc, inc) 6 times. (24 sts)
- Rnd 5: sc in each st around. (24 sts)
Fasten off the base? No, do not fasten off. You will keep working straight into the mesh body from here, so leave the yarn attached and keep your hook in the live loop. The base should be about 3.5 inches across and lie perfectly flat. If the edge curls up, your tension is too tight, so work the next round a little looser. If the edge ripples like a wave, your tension is too loose, so work the next round a little tighter.
Part 2: The Mesh Body
The mesh body is the heart of this soap saver. It is made with a simple repeat of chain spaces and single crochet, worked in the round, and it grows quickly because each round has only 12 single crochet stitches and 12 chain spaces. The open mesh lets water flow through the pouch, which is exactly what makes the soap lather so well.
The Mesh Rounds
Keep working from the base, with the right side facing out.
- Rnd 6: ch 2, sk 1 st, sc in the next st, (ch 2, sk 1 st, sc in the next st) 11 times. Join with a sl st to the first sc of the round. (12 sc, 12 ch-2 sps)
- Rnd 7: sl st into the first ch-2 sp, ch 2, sc in the same ch-2 sp, (ch 2, sc in the next ch-2 sp) 11 times. Join with a sl st to the first sc of the round. (12 sc, 12 ch-2 sps)
- Rnds 8 to 14: rep Rnd 7 seven more times. (12 sc, 12 ch-2 sps)
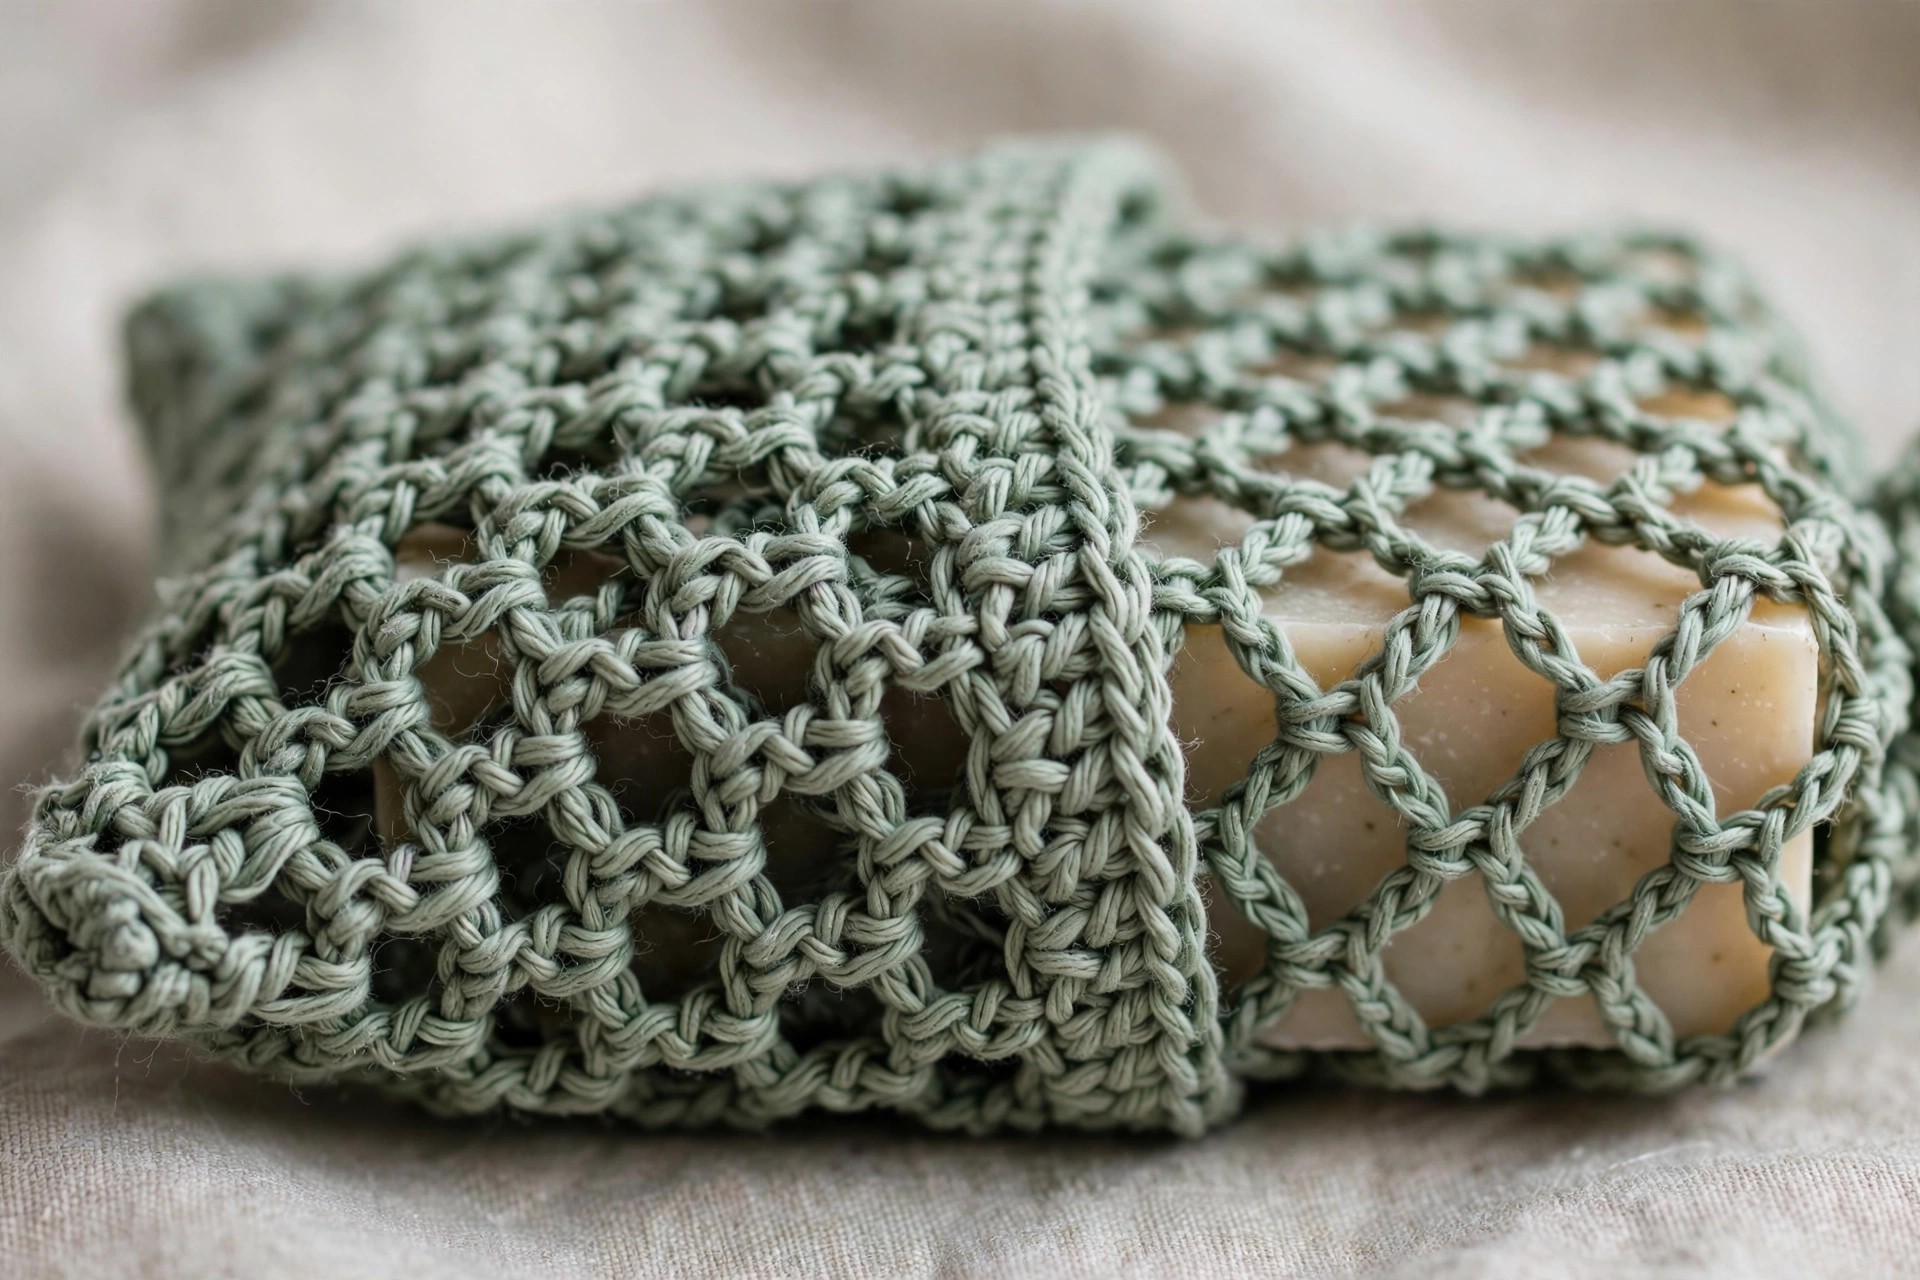
Work each mesh round the same way, moving your stitch marker to the first single crochet of the round so you never lose your place. The mesh should grow straight up from the base, like a little tube, and after round 14 the body should be about 3 inches tall. Hold the pouch up and check that the mesh looks even, with all the chain spaces about the same size. If one side looks tighter than the other, it usually means you skipped a chain space on that side, so count the spaces before you move on.
Checking the Fit
Before you work the top edge, slip your bar of soap into the pouch. It should slide in easily and sit with about half an inch of mesh above it. If the bar will not fit, your base is too small, so go back and add one more increase round to the base, then work the mesh again. If the bar rattles around loosely, your base is too wide, so work the next pouch with a smaller hook. The fit matters, because a pouch that is too loose lets the soap slide out, and a pouch that is too tight will not close over the top of the bar.
Part 3: The Top Edge, Drawstring, and Finishing
The top edge closes the mesh into a firm band, and the eyelet round gives the drawstring a path to run through. This is the part that turns a mesh tube into a pouch you can open and close with one pull.
The Top Edge
Keep working from the mesh body, with the right side facing out.
- Rnd 15: sc in each sc and 1 sc in each ch-2 sp around. Join with a sl st to the first sc. (24 sts)
- Rnd 16: ch 3 (counts as the first dc), sk 1 st, dc in the next st, (ch 1, sk 1 st, dc in the next st) 11 times, ch 1, join with a sl st to the top of the beginning ch-3. (12 dc, 12 ch-1 sps)
- Rnd 17: sc in each dc and 1 sc in each ch-1 sp around. Join with a sl st to the first sc. (24 sts)
- Rnd 18: sc in each st around. Join with a sl st to the first sc. (24 sts)
Fasten off and weave in the end, working the tail through the back of several stitches in the same color, then trimming it close. The top edge should be about 1 inch tall and firm enough to hold its shape when you pull the drawstring.
The Drawstring
The drawstring is a simple chain cord, long enough to run around the pouch twice and tie in a bow.
- Ch 70.
- Fasten off, leaving a tail about 6 inches long at each end.
Thread one end of the chain onto a tapestry needle and weave it in and out of the eyelet spaces of round 16, going all the way around the pouch until the two ends meet. Pull both ends through the last eyelet so they hang together. If you are using a wooden bead, thread both ends through the bead, tie a knot below the bead to stop it sliding off, and trim the ends to about 1 inch below the knot. If you are not using a bead, tie the two ends together in a small knot and trim them even.
To close the pouch, pull both drawstring ends at the same time until the top gathers shut, then tie a loose bow. To open it, pull the top edge open with your fingers and slide the bar out. Our crochet market bag pattern uses the same chain drawstring technique if you want another project that uses this skill.

Final Finishing
Weave in every yarn end, working each tail through the back of several stitches in the same color, then trimming it close. Turn the pouch right side out if it flipped during the mesh rounds, and check the base from underneath to make sure it is still flat. Slip a bar of soap inside, pull the drawstring closed, and hold the pouch under running water. It should lather within a few seconds. If the lather is slow, the mesh may be too tight, so work the next pouch with a larger hook. Our crochet coaster pattern makes a lovely matching bathroom set with this pouch.
Variations: Colors, Sizes, and Uses
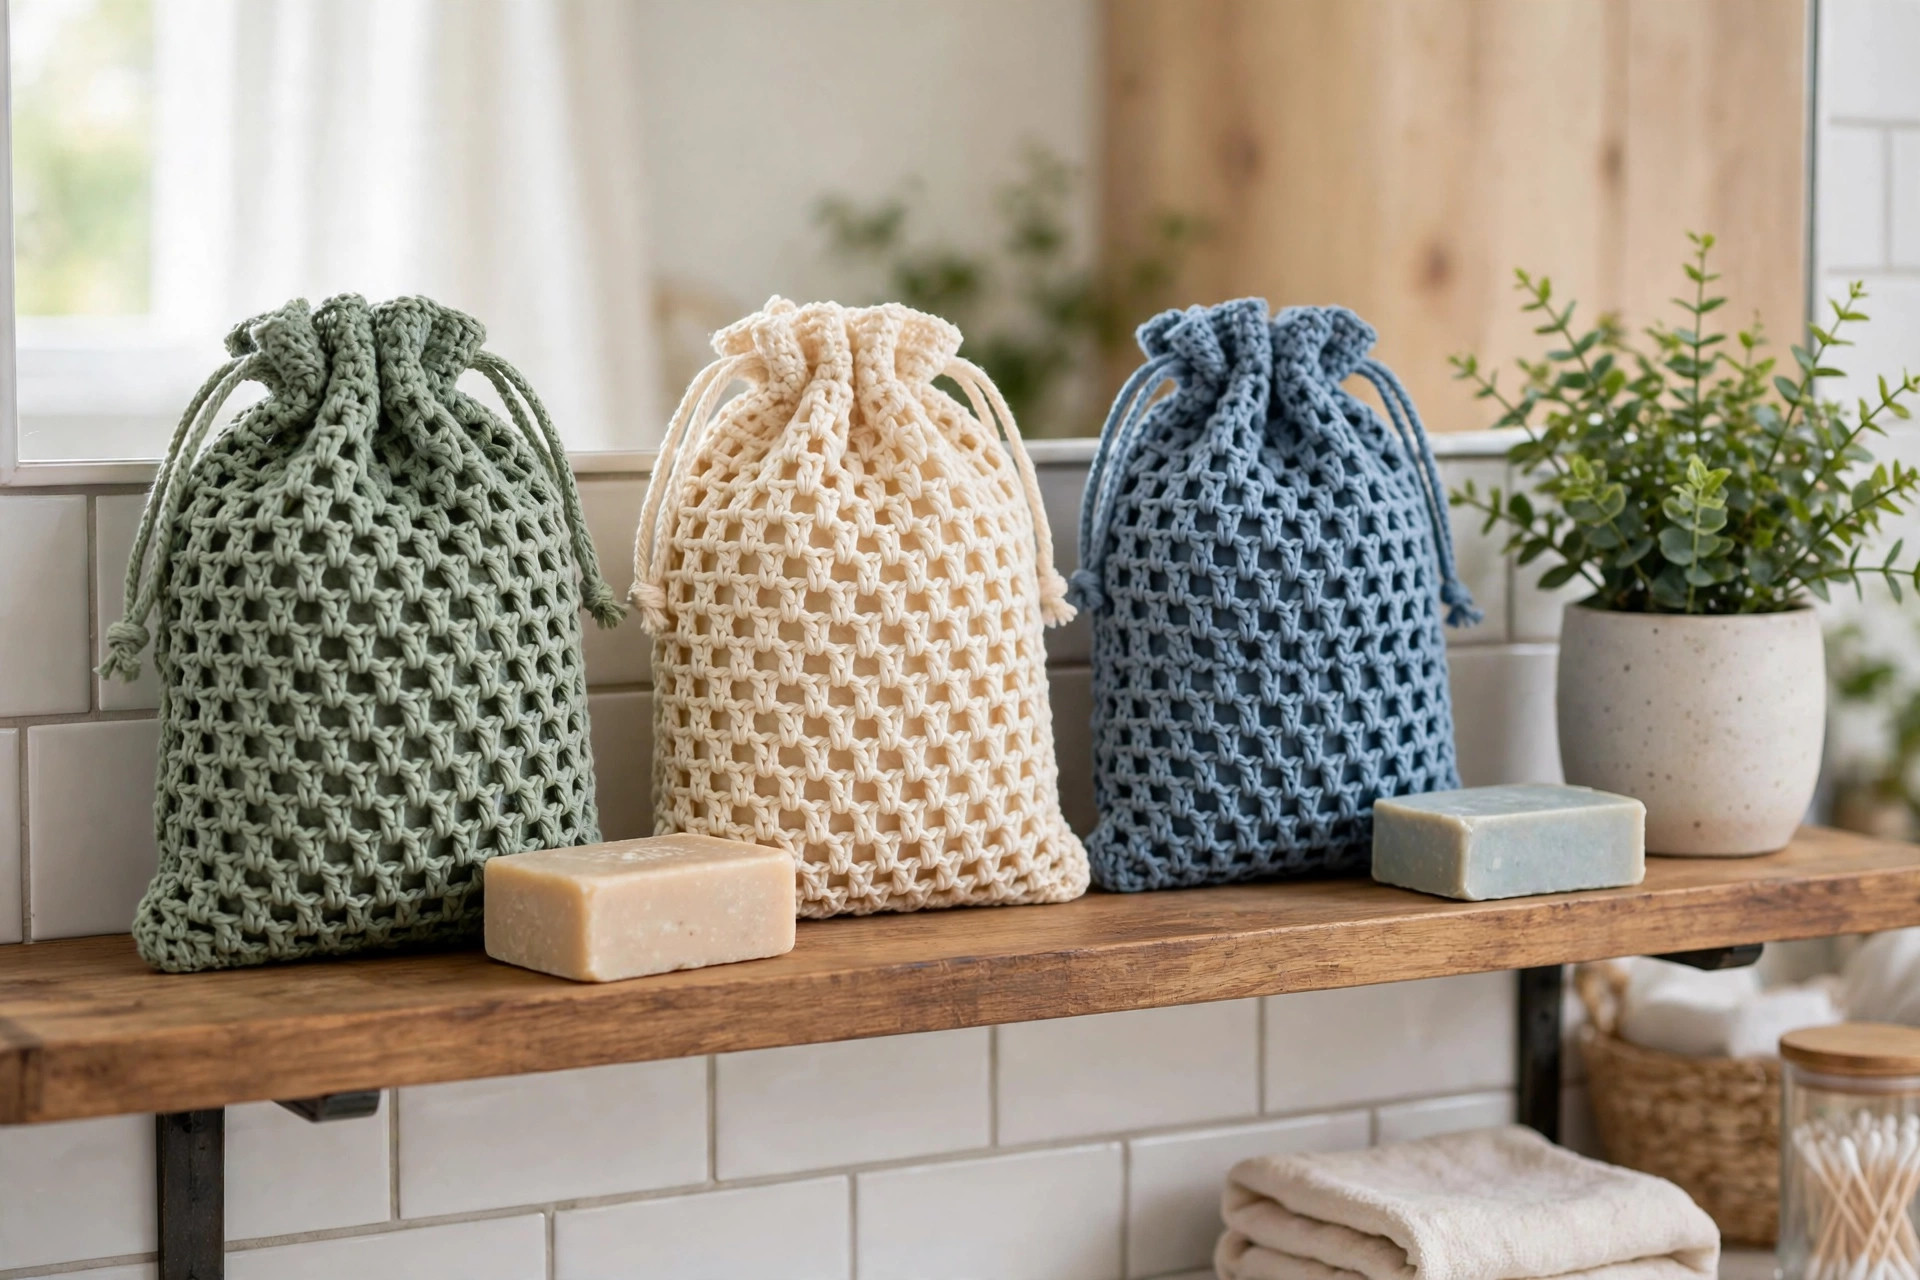
- Classic sage pouch: work the whole pouch in sage green cotton with a cream drawstring, the colorway in the photos. Our bathroom crochet toilet paper holder patterns add more handmade charm to the same bathroom.
- Two tone pouch: make the base and top edge in cream and the mesh body in dusty blue for a fresh striped look.
- Mini guest soap pouch: stop the mesh after round 11 and use a smaller bar, for a guest bathroom or a travel pouch.
- Gift set pouch: make three pouches in matching colors, add a bar of handmade soap to each, and tie the set with a ribbon for a housewarming gift.
- Scrubby pouch: work the mesh rounds in a textured cotton blend for extra exfoliation, and use it on rough skin like elbows and heels.
Troubleshooting a Pouch That Will Not Fit the Soap
- My bar will not fit inside. The base is too small. Add one more increase round to the base, working (3 sc, inc) 6 times for 30 stitches, then work the mesh with 15 chain spaces instead of 12.
- My bar falls out of the top. The pouch is too wide or the drawstring is too loose. Check that the drawstring runs through every eyelet, and tie the bow tighter.
- My mesh looks uneven. Some chain spaces were pulled longer than others. Keep your chain tension even, and count the spaces at the end of every round.
- My base curls up like a bowl. Your tension is too tight on the base rounds. Work the base a little looser, or go up one hook size for the base only.
- My drawstring keeps slipping out. The eyelet spaces are too big, or the chain is too thin. Use a thicker yarn for the drawstring, or work the eyelet round with single crochet instead of double crochet.
- My pouch smells damp. Cotton needs air to dry. Hang the pouch by its drawstring after every shower so air flows through the mesh, and wash it weekly.
Care Instructions
Hand wash a crochet soap saver in cool water with a mild detergent, and rinse it well to remove all soap residue. Squeeze the water out gently without wringing, reshape the base while it is damp, and hang it by the drawstring to dry. Never leave a wet pouch sitting in a puddle on the shower shelf, because trapped water makes cotton smell musty. Wash the pouch at least once a week, and replace it every few months when the mesh starts to look thin. A pouch that has held a strongly scented bar will carry a little of that scent, which is part of its charm.
Frequently Asked Questions
Is this soap saver crochet pattern good for beginners?
Yes, it is a great first mesh project. You need a magic ring, single crochet, double crochet, and chain spaces. One pouch takes about 1.5 hours, and the mesh repeat is easy to memorize after the first two rounds.
What yarn is best for a soap saver?
Worsted weight 100 percent cotton yarn is the best choice, because it absorbs water, lathers well, and dries between uses. Acrylic yarn does not absorb water and feels slippery when wet, so it makes a poor soap saver.
How big is the finished soap saver?
The finished pouch is about 4.5 inches tall and 3.5 inches wide, made to fit a standard bar of soap about 3.5 inches long. A mini version for a guest bar comes out about 3.5 inches tall.
Can I use this soap saver with a shampoo bar?
Yes, it works beautifully with a shampoo bar. Rub the pouch over wet hair to build a lather, then hang it up to dry. Wash the pouch weekly so shampoo does not build up in the mesh.
How do I keep my soap saver from getting slimy?
Hang it by the drawstring after every shower so air flows through the mesh, and rinse it well before you hang it. A weekly hand wash in cool water keeps it fresh.
Can I make the soap saver in different colors?
Yes, any cotton color works well. Sage green with a cream drawstring is the classic look, and dusty blue with a white top edge makes a fresh bathroom set. Keep the drawstring in a contrasting color so it is easy to find with wet hands.
Can I sell soap savers made from this pattern?
Yes, you may sell finished soap savers made from this free pattern, with credit to Little Loop Finds. Do not sell or republish the pattern text itself. A set of three pouches with a bar of handmade soap in each makes a lovely market stall bundle, and pairs nicely with our crochet water bottle holder pattern.
Happy stitching, and may your little soap saver make every shower a little softer.