Crochet Corset Pattern (Lace-Up Corset Top)
Crochet a structured lace-up corset top in soft cotton yarn with ribbon lacing in about nine hours, then wear it with jeans or a skirt for warm weather outfits.

Patterns · Crochet
- Finished size
- 10 in bodice, size M
- Making time
- 9 hours
- Hook
- US H-8 (5.0 mm)
- Set
- Corset top, straps
- Skill
- Intermediate
In this post
- Key Takeaways
- Table of Contents
- Why You Will Love This Crochet Corset
- Finished Size, Skill Level, and Time
- Materials You Need
- Abbreviations (US Terms)
- Gauge and Sizing Notes
- Part 1: The Front and Back Panels
- Part 2: Joining, Eyelets, and Lacing
- Part 3: The Straps, Edging, and Finishing
- Variations: Colors, Sizes, and Uses
- Troubleshooting a Corset That Does Not Fit Right
- Care Instructions
- Frequently Asked Questions
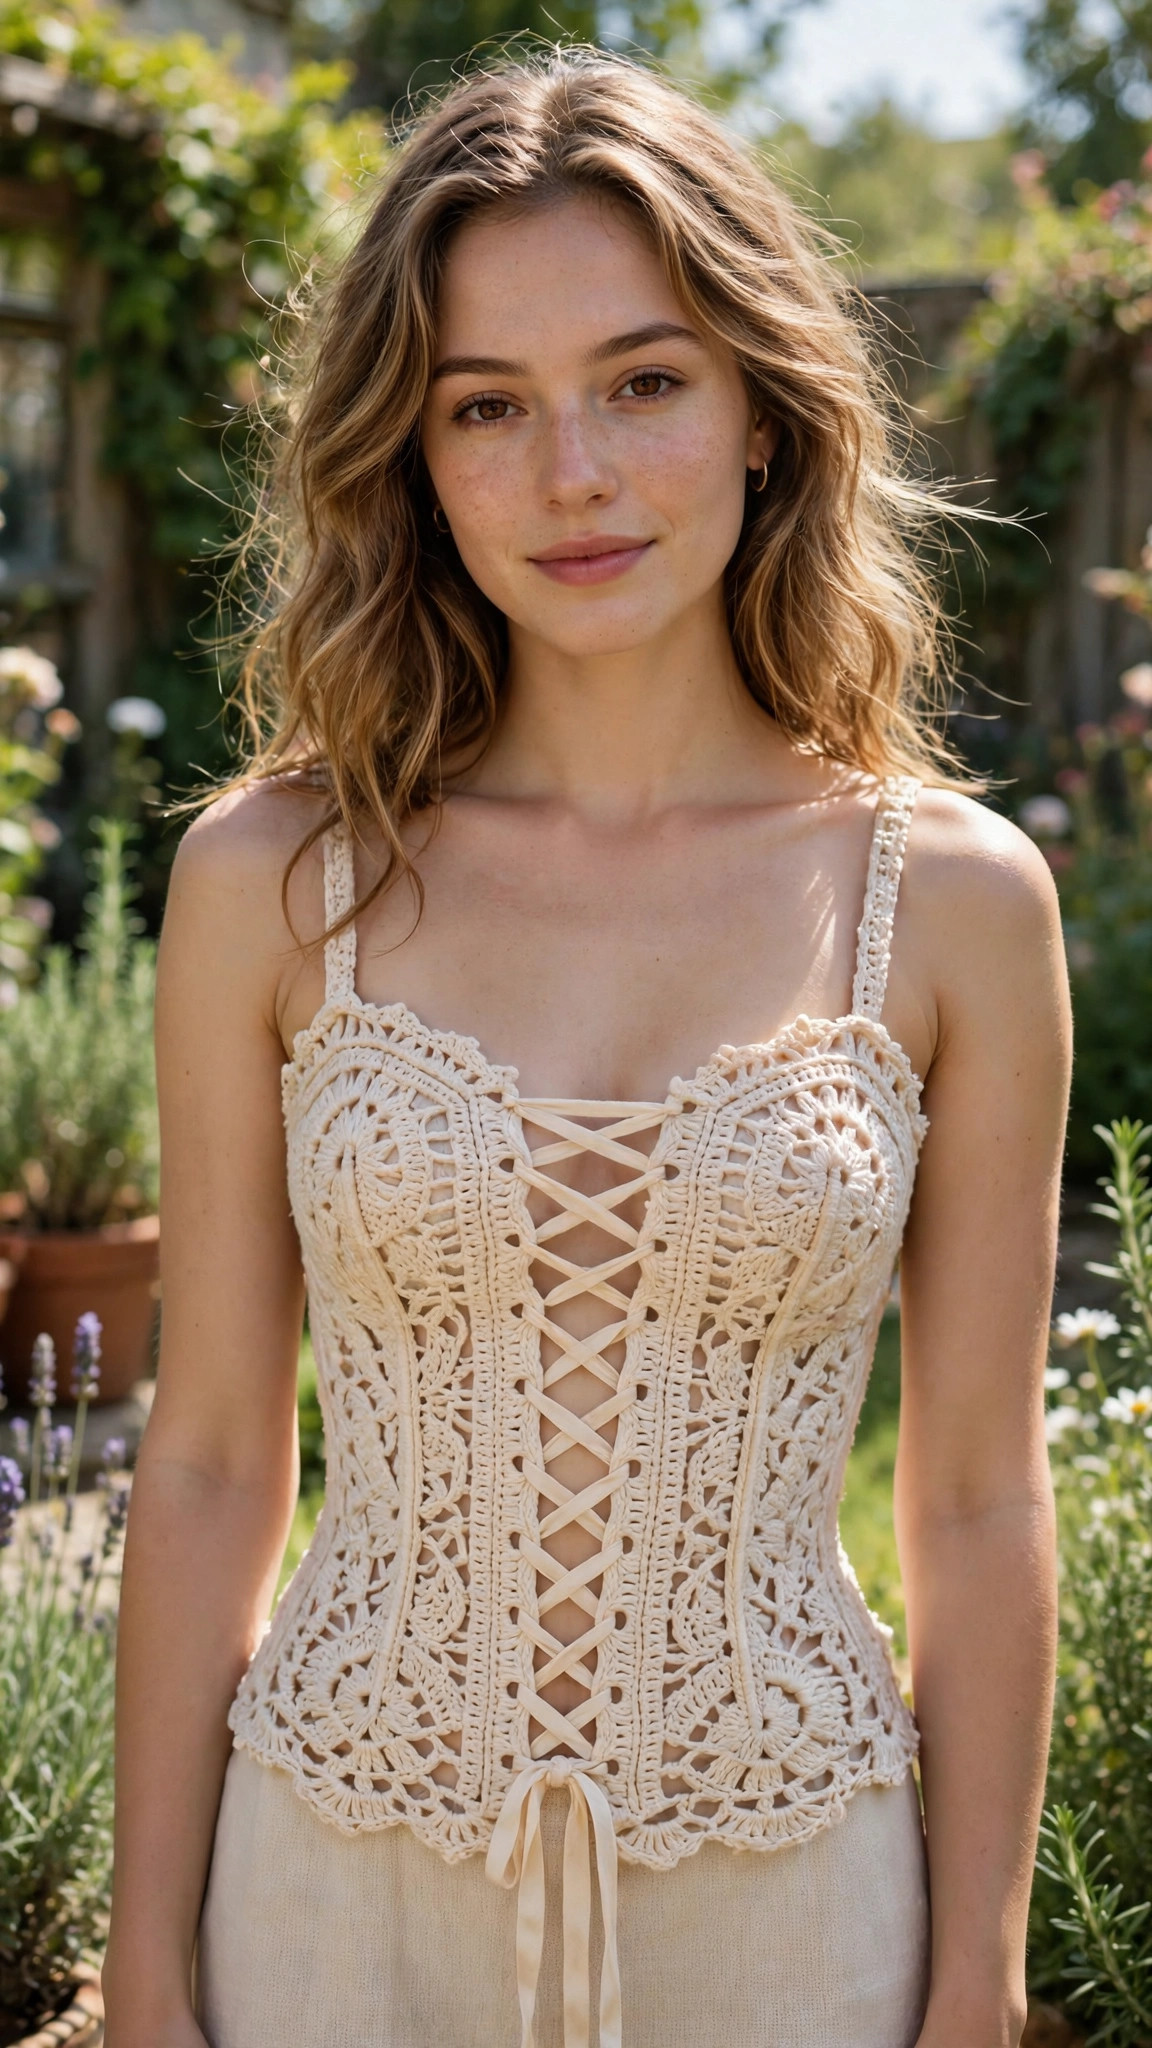
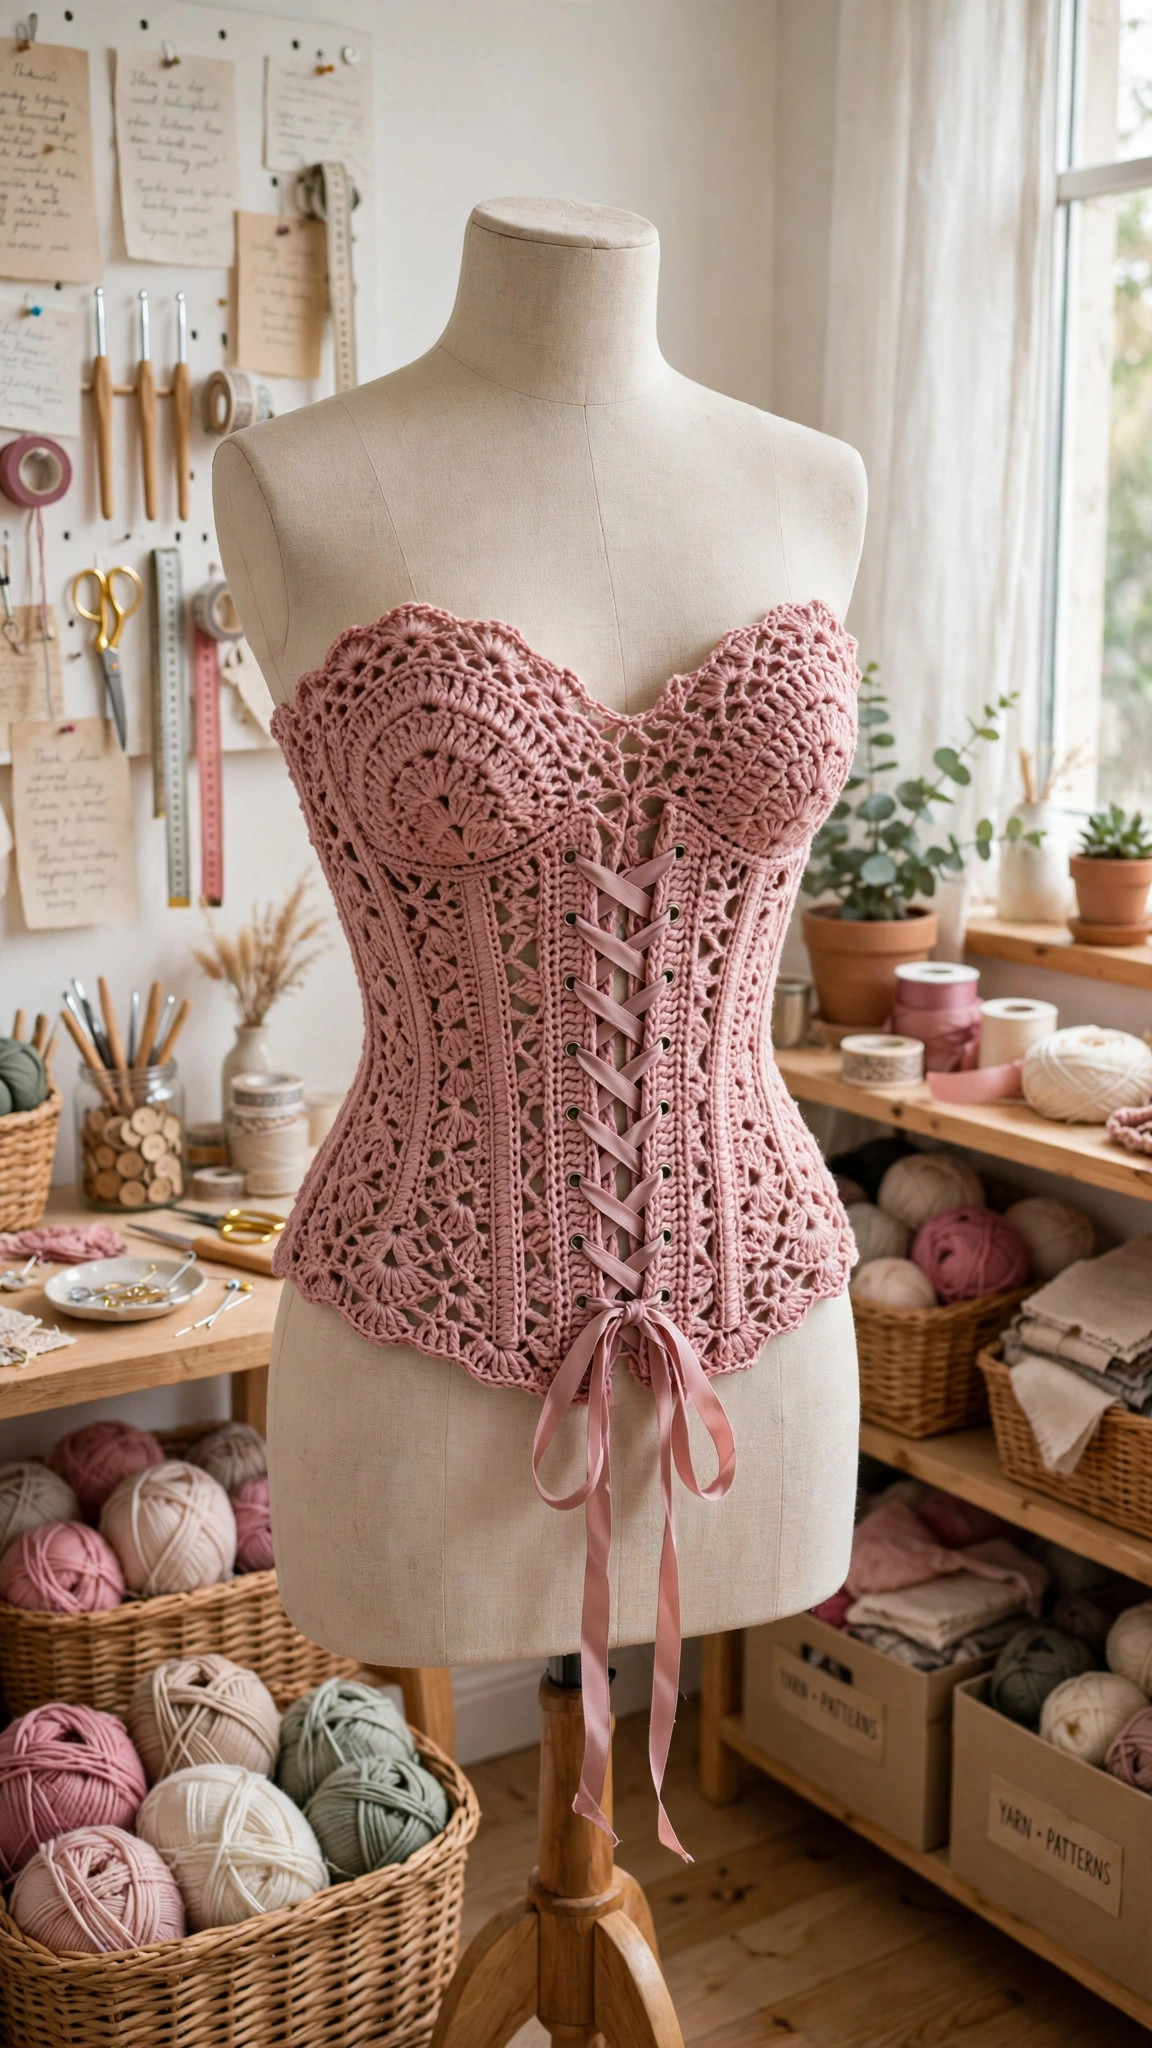
A crochet corset top is the prettiest way to wear handmade lace. This free crochet corset pattern makes a structured lace-up corset top in soft cotton yarn, with a fitted bodice, neat eyelets, and crisscross ribbon lacing down the front. It cinches gently at the waist and looks lovely with jeans or a skirt.
This is an original Little Loop Finds design, written in US terms and completely free. The top is worked in two panels, front and back, with simple double crochet and half double crochet stitches, then joined at the sides and finished with ribbon lacing. There is no boning and no zipper, just crochet and ribbon, so it stays soft and comfortable all day.
A quick note on scope: this post is about one specific crochet corset, a structured lace-up corset top made for warm weather outfits and festival looks. It is not a historical underbust corset, and it is not made for waist training. If you want a lighter top to go with it, our crochet crop top pattern is a good match.
Key Takeaways
- Free original pattern: a Little Loop Finds original design, written in US terms, and completely free.
- A structured lace-up top: a fitted bodice with eyelets and crisscross ribbon lacing down the front.
- For warm weather outfits: lovely with jeans or a skirt for festivals and summer days.
- Soft and comfortable: no boning and no zipper, just crochet and ribbon.
- A 9 hour project: one corset top takes about 9 hours.
Table of Contents
- Why You Will Love This Crochet Corset
- Finished Size, Skill Level, and Time
- Materials You Need
- Abbreviations (US Terms)
- Gauge and Sizing Notes
- Part 1: The Front and Back Panels
- Part 2: Joining, Eyelets, and Lacing
- Part 3: The Straps, Edging, and Finishing
- Variations: Colors, Sizes, and Uses
- Troubleshooting a Corset That Does Not Fit Right
- Care Instructions
- Frequently Asked Questions
Why You Will Love This Crochet Corset
A lace-up corset top turns a simple outfit into something special. The fitted bodice shapes the waist, the ribbon lacing adds a romantic detail, and the crochet texture keeps it soft and handmade instead of stiff and store bought.
The stitches are simple, mostly double crochet and half double crochet, but the shaping and the lacing make the finished top look far more advanced than it is. You work two flat panels, join them at the sides, and add the ribbon.
Finished Size, Skill Level, and Time
- Finished size: size M, to fit a 36 to 38 inch bust, with a 10 inch bodice length from the top edge to the waist. The pattern includes notes for sizes XS to XL, with bust measurements from 30 inches to 46 inches.
- Skill level: Intermediate. You need a foundation chain, single crochet, half double crochet, double crochet, simple increases and decreases, and basic seaming.
- Time: about 9 hours per corset top: 4 hours for the panels, 2 hours for joining and eyelets, 2 hours for straps and edging, and 1 hour for lacing and finishing.
Materials You Need
| Item | What to get |
|---|---|
| Yarn, main color | DK weight cotton yarn in cream, 600 yards |
| Yarn, contrast color | DK weight cotton yarn in dusty rose, 50 yards, optional |
| Hook | US H-8 (5.0 mm), or the size that gives you the gauge below |
| Ribbon | 3 yards of 3/8 inch wide grosgrain ribbon in a matching color |
| Notions | Tapestry needle, scissors, tape measure, stitch markers, pins |
Soft cotton yarn is the best choice for a crochet corset top because it is breathable in warm weather, holds its shape, and shows the stitch texture clearly. Avoid very stretchy acrylic yarns, because they sag at the waist and the lacing will pull the eyelets out of shape.
Grosgrain ribbon is the best choice for the lacing because it is strong, does not stretch, and holds a bow well. Choose a ribbon about 3/8 inch wide, in a color that matches or contrasts with your yarn. You need about 3 yards so the laces are long enough to crisscross down the front and tie in a bow at the waist.
Abbreviations (US Terms)
- ch = chain
- sl st = slip stitch
- sc = single crochet
- hdc = half double crochet
- dc = double crochet
- dc2tog = double crochet two together (decrease)
- st(s) = stitch(es)
- sp = space
- rep = repeat
- RS = right side
Gauge and Sizing Notes
Gauge matters on a corset top because the bodice must fit close to the body, and a loose gauge will make a top that gaps at the bust and sags at the waist. Work a swatch of 12 dc and 8 rows in the main color. It should be about 4 inches wide and 4 inches tall. If it is wider, go down a hook size. If it is narrower, go up a hook size.
Measure your bust at the fullest point and your waist at the narrowest point before you start, because the pattern is written for size M with a 36 to 38 inch bust and a 30 inch waist. To make a smaller size, work 4 fewer stitches across each panel for each size down. To make a larger size, work 4 more stitches across each panel for each size up. Try the panels on as you go, because a corset top should fit snugly but never pinch.
Part 1: The Front and Back Panels
The front and back panels are worked the same way, flat in rows, from the bottom waist edge up to the top bust edge. The front panel has the eyelet columns for the ribbon lacing worked into its two front edges. Make both panels, then lay them side by side to check that they match before you join them.
The Front Panel
With the main color, ch 44.
- Row 1: dc in the 4th ch from the hook, dc in each ch across. Turn. (42 dc)
- Row 2: ch 2 (counts as hdc), hdc in each st across. Turn. (42 hdc)
- Row 3: ch 3 (counts as dc), dc in each st across. Turn. (42 dc)
- Row 4: ch 2, hdc in each st across. Turn. (42 hdc)
- Rows 5 to 8: rep rows 3 and 4 twice more, so the panel grows straight up from the waist. Turn at the end of each row.
- Row 9: ch 3, dc in the next 3 sts, dc2tog, dc in each st across to the last 5 sts, dc2tog, dc in the last 4 sts. Turn. (40 dc)
- Row 10: ch 2, hdc in each st across. Turn. (40 hdc)
- Row 11: ch 3, dc in each st across. Turn. (40 dc)
- Row 12: ch 2, hdc in the next 2 sts, dc2tog, hdc in each st across to the last 3 sts, dc2tog, hdc in the last 2 sts. Turn. (38 hdc)
- Rows 13 to 18: continue in the same way, working one dc row and one hdc row, decreasing 2 stitches on every third row, until the panel has 32 stitches across and measures about 8 inches tall from the waist edge.
- Row 19: ch 3, dc in each st across. Turn. (32 dc)
- Row 20: ch 2, hdc in each st across. Turn. (32 hdc)
Fasten off, leaving a long tail for seaming. The front panel should be about 10 inches tall and 13 inches wide at the waist edge, narrowing to about 10 inches wide at the top edge.
The Back Panel
Work the back panel exactly the same as the front panel, rows 1 to 20, with the main color. The only difference is that the back panel has no eyelet columns, so both side edges stay plain. Fasten off, leaving a long tail for seaming.
Lay both panels flat with the right sides facing up and check that they are the same height and the same width. If one panel is taller than the other, count its rows, because it probably has 21 rows instead of 20. Our crochet tank top pattern uses the same two panel construction if you want to practice the shaping on a simpler top first.
Blocking the Panels
Block each panel before you join them. Pin each panel to a towel or a blocking board, pulling it gently into a neat rectangle that is narrower at the top than at the bottom. Spray it lightly with water and let it dry fully. Do not skip blocking, because unblocked panels curl at the edges and the side seams will not sit flat.
Part 2: Joining, Eyelets, and Lacing
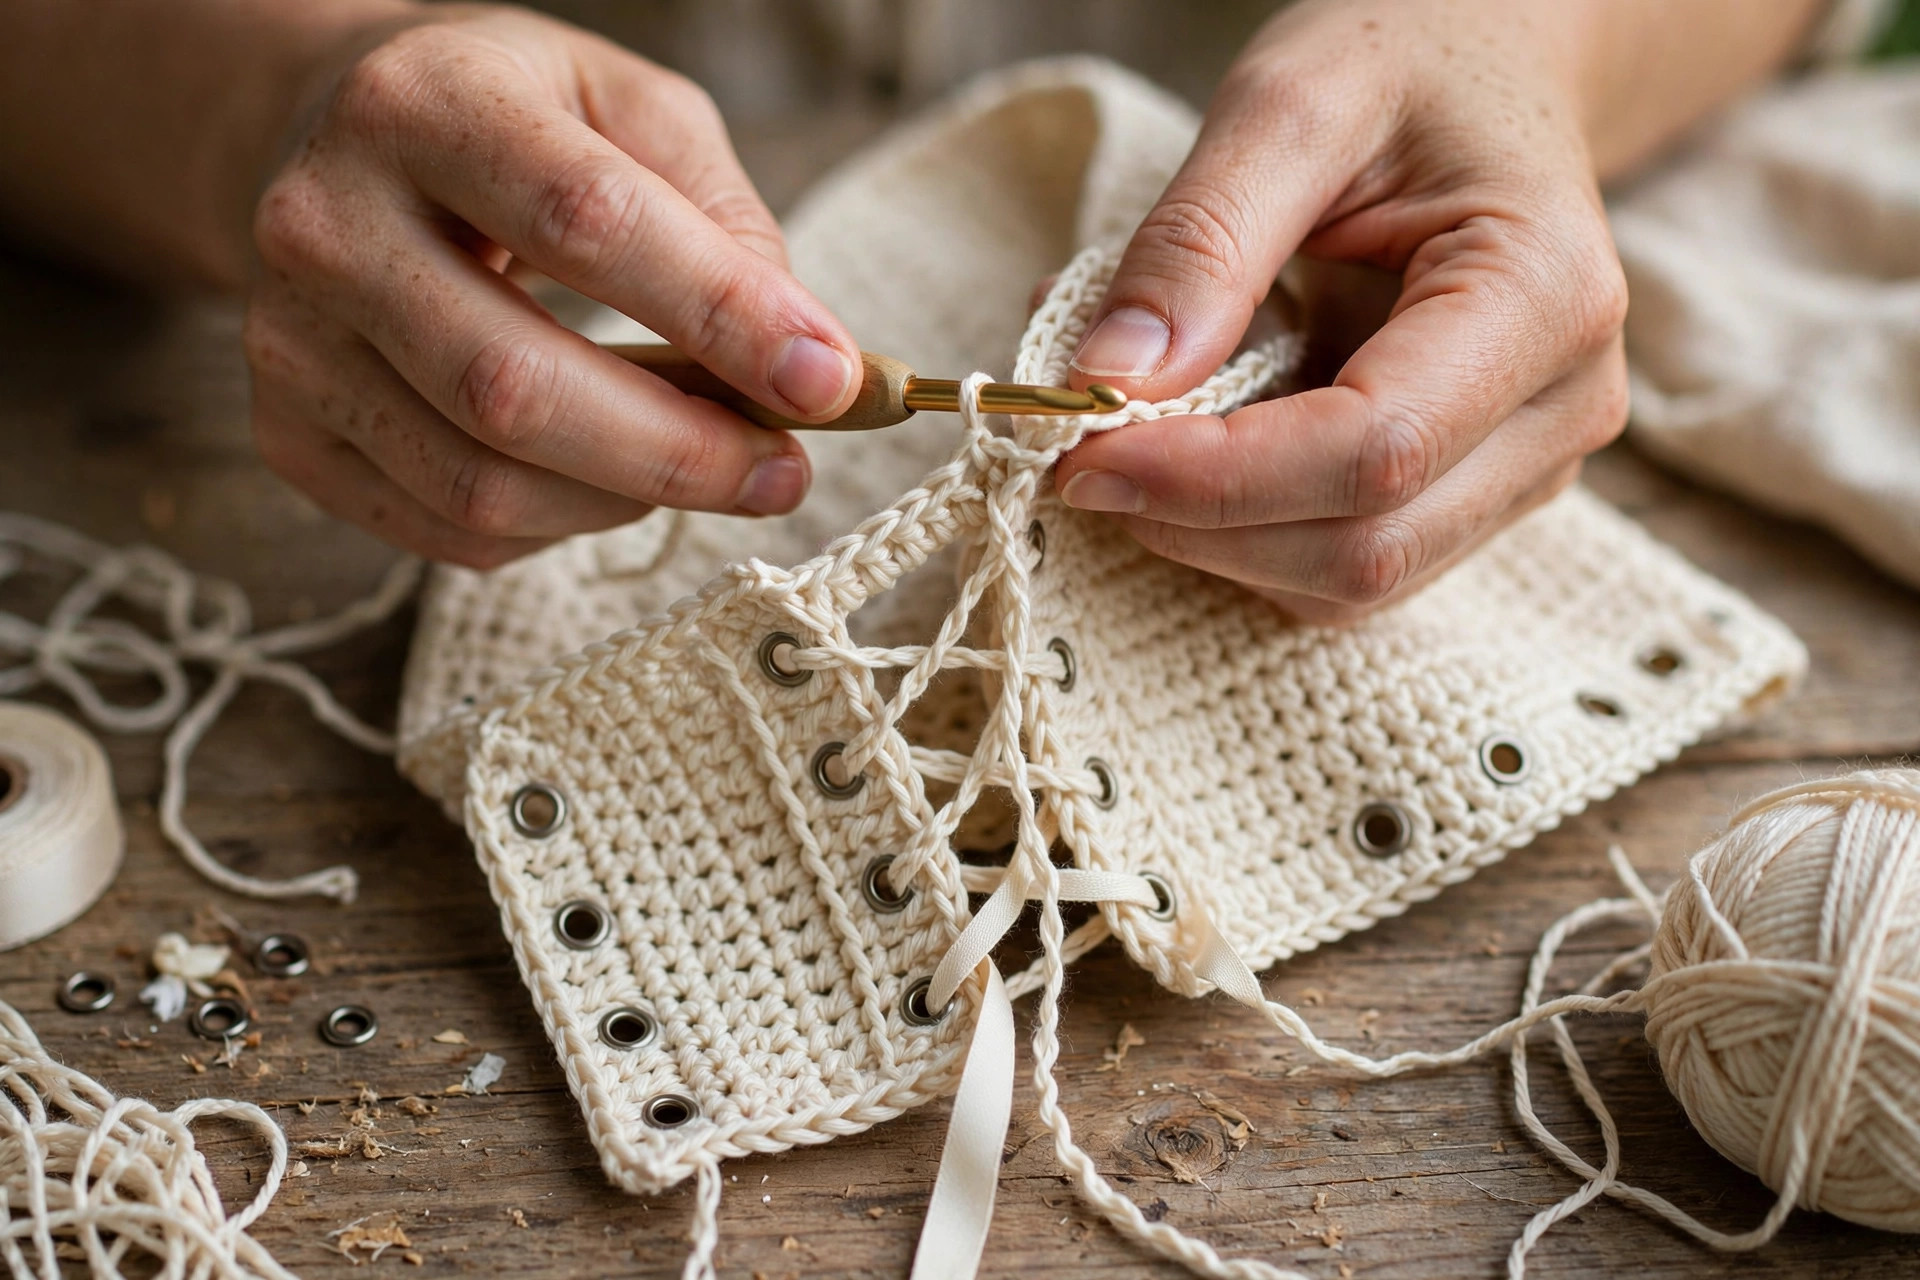
This is the part where two flat panels become a corset top. Join them at the sides, work the eyelet columns down the two front edges, and thread the ribbon through. Take your time here, because neat eyelets and even lacing are what make the top look like a corset.
Joining the Side Seams
Lay the front and back panels together with the right sides facing each other and the waist edges lined up. With the main color and a tapestry needle, whipstitch one side edge together from the waist up to the top edge, working one stitch into each row end and pulling gently so the seam lies flat. Join the other side edge in the same way.
Turn the top right side out and try it on. The waist should sit snugly and the top edge should sit just above the bust. If it feels too loose, take in one side seam by half an inch. If it feels too tight, let it out the same amount.
The Eyelet Columns
With the main color, join the yarn at the bottom of the right front edge, on the right side of the top.
- Round 1: ch 1, work 1 sc in each row end up the front edge, about 24 sc in total, working up to the top edge. Turn.
- Round 2: ch 1, sc in the first st, ch 1, skip 1 st, sc in the next st, rep across the whole column, making an eyelet with each chain 1 space. Turn.
- Round 3: ch 1, sc in each st and each ch-1 sp across the whole column. Fasten off and weave in the ends.
Work the same eyelet column down the left front edge, starting at the top edge and working down to the waist, so the two columns mirror each other. You should have about 12 eyelets on each side, evenly spaced from the waist to the top edge.
Threading the Ribbon
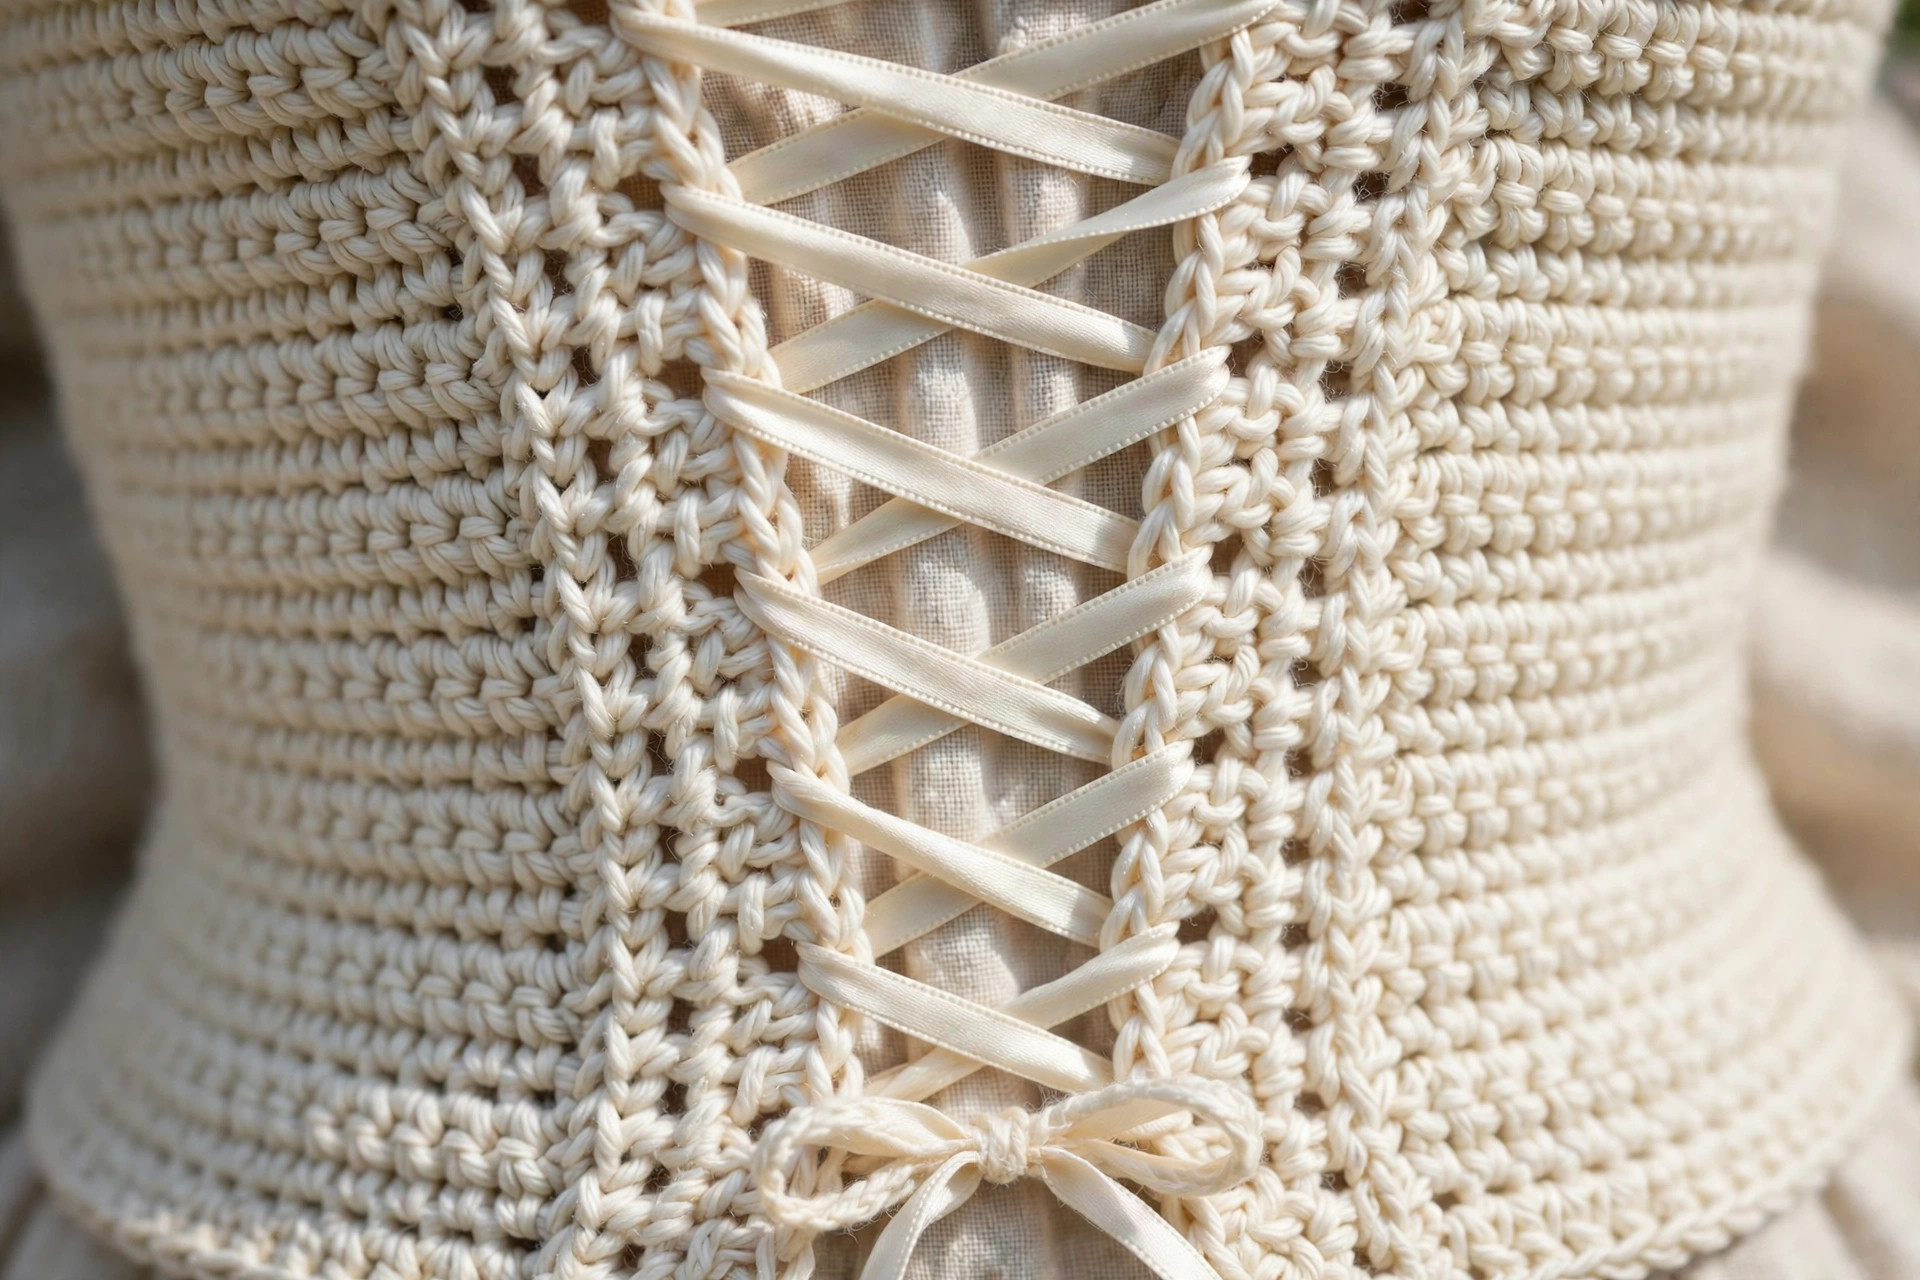
Cut the ribbon into two equal lengths of about 54 inches each. Thread one ribbon through the bottom eyelets on both sides, cross it over, and work upward, crossing the ribbon each time so it forms an X over each pair of eyelets. At the top, tie the two ends in a small bow. Save the second length for a matching hair ribbon.
Pull the laces evenly as you go, so the front edges stay parallel and the X shapes are all the same size. If one side pulls tighter than the other, loosen the whole lace and start again from the bottom, because a corset that laces crooked will twist on the body.
Part 3: The Straps, Edging, and Finishing
The straps and the edging are the finishing touches that make the corset top wearable and neat, so keep your stitches even and your strap length matched.
The Shoulder Straps
With the main color, join the yarn at the top edge of the front panel, about 3 inches in from the left side edge.
- Row 1: ch 1, sc in the next 6 sts. Turn. (6 sc)
- Rows 2 to 24: ch 1, sc in each st across. Turn. (6 sc)
Fasten off, leaving a long tail. The strap should be about 12 inches long, which fits most shoulders with a little extra to adjust. Work the second strap the same way, about 3 inches in from the right side edge of the front panel. Sew the free ends of both straps to the top edge of the back panel, in the same positions, with the long tails. Try the top on and adjust the strap length before you sew them down firmly.
The Top and Bottom Edging
With the main color, join the yarn at any point on the top edge of the top, with the right side facing out.
- Round 1: ch 1, work 1 sc in each st around the whole top edge, about 76 sc in total. Join with a sl st to the first sc.
- Round 2: ch 1, sc in the first st, skip 1 st, work 1 shell of 5 dc in the next st, skip 1 st, sc in the next st, rep around the whole top edge. Join with a sl st to the first sc.
Fasten off and weave in the ends. Work the same two rounds around the bottom waist edge, starting at a side seam. Count your shells as you work round 2, because an uneven shell count makes the edging bunch up on one side.
Final Finishing
Weave in all the loose ends with a tapestry needle, working the tails through the backs of the stitches so they do not show on the right side. Give the finished top a light steam with an iron held a few inches above the fabric, or spray it lightly with water and lay it flat to dry. Check that both straps are the same length, that both eyelet columns have the same number of eyelets, and that the ribbon laces evenly.
Variations: Colors, Sizes, and Uses
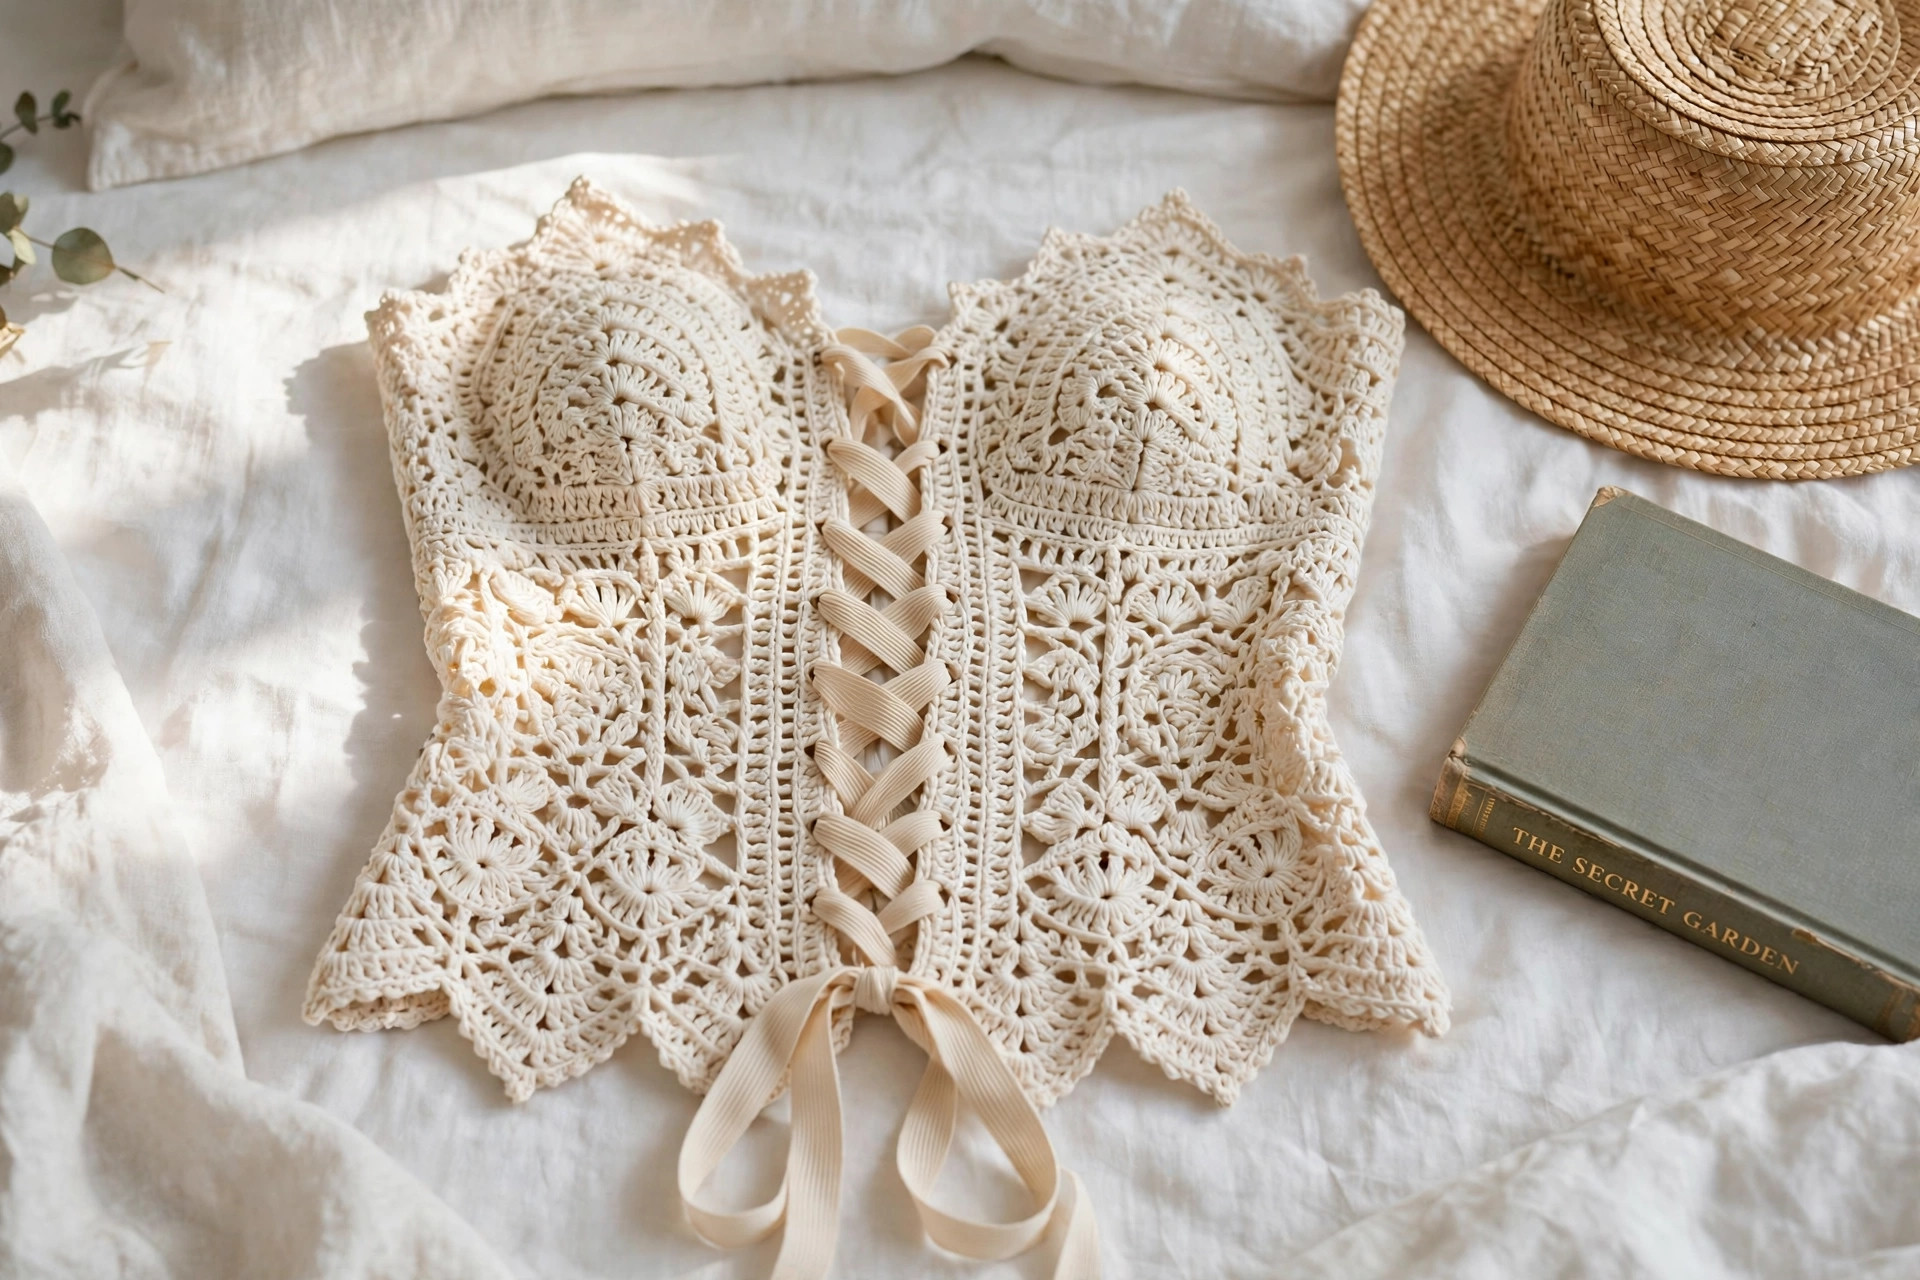
- Classic cream corset: work the whole top in cream with a cream ribbon for a timeless look.
- Dusty rose festival top: make the bodice in dusty rose with a cream ribbon.
- Black evening corset: work the top in black cotton with a black satin ribbon for a night out look.
- Smaller size XS: work 4 fewer stitches across each panel and 2 fewer rows, for a 30 to 32 inch bust.
- Larger size XL: work 4 more stitches across each panel and 2 more rows, for a 44 to 46 inch bust. A matching crochet duster pattern in cream makes a lovely layer over the corset top for cooler evenings.
Troubleshooting a Corset That Does Not Fit Right
- My top gaps at the bust. The top edge is too wide for your bust. Work one more decrease row on each panel, or take in the side seams by half an inch at the top.
- My top sags at the waist. The gauge is too loose, or the yarn is too stretchy. Go down a hook size and use a firm cotton yarn, or add a row of single crochet around the waist edge to firm it up.
- My eyelets are uneven. The eyelet columns were not counted. Count the eyelets on each side, because they should match, about 12 on each side.
- My lacing pulls crooked. One side of the ribbon is tighter than the other. Loosen the whole lace and rethread it from the bottom, pulling evenly on both sides.
- My straps slip off my shoulders. The straps are too long. Shorten them by two rows each, or work them a little narrower, 4 stitches wide instead of 6.
Care Instructions
Hand wash a crochet corset top in cool water with a mild detergent, and press the water out gently without wringing. Lay it flat to dry, reshaping the bodice and smoothing the straps, away from direct heat. Remove the ribbon before washing, or wash it separately by hand, so the color does not bleed onto the yarn. Do not put a crochet corset top in the washing machine or the dryer, because the heat can stretch the bodice out of shape and fray the eyelets.
Frequently Asked Questions
Is this crochet corset pattern good for beginners?
It is best for an intermediate crocheter. You need double crochet, half double crochet, simple decreases, and basic seaming. One top takes about 9 hours, so it is a good project for a few evenings.
What yarn is best for a crochet corset top?
DK weight cotton yarn is the best choice, because it is breathable, holds its shape, and shows the stitch texture clearly. Avoid very stretchy acrylic yarns, because they sag at the waist and pull the eyelets out of shape.
How do I make the corset in a different size?
The pattern is written for size M, to fit a 36 to 38 inch bust. To make a smaller size, work 4 fewer stitches across each panel for each size down. To make a larger size, work 4 more stitches across each panel for each size up. Try the panels on as you go, because a corset top should fit snugly but never pinch.
Do I need ribbon for the lacing?
Yes, the ribbon lacing is what makes this a lace-up corset top. Use about 3 yards of 3/8 inch wide grosgrain ribbon, because it is strong, does not stretch, and holds a bow well.
Can I wear the corset top without straps?
Yes, you can skip the straps for a strapless look. Add a row of single crochet around the top edge to keep it from stretching, and wear it with a fitted strapless bra underneath for support.
Can I sell corset tops made from this pattern?
Yes, you may sell finished corset tops made from this free pattern, with credit to Little Loop Finds. Do not sell or republish the pattern text itself. A cream corset top with a matching crochet duster pattern makes a lovely set for a summer market stall.
Happy stitching, and may your little corset top tie up beautifully on every warm day ahead.