Christmas spiral ornaments: 12-in-1 crochet pattern
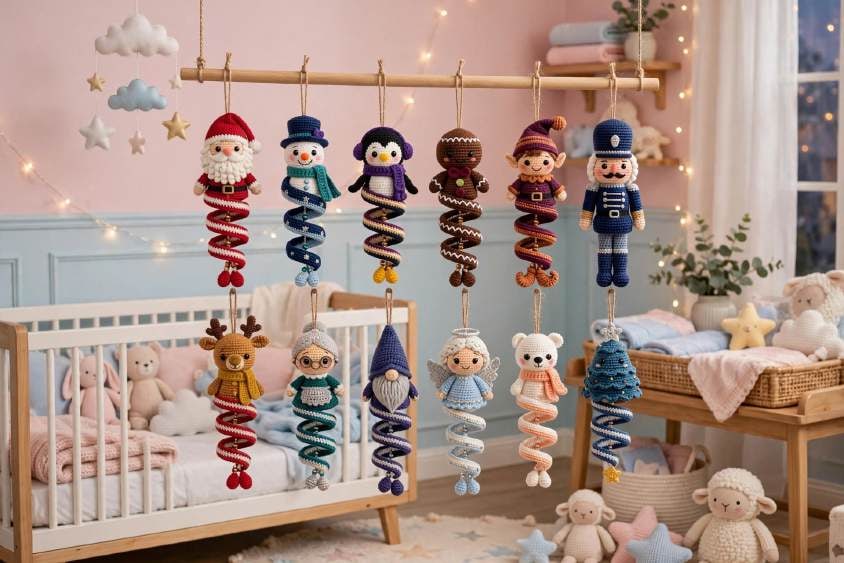
Twelve matched hanging ornaments — Santa, Snowman, Penguin, Gingerbread, Elf, Nutcracker, Reindeer, Winter Girl, Gnome, Angel, Polar Bear and a layered Christmas Tree — all sharing one simple spiral body.

Christmas · Crochet
- Finished length
- 24–28 cm incl. loop
- Yarn
- DK / light worsted #3
- Hooks
- 2.75 mm and 3.0 mm
- Gauge
- 22–24 sc × 24–26 rnds = 10 cm
- Skill
- Beginner friendly
In this post
If you want a set of handmade ornaments that look like a matched collection on the tree, this is the bundle to make. Every design in this post uses the same core idea: a neatly stuffed character head or topper sitting above a long, naturally curling spiral body. The spiral is worked in one simple row, yet it creates that ribbon-like drape that makes these ornaments move gently when they hang.
Inside this 12-in-1 collection you get Santa, Snowman, Penguin, Gingerbread, Elf, Nutcracker, Reindeer, Winter Girl, Gnome, Angel, Polar Bear, and Christmas Tree. Eleven of them share the same spiral lower body, so once you have made your first spiral you can repeat it confidently for the whole set. The Nutcracker is the one exception — he stands straight with a torso and legs, which makes him a lovely focal piece among the spirals.
Each ornament is presented below as a self-contained mini pattern with its exact yarn colours, amounts, tools, finished measurements, preparation lengths, crochet charts, accessory construction, spiral or body construction, feet, hanging loop, assembly order, and final quality check. Work one ornament completely from its first page to its final check before starting the next, and make one full sample before batch-making multiples. Yarn brand and individual tension change finished size, so your first ornament becomes your personal gauge reference for the rest.
In this collection: Santa · Snowman · Penguin · Gingerbread · Elf · Nutcracker · Reindeer · Winter Girl · Gnome · Angel · Polar Bear · Christmas Tree
All patterns use US crochet terms and DK / light worsted (#3) yarn with a 2.75 mm hook for heads and small accessories and a 3.0 mm hook for spirals and larger flat pieces.
Why you will love this collection
- One technique, twelve looks: Learn the standard head and the 70-chain spiral once, then customise colour and accessories for a whole tree.
- True hanging ornaments: Every piece finishes at about 24–28 cm long including a 10–12 cm twine hanging loop, so they sit well on branches without weighing them down.
- Beginner-friendly construction: Mostly single crochet in continuous rounds, a one-row spiral, and small flat accessories. If you can make a magic ring, increase, and decrease, you can make these.
- Gift and craft-fair friendly: Lightweight, unbreakable, and easy to mix into sets — make a Santa and Reindeer pair, a full 12-piece boxed set, or single characters as stocking fillers.
- Child-safe options included: Embroider eyes and facial details and omit beads, wire, and detachable charms wherever you want a toddler-safe finish.
Before you begin
How to use this pattern
Complete one ornament from start to finish before beginning the next. Use the finished reference photo for look and placement only — construction is shown separately in the clean step diagrams throughout this post. All written instructions are the authoritative pattern. Work a gauge swatch and one complete sample before producing multiples.
This is a crochet pattern. There are no fabric cutting templates. “Preparation / cutting” in this guide means measured cord, embroidery lengths, tassel strands, and any pre-measured decorative yarn. Structural crochet yarn is worked directly from the ball unless a step says to fasten off.
Global tools used throughout
| Tool | Recommended use |
|---|---|
| 2.75 mm hook | Heads, small accessories, ears, horns, stars |
| 3.0 mm hook | Spirals, scarves, larger flat pieces |
| Tapestry needle | Assembly and embroidery |
| Stitch marker | First stitch of continuous rounds |
| Pins | Symmetry check before sewing |
| Scissors | Cut yarn and cord only |
| Flexible tape | Centimetre measurement checks |
You will also need polyester fiberfill, 8 mm safety eyes or black embroidery yarn for eyes, and 22–24 cm natural twine per ornament for the hanging loop.
Gauge and standard head
Suggested gauge: 22–24 sc × 24–26 rounds = 10 cm in firm amigurumi tension with DK / light worsted (#3) yarn and a 2.75–3.0 mm hook. The standard head finishes at approximately 5.0–5.5 cm wide and 4.5–5.0 cm tall when stuffed firmly.
Keep your marker at the back or underside of the head, stuff after Round 12, insert safety eyes before Round 13 if you are using them, and close firmly after Round 15. Measure width before closing and adjust stuffing — not stitch count — for minor shape correction.
Standard Head Round Chart
| Round | Instruction | Stitch count |
|---|---|---|
| R1 | 6 sc in MR | 6 |
| R2 | inc ×6 | 12 |
| R3 | (1 sc, inc) ×6 | 18 |
| R4 | (2 sc, inc) ×6 | 24 |
| R5 | (3 sc, inc) ×6 | 30 |
| R6 | (4 sc, inc) ×6 | 36 |
| R7–R10 | sc around | 36 each |
| R11 | (4 sc, dec) ×6 | 30 |
| R12 | (3 sc, dec) ×6 | 24 |
| R13 | (2 sc, dec) ×6 | 18 |
| R14 | (1 sc, dec) ×6 | 12 |
| R15 | dec ×6; close | 6 |
This chart is repeated for Santa, Snowman, Penguin, Gingerbread, Elf, Nutcracker, Reindeer, Winter Girl, Gnome, Angel, and Polar Bear. The Christmas Tree uses its own cone chart, included in its section below.
Abbreviations — US terms
| Abbreviation | Meaning |
|---|---|
| MR | Magic ring |
| ch | Chain |
| sc | Single crochet |
| hdc | Half double crochet |
| dc | Double crochet |
| sl st | Slip stitch |
| inc | Increase — 2 sc in same stitch |
| dec | Decrease — sc2tog |
| BLO | Back loop only |
| FLO | Front loop only |
| FO | Fasten off |
Safety notes
For child-oriented ornaments, embroider eyes and omit beads, wire, and detachable small parts. If using safety eyes, insert and lock them before the head opening becomes too small. Secure every hanging loop through several stitches, knot inside, and bury the ends. Lift each ornament by its loop before final finishing — the front must face forward without twisting.
The spiral — read this once, use it eleven times
Eleven ornaments share the same spiral lower body, and the method is intentionally simple. You chain 70 loosely, then starting in the second chain from the hook you work 3 single crochet in each chain across, for 207 stitches total. Do not force the curl — let the strip spiral naturally as you work. Join your contrast colour at the outer edge and slip stitch evenly along the visible edge, then fasten off leaving a 25 cm sewing tail. A finished relaxed spiral should measure 14–16 cm from top join to lower curl.
If your spiral is too tight, remake the foundation chain looser. If it does not curl, confirm you worked 3 sc into every foundation chain. Work the edge trim only after the spiral has fully curled if you want a clean two-colour ribbon effect. Steam or block only if your yarn allows it.
Tiny feet — the same for every spiral ornament
Where feet are listed, make two small stuffed ovals the same way: R1 6 sc in MR; R2 inc ×6 = 12; R3–R4 sc 12; R5 dec ×6 = 6. Lightly stuff and close. Each foot should finish at about 1.8–2.2 cm long. Attach the pair at equal height beneath the spiral and check symmetry from the front before securing.
Hanging loop — the same method every time
Use the pre-cut 22–24 cm cord. Fold it in half to form a 10–12 cm finished loop. Pass both ends through the crown or top at least 1 cm apart, knot securely inside or beneath the accessory, then hide the ends. If an ornament hangs sideways after its first lift test, move the loop attachment point before knotting permanently.
Collection at a glance
| # | Ornament | Primary colours | Lower form | Finished length |
|---|---|---|---|---|
| 1 | Santa | Red, white, skin beige | Spiral | 24–27 cm |
| 2 | Snowman | White, navy, teal | Spiral | 24–27 cm |
| 3 | Penguin | Charcoal/navy, cream, purple | Spiral | 24–27 cm |
| 4 | Gingerbread | Gingerbread brown, white, berry | Spiral | 24–27 cm |
| 5 | Elf | Skin beige, plum, rust | Spiral | 24–27 cm |
| 6 | Nutcracker | Navy, skin beige, grey | Straight body + legs | 23–26 cm |
| 7 | Reindeer | Warm tan, dark brown, mustard | Spiral | 24–27 cm |
| 8 | Winter Girl | Skin beige, teal, white/cream | Spiral | 24–27 cm |
| 9 | Gnome | Purple/navy, cream, skin beige | Spiral | 24–28 cm |
| 10 | Angel | Skin beige, white, pale blue | Spiral | 24–27 cm |
| 11 | Polar Bear | White/cream, peach | Spiral | 24–27 cm |
| 12 | Christmas Tree | Deep teal/green, blue/navy, gold | Spiral | 24–28 cm |
Every ornament below follows the same reading order: setup and materials first, then Step 1 head or topper, Step 2 face and accessories, Step 3 spiral or straight body, and Step 4 feet, hanging loop, final assembly, and quality check.
1. Santa
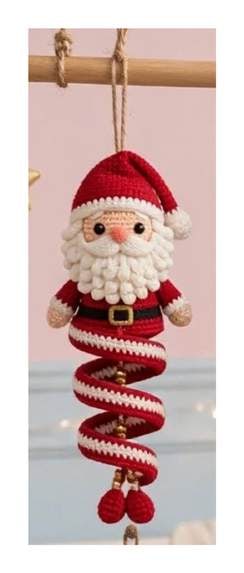
Santa is the natural first make in this collection because he shows you every core skill at once: the standard stuffed head, a shaped hat, surface beard detail, the full red spiral, and the tiny oval feet. His finished size is 24–27 cm long overall, with a 5.0–5.5 cm head, a 14–16 cm spiral, and a 10–12 cm hanging loop. Use firm amigurumi tension so his beard and hat sit cleanly against the face.
Setup and materials
Do not begin Step 1 until all listed colours and tools are beside you. This prevents colour substitutions halfway through the ornament.
| Yarn / colour | Approx. amount | Use |
|---|---|---|
| Red DK #3 | 28 g | Hat, jacket, spiral, feet |
| White DK #3 | 20 g | Beard, hat trim, spiral edging |
| Skin beige DK #3 | 10 g | Head and hands |
| Black DK / embroidery | 3 g | Eyes, belt, mouth |
| Gold/yellow embroidery | 1 g | Buckle and details |
| Blush pink | <1 g | Nose and cheeks |
Tools and materials: Polyester fiberfill 8–10 g; 2 × 8 mm safety eyes OR black embroidery yarn; 20–24 cm natural twine; tapestry needle; 2.75 mm hook; 3.0 mm hook; stitch marker; pins; scissors; measuring tape.
Measured preparation: Hanging cord cut 22–24 cm, folded to a 10–12 cm loop. Gold buckle thread 35–40 cm. Black belt yarn 45–50 cm. Do not pre-cut structural crochet yarn; cut only after fastening off.
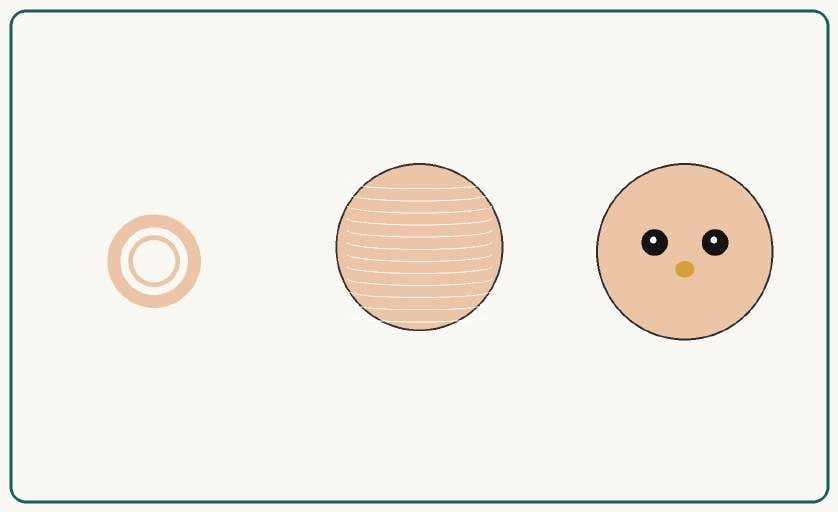
Step 1: Head / top section
Use skin beige for the standard head.
Work the Standard Head chart in Before You Begin: R1 6 sc in MR (6); R2 inc ×6 (12); R3 (1 sc, inc) ×6 (18); R4 (2 sc, inc) ×6 (24); R5 (3 sc, inc) ×6 (30); R6 (4 sc, inc) ×6 (36); R7–R10 sc around (36 each); R11 (4 sc, dec) ×6 (30); R12 (3 sc, dec) ×6 (24); R13 (2 sc, dec) ×6 (18); R14 (1 sc, dec) ×6 (12); R15 dec ×6 and close (6).
Stuff after R12. Insert safety eyes before R13 if used. Close firmly after R15. Target head: 5.0–5.5 cm wide and 4.5–5.0 cm tall. Keep the round marker at the back or underside, keep stuffing even with no visible gaps, and measure width before closing.
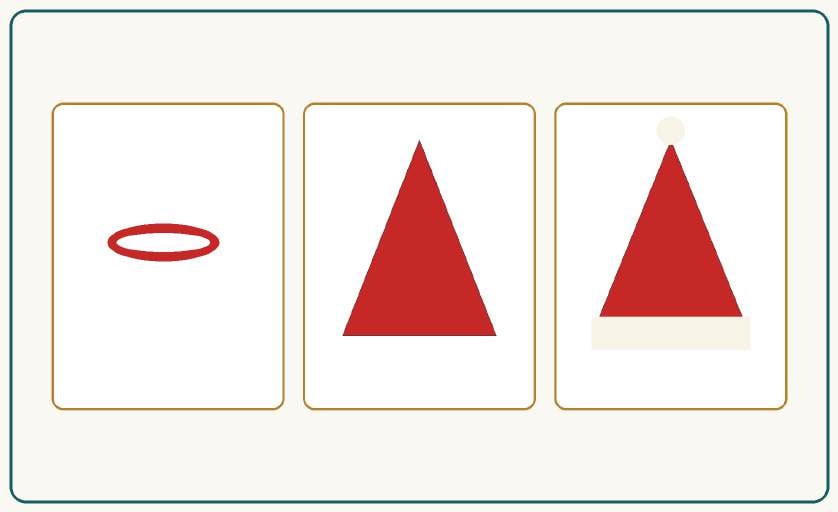
Step 2: Face, Santa hat, beard, and belt
Place the eyes between R8–R9, 7 stitches apart. Embroider the nose with 5–6 satin stitches centred one round below the eyes, and add two tiny black stitches below the nose for the mouth. For the beard, make 10–12 white loop tufts, each 2.0–2.5 cm, and sew them in three staggered rows so the face stays visible at the top.
Work the hat as a slow cone: R1 6 sc in MR; R2–R3 6 sc; R4 (1 sc, inc) ×3 = 9; R5 9 sc; R6 (2 sc, inc) ×3 = 12; R7 12 sc; R8 (3 sc, inc) ×3 = 15; R9 15 sc; R10 (4 sc, inc) ×3 = 18; R11 (5 sc, inc) ×3 = 21; R12 (6 sc, inc) ×3 = 24; R13 (7 sc, inc) ×3 = 27; R14 (8 sc, inc) ×3 = 30; R15–R16 30 sc. Add two rounds of white single crochet at the brim, then sew a small 2 cm white pom-pom firmly to the hat tip.
Pin all parts before sewing. Compare front and side views, keep left and right details level, and sew around the base of each accessory with small hidden stitches through structural crochet stitches — not only surface loops.
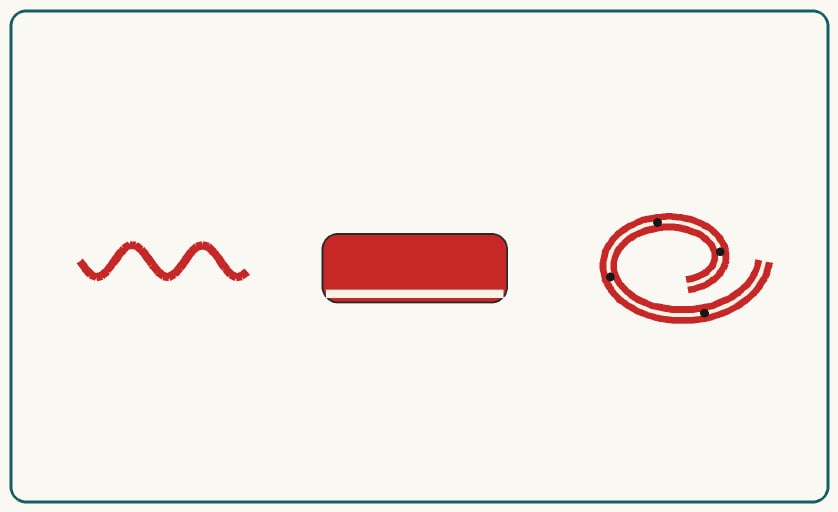
Step 3: Spiral lower body
Spiral crochet chart
| Stage | Instruction | Target |
|---|---|---|
| Foundation | ch 70 loosely | 70 ch |
| Row 1 | From 2nd ch from hook, 3 sc in each chain across | 207 sc |
| Shape | Allow strip to curl naturally; do not twist by force | 14–16 cm |
| Trim | Join contrast at outer edge and sl st evenly along edge | Even |
| Finish | FO leaving 25 cm sewing tail | — |
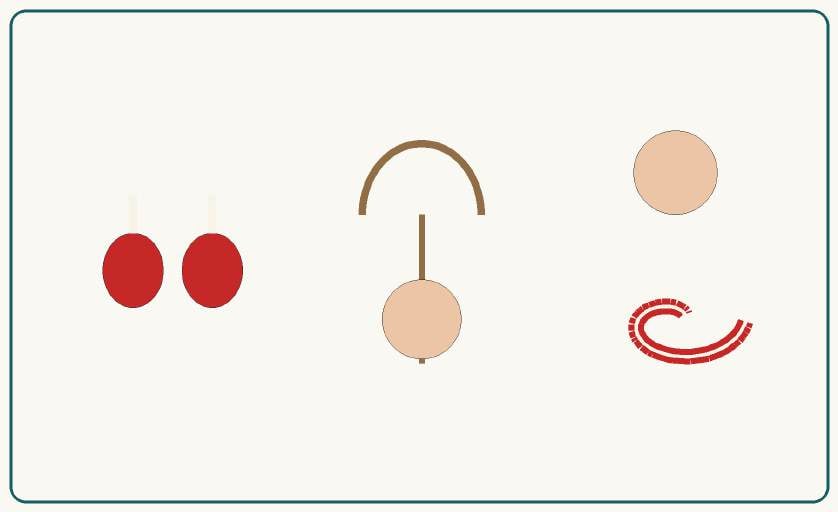
Base spiral colour: Red DK #3. Contrast and edge colour is the soft cream-white family shown on the setup. Work the edge trim only after the spiral has fully curled. Finished relaxed spiral: 14–16 cm from top join to lower curl.
Step 4: Feet, hanging loop, and final assembly
Make two tiny feet using the standard oval method above, in the foot colour from your setup. Attach them at equal height beneath the spiral.
For the hanging loop, fold your pre-cut 22–24 cm cord in half, pass both ends through the crown at least 1 cm apart, knot securely inside or beneath the hat, hide the ends, and lift-test before finishing.
Final assembly order: Sew the hat to the upper back half of the head only, keeping the face clear. Sew the head to the spiral centre through at least 8–10 strong stitches. Add the black belt around the upper red body edge and embroider the gold buckle. Attach the feet at equal height beneath the spiral.
Final quality check:
- Full ornament is intact and centred; no part is cropped or omitted.
- No loose yarn tails, beads, or pins remain.
- Head or top section is centred over the lower body.
- Hanging loop supports the ornament without tilting.
- All decorative pieces are sewn through structural stitches.
- Finished measurements are within the target range on the setup section.
2. Snowman
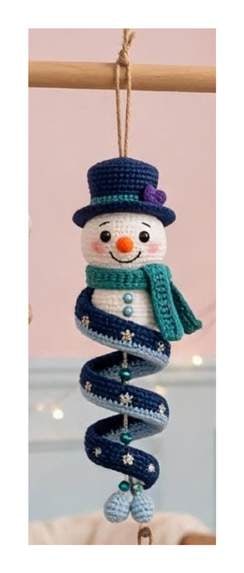
The Snowman keeps the same head and spiral you just learned, but swaps Santa's beard for a tall top hat, a teal hdc scarf, and a tiny crochet carrot nose. Finished size is 24–27 cm long, with a 5.0–5.5 cm head, a 14–16 cm spiral, a 3.5–4 cm high top hat, and a 10–12 cm loop. He is a lovely second make because the accessories are flat and quick, yet they change the character completely.
Setup and materials
| Yarn / colour | Approx. amount | Use |
|---|---|---|
| White DK #3 | 16 g | Head and body |
| Navy DK #3 | 25 g | Hat and spiral |
| Teal DK #3 | 8 g | Scarf and accents |
| Light blue DK #3 | 5 g | Feet and trim |
| Orange DK | 2 g | Carrot nose |
| Black embroidery | 1 g | Eyes and mouth |
| Purple DK | 2 g | Hat flower / band accent |
Tools and materials: Fiberfill 8–10 g; 2 × 8 mm safety eyes; 22–24 cm hanging twine; 2.75 mm and 3.0 mm hooks; tapestry needle; stitch marker; pins; scissors; measuring tape.
Measured preparation: Hanging cord 22–24 cm. Scarf tassel strands 4 × 5 cm. Black smile embroidery 35 cm. No structural yarn is pre-cut.
Step 1: Head / top section
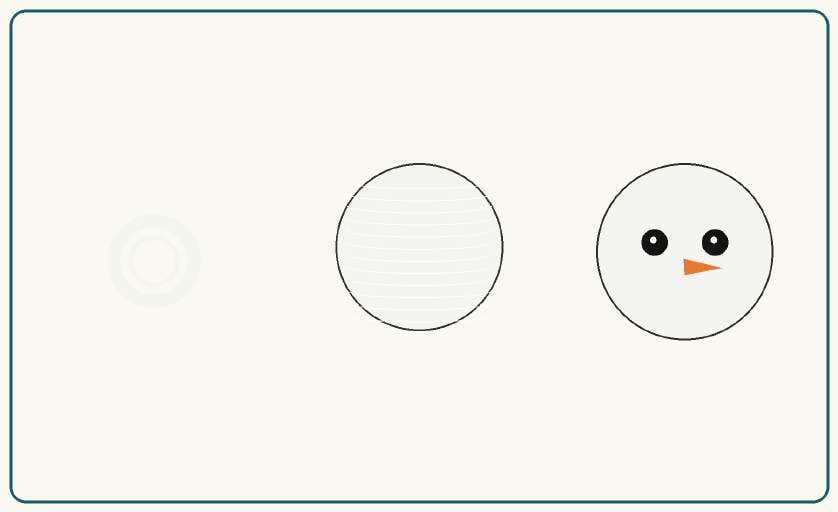
Use white for the standard head.
Work the Standard Head chart in Before You Begin: R1 6 sc in MR (6); R2 inc ×6 (12); R3 (1 sc, inc) ×6 (18); R4 (2 sc, inc) ×6 (24); R5 (3 sc, inc) ×6 (30); R6 (4 sc, inc) ×6 (36); R7–R10 sc around (36 each); R11 (4 sc, dec) ×6 (30); R12 (3 sc, dec) ×6 (24); R13 (2 sc, dec) ×6 (18); R14 (1 sc, dec) ×6 (12); R15 dec ×6 and close (6).
Stuff after R12. Insert safety eyes before R13 if used. Close firmly after R15. Target head: 5.0–5.5 cm wide and 4.5–5.0 cm tall. Keep the round marker at the back or underside, keep stuffing even with no visible gaps, and measure width before closing.
Step 2: Face, top hat, and scarf
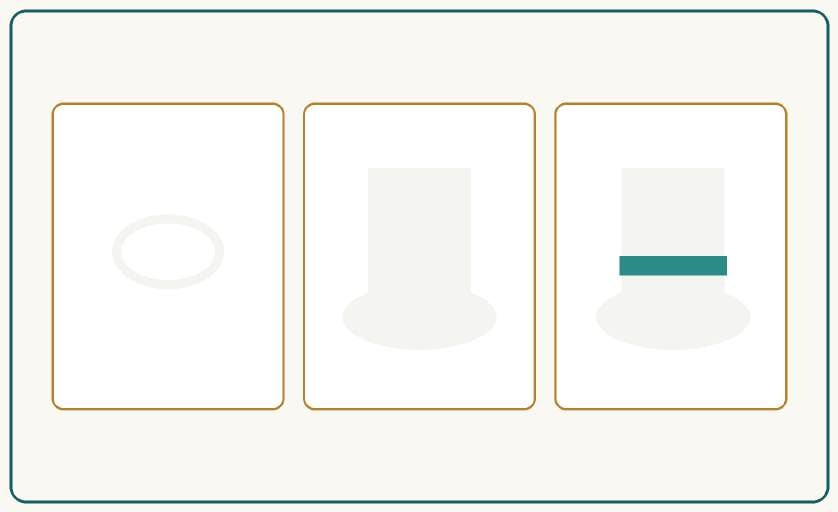
Place eyes between R8–R9, 7 stitches apart. Work the carrot nose as ch 4, sl st in second chain from hook, sc, hdc, then sew it centred below the eyes. Add a smile with five small black backstitches in a shallow curve, and optional blush with 3–4 pale pink stitches on each cheek.
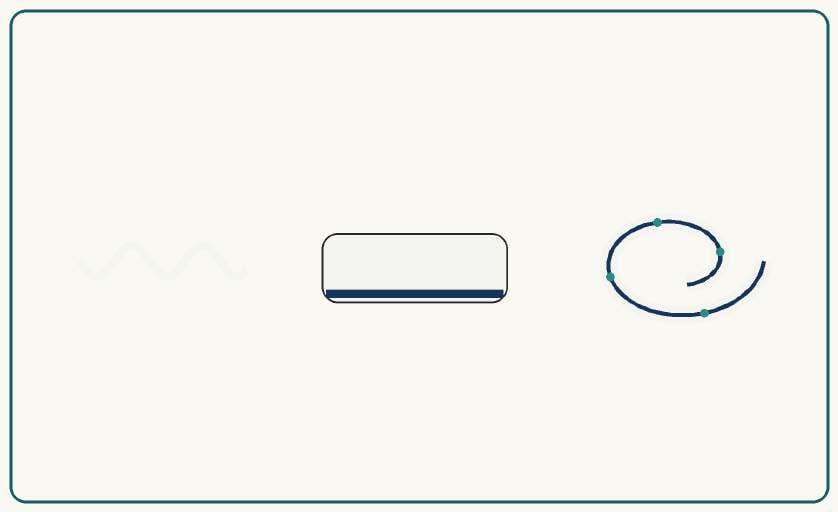
For the top hat, work the crown as R1 6 sc in MR; R2 inc ×6 = 12; R3 (1 sc, inc) ×6 = 18; R4 (2 sc, inc) ×6 = 24; R5 (3 sc, inc) ×6 = 30; R6 BLO sc 30; R7–R10 sc 30. Work the brim in FLO of R6 or as a separate round: (4 sc, inc) ×6 = 36, then sc 36, and fasten off. For the scarf, ch 42 and work hdc from the second chain across (41 sts). Row 2: hdc 41. Fasten off and add two tassels to each end.
Pin the hat and scarf before sewing, checking front and side views. Sew with hidden stitches through structural stitches.
Step 3: Spiral lower body
Spiral crochet chart
| Stage | Instruction | Target |
|---|---|---|
| Foundation | ch 70 loosely | 70 ch |
| Row 1 | From 2nd ch from hook, 3 sc in each chain across | 207 sc |
| Shape | Allow strip to curl naturally; do not twist by force | 14–16 cm |
| Trim | Join contrast at outer edge and sl st evenly along edge | Even |
| Finish | FO leaving 25 cm sewing tail | — |
Base spiral colour: Navy DK #3. Use the deep navy contrast family from the setup for the edge. Work the edge trim only after the spiral has fully curled. Finished relaxed spiral: 14–16 cm from top join to lower curl.
Step 4: Feet, hanging loop, and final assembly
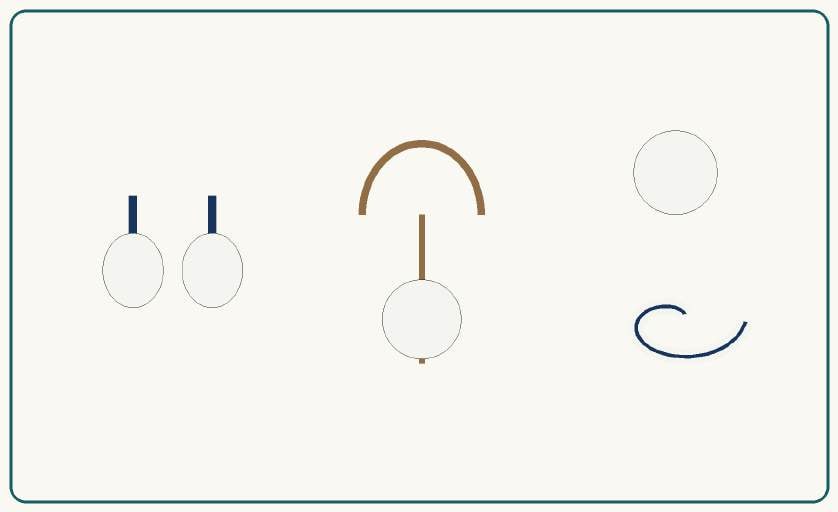
Make two tiny feet in light blue using the standard oval method. Attach the hanging loop through the crown using the standard loop method and lift-test.
Final assembly order: Fit the hat so the lower brim sits just above the eyes and sew at 6–8 hidden points. Wrap the scarf around the neck or head join once and tack in two places. Attach the head to the navy spiral, keeping the carrot nose facing forward. Attach the two light-blue feet evenly beneath the spiral.
Final quality check:
- Full ornament is intact and centred; no part is cropped or omitted.
- No loose yarn tails, beads, or pins remain.
- Head or top section is centred over the lower body.
- Hanging loop supports the ornament without tilting.
- All decorative pieces are sewn through structural stitches.
- Finished measurements are within the target range on the setup section.
3. Penguin
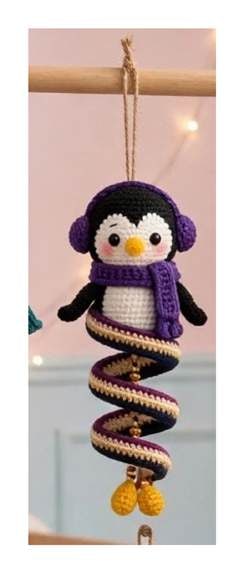
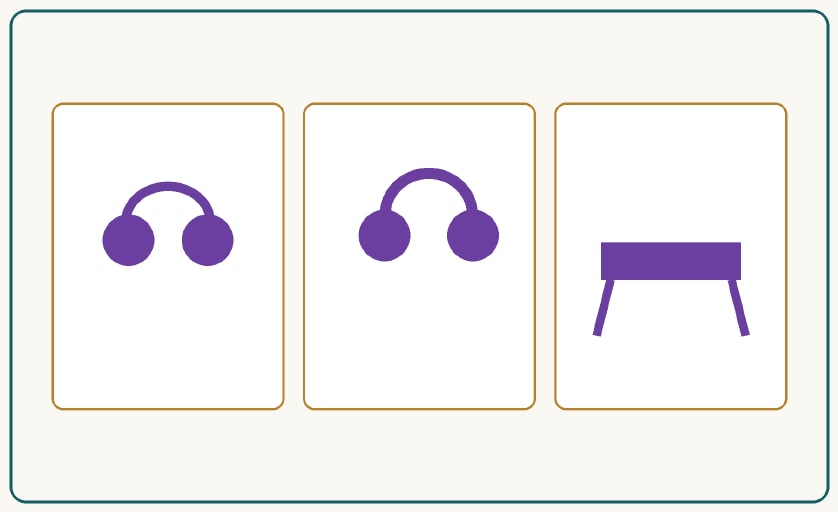
The Penguin is all about contrast: a cream oval face patch on a charcoal head, purple earmuff discs joined by a sl-stitch headband, and a short hdc scarf with tassels. He finishes at 24–27 cm long, with a 5.0–5.5 cm head, a 14–16 cm spiral, 2.0 cm earmuff discs, and a 10–12 cm loop. Make the face patch first so you can position the eyes through it accurately.
Setup and materials
| Yarn / colour | Approx. amount | Use |
|---|---|---|
| Charcoal/navy DK #3 | 25 g | Head edge, body and spiral |
| Cream/white DK #3 | 10 g | Face patch and trim |
| Purple DK #3 | 8 g | Earmuffs, scarf, trim |
| Orange DK | 2 g | Beak and feet accents |
| Gold embroidery | 1 g | Spiral accents |
| Black embroidery | <1 g | Eyes |
Tools and materials: Fiberfill 8 g; 2 × 8 mm safety eyes; 22–24 cm hanging twine; 2.75 mm and 3.0 mm hooks; tapestry needle; stitch marker; pins; scissors.
Measured preparation: Hanging cord 22–24 cm. Gold accent thread 40 cm. Scarf tassels 4 × 4 cm. No pre-cut structural yarn.
Step 1: Head / top section
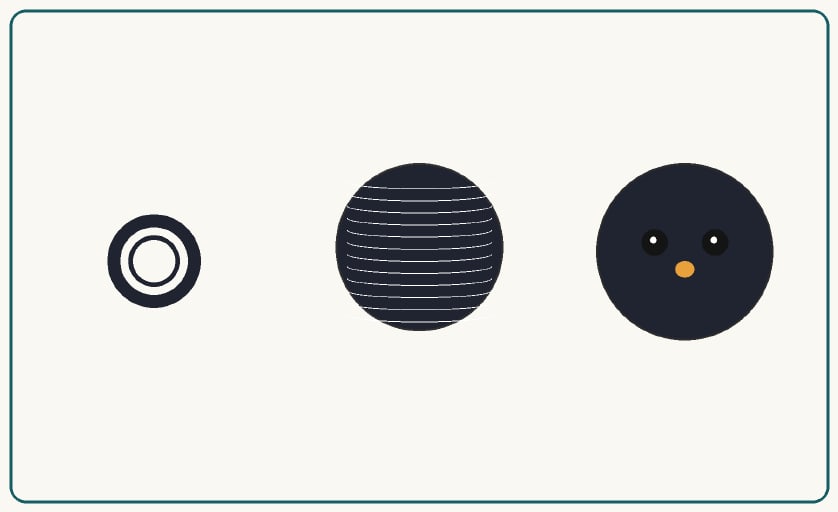
Use charcoal/navy as the main head colour, with the cream face patch added in Step 2.
Work the Standard Head chart in Before You Begin: R1 6 sc in MR (6); R2 inc ×6 (12); R3 (1 sc, inc) ×6 (18); R4 (2 sc, inc) ×6 (24); R5 (3 sc, inc) ×6 (30); R6 (4 sc, inc) ×6 (36); R7–R10 sc around (36 each); R11 (4 sc, dec) ×6 (30); R12 (3 sc, dec) ×6 (24); R13 (2 sc, dec) ×6 (18); R14 (1 sc, dec) ×6 (12); R15 dec ×6 and close (6).
Stuff after R12. Insert safety eyes before R13 if used. Close firmly after R15. Target head: 5.0–5.5 cm wide and 4.5–5.0 cm tall. Keep the round marker at the back or underside, keep stuffing even with no visible gaps, and measure width before closing.
Step 2: Face patch, earmuffs, and scarf
For the cream face patch, ch 8 and work an oval for three rows to approximately 3.8 × 2.6 cm, then sew it centred on the face. Place the eyes through the face patch, 6 stitches apart. Work the beak as ch 3, sl st, sc, fold it into a tiny triangle, and sew it between the eyes.
Make two earmuffs: R1 6 sc in MR; R2 inc ×6 = 12; R3 (1 sc, inc) ×6 = 18, then fasten off. For the headband, ch 24 and sl st back across, then sew it between the earmuffs over the crown. For the scarf, ch 38 and work hdc across from the second chain for one row only, then add short tassels.
Pin everything before sewing and keep left and right pieces level. Sew through structural stitches with small hidden stitches.
Step 3: Spiral lower body
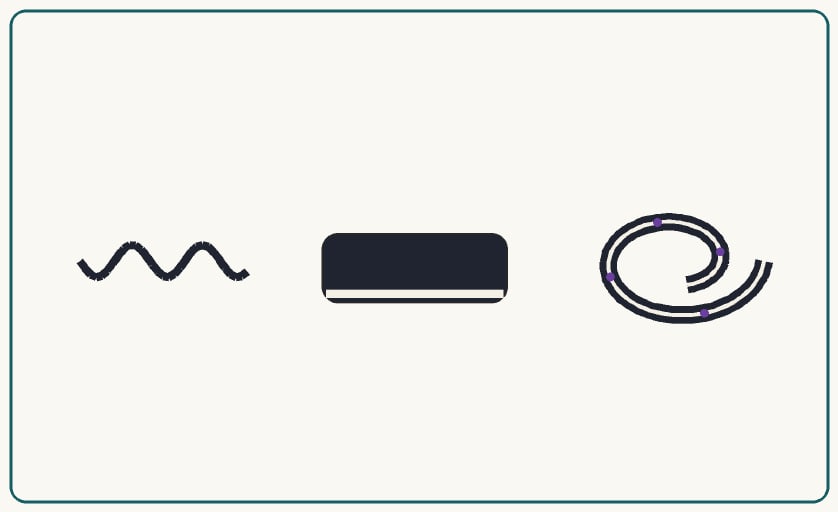
Spiral crochet chart
| Stage | Instruction | Target |
|---|---|---|
| Foundation | ch 70 loosely | 70 ch |
| Row 1 | From 2nd ch from hook, 3 sc in each chain across | 207 sc |
| Shape | Allow strip to curl naturally; do not twist by force | 14–16 cm |
| Trim | Join contrast at outer edge and sl st evenly along edge | Even |
| Finish | FO leaving 25 cm sewing tail | — |
Base spiral colour: Charcoal/navy DK #3. Contrast edge is the warm cream-white family from the setup. Work the edge trim only after the spiral has fully curled. Finished relaxed spiral: 14–16 cm from top join to lower curl.
Step 4: Feet, hanging loop, and final assembly
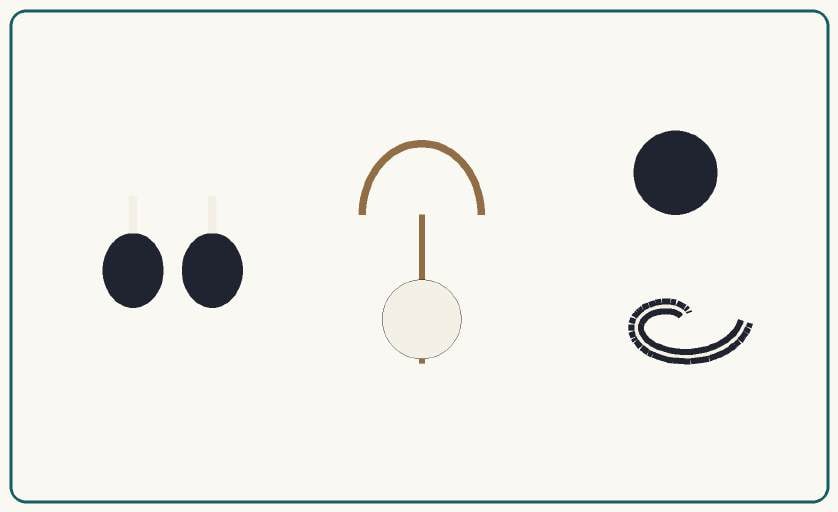
Make two tiny feet using the standard oval method in your foot colour. Attach the hanging loop with the standard method and lift-test for forward-facing hang.
Final assembly order: Sew the cream patch before inserting the eyes. Attach the earmuffs symmetrically at side-centre of the head. Tack the scarf at the front so it cannot rotate. Attach the head to the dark spiral and add the feet and any pendant accent.
Final quality check:
- Full ornament is intact and centred; no part is cropped or omitted.
- No loose yarn tails, beads, or pins remain.
- Head or top section is centred over the lower body.
- Hanging loop supports the ornament without tilting.
- All decorative pieces are sewn through structural stitches.
- Finished measurements are within the target range on the setup section.
4. Gingerbread
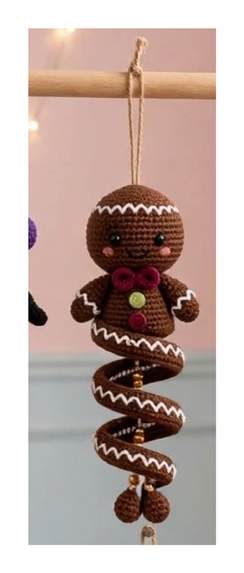
Gingerbread is the most embroidery-led design in the set. The brown head and spiral are simple, while the personality comes from white icing lines, a small berry bow pinched and wrapped at the centre, and two tiny buttons below the chin. He finishes at 24–27 cm, with a 5.0–5.5 cm head, a 14–16 cm spiral, a 3–3.5 cm bow, and a 10–12 cm loop. Add the icing before you join the spiral so the ornament is easy to handle.
Setup and materials
| Yarn / colour | Approx. amount | Use |
|---|---|---|
| Gingerbread brown DK #3 | 30 g | Head and spiral |
| White DK #3 | 8 g | Icing trim |
| Berry/red DK | 3 g | Bow |
| Green DK | 1 g | Button detail |
| Pink DK | 1 g | Cheeks |
| Black embroidery | <1 g | Eyes and mouth |
Tools and materials: Fiberfill 8–10 g; 2 × 8 mm safety eyes; 22–24 cm twine; 2.75 mm and 3.0 mm hooks; tapestry needle; stitch marker; pins; scissors.
Measured preparation: Hanging cord 22–24 cm. White icing embroidery 60–70 cm. Bow centre wrap 15 cm. No pre-cut structural yarn.
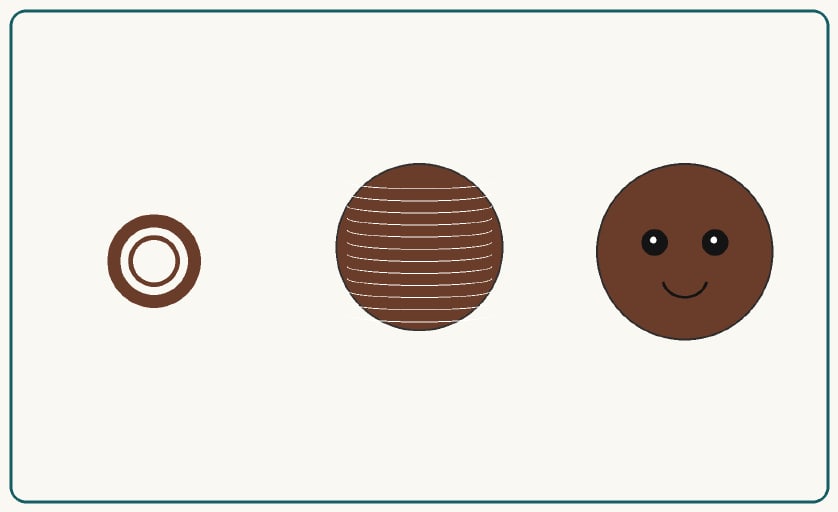
Step 1: Head / top section
Use gingerbread brown for the standard head.
Work the Standard Head chart in Before You Begin: R1 6 sc in MR (6); R2 inc ×6 (12); R3 (1 sc, inc) ×6 (18); R4 (2 sc, inc) ×6 (24); R5 (3 sc, inc) ×6 (30); R6 (4 sc, inc) ×6 (36); R7–R10 sc around (36 each); R11 (4 sc, dec) ×6 (30); R12 (3 sc, dec) ×6 (24); R13 (2 sc, dec) ×6 (18); R14 (1 sc, dec) ×6 (12); R15 dec ×6 and close (6).
Stuff after R12. Insert safety eyes before R13 if used. Close firmly after R15. Target head: 5.0–5.5 cm wide and 4.5–5.0 cm tall. Keep the round marker at the back or underside, keep stuffing even with no visible gaps, and measure width before closing.
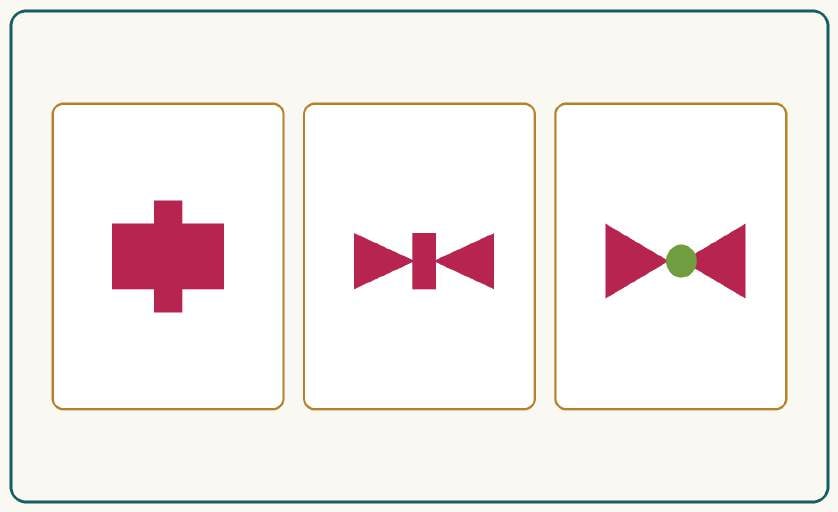
Step 2: Face, icing, bow, and buttons
Place eyes between R8–R9, 7 stitches apart. Add a smile with 4–5 black backstitches centred below the eyes, and cheeks with three pink stitches each side. Work the white icing line as a surface chain or embroidery across the forehead and along the spiral edge.
For the bow, ch 10 and sc in the second chain and across (9 sts). Work Rows 2–4 as sc 9, fasten off, pinch the centre, and wrap berry yarn 8–10 times to form the bow knot. Embroider two small round buttons below the bow, one green and one red or pink.
Pin before sewing, check symmetry, and sew through structural stitches.
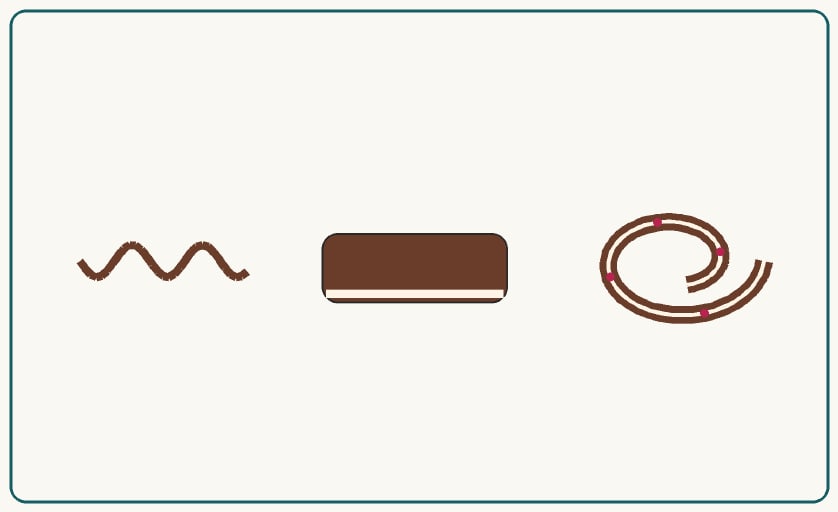
Step 3: Spiral lower body
Spiral crochet chart
| Stage | Instruction | Target |
|---|---|---|
| Foundation | ch 70 loosely | 70 ch |
| Row 1 | From 2nd ch from hook, 3 sc in each chain across | 207 sc |
| Shape | Allow strip to curl naturally; do not twist by force | 14–16 cm |
| Trim | Join contrast at outer edge and sl st evenly along edge | Even |
| Finish | FO leaving 25 cm sewing tail | — |
Base spiral colour: Gingerbread brown DK #3. Contrast edge is the warm cream-white family shown in the setup, worked as the icing-like trim. Work the edge trim only after the spiral has fully curled. Finished relaxed spiral: 14–16 cm from top join to lower curl.
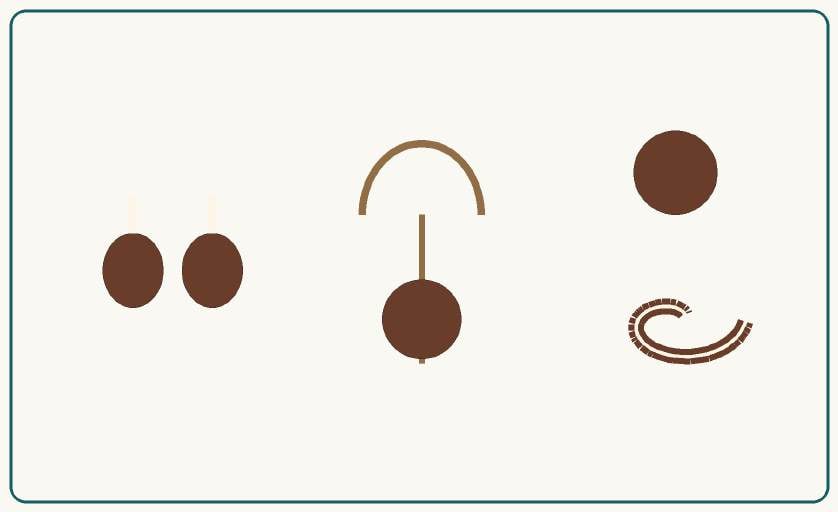
Step 4: Feet, hanging loop, and final assembly
Make two tiny brown feet using the standard oval method. Attach the hanging loop with the standard method.
Final assembly order: Sew the bow under the chin, centred. Add icing before attaching the spiral to avoid awkward handling. Attach the head to the brown spiral and align the white trim continuously. Attach the small brown feet and hanging loop.
Final quality check:
- Full ornament is intact and centred; no part is cropped or omitted.
- No loose yarn tails, beads, or pins remain.
- Head or top section is centred over the lower body.
- Hanging loop supports the ornament without tilting.
- All decorative pieces are sewn through structural stitches.
- Finished measurements are within the target range on the setup section.
5. Elf
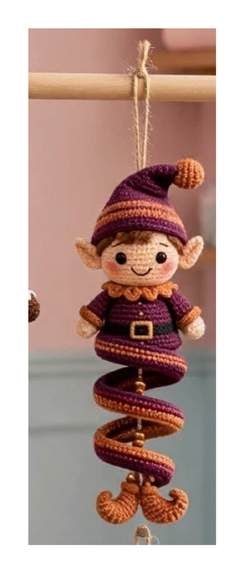
The Elf brings height and colour play to the collection: a tall striped cone hat alternating plum and rust every two rounds, pointed ears peeking out beneath the brim, and a small ruffled collar at the neck. Finished size is 24–27 cm, with a 5.0–5.5 cm head, a 14–16 cm spiral, a 6–7 cm hat from brim to tip, and a 10–12 cm loop. Sew the ears before the hat so their bases hide neatly under the brim.
Setup and materials
| Yarn / colour | Approx. amount | Use |
|---|---|---|
| Skin beige DK #3 | 10 g | Head and ears |
| Plum DK #3 | 22 g | Hat, outfit, spiral |
| Rust/orange DK #3 | 9 g | Hat stripes, collar, spiral trim, feet |
| Gold/yellow | 2 g | Belt and buckle |
| Brown/black embroidery | 1 g | Eyes and mouth |
| Blush pink | <1 g | Cheeks |
Tools and materials: Fiberfill 8–10 g; 2 × 8 mm eyes; 22–24 cm twine; 2.75 mm and 3.0 mm hooks; tapestry needle; stitch marker; pins; scissors.
Measured preparation: Hanging cord 22–24 cm. Gold belt and buckle yarn 45 cm. Ear sewing tails: leave 20 cm on each ear. No structural yarn pre-cut.
Step 1: Head / top section
Use skin beige for the standard head.
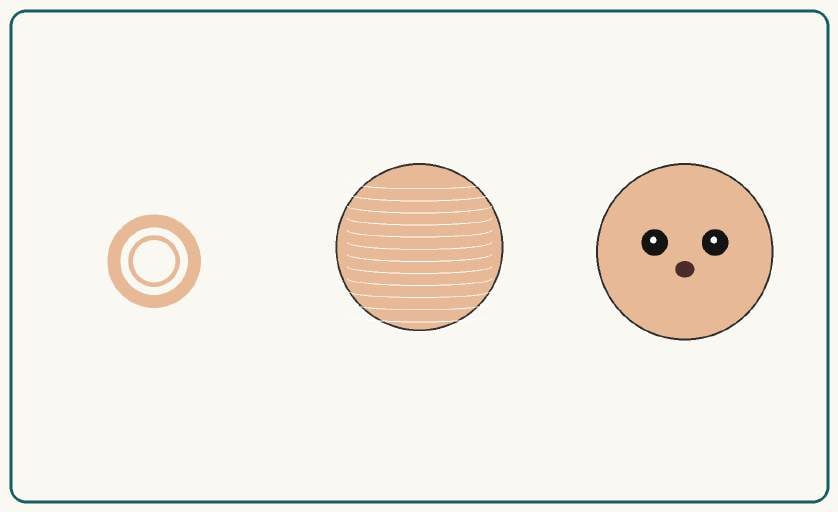
Work the Standard Head chart in Before You Begin: R1 6 sc in MR (6); R2 inc ×6 (12); R3 (1 sc, inc) ×6 (18); R4 (2 sc, inc) ×6 (24); R5 (3 sc, inc) ×6 (30); R6 (4 sc, inc) ×6 (36); R7–R10 sc around (36 each); R11 (4 sc, dec) ×6 (30); R12 (3 sc, dec) ×6 (24); R13 (2 sc, dec) ×6 (18); R14 (1 sc, dec) ×6 (12); R15 dec ×6 and close (6).
Stuff after R12. Insert safety eyes before R13 if used. Close firmly after R15. Target head: 5.0–5.5 cm wide and 4.5–5.0 cm tall. Keep the round marker at the back or underside, keep stuffing even with no visible gaps, and measure width before closing.
Step 2: Face, striped pointed hat, ears, and collar
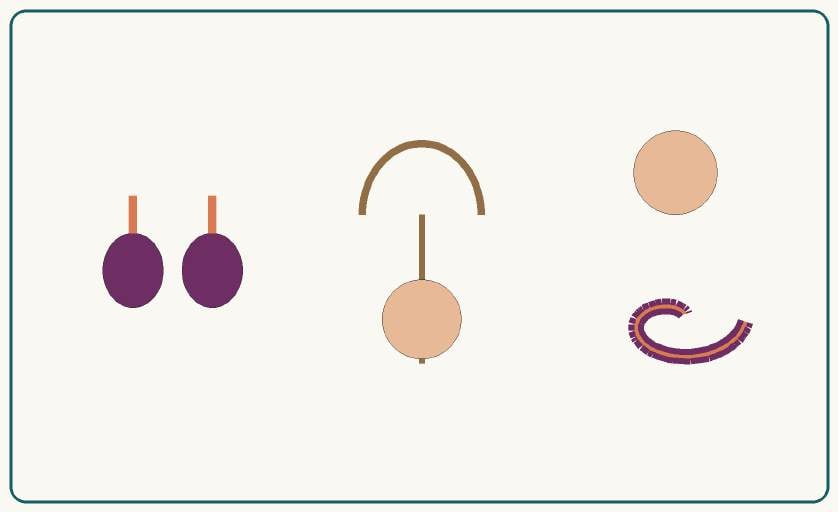
Place eyes between R8–R9. Add a smile with three small brown stitches and blush with three pink stitches on each cheek. Make two ears: ch 4; sl st, sc, hdc; turn and work back along the opposite side; fasten off with a sewing tail.
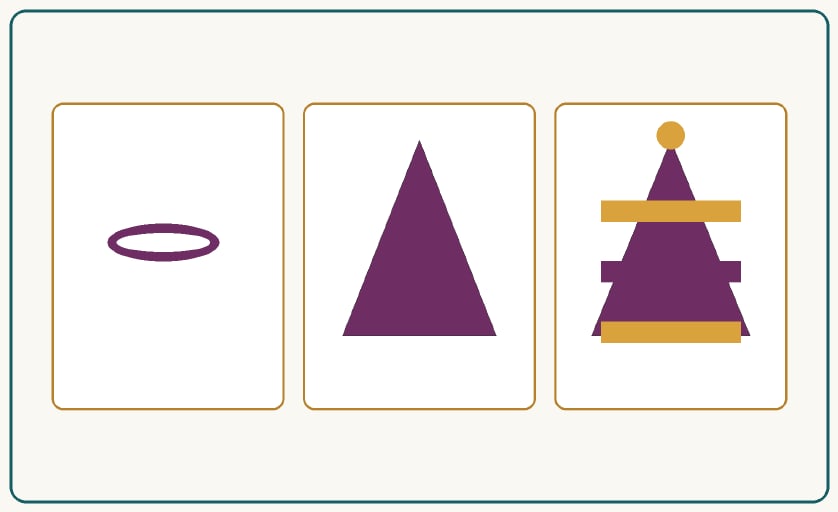
Work the pointed hat as the same slow-increase cone used for Santa to 30 stitches, alternating plum and rust every two rounds. Make the tip bobble as 6 sc in MR, inc to 12, one round sc, dec to 6, lightly stuffed. For the collar, ch 26 and work (sc, hdc, dc, hdc) repeated to create a small ruffle, then sew it under the head.
Pin all parts before sewing and keep accessories level and equally spaced.
Step 3: Spiral lower body
Spiral crochet chart
| Stage | Instruction | Target |
|---|---|---|
| Foundation | ch 70 loosely | 70 ch |
| Row 1 | From 2nd ch from hook, 3 sc in each chain across | 207 sc |
| Shape | Allow strip to curl naturally; do not twist by force | 14–16 cm |
| Trim | Join contrast at outer edge and sl st evenly along edge | Even |
| Finish | FO leaving 25 cm sewing tail | — |
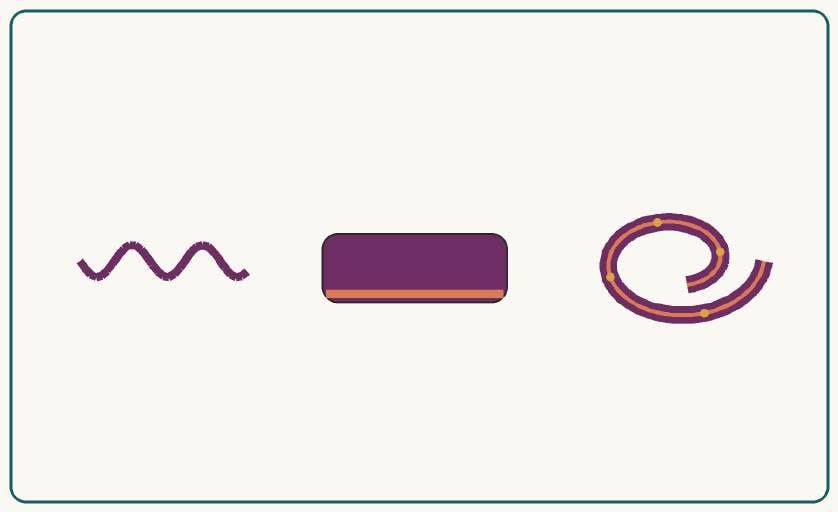
Base spiral colour: Plum DK #3. Contrast edge is the warm rust-orange family from the setup. Work the edge trim only after the spiral has fully curled. Finished relaxed spiral: 14–16 cm from top join to lower curl.
Step 4: Feet, hanging loop, and final assembly
Make two tiny feet in rust using the standard oval method. Attach the hanging loop with the standard method.
Final assembly order: Sew the ears before the hat so the ear bases are hidden by the brim. Position the hat slightly back to reveal the face. Attach the collar at the neck and head join, then join the head to the plum spiral. Add the orange curled feet symmetrically.
Final quality check:
- Full ornament is intact and centred; no part is cropped or omitted.
- No loose yarn tails, beads, or pins remain.
- Head or top section is centred over the lower body.
- Hanging loop supports the ornament without tilting.
- All decorative pieces are sewn through structural stitches.
- Finished measurements are within the target range on the setup section.
6. Nutcracker
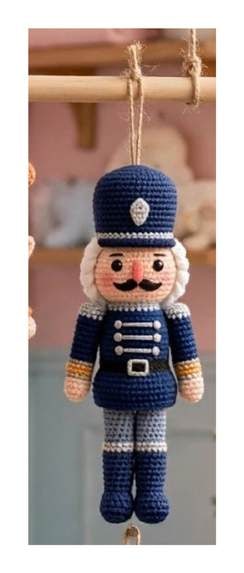
The Nutcracker is deliberately different. Instead of a curling spiral he has a firm stuffed torso, two straight legs, and small boots, which gives the whole collection a strong centrepiece and a lovely contrast in silhouette on the tree. Finished size is 23–26 cm total, with a 5.0–5.5 cm head, a 6.5–7 cm torso, 7–8 cm legs, a 4.5 cm high hat, and a 10–12 cm loop. Stuff the torso firmly and the legs lightly so he hangs straight.
Setup and materials
| Yarn / colour | Approx. amount | Use |
|---|---|---|
| Navy DK #3 | 32 g | Hat, jacket, legs |
| Skin beige DK #3 | 10 g | Head and hands |
| Grey DK #3 | 8 g | Trouser and leg accents |
| White DK #3 | 5 g | Braid and trim |
| Black DK / embroidery | 3 g | Moustache, belt, boots |
| Gold/yellow embroidery | 2 g | Buttons and buckle |
Tools and materials: Fiberfill 12 g; 2 × 8 mm safety eyes; 22–24 cm twine; 2.75 mm and 3.0 mm hooks; tapestry needle; stitch marker; pins; scissors; optional two small beads for shoulder detail (adult decor only).
Measured preparation: Hanging cord 22–24 cm. Gold button embroidery 50 cm. White chest braid 70 cm. Black belt yarn 45 cm.
Step 1: Head / top section
Use skin beige for the standard head.
Work the Standard Head chart in Before You Begin: R1 6 sc in MR (6); R2 inc ×6 (12); R3 (1 sc, inc) ×6 (18); R4 (2 sc, inc) ×6 (24); R5 (3 sc, inc) ×6 (30); R6 (4 sc, inc) ×6 (36); R7–R10 sc around (36 each); R11 (4 sc, dec) ×6 (30); R12 (3 sc, dec) ×6 (24); R13 (2 sc, dec) ×6 (18); R14 (1 sc, dec) ×6 (12); R15 dec ×6 and close (6).
Stuff after R12. Insert safety eyes before R13 if used. Close firmly after R15. Target head: 5.0–5.5 cm wide and 4.5–5.0 cm tall. Keep the round marker at the back or underside, keep stuffing even with no visible gaps, and measure width before closing.
Step 2: Face, tall hat, moustache, and uniform
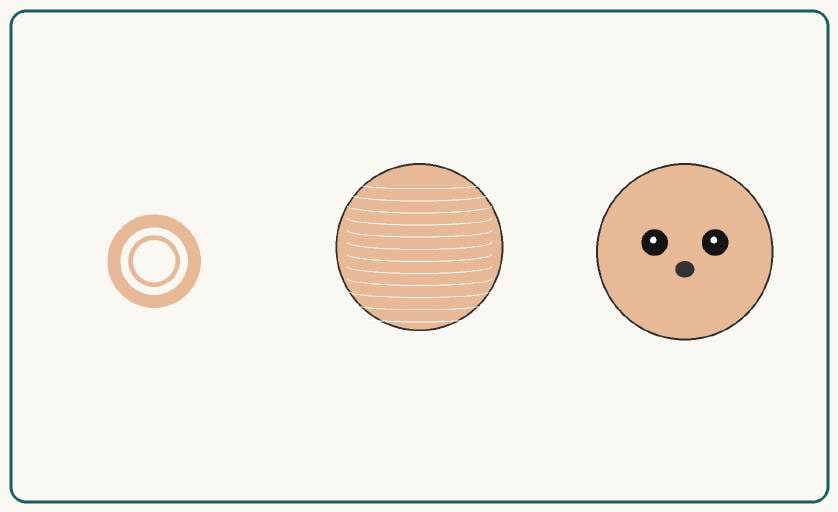
Place eyes between R8–R9. Embroider the nose with five skin-colour satin stitches. Work the moustache as two black curved embroidered sections, 6–8 stitches each, and add optional blush with two pale pink stitches on each cheek.
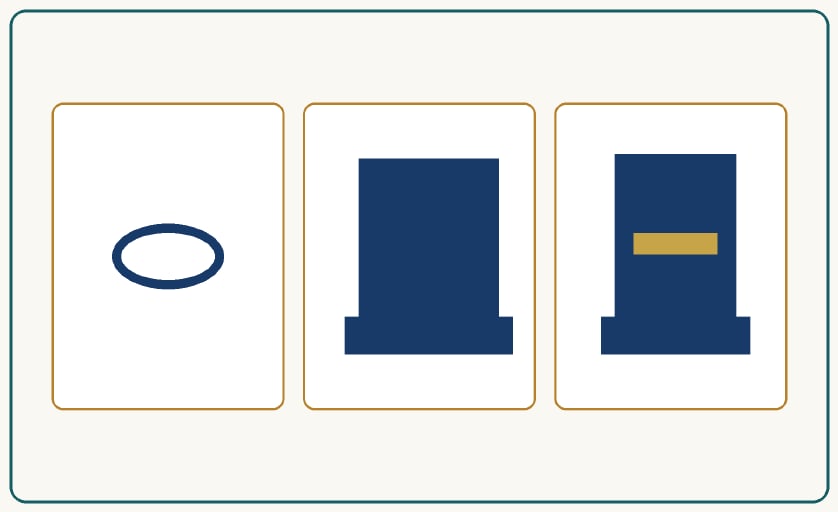
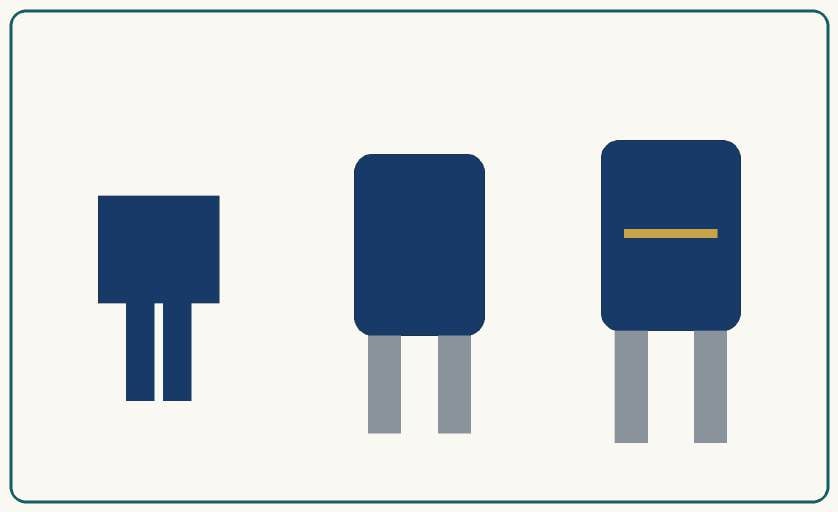
Work the hat crown as MR 6 → 12 → 18 → 24 → 30. R6 BLO sc 30; R7–R12 sc 30. Work the brim by joining to FLO of R6 and (4 sc, inc) ×6 = 36, then sc 36. For the torso, start with MR 6 and increase to 30 by R5; R6 BLO 30; R7–R12 sc 30; lightly stuff; decrease to 24 at the top. Make two legs: MR 6; R2 inc = 12; R3–R10 sc 12, changing grey and navy as shown, and stuff lightly. Make two boots: ch 5, work an oval base of about 14 stitches, work two rounds sc, and sew to the leg ends.
Pin all parts before sewing and sew through structural stitches with hidden stitches.
Step 3: Straight torso and legs
| Part | Round / row | Instruction | Count |
|---|---|---|---|
| Torso | R1 | 6 sc in MR | 6 |
| Torso | R2 | inc ×6 | 12 |
| Torso | R3 | (1 sc, inc) ×6 | 18 |
| Torso | R4 | (2 sc, inc) ×6 | 24 |
| Torso | R5 | (3 sc, inc) ×6 | 30 |
| Torso | R6–R12 | sc around | 30 |
| Torso | R13 | (3 sc, dec) ×6 | 24 |
| Leg ×2 | R1 | 6 sc in MR | 6 |
| Leg ×2 | R2 | inc ×6 | 12 |
| Leg ×2 | R3–R10 | sc around | 12 |
| Boot ×2 | Rows | ch 5; oval base; 2 rounds sc | ~14–18 |
Stuff the torso firmly and the legs lightly. Match both legs before attachment. The finished straight body from neck to boots should be approximately 13–15 cm.
Step 4: Boots, hanging loop, and final assembly
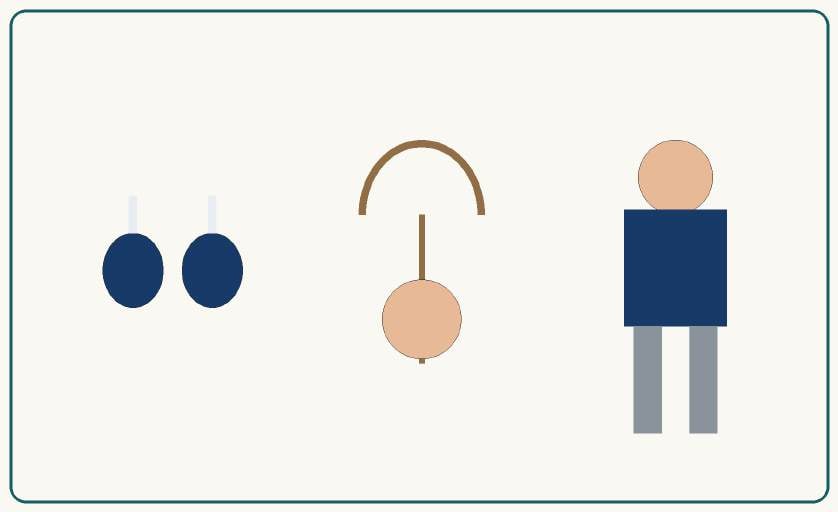
Flatten each boot base before sewing it to the leg. Make both boots equal length, approximately 2.5–3 cm, and align the legs vertically before the final reinforcing stitches.
Attach the hanging loop through the crown and head using the standard loop method.
Final assembly order: Sew the head centred to the stuffed torso — not to a spiral. Attach the legs 1.5–2 cm apart at the lower torso. Embroider 3–4 gold buttons and white horizontal chest bars. Attach the hat firmly and add the hanging loop through crown and head.
Final quality check:
- Full ornament is intact and centred; no part is cropped or omitted.
- No loose yarn tails, beads, or pins remain.
- Head or top section is centred over the lower body.
- Hanging loop supports the ornament without tilting.
- All decorative pieces are sewn through structural stitches.
- Finished measurements are within the target range on the setup section.
7. Reindeer
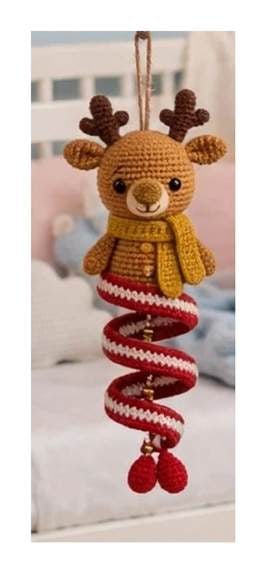
The Reindeer is full of small, satisfying details: chain-work antlers with two branches each, tiny leaf-shaped ears, a cream oval muzzle, and a mustard hdc scarf with tassels. He finishes at 24–27 cm, with a 5.0–5.5 cm head, 3.5–4 cm antlers, a 14–16 cm spiral, and a 10–12 cm loop. Sew the ears first and the antlers immediately behind them for the cleanest silhouette.
Setup and materials
| Yarn / colour | Approx. amount | Use |
|---|---|---|
| Warm tan/brown DK #3 | 22 g | Head and feet |
| Dark brown DK | 5 g | Antlers |
| Mustard DK | 7 g | Scarf and body accent |
| Red DK | 16 g | Spiral |
| White DK | 5 g | Spiral trim |
| Cream DK | 3 g | Muzzle |
| Black embroidery | <1 g | Eyes and mouth |
Tools and materials: Fiberfill 8–10 g; 2 × 8 mm safety eyes; 22–24 cm twine; 2.75 mm and 3.0 mm hooks; tapestry needle; stitch marker; pins; scissors.
Measured preparation: Hanging cord 22–24 cm. Scarf tassels 4 × 5 cm. Antler sewing tails 20 cm each. No structural yarn pre-cut.
Step 1: Head / top section
Use warm tan/brown for the standard head.
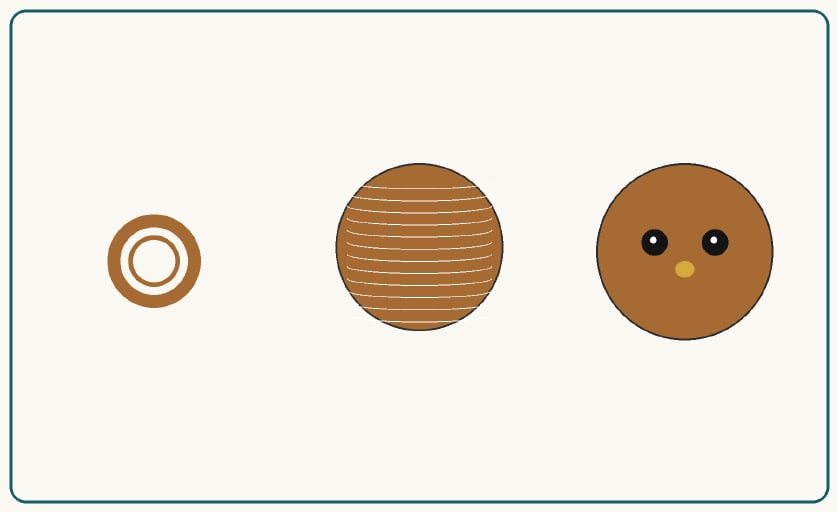
Work the Standard Head chart in Before You Begin: R1 6 sc in MR (6); R2 inc ×6 (12); R3 (1 sc, inc) ×6 (18); R4 (2 sc, inc) ×6 (24); R5 (3 sc, inc) ×6 (30); R6 (4 sc, inc) ×6 (36); R7–R10 sc around (36 each); R11 (4 sc, dec) ×6 (30); R12 (3 sc, dec) ×6 (24); R13 (2 sc, dec) ×6 (18); R14 (1 sc, dec) ×6 (12); R15 dec ×6 and close (6).
Stuff after R12. Insert safety eyes before R13 if used. Close firmly after R15. Target head: 5.0–5.5 cm wide and 4.5–5.0 cm tall. Keep the round marker at the back or underside, keep stuffing even with no visible gaps, and measure width before closing.
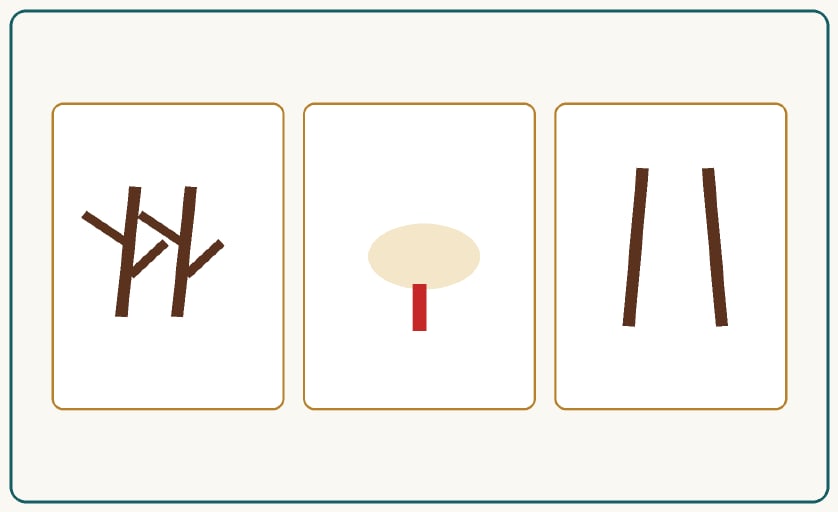
Step 2: Face, antlers, ears, muzzle, and scarf
Work the cream muzzle as ch 6 with an oval of two rounds to approximately 2.6 × 1.8 cm. Centre a red or dark brown satin-stitch nose on the muzzle. Place eyes between R8–R9, 7 stitches apart, and add one short black line below the muzzle for the smile.
Make two antlers: ch 10; sl st back 3, ch 4 for a branch and sl st back, continue along the main chain and add a second branch; fasten off. Make two ears: ch 5; sc, hdc, dc, hdc; work along the opposite side; fasten off. For the scarf, ch 38, hdc 37, and add tassels.
Pin before sewing and sew through structural stitches.
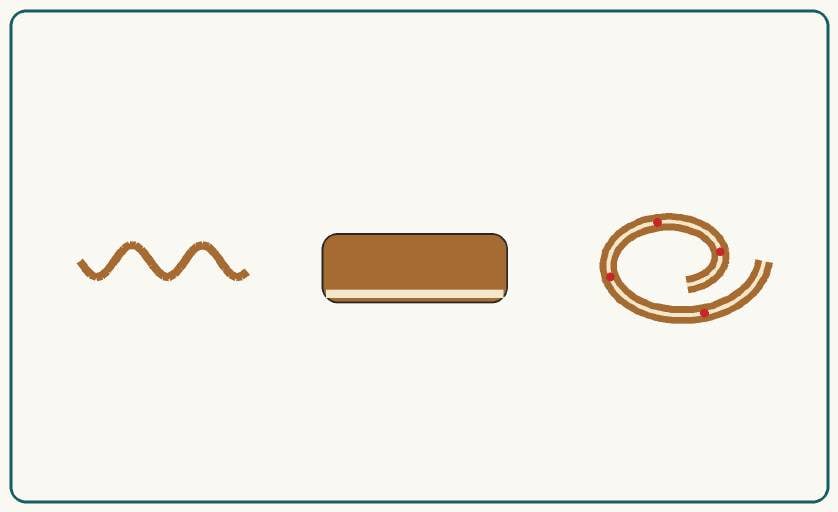
Step 3: Spiral lower body
Spiral crochet chart
| Stage | Instruction | Target |
|---|---|---|
| Foundation | ch 70 loosely | 70 ch |
| Row 1 | From 2nd ch from hook, 3 sc in each chain across | 207 sc |
| Shape | Allow strip to curl naturally; do not twist by force | 14–16 cm |
| Trim | Join contrast at outer edge and sl st evenly along edge | Even |
| Finish | FO leaving 25 cm sewing tail | — |
Base spiral colour: Red DK. Contrast edge is the warm cream family from the setup. Work the edge trim only after the spiral has fully curled. Finished relaxed spiral: 14–16 cm from top join to lower curl.
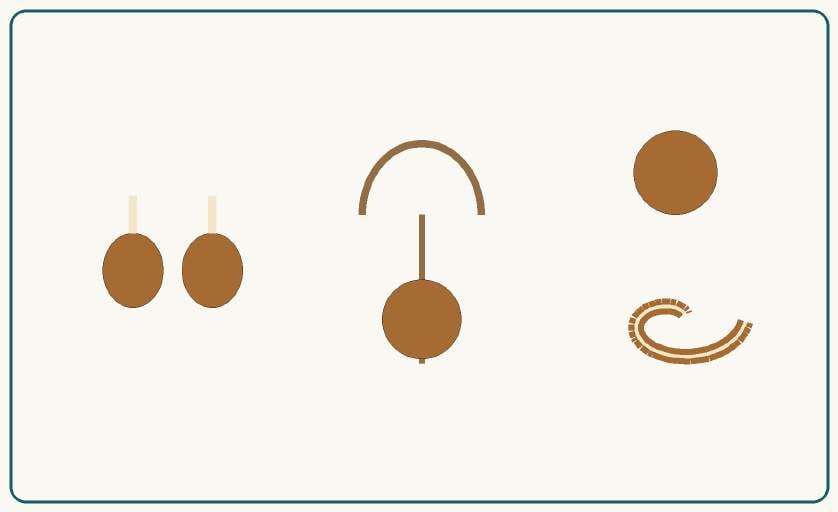
Step 4: Feet, hanging loop, and final assembly
Make two tiny feet in warm tan using the standard oval method. Attach the hanging loop with the standard method.
Final assembly order: Sew the ears first, with antlers immediately behind the ears. Centre the muzzle below the eyes. Attach the scarf around the head and spiral join. Attach the head to the red spiral, add white edging, and attach the brown feet.
Final quality check:
- Full ornament is intact and centred; no part is cropped or omitted.
- No loose yarn tails, beads, or pins remain.
- Head or top section is centred over the lower body.
- Hanging loop supports the ornament without tilting.
- All decorative pieces are sewn through structural stitches.
- Finished measurements are within the target range on the setup section.
8. Winter Girl
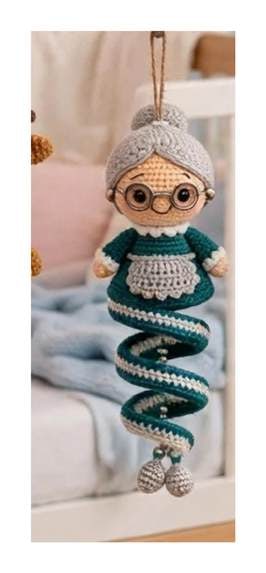
Winter Girl is the most storybook design in the set. She has a grey bun and hair wrap, embroidered round glasses — no wire in the child-safe version — a small cream apron with tie strings, and a teal spiral dress. Finished size is 24–27 cm, with a 5.0–5.5 cm head, a 2.5–3 cm bun, a 14–16 cm spiral, and a 10–12 cm loop. Add the glasses only after the eyes are secure so the circles sit evenly.
Setup and materials
| Yarn / colour | Approx. amount | Use |
|---|---|---|
| Skin beige DK #3 | 10 g | Head |
| Teal DK #3 | 22 g | Outfit and spiral |
| White/cream DK #3 | 8 g | Apron and trim |
| Silver-grey DK #3 | 8 g | Hair, bun, feet |
| Black embroidery | 1 g | Eyes, glasses, mouth |
Tools and materials: Fiberfill 8–10 g; 2 × 8 mm safety eyes OR embroidered eyes; 22–24 cm twine; 2.75 mm and 3.0 mm hooks; tapestry needle; stitch marker; pins; scissors.
Measured preparation: Hanging cord 22–24 cm. Black glasses embroidery 70 cm. Apron tie strands 2 × 10 cm. No structural yarn pre-cut.
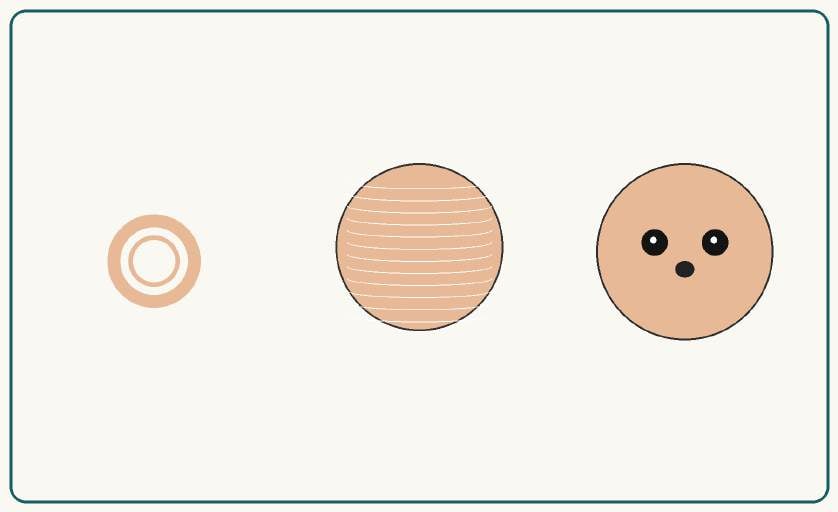
Step 1: Head / top section
Use skin beige for the standard head.
Work the Standard Head chart in Before You Begin: R1 6 sc in MR (6); R2 inc ×6 (12); R3 (1 sc, inc) ×6 (18); R4 (2 sc, inc) ×6 (24); R5 (3 sc, inc) ×6 (30); R6 (4 sc, inc) ×6 (36); R7–R10 sc around (36 each); R11 (4 sc, dec) ×6 (30); R12 (3 sc, dec) ×6 (24); R13 (2 sc, dec) ×6 (18); R14 (1 sc, dec) ×6 (12); R15 dec ×6 and close (6).
Stuff after R12. Insert safety eyes before R13 if used. Close firmly after R15. Target head: 5.0–5.5 cm wide and 4.5–5.0 cm tall. Keep the round marker at the back or underside, keep stuffing even with no visible gaps, and measure width before closing.
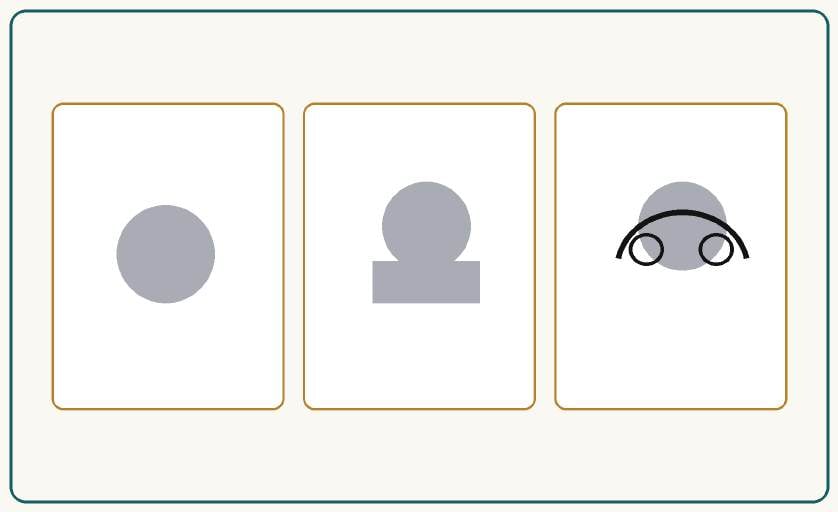
Step 2: Face, grey hair and bun, glasses, and apron
Place eyes between R8–R9. Embroider glasses as two small circles around the eyes joined by two straight stitches — do not use wire for the child-safe version. Add a smile with three tiny black stitches, and work a hairline with surface-stitched grey yarn around the upper half of the head.
Make the bun: R1 6 sc in MR; R2 inc = 12; R3 (1 sc, inc) ×6 = 18; R4–R5 sc 18; R6 (1 sc, dec) ×6 = 12; lightly stuff and close. For the cap or hair wrap, ch 28, sc 27 for two rows, fit it around the upper head, and seam at the back. For the apron, ch 16, sc 15 for five rows, decrease one stitch each side on rows 6–7, and add tie strings.
Pin all parts before sewing and sew through structural stitches.
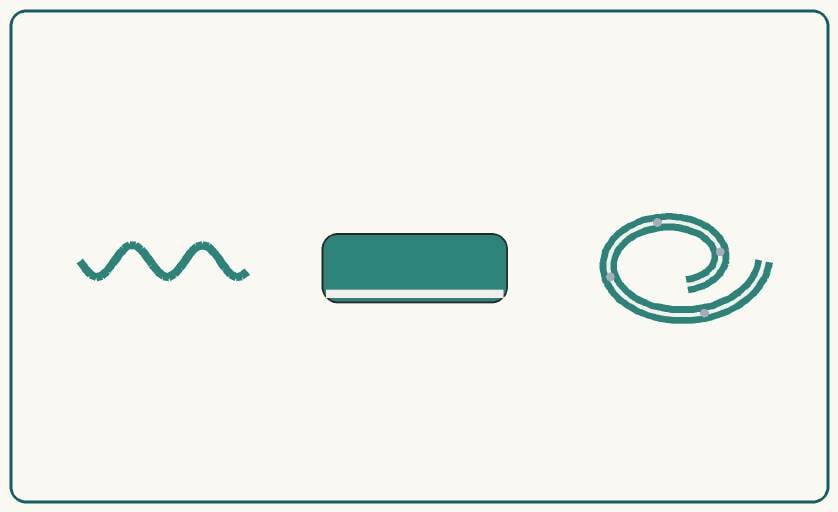
Step 3: Spiral lower body
Spiral crochet chart
| Stage | Instruction | Target |
|---|---|---|
| Foundation | ch 70 loosely | 70 ch |
| Row 1 | From 2nd ch from hook, 3 sc in each chain across | 207 sc |
| Shape | Allow strip to curl naturally; do not twist by force | 14–16 cm |
| Trim | Join contrast at outer edge and sl st evenly along edge | Even |
| Finish | FO leaving 25 cm sewing tail | — |
Base spiral colour: Teal DK #3. Contrast edge is the soft cream-white family from the setup. Work the edge trim only after the spiral has fully curled. Finished relaxed spiral: 14–16 cm from top join to lower curl.
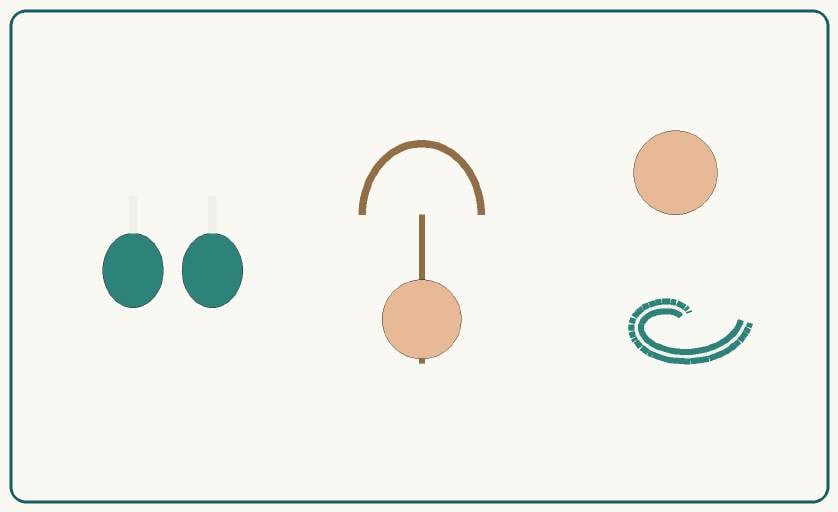
Step 4: Feet, hanging loop, and final assembly
Make two tiny feet in grey or cream using the standard oval method. Attach the hanging loop with the standard method.
Final assembly order: Sew the bun at the upper back centre. Add glasses only after the eyes are secure. Attach the apron to the front before joining the spiral. Attach the head to the teal spiral, then add the grey or white feet.
Final quality check:
- Full ornament is intact and centred; no part is cropped or omitted.
- No loose yarn tails, beads, or pins remain.
- Head or top section is centred over the lower body.
- Hanging loop supports the ornament without tilting.
- All decorative pieces are sewn through structural stitches.
- Finished measurements are within the target range on the setup section.
9. Gnome
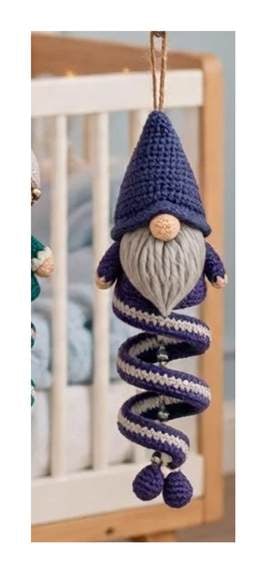
The Gnome is the quickest head in the collection because the tall hat and full beard do most of the work — eyes can be hidden entirely beneath the brim. His beard is made from folded cream strands trimmed into a taper, and his hat is a slow-increase cone pulled low over the nose. Finished size is 24–28 cm, with a 1.6–1.8 cm nose, a 4–5 cm beard, a 7–8 cm hat, a 14–16 cm spiral, and a 10–12 cm loop.
Setup and materials
| Yarn / colour | Approx. amount | Use |
|---|---|---|
| Purple/navy DK #3 | 28 g | Hat and spiral |
| Cream/white DK #3 | 14 g | Beard and trim |
| Skin beige DK | 3 g | Nose |
| Silver-grey DK | 3 g | Accent and feet |
| Dark brown embroidery | <1 g | Optional mouth |
Tools and materials: Fiberfill 5–7 g; 22–24 cm twine; 2.75 mm and 3.0 mm hooks; tapestry needle; stitch marker; pins; scissors. No safety eyes are required if the hat covers the eye area.
Measured preparation: Hanging cord 22–24 cm. Beard strands: 18–22 pieces × 10 cm, folded in half. Hat sewing tail 25 cm. No structural yarn pre-cut.
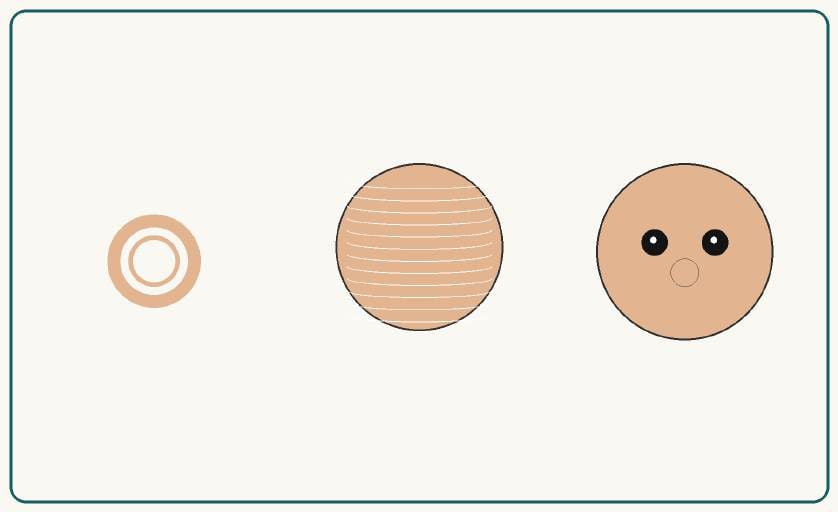
Step 1: Head / top section
Use the standard head as the base under the hat and beard. Stuff lightly, since the hat and beard add most of the finished volume.
Work the Standard Head chart in Before You Begin: R1 6 sc in MR (6); R2 inc ×6 (12); R3 (1 sc, inc) ×6 (18); R4 (2 sc, inc) ×6 (24); R5 (3 sc, inc) ×6 (30); R6 (4 sc, inc) ×6 (36); R7–R10 sc around (36 each); R11 (4 sc, dec) ×6 (30); R12 (3 sc, dec) ×6 (24); R13 (2 sc, dec) ×6 (18); R14 (1 sc, dec) ×6 (12); R15 dec ×6 and close (6).
Stuff after R12. Insert safety eyes before R13 if used. Close firmly after R15. Target head: 5.0–5.5 cm wide and 4.5–5.0 cm tall. Keep the round marker at the back or underside, keep stuffing even with no visible gaps, and measure width before closing.
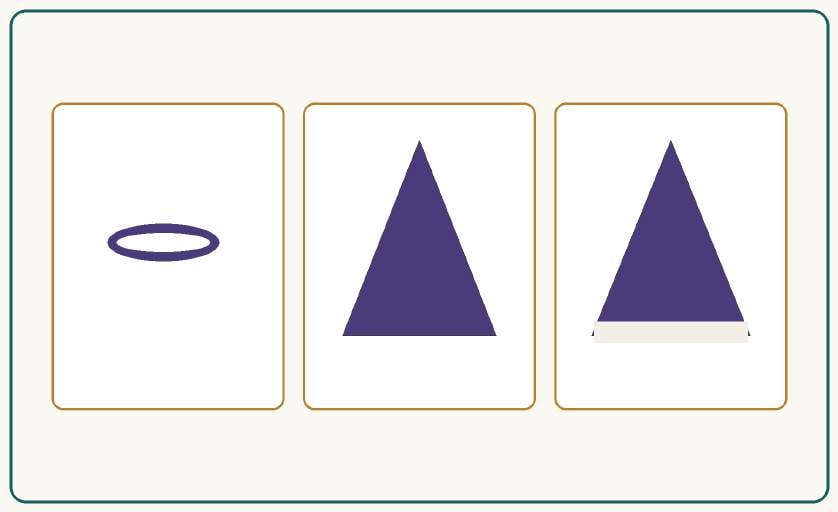
Step 2: Nose, beard, and tall hat
Work the nose as R1 6 sc in MR; R2 inc = 12; R3 sc 12; R4 dec ×6 = 6; lightly stuff and close. Attach the folded cream beard strands along a 3.5–4 cm line and trim them to a tapered 4–5 cm shape. Eyes may be omitted or hidden by the hat to match the finished design.
Work the tall hat as R1 6 sc in MR; R2–R4 sc 6; R5 (1 sc, inc) ×3 = 9; R6 sc 9; R7 (2 sc, inc) ×3 = 12; R8 sc 12; then continue slow increases every two rounds to 30 stitches and work two rounds even. Add an optional brim of one round of reverse sc or regular sc in contrast.
Pin before sewing and sew the hat securely around the back half of the head or base.
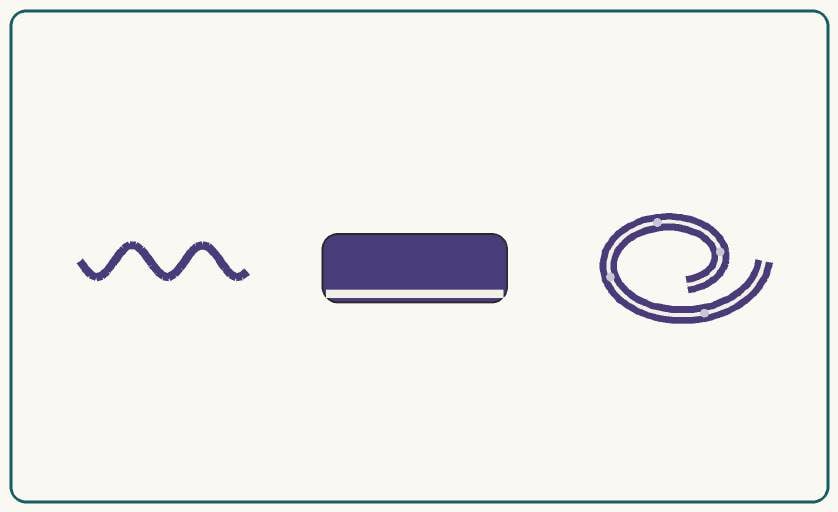
Step 3: Spiral lower body
Spiral crochet chart
| Stage | Instruction | Target |
|---|---|---|
| Foundation | ch 70 loosely | 70 ch |
| Row 1 | From 2nd ch from hook, 3 sc in each chain across | 207 sc |
| Shape | Allow strip to curl naturally; do not twist by force | 14–16 cm |
| Trim | Join contrast at outer edge and sl st evenly along edge | Even |
| Finish | FO leaving 25 cm sewing tail | — |
Base spiral colour: Purple/navy DK #3. Contrast edge is the warm cream-white family from the setup. Work the edge trim only after the spiral has fully curled. Finished relaxed spiral: 14–16 cm from top join to lower curl.
Step 4: Feet, hanging loop, and final assembly
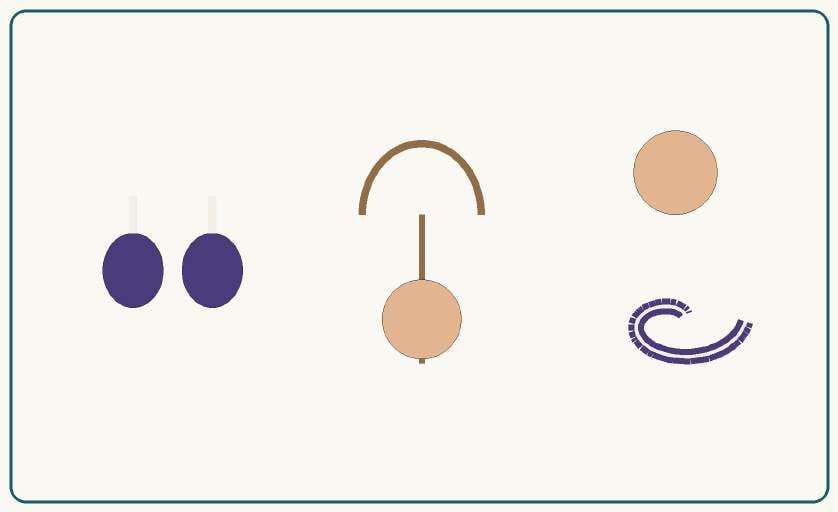
Make two tiny feet in grey using the standard oval method. Attach the hanging loop through the hat tip or crown using the standard method, making sure it is anchored into structural stitches.
Final assembly order: Sew the beard first, then centre the nose over the top of the beard. Pull the hat low so the brim nearly touches the nose. Attach the hat securely around the back half of the head or base. Attach the head to the purple spiral and add matching feet.
Final quality check:
- Full ornament is intact and centred; no part is cropped or omitted.
- No loose yarn tails, beads, or pins remain.
- Head or top section is centred over the lower body.
- Hanging loop supports the ornament without tilting.
- All decorative pieces are sewn through structural stitches.
- Finished measurements are within the target range on the setup section.
10. Angel
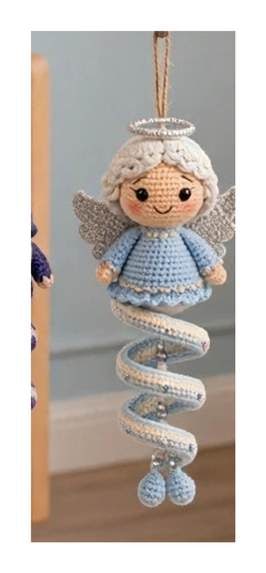
The Angel is the most delicate ornament in the collection: pale blue spiral dress, white loop curls around the crown, a small gold halo blocked into a circle, and two shaped wings with an optional picot edge. She finishes at 24–27 cm, with a 5.0–5.5 cm head, 4.5–5 cm wings, a 4–4.5 cm halo, a 14–16 cm spiral, and a 10–12 cm loop. Anchor the halo at two points so it stays level when hanging.
Setup and materials
| Yarn / colour | Approx. amount | Use |
|---|---|---|
| Skin beige DK #3 | 10 g | Head |
| White DK #3 | 12 g | Hair and trim |
| Pale blue DK #3 | 22 g | Dress and spiral |
| Silver-grey DK #3 | 8 g | Wings and feet |
| Gold/yellow DK or embroidery | 2 g | Halo |
| Black/pink embroidery | 1 g | Eyes, smile, blush |
Tools and materials: Fiberfill 8–10 g; 2 × 8 mm safety eyes OR embroidery; 22–24 cm twine; 2.75 mm and 3.0 mm hooks; tapestry needle; stitch marker; pins; scissors.
Measured preparation: Hanging cord 22–24 cm. Halo: 35–40 cm gold yarn if wrapped or embroidered. Hair curls: 10–12 strands × 7 cm. No structural yarn pre-cut.
Step 1: Head / top section
Use skin beige for the standard head.
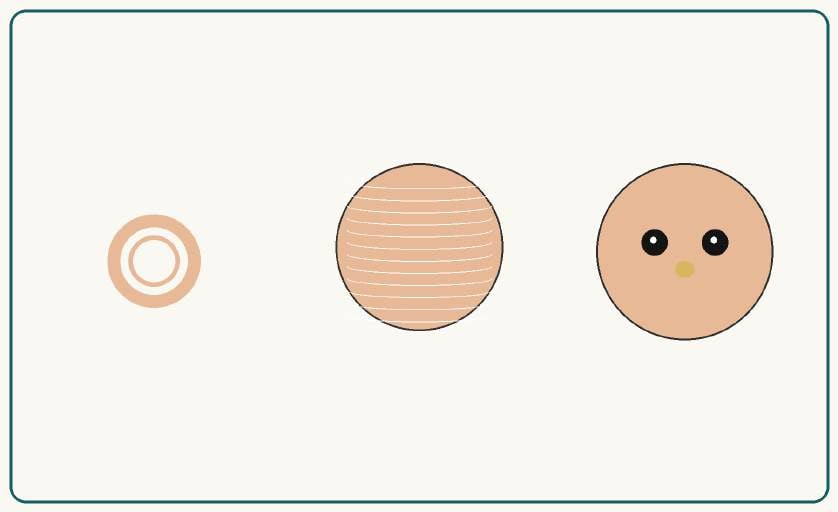
Work the Standard Head chart in Before You Begin: R1 6 sc in MR (6); R2 inc ×6 (12); R3 (1 sc, inc) ×6 (18); R4 (2 sc, inc) ×6 (24); R5 (3 sc, inc) ×6 (30); R6 (4 sc, inc) ×6 (36); R7–R10 sc around (36 each); R11 (4 sc, dec) ×6 (30); R12 (3 sc, dec) ×6 (24); R13 (2 sc, dec) ×6 (18); R14 (1 sc, dec) ×6 (12); R15 dec ×6 and close (6).
Stuff after R12. Insert safety eyes before R13 if used. Close firmly after R15. Target head: 5.0–5.5 cm wide and 4.5–5.0 cm tall. Keep the round marker at the back or underside, keep stuffing even with no visible gaps, and measure width before closing.
Step 2: Face, halo, curls, and wings
Place eyes between R8–R9. Add a smile with three black stitches and blush with three pale pink stitches on each side. Attach 10–12 white loop or curl strands around the crown and sides for the hair.
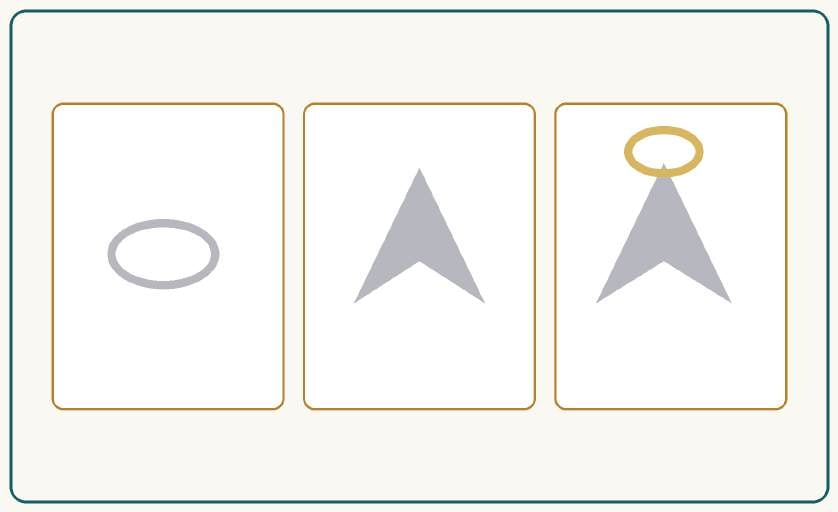
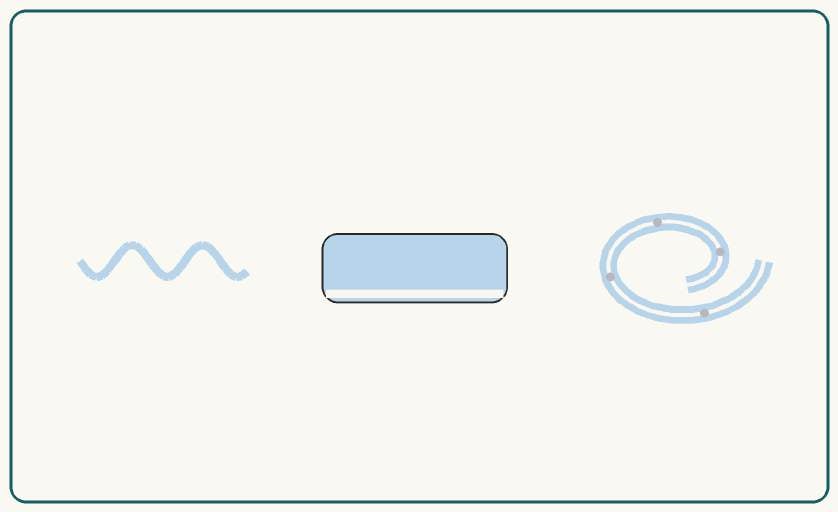
Work the halo as ch 24 loosely, join with a sl st, work one round of sl st or sc, and block it into a 4–4.5 cm circle. Make two wings: ch 7; Row 1 sc 6; Row 2 inc, sc 4, inc = 8; Row 3 sc 8; Row 4 hdc 2, dc 4, hdc 2; Row 5 sc 8; fasten off. Add an optional picot edge of (sl st, ch 2, sl st in same stitch) every two stitches.
Pin the wings and halo before sewing, check symmetry from the front, and sew through structural stitches.
Step 3: Spiral lower body
Spiral crochet chart
| Stage | Instruction | Target |
|---|---|---|
| Foundation | ch 70 loosely | 70 ch |
| Row 1 | From 2nd ch from hook, 3 sc in each chain across | 207 sc |
| Shape | Allow strip to curl naturally; do not twist by force | 14–16 cm |
| Trim | Join contrast at outer edge and sl st evenly along edge | Even |
| Finish | FO leaving 25 cm sewing tail | — |
Base spiral colour: Pale blue DK #3. Contrast edge is the soft cream-white family from the setup. Work the edge trim only after the spiral has fully curled. Finished relaxed spiral: 14–16 cm from top join to lower curl.
Step 4: Feet, hanging loop, and final assembly
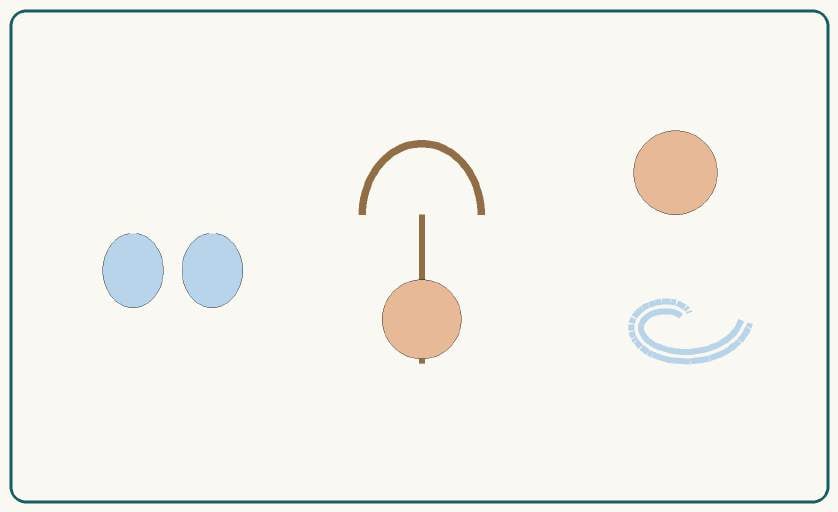
Make two tiny feet in silver-grey or pale blue using the standard oval method. Attach the hanging loop with the standard method, anchoring it so the halo is not the only support point.
Final assembly order: Sew the wings symmetrically behind the head and upper spiral join. Anchor the halo at two points to the hair, not only one. Attach the head to the pale blue spiral and add silver or blue feet. Check that the halo sits level when hanging.
Final quality check:
- Full ornament is intact and centred; no part is cropped or omitted.
- No loose yarn tails, beads, or pins remain.
- Head or top section is centred over the lower body.
- Hanging loop supports the ornament without tilting.
- All decorative pieces are sewn through structural stitches.
- Finished measurements are within the target range on the setup section.
11. Polar Bear
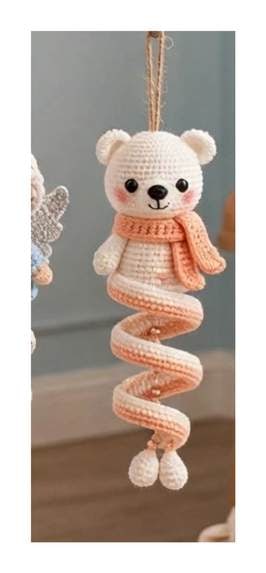
Polar Bear is the softest palette in the set — white and cream with a gentle peach scarf and trim that warms the whole ornament. The ears, oval muzzle, and two-row hdc scarf are all quick makes. He finishes at 24–27 cm, with a 5.0–5.5 cm head, 1.8–2 cm ears, a 14–16 cm spiral, a 9–10 cm scarf, and a 10–12 cm loop. Sew the muzzle before the scarf so the face stays centred.
Setup and materials
| Yarn / colour | Approx. amount | Use |
|---|---|---|
| White/cream DK #3 | 28 g | Head, ears, spiral, feet |
| Peach DK #3 | 10 g | Scarf and spiral trim |
| Black embroidery | 1 g | Eyes, nose, mouth |
| Soft pink | <1 g | Cheeks |
Tools and materials: Fiberfill 8–10 g; 2 × 8 mm safety eyes; 22–24 cm twine; 2.75 mm and 3.0 mm hooks; tapestry needle; stitch marker; pins; scissors.
Measured preparation: Hanging cord 22–24 cm. Scarf tassels 4 × 4 cm. Black nose and mouth embroidery 45 cm. No structural yarn pre-cut.
Step 1: Head / top section
Use white/cream for the standard head.
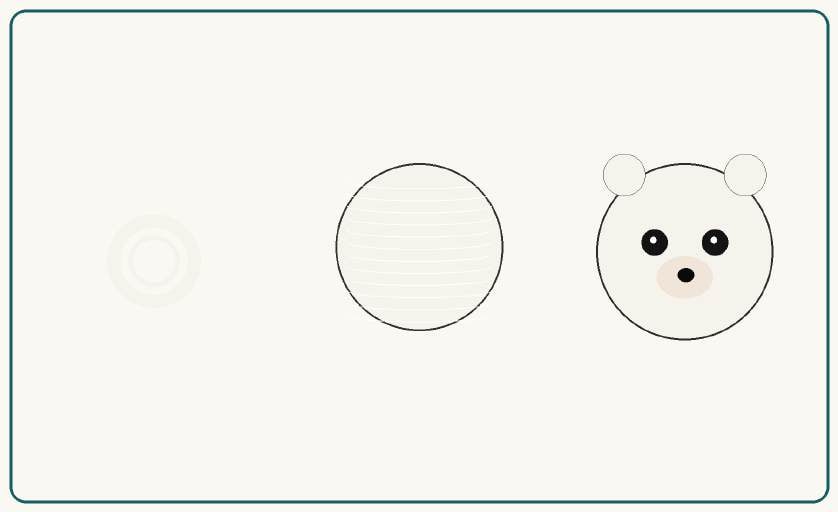
Work the Standard Head chart in Before You Begin: R1 6 sc in MR (6); R2 inc ×6 (12); R3 (1 sc, inc) ×6 (18); R4 (2 sc, inc) ×6 (24); R5 (3 sc, inc) ×6 (30); R6 (4 sc, inc) ×6 (36); R7–R10 sc around (36 each); R11 (4 sc, dec) ×6 (30); R12 (3 sc, dec) ×6 (24); R13 (2 sc, dec) ×6 (18); R14 (1 sc, dec) ×6 (12); R15 dec ×6 and close (6).
Stuff after R12. Insert safety eyes before R13 if used. Close firmly after R15. Target head: 5.0–5.5 cm wide and 4.5–5.0 cm tall. Keep the round marker at the back or underside, keep stuffing even with no visible gaps, and measure width before closing.
Step 2: Ears, muzzle, and peach scarf
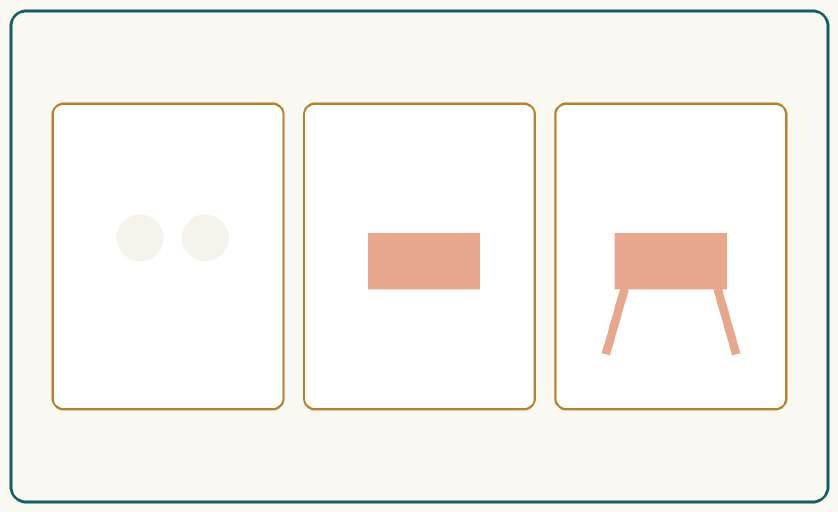
Make two ears: R1 6 sc in MR; R2 inc = 12; R3 sc 12. Fold slightly and fasten off with a 20 cm tail. Work the muzzle as ch 6 with an oval of two rounds to approximately 2.5 × 1.8 cm. Place eyes between R8–R9. Work the nose with black satin stitches centred on the muzzle, then add a short vertical stitch and a curved mouth. Add optional blush with three pale pink stitches on each cheek.
Work the scarf as ch 40, hdc 39. Row 2: hdc 39. Fasten off and add two short tassels to each end.
Sew the ears at the 10 and 2 o'clock positions, pin the muzzle centred below the eyes, and sew through structural stitches.
Step 3: Spiral lower body
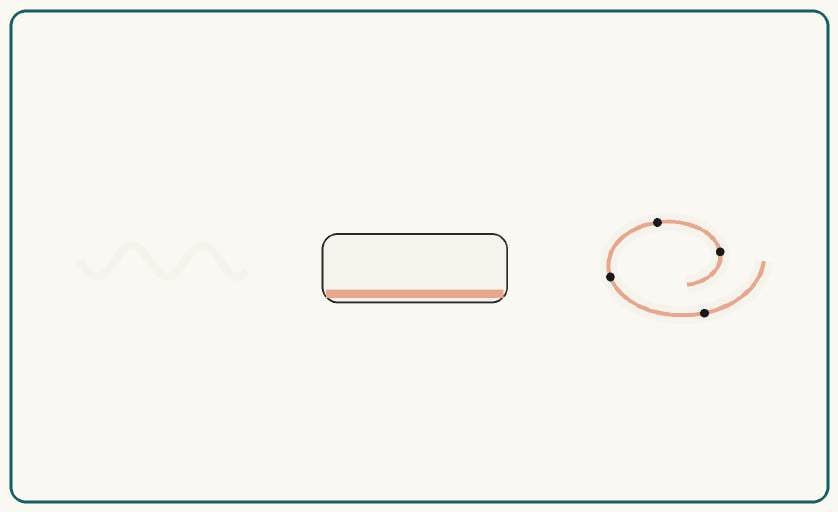
Spiral crochet chart
| Stage | Instruction | Target |
|---|---|---|
| Foundation | ch 70 loosely | 70 ch |
| Row 1 | From 2nd ch from hook, 3 sc in each chain across | 207 sc |
| Shape | Allow strip to curl naturally; do not twist by force | 14–16 cm |
| Trim | Join contrast at outer edge and sl st evenly along edge | Even |
| Finish | FO leaving 25 cm sewing tail | — |
Base spiral colour: White/cream DK #3. Contrast edge is the soft peach family from the setup. Work the edge trim only after the spiral has fully curled. Finished relaxed spiral: 14–16 cm from top join to lower curl.
Step 4: Feet, hanging loop, and final assembly
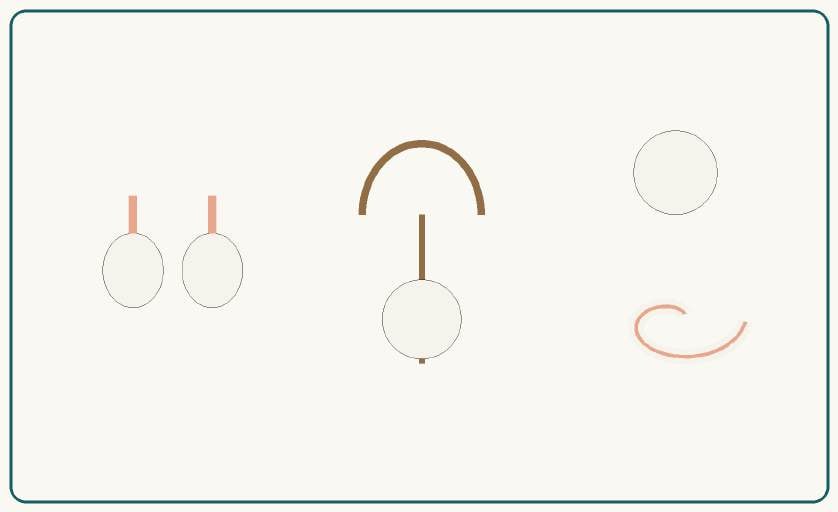
Make two tiny white feet using the standard oval method. Attach the hanging loop with the standard method.
Final assembly order: Sew the ears at 10 and 2 o'clock. Sew the muzzle centred below the eyes before adding the scarf. Wrap and tack the scarf at the side. Attach the head to the cream spiral with peach trim and add the white feet.
Final quality check:
- Full ornament is intact and centred; no part is cropped or omitted.
- No loose yarn tails, beads, or pins remain.
- Head or top section is centred over the lower body.
- Hanging loop supports the ornament without tilting.
- All decorative pieces are sewn through structural stitches.
- Finished measurements are within the target range on the setup section.
12. Christmas Tree
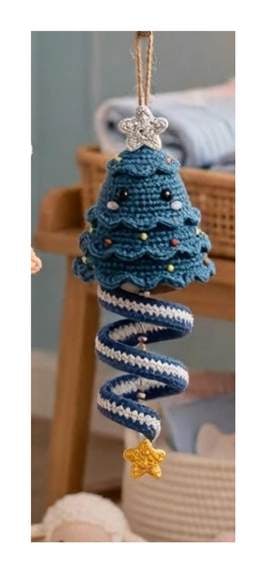
The Christmas Tree closes the collection with a design that needs no face at all — a slowly widening cone worked over 19 rounds, layered branch edges worked into front loops, a tiny five-point gold star on top, and embroidered ornaments scattered across the green. Finished size is 24–28 cm, with a 7–8 cm high × 5.5–6 cm wide tree top, a 14–16 cm spiral, a 2.5–3 cm star, and a 10–12 cm loop. Stuff the cone lightly so it stays crisp rather than round.
Setup and materials
| Yarn / colour | Approx. amount | Use |
|---|---|---|
| Deep teal/green DK #3 | 24 g | Tree top and spiral |
| Blue/navy DK #3 | 8 g | Spiral secondary stripe |
| Gold/yellow DK | 3 g | Star and top accents |
| White/cream DK | 4 g | Spiral edging |
| Multicolour scraps | <1 g each | Ornaments |
Tools and materials: Fiberfill 5–7 g; 22–24 cm twine; 2.75 mm and 3.0 mm hooks; tapestry needle; stitch marker; pins; scissors; optional tiny beads for adult-only decoration.
Measured preparation: Hanging cord 22–24 cm. Ornament embroidery: 20–25 cm of each accent colour. Star sewing tail 20 cm. No structural yarn pre-cut.
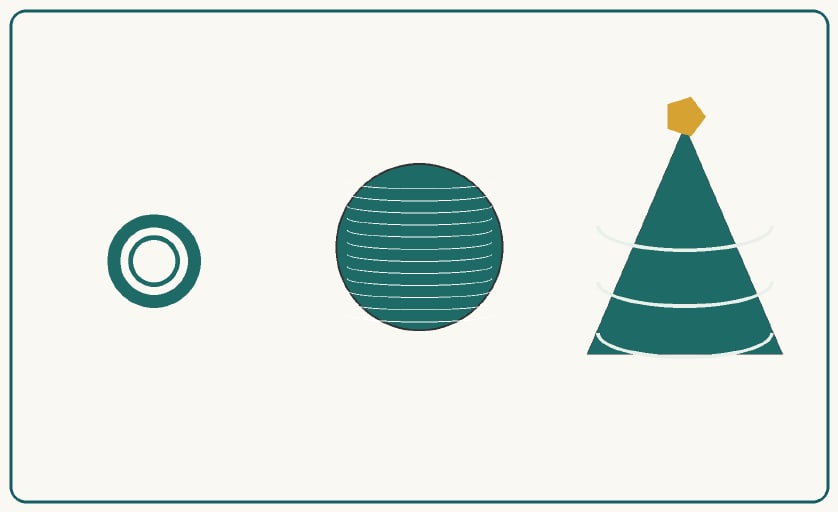
Step 1: Tree top
Unlike the other eleven ornaments, the Tree does not use the standard round head. Work the cone chart below and stuff lightly so the shape stays crisp, not round. Finished tree top: 7–8 cm high and 5.5–6 cm wide at the base.
| Round | Instruction | Count |
|---|---|---|
| R1 | 6 sc in MR | 6 |
| R2 | sc around | 6 |
| R3 | (1 sc, inc) ×3 | 9 |
| R4 | sc around | 9 |
| R5 | (2 sc, inc) ×3 | 12 |
| R6 | sc around | 12 |
| R7 | (3 sc, inc) ×3 | 15 |
| R8 | sc around | 15 |
| R9 | (4 sc, inc) ×3 | 18 |
| R10 | sc around | 18 |
| R11 | (5 sc, inc) ×3 | 21 |
| R12 | sc around | 21 |
| R13 | (6 sc, inc) ×3 | 24 |
| R14 | sc around | 24 |
| R15 | (7 sc, inc) ×3 | 27 |
| R16 | sc around | 27 |
| R17 | (8 sc, inc) ×3 | 30 |
| R18–R19 | sc around | 30 each |
Keep the round marker at the back or underside. Keep stuffing even with no visible gaps, and measure width before closing, adjusting stuffing rather than stitch count for minor correction.
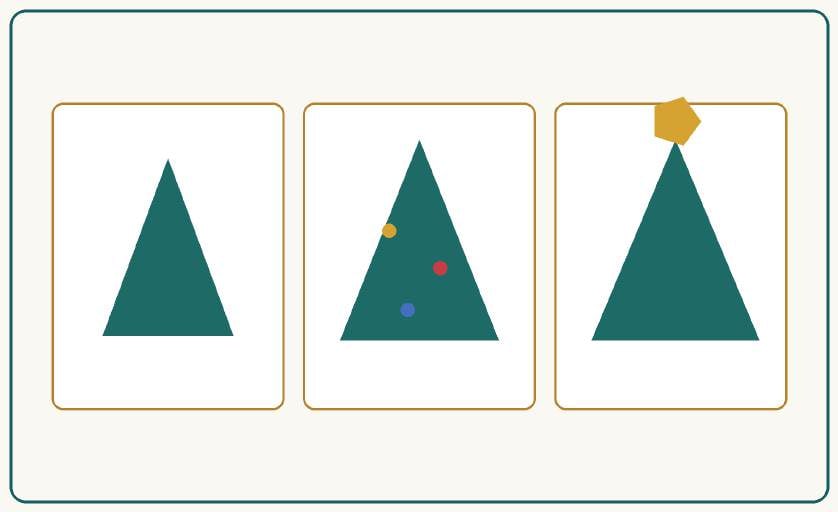
Step 2: Layered cone, gold star, and ornaments
No face is required for this design. Decorate with tiny French knots, surface stitches, or securely sewn beads for adult decor only. For a child-safe finish, use embroidery only and omit beads.
Work the tree cone exactly as in Step 1. To create the layered branch edge, in selected FLO rounds repeat (sl st, hdc, dc, hdc) around. Work the star as ch 2 with five small points made from ch 3 and sl st loops around a tiny magic ring; fasten off and block it flat.
Pin the star and ornaments before sewing. Sew the star securely to the top point and sew or embroider ornaments through structural stitches.
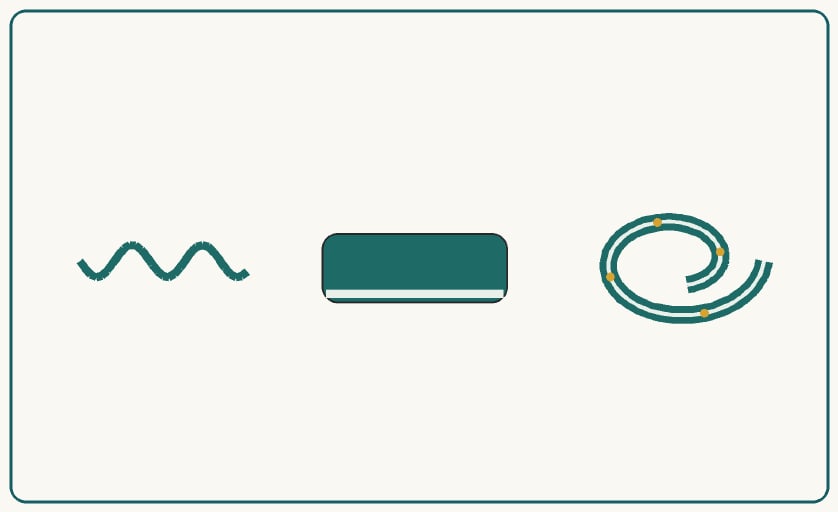
Step 3: Spiral lower body
Spiral crochet chart
| Stage | Instruction | Target |
|---|---|---|
| Foundation | ch 70 loosely | 70 ch |
| Row 1 | From 2nd ch from hook, 3 sc in each chain across | 207 sc |
| Shape | Allow strip to curl naturally; do not twist by force | 14–16 cm |
| Trim | Join contrast at outer edge and sl st evenly along edge | Even |
| Finish | FO leaving 25 cm sewing tail | — |
Base spiral colour: Deep teal/green DK #3. Contrast edge is the soft cream-green family from the setup. Add white edge trim after the spiral has curled. Work the edge trim only after the spiral has fully curled. Finished relaxed spiral: 14–16 cm from top join to lower curl.
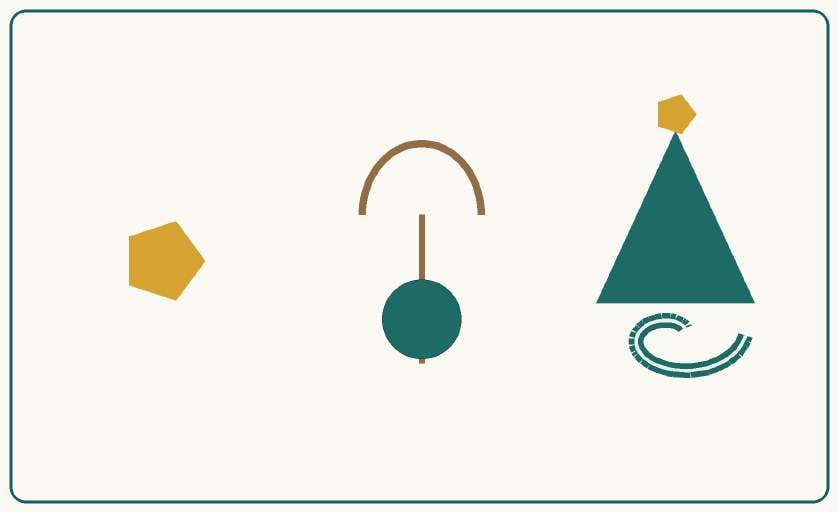
Step 4: Lower pendant, hanging loop, and final assembly
Crochet a second small five-point star using the same star method as the topper, or use a matching gold star charm for adult decor only. Attach it to the spiral end with a 3–4 cm cord so it hangs freely. For child-safe use, crochet the star and do not use a metal charm.
Attach the hanging loop through the top of the tree using the standard loop method and lift-test.
Final assembly order: Sew the star securely to the top point. Add embroidered ornaments before joining the spiral. Attach the tree top centred to the teal and navy spiral and add white edge trim. Finish the lower end with the gold star charm or crocheted star, matching the product look.
Final quality check:
- Full ornament is intact and centred; no part is cropped or omitted.
- No loose yarn tails, beads, or pins remain.
- Head or top section is centred over the lower body.
- Hanging loop supports the ornament without tilting.
- All decorative pieces are sewn through structural stitches.
- Finished measurements are within the target range on the setup section.
Finishing the full collection
Complete one full ornament before batch-making multiples. Record your actual yarn brand, hook, and finished measurement after the first sample and use those values for the remaining set, so all twelve hang at a consistent size across the tree.
If a spiral is too tight, remake the foundation chain looser. If it does not curl, confirm 3 sc were worked into every foundation chain. If an ornament hangs sideways, move the hanging loop attachment point before knotting permanently.
Store the finished ornaments flat or hang them from a wide rail so the spirals are not crushed. Keep them away from direct heat, and spot-clean gently rather than soaking, to protect embroidery and any glued or sewn star details.
A note on sizing: Stitch arithmetic in this pattern has been checked for internal consistency, but finished size still depends on yarn and individual tension. A physical test-crochet of one sample is always the final production check before selling the finished ornaments or listing the pattern as fully tested.
Quick checklist before you hang them
- [ ] Gauge swatch matches 22–24 sc × 24–26 rounds = 10 cm
- [ ] Standard head measures 5.0–5.5 cm wide before closing
- [ ] Spiral relaxed length is 14–16 cm and curls without forcing
- [ ] Edge trim worked only after the spiral has fully curled
- [ ] Feet are equal length (1.8–2.2 cm) and attached at the same height
- [ ] Hanging loop is 10–12 cm finished, knotted inside, ends hidden
- [ ] Lift test passed — front faces forward without twisting
- [ ] No loose tails, pins, or beads remain
- [ ] Child-safe versions use embroidered eyes only
Happy crocheting — make one as a test, then enjoy working through the full dozen at your own pace. This set looks beautiful mixed across one tree, split into gift sets of three or four, or sold as a complete 12-piece collection.
Pattern note: This post presents the Christmas Spiral Ornaments 12-in-1 pattern in full. Use the step photos for placement and the written rounds and counts as your authoritative guide. Colours are named by family — substitute your favourite DK / light worsted (#3) yarns in matching tones for your own palette.
The box below contains an Etsy link. If you buy through it, we may earn a small commission at no extra cost to you. Learn more.
No time to make one?
Find handmade crochet spiral Christmas ornaments from independent makers on Etsy.
Browse on Etsy (opens Etsy in a new tab)