Crochet hanging plants free pattern: 3 no-water beauties
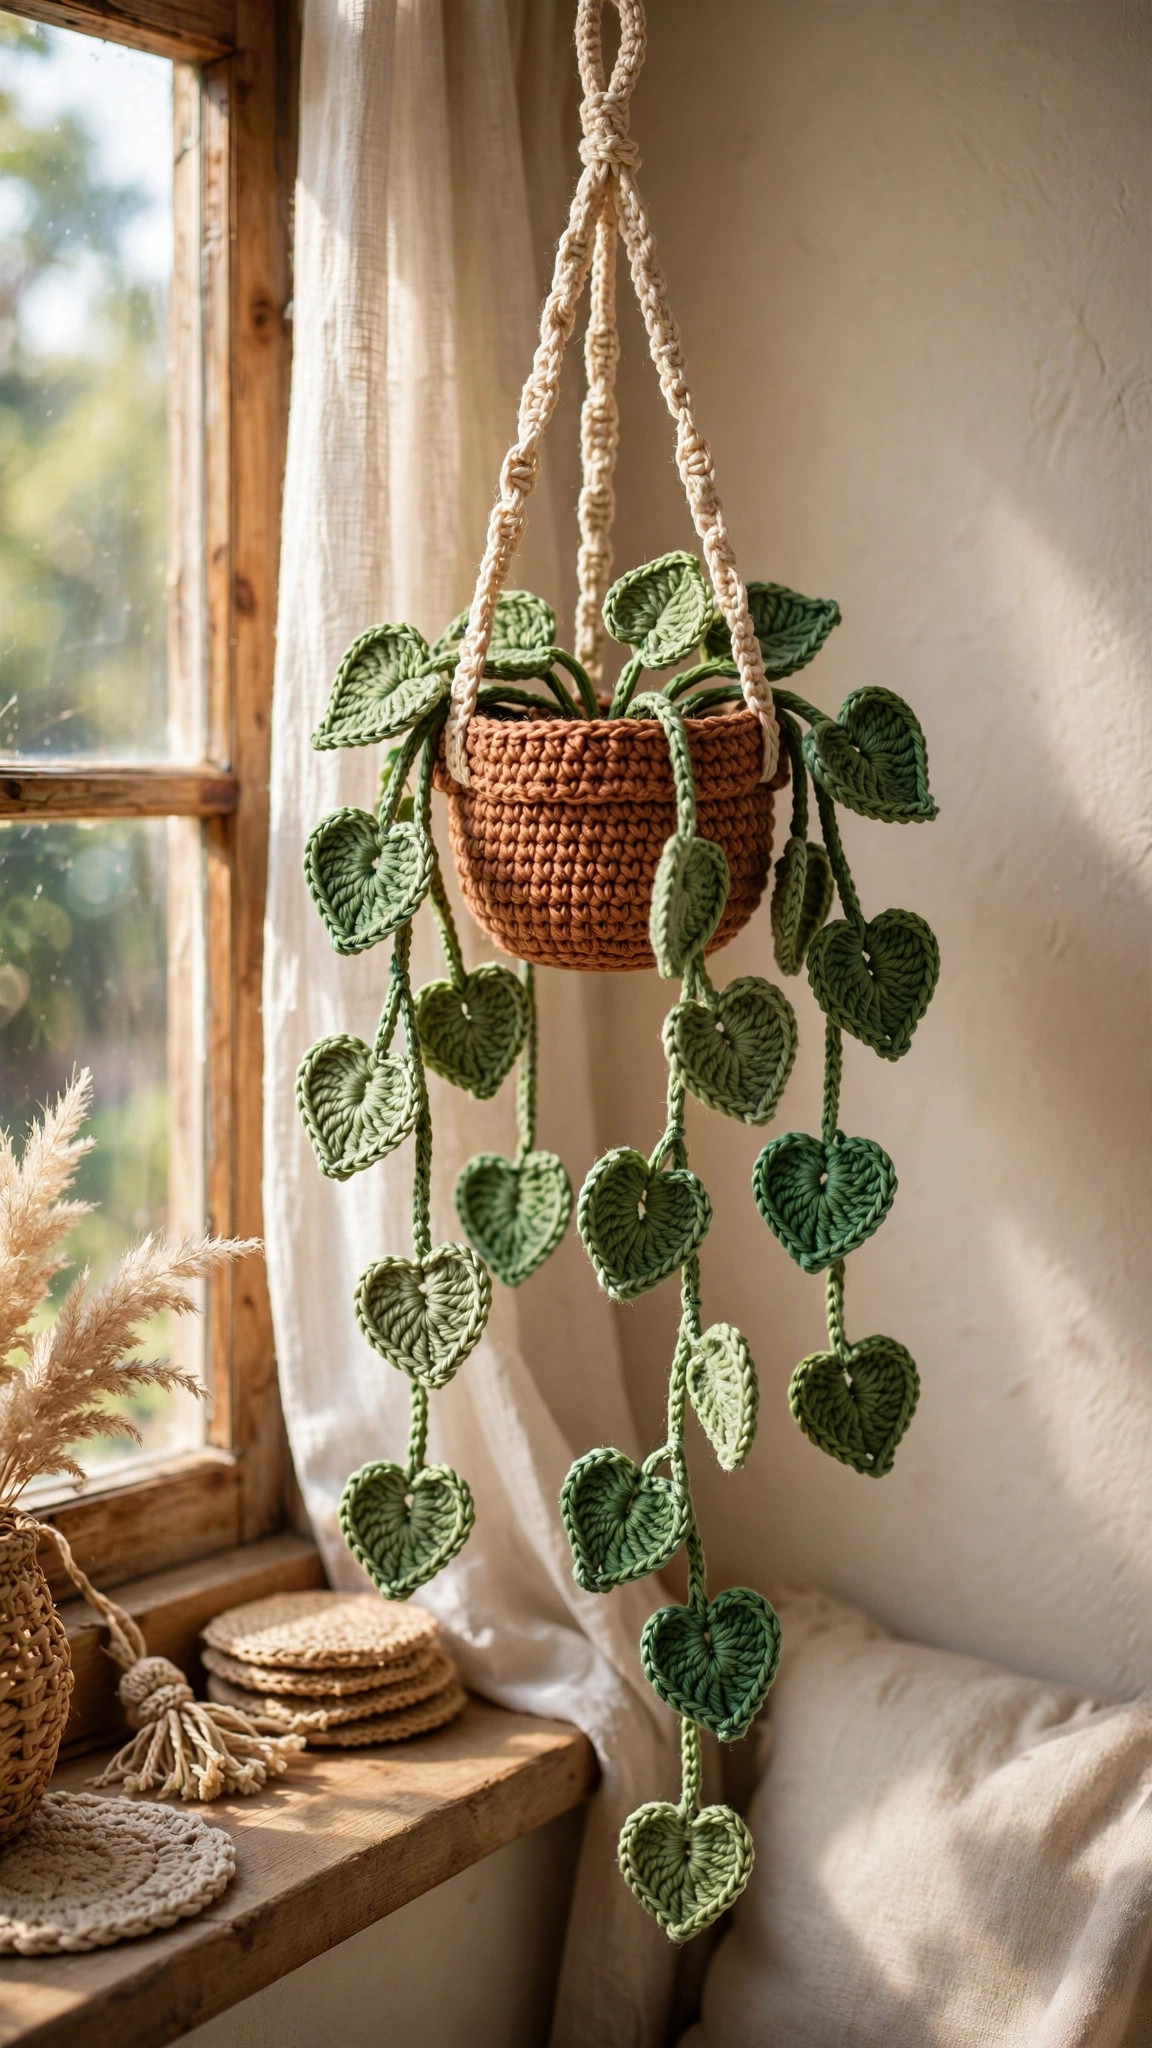
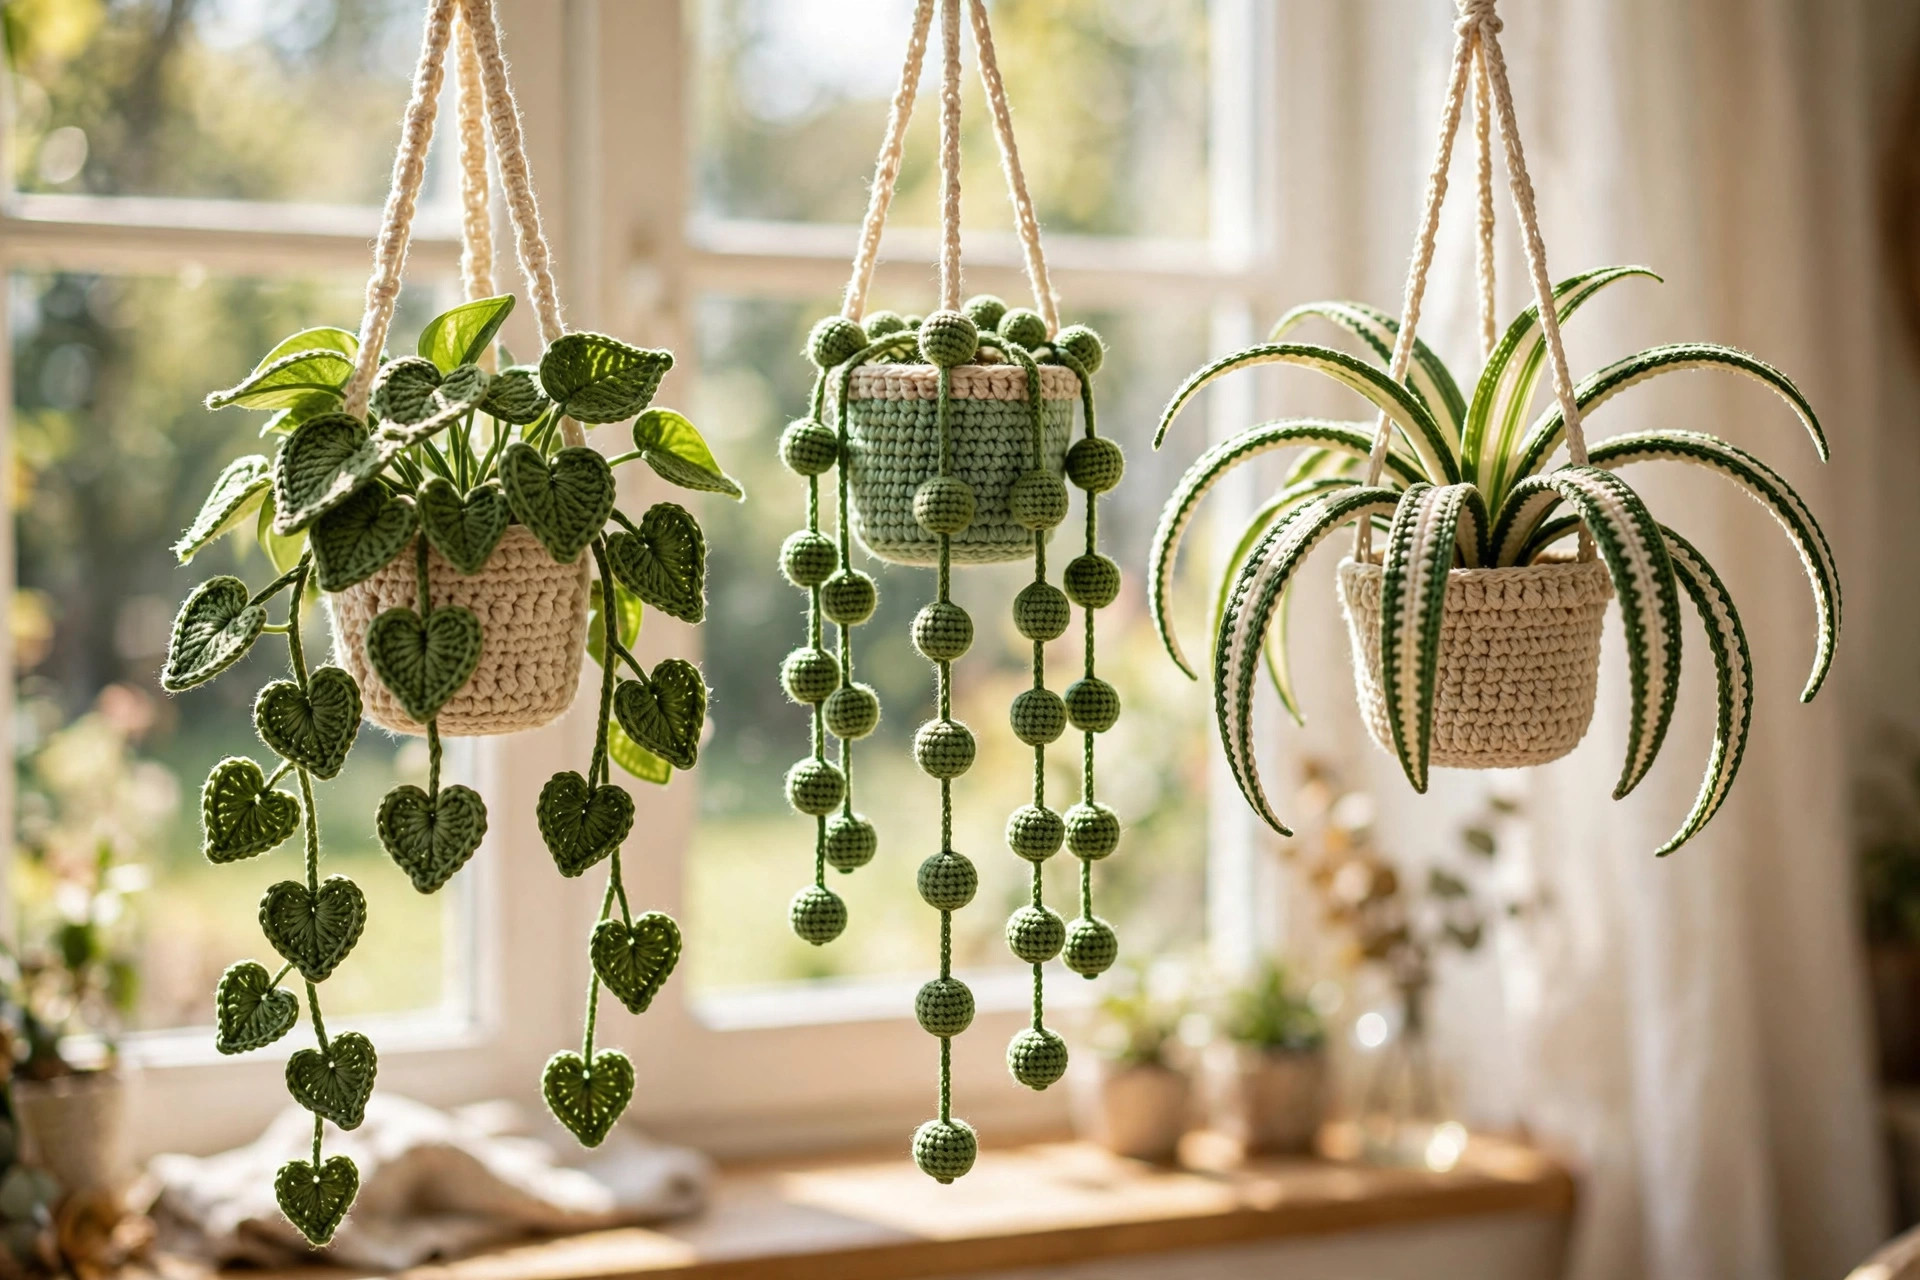
Three no-water crochet beauties — a trailing pothos with heart-shaped leaves on long chains, a string-of-pearls dripping with bobble beads, and a spider plant with arching striped leaves — each in its own little crocheted terracotta pot with a simple cord-and-loop hanger.

Home Decor · Crochet
- Finished size
- Hangs about 20–35 cm / 8–14 in
- Making time
- About 2–3 hours per plant
- Hook
- 4.0 mm, worsted-weight yarn
- Pieces
- 3 plants, 3 pots, 3 hangers
- Skill
- Beginner
In this post
There is a special kind of joy in owning plants that can never die on you. No watering schedule to forget, no guilt when you go on vacation — just cheerful little green things dangling by your brightest window, lush all year round. This original pattern gives you all three: a trailing pothos with heart-shaped leaves, a string-of-pearls dripping with bobble beads, and a spider plant with arching striped leaves — each in its own little crocheted pot with a simple hanger cord and loop, ready to hang the moment you finish.
Why you'll love this crochet hanging plants pattern
Most crochet plant patterns fall into two traps: fiddly botanical replicas that take a week, or shapes so simplified they read as "green blob in a pot." This design lands in the sweet spot — three instantly recognizable houseplants built from simple techniques: heart-shaped pothos leaves, classic bobbles marching along chains for the pearls, and flat striped rows that arch naturally for the spider plant.
Everything is original stitch math, and each plant is built from the same shared pot, hanger cord, and "root ball" core — so once you've made one, the rest fly by. They're also perfect stash-busters for all those half-skeins of green, cream, and terracotta yarn.
The hanger needs no macramé, beads, or hardware — just chain-stitch cords gathered into a simple crocheted loop, so your plant hangs from any hook, doorknob, or curtain rod.
Materials you'll need
| Supply | What to get |
|---|---|
| Terracotta yarn | Worsted-weight (#4) acrylic or cotton in terracotta/rust, about 60 g (makes all 3 pots) |
| Green yarn | Worsted-weight (#4) in medium green, about 80 g total |
| Dark green yarn | Worsted-weight (#4) in darker green, about 20 g (pearls) |
| Cream yarn | Worsted-weight (#4) in cream or ivory, about 30 g (spider plant stripes) |
| Hanger yarn | Worsted-weight (#4) in natural jute-tone tan or matching terracotta, about 30 g |
| Crochet hook | 4.0 mm (G-6) |
| Stuffing | Polyester fiberfill, a small handful (for the 3 root balls) |
| Notions | Tapestry needle, stitch markers, scissors, small hook or doorknob for hanging |
A note on yarn choice: smooth worsted-weight acrylic is ideal — crisp stitch definition for the leaves and bobbles, and it holds its shape on the hanger cords. Cotton works too, with a slightly stiffer, more botanical drape. Avoid fluffy yarns; you want to see every heart leaf and bobble clearly. Mixed greens are a plus — real plants come in dozens of green tones.
Size, gauge and skill level
- Finished size: each plant hangs about 20–35 cm (8–14 in) from hanger loop to longest tip; pots are about 7 cm (2.75 in) tall and 7 cm across.
- Gauge: not critical — what matters is pot fabric dense enough to hold its shape and hide the root ball. Floppy pot? Drop to a 3.5 mm hook for the pot only. As a rough guide, 4 single crochets should measure about 2.5 cm (1 in).
- Skill level: confident beginner. Know the magic ring, chain, single crochet, half double crochet, double crochet, increase, and decrease. The bobble stitch is explained below — you'll master it on the first strand.
New to chains and basic stitches? Start with the easy beginner crochet patterns collection, then come back to this trio with total confidence.
Bobble stitch refresher: work five unfinished double crochets into the SAME stitch (6 loops on hook), then yarn over and pull through all 6 loops. One round green bead, done — push it gently with your fingertip so it pops to the front.
Abbreviations — US terms
| Abbreviation | Meaning |
|---|---|
| MR | magic ring |
| sc | single crochet |
| hdc | half double crochet |
| dc | double crochet |
| bobble | 5-dc bobble (explained above) |
| inc | increase (2 sc in the same stitch) |
| dec | decrease (sc 2 together — invisible decrease recommended) |
| st(s) | stitch(es) |
| ch | chain |
| sl st | slip stitch |
| BLO | back loop only |
| R | round |
| FO | fasten off |
The pattern (US terms)
Work in continuous spirals for pot and root ball unless noted. Mark the first stitch of each round on the pot — stitch counts are in parentheses. Count carefully on R3–R4; later rounds build on those numbers.
The little terracotta pot — make 3
Worked bottom-up in terracotta, one pot per plant.
- R1: MR, 6 sc (6)
- R2: inc in each st (12)
- R3: [sc, inc] × 6 (18)
- R4: [2 sc, inc] × 6 (24)
- R5: working in BLO, sc in each st around (24) — this creates the crisp crease where the pot base meets the wall
- R6–R9: sc in each st around (24) — 4 rounds even
- R10 (rim): [5 sc, inc] × 4 (28) — a gentle flare for the pot rim
- R11: sc in each st around (28). FO and weave in the end.
Tip: the pot is intentionally unstuffed — the root ball (below) fills it. If the wall looks wavy after R6, don't worry; once the root ball is sewn inside, everything sits snugly.
The root ball — make 3
This little stuffed ball anchors every leaf, vine, and strand, and wedges inside the pot so nothing ever shifts.
- R1: MR, 6 sc (6)
- R2: inc in each st (12)
- R3: [sc, inc] × 6 (18)
- R4–R5: sc in each st around (18) — 2 rounds even
- Stuff lightly — firm enough to hold shape, soft enough to push a needle through.
- R6: [sc, dec] × 6 (12). FO and cinch closed.
Set each root ball inside its pot, top roughly level with the rim, and whipstitch it to the pot interior (6–8 stitches around the base) so it can't twist or lift out.
The hanger cord and loop — make 3
Simple and sturdy, worked in your jute-tone or terracotta yarn.
- Hanging loop: ch 20, sl st into the first ch to form a ring. FO. This ring goes over your hook or doorknob.
- Cords — make 3 per plant: ch 60 (about 30 cm / 12 in), FO leaving a 15 cm (6 in) tail.
Assembly: fold each cord in half, push the folded loop through the hanging ring, and pull the cord ends through it — a lark's-head knot. You now have 6 cord ends; pair them into 3 pairs and sew each pair to the pot rim at three evenly spaced points (about 9 stitches apart on R11), going through the rim twice for strength. Check the pot hangs level, then trim the tails.
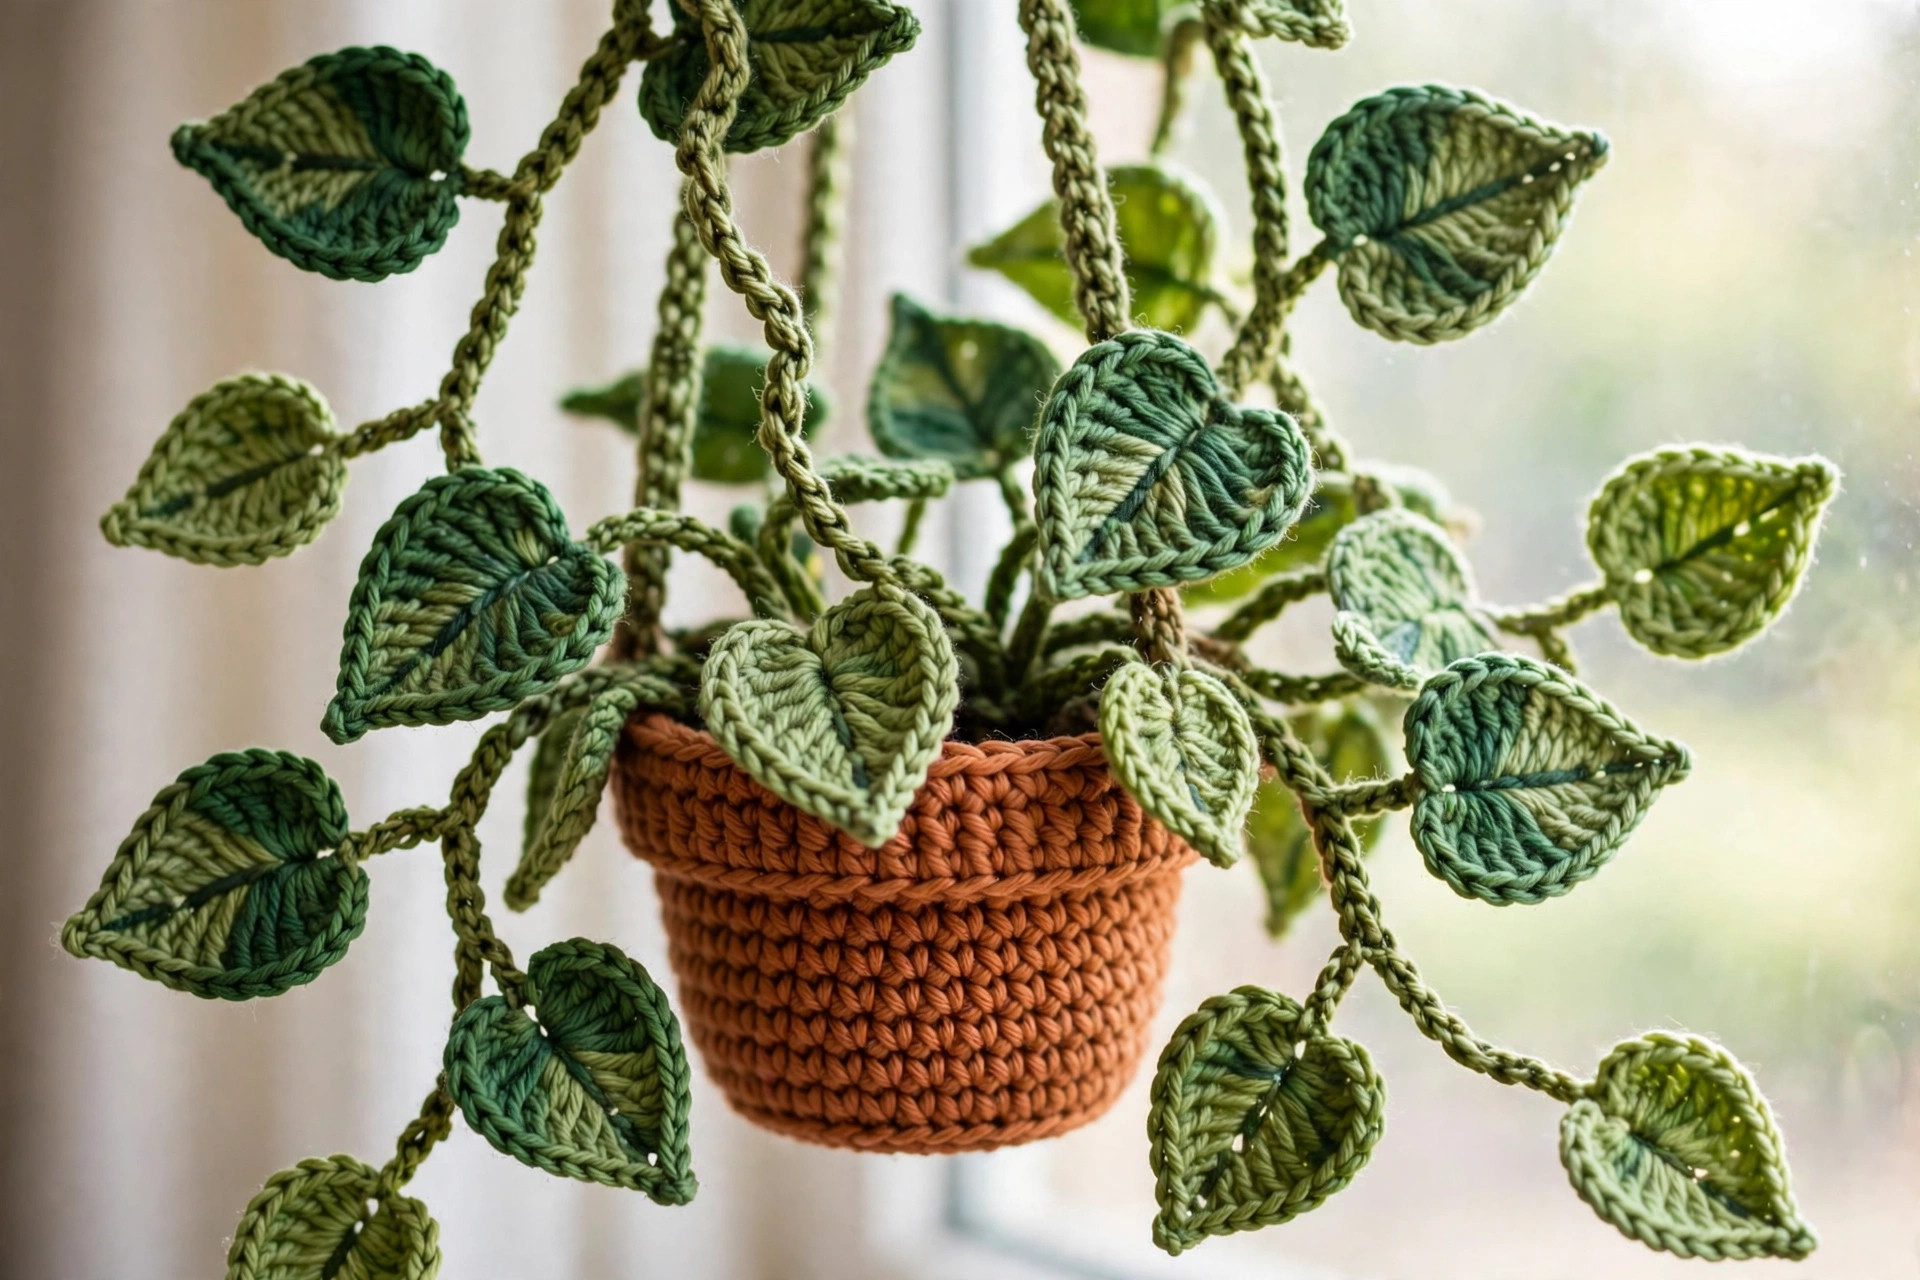
Plant 1: trailing pothos — heart-shaped leaves on chains
The easiest of the three: five graduated vines studded with heart leaves.
Heart leaf — make 12–14
Each leaf takes about two minutes once you're in the groove. Worked in medium green.
- Ch 7. In the 2nd ch from the hook: sc, then hdc in the next ch, dc in the next 2 chs, 3 dc in the next ch (this is the leaf tip), then working down the opposite side of the starting chain: dc in the next 2 chs, hdc in the next ch, sc in the last ch.
- Join with a sl st to the first sc — a little heart/leaf shape with a pointed tip.
- Stem: ch 4, FO, leaving a 10 cm (4 in) tail — this doubles as your sewing thread.
For the heart notch, pinch the two top corners together and tack them with one stitch of the tail — one tiny stitch suggests that classic pothos cleft.
Vines — make 5, in graduated lengths
- Vine A: ch 45 · Vine B: ch 55 · Vine C: ch 65 · Vine D: ch 75 · Vine E: ch 85.
Attach 2–3 heart leaves per vine: using the leaf's stem tail, whipstitch the leaf base to the vine chain every 7–9 chains, alternating sides. The longest vine gets 3 leaves, the shortest 2. Weave tails into the chain, then sew each vine top to the root ball, spacing them so the vines cascade over the rim in every direction — longest vine lowest at the front.
Plant 2: string-of-pearls — bobble beads
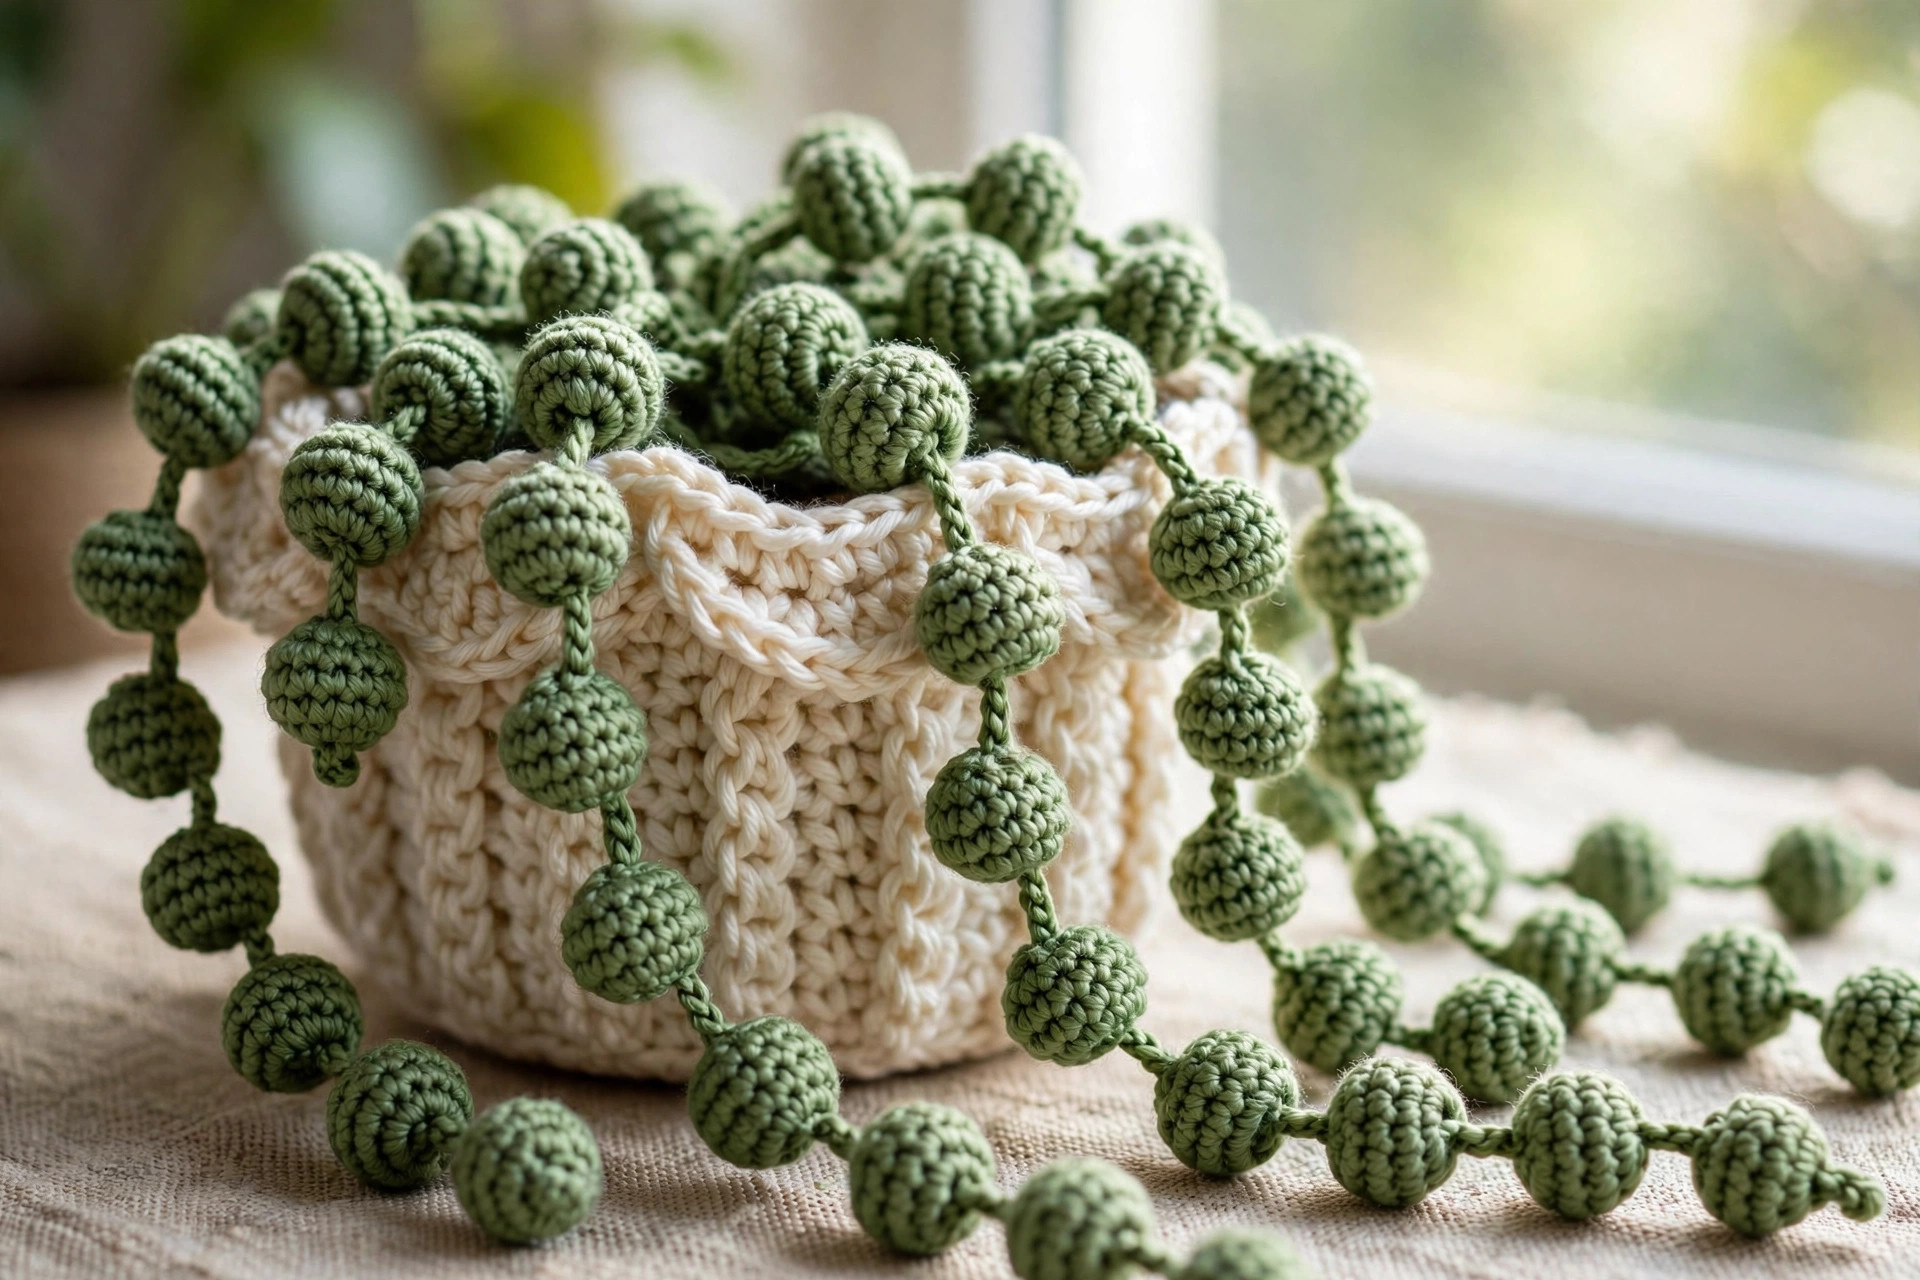
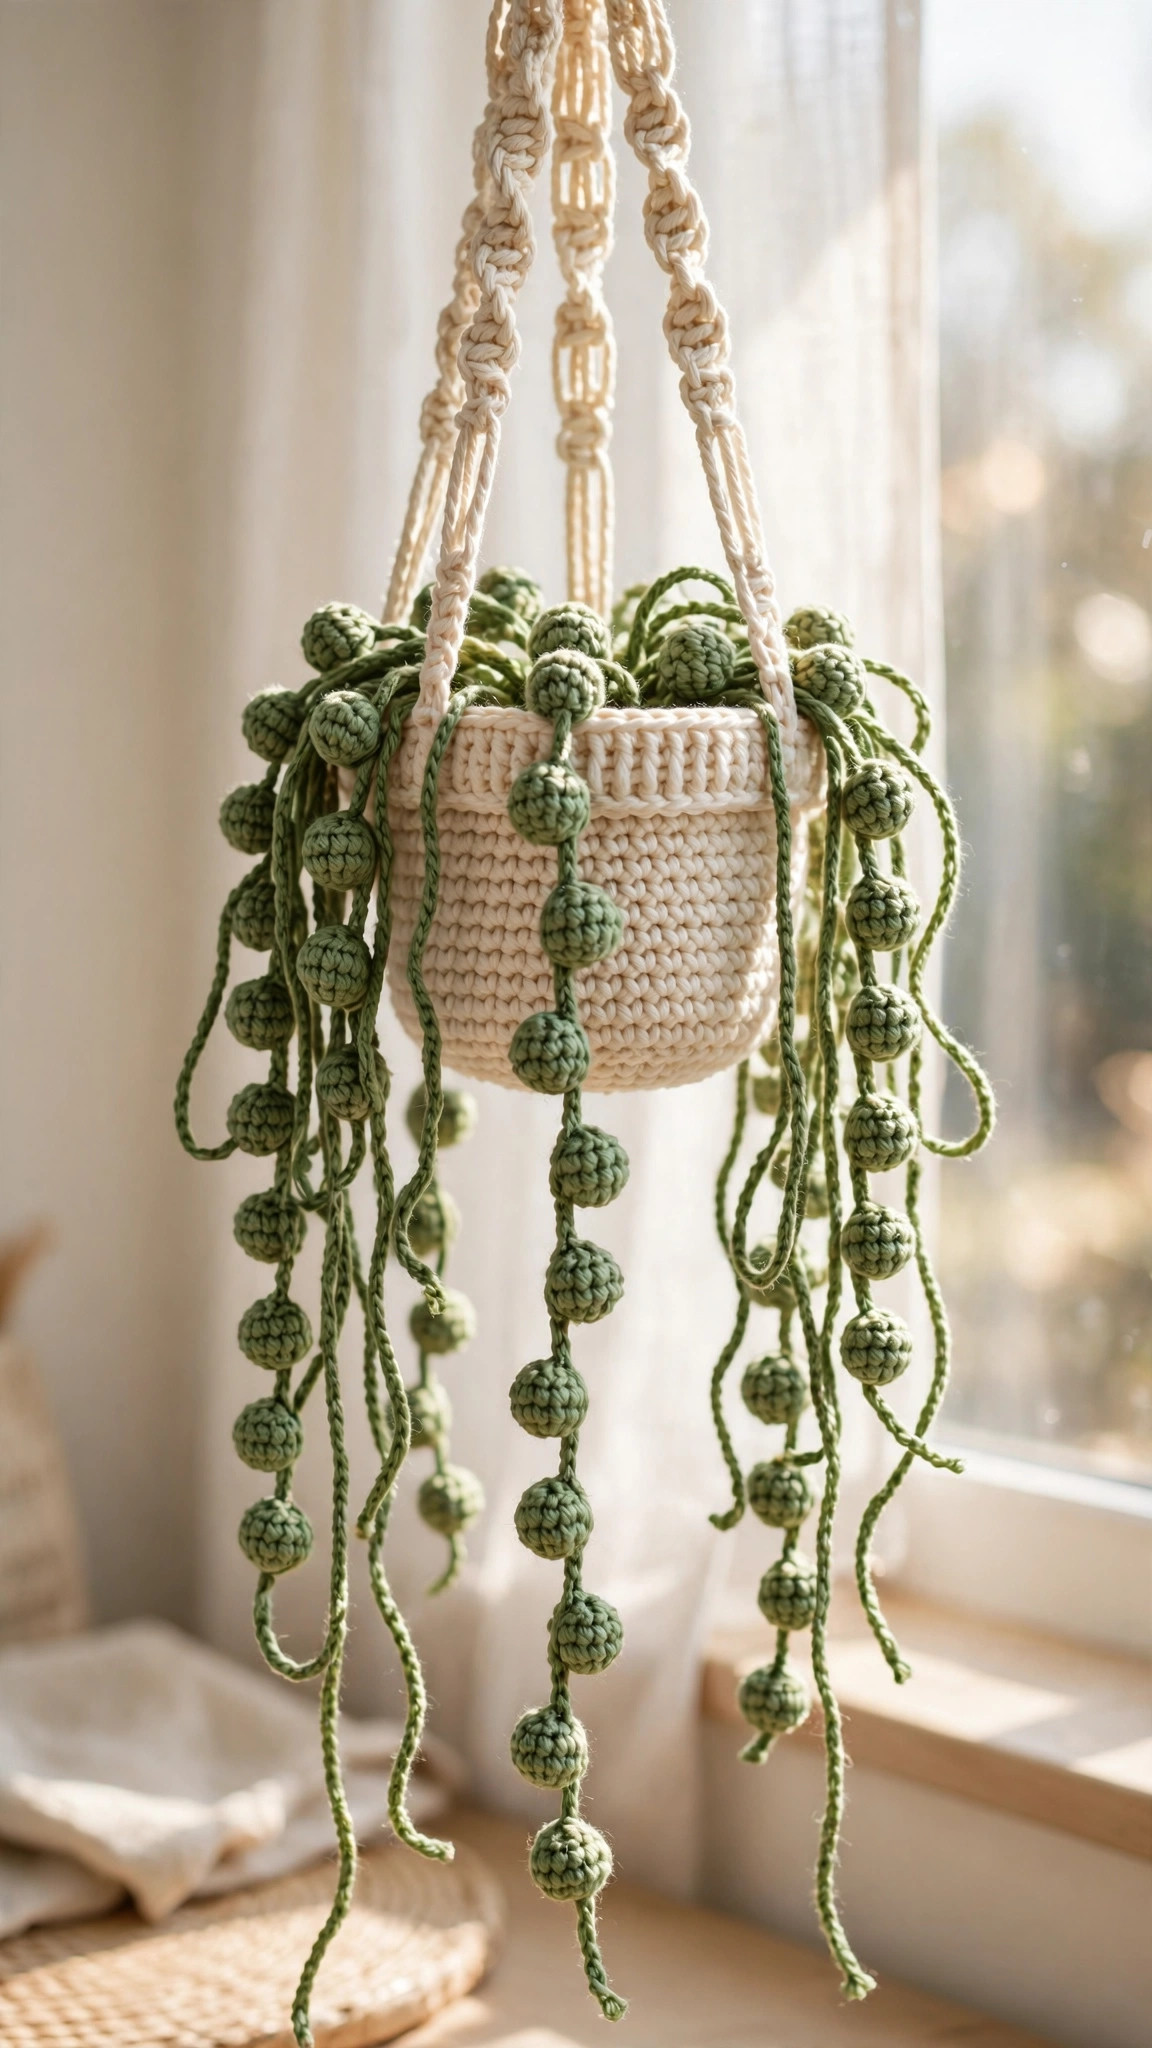
The crowd favorite: long strands of round green bobbles spilling over the pot rim. Worked in the darker green so the beads read clearly.
Pearl strands — make 7, in graduated lengths
- Strand lengths: ch 50, 55, 60, 65, 70, 75, 80.
Along each chain: skip the first ch, sl st in the next 2 chs, then [bobble in the next ch, sl st in the next 3 chs] — repeat to the end. FO, leaving a 10 cm (4 in) tail.
Each strand has a bobble every 4th chain. Push every bobble gently to the same side with your fingertip so they face outward like beads on a string. Sew each strand's starting end to the top of the root ball, longest strands at the front — 7 strands give a lovely full curtain of pearls.
Tip: a lopsided bobble almost always means the five unfinished double crochets weren't all in the same chain. Undo just that bobble and redo it.
Plant 3: spider plant — arching striped leaves
The showpiece: long striped leaves that arch and fountain over the pot, worked flat in rows alternating green and cream.
Striped leaf — make 10
- With green, ch 24.
- Row 1 (green): sc in the 2nd ch from the hook and in each ch across (23).
- Row 2 (cream): ch 1, turn, sc in each st across (23). To change color: work the last sc of a row until two loops remain, then complete it with the new color.
- Row 3 (green): ch 1, turn, sc in each st across (23).
- Row 4 (cream): ch 1, turn, sc in each st across (23).
- Row 5 (green): ch 1, turn, sc2tog, sc in next 19 sts, sc2tog (21).
- Row 6 (cream): ch 1, turn, sc2tog, sc in next 17 sts, sc2tog (19).
- Row 7 (green): ch 1, turn, sc2tog, sc in next 15 sts, sc2tog (17). FO, weave in the ends.
Don't cut at color changes — carry the unused color up the side edge; it gets buried in the root ball anyway.
To get the arch: pin the 10 leaves around the root ball like the hours on a clock face, bases angled outward, then sew. Gravity and the taper do the rest — the leaves fountain outward and droop at the tips like a real spider plant. For extra arch, bend each leaf gently downward after sewing; acrylic "remembers" a soft crease.
Putting each plant together — the order that works
- Root ball in the pot. Whipstitch each stuffed root ball inside its pot (6–8 stitches), top roughly level with the rim.
- Plant the greenery. Pothos: sew vine tops around the ball, longest front-center. Pearls: sew strand ends across the top, longest front. Spider: pin the 10 leaf bases around the ball like a clock face, then sew down.
- Drape and arrange. Hold the pot up, let everything fall naturally, and nudge anything crowded — you want air between the trails.
- Attach the hanger. Lark's-head the cords onto the ring, pair the six ends into three pairs, and sew each pair to the pot rim. Check it's level before trimming tails.
- Final fluff. Separate any stuck-together leaves or bobbles, bend the spider leaves outward, and admire your no-water garden.
Finishing touches
This ten-minute step separates "cute craft" from "wait, that's CROCHET?" Give each plant a quick styling session.
Shape the pothos hearts. If you skipped the heart cleft, add the tacking stitch now. Curl a couple of longer vines loosely around your finger for a soft spiral — acrylic holds the curve beautifully.
Face the pearls outward. Push every bobble to face outward and slightly down. This is what makes the strands read as beads instead of lumpy chains — five minutes that transform the plant.
Arch the spider leaves. Bend each striped leaf gently outward and down until you get an even fountain shape. If one leaf flops forward, tack its base at a steeper angle with one extra stitch.
Level the hangers. If one pot tilts, the cord pair on the low side is too long — undo its rim stitches, shorten by a centimeter, re-sew. A tilted pot looks thirsty, which is ironic for a plant that never drinks.
Fun variations to try next
Same pot and hanger, new personalities:
- Autumn trailing vine. Make the pothos vines in rust orange, mustard, and deep red, inspired by the maple leaves palette. Instant October decor.
- Mini herb garden. Shorten the strands (ch 30–40) and work the pothos leaves in spring green for a kitchen-window herb garden. Tuck a tiny flower from the crochet flower pattern into the root ball.
- Pastel nursery trio. Work all three in soft pastels — mint, blush, cream — with white pots. Lovely over a changing table or in a reading nook, and completely safe around little hands: no soil, no small parts.
- Giant statement pothos. Double the vine lengths and make 20+ leaves for one dramatic pothos in a bigger pot (add two increase rounds to the pot: [3 sc, inc] × 6 (30), then [4 sc, inc] × 6 (36), and continue as written). Incredible in a stairwell or over a bookshelf.
If trailing things are your new obsession, the crochet garland pattern uses the same technique at party-decor scale, and the crochet basket pattern gives your real plants a handmade home.
Troubleshooting tips
- The pot won't sit straight on the hanger. Attach the three cord pairs at evenly spaced rim points — with 28 rim stitches, roughly every 9th stitch. Re-sew any pair that's off.
- The vines/strands look sparse. You need more of them, not longer ones — fullness comes from count. Add 2–3 more vines or strands; the pothos wants at least 5 vines to look lush.
- Bobbles face every which way. Normal — push each one outward with your fingertip once the strand is sewn on.
- The spider plant leaves flop instead of arching. Anchor the leaf bases deeper into the root ball at a steeper outward angle — deeper anchoring means a stronger arch.
- Heart leaves look like blobs. The 3-dc tip and pinched heart cleft make the shape read. Skipped the cleft tack? Add it now — one stitch transforms blob into heart.
- The root ball peeks out over the pot rim. Push it down, add whipstitches lower on the pot wall, or trim a little stuffing. The top should sit at or below the rim, hidden by greenery.
- Messy stripes on the spider leaves. Complete the last stitch of each row with the new color and carry the unused yarn up the edge instead of cutting. Clean stripes, no ends to weave.
Frequently asked questions
Is this crochet hanging plants pattern really free?
Yes — the complete pattern for all three plants is free above, no signup or purchase required. Sharing the post or saving it on Pinterest is the kindest thank-you.
What skill level do I need?
Confident beginner. If you can work a magic ring, chain, single crochet, and double crochet, you have everything you need — the bobble is just five unfinished double crochets joined together. Start with the pothos, the simplest of the three.
How long does the whole trio take?
About 2–3 hours per plant including pot and hanger, so 6–9 hours for all three. Each plant is a complete project on its own — most makers finish the pothos in one evening, then cascade into the other two over the weekend.
How do I hang them without damaging my walls?
The crocheted loop slips over anything: an adhesive hook, curtain rod, doorknob, or nail. Each plant is very light (under 50 g), so a small removable adhesive hook holds one easily — perfect for renters.
Can I sell the finished plants I make?
Yes! You may sell finished plants from this pattern in small batches (craft fairs, Etsy, gifts). Please credit Little Loop Finds with a link back to this page. The pattern text and photos themselves may not be redistributed or sold.
Will the hanging cords stretch over time?
Acrylic can relax slightly, but each plant weighs almost nothing, so stretching is minimal. If one hanger looks longer than its siblings, steam it briefly from a kettle (at a distance, never touching) — or re-tie the lark's-head knot a centimeter higher.
Can I make just one plant instead of all three?
Absolutely — each plant stands alone, and the pot, root ball, and hanger are written so you can make exactly one set. That said, the trio at slightly different heights is greater than the sum of its parts, and plants two and three work up much faster once the pot is memorized.
More free patterns to try
If trailing greenery was fun, keep the hook moving. The crochet garland is the natural next project — same chain-and-motif rhythm at festive scale. Leaf lovers should try the maple leaves, the crochet flower pattern gives you blossoms to tuck into any arrangement, and the crochet basket makes a handmade home for your real plants' pots. Still building skills? The easy beginner patterns collection is the perfect next stop.
The box below contains an Etsy link. If you buy through it, we may earn a small commission at no extra cost to you. Learn more.
No time to make one?
Short on time? Find handmade crochet hanging plants from independent makers on Etsy.
Browse on Etsy (opens Etsy in a new tab)