Maple Leaves Crochet Pattern: Free Fall Leaf Motif
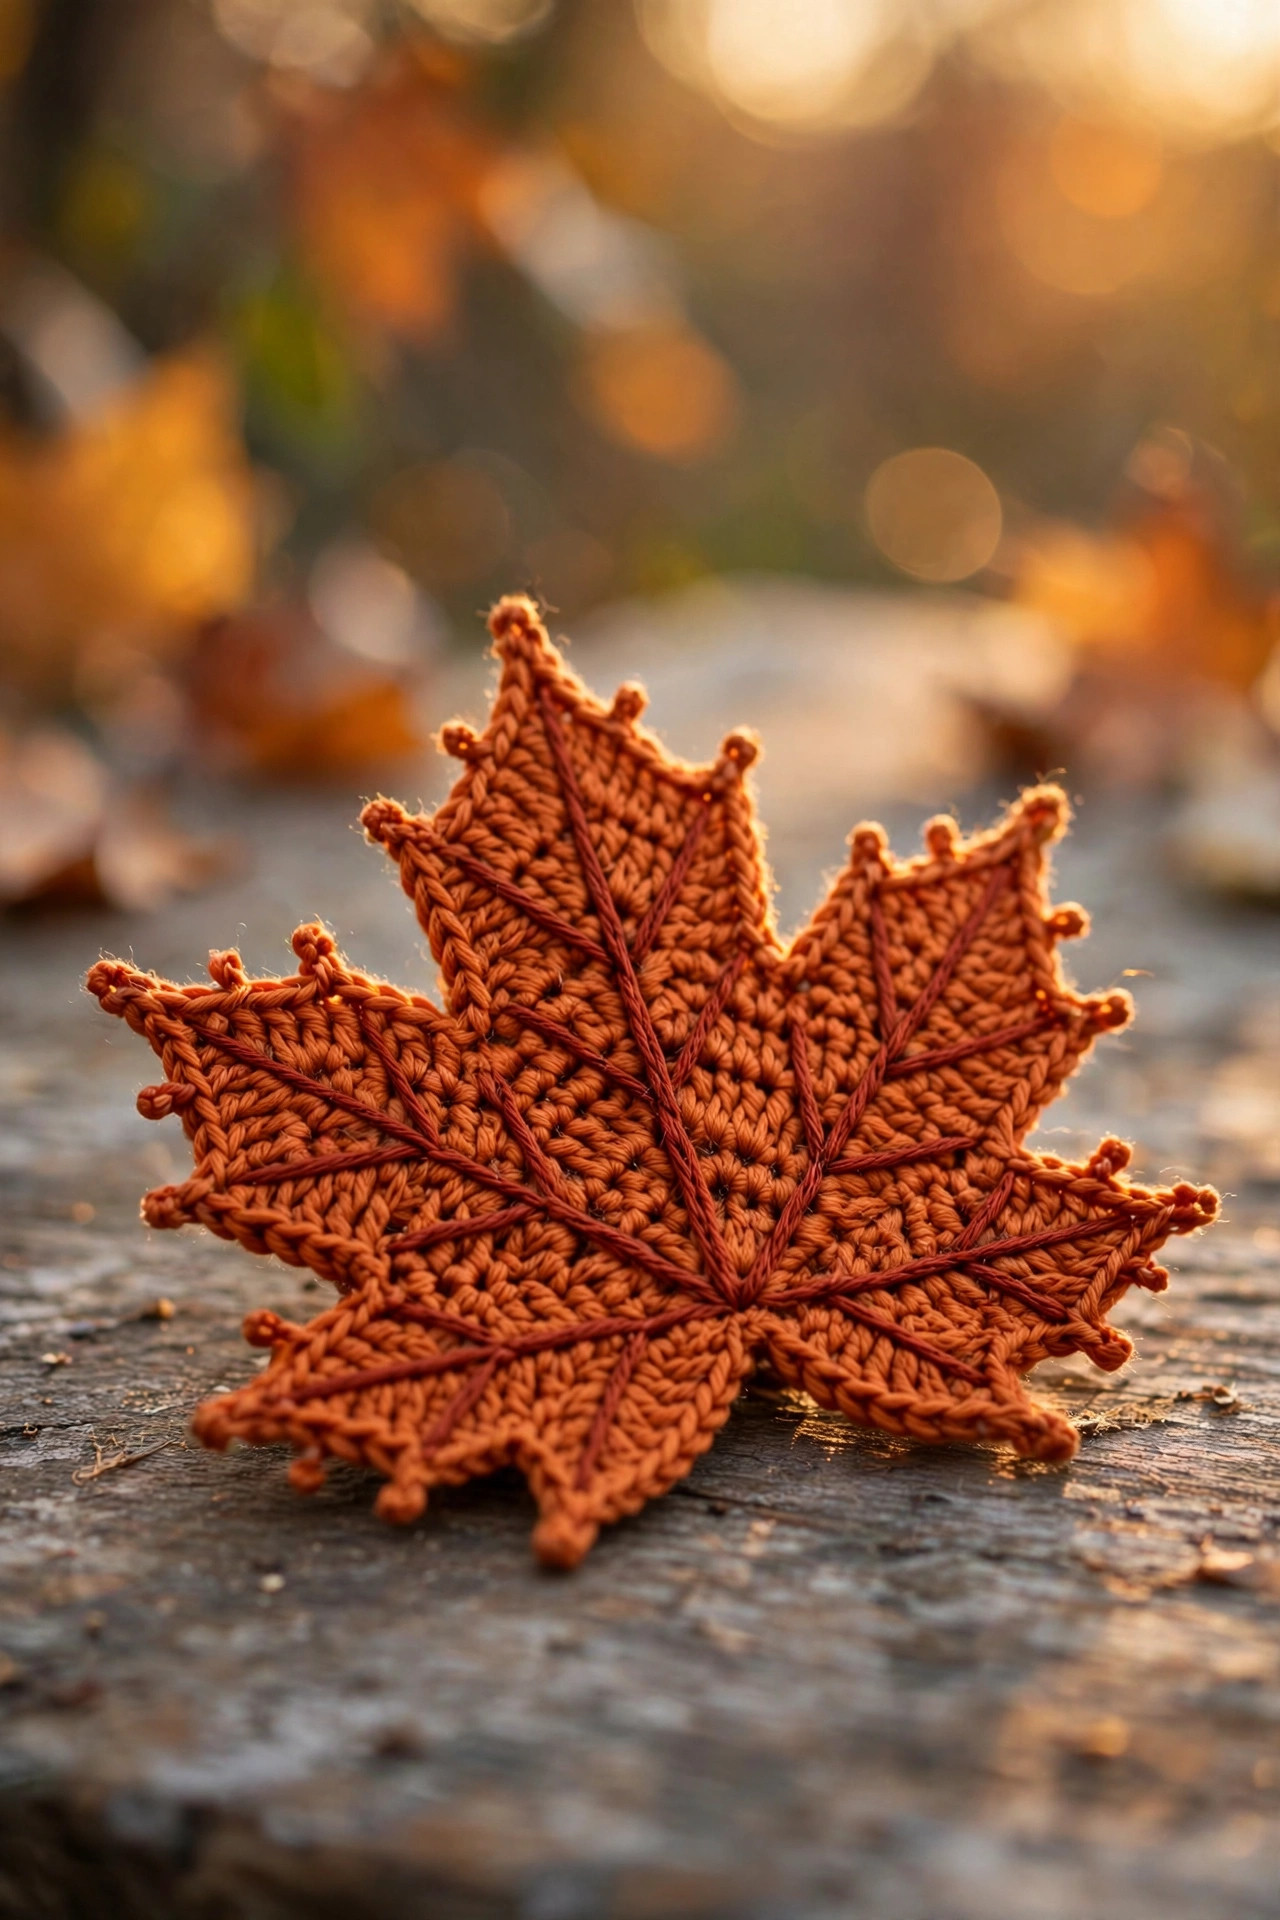
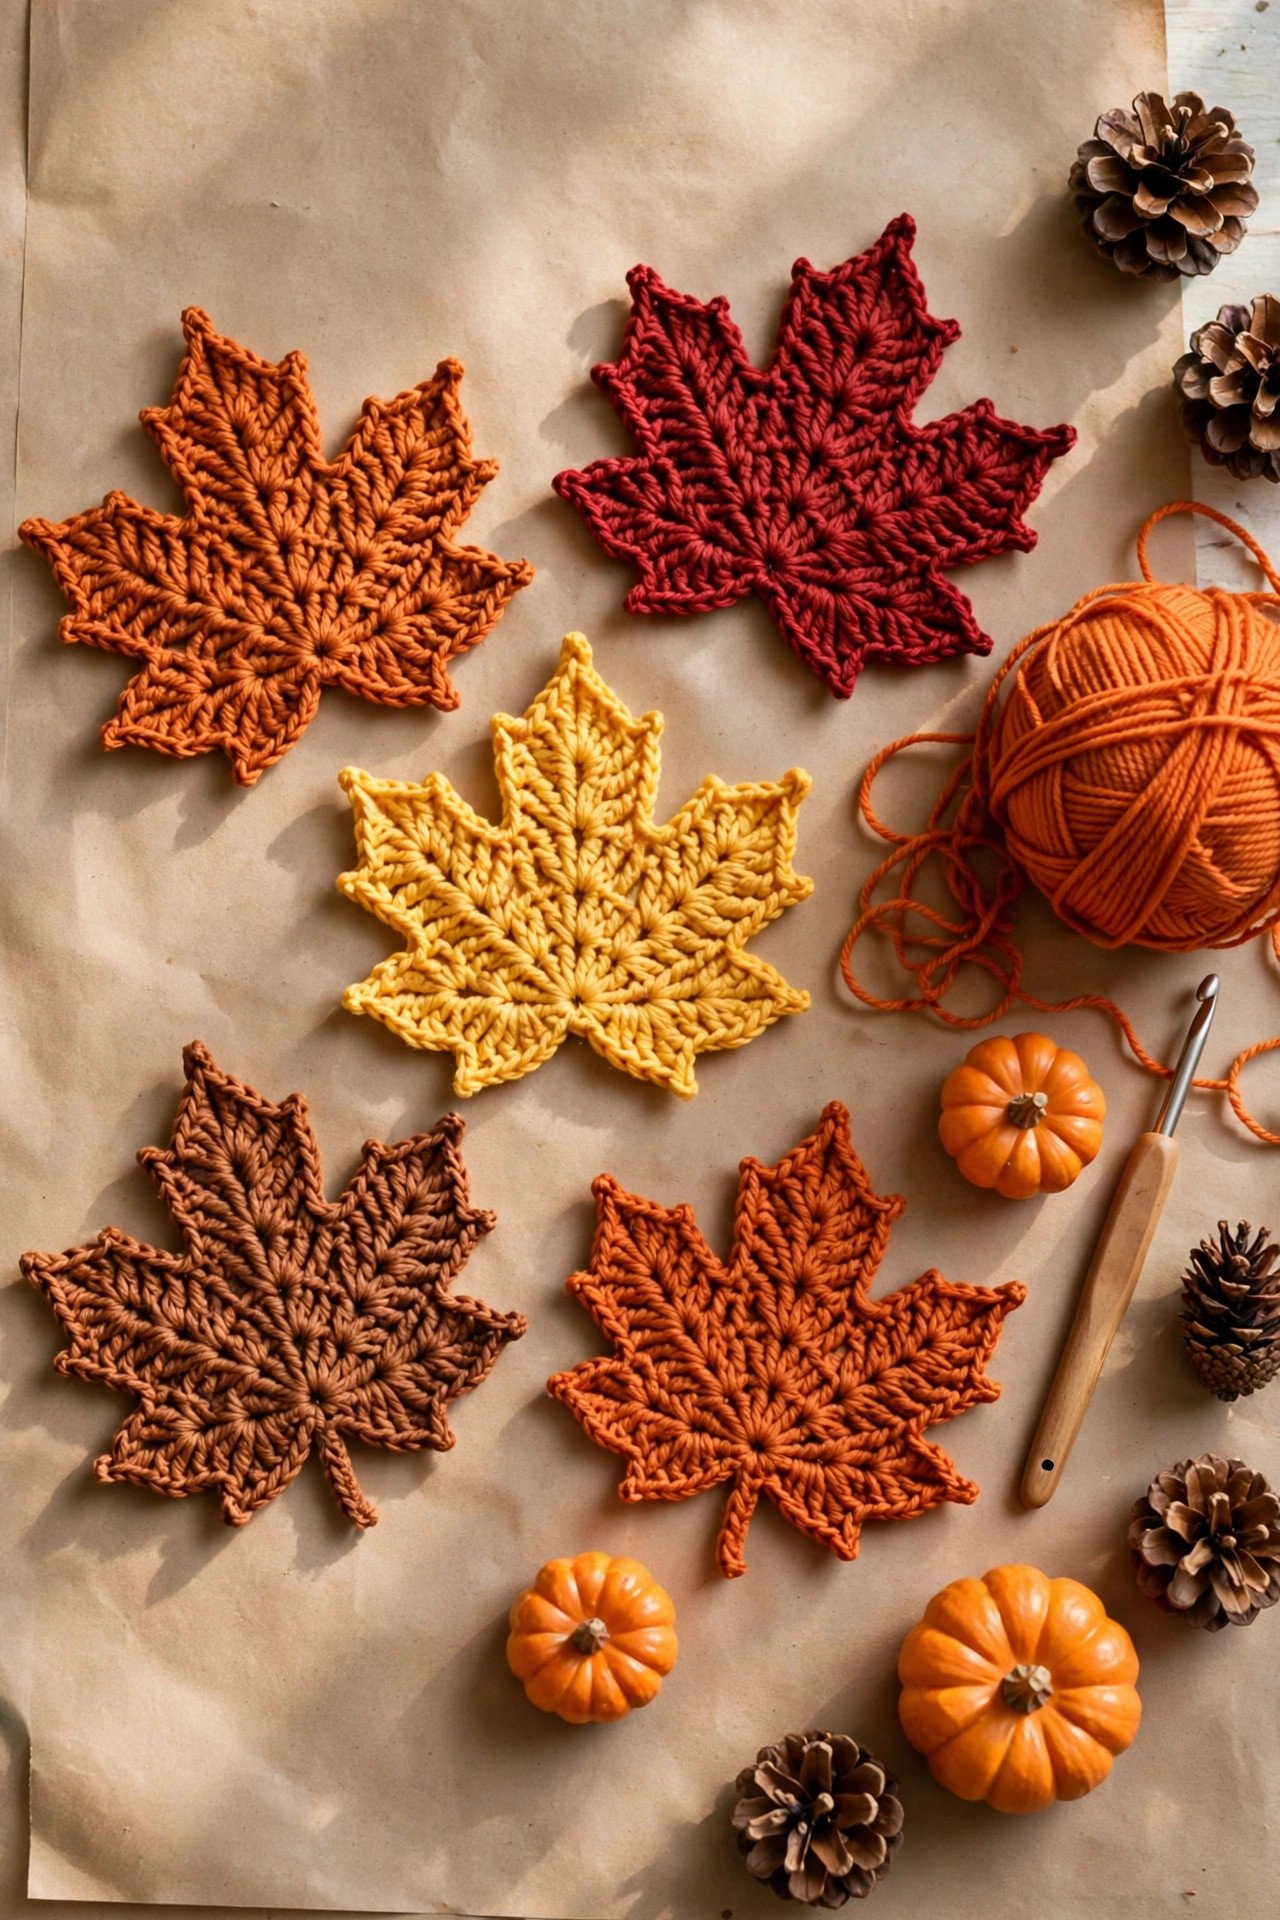
A crisp five-lobe maple leaf with pointed picot tips and a veined texture in surface slip stitch — seven small pieces, about 45 minutes, and endless fall decorating: garlands, table scatter, Thanksgiving place settings.

Motifs · Crochet
- Finished size
- About 13 cm / 5 in wide
- Making time
- About 45 minutes per leaf
- Hook
- 5.0 mm, worsted-weight yarn
- Pieces
- 7 pieces to assemble
- Skill
- Advanced beginner
In this post
- Table of contents
- Why you'll love this maple leaves crochet pattern
- Materials you'll need
- Size, gauge and skill level
- Abbreviations — US terms
- The pattern (US terms)
- Finishing and blocking
- Five fall projects for your maple leaves
- Tips for crisp, realistic leaves
- Frequently asked questions
- More free patterns to try
It's mid-October, the maples are doing their annual show-off routine, and your crochet basket is begging for an autumn project. This original maple leaves crochet pattern gives you a crisp, pointed five-lobe maple leaf — the kind with real maple attitude, not a generic oval "leaf" — complete with a veined texture worked in simple surface slip stitches. Each leaf takes about 45 minutes and uses only basic stitches plus decreases you already know. String a dozen into a fall garland, scatter them down a Thanksgiving table, or tuck one into every napkin ring.
Table of contents
- Why you'll love this maple leaves crochet pattern
- Materials you'll need
- Size, gauge and skill level
- Abbreviations — US terms
- The pattern (US terms)
- Finishing and blocking
- Five fall projects for your maple leaves
- Tips for crisp, realistic leaves
- Frequently asked questions
- More free patterns to try
Why you'll love this maple leaves crochet pattern
Most crochet leaf patterns are polite little ovals — perfectly fine for a flower stem, but they don't read as maple. A real maple leaf has drama: five pointed lobes, sharp valleys between them, and that unmistakable silhouette you can spot from across the street. This design builds the leaf the way nature does, from five separate pointed triangles arranged around a center, so the finished motif is instantly recognizable even from a distance. The pointed picot tips are the secret — they give each lobe the sharp little point of a real maple leaf instead of a rounded blob.
And then there's the timing. A single leaf is a genuine one-sitting project. But leaves are social creatures — they want to be made in batches. Ten leaves in autumn colors become a garland, twenty become table scatter for Thanksgiving. The lobes are small, repetitive, and weirdly addictive, and by your third leaf you'll be working them from memory.
Materials you'll need
| Supply | What to get |
|---|---|
| Main yarn | Worsted-weight (#4) acrylic or cotton in fall colors — burnt orange, deep red, golden yellow, rust — about 30 g per leaf |
| Vein yarn | Worsted-weight in a darker or contrasting shade (rust on orange, gold on red), about 5 g per leaf |
| Stem yarn | Worsted-weight brown, a few grams |
| Crochet hook | 5.0 mm (H-8) |
| Notions | Tapestry needle, scissors, stitch markers (optional) |
| Blocking supplies | Pins and a blocking mat or towel (optional but recommended) |
A quick note on yarn choice: smooth worsted acrylic is ideal — it holds the pointed lobe shapes crisply and the surface veins sit neatly on top. Cotton works beautifully too and gives a slightly stiffer leaf that's great for coasters. Avoid fuzzy or textured yarns; they blur the stitch definition that makes the lobes and valleys read clearly.
Size, gauge and skill level
- Finished size: each leaf measures about 13 cm (5 in) wide and 11 cm (4.5 in) tall, not counting the stem, in worsted-weight yarn with a 5.0 mm hook.
- Gauge: not critical — this is a motif, not a garment. What matters is firm fabric that holds the pointed lobe shapes. If your leaf looks floppy, drop to a 4.5 mm hook.
- Skill level: advanced beginner. You should be comfortable with chains, single crochet, increases, decreases (skip-a-stitch and sc2tog), and basic sewing with a tapestry needle. The surface slip-stitch veins are explained step by step below — they're easier than they sound.
If decreases still make you nervous, warm up with our easy beginner crochet patterns first — the projects in that collection will get your decrease confidence exactly where it needs to be.
Abbreviations — US terms
| Abbreviation | Meaning |
|---|---|
| MR | magic ring |
| ch | chain |
| sc | single crochet |
| sc2tog | single crochet 2 together (decrease) |
| sc3tog | single crochet 3 together |
| sl st | slip stitch |
| st(s) | stitch(es) |
| R | round/row |
| RS | right side |
| FO | fasten off |
A note on the decrease method: this pattern decreases at the start of a row by simply skipping the first stitch, and with a standard sc2tog at the end. Together they shave exactly two stitches per row, sculpting each lobe from a wide base to a sharp point.
The pattern (US terms)
Each leaf is made from 7 small pieces: 1 large lobe, 2 medium lobes, 2 small lobes, 1 center disc, and 1 stem. Crochet all the pieces first, sew the lobes to the disc, add the stem, then work the veins. Stitch counts are in parentheses at the end of each row.
Center disc
- R1: MR, 6 sc (6)
- R2: inc in each st — 2 sc in each stitch (12)
- R3: [sc, inc] × 6 (18). FO, leaving a 20 cm (8 in) tail.
Your disc should measure about 5 cm (2 in) across. This is the hub everything attaches to — don't skip Round 3; the extra width gives each lobe base a solid sewing surface.
Lobes — make 1 large, 2 medium, 2 small
All three lobe sizes use the same shaping: start with a foundation chain, work one row of single crochet, then decrease two stitches every row until one stitch remains, and finish with a picot point. Only the starting chain length changes.
Large lobe (make 1):
- Foundation: ch 10.
- Row 1 (RS): sc in 2nd ch from hook, sc in each ch across (9). Ch 1, turn.
- Row 2: skip first st, sc in next 6 sts, sc2tog in last 2 sts (7). Ch 1, turn.
- Row 3: skip first st, sc in next 4 sts, sc2tog (5). Ch 1, turn.
- Row 4: skip first st, sc in next 2 sts, sc2tog (3). Ch 1, turn.
- Row 5: sc3tog (1). Picot: ch 3, sl st in 3rd ch from hook, sl st in the same stitch. FO, leaving a 20 cm (8 in) tail for sewing.
Medium lobe (make 2):
- Foundation: ch 8.
- Row 1 (RS): sc in 2nd ch from hook, sc in each ch across (7). Ch 1, turn.
- Row 2: skip first st, sc in next 4 sts, sc2tog (5). Ch 1, turn.
- Row 3: skip first st, sc in next 2 sts, sc2tog (3). Ch 1, turn.
- Row 4: sc3tog (1). Picot as for the large lobe. FO with a 20 cm tail.
Small lobe (make 2):
- Foundation: ch 6.
- Row 1 (RS): sc in 2nd ch from hook, sc in each ch across (5). Ch 1, turn.
- Row 2: skip first st, sc in next 2 sts, sc2tog (3). Ch 1, turn.
- Row 3: sc3tog (1). Picot as for the large lobe. FO with a 20 cm tail.
Check your lobes: lay them out — one tall triangle, two medium, two short, each ending in a tiny picot point. If a lobe looks rounded rather than triangular, your decreases drifted; the skip-first-stitch decrease at the start of each row is what keeps the edges straight.
Stem — make 1
- Ch 12. Sc in 2nd ch from hook and in each ch across (11). FO, leaving a 15 cm (6 in) tail.
Assembly
Lay the center disc right-side up. Arrange the five lobes around it like a fan: the large lobe at 12 o'clock, the two medium lobes at roughly 10 and 2 o'clock, and the two small lobes at roughly 8 and 4 o'clock. The bases should overlap the disc's outer round by about 1 cm, with neighboring lobe bases just touching — real maple leaves have deep valleys between lobes, so don't crowd them together.
Sew each lobe down with its tail using a whipstitch through the base row and the disc, making two or three passes for security. Work from the back so your stitches stay invisible. The stem is sewn to the back of the disc at 6 o'clock — it takes handling when people pick the leaf up, so give it an extra pass. Weave in all ends on the back of the leaf.
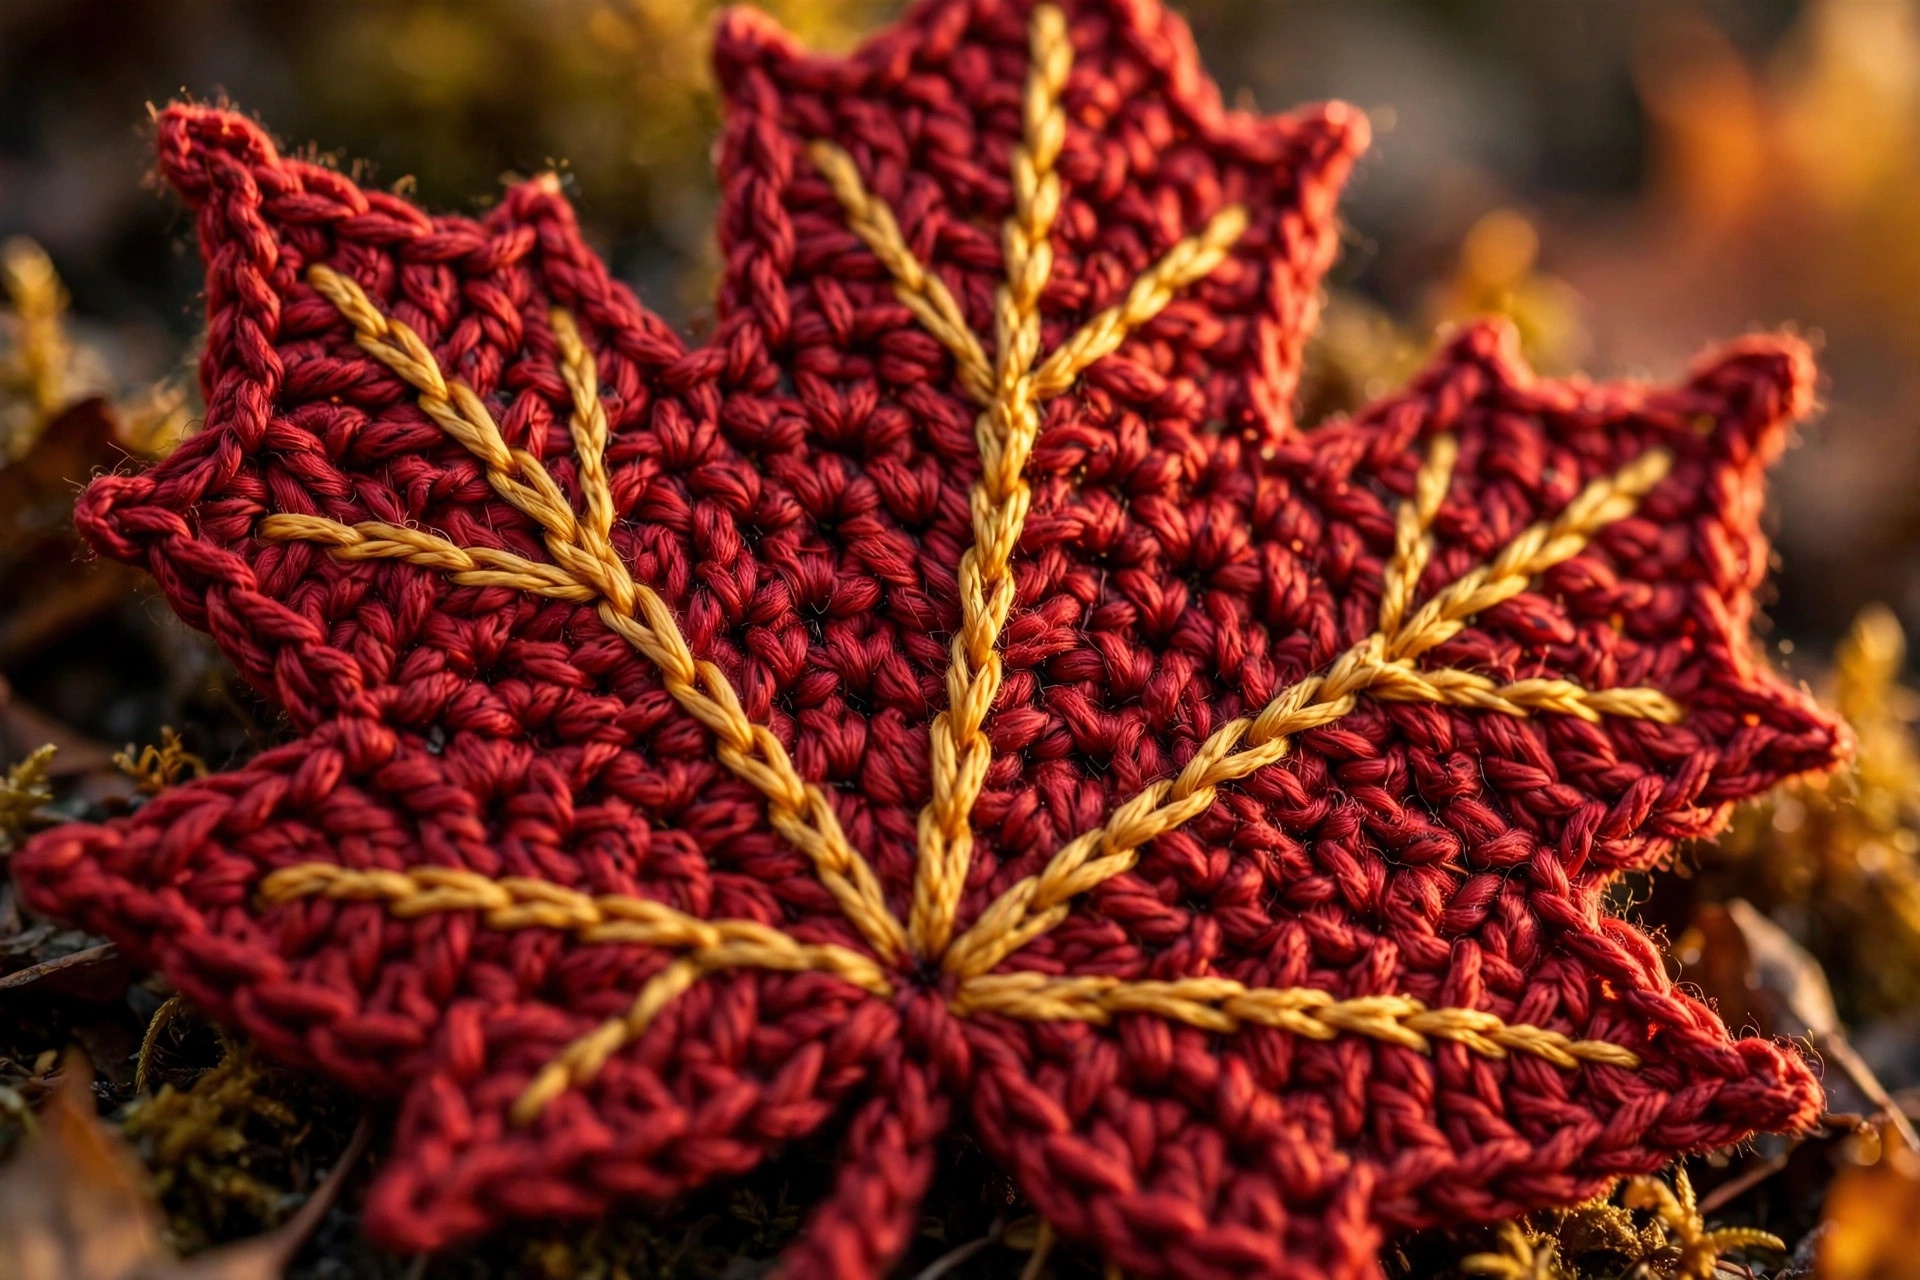
Veins — surface slip stitch
Thread your contrast yarn onto the hook (no need to fasten to the leaf first). Working on the right side:
- Insert your hook from front to back through the fabric at the very center of the disc, catch the vein yarn, and pull a loop up to the front.
- Move one stitch toward the tip of the large lobe, insert the hook front-to-back, yarn over with the vein yarn held behind the work, and pull a loop through the stitch and through the loop on your hook — that's one surface slip stitch.
- Continue stitch by stitch in a straight line up the center of the large lobe, all the way to the picot tip. Keep your tension relaxed — if the leaf starts to cup or pucker, you're pulling too hard; surface stitches should lie on the fabric, not cinch it.
- Cut the yarn, pull the tail through the last loop, and weave both ends into the back.
- Repeat for the other four lobes, always starting from the center and working outward to the tip.
Optional side veins: on the large lobe only, add two short diagonal veins — start halfway up the main vein and angle outward toward each edge, three or four surface stitches each side. Real maple leaves have palmate veining (all veins radiating from one point), and these little side veins sell the realism.
Optional crisping edging
If your leaf edges look soft and you'd like a more defined outline, work one round of single crochet around the entire perimeter: join yarn at the base of any lobe, sc evenly around (working into row-ends along the lobe sides), and at each valley between lobes work (sc, ch 2, sc) into the same spot to keep the notch sharp. This adds about ten minutes and gives the leaf a polished, almost blocked look even before blocking.
Finishing and blocking
Weave in every end on the back of the leaf, then give it a gentle steam block: pin it flat on a towel with the lobes fanned out, hover a steam iron an inch above (never press acrylic directly — it melts and goes shiny), and let it cool completely. Blocking is the difference between a leaf that looks handmade-charming and one that looks handmade-professional: lobes lie flat, points stay sharp, and the valleys open up crisply. Cotton leaves can be misted with water and pinned instead.
Five fall projects for your maple leaves
One leaf is a motif. A dozen is a decorating strategy. Here's how to put your leaves to work this autumn:
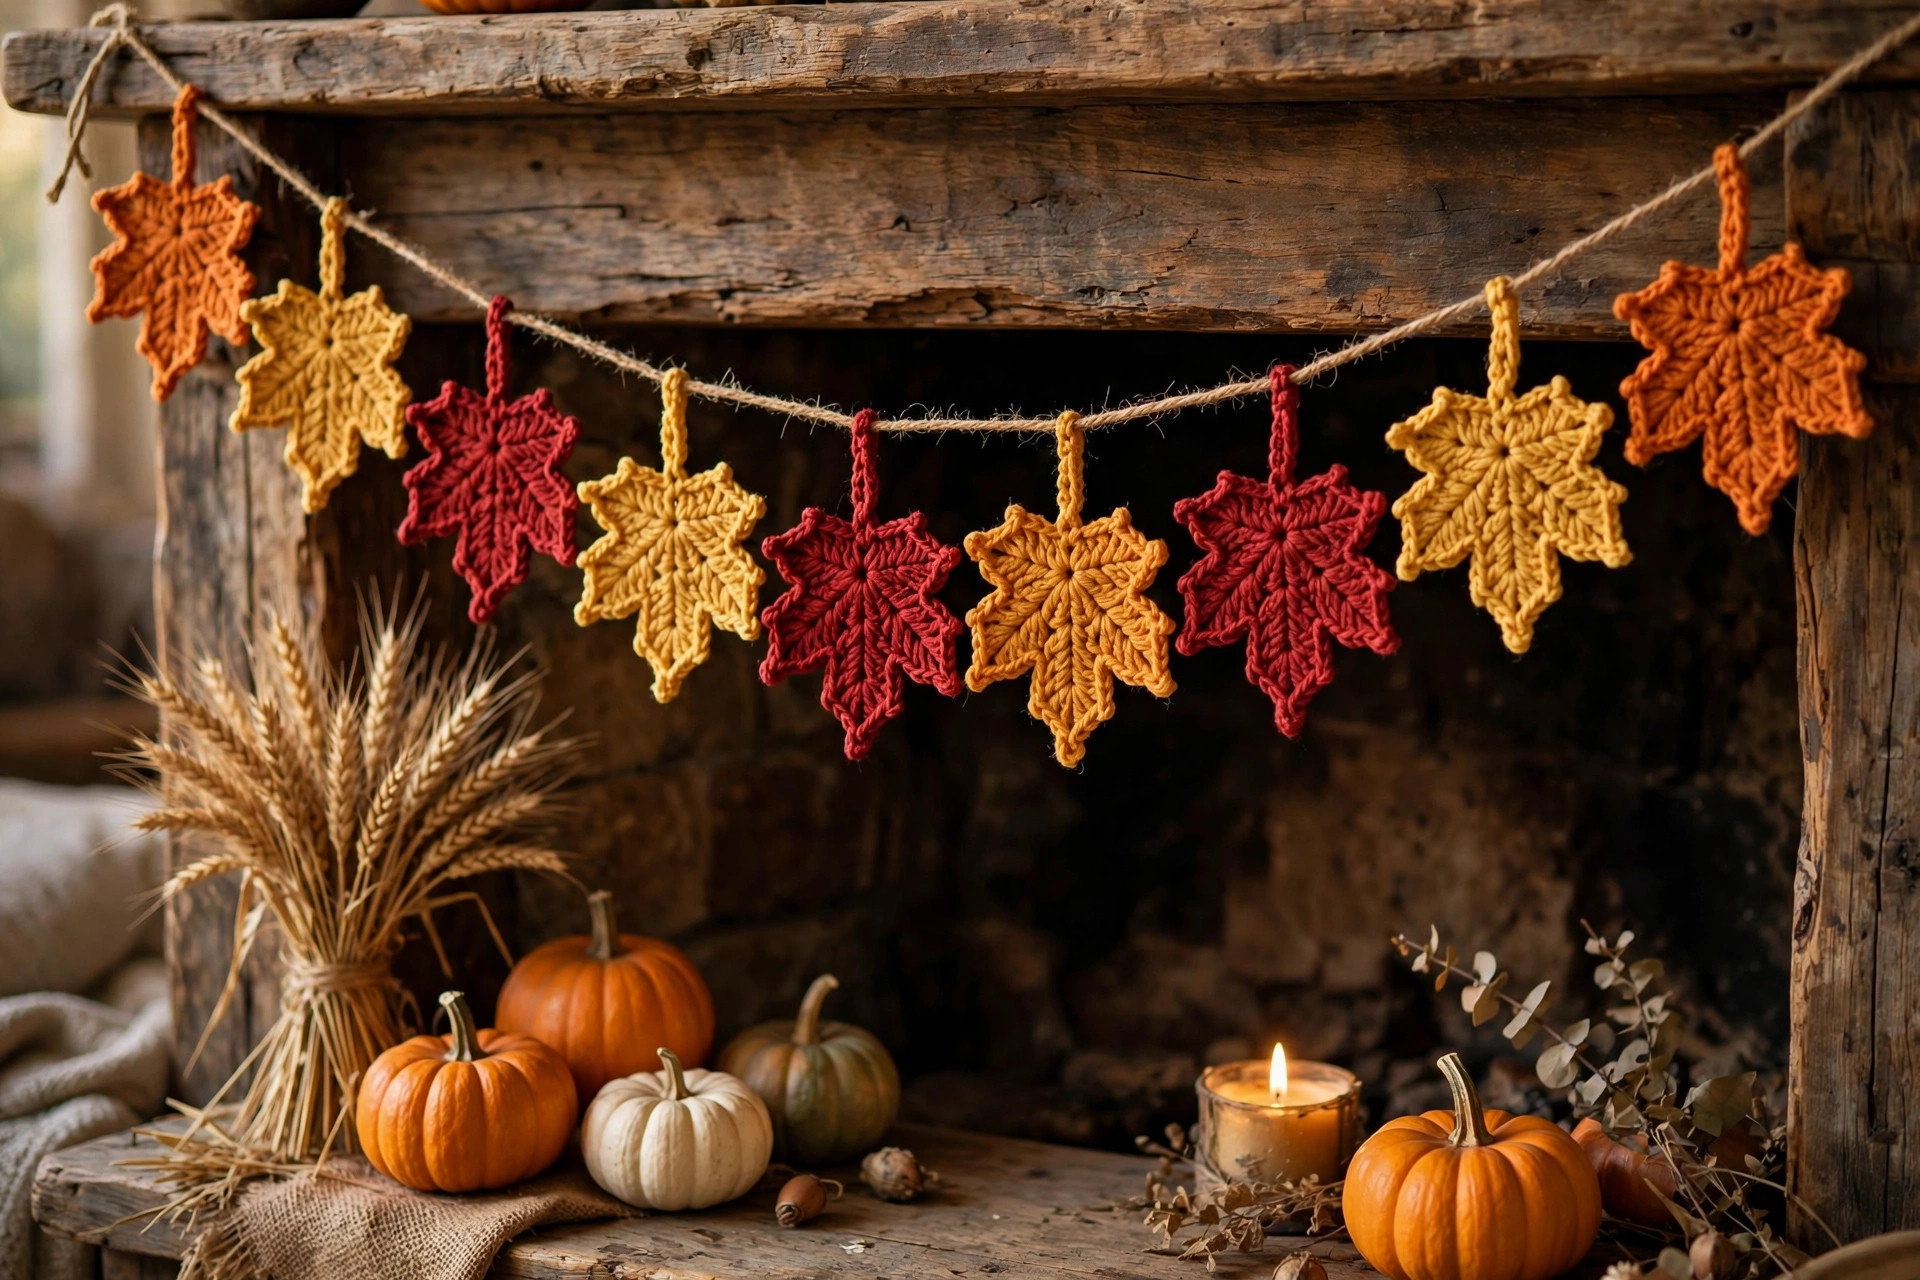
1. The classic fall garland. Crochet a long foundation chain (about 2 meters for a mantel), then attach 9–12 leaves at even intervals by sewing or tying their stems to the chain. Alternate your fall colors and vary the leaf angles — some pointing up, some drooping — for that just-gathered look. If you want the full garland treatment with bunting and spacing math already worked out, our crochet garland pattern is the perfect companion — these maple leaves strung along its base chain are a match made in October.
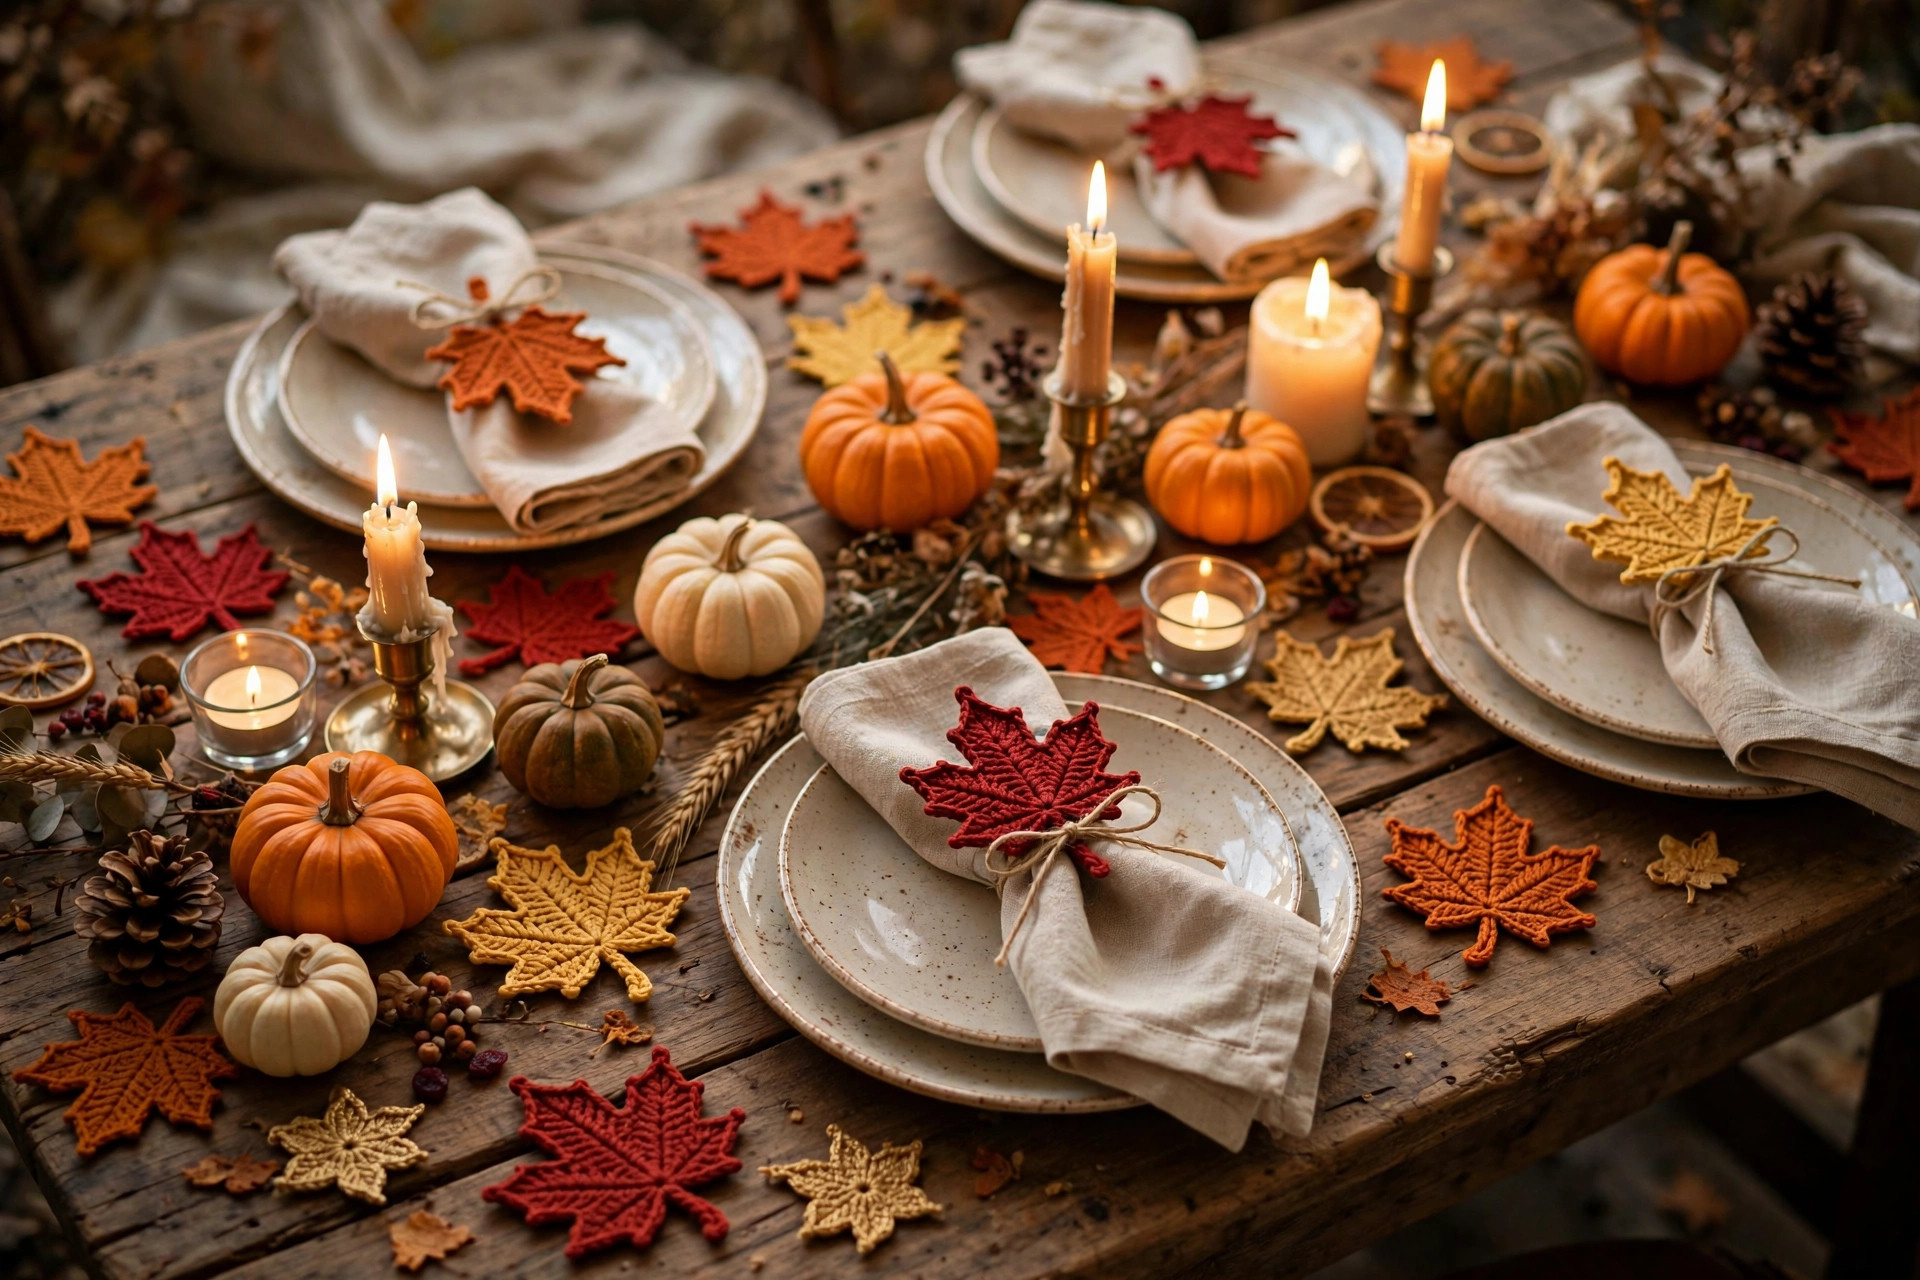
2. Thanksgiving table scatter. Make 15–20 leaves in mixed fall shades and scatter them down the center of your holiday table, over a runner, or around serving dishes. They catch candlelight beautifully and — unlike real leaves — they won't crumble into your mashed potatoes. The crochet table runner patterns collection has openwork designs that let a wooden table glow through between the leaves.
3. Napkin rings and place cards. Tie a single leaf to each rolled napkin with twine or ribbon, and tuck a handwritten kraft-paper name tag behind it. Guests get a place card and a party favor in one — you'll be amazed how many pocket the leaf.
4. Wreath accents. A plain grapevine or foam wreath becomes a fall statement when you hot-glue 7–9 maple leaves around one side, clustered asymmetrically with a few mini pumpkins or pinecones. The leaves are lightweight, so a dab of hot glue is plenty.
5. Autumn coasters. Work the leaf in cotton yarn, add the optional crisping edging, and block it firmly — the wide, flat shape is naturally mug-sized. Back it with a circle of felt glued on for extra heat protection. A set of four in graduated fall colors makes a genuinely lovely hostess gift, and they pair beautifully with the floral designs in our flower coaster pattern for a mixed seasonal set.
Tips for crisp, realistic leaves
- Mind the valleys. The deep notches between lobes are what make a maple leaf read as maple. When sewing, resist the urge to overlap the lobe bases too much — leave real gaps between neighboring lobes so the valleys stay open and shadowed.
- Keep surface veins loose. This is the number-one beginner mistake with this pattern. Surface slip stitches should float on top of the fabric. If your leaf curls after veining, gently stretch it flat and re-block; next time, work each surface stitch looser.
- Batch by step, not by leaf. For garlands and table scatter, crochet all the large lobes first, then all the mediums, then all the smalls, then assemble in one sewing session. It's dramatically faster, and your lobes come out more consistent.
- Vary your reds. Real fall foliage is never one flat color. Mixing burnt orange, rust, deep red, and golden yellow — even within a single project — looks infinitely more natural than twelve identical leaves. This pattern was born for stash leftovers.
- Starch for scatter. Leaves destined for table scatter or wreaths benefit from a light spray starch after blocking — it keeps the points perky through a whole dinner party. Skip the starch for garlands, which look better with a little soft drape.
- Count the picots. Every lobe should end in exactly one picot. If a tip looks blunt, you probably worked the final sc3tog but forgot the picot — it's a small detail with an outsized effect on the silhouette.
Frequently asked questions
Is this maple leaves crochet pattern really free?
Yes — the complete pattern above is free, no email signup and no PDF purchase required. If you'd like to support the site, pinning the post on Pinterest or sharing it with a crochet friend is the kindest thank-you.
What skill level is this pattern?
Advanced beginner. The stitches themselves are all basic — chain, single crochet, simple decreases — but you're working small pieces, sewing them together, and adding surface slip-stitch veins. If you can sew a seam with a tapestry needle and keep track of small stitch counts, you can make this leaf.
How long does one leaf take?
About 45 minutes once you've made your first: roughly 25 minutes for the seven pieces, 10 minutes of sewing, and 10 minutes for the veins. A 12-leaf garland is a comfortable weekend project.
Can I sell finished leaves I make from this pattern?
Yes! You may sell finished leaves in small batches — craft fairs, Etsy shops, market stalls. Please credit Little Loop Finds as the pattern designer with a link back to this page. The pattern text and photos themselves may not be redistributed, republished, or sold.
Can I make the leaf bigger or smaller?
Absolutely — that's the beauty of a motif. Use fingering-weight yarn with a 3.5 mm hook for a delicate 8 cm (3 in) leaf (perfect for place cards), or bulky yarn with a 6.5 mm hook for a bold 17 cm (6.5 in) statement leaf for garlands and wreaths. Keep the same stitch counts; only the yarn and hook change.
Why does my leaf curl after I add the veins?
Your surface slip stitches are too tight — they're cinching the fabric. Gently stretch the leaf flat, re-block it, and on the next leaf consciously work each surface stitch looser. The vein yarn should lie on the surface like embroidery, never pull the fabric inward.
Do I have to block the leaves?
Strictly speaking, no — an unblocked leaf still looks charming. But blocking takes five minutes and transforms the finished piece: lobes lie flat, points sharpen, and the leaf photographs dramatically better. For anything you'll photograph for Pinterest or give as a gift, block it.
More free patterns to try
If these little leaves got you in the fall spirit, keep the hook moving. The crochet garland pattern is the natural next project — string your maple leaves along its base for the ultimate autumn mantel. The autumn acorn granny square keeps the harvest palette going in blanket form, the crochet table runner patterns give your leaf scatter a proper stage, and the flower coaster pattern pairs with leaf coasters for a full seasonal set.
The box below contains an Etsy link. If you buy through it, we may earn a small commission at no extra cost to you. Learn more.
No time to make one?
Short on time? Find handmade crochet maple leaves from independent makers on Etsy.
Browse on Etsy (opens Etsy in a new tab)