Baby Cocoon Crochet Pattern (Newborn Swaddle Sack)
Crochet a soft stretchy baby cocoon swaddle sack with a matching little hat in about three hours, then wrap your newborn up for photos and naps.

Patterns · Crochet
- Finished size
- 14 in long
- Making time
- 3 hours
- Hook
- US G-6 (4.0 mm)
- Set
- Cocoon, hat
- Skill
- Easy
In this post
- Key Takeaways
- Table of Contents
- Why You Will Love This Baby Cocoon
- Finished Size, Skill Level, and Time
- Materials You Need
- Abbreviations (US Terms)
- Gauge and Sizing Notes
- Part 1: The Bottom and the Body
- Part 2: The Ribbed Top and the Drawstring
- Part 3: The Matching Hat and Finishing
- Variations: Colors, Sizes, and Uses
- Troubleshooting a Cocoon That Does Not Fit
- Care Instructions
- Frequently Asked Questions
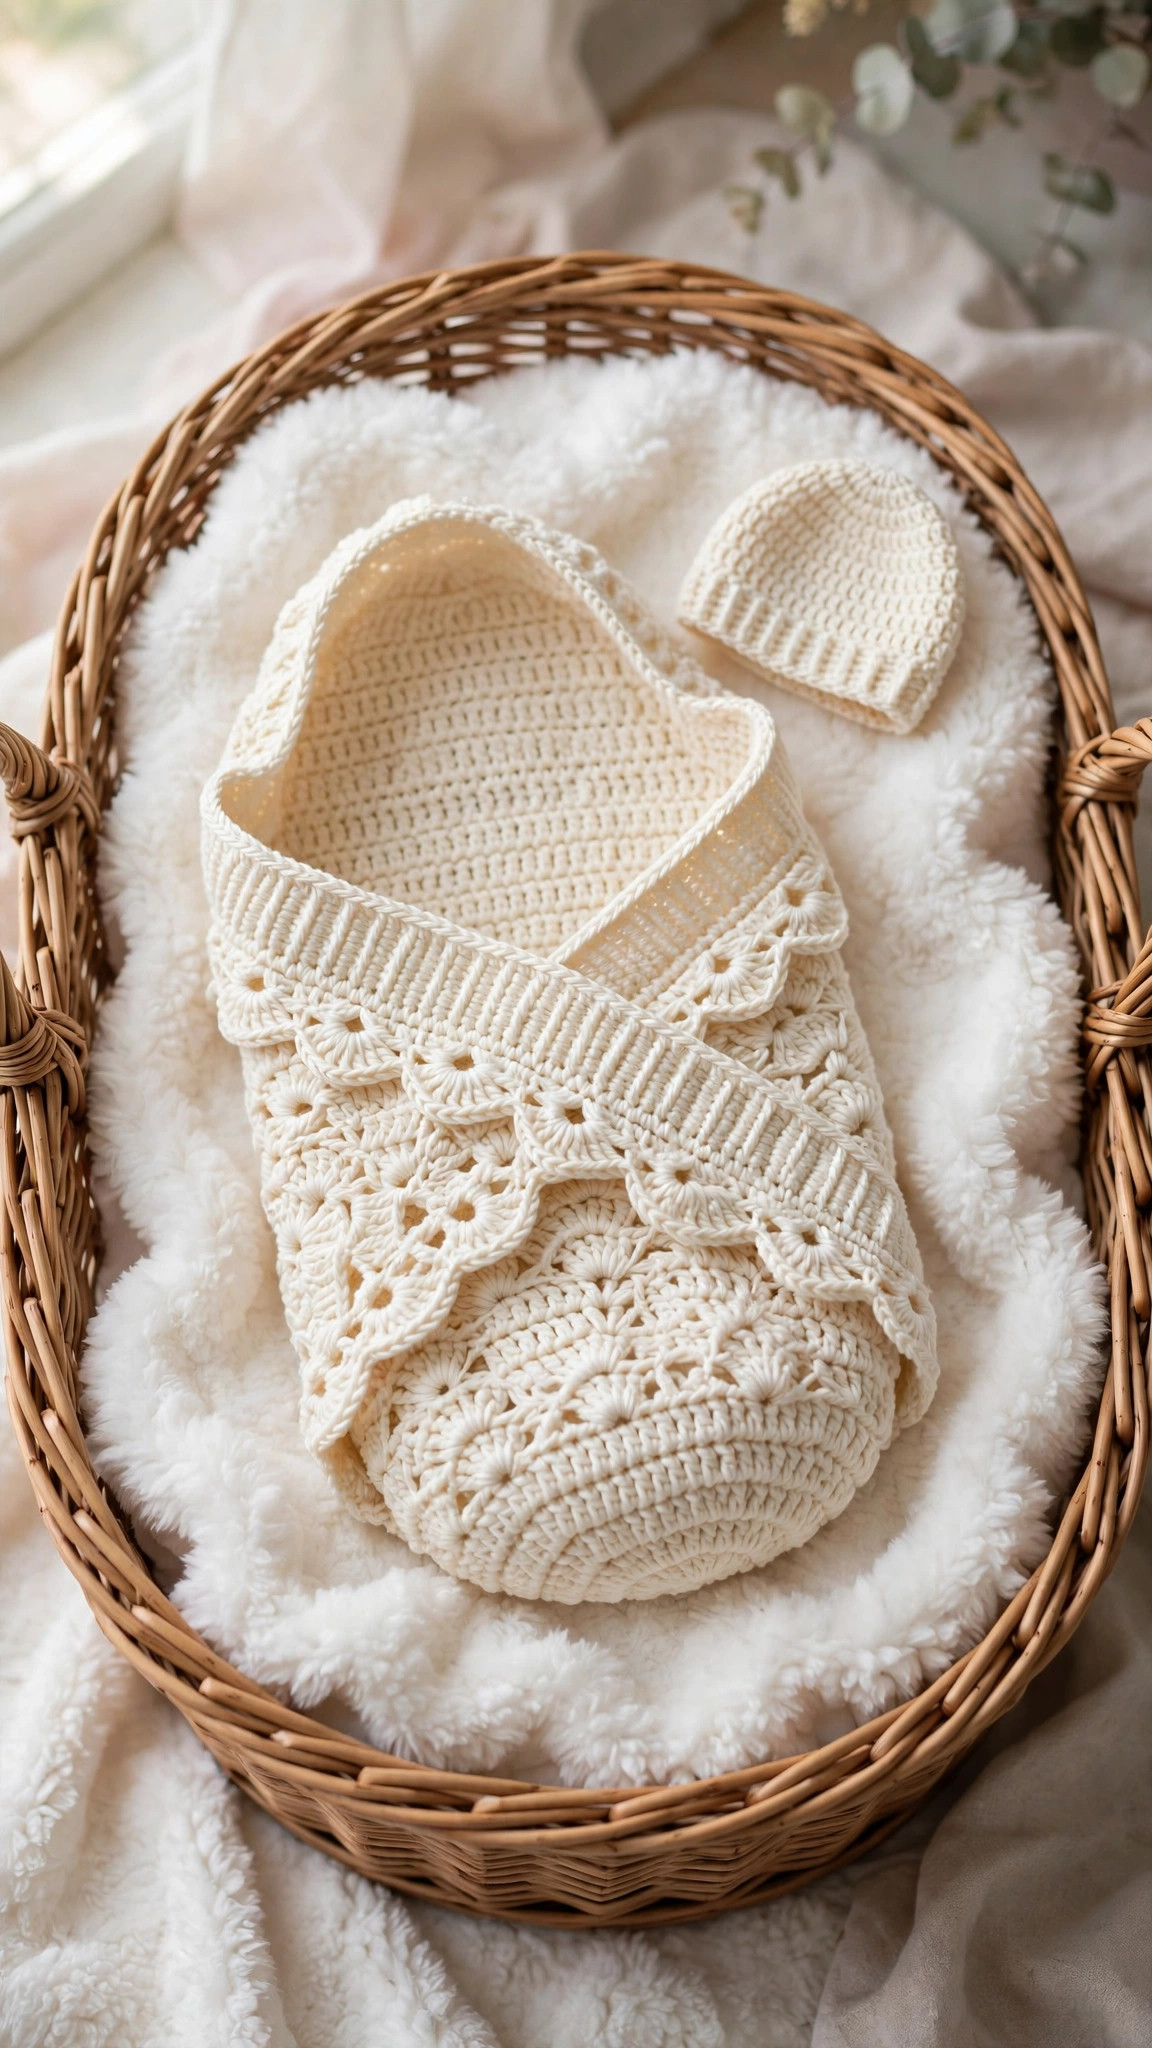
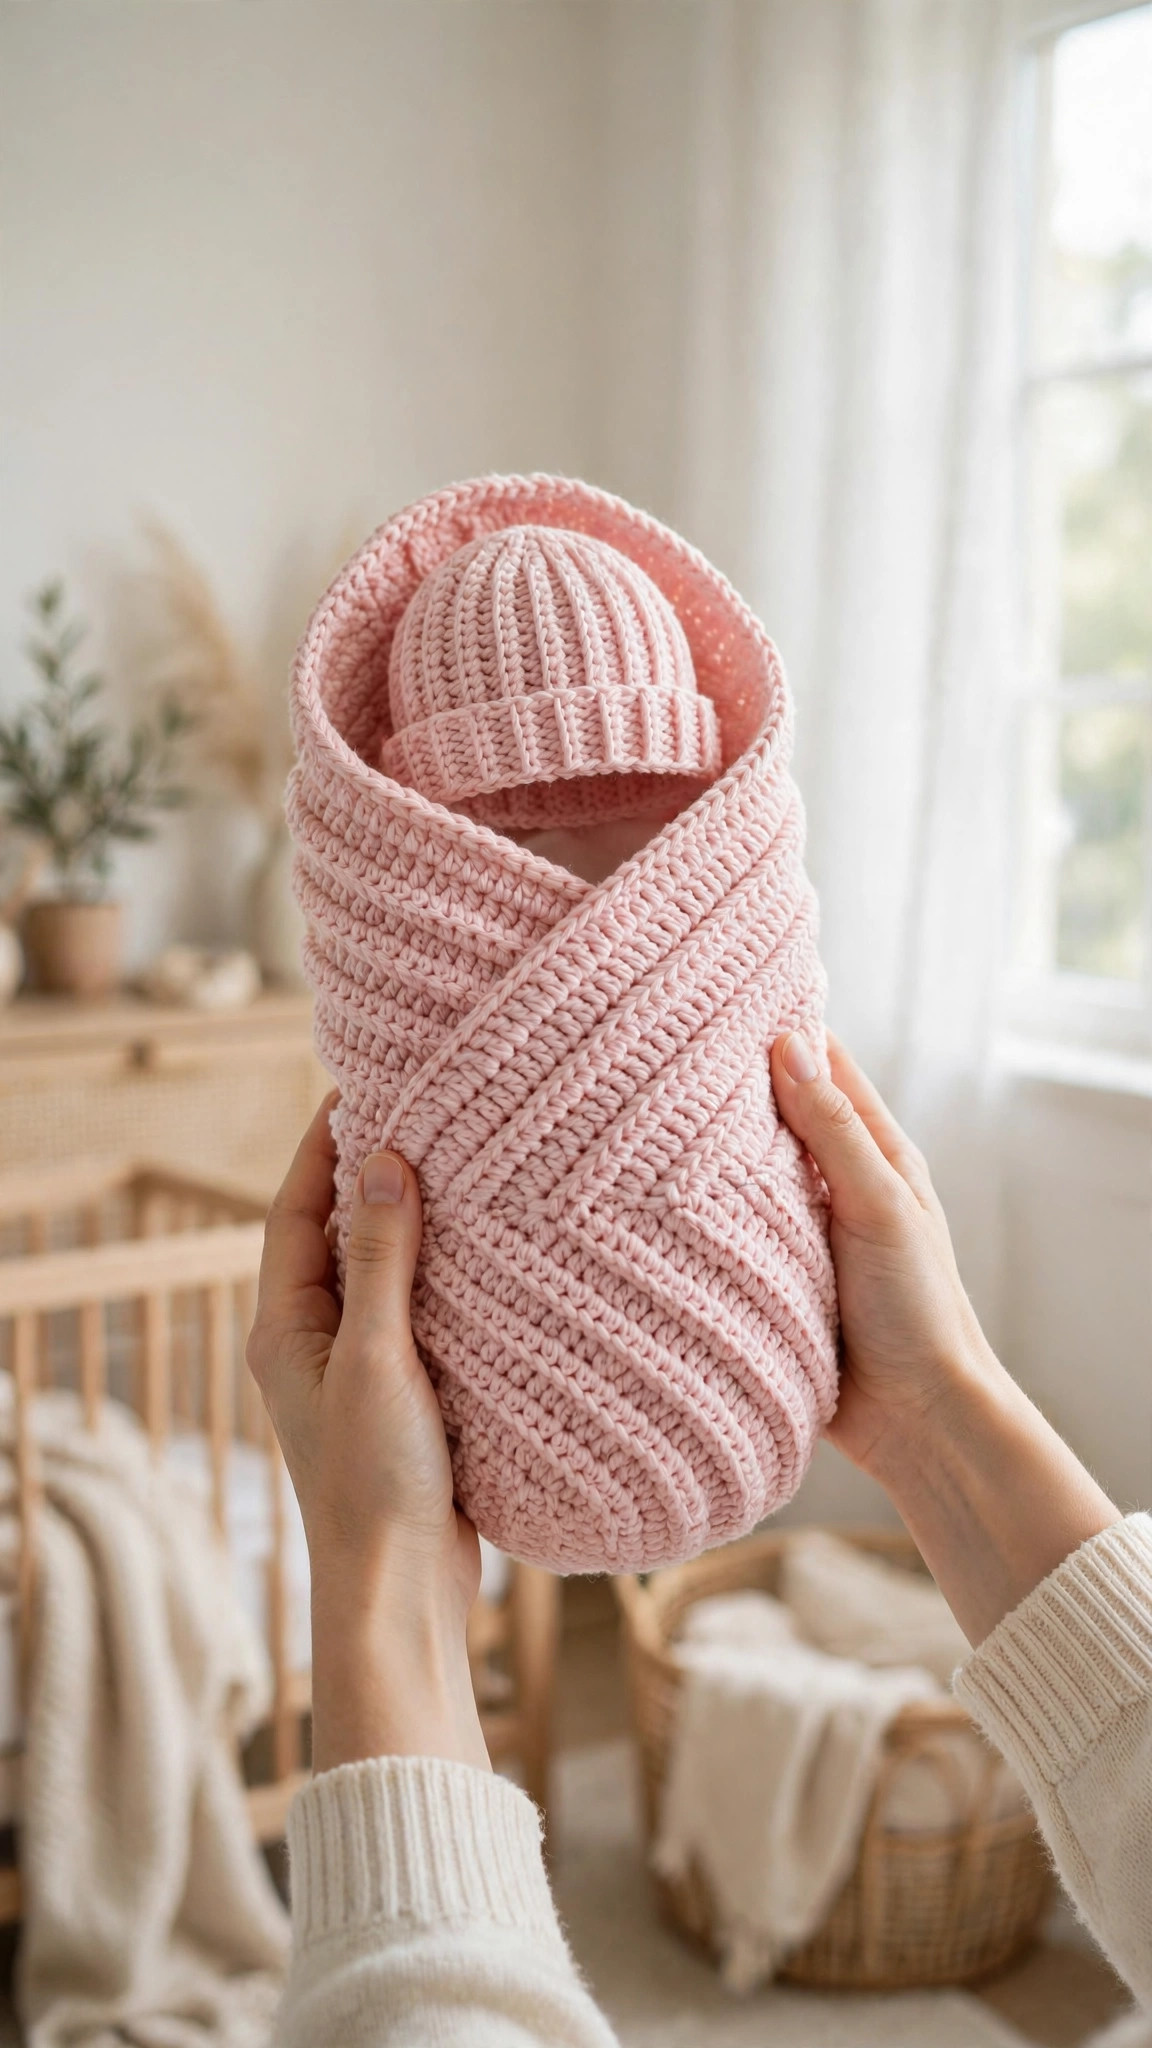
A baby cocoon is the softest way to keep a newborn snug, and this free baby cocoon crochet pattern makes a stretchy swaddle sack with a matching little hat, perfect for newborn photos and cozy naps. It is worked in the round with simple half double crochet, then finished with a ribbed top edge and a gentle drawstring, so it hugs the baby without squeezing. It takes about 3 hours, uses less than two skeins of soft baby yarn, and makes a thoughtful gift for a baby shower or a new arrival.
This is an original Little Loop Finds design, written in US terms and completely free. The cocoon is sized for a newborn from birth to about 3 months, with a stretchy stitch that grows a little with the baby. The matching hat uses the same stitch, so the set looks finished and ready for the camera.
A quick note on scope: this post is about one specific baby cocoon, a soft swaddle sack that wraps the baby from the shoulders down, with a matching hat. That makes it different from a blanket, which lies flat, and from a sleep sack with armholes. A cocoon is a snug tube with a closed bottom, made for photos and naps. If you want a blanket to pair with it, our lovey blanket crochet pattern is the matching project.
Key Takeaways
- Free original pattern: a Little Loop Finds original design, written in US terms, and completely free.
- A newborn swaddle sack: a soft stretchy baby cocoon with a closed bottom and a ribbed top edge.
- A matching little hat: the set includes a tiny hat worked in the same stitch as the cocoon.
- A 14 inch cocoon: about 14 inches long and 9 inches wide, sized for a newborn from birth to 3 months.
- A 3 hour project: one cocoon and hat set takes about 3 hours.
Table of Contents
- Why You Will Love This Baby Cocoon
- Finished Size, Skill Level, and Time
- Materials You Need
- Abbreviations (US Terms)
- Gauge and Sizing Notes
- Part 1: The Bottom and the Body
- Part 2: The Ribbed Top and the Drawstring
- Part 3: The Matching Hat and Finishing
- Variations: Colors, Sizes, and Uses
- Troubleshooting a Cocoon That Does Not Fit
- Care Instructions
- Frequently Asked Questions
Why You Will Love This Baby Cocoon
A baby cocoon makes a newborn look like a tiny wrapped bundle, which is why photographers love it. The soft tube keeps the baby warm and snug, the stretchy stitch lets the baby move a little without escaping, and the matching hat turns a simple photo into a keepsake. Parents love it too, because it is easier than a swaddle blanket and stays put during naps.
The cocoon is a relaxing project because it is one simple tube of half double crochet, worked in the round from the bottom up. There is no shaping to worry about, no pieces to sew together, and no fiddly details. The stitch pattern stretches in every direction, so the cocoon fits a range of newborn sizes and forgives a stitch or two of difference in gauge.
The matching hat is the best part, because it takes only 30 minutes and makes the set look complete. Work it in the same color as the cocoon for a classic look, or use a soft contrast color for the brim so the set has a little pop in photos. Either way, you will have a gift that looks like it came from a boutique.
Finished Size, Skill Level, and Time
- Finished size: the cocoon is about 14 inches long and 9 inches wide, sized for a newborn from birth to about 3 months, up to about 12 pounds. The hat is about 5.5 inches tall and 13 inches around.
- Skill level: Easy. You need a magic ring, half double crochet, increases, decreases, and basic finishing. The hat uses the same stitches, and the drawstring is a simple chain.
- Time: about 3 hours per set: 2 hours for the cocoon, 30 minutes for the hat, and 30 minutes for the drawstring and finishing.
Materials You Need
| Item | What to get |
|---|---|
| Yarn, main color | Soft DK weight baby yarn in cream, 300 yards |
| Yarn, contrast color | Soft DK weight baby yarn in pastel pink, 40 yards |
| Hook | US G-6 (4.0 mm), or the size that gives you the gauge below |
| Notions | Tapestry needle, scissors, tape measure, stitch markers |
Choose a soft baby yarn for this project, because it touches newborn skin. Look for a yarn labeled baby or soft, in premium acrylic, with a smooth texture and no scratchy fibers. Cotton also works, but it has less stretch, so the cocoon will fit more snugly. Avoid wool, because it can irritate sensitive skin, and avoid fuzzy yarns, because the fibers can shed near a newborn face.
Use a hook that gives you a soft, stretchy fabric, not a stiff one. The cocoon should drape and give when you pull it gently, so the baby can move a little inside it. A stitch marker at the start of each round keeps you from losing your place on a long tube where the rounds all look the same.
Abbreviations (US Terms)
- MR = magic ring
- ch = chain
- sl st = slip stitch
- sc = single crochet
- hdc = half double crochet
- dc = double crochet
- inc = increase (2 hdc in the same stitch)
- dec = decrease (hdc 2 together)
- st(s) = stitch(es)
- rep = repeat
- RS = right side
- FO = fasten off
Gauge and Sizing Notes
Gauge matters on a baby cocoon because the sack must fit snugly enough to feel secure, but loosely enough for the baby to breathe and move. Work a swatch of 14 hdc and 10 rows in the main color. It should be about 4 inches wide and 4 inches tall. If it is wider, go down a hook size. If it is narrower, go up a hook size.
The pattern is written for a newborn from birth to about 3 months, up to about 12 pounds. For a smaller newborn, work the bottom to 48 sts instead of 54, and the body to 12 inches long instead of 14. For a baby of 3 to 6 months, work the bottom to 60 sts and the body to 16 inches long, and add 2 extra increase rounds to the hat. Test the fit against the measurements below, not against a baby, and never put a baby in a cocoon that is too tight around the chest. Our crochet baby hat pattern uses the same hat shaping if you want to practice the hat first.
Part 1: The Bottom and the Body
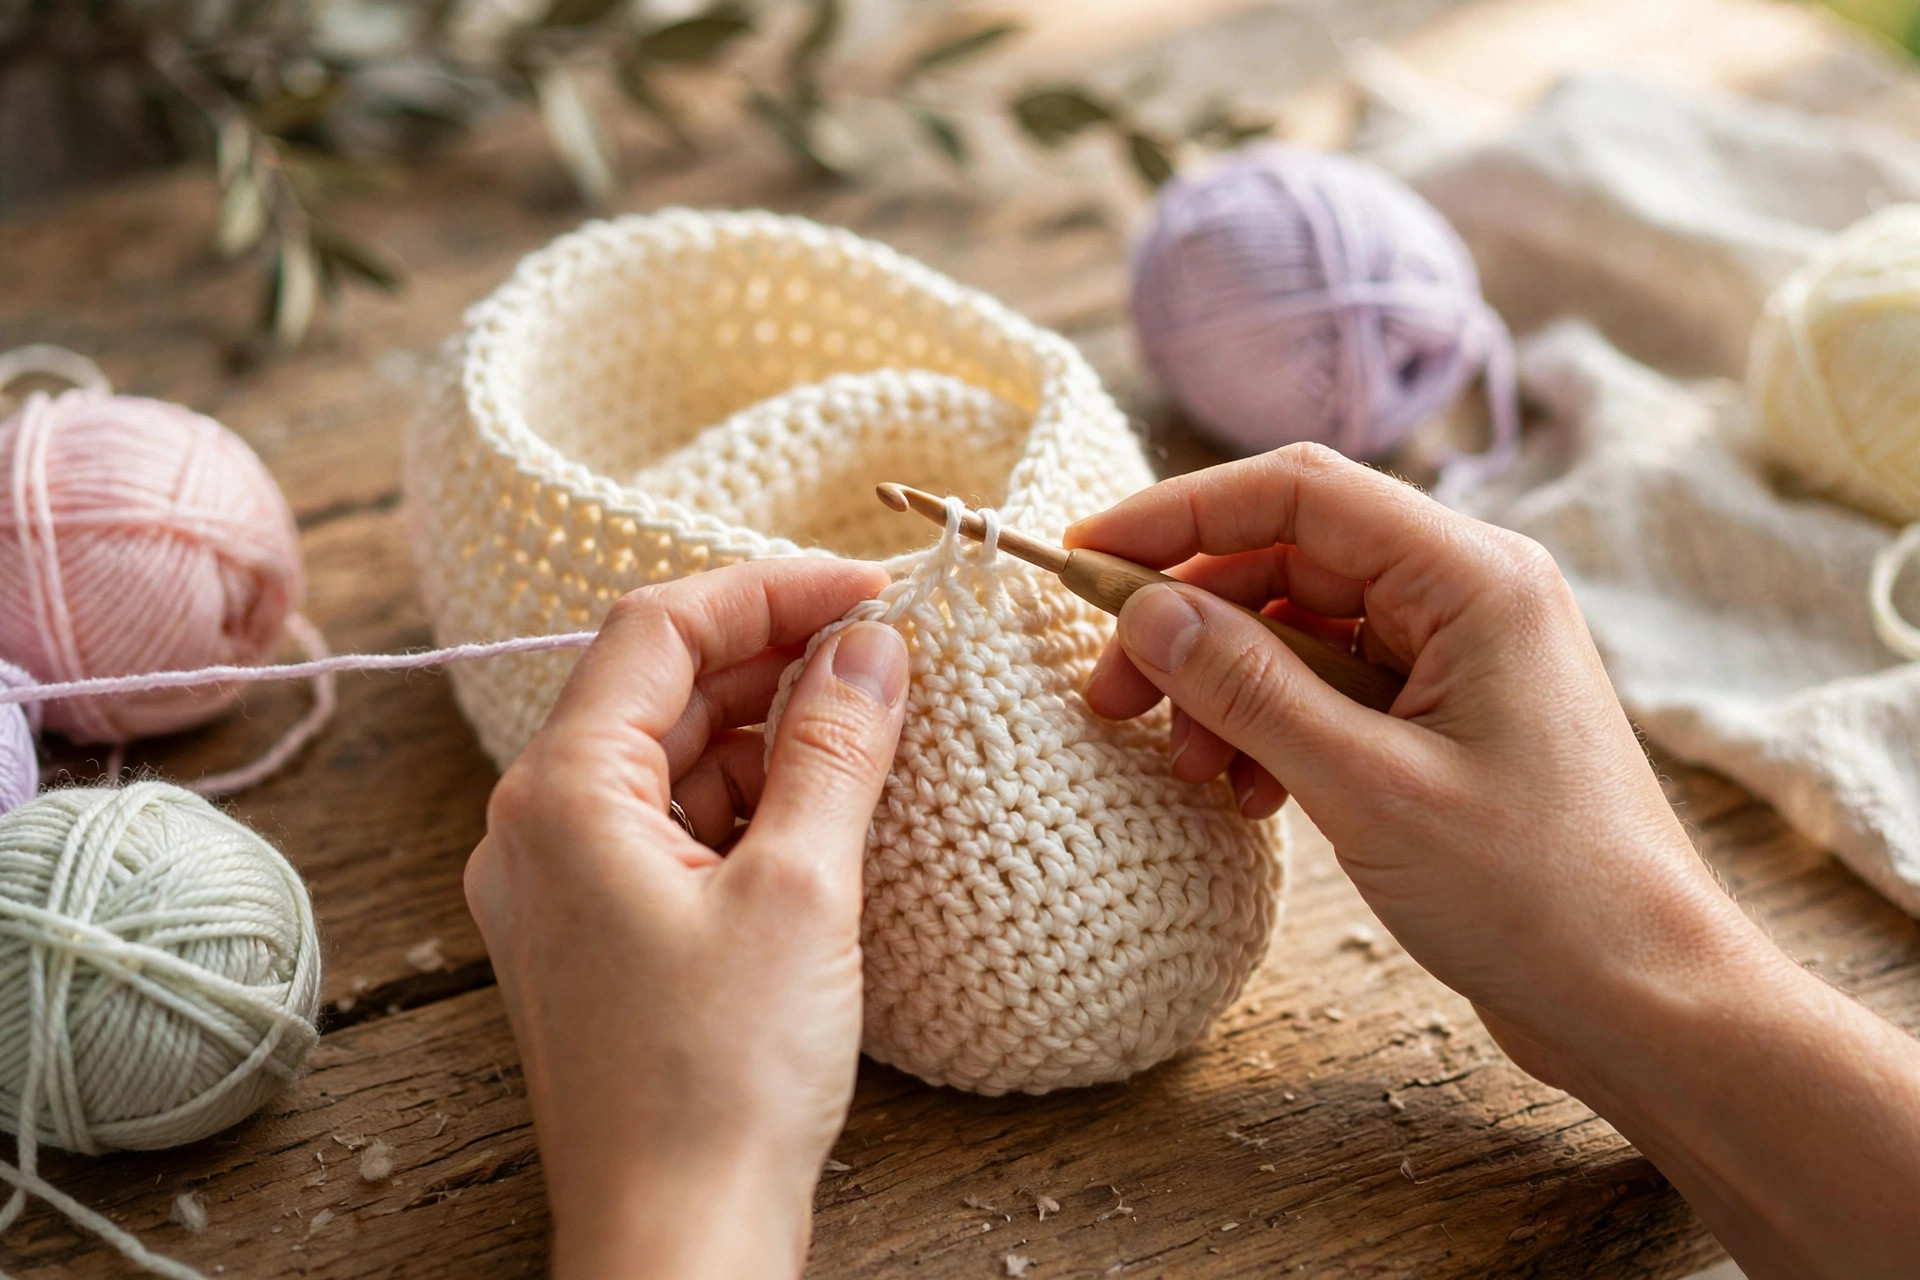
The cocoon starts with a flat round for the bottom, then the sides are worked straight up with no shaping. Work in continuous rounds, and place a stitch marker at the start of each round.
The Bottom
With the main color, work in continuous rounds.
- Round 1: MR, 8 hdc in the ring. (8)
- Round 2: inc in each st around. (16)
- Round 3: (hdc, inc) rep 8 times. (24)
- Round 4: (2 hdc, inc) rep 8 times. (32)
- Round 5: (3 hdc, inc) rep 8 times. (40)
- Round 6: (4 hdc, inc) rep 8 times. (48)
- Round 7: (7 hdc, inc) rep 6 times. (54)
The bottom should be a flat round about 9 inches wide. If the edges curl up, your tension is too tight, so go up a hook size. If the edges ripple, your tension is too loose, so go down a hook size. The bottom must sit flat, because a wavy bottom makes the whole cocoon lean and the baby will not lie straight in it.
The Body
With the main color, work the sides of the cocoon straight up from the bottom round.
- Round 8: hdc in each st around, working in the back loop only. (54)
- Rounds 9 to 30: hdc in each st around. (54)
Working round 8 in the back loop only makes a clean corner where the bottom meets the sides, so the cocoon stands up straight instead of flaring out. Keep your stitches even and relaxed. The body should reach about 12 inches long when you finish round 30. If your yarn is stretchy, the cocoon may measure a little longer, which is fine, because the ribbed top will pull it back in.
At round 20, switch to the contrast color for two rounds, then switch back to the main color. This gives the cocoon a neat stripe near the lower third, which looks sweet in photos and helps you find the bottom when you dress the baby. To change colors, work the last stitch of the old color until two loops are left on the hook, then pull the new color through. Carry the unused color up the inside so you do not have to weave in lots of ends. Our crochet baby dress pattern uses the same color change method if you want to practice the stripe first.
Part 2: The Ribbed Top and the Drawstring
The top edge decides how the cocoon finishes. A ribbed edge pulls the top in gently so it hugs the baby, and a drawstring lets you adjust the opening for photos.
The Ribbed Top Edge
Work the top edge in the contrast color for a sweet finish.
- Round 31: (7 hdc, dec) rep 6 times. (48)
- Round 32: (6 hdc, dec) rep 6 times. (42)
- Round 33: hdc in each st around, working in the back loop only. (42)
- Rounds 34 to 36: (hdc in the front loop, hdc in the back loop) rep around. (42)
The decrease rounds pull the top in slightly so it hugs the baby instead of gaping open. The back loop round makes a clean fold line, and the last three rounds make a soft ribbed band that stretches and springs back. The band should sit flat and even, with no flare. If it flares, your tension is too loose on the ribbed rounds, so go down a hook size for the band only.
The Drawstring
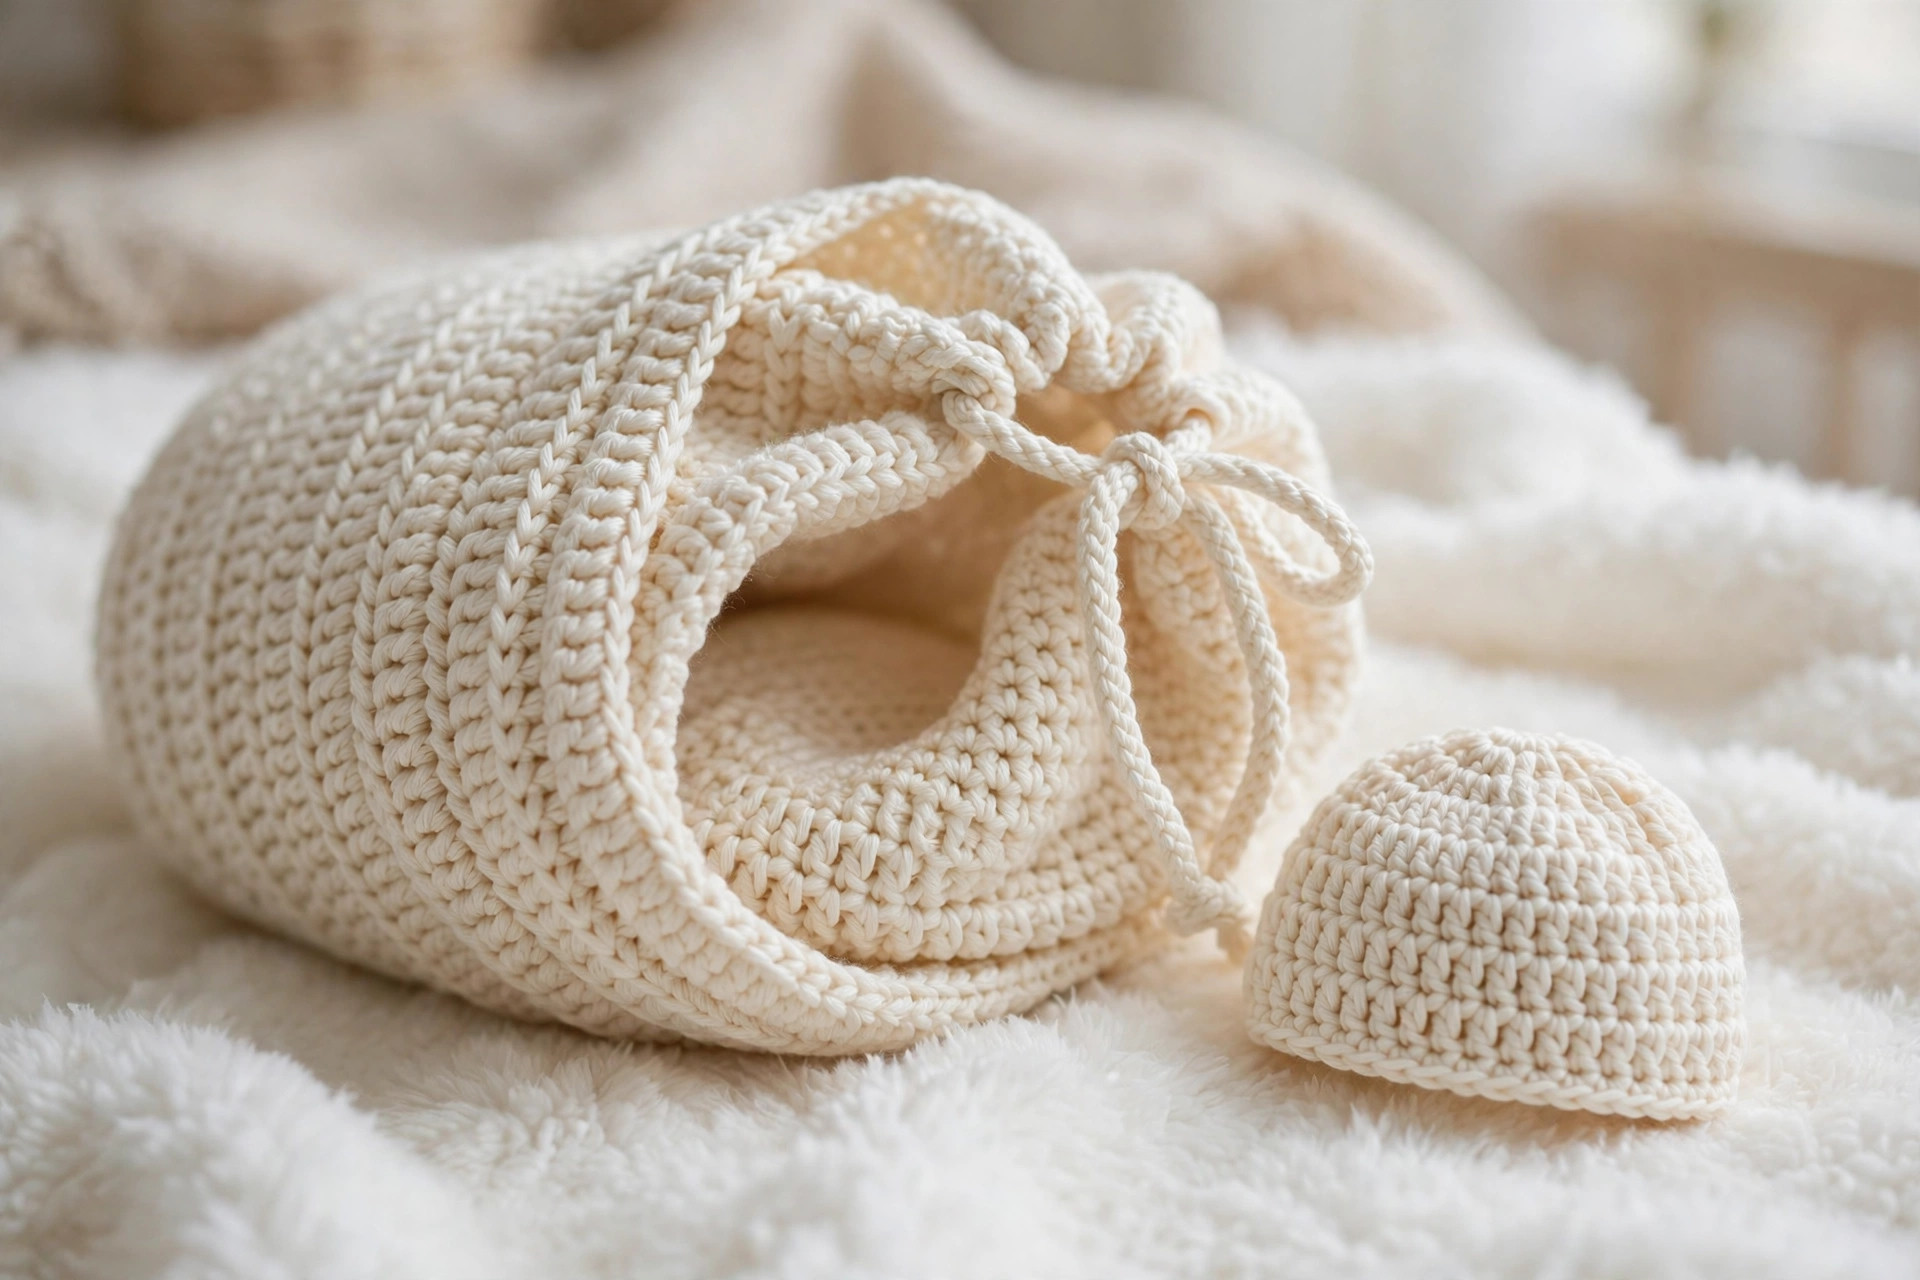
With the contrast color, chain 60. Work 1 sl st in the 2nd ch from the hook and in each ch across, then fasten off. The drawstring should be about 15 inches long.
Thread the drawstring through round 33, going in one stitch and out the next, all the way around, so both ends come out at the front. Tie the two ends in a small knot, then tie a bow. Pull the drawstring snug to test it, then loosen it again. The drawstring is for photos and for adjusting the fit, and it should never be pulled tight around a sleeping baby. Always keep the bow outside the cocoon, and never leave a baby unsupervised with a drawstring.
Part 3: The Matching Hat and Finishing
This is the part where the cocoon becomes a set. Make the little hat in the same stitch as the cocoon, add a small brim, and weave in the ends.
The Hat
With the main color, work in continuous rounds.
- Round 1: MR, 8 hdc in the ring. (8)
- Round 2: inc in each st around. (16)
- Round 3: (hdc, inc) rep 8 times. (24)
- Round 4: (2 hdc, inc) rep 8 times. (32)
- Round 5: (3 hdc, inc) rep 8 times. (40)
- Rounds 6 to 12: hdc in each st around. (40)
The hat should be about 5.5 inches tall and 13 inches around, sized to fit a newborn head. Try it on a doll or a round object of the same size to check the fit, because a hat that is too tight will leave marks and one that is too loose will slide over the eyes.
The Hat Brim
Switch to the contrast color for the brim.
- Rounds 13 to 15: (hdc in the front loop, hdc in the back loop) rep around. (40)
The ribbed brim should be about 1 inch tall, and it folds up neatly if you want a shorter look. The brim keeps the hat on the baby head and gives the set its finished look. Fasten off and weave in the end on the inside of the hat, where it will not touch the baby skin.
Final Finishing
Lay the cocoon flat and check it from every side. The bottom should sit flat, the body should be even with no twists, and the ribbed top should pull in gently. Turn the cocoon inside out and weave in all the loose ends, trimming them close so nothing pokes through to the baby side. Check the inside for knots or rough spots, and smooth them flat.
Wash the finished set before you gift it or photograph a baby in it. Hand wash in cool water with a mild baby detergent, press the water out gently without wringing, and lay the pieces flat to dry. A freshly washed cocoon is softer, and the stitches settle evenly. Our baby bonnet crochet pattern uses the same gentle finishing steps if you want another baby piece to match the set.
Variations: Colors, Sizes, and Uses
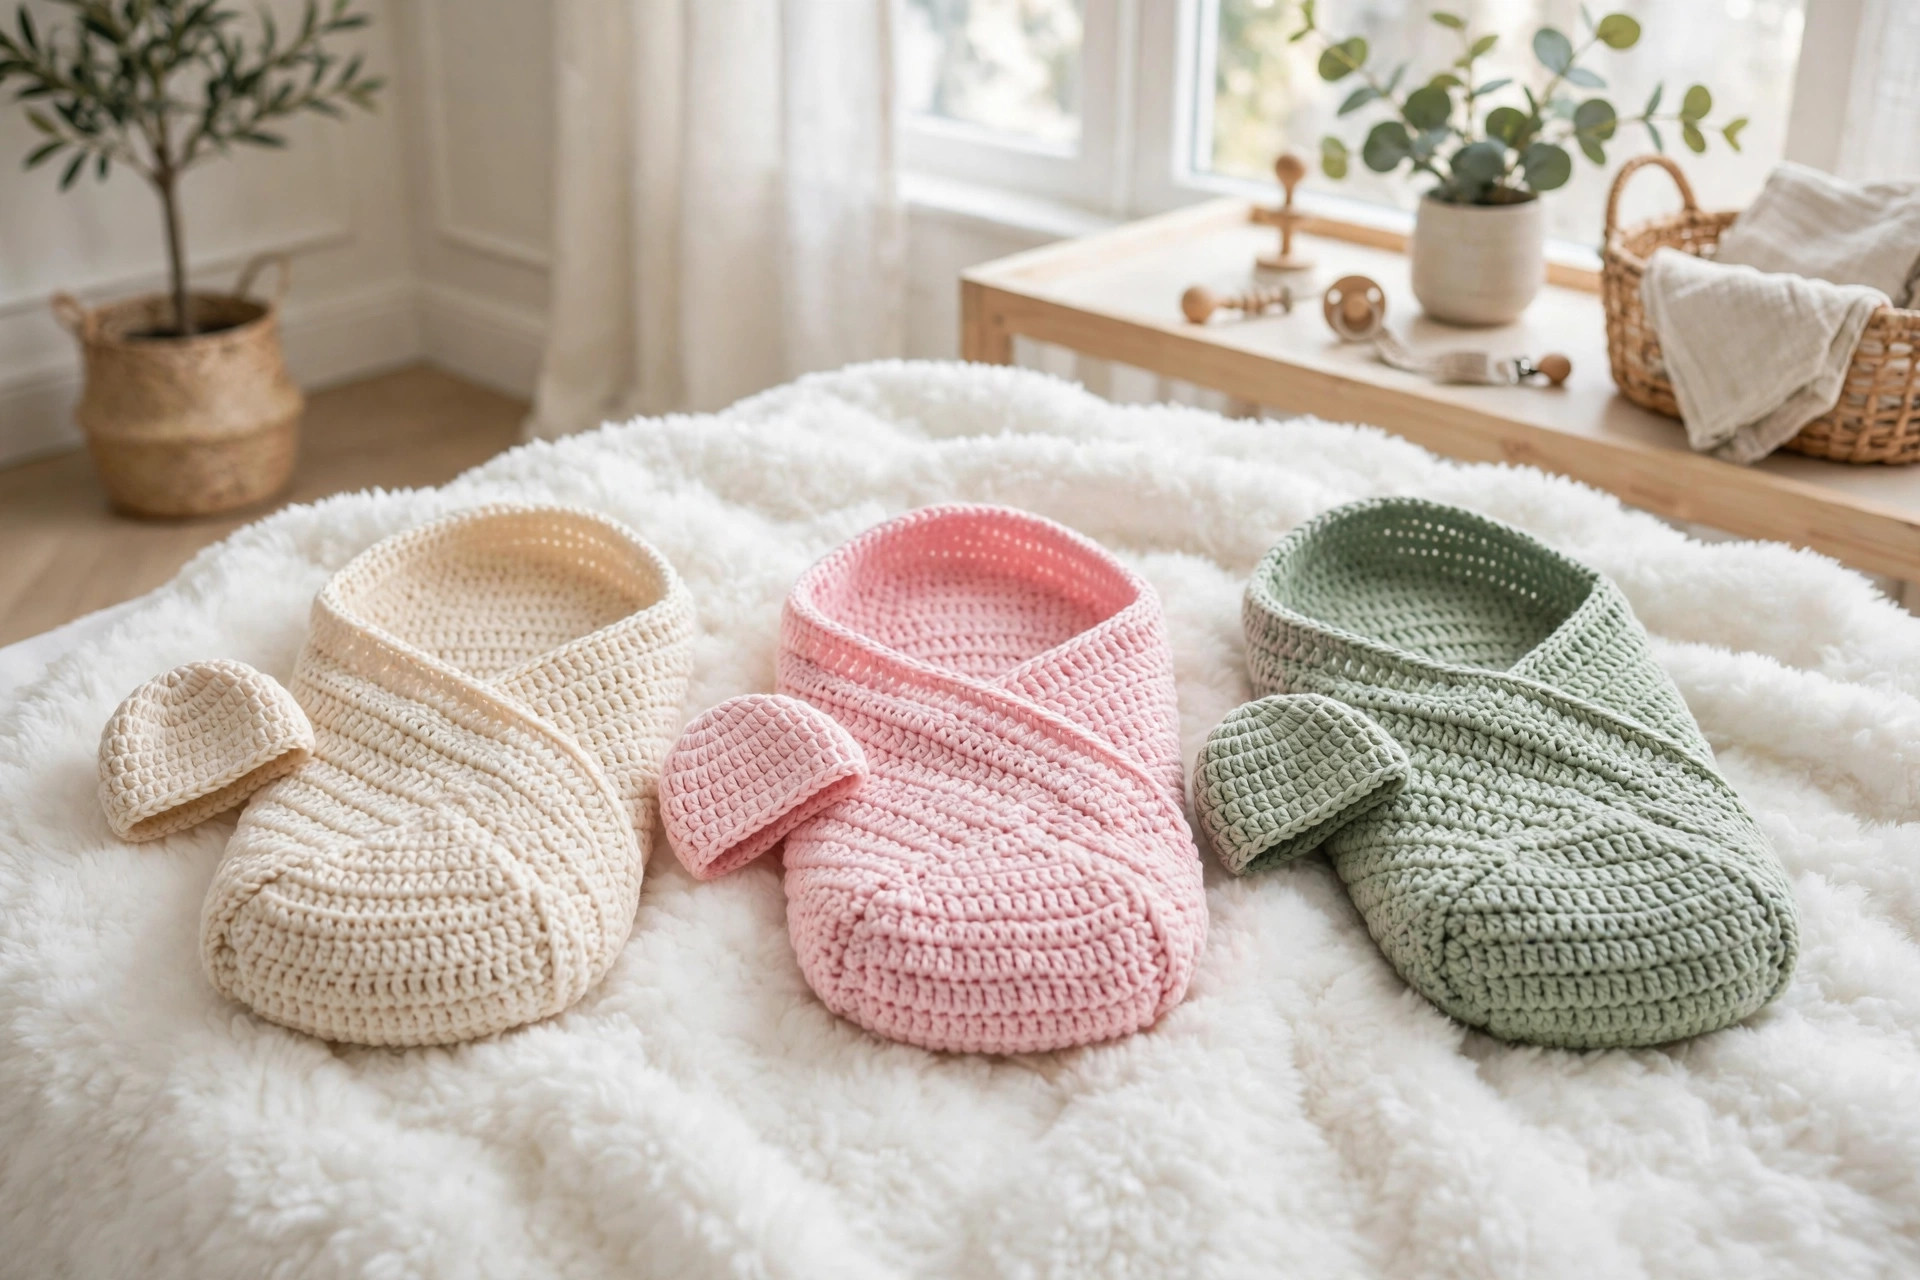
- Classic cream cocoon: work the cocoon in cream with a pastel pink stripe and brim, just as written.
- Boy cocoon: use soft sage green or dusty blue as the main color, with a cream stripe and brim.
- Neutral cocoon: work the whole set in cream or oatmeal, with no contrast color, for a timeless photo look.
- Preemie cocoon: work the bottom to 48 sts and the body to 12 inches long, with a smaller hat, for a tiny newborn.
- 3 to 6 month cocoon: work the bottom to 60 sts and the body to 16 inches long, with 2 extra hat increase rounds, for an older baby.
- Gift set: pair the cocoon and hat with a matching little lamb baby snuggle gift set crochet pattern for a complete baby shower gift.
Troubleshooting a Cocoon That Does Not Fit
- My cocoon is too tight around the baby. The gauge is too tight, or the bottom is too small. Go up a hook size, or work the bottom to 60 sts instead of 54.
- My cocoon is too loose and baggy. The gauge is too loose. Go down a hook size, and check that the ribbed top pulls the opening in.
- My bottom curls up at the edges. The stitches are too tight. Go up a hook size, and check that the bottom lies flat after every increase round.
- My ribbed top flares open. The ribbed rounds were worked too loosely. Go down a hook size for the band only, and check that the decrease rounds pulled the top in.
- My hat slides over the baby eyes. The hat is too big, or the brim is too loose. Work the hat to 36 sts instead of 40.
Care Instructions
Hand wash a baby cocoon in cool water with a mild baby detergent, and press the water out gently without wringing. Reshape the tube and the hat and lay them flat to dry away from direct heat. Do not put a baby cocoon in the dryer, because the heat can shrink the fibers and stiffen the stretchy stitch. Wash the set before the first use, and again after every few uses, so it stays soft and clean for newborn skin. Store the set folded in a drawer, away from anything that could snag the stitches.
Frequently Asked Questions
Is this baby cocoon crochet pattern good for beginners?
Yes, it is best for an easy crocheter. You need a magic ring, half double crochet, increases, and decreases. One cocoon and hat set takes about 3 hours, and the hat alone takes 30 minutes.
What size is this baby cocoon?
It is sized for a newborn from birth to about 3 months, up to about 12 pounds. The cocoon is about 14 inches long and 9 inches wide, and the hat is about 5.5 inches tall and 13 inches around. Notes for a smaller preemie size and a larger 3 to 6 month size are included.
What yarn is best for a baby cocoon?
Soft DK weight baby yarn is the best choice, because it is gentle on newborn skin, has a smooth texture, and stretches a little. Look for a yarn labeled baby or soft, in premium acrylic or a soft cotton blend. Avoid wool, which can irritate sensitive skin, and avoid fuzzy yarns, which can shed near a newborn face.
Is a baby cocoon safe for naps?
A cocoon is safe for supervised naps and photos, with the baby lying on their back and the cocoon loose enough for the baby to move and breathe easily. Never pull the drawstring tight around a sleeping baby, and never leave a baby unsupervised in a cocoon. Follow safe sleep guidance from your pediatrician. This pattern is a photo prop and a snuggle sack, not a sleep product.
Is this the same as a baby blanket?
No, this is a different project. This pattern makes a snug tube with a closed bottom that wraps the baby from the shoulders down, plus a hat. A blanket lies flat. If you want a blanket to pair with the cocoon, our lovey blanket crochet pattern is the matching project.
Can I sell baby cocoons made from this pattern?
Yes, you may sell finished cocoons made from this free pattern, with credit to Little Loop Finds. Do not sell or republish the pattern text itself. A cocoon and hat set in a soft neutral color makes a lovely gift.
Happy stitching, and may your little cocoon keep every newborn snug, warm, and photo ready.