Crochet Wind Spinner Pattern (Free, Easy, One Day)
Stitch a colorful spiral that dances in the wind with this free, beginner-friendly crochet wind spinner pattern.

Home Decor · Crochet
- Finished size
- 10 in wide x 22 in long with tails
- Making time
- 3 to 4 hours
- Hook
- US H-8 (5.0 mm)
- Set
- Spinner, hanger, and tails
- Skill
- Beginner
In this post
- Key Takeaways
- Table of Contents
- Why You Will Love This Project
- Finished Size, Skill Level, and Time
- Materials You Need
- Abbreviations (US Terms)
- How the Spiral Works
- Part 1: Crocheting the Spiral Strip
- Part 2: Adding the Hanger
- Part 3: Tails and Finishing
- Color Theme Ideas
- Troubleshooting
- Where to Hang Your Wind Spinner
- Care Instructions
- Frequently Asked Questions
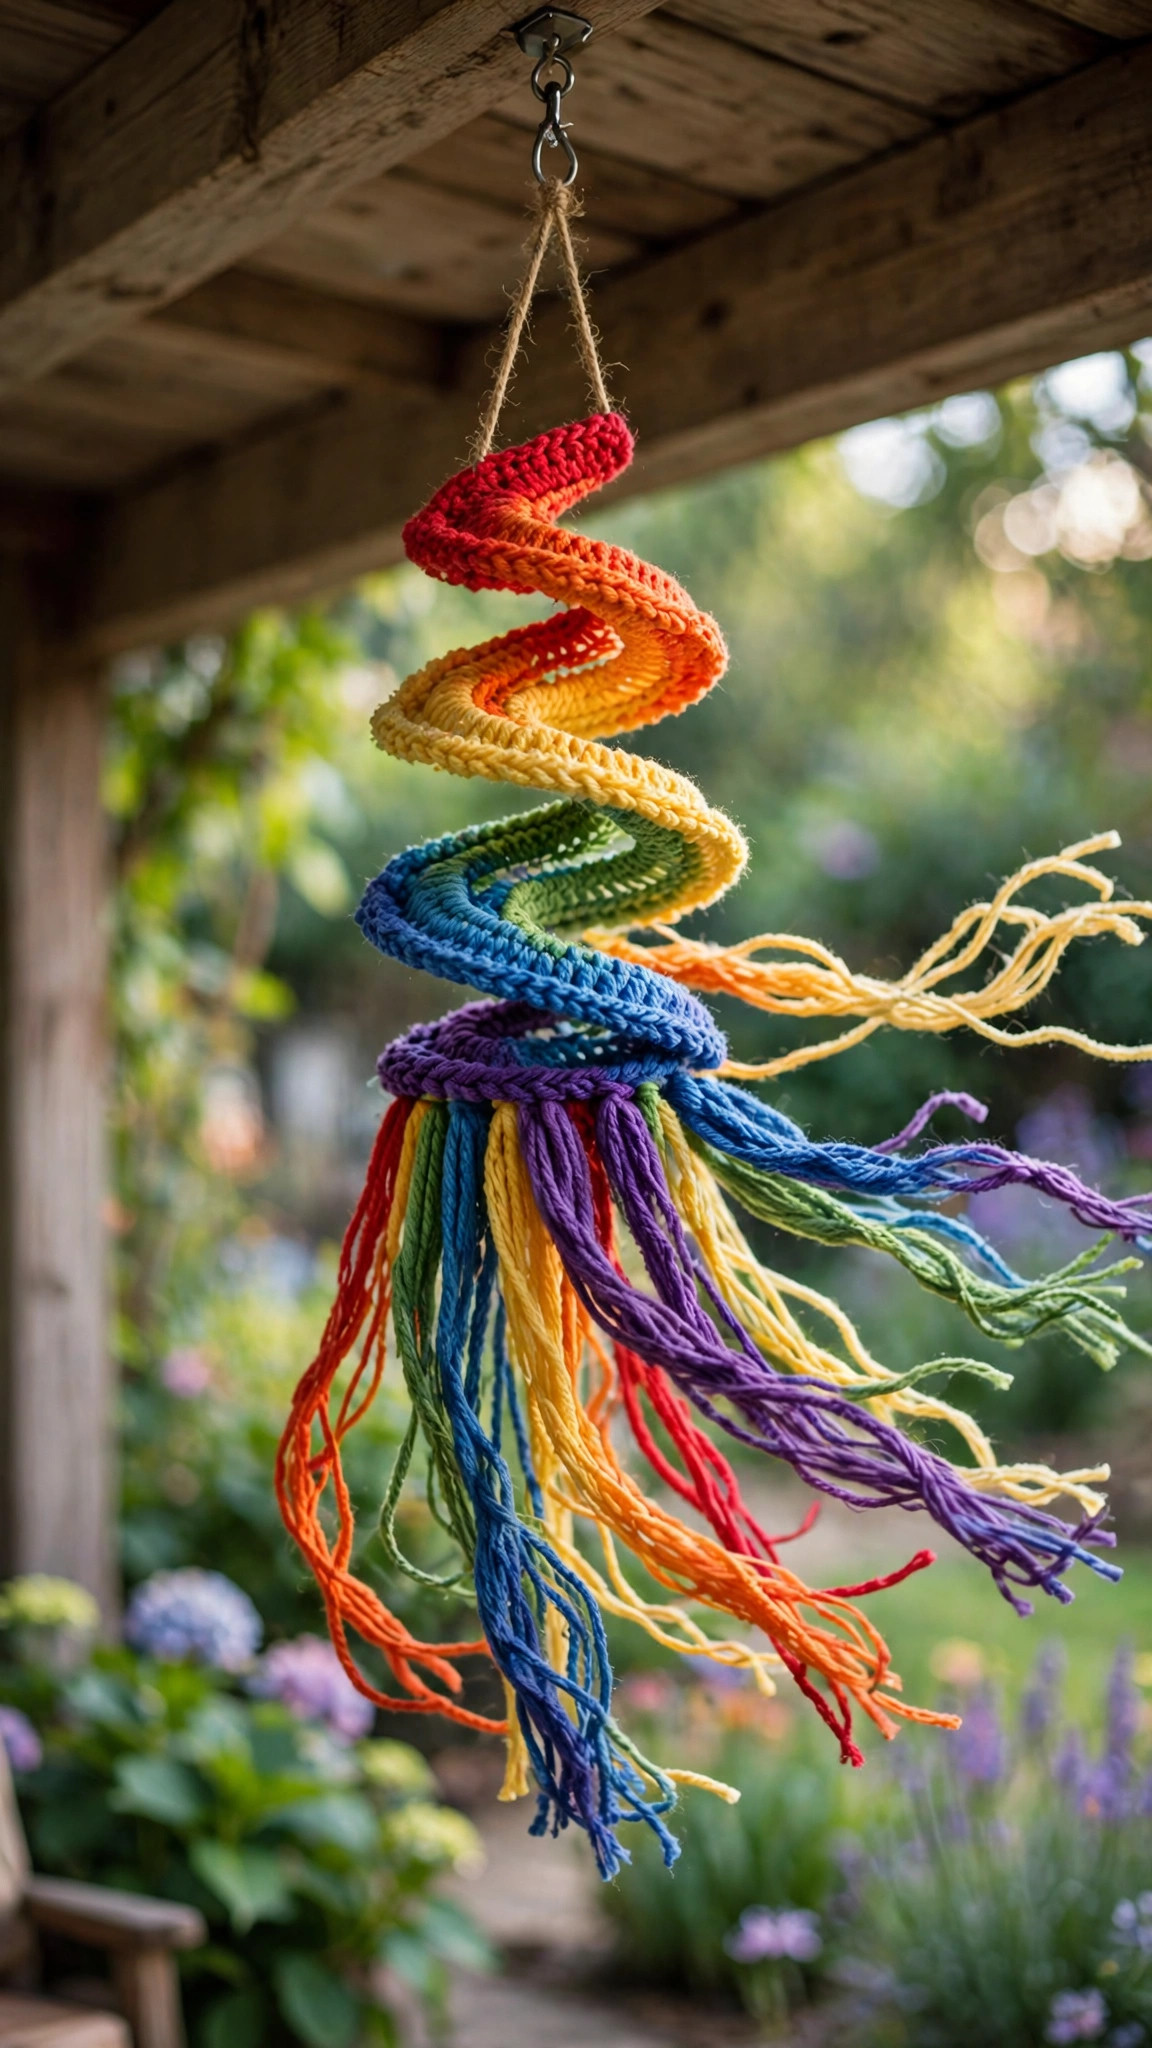
There is something magical about a crochet wind spinner. One minute it is a flat strip of colorful stitches, and the next it is twirling in the breeze on your porch, catching the light and making the whole garden feel alive. This free crochet wind spinner pattern shows you exactly how to make one from start to finish, and the best part is how simple the stitching really is. If you can single crochet, half double crochet, double crochet, treble crochet, and double treble crochet, you already have every skill this project asks for.
This is an original Little Loop Finds design. It uses a clever wedge stitch pattern, where each row gets taller on one side than the other, so the finished strip twists into a natural spiral all by itself. No wire frame, no stiffening spray, and no complicated shaping. Just yarn, a hook, and a little breeze. Most makers finish the stitching in a single relaxed afternoon, and hanging it takes about five minutes with a wooden bead and a fishing swivel.
Wind spinners also make wonderful gifts. They are light, they pack flat for mailing, and they suit just about everyone: gardeners, teachers, new homeowners, and anyone who loves handmade decor. Make one in rainbow brights for summer, switch to warm ambers and rusts for fall, or stitch a cool ocean palette for a beach house porch. Once you learn the technique, you will want a whole collection.
Key Takeaways
- Free and original: this crochet wind spinner pattern is a Little Loop Finds original design, written in US terms, and completely free.
- Beginner friendly: uses only basic stitches (sc, hdc, dc, tr, dtr); the wedge rows create the spiral shape automatically.
- Fast project: about 3 to 4 hours of stitching, plus 5 minutes to assemble the hanger.
- One ball project: needs roughly 180 yards of worsted weight cotton yarn, in one to three colors.
- No special hardware beyond a swivel: a small fishing swivel and a wooden bead let the spinner rotate freely in the wind.
Table of Contents
- Why You Will Love This Project
- Finished Size, Skill Level, and Time
- Materials You Need
- Abbreviations (US Terms)
- How the Spiral Works
- Part 1: Crocheting the Spiral Strip
- Part 2: Adding the Hanger
- Part 3: Tails and Finishing
- Color Theme Ideas
- Troubleshooting
- Where to Hang Your Wind Spinner
- Care Instructions
- Frequently Asked Questions
Why You Will Love This Project
Crochet wind spinners sit in that sweet spot of handmade projects: they look impressive, they stitch up fast, and they use simple techniques you probably already know. The wedge stitch pattern is the whole secret. Each row climbs from a short single crochet on one edge to a tall double treble on the other edge. Because one side of the strip is physically longer than the other, the fabric has no choice but to curl, and a few gentle twists turn that curl into a perfect spiral.
This project is also wonderfully forgiving. Slight tension differences just add character to the twist. Color changes can land anywhere and still look intentional. And if your strip does not curl as dramatically as you hoped, a quick steam or a gentle hand twist sets it right. Beginners get a satisfying win, and experienced crocheters get a relaxing, almost meditative make.
If you enjoy quick home decor projects like this one, you will also love our crochet garland pattern, which uses the same easy stitch rhythm in a festive string of color.
Finished Size, Skill Level, and Time
- Finished size: about 10 inches wide and 14 inches long for the spiral body, 22 inches total including the yarn tails. Size varies a little with yarn and tension.
- Skill level: confident beginner. You should be comfortable with chain, slip stitch, single crochet, half double crochet, double crochet, treble crochet, and double treble crochet.
- Making time: 3 to 4 hours of crocheting, plus about 5 minutes to attach the hanger and tails.
Materials You Need
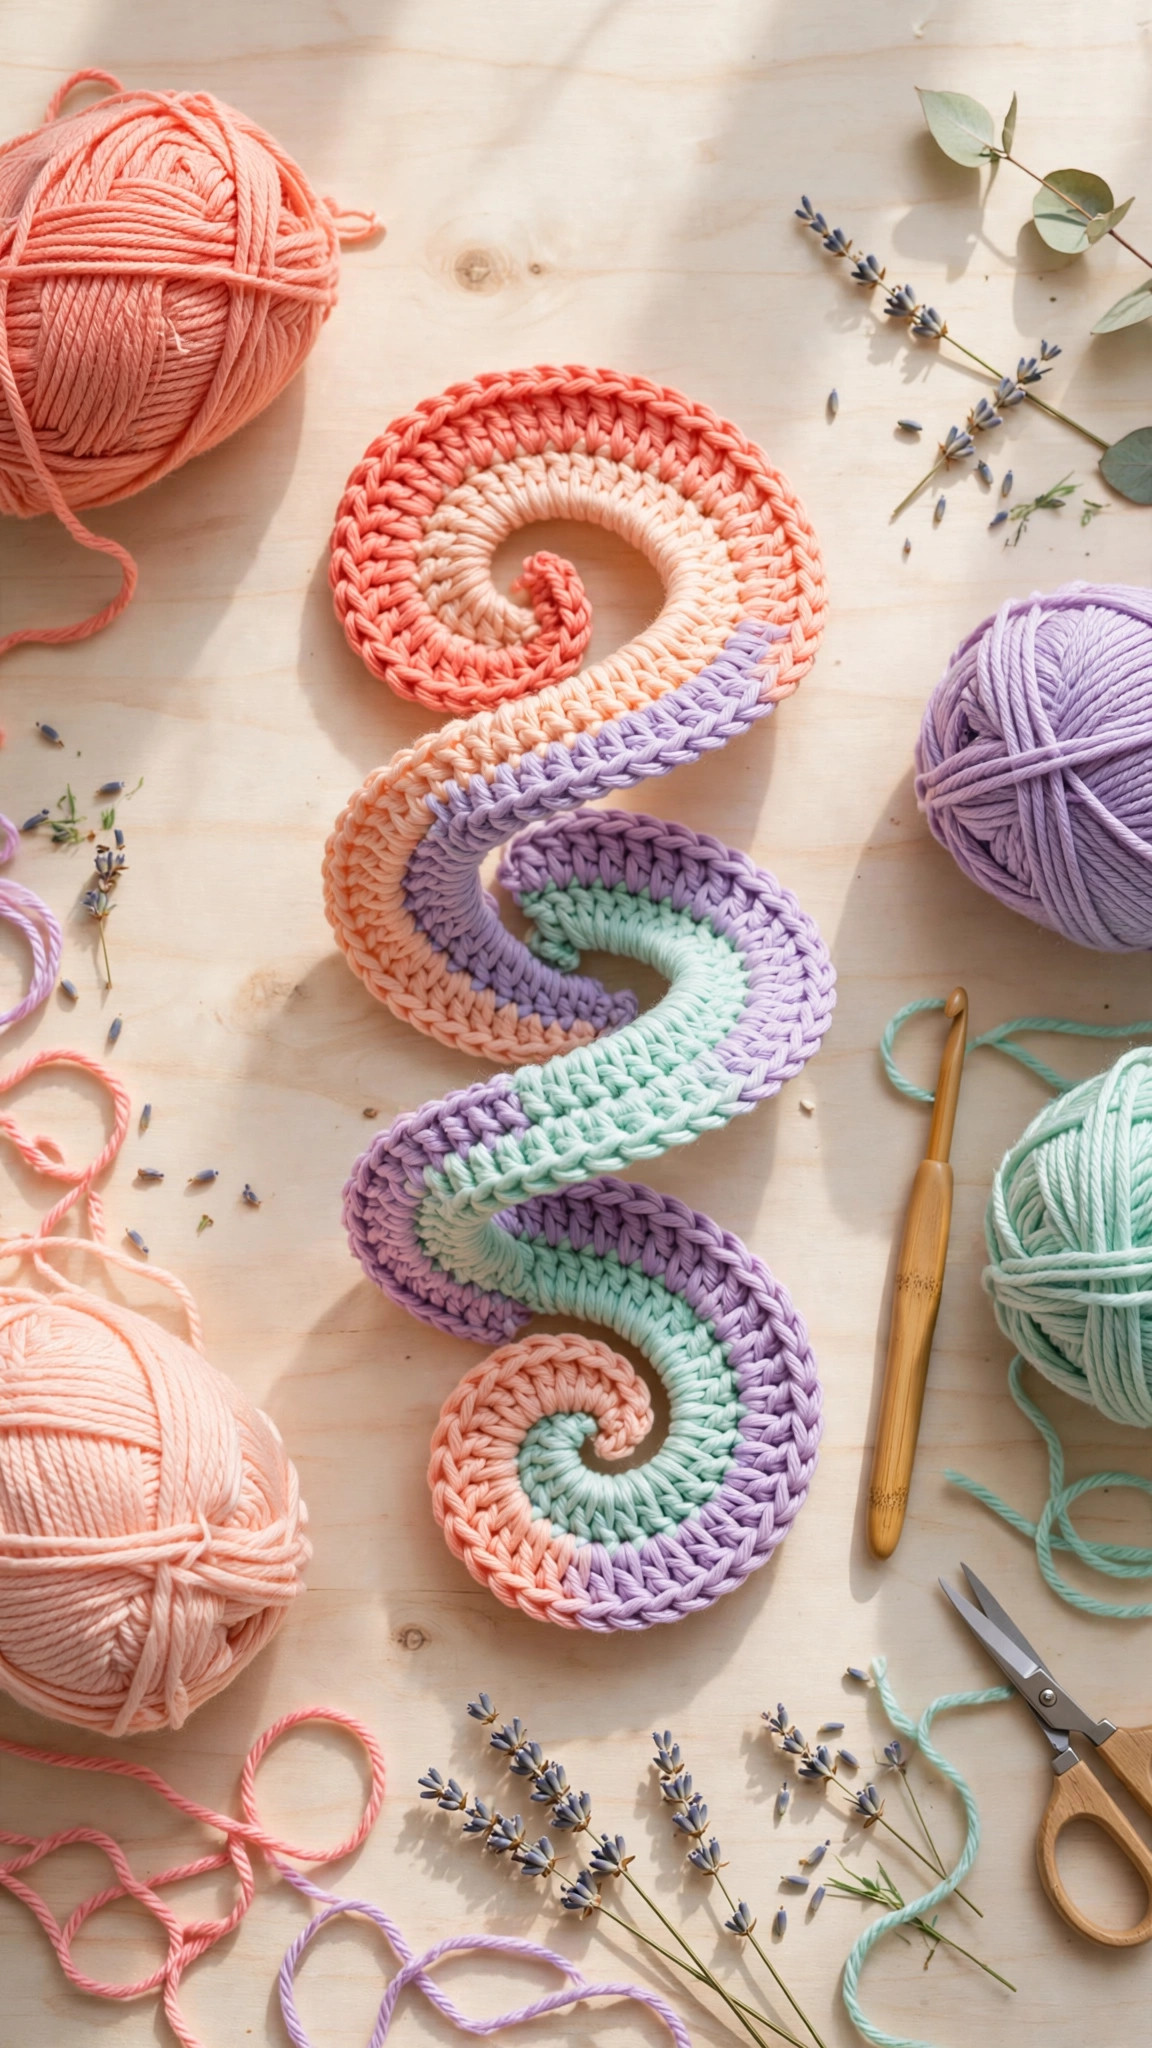
- Worsted weight (#4) cotton yarn, about 180 yards total. Cotton holds its shape outdoors better than acrylic. Use one color, or split it into three colors of about 60 yards each for stripes.
- US H-8 (5.0 mm) crochet hook.
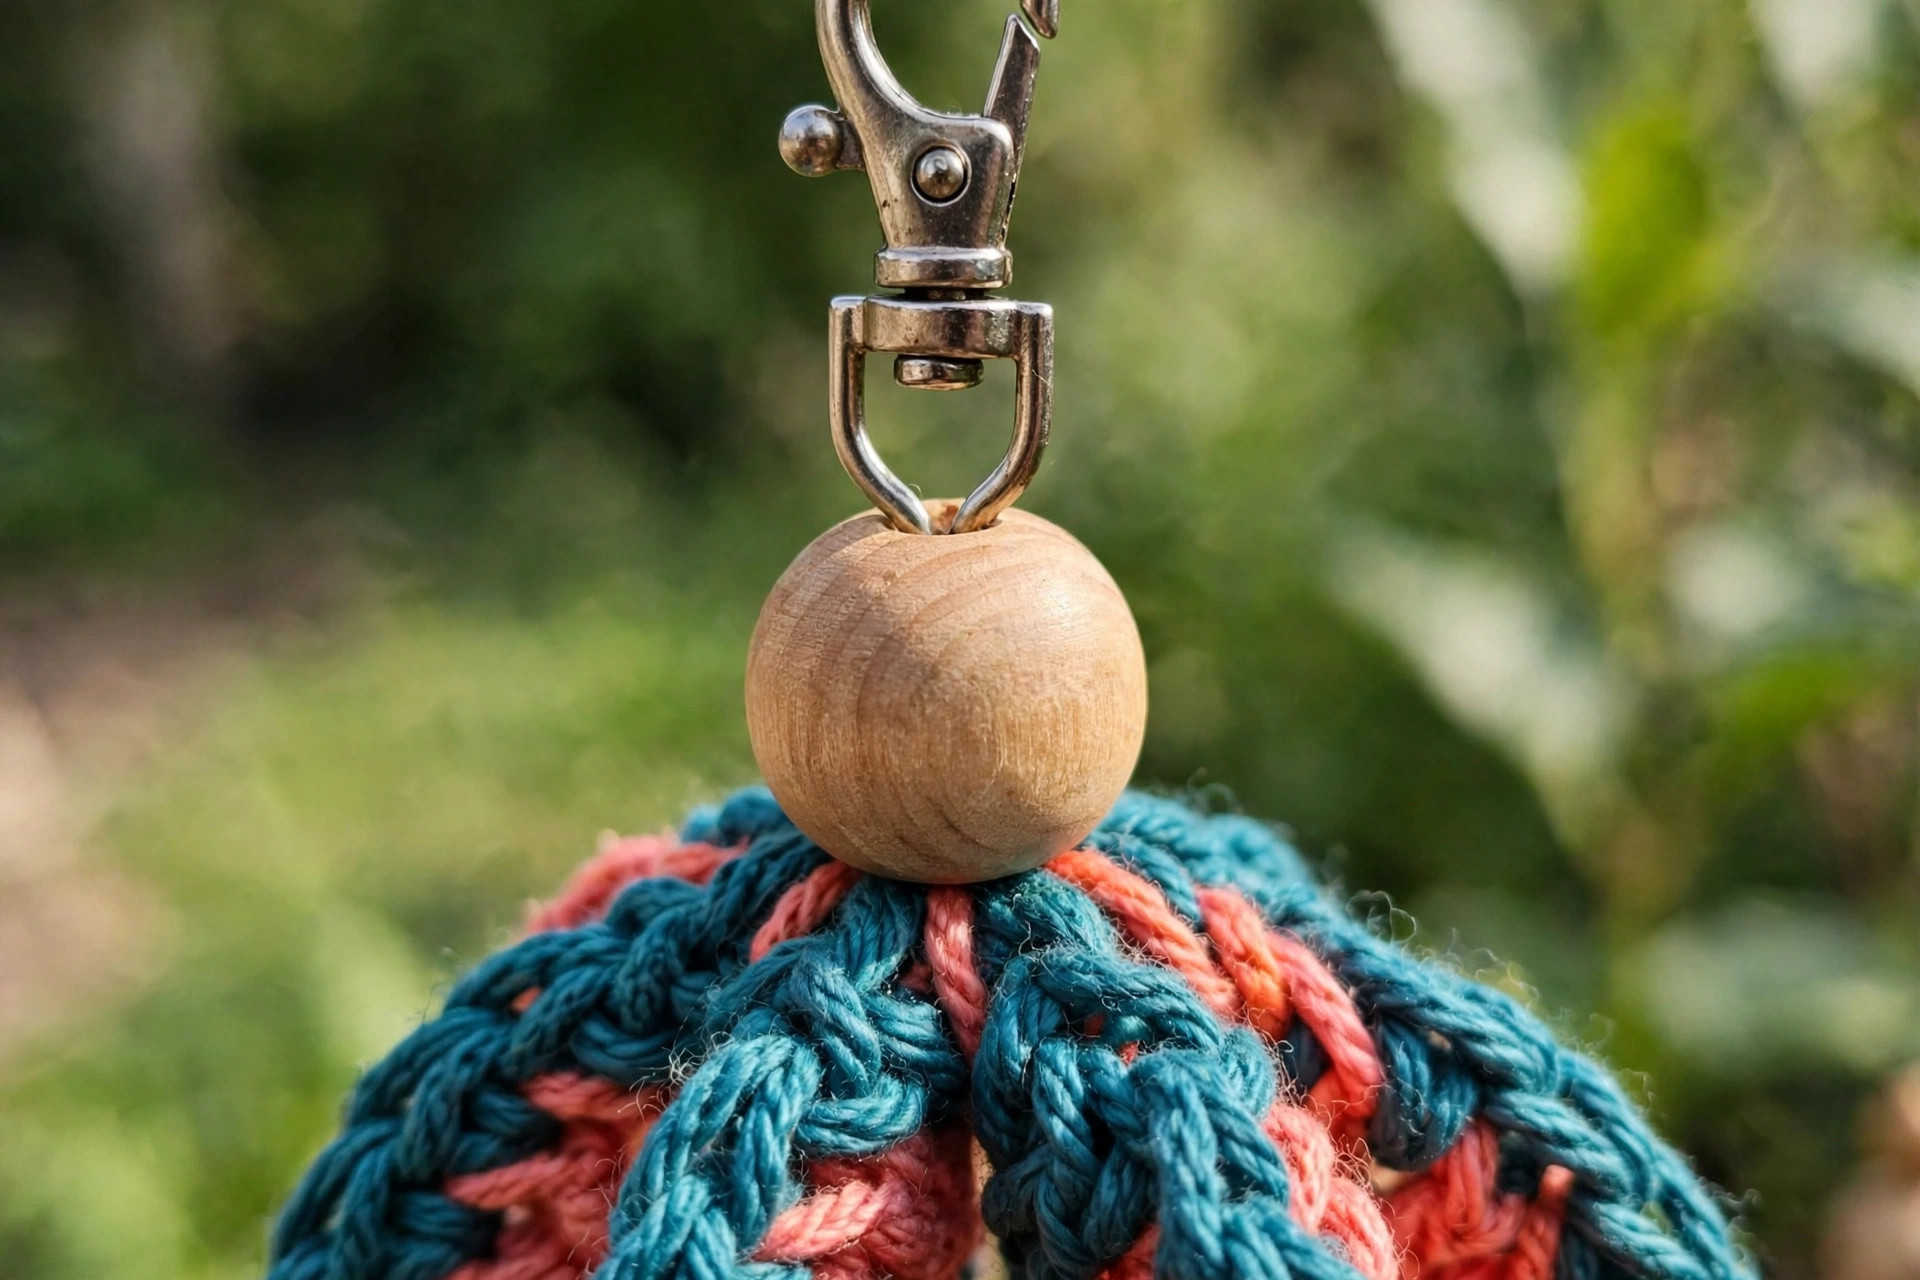
- One wooden bead, about 1 inch in diameter, with a hole large enough for yarn.
- One small fishing swivel (ball bearing swivels spin the smoothest).
- Yarn needle and scissors.
- Optional: a small metal ring or key ring for the top loop.
Abbreviations (US Terms)
- ch = chain
- sc = single crochet
- hdc = half double crochet
- dc = double crochet
- tr = treble crochet
- dtr = double treble crochet
- sl st = slip stitch
- st(s) = stitch(es)
- rep = repeat
- RS = right side
How the Spiral Works
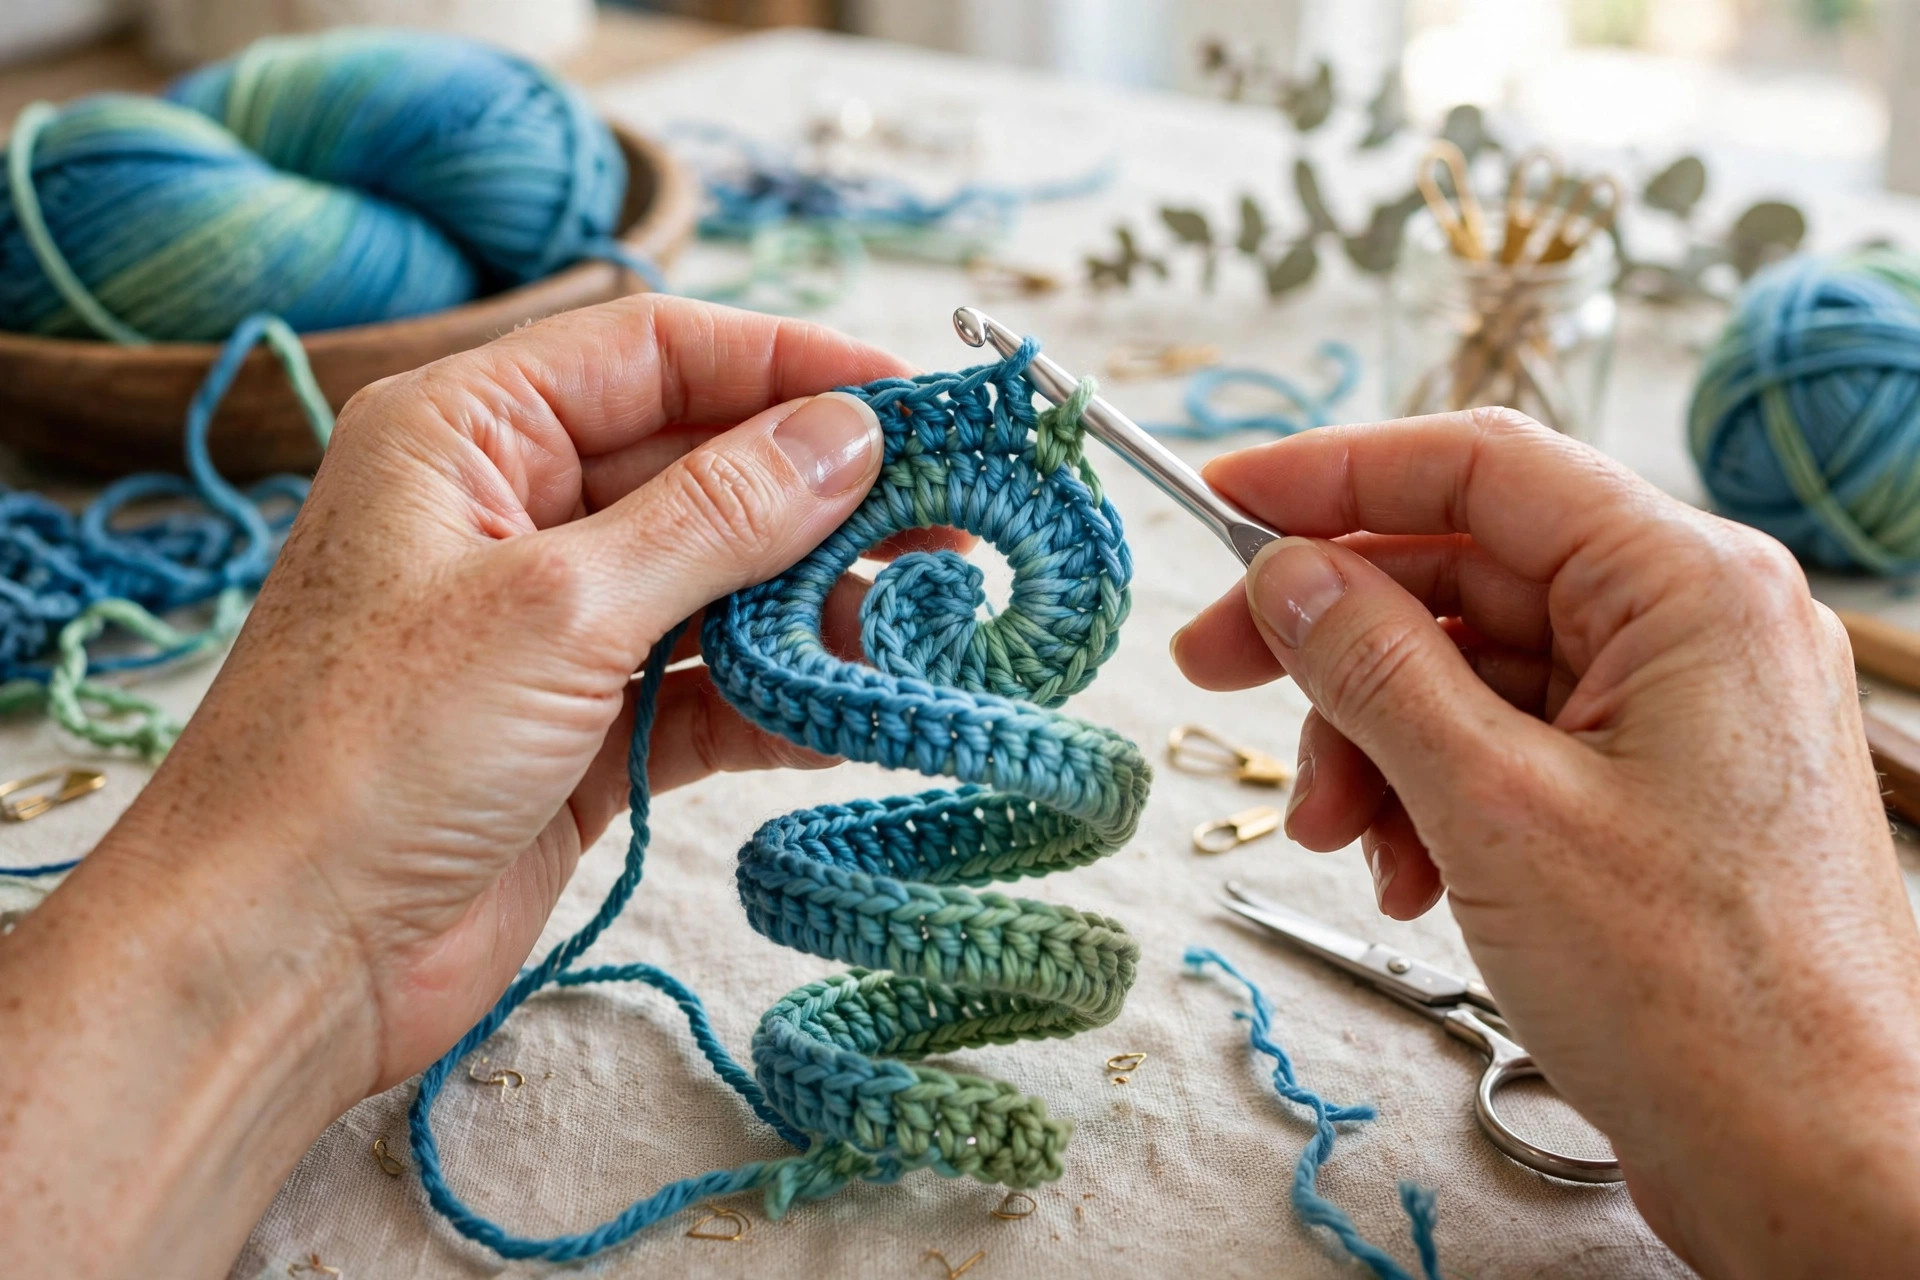
Before you pick up your hook, it helps to understand what makes this pattern twist. Every patterned row is worked as a repeating wedge: one single crochet, one half double crochet, one double crochet, one treble crochet, and one double treble crochet, repeated across the row. The double treble side of each wedge is much taller than the single crochet side. Row after row of these wedges makes one long edge of the strip longer than the other long edge, and the fabric curls to absorb the difference.
On the return rows, the wedge runs in the opposite direction, which keeps the edges neat and the color stripes balanced. A final gentle twist by hand locks in the spiral. That is the entire engineering behind this project, and it means there is no seaming, no stuffing, and no shaping to memorize.
Part 1: Crocheting the Spiral Strip
Work the strip in rows, turning at the end of every row. The chain-1 at the start of single crochet rows does not count as a stitch. For taller rows, the turning chains do not count as stitches either; work the first stitch of the row into the very first stitch of the previous row.
Foundation: With Color A, ch 51.
Row 1 (RS): Sc in the 2nd ch from the hook and in each ch across. Turn. (50 sc)
Row 2: Ch 4 (counts as turning chain only, not as a stitch), *sc in the next st, hdc in the next st, dc in the next st, tr in the next st, dtr in the next st; rep from * across to the end. Turn. (10 wedge repeats, 50 sts)
Take a moment to look at your work after Row 2. You should see a rippled edge where the tall stitches stand up and the short stitches sit low. That ripple is the start of your spiral.
Row 3: Ch 1, *dtr in the next st, tr in the next st, dc in the next st, hdc in the next st, sc in the next st; rep from * across. Turn. (10 wedge repeats, 50 sts)
Row 4: Ch 1, sc in each st across. Turn. (50 sc)
Rows 1 through 4 form one complete color block. You will now repeat this four-row block three more times, changing colors as you like.
Rows 5 to 8: Change to Color B. Rep Rows 1 to 4.
Rows 9 to 12: Change to Color C. Rep Rows 1 to 4.
Rows 13 to 16: Change back to Color A. Rep Rows 1 to 4.
Fasten off, leaving a 12-inch tail for finishing. Your strip should measure about 10 inches wide and 14 inches long, and it should already be curling gently along its length. Give it a soft twist with your hands, holding the top corners and rotating one end two or three full turns, and watch the spiral settle in.
A note on tension: keep your turning chains relaxed, especially the chain-4 at the start of the wedge rows. Tight turning chains pinch the tall edge and fight the curl. If your hands tend to crochet tightly, go up to a 5.5 mm hook; the slightly looser fabric spins and drapes even better.
Garden-themed makers might also enjoy our crochet hanging plants free pattern, another porch-perfect project that uses worsted cotton.
Part 2: Adding the Hanger
A wind spinner needs to rotate freely, and that is exactly what the fishing swivel is for. Without it, the whole piece just swings; with it, the spiral catches the air and turns.
Step 1: Thread your yarn needle with the 12-inch tail at the top edge of the strip. Run a gathering stitch along the top short edge: weave the needle in and out through the end of each row, all the way across the 10-inch width.
Step 2: Pull the tail gently to cinch the top edge into a soft gathered point. Do not pull it drum tight; a gentle gather looks best and lets the spiral open below it. Knot the tail securely to hold the gather.
Step 3: Thread the wooden bead onto a 10-inch length of yarn, then thread one end of the fishing swivel. Tie the yarn firmly to the swivel eye, then pass the yarn ends through the gathered top of the spinner and knot them securely on the inside. The order from top to bottom is now: hanging loop, swivel, bead, gathered spinner top.
Step 4: Use the remaining yarn to form a hanging loop above the swivel, or attach a small metal ring there instead. Weave in all ends with your yarn needle.
Part 3: Tails and Finishing
The tails at the bottom are what make a wind spinner dance. They catch the wind, add movement, and give the piece its classic finished look.
Step 1: Cut 12 strands of yarn, each about 14 inches long. Use your main colors, or mix in a contrasting shade for extra flair.
Step 2: Working along the bottom short edge, attach the strands with lark's head knots: fold a strand in half, push the folded loop through a stitch at the edge from front to back, then pull the two loose ends through the loop and tighten. Space the strands evenly, about one per wedge repeat, with a couple extra at the corners.
Step 3: Trim the tails so they hang evenly, or leave them slightly graduated (longer in the middle) for a pretty pointed effect. Give the whole spinner one more gentle twist to set the spiral, then hang it up and let the breeze do the rest.
If you love the look of flowing yarn tails, our crochet vine pattern uses a similar trailing technique on a smaller, indoor-friendly scale.
Color Theme Ideas
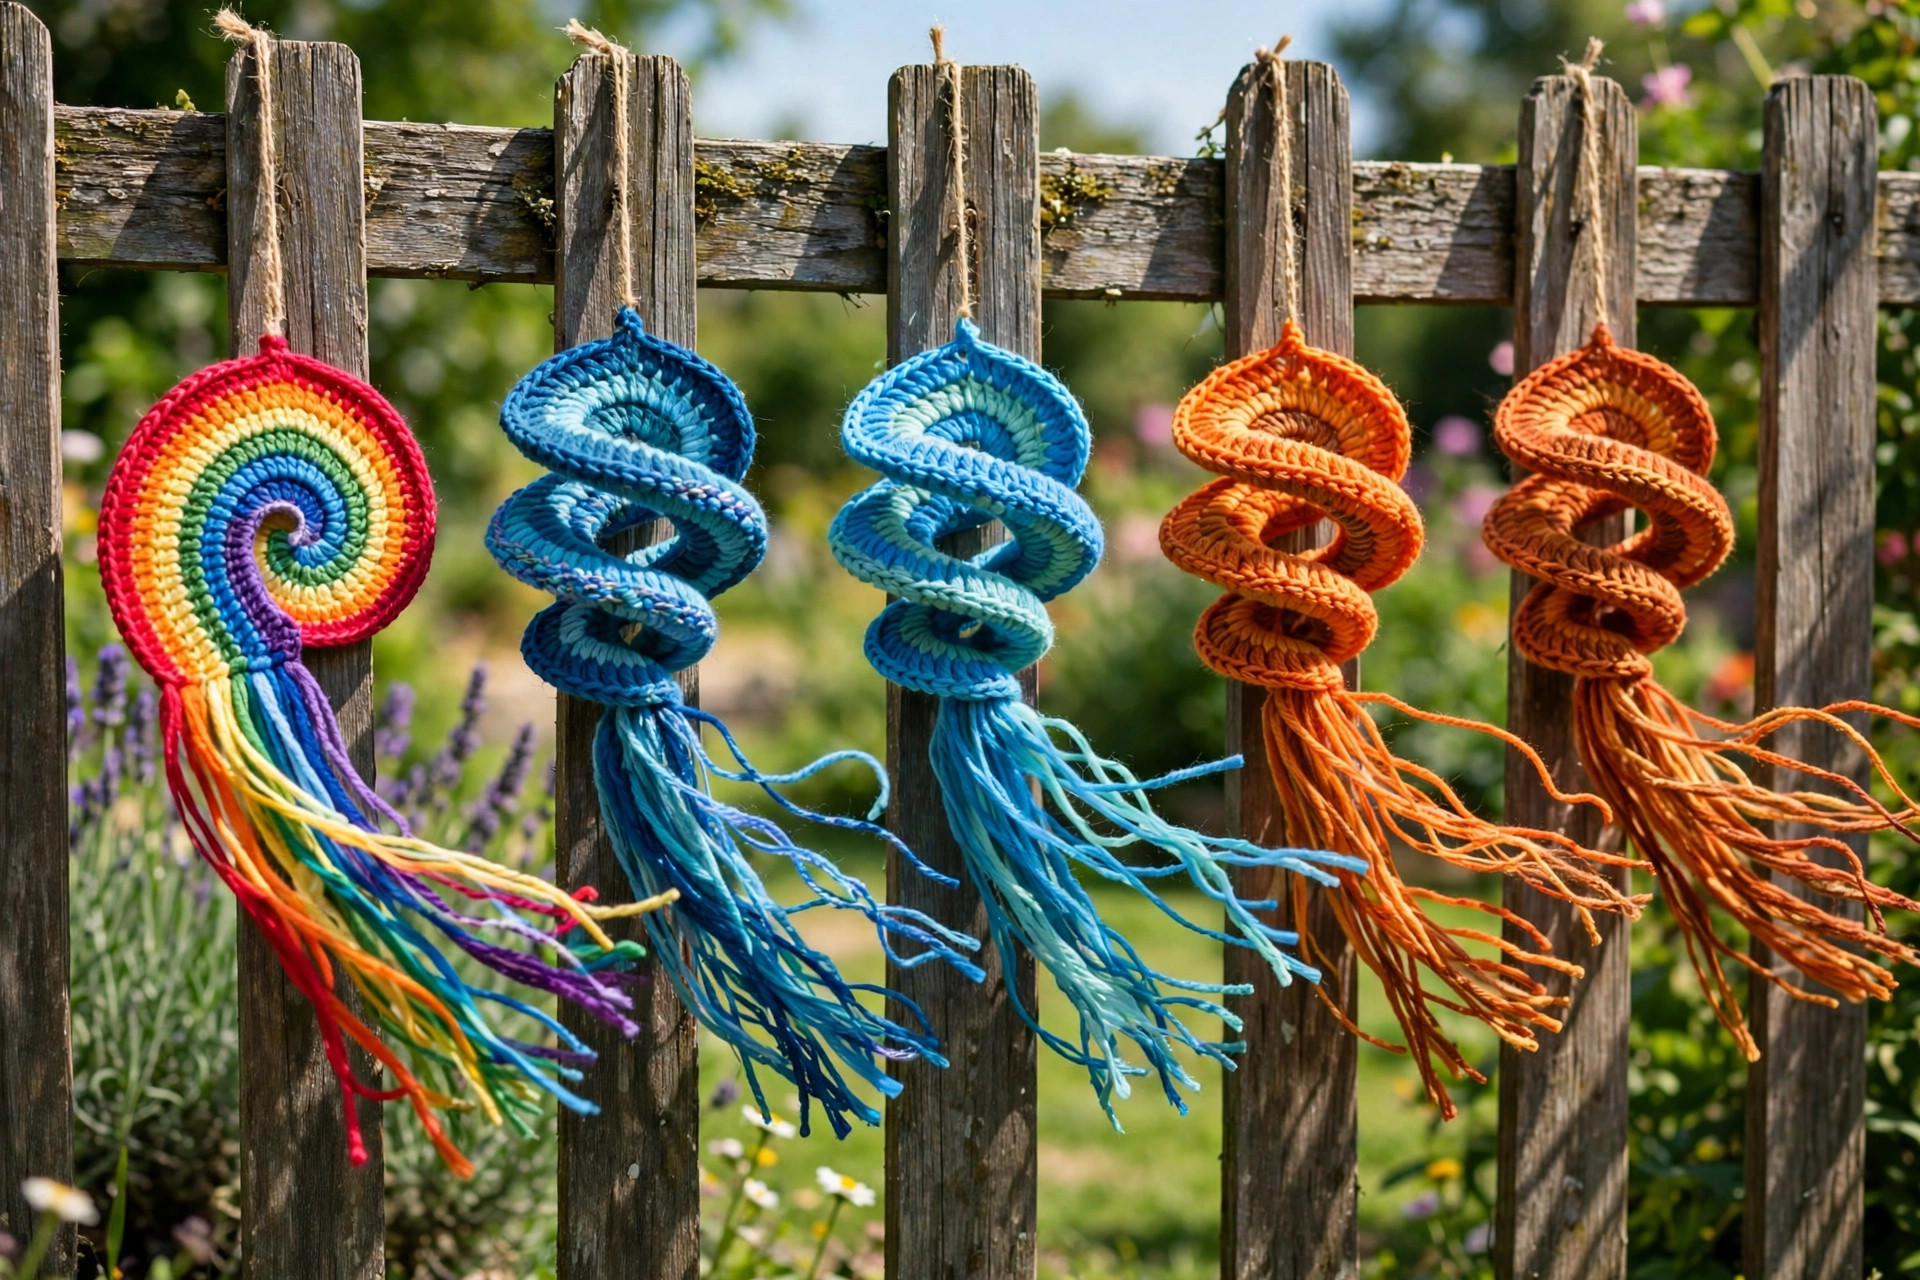
One pattern, endless personalities. Here are five color themes our test makers loved:
- Rainbow Brights: red, orange, yellow, green, blue, purple, one stripe each, repeating. The classic, and the fastest to gift.
- Sunset: coral, peach, golden yellow, and dusty rose. Gorgeous in late afternoon light.
- Ocean: teal, seafoam, navy, and white. Perfect for coastal porches.
- Autumn Harvest: rust, mustard, chocolate brown, and burnt orange. Hang it in September and leave it through Thanksgiving.
- Monochrome: three shades of a single color, light to dark. Surprisingly elegant and modern.
For a festive version, pair this project with our crochet ornaments free patterns and hang both on the same porch for the holidays.
Troubleshooting
My strip is not curling. Check two things: your turning chains (keep them loose) and your stitch heights. If the double trebles are accidentally worked as trebles, the wedge is too shallow to curl. A gentle steam from an iron held an inch above the fabric also encourages cotton to relax into the twist.
My spiral twists the wrong way or looks uneven. Simply twist it by hand in the direction you prefer and hang it; gravity and wind will train it within a day. Unevenness usually comes from tension drifting between rows, and it reads as handmade charm, not a flaw.
The spinner tangles in strong wind. That is what the swivel prevents, so check that it rotates freely and is not gummed up with yarn fibers. In very exposed spots, shorten the tails by a few inches to reduce tangling.
The colors bled after rain. This happens with some hand-dyed yarns. Stick to colorfast cotton from major brands for outdoor pieces, or bring the spinner inside during heavy storms.
Where to Hang Your Wind Spinner
Wind spinners need moving air, so placement matters more than you might think. Porch corners, where breezes eddy around the house, are ideal. Tree branches work beautifully if the spinner hangs clear of leaves. Shepherd's hooks in the garden put the color right at eye level along a path. Balcony railings catch steady wind on upper floors, and a sturdy hook by a sunny window lets you enjoy one indoors with the window cracked.
Avoid hanging your spinner where it will constantly slap against a wall or railing; the friction wears the yarn and tangles the tails. A clearance of at least a foot on all sides keeps it twirling freely.
Care Instructions
Cotton wind spinners are hardy, but a little care keeps the colors bright. Bring yours indoors during heavy storms and over winter in harsh climates. If it gets dusty, shake it out or rinse it gently in cool water with mild soap, then reshape and air dry flat. Never wring a wind spinner; the twist will distort. Faded tails are easy to snip off and replace with fresh strands, which is a lovely way to refresh the piece each spring.
Frequently Asked Questions
What is the best yarn for a crochet wind spinner?
Worsted weight cotton is the best choice. It holds the spiral shape, resists stretching in humidity, and survives outdoor life far better than acrylic. Look for colorfast yarn if your spinner will see rain or strong sun.
How long does it take to crochet a wind spinner?
Most makers finish in 3 to 4 hours of relaxed stitching. The rows are long but simple, and the pattern repeat is easy to memorize after the first color block, so the time passes quickly.
Do I really need a fishing swivel?
Yes, for the best result. The swivel lets the spinner rotate freely instead of just swinging, which is what creates the mesmerizing twirl. Small ball bearing swivels from any fishing or craft aisle work perfectly and cost very little.
Why is my wind spinner not spinning?
Three usual causes: no swivel (or a stuck one), a spot with no breeze, or tails that are tangled. Check the swivel spins freely, move the spinner to a breezier spot with clearance on all sides, and trim any tangled tail ends.
Can beginners really make this pattern?
Absolutely. If you can work the five basic stitches used here, single through double treble, you can make this spinner. There is no shaping, no seaming, and no counting beyond the 5-stitch wedge repeat.
Can I make a wind spinner with acrylic yarn?
You can, and it will look lovely indoors. For outdoor use, though, cotton is better: acrylic stretches in heat and humidity, which slowly pulls the spiral out of shape. Save acrylic spinners for covered porches and indoor windows.
How do I keep the colors from fading in the sun?
Some fading is inevitable outdoors, but you can slow it down. Choose yarns labeled fade resistant, hang the spinner where it gets morning sun rather than harsh afternoon sun, and bring it inside during the brightest summer weeks if you want to preserve the colors.
Happy crocheting, and enjoy watching your handmade spinner dance in the wind.