Crochet Bucket Hat Pattern (Classic, Free)
Stitch a classic crochet bucket hat with a shaped crown and a soft wide brim, perfect for sunny days.


Accessories · Crochet
- Finished size
- Adult S/M and L, 21 to 23 in
- Making time
- 3 to 4 hours
- Hook
- US H-8 (5.0 mm)
- Set
- Crown, sides, and brim
- Skill
- Easy
In this post
- Key Takeaways
- Table of Contents
- Why You Will Love This Crochet Bucket Hat
- Finished Size, Skill Level, and Time
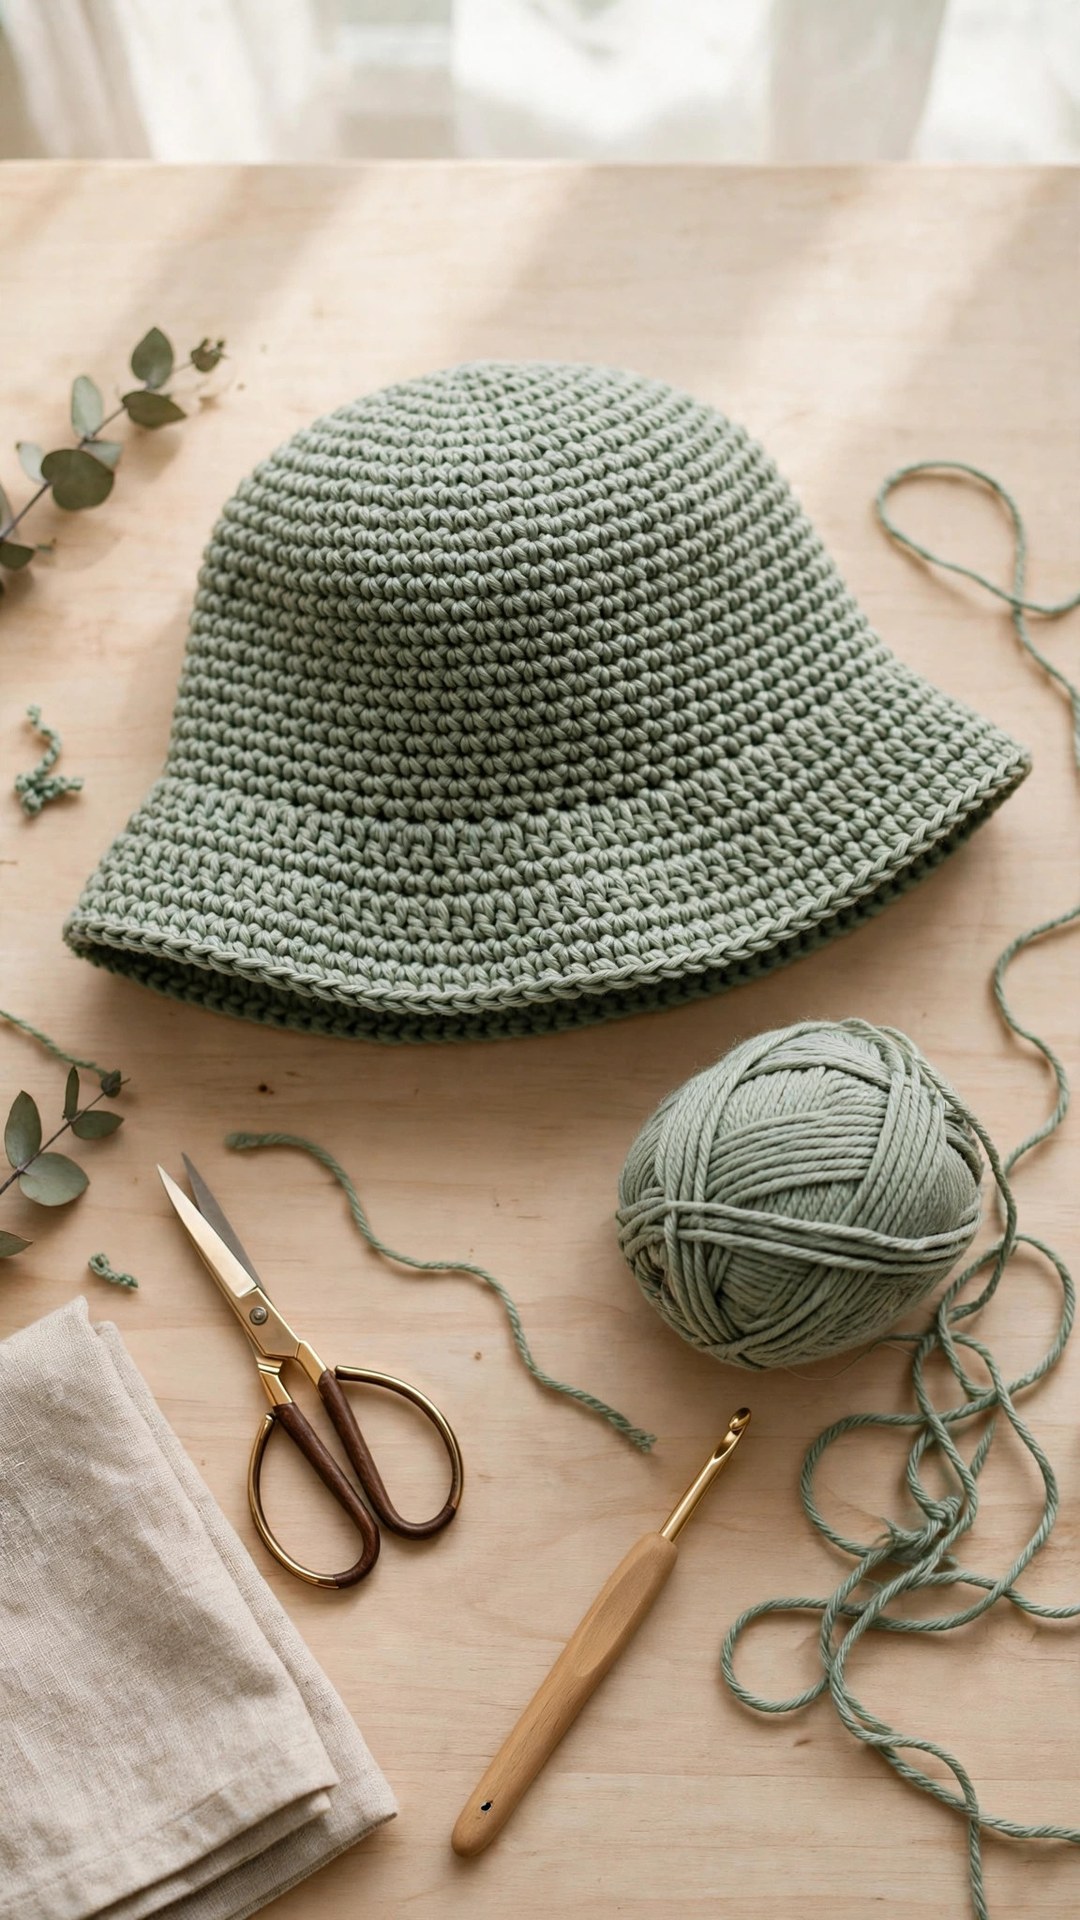
- Materials You Need
- Abbreviations (US Terms)
- Gauge and Sizing Notes
- Part 1: The Crown
- Part 2: The Sides
- Part 3: The Brim and Finishing
- Variations: Colors, Stripes, and Brim Widths
- Troubleshooting Hats That Wobble or Flop
- Care Instructions
- Frequently Asked Questions
There is nothing quite like a hat you made yourself shading your face on a sunny day. This free crochet bucket hat pattern gives you a classic bucket hat with a shaped crown, straight sides, and a soft wide brim that flops just enough to keep the sun out of your eyes. It looks like the hats in a seaside shop window, simple and cheerful, and it packs flat in a beach bag without losing its shape.
This is an original Little Loop Finds design, written in US terms and completely free. The hat is worked in the round from the crown down, so there are no seams at all. The crown is a flat circle built with steady increases, the sides are worked straight, and the brim grows with gentle increases until it reaches the perfect width. If you can work a magic ring, single crochet, and increases, you can make this hat in a single afternoon.
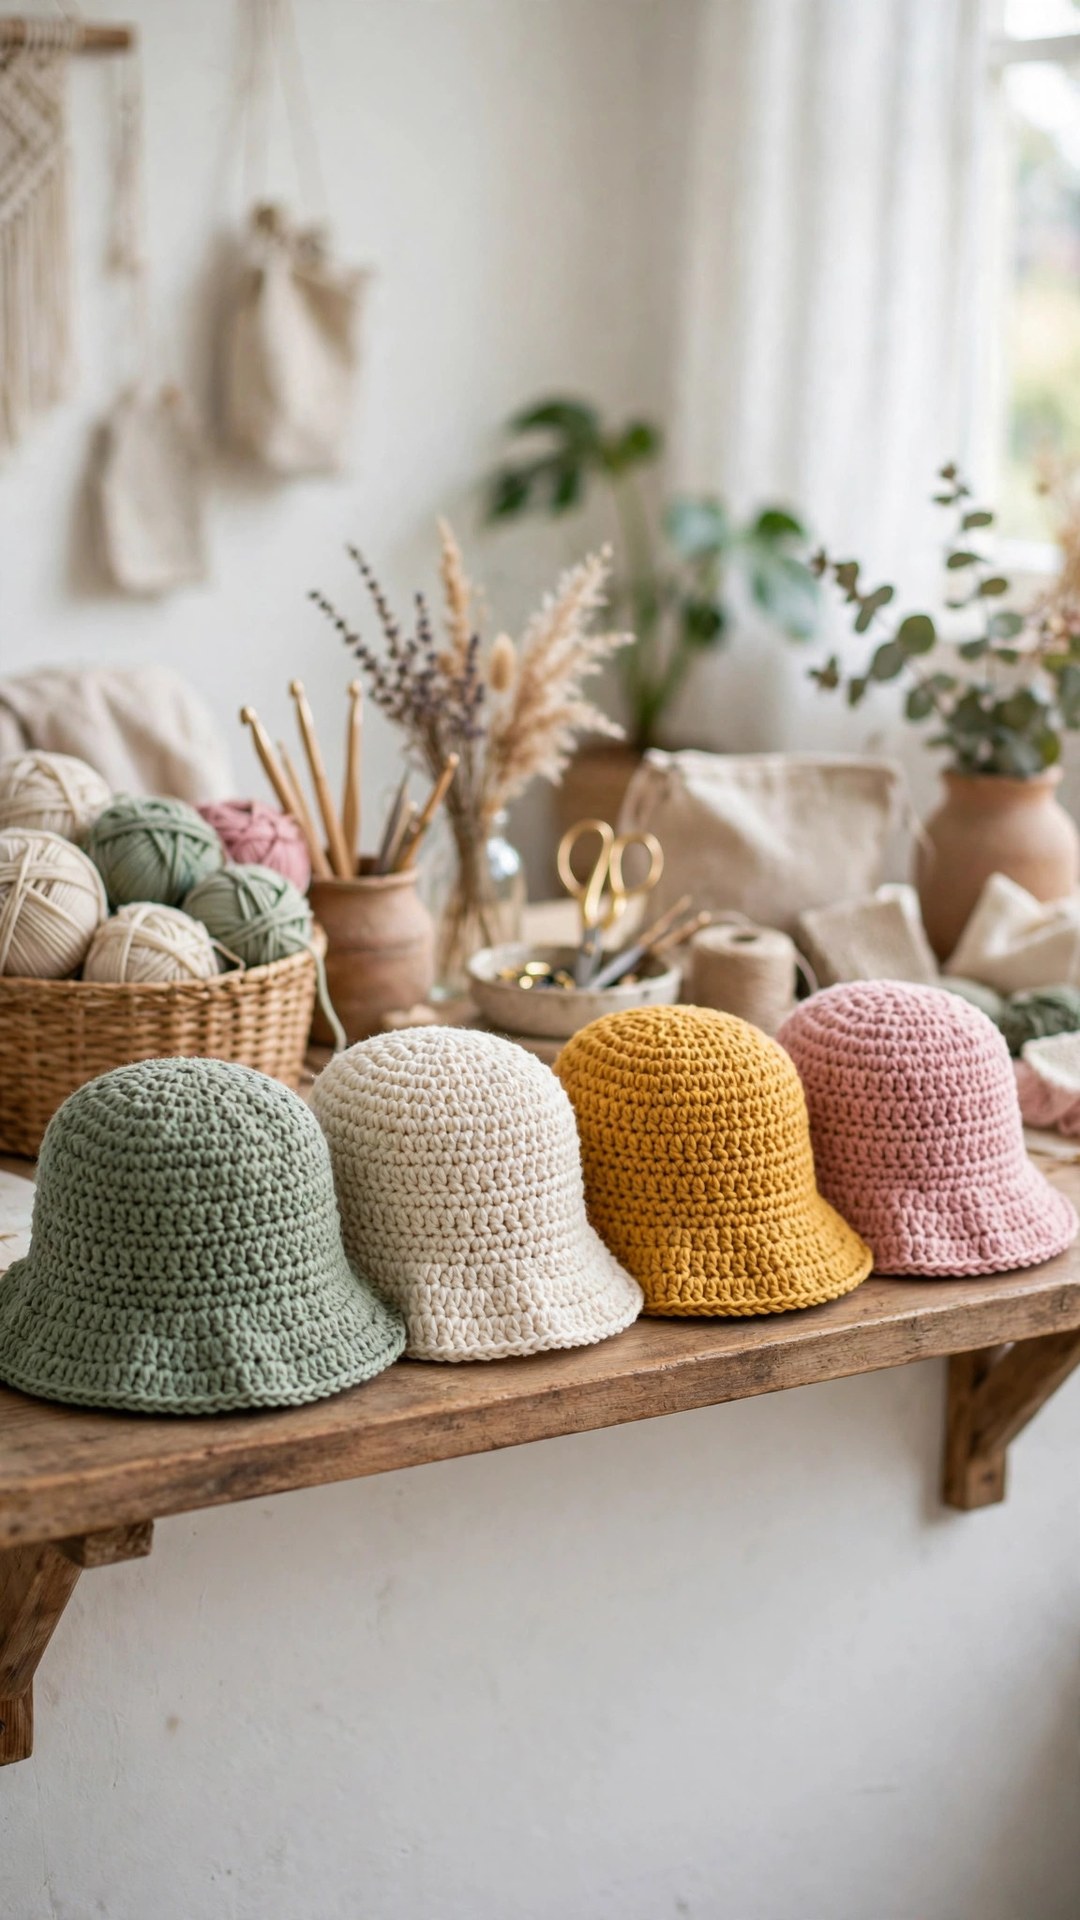
A quick note on scope: this post is about a classic bucket hat with a plain round crown and an even brim, not a cowboy hat, mushroom hat, or flower hat. If you want a novelty hat, we have those too, and you will find links to them below. Make this hat in sage green for a soft garden look, in cream for a clean beach feel, or in mustard yellow for a pop of sunshine.
Key Takeaways
- Free original pattern: this crochet bucket hat pattern is a Little Loop Finds original design, written in US terms, and completely free.
- Classic bucket shape: a flat crown, straight sides, and a soft wide brim, with no seams anywhere.
- Beginner friendly construction: worked in the round from the crown down, with increases you can count easily.
- Two adult sizes included: S/M fits 21 to 22 inches, L fits 22 to 23 inches, with clear stitch counts for both.
- Afternoon project: about 3 to 4 hours from first stitch to finished brim, including the final edging round.
Table of Contents
- Why You Will Love This Crochet Bucket Hat
- Finished Size, Skill Level, and Time
- Materials You Need
- Abbreviations (US Terms)
- Gauge and Sizing Notes
- Part 1: The Crown
- Part 2: The Sides
- Part 3: The Brim and Finishing
- Variations: Colors, Stripes, and Brim Widths
- Troubleshooting Hats That Wobble or Flop
- Care Instructions
- Frequently Asked Questions
Why You Will Love This Crochet Bucket Hat
A crochet bucket hat solves the everyday problem of sun in your eyes without the stiffness of a store bought hat. The cotton fabric breathes, so your head stays cool, and the brim is soft enough to fold up on one side or wear straight all the way around. It also folds flat, which means it travels better than any structured hat you own: tuck it in a tote bag, a suitcase, or a beach bag, and it springs back into shape when you take it out.
This design is also a wonderful stash project with a purpose. One skein of worsted weight cotton makes the whole hat, with yarn left over for a matching accessory. That makes it ideal for gifts, because you can finish one in an afternoon and start another the same evening. Friends, sisters, and moms all love receiving a hat in their favorite color, and a handmade hat says you were thinking of them every time they wear it.
Bucket hats suit almost everyone. The crown sits comfortably without squeezing, the brim frames the face without hiding it, and the whole hat reads as relaxed and cheerful rather than fussy.
Finished Size, Skill Level, and Time
- Finished size: adult S/M fits a head circumference of 21 to 22 inches, adult L fits 22 to 23 inches. Crown diameter about 6.5 inches, sides about 3 inches tall, brim about 2.5 inches wide.
- Skill level: Easy. You need a magic ring, chains, slip stitches, single crochet, and simple increases.
- Time: about 3 to 4 hours total: roughly 1 hour for the crown, 1 hour for the sides, 1 hour for the brim, and 30 minutes for the edging and finishing.
Materials You Need
| Item | What to get |
|---|---|
| Yarn, main color | Worsted weight (medium 4) cotton or cotton blend, about 200 yards |
| Yarn, optional accent | A small amount of a contrast color for the brim edging, about 25 yards |
| Hook | US H-8 (5.0 mm), or the size that meets gauge with your yarn |
| Notions | Tapestry needle, scissors, stitch markers, measuring tape |
| Optional | A small piece of millinery wire or a pipe cleaner, if you want a stiffer brim edge |
Cotton yarn is the best choice for a summer hat because it breathes, holds its shape in the heat, and survives being folded into a bag. A cotton acrylic blend is a good second choice if you want a softer hand and a lighter hat. Avoid pure wool for this project, because it will be too warm for sunny days and it can felt if it gets rained on. Whichever yarn you choose, work with a hook one size smaller than you normally would for that yarn, because a firm fabric keeps the brim from drooping over your eyes.
Abbreviations (US Terms)
- ch = chain
- sl st = slip stitch
- sc = single crochet
- inc = increase (2 sc in the same stitch)
- dec = decrease (sc 2 together)
- st(s) = stitch(es)
- rnd(s) = round(s)
- rep = repeat
- MR = magic ring
Gauge and Sizing Notes
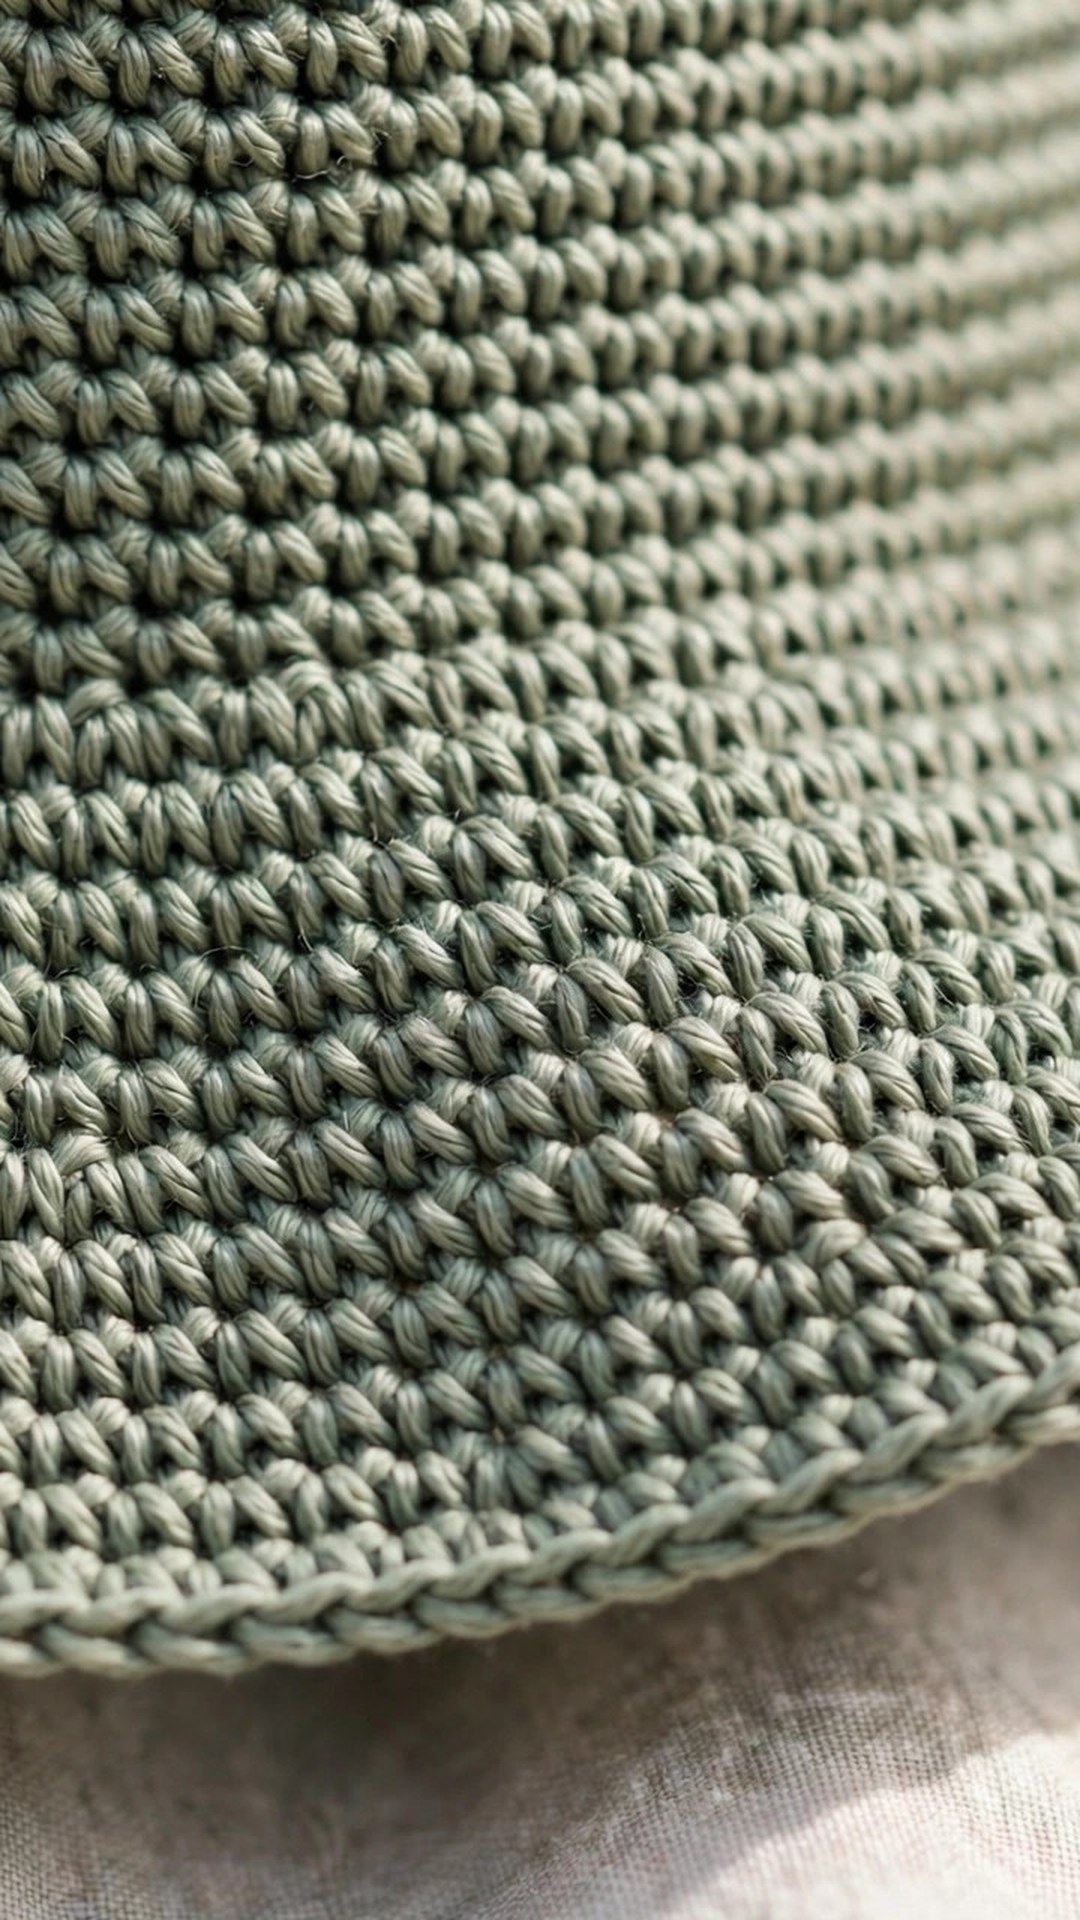
Gauge for a hat matters more than it does for a scarf, because a hat has to fit a real head. Work a swatch of single crochet in the round at least 4 inches wide and check that 16 stitches measure 4 inches across and 18 rounds measure 4 inches tall. If your swatch is wider than that, go down a hook size. If it is narrower, go up a hook size.
Measure the head the hat is for, wrapping the tape around the forehead just above the eyebrows and above the ears. Pick the size whose finished circumference matches that measurement, or is up to half an inch smaller, because cotton relaxes a little with wear and a hat that starts snug will settle into a perfect fit. If you are between sizes, make the smaller size for a neat fit or add one extra increase round to the crown for the larger size. The crown diameter is the key number: about 6.5 inches across for S/M and about 7 inches across for L.
To check your crown as you work, lay it flat and measure across the middle after every few rounds. It should stay flat like a pancake until you stop increasing. If it starts to cup upward like a bowl, you are increasing too slowly, so add an extra increase round. If it starts to ruffle like a potato chip, you are increasing too fast, so work a plain round with no increases.
Part 1: The Crown
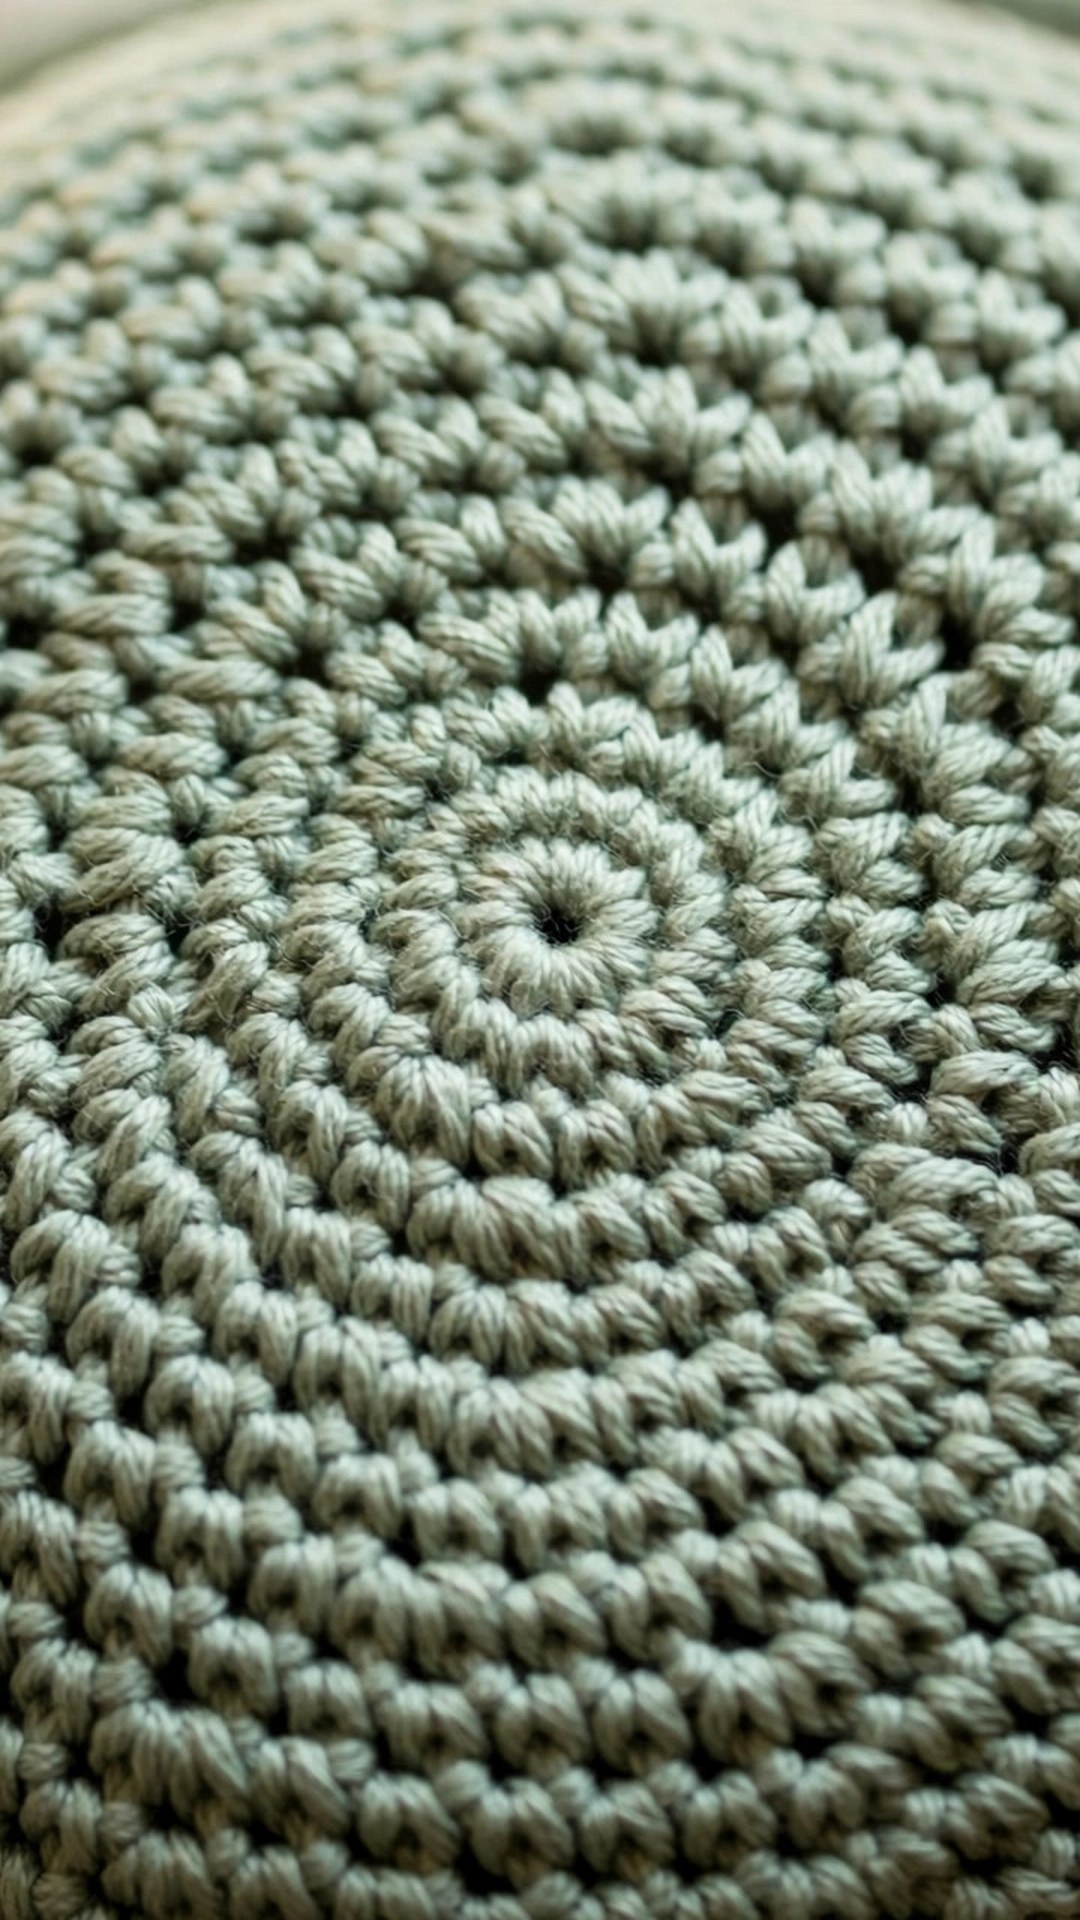
The crown is a flat circle worked from the center out, starting with a magic ring and increasing steadily. Work in continuous rounds (do not join) and use a stitch marker to mark the first stitch of each round. To keep the circle truly round instead of hexagonal, stagger the increases: on even rounds, start the round with half the increase interval, so the increase points do not stack up in the same place every round.
With main color yarn, MR, ch 1.
- Rnd 1: 6 sc in MR. (6 sts)
- Rnd 2: inc in each st around. (12 sts)
- Rnd 3: (sc, inc) rep around. (18 sts)
- Rnd 4: (2 sc, inc) rep around. (24 sts)
- Rnd 5: (3 sc, inc) rep around. (30 sts)
- Rnd 6: (4 sc, inc) rep around. (36 sts)
- Rnd 7: (5 sc, inc) rep around. (42 sts)
- Rnd 8: (6 sc, inc) rep around. (48 sts)
- Rnd 9: (7 sc, inc) rep around. (54 sts)
- Rnd 10: (8 sc, inc) rep around. (60 sts)
- Rnd 11: (9 sc, inc) rep around. (66 sts)
- Rnd 12: (10 sc, inc) rep around. (72 sts)
- Rnd 13: (11 sc, inc) rep around. (78 sts)
- Rnd 14: (12 sc, inc) rep around. (84 sts) Stop here for size S/M. The crown should measure about 6.5 inches across.
- Rnd 15: (13 sc, inc) rep around. (90 sts) Work this round only for size L. The crown should measure about 7 inches across.
Lay the crown flat and check the measurement before you move on. If it is smaller than the numbers above, work one more increase round following the same rhythm. If it is larger, unpick the last round and check your gauge, because a crown that is too wide will make a hat that slides down over your eyes.
Part 2: The Sides
The sides are worked straight with no increases, which turns the flat circle into the familiar bucket shape. This is the easiest part of the hat: the same round, repeated, until the sides reach the right height. Try the hat on as you go, because the sides should cover the top of your ears when the hat sits comfortably on your head.
- Rnds 1 to 12: sc in each st around. 84 (90) sts. Do not increase or decrease.
- After Rnd 6, try the hat on. The crown should sit on top of your head with the sides reaching to just above your ears. If the sides feel too short, add 2 more rounds. If they feel too long, stop 2 rounds early.
The sides should measure about 3 inches tall from the last crown increase round to the last side round. Keep your tension even through this section, because loose stitches here will make the hat grow wider as you go down, and tight stitches will make it taper inward like a beanie.
Part 3: The Brim and Finishing
The brim is where the bucket hat gets its character. It grows outward with gentle increases, one increase round followed by a plain round, so the brim flares softly instead of ruffling. The final round is a slip stitch edge that firms up the brim and stops it from curling.
- Brim Rnd 1: (6 sc, inc) rep around. 96 (103) sts. For size L, work the increases evenly spaced and accept a slightly uneven final repeat; the brim hides small count differences.
- Brim Rnd 2: sc in each st around.
- Brim Rnd 3: (7 sc, inc) rep around. 108 (116) sts.
- Brim Rnd 4: sc in each st around.
- Brim Rnd 5: (8 sc, inc) rep around. 120 (129) sts.
- Brim Rnd 6: sc in each st around.
- Brim Rnd 7: sc in each st around. This plain round lets the brim settle before the edge.
- Brim Rnd 8: sl st in each st around, keeping your tension relaxed so the edge does not pull tight. Fasten off and weave in the end.
For a stiffer brim, work Brim Rnd 8 with a hook one size smaller, or work a second slip stitch round on top of the first. For a softer, floppier brim, skip Brim Rnd 7 and fasten off after Rnd 6. For a contrast edge, join the accent color before Brim Rnd 8 and work the slip stitch round in that color.
To finish, weave in all ends with a tapestry needle, working the tails along the back of the stitches on the inside of the hat so they disappear completely. Try the hat on one last time and shape the brim with your hands, curving it down evenly all the way around. If you used millinery wire, thread it through the stitches of Brim Rnd 7 before you work the slip stitch edge, and join the wire ends with a small twist tucked inside the fabric.
Variations: Colors, Stripes, and Brim Widths
- Striped bucket hat: change colors every 4 rounds on the sides for soft stripes, carrying the unused yarn up the inside of the hat so you have fewer ends to weave in. Cream with sage stripes is a classic combination.
- Two tone hat: work the crown and sides in one color and the brim in a contrast color for a bold, modern look. Mustard brim with a cream crown is cheerful and summery.
- Wider brim: add one more increase round and one more plain round to the brim for extra sun coverage, following the same rhythm (9 sc, inc). You will need about 30 extra yards of yarn.
- Narrower brim: stop after Brim Rnd 4 for a neat, short brim that reads more like a fisherman cap. This version packs even smaller for travel.
- A matching set: pair this hat with a crochet top pattern in the same yarn for a coordinated summer outfit, or wear it with a free crochet hat pattern collection for a full week of handmade hats.
If you enjoy making hats, a crochet earflap hat free pattern is a warm winter version of the same skills, and a free crochet newsboy hat pattern uses increases in a completely different shape. For little ones, try a crochet baby hat pattern, or a free ribbed beanie pattern for a quick cold weather gift.
Troubleshooting Hats That Wobble or Flop
- My crown ruffles like a potato chip. You are increasing too fast for your gauge. Unpick the last two rounds, work one plain round with no increases, then continue with the increase rhythm. Check the crown flat after every round.
- My crown cups upward like a bowl. You are increasing too slowly. Add an extra increase round, or go up a hook size for the crown only, then return to your regular hook for the sides.
- The brim droops over my eyes. Your fabric is too loose, or the brim is too wide for your yarn. Rework the brim with a hook one size smaller, or stop one increase round earlier. A round of slip stitches worked tightly will also firm up the edge.
- The hat slides down over my forehead. The crown is too wide for your head. Measure the crown diameter: if it is more than 7 inches for S/M, unpick the last increase round and work the sides from there.
- The sides lean to one side. This usually means your stitch marker drifted and your rounds are spiraling unevenly. Count your stitches at the end of the sides section: you should still have 84 (90) stitches. If the count is right, block the hat over a bowl to reset the shape.
Care Instructions
Hand wash your hat in cool water with a mild soap, gently squeezing the suds through the fabric. Never wring a crochet hat, because twisting stretches the crown out of shape. Roll it in a clean towel to press out the water, then reshape it over a bowl or a balloon that matches your head size and let it air dry completely. Do not hang a wet hat, because the weight of the water will pull the brim longer on one side. Cotton hats can go in the machine on a gentle cold cycle inside a mesh bag, but hand washing will keep the brim crisp for much longer. Store the hat flat, or stuffed lightly with tissue paper so the crown keeps its shape.
Frequently Asked Questions
Is this crochet bucket hat pattern good for beginners?
Yes, it is one of the best first hat projects. The whole hat is single crochet worked in the round, the increases follow a simple rhythm you can count, and there are no seams to sew. If you can work a magic ring and single crochet, and you are willing to measure the crown as you go, you can make this hat.
How much yarn do I need for a crochet bucket hat?
You need about 200 yards of worsted weight cotton or a cotton blend for either adult size, which is roughly one skein. The wider brim version needs about 30 extra yards.
What yarn is best for a crochet bucket hat?
Worsted weight cotton is the best choice, because it breathes, holds its shape in the sun, and survives being folded into a bag. A cotton acrylic blend is a good second choice if you want a softer hand and a lighter hat. Avoid wool and fuzzy yarns for this design: wool is too warm for summer, and fuzzy yarn hides the neat stitch definition that makes the crown look so clean.
Can I make this bucket hat for a child?
Yes, the pattern is easy to resize. Work the crown increases until the circle measures about 5.5 inches across for a small child, or 6 inches across for an older child, then work the sides for 8 to 10 rounds instead of 12, and work the brim with one fewer increase round. Measure the childs head first, and aim for a finished circumference about half an inch smaller than the measurement.
How do I keep the brim from flopping over my eyes?
Three things help: a firm fabric, a brim that is not too wide, and a tight slip stitch edge. Work the brim with a hook one size smaller than the rest of the hat, stop after Brim Rnd 4 if you prefer a shorter brim, and keep the final slip stitch round relaxed but firm. If your brim still droops, a length of millinery wire threaded through the last plain round will hold it in shape.
Can I sell hats made from this pattern?
Yes, you may sell finished hats made from this free pattern, with credit to Little Loop Finds. Please do not sell, share, or republish the pattern text itself, and do not claim this original design as your own.
Happy stitching, and may your sunny days be shady in all the right places.


