Crochet Baseball Cap Pattern (Free and Easy)
Crochet a wearable baseball cap with a stiff brim and a ribbed band in about four hours, then wear it all summer long.


Patterns · Crochet
- Finished size
- Adult 21-23 in
- Making time
- 4 hours
- Hook
- US H-8 (5.0 mm)
- Set
- Crown, band, brim
- Skill
- Easy
In this post
- Key Takeaways
- Table of Contents
- Why You Will Love This Cap
- Finished Size, Skill Level, and Time
- Materials You Need
- Abbreviations (US Terms)
- Gauge and Sizing Notes
- Part 1: The Crown
- Part 2: The Sides and the Band
- Part 3: The Brim and the Button
- Finishing and Fitting
- Variations: Colors, Sizes, and Uses
- Troubleshooting a Cap That Does Not Fit Right
- Care Instructions
- Frequently Asked Questions
- More Free Patterns to Try
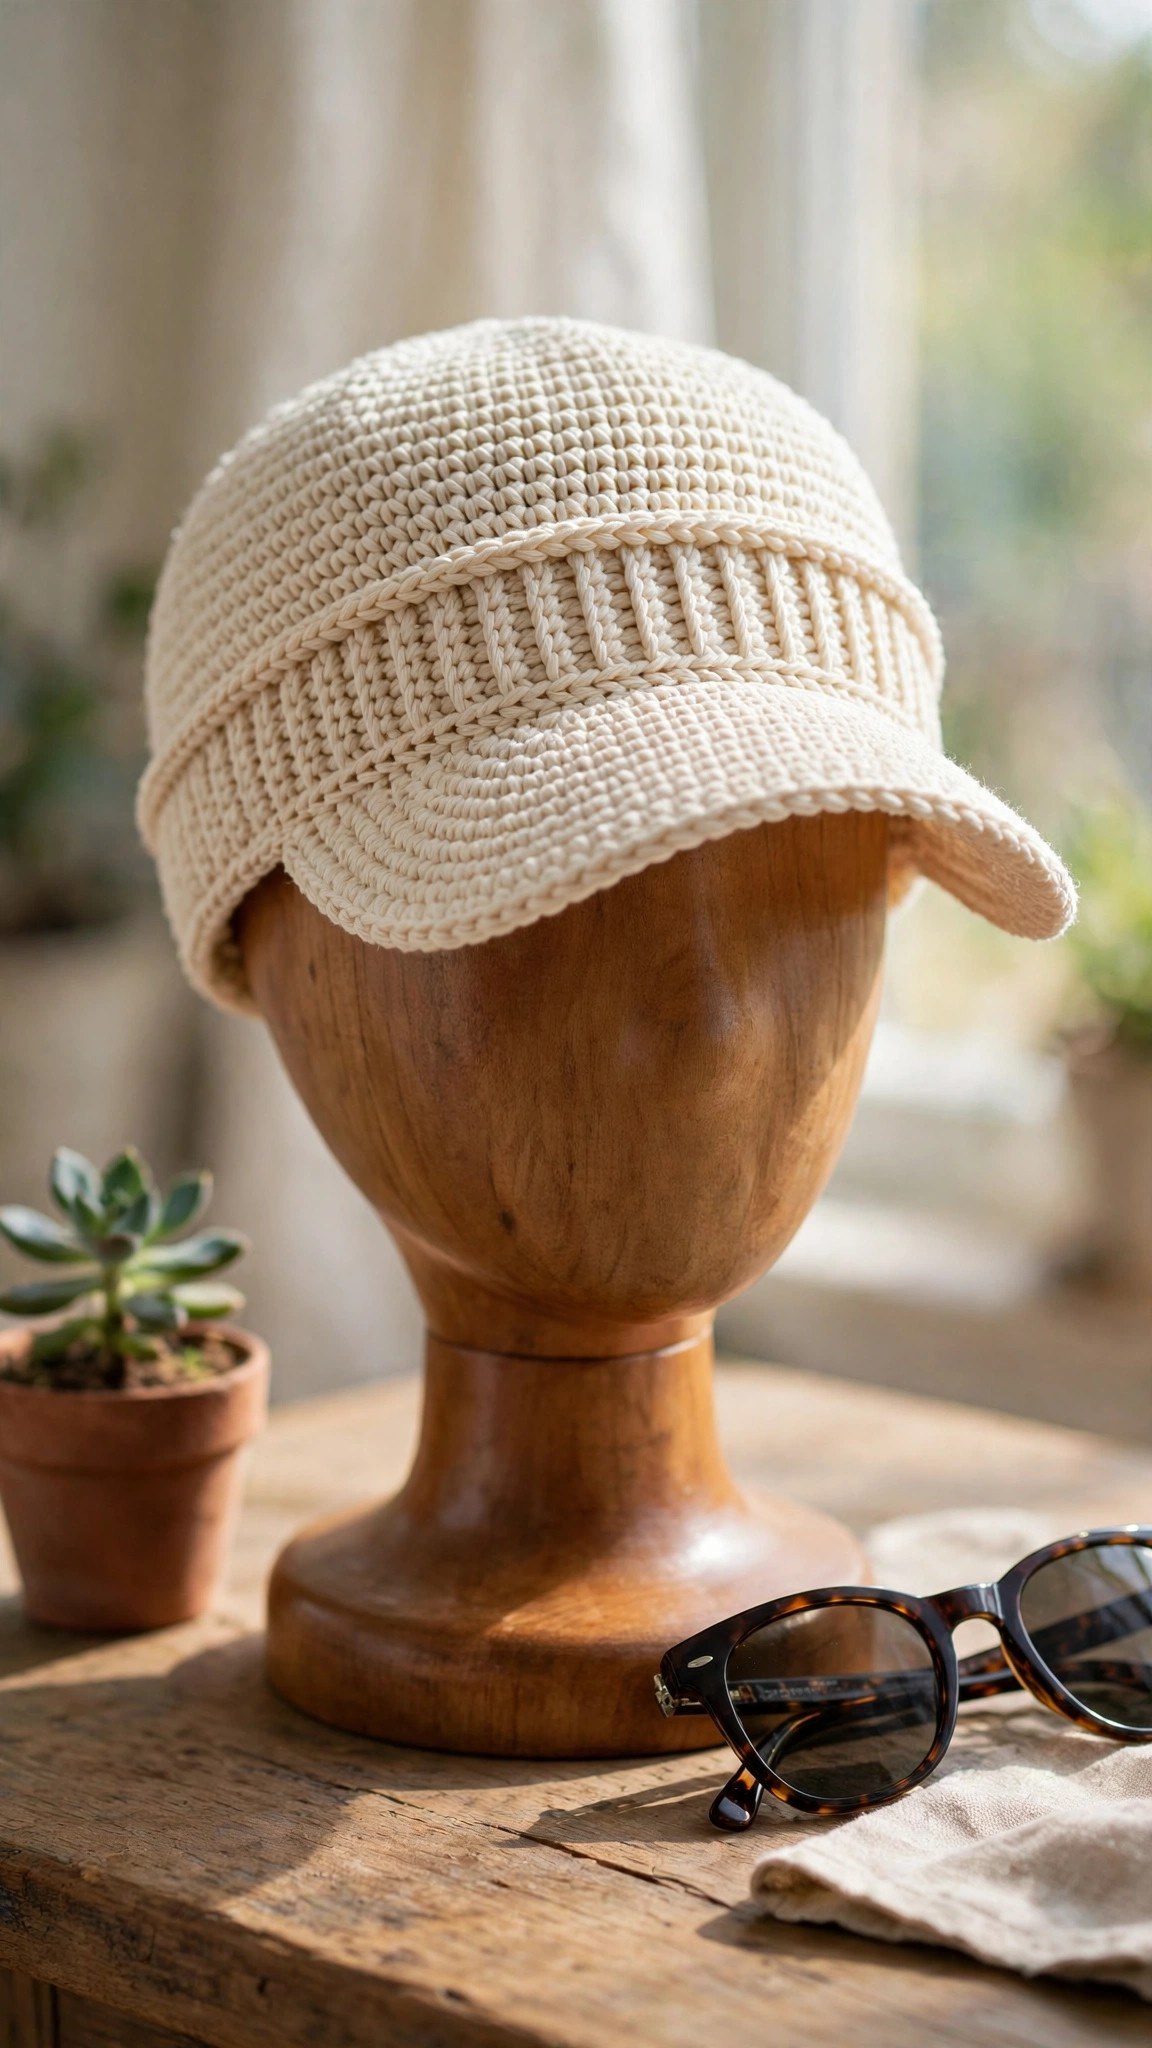
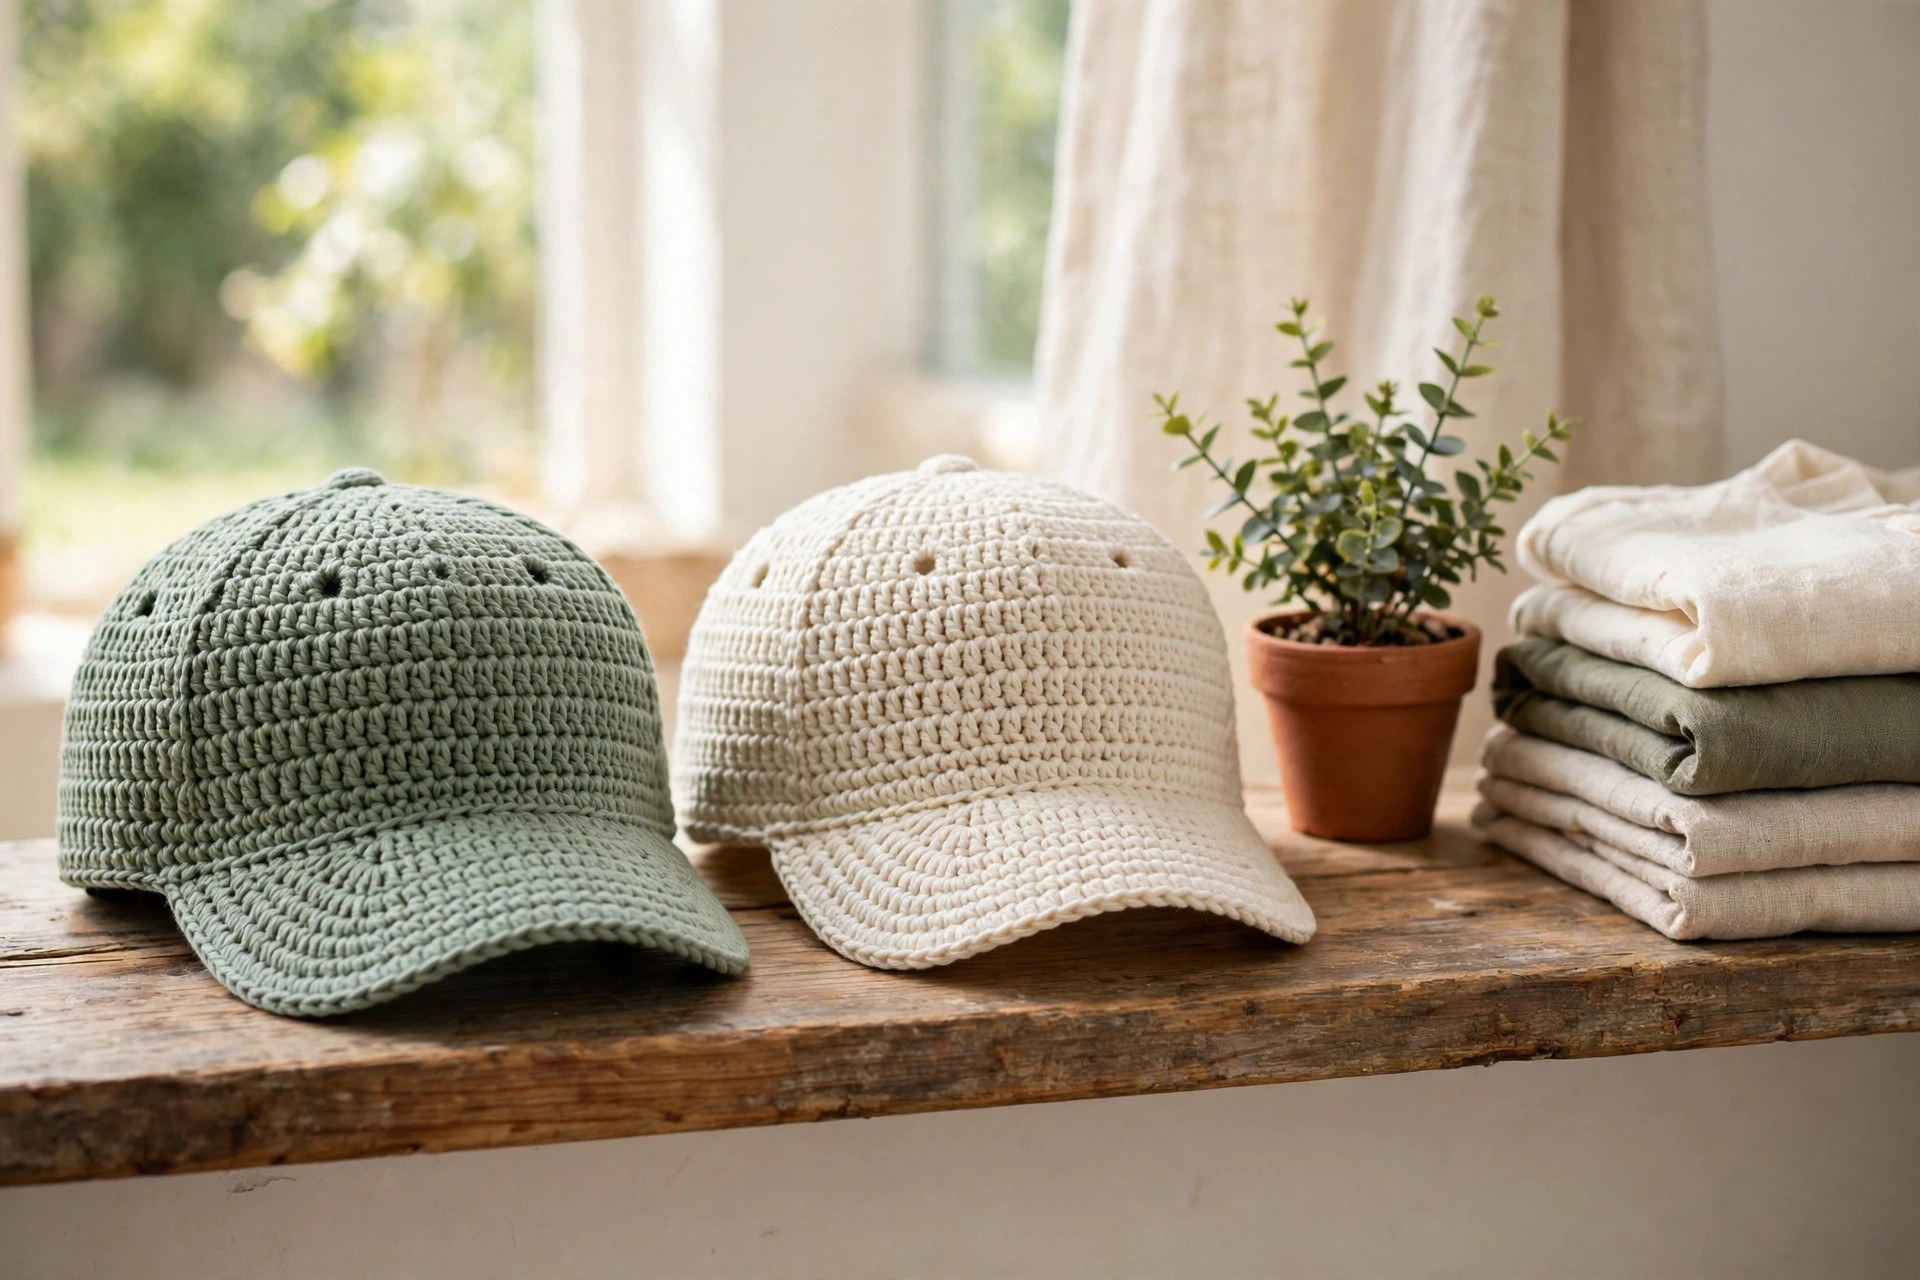
A crocheted baseball cap is the most wearable project you can make, and this free crochet baseball cap pattern turns a few balls of cotton yarn into a comfortable cap with a stiff brim and a ribbed band. It takes about 4 hours, uses about 230 yards of yarn, and makes a wonderful gift or a sunny day staple.
This is an original Little Loop Finds design, written in US terms and completely free. The cap is worked from the top down in half double crochet, with a ribbed band worked in front and back post stitches, and a brim worked in rows across the front.
A quick note on scope: this post is about one specific crochet baseball cap, a classic style cap with a curved brim, worked in the round from the crown down. That makes it different from a beanie, which has no brim, and different from a bucket hat, which has a floppy brim all the way around.
Key Takeaways
- Free original pattern: a Little Loop Finds original design, written in US terms, and completely free.
- A real wearable cap: a classic crown, a ribbed band, and a stiff curved brim, sized for an adult head.
- Simple stitches: worked in the round with half double crochet, single crochet, and post stitches only.
- A 4 hour project: one cap takes about 4 hours.
- Great for gifts and markets: a quick make in team colors or a thoughtful handmade gift.
Table of Contents
- Why You Will Love This Cap
- Finished Size, Skill Level, and Time
- Materials You Need
- Abbreviations (US Terms)
- Gauge and Sizing Notes
- Part 1: The Crown
- Part 2: The Sides and the Band
- Part 3: The Brim and the Button
- Finishing and Fitting
- Variations: Colors, Sizes, and Uses
- Troubleshooting a Cap That Does Not Fit Right
- Care Instructions
- Frequently Asked Questions
- More Free Patterns to Try
Why You Will Love This Cap
A crocheted baseball cap is a small project with a big payoff. The crown works up fast, so you can finish it in one evening, and the finished cap is something you will actually wear, not just admire on a shelf.
The cap is worked from the top down, which means there is no seaming and no guessing about the fit. You start with a magic ring, increase evenly to make a flat crown, and then work straight down the sides until the cap reaches your ears.
This cap also makes a wonderful gift for a sports fan, a gardener, or anyone who spends time outdoors. The brim shades your eyes, the cotton yarn breathes in warm weather, and the ribbed band hugs your head without squeezing. It uses only two colors of yarn, so it is a great stash buster.
Finished Size, Skill Level, and Time
- Finished size: one size, adult. The cap fits a head of 21 to 23 inches around, and the crown is about 7 inches across when laid flat. The brim is about 2.75 inches long.
- Skill level: Easy. You need a magic ring, half double crochet, single crochet, increases, and front and back post double crochet for the band.
- Time: about 4 hours per cap: 1 hour and 15 minutes for the crown, 1 hour for the sides and band, 1 hour for the brim and button, and 45 minutes for finishing and fitting.
Materials You Need
| Item | What to get |
|---|---|
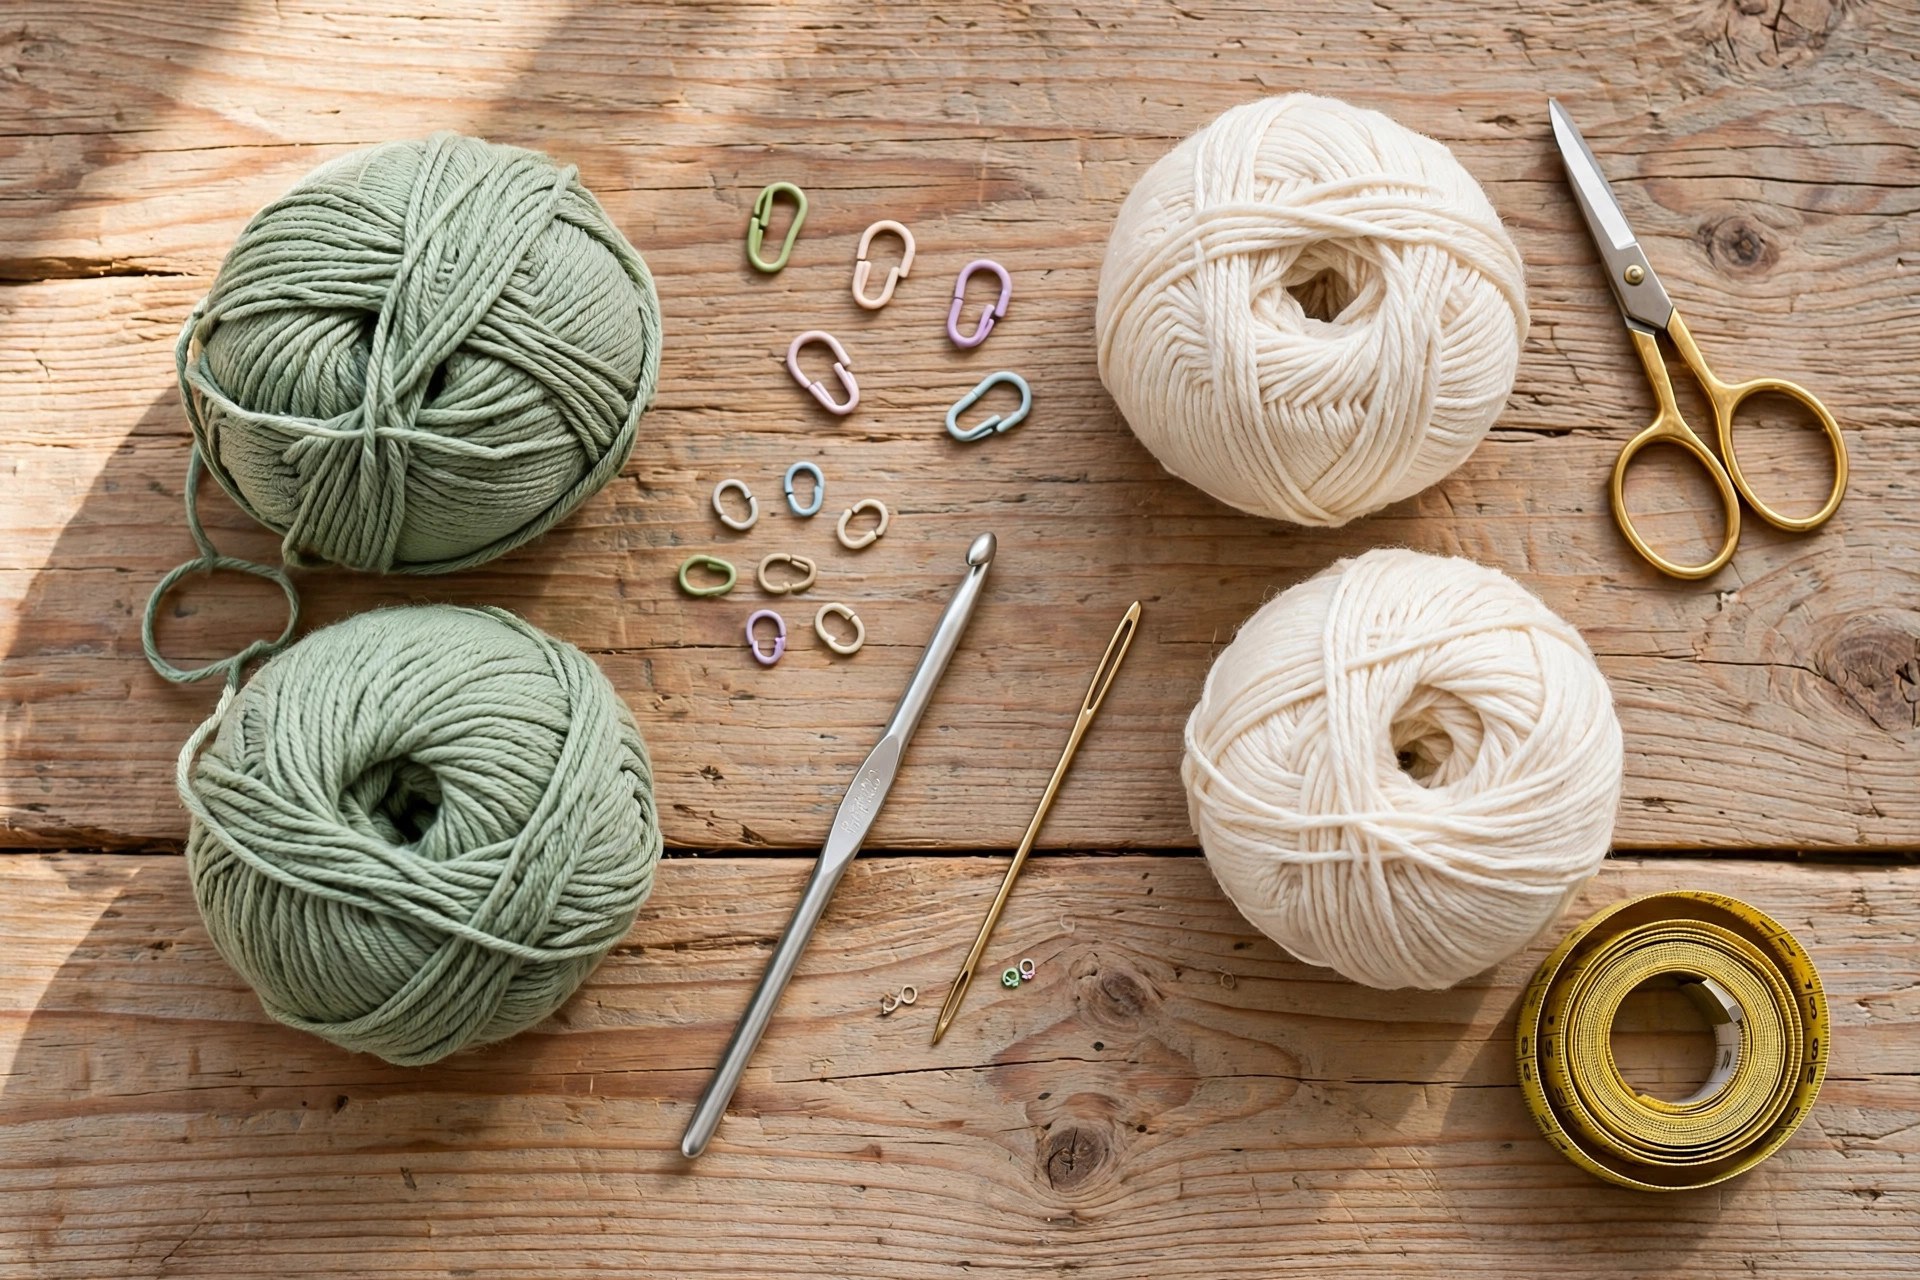
| Yarn, main | Worsted weight cotton yarn in sage green, about 200 yards |
| Yarn, contrast | Worsted weight cotton yarn in cream, about 30 yards |
| Hook | US H-8 (5.0 mm), or the size that gives you the gauge below |
| Notions | Tapestry needle, scissors, stitch markers, measuring tape, 1 button (3/4 inch), plastic canvas (optional, for a stiffer brim) |
Worsted weight cotton yarn is the best choice for a crochet baseball cap because it is breathable, it holds its shape, and it washes well. A smooth cotton yarn shows the half double crochet stitches clearly. Avoid fluffy or textured yarn, because the post stitch band gets lost in the fuzz.
The contrast yarn is used for the brim edge and the button, so a small amount goes a long way. A stitch marker is the most important notion here, because the crown is worked in joined rounds, and it is easy to lose track of where each round starts.
Abbreviations (US Terms)
- ch = chain
- sl st = slip stitch
- sc = single crochet
- hdc = half double crochet
- dc = double crochet
- fpdc = front post double crochet
- bpdc = back post double crochet
- inc = increase (2 sts in the same stitch)
- dec = decrease (2 sts together)
- st(s) = stitch(es)
- rep = repeat
- MR = magic ring
- FO = fasten off
Gauge and Sizing Notes
Gauge matters on a hat because a cap that is one inch too small will not fit, and a cap that is one inch too big will slide down over your eyes. Work a swatch of 14 hdc and 10 rows. It should be about 4 inches wide and 4 inches tall.
The pattern is written in one size, adult, fitting a head of 21 to 23 inches around. To make a child size, stop the crown after round 7 and work two fewer side rounds, which gives a cap for a head of about 19 to 20 inches. To make a large adult size, add one more increase round after round 9. Measure the crown as you work: it should be about 7 inches across when laid flat after round 9.
Part 1: The Crown
The cap starts with the crown, a flat circle worked in half double crochet from the center out. Work the crown in joined rounds, joining with a slip stitch at the end of each round and chaining 2 to start the next round. The chain 2 does not count as a stitch.
With the main yarn, make a magic ring.
- Round 1: 8 hdc in the ring, join with a sl st to the first hdc, ch 2. (8)
- Round 2: 2 hdc in each st around, join, ch 2. (16)
- Round 3: (hdc in the next st, inc in the next st) rep 8 times, join, ch 2. (24)
- Round 4: (hdc in the next 2 sts, inc in the next st) rep 8 times, join, ch 2. (32)
- Round 5: (hdc in the next 3 sts, inc in the next st) rep 8 times, join, ch 2. (40)
- Round 6: (hdc in the next 4 sts, inc in the next st) rep 8 times, join, ch 2. (48)
- Round 7: (hdc in the next 5 sts, inc in the next st) rep 8 times, join, ch 2. (56)
- Round 8: (hdc in the next 6 sts, inc in the next st) rep 8 times, join, ch 2. (64)
- Round 9: (hdc in the next 7 sts, inc in the next st) rep 8 times, join, ch 2. (72)
Lay the crown flat and measure it. It should be about 7 inches across after round 9. If it is smaller, go up a hook size and start again. If it is larger, go down a hook size. Count your stitches at the end of every increase round, because a missed increase will make the crown pucker.
A flat crown is the foundation of the whole cap, so it is worth slowing down here. The increases should sit evenly around the circle, and the join should travel in a straight line up the back of the cap, which becomes the back seam.
Part 2: The Sides and the Band
The sides are worked straight down from the crown with no more increases, and the band is worked in front and back post stitches for a stretchy, ribbed finish. Keep joining each round with a slip stitch and chaining 2 to start the next round.
With the main yarn, continue from the crown.
- Rounds 10-17: hdc in each st around, join, ch 2. (72)
- Round 18: sc in each st around, join, ch 1. (72)
The sides should be about 4 inches long from the last increase round to round 18. Try the cap on before you work the band: it should sit just above your eyebrows and cover the tops of your ears. If it is too short, add one more round of hdc. If it is too long, take one round out.
The band is worked in post stitches around the posts of round 18, which gives it a ribbed look and a gentle stretch. With the main yarn, continue from round 18.
- Round 19: ch 2, (fpdc around the next st, bpdc around the next st) rep around, join with a sl st to the first fpdc, ch 2. (72)
- Rounds 20-21: (fpdc around the next fpdc, bpdc around the next bpdc) rep around, join, ch 2. (72)
- Sl st in the next st and fasten off, leaving a 8 inch tail for weaving in.
Work the post stitches loosely, because tight post stitches will pull the band in and make the cap too snug. The band should stretch gently when you pull it, and spring back when you let go.
Part 3: The Brim and the Button
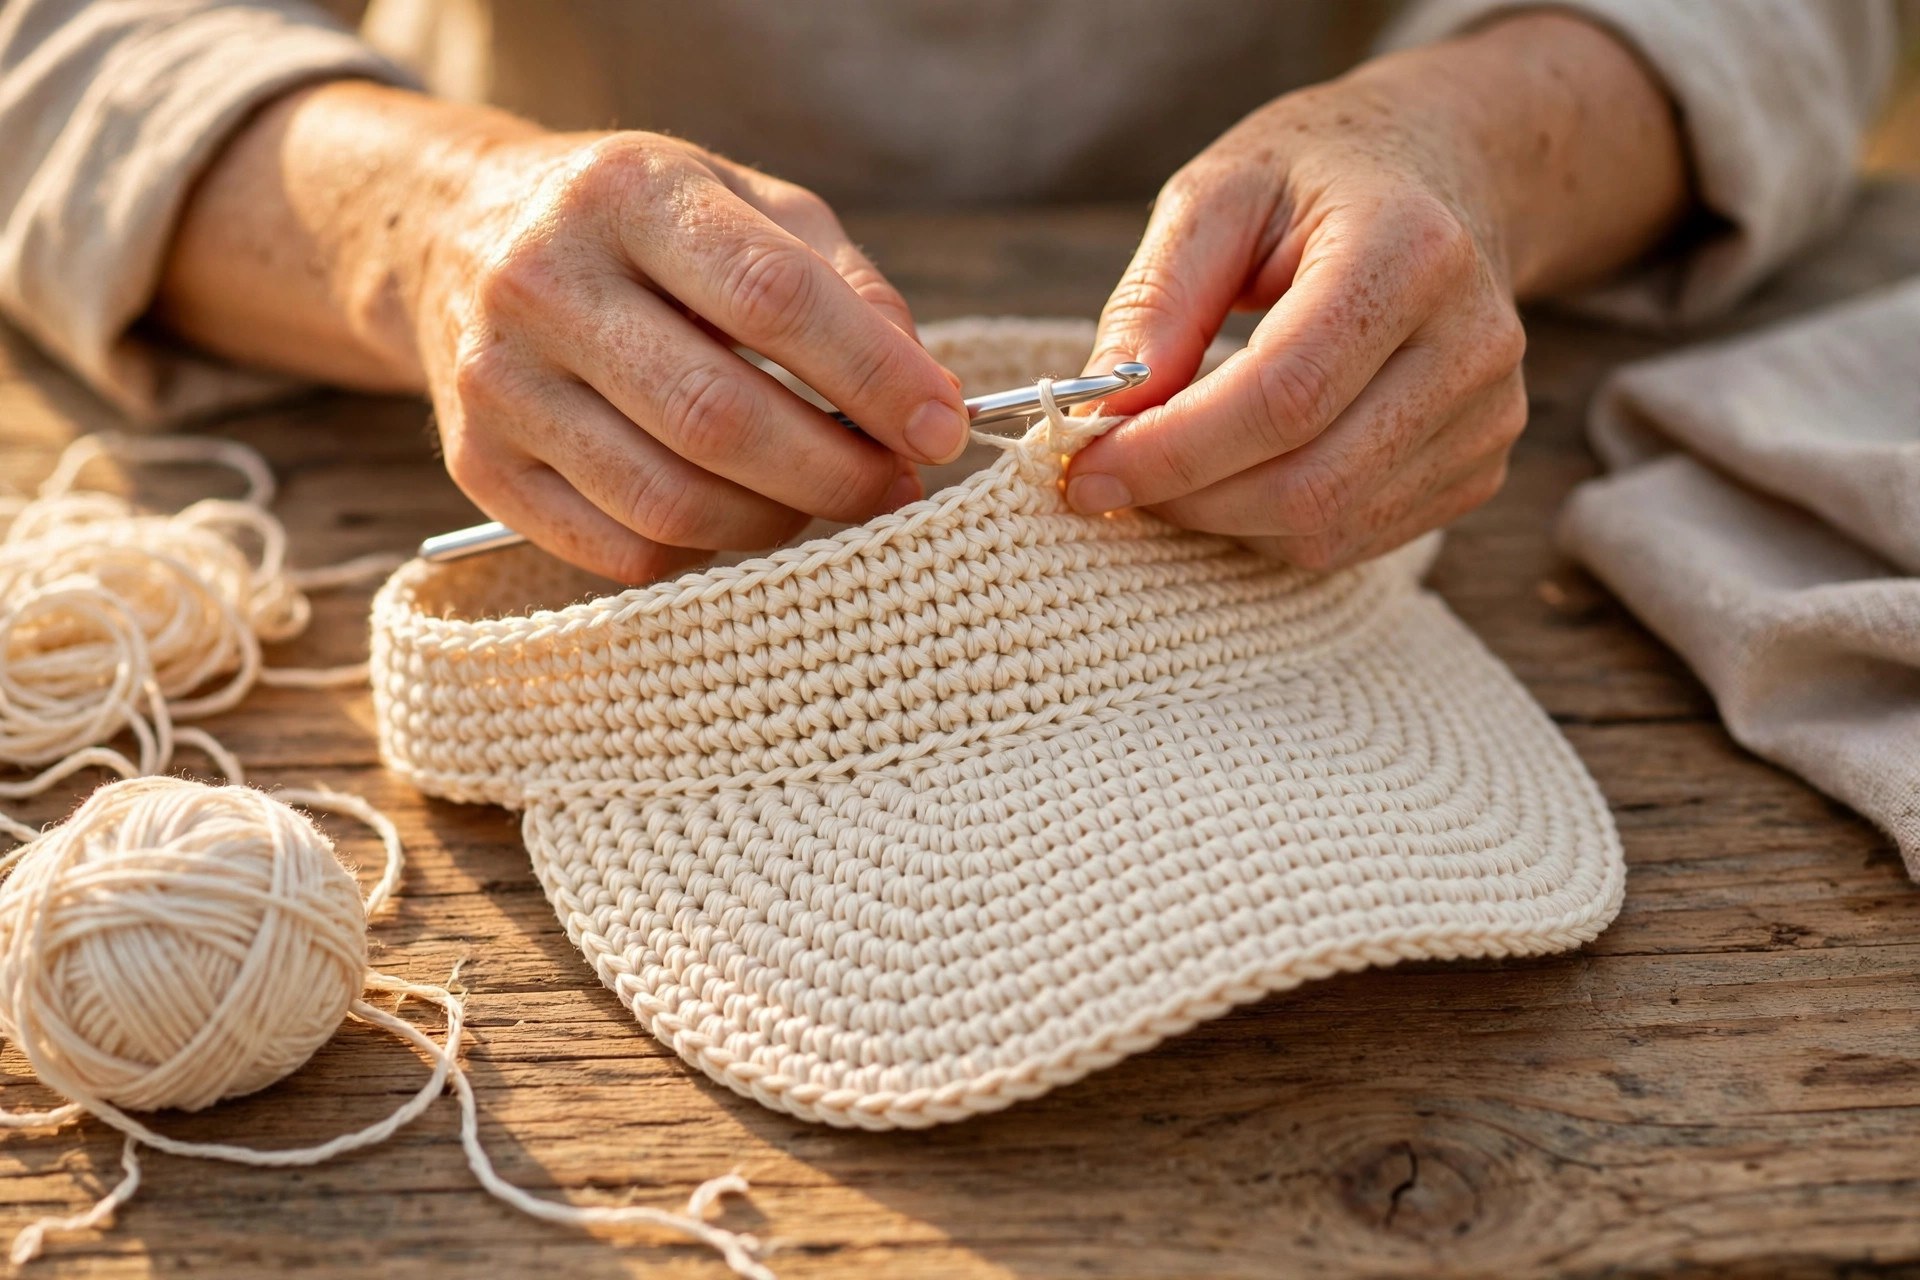
The brim is worked in rows across the front of the cap, with decreases at each end so it curves into a classic shape. Hold two strands of the main yarn together, because the double strand makes it stiff enough to hold its curve.
Mark the front center of the cap with a stitch marker, and count 15 stitches to each side of the marker to mark 30 stitches for the brim. Attach the main yarn, held double, at the first marked stitch on the right side of the front.
- Row 1: sc in each of the 30 marked sts, ch 1, turn. (30)
- Row 2: sc in each st across, ch 1, turn. (30)
- Row 3: dec, sc in the next 26 sts, dec, ch 1, turn. (28)
- Row 4: sc in each st across, ch 1, turn. (28)
- Row 5: dec, sc in the next 24 sts, dec, ch 1, turn. (26)
- Row 6: sc in each st across, ch 1, turn. (26)
- Row 7: dec, sc in the next 22 sts, dec, ch 1, turn. (24)
- Row 8: sc in each st across. (24)
- Fasten off, leaving a 8 inch tail for weaving in.
The brim should be about 2.75 inches long and 5.5 inches wide. For a stiffer brim, cut a piece of plastic canvas to the shape of the brim and slip it between two layers. For a softer brim, skip the canvas and let the double strand do the work.
Finish the brim edge with the contrast yarn. Attach it at one end of the brim, and work single crochet evenly around the three outer edges, working 2 sc in each corner stitch to turn the corner neatly. Fasten off and weave in the end.
The button is a small covered ball sewn to the top center of the crown. With the contrast yarn, make a magic ring.
- Round 1: 6 sc in the ring. (6)
- Round 2: inc in each st around. (12)
- Round 3: sc in each st around. (12)
- Round 4: (sc in the next st, dec) rep 4 times. (8)
- Sl st in the next st and fasten off, leaving a 8 inch tail for sewing.
Stuff the button lightly with a pinch of fiberfill, and sew it to the top center of the crown, right over the magic ring, with a whip stitch around the edge.
Finishing and Fitting
Weave in all the yarn ends with a tapestry needle, working the ends through the stitches on the inside of the cap so they do not show. Weave the crown tail through the magic ring and pull it closed, then weave the end in a circle around the ring to lock it.
Try the cap on and check the fit. The crown should sit comfortably, the band should hug without squeezing, and the brim should sit level above your eyebrows. If the band feels loose, work one more round of post stitches. If it feels tight, block the cap: dampen it lightly, put it on a head form or a bowl, and let it dry in shape.
Shape the brim by curving it gently with your hands, bending the sides down a little at a time. Do not crease it sharply, because a sharp crease is hard to remove from cotton.
Variations: Colors, Sizes, and Uses
- Team colors cap: work the crown in one team color and the band and brim edge in a second team color for a sporty, spirited cap.
- Striped cap: change colors every two rounds on the sides for a bold striped cap.
- Child size cap: stop the crown after round 7 and work two fewer side rounds for a cap that fits a head of about 19 to 20 inches.
- Ponytail cap: leave a gap in the band at the back by working rounds 19 to 21 in rows instead of rounds, and add a button loop for a ponytail opening.
- Summer mesh cap: work the sides in double crochet with a chain 1 space between stitches for a breezy, open cap.
- Market set: pair a cap with matching crochet bucket hat pattern, cat beanie pattern, and headband pattern for a full hat stall that looks planned.
Troubleshooting a Cap That Does Not Fit Right
- My crown will not lie flat. You missed an increase, or your stitches are too tight. Count your stitches on every increase round, and check the crown after round 9. It should be about 7 inches across.
- My cap is too tight. Your gauge is tight, or you stopped the crown too soon. Go up a hook size, or add one more increase round after round 9.
- My cap is too loose. Your gauge is loose, or the band is stretched out. Go down a hook size, or work one more round of post stitches to pull the band in.
- My brim is floppy. The brim was worked in a single strand, or the yarn is too soft. Work it with two strands held together, or slip plastic canvas inside the brim.
- My band rolls up. The post stitches were worked too tightly, or the band is too short. Work them loosely, and add one more band round.
Care Instructions
Hand wash a crocheted baseball cap in cool water with a mild detergent, and press the water out gently without wringing. Reshape the crown and the band, curve the brim gently, and lay the cap flat or on a head form to dry away from direct heat. Do not put the cap in a dryer, because the heat can shrink the cotton and warp the brim.
Frequently Asked Questions
Is this crochet baseball cap pattern good for beginners?
Yes, it is best for an easy crocheter who knows half double crochet, single crochet, and increases. The band uses front and back post stitches, which are just double crochet worked around a post instead of through a stitch, and the pattern explains each round step by step. If this is your first hat, try our free crochet hat pattern first, because it has no brim.
What yarn is best for a crochet baseball cap?
Worsted weight cotton yarn is the best choice, because it breathes in warm weather, holds its shape, and washes well. A smooth cotton yarn shows the half double crochet stitches clearly. Avoid fluffy yarn, because the post stitch band gets lost in the fuzz, and avoid heavy wool, because it is too warm for a summer cap.
How do I make the brim stiff?
Work the brim with two strands of yarn held together, which makes it firm enough to hold its curve. For a really stiff brim, cut a piece of plastic canvas to the shape of the brim and slip it between two layers. A light spray of fabric stiffener also helps.
How do I know what size to make?
Measure around your head just above your eyebrows, where the band will sit. The adult size fits 21 to 23 inches. If your head measures 19 to 20 inches, make the child size by stopping the crown after round 7. If it measures 23 to 24 inches, add one more increase round after round 9.
Can I make this cap for a child?
Yes, stop the crown after round 7 and work two fewer side rounds, which gives a cap for a head of about 19 to 20 inches. Work the brim across 26 stitches instead of 30, and skip the plastic canvas, because a soft brim is safer for a child.
Can I sell caps made from this pattern?
Yes, you may sell finished caps made from this free pattern, with credit to Little Loop Finds. Do not sell or republish the pattern text itself. Caps sell well at craft markets, especially in team colors. See our earflap hat pattern for another market favorite.
More Free Patterns to Try
- Free Crochet Hat Pattern: a simple beanie with no brim, perfect for a first hat.
- Crochet Bucket Hat Pattern: a floppy brim hat for sunny days at the beach.
- Crochet Cat Beanie Pattern: a playful beanie with cat ears for a fun gift.
- Crochet Headband Pattern (Free): a quick headband that uses up small balls of yarn.
Happy stitching!