Beret Crochet Pattern (Classic French Beret)
Crochet a classic French-style slouchy beret in soft wool with a ribbed band in about four hours, then wear it tilted to one side.


Patterns · Crochet
- Finished size
- 11 in across
- Making time
- 4 hours
- Hook
- US H-8 (5.0 mm)
- Set
- Beret, band
- Skill
- Easy
In this post
- Key Takeaways
- Table of Contents
- Why You Will Love This Beret
- Finished Size, Skill Level, and Time
- Materials You Need
- Abbreviations (US Terms)
- Gauge and Sizing Notes
- Part 1: The Flat Crown
- Part 2: The Slouch, the Band, and Shaping
- Part 3: Finishing, Blocking, and Wearing
- Variations: Colors, Sizes, and Uses
- Troubleshooting a Beret That Does Not Look Right
- Care Instructions
- Frequently Asked Questions
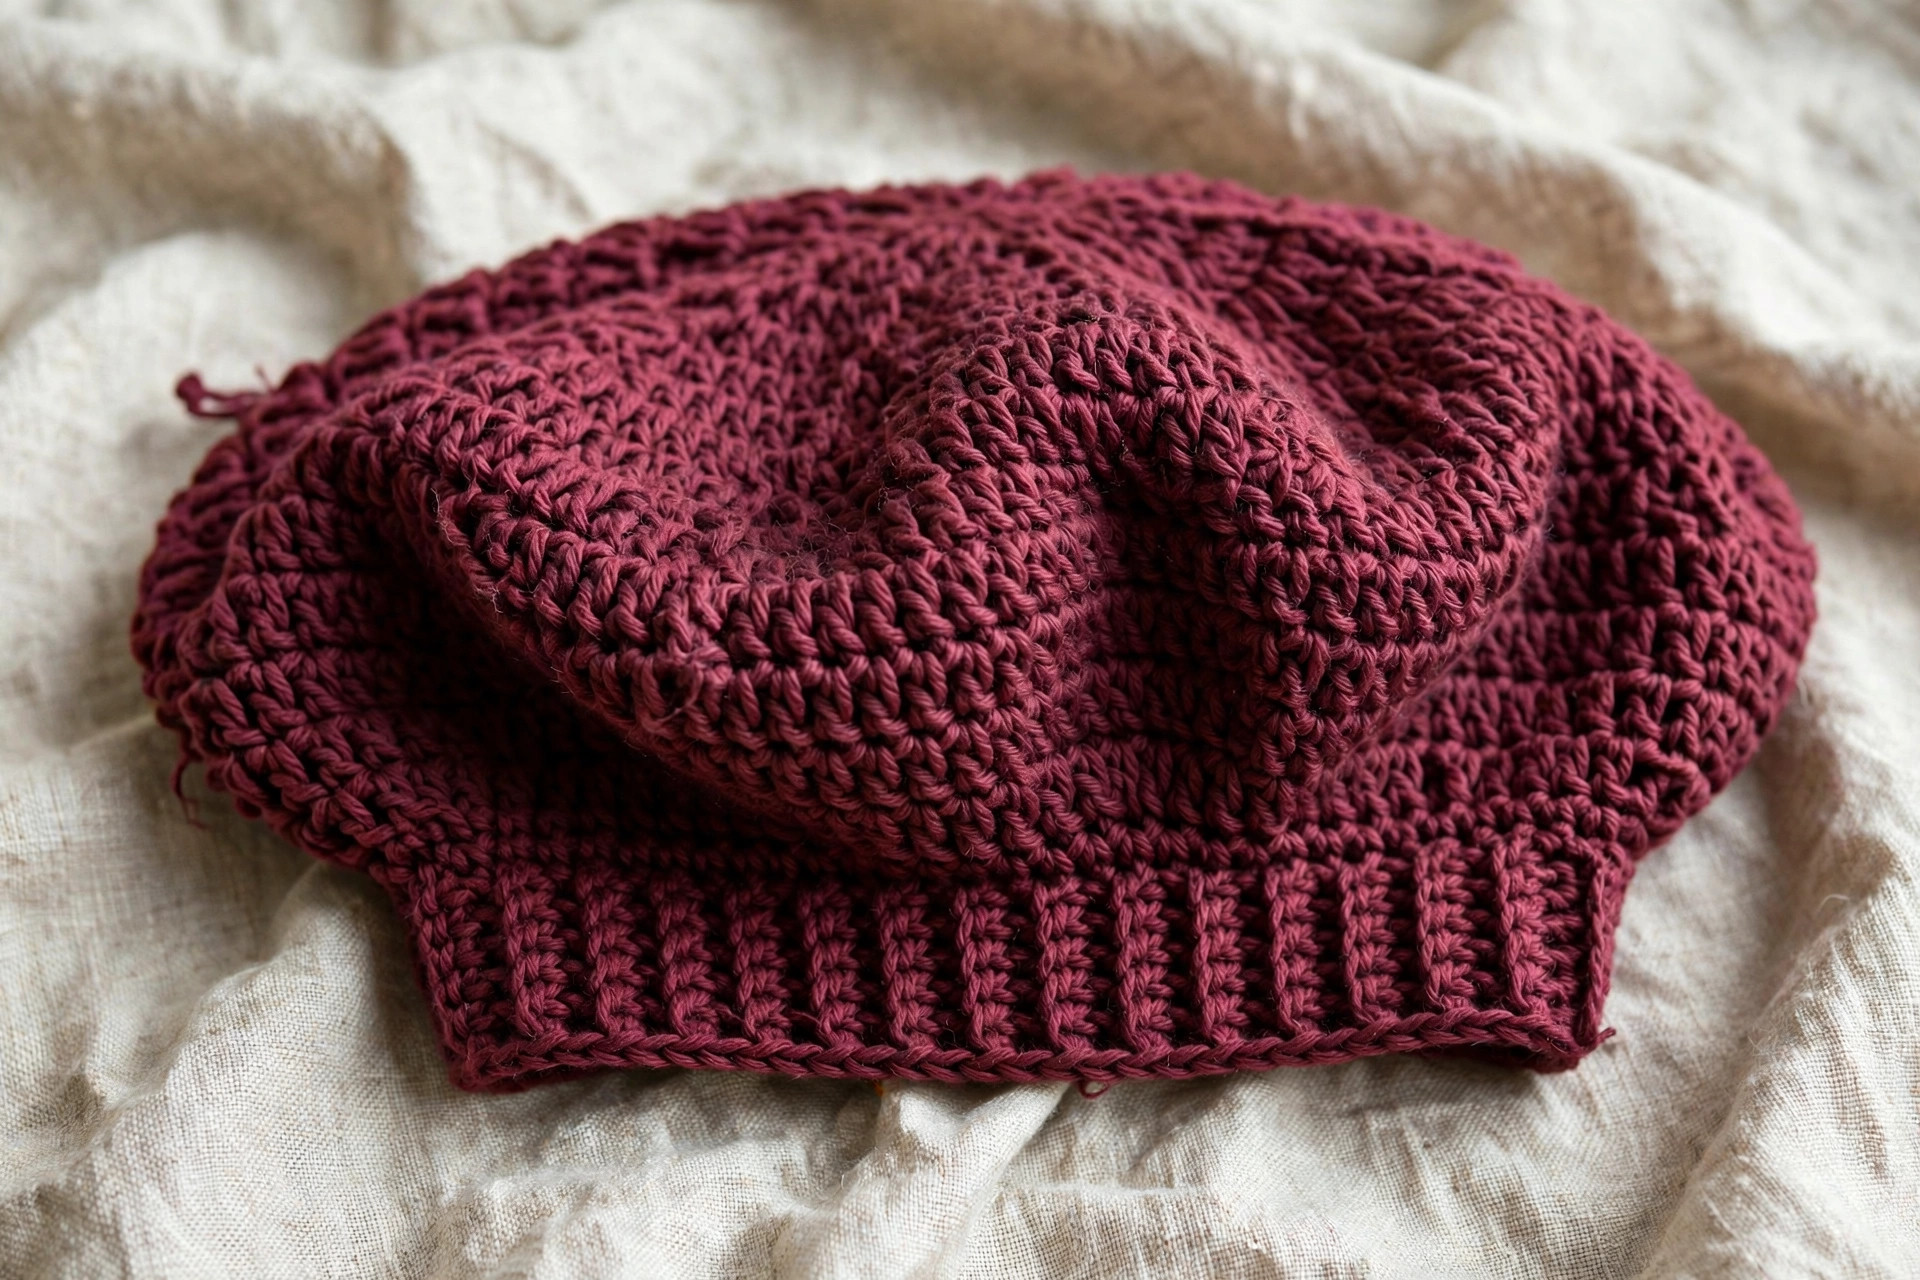
A crochet beret is the most elegant hat you can make in an afternoon. This free beret crochet pattern makes a classic French-style slouchy beret in soft wool, with a flat round crown, a gentle drape, and a snug ribbed band. It is the hat that goes with a wool coat, a scarf, and a cold bright day.
This is an original Little Loop Finds design, written in US terms and completely free. The beret is worked in the round from the top down, starting with a flat circle and then decreasing to shape the slouch. One size fits most adults, with sizing notes so you can make it smaller or larger.
A quick note on scope: this post is about one specific hat, a classic flat round beret that slouches to one side. It is not a beanie, which is tall and close fitting, and it is not a bucket hat, which has a brim. If you want a brimmed hat instead, our crochet bucket hat pattern is a good match.
Key Takeaways
- Free original pattern: a Little Loop Finds original design, written in US terms, and completely free.
- A classic French beret: a flat round crown with a soft slouch and a snug ribbed band.
- One size, with notes: one size fits most adults, about 22 inches around the band, with sizing notes.
- Simple stitches: worked in the round with double crochet, increases, and decreases only.
- A 4 hour project: one beret takes about 4 hours.
Table of Contents
- Why You Will Love This Beret
- Finished Size, Skill Level, and Time
- Materials You Need
- Abbreviations (US Terms)
- Gauge and Sizing Notes
- Part 1: The Flat Crown
- Part 2: The Slouch, the Band, and Shaping
- Part 3: Finishing, Blocking, and Wearing
- Variations: Colors, Sizes, and Uses
- Troubleshooting a Beret That Does Not Look Right
- Care Instructions
- Frequently Asked Questions
Why You Will Love This Beret
A beret makes an outfit feel finished with almost no effort. Pull it on, tilt it to one side, and a plain coat suddenly looks like a plan. It is warm without being bulky, and it fits in a coat pocket when you go inside, which a stiff hat never does.
The beret is also a kind project. It is worked in the round, so there are no seams to sew and no pieces to join. If you can work a double crochet and count to twelve, you can make this beret.
The shape is forgiving, which is rare for a hat. A beret that is a little too slouchy still looks like a beret, and a beret that is a little too flat still looks French. The band does the fitting, and the crown does the style, so a small mistake in the crown rarely shows.
Finished Size, Skill Level, and Time
- Finished size: about 11 inches across when laid flat, and about 22 inches around the band, unstretched. The band stretches to fit heads from 21 to 23 inches around.
- Skill level: Easy. You need a magic ring, double crochet, increases, decreases, and basic seaming for the band join. The beret is worked in the round, so there are no rows to turn.
- Time: about 4 hours per beret: 2 hours for the crown, 1 hour for the slouch and band, and 1 hour for finishing and blocking.

Materials You Need
| Item | What to get |
|---|---|
| Yarn, main color | DK weight wool yarn in burgundy, 220 yards |
| Yarn, accent color | DK weight wool yarn in cream, 30 yards, for the band stripe (optional) |
| Hook | US H-8 (5.0 mm), or the size that gives you the gauge below |
| Notions | Polyester stuffing (for blocking only), tapestry needle, scissors, tape measure, stitch markers, pins |
| Blocking | A dinner plate, 10 inches across, for blocking the crown flat |
Soft DK weight wool is the best choice for a beret because it is warm, it drapes well, and it holds the slouch without going limp. A wool blend with a little acrylic also works and is easier to wash. Avoid very stiff cotton, because it makes a beret that stands up instead of draping, and avoid very fuzzy yarns, because they hide the stitch pattern.
Use the same yarn weight for the crown and the band. Mixing weights makes the band tighter or looser than the crown, and the beret will not sit right. If you want a stripe in the band, use the same weight and the same brand in a second color.
Abbreviations (US Terms)
- MR = magic ring
- ch = chain
- sl st = slip stitch
- sc = single crochet
- hdc = half double crochet
- dc = double crochet
- inc = increase (2 dc in the same stitch)
- dec = decrease (dc 2 together)
- st(s) = stitch(es)
- rep = repeat
- RS = right side
- FO = fasten off
Gauge and Sizing Notes
Gauge matters on a beret because the band must fit the head and the crown must drape. Work a swatch of 12 dc and 7 rows in the main color. It should be about 4 inches wide and 4 inches tall. If it is wider, go down a hook size. If it is narrower, go up a hook size.
You can change the size easily. For a smaller head, work the band 2 rounds shorter and the crown 1 increase round fewer. For a larger head, work the band 2 rounds longer and add 1 more increase round to the crown. Keep the same stitch counts in the crown otherwise, so the slouch stays the same. Our free ribbed beanie pattern uses the same DK weight gauge if you want to practice the tension on a simpler hat first.
Part 1: The Flat Crown
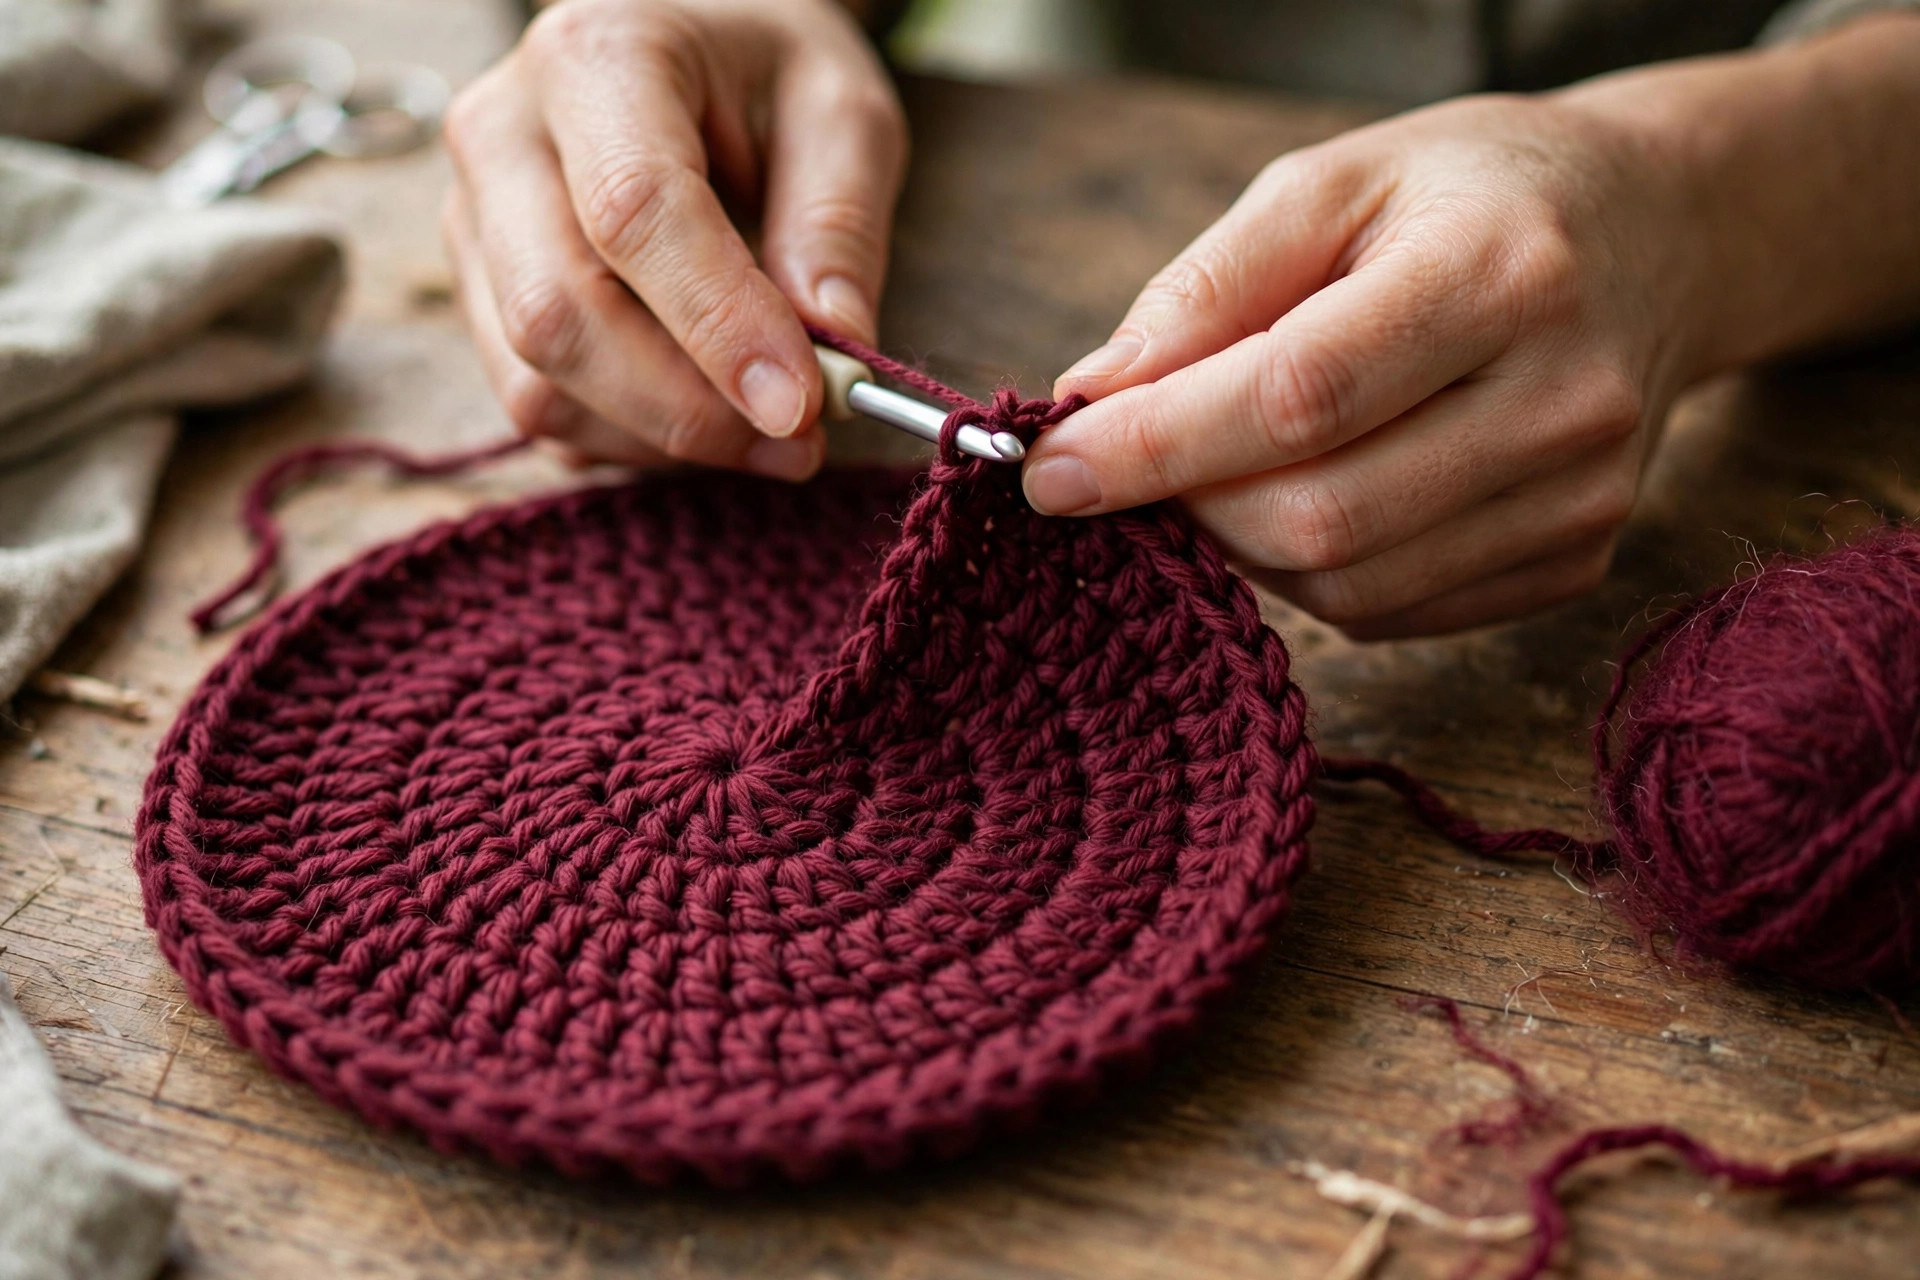
The crown is the flat round top of the beret, and it is the part that makes a beret a beret. It starts as a small circle and grows evenly, round by round, until it is about 11 inches across. The secret is to increase the same number of stitches in every round, so the circle stays flat instead of curling into a bowl.
Work in joined rounds. At the end of each round, join with a sl st to the top of the first stitch, then chain 2 to start the next round. The chain 2 does not count as a stitch. Place a stitch marker at the start of each round and move it up as you go.
The Crown Rounds
With the main color, work the crown as follows.
- Round 1: MR, ch 2, 12 dc in the ring, join. (12)
- Round 2: ch 2, inc in each st around, join. (24)
- Round 3: ch 2, (dc, inc) rep 12 times, join. (36)
- Round 4: ch 2, (2 dc, inc) rep 12 times, join. (48)
- Round 5: ch 2, (3 dc, inc) rep 12 times, join. (60)
- Round 6: ch 2, (4 dc, inc) rep 12 times, join. (72)
- Round 7: ch 2, (5 dc, inc) rep 12 times, join. (84)
- Round 8: ch 2, (6 dc, inc) rep 12 times, join. (96)
- Round 9: ch 2, (7 dc, inc) rep 12 times, join. (108)
- Round 10: ch 2, (8 dc, inc) rep 12 times, join. (120)
- Round 11: ch 2, dc in each st around, join. (120)
- Round 12: ch 2, (9 dc, inc) rep 12 times, join. (132)
After round 12, lay the crown flat on a table. It should be about 10 inches across and lie flat without curling up at the edges. If it curls, you need more increases, so work one more increase round. If it ripples like a wave, you have too many increases, so take out the last increase round and work a straight round instead.
The Crown Edge
The last 2 rounds of the crown set up the slouch. Work them straight, with no increases, so the edge of the circle starts to turn down gently.
- Rounds 13 to 14: ch 2, dc in each st around, join. (132)
The crown should now be about 11 inches across. Do not fasten off. The next part shapes the slouch and the band, and it is worked in the same yarn, in the same rounds, without a break.
Part 2: The Slouch, the Band, and Shaping
The slouch is what makes the beret drape to one side instead of sitting flat like a plate. You make it by decreasing evenly for a few rounds, so the opening gets smaller while the crown stays wide. Then the band pulls the opening in to fit the head.
The Slouch Rounds
Work the slouch rounds as follows, decreasing 12 stitches in each round.
- Round 15: ch 2, (9 dc, dec) rep 12 times, join. (120)
- Round 16: ch 2, (8 dc, dec) rep 12 times, join. (108)
- Round 17: ch 2, dc in each st around, join. (108)
- Round 18: ch 2, (7 dc, dec) rep 12 times, join. (96)
- Round 19: ch 2, (6 dc, dec) rep 12 times, join. (84)
The beret should now look like a soft bowl with a wide flat top. Try it on at this point, before you work the band. The crown should sit on your head with the edge falling to about your ears, and the extra fabric should flop gently to one side. If it feels too tight, work one more straight round before the band. If it feels too loose, work one more decrease round.
The Band
The band is worked in single crochet, which is tighter than double crochet and holds its shape. It is worked in the round, straight down from the slouch, for 6 rounds. Work it in the main color, or switch to the accent color for the last 2 rounds if you want a stripe.
- Rounds 20 to 25: ch 1, sc in each st around, join with a sl st. (84)
The band should be about 1.5 inches tall. If you want a taller band, work 2 more rounds. If you want a shorter band, work 2 fewer rounds. The band is the part that grips the head, so it should feel snug but not tight. Our crochet earflap hat free pattern uses the same single crochet band if you want to practice the tension on a simpler hat first.
The Band Edge
Work one final round of slip stitches around the bottom edge of the band, in the main color, to give it a clean finish and stop it from stretching out. Work 1 sl st in each stitch around, join, and fasten off, leaving a 6 inch tail. Weave the tail in on the inside of the beret, going back and forth through the stitches so it cannot work loose.
Part 3: Finishing, Blocking, and Wearing
A beret needs blocking to look its best. Blocking is just a fancy word for shaping the beret while it is damp and letting it dry in that shape. It is the step that turns a floppy circle into a beret with a flat crown and a neat drape.
How to Block a Beret
Soak the beret in cool water with a little mild detergent for 10 minutes, then press the water out gently without wringing. Lay the beret flat on a clean towel, and slide a dinner plate inside the crown, so the plate holds the crown flat and round. Pull the band down over the edge of the plate, and smooth the slouch to one side with your hands. Leave the beret to dry flat, away from direct heat, for about 24 hours.
Do not block a beret on a balloon or a bowl, because both make the crown dome up instead of lying flat. The plate is the right shape, and it is already in your kitchen. If the beret still looks puffy after blocking, press the crown gently with a cool iron through a cloth, and block it again.
How to Wear a Beret
Put the beret on with the band sitting just above your eyebrows, then pull the crown to one side so it slouches over one ear. The classic tilt is to the right, but the left works just as well, so choose the side that feels natural. Pin the beret in place with a small hairpin through the band if you are going out in the wind.
A beret goes with a wool coat, a scarf, and boots, and it also goes with a simple sweater and jeans. If the band feels loose after a few wears, wash the beret and block it again, and the wool will spring back.
Final Finishing
Check the whole beret before you call it done. The crown should lie flat, the slouch should fall to one side, and the band should be even all the way around. Weave in all the loose ends on the inside of the beret, and trim any stray yarn tails close to the fabric. Try the beret on one more time, in front of a mirror, and adjust the tilt until it looks right.
Variations: Colors, Sizes, and Uses
- Classic burgundy beret: work the whole beret in burgundy wool with a cream stripe in the last 2 rounds of the band.
- Black Paris beret: make the beret in black wool with no stripe, for a look that goes with everything.
- Cream winter beret: make the beret in cream wool and wear it with a cream scarf, for a soft winter set.
- Child size beret: work the crown to round 10 instead of round 12, and work the band 2 rounds shorter, for a child about 8 to 10 years old.
- Slouchy beret: work 2 more straight rounds in the crown before the slouch, for a beret with extra drape.
- Gift set: make a beret and a matching scarf in the same yarn, and give them together as a winter gift.
Troubleshooting a Beret That Does Not Look Right
- My crown curls up like a bowl. There are too few increases. Work one more increase round, then a straight round, and check again.
- My crown ripples like a wave. There are too many increases. Take out the last increase round and work a straight round instead.
- My beret will not slouch. The slouch rounds were worked too straight. Work one more decrease round before the band, so the opening gets smaller and the crown has room to flop.
- My band is too loose. The gauge is too loose, or the band is too tall. Work the band with a hook one size smaller, or work 2 fewer rounds.
- My beret looks like a beanie. The crown is too small, or the slouch rounds were skipped. Work the crown to the full 11 inches across before you start the decreases.
- My beret looks lopsided. The increases were not spaced evenly. Count the stitches between increases in each round, and keep them even all the way around.
Care Instructions
Hand wash a crochet beret in cool water with a mild detergent, and press the water out gently without wringing. Reshape the beret, pulling the crown flat and smoothing the band, and lay it flat to dry away from direct heat, with a plate inside the crown if you want to keep the shape. Do not put a wool beret in the washing machine or the dryer, because the tumbling can felt the yarn and shrink the beret. Store the beret flat in a drawer, or on a shelf, so the crown keeps its shape.
Frequently Asked Questions
Is this beret crochet pattern good for beginners?
Yes, it is a good beginner hat. You need a magic ring, double crochet, increases, decreases, and a simple band. The beret is worked in the round, so there are no seams to sew and no pieces to join. One beret takes about 4 hours.
What yarn is best for a crochet beret?
DK weight wool is the best choice, because it is warm, it drapes well, and it holds the slouch without going limp. A wool blend with a little acrylic also works and is easier to wash. Avoid very stiff cotton, because it makes a beret that stands up instead of draping.
How is a beret different from a beanie?
A beret is flat, round, and slouchy, with a wide crown that drapes to one side and a short band. A beanie is tall and close fitting, with a crown that hugs the head. The beret in this pattern is about 11 inches across when laid flat, which a beanie never is.
How do I make the beret bigger or smaller?
For a smaller head, work the band 2 rounds shorter and the crown 1 increase round fewer. For a larger head, work the band 2 rounds longer and add 1 more increase round to the crown. Keep the same stitch counts in the crown otherwise, so the slouch stays the same.
Why does my beret need blocking?
Blocking shapes the beret while it is damp and lets it dry in that shape. It flattens the crown, sets the drape, and stops the beret from looking puffy. A dinner plate inside the crown is the easiest way to block it, and it takes about 24 hours to dry.
Can I sell berets made from this pattern?
Yes, you may sell finished berets made from this free pattern, with credit to Little Loop Finds. Do not sell or republish the pattern text itself. A burgundy beret with a matching crochet scarf patterns for beginners makes a lovely pair for a market stall, and a black beret with a matching easy crochet ear warmer pattern free is a sweet winter gift set.

Happy stitching.