Realistic crochet horse pattern: lifelike free amigurumi
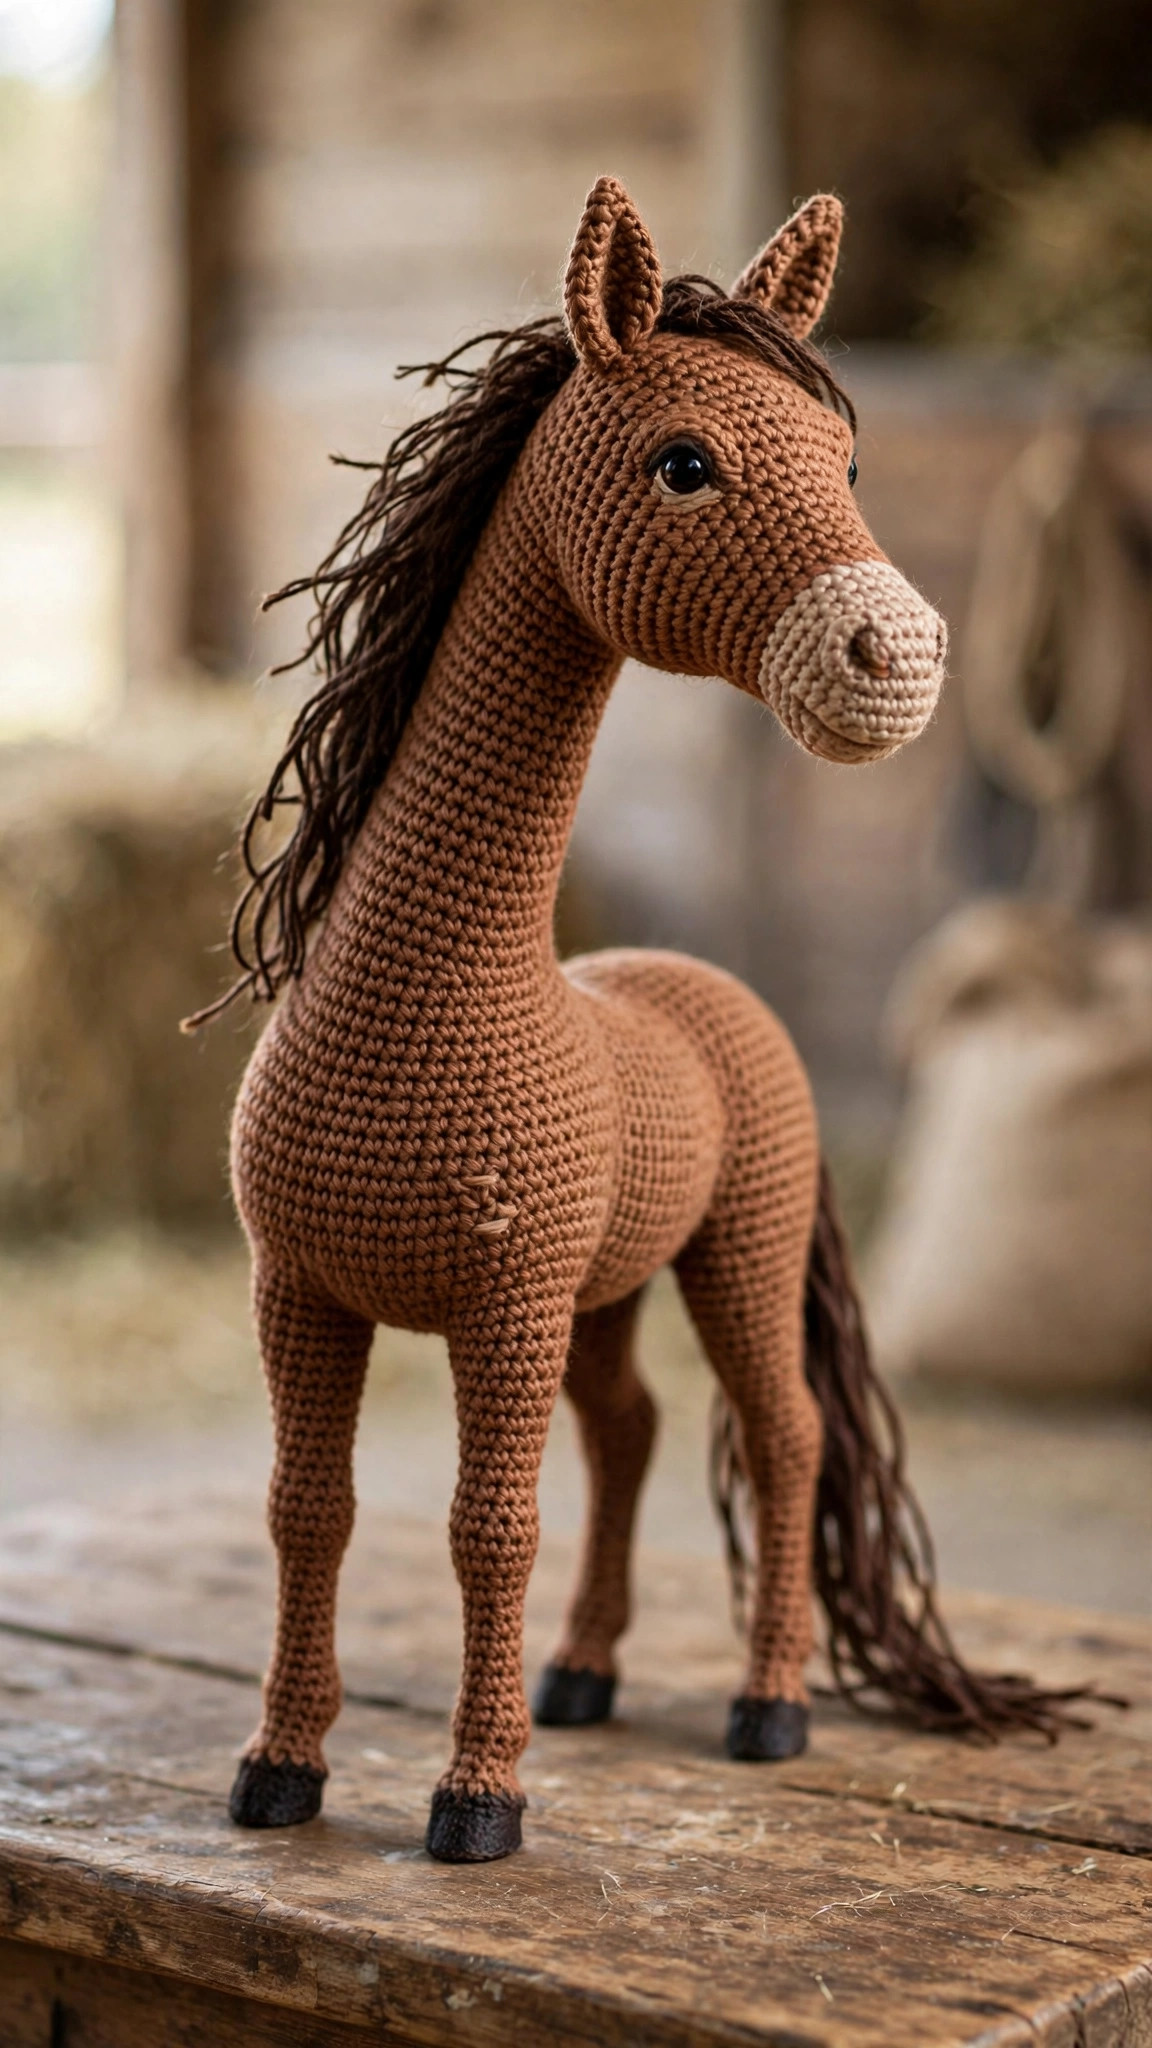
A standing horse with lifelike proportions — long tapered muzzle, arched neck, slim legs with real hooves and a strand-knotted mane — built from 13 pieces of single crochet in an original intermediate-level design.

Amigurumi · Crochet
- Finished size
- About 28 cm / 11 in tall
- Making time
- About 7–9 hours
- Hook
- 3.5 mm, worsted-weight yarn
- Pieces
- 13 pieces to assemble
- Skill
- Intermediate
In this post
Most crochet horses look like cartoon ponies — big round heads, stubby legs, a glued-on yarn strip for a mane. This free realistic crochet horse pattern is designed from real equine anatomy instead: a long tapered head with a distinct muzzle, a slim neck set at a natural angle, a deep barrel body, slender legs with real hooves, and a mane and tail built from individual yarn strands so they fall like actual hair.
This original Little Loop Finds design uses US terms and is rated intermediate — not for hard stitches (it is nearly all single crochet), but for the shaping, stuffing, and assembly that create the lifelike look.
Table of Contents
- Head - Neck - Body - Legs - Ears - Mane - Tail - Assembling Your Horse - Finishing Touches
Why This Horse Looks Realistic
Eight deliberate design choices separate this pattern from cartoon-style horse amigurumi:
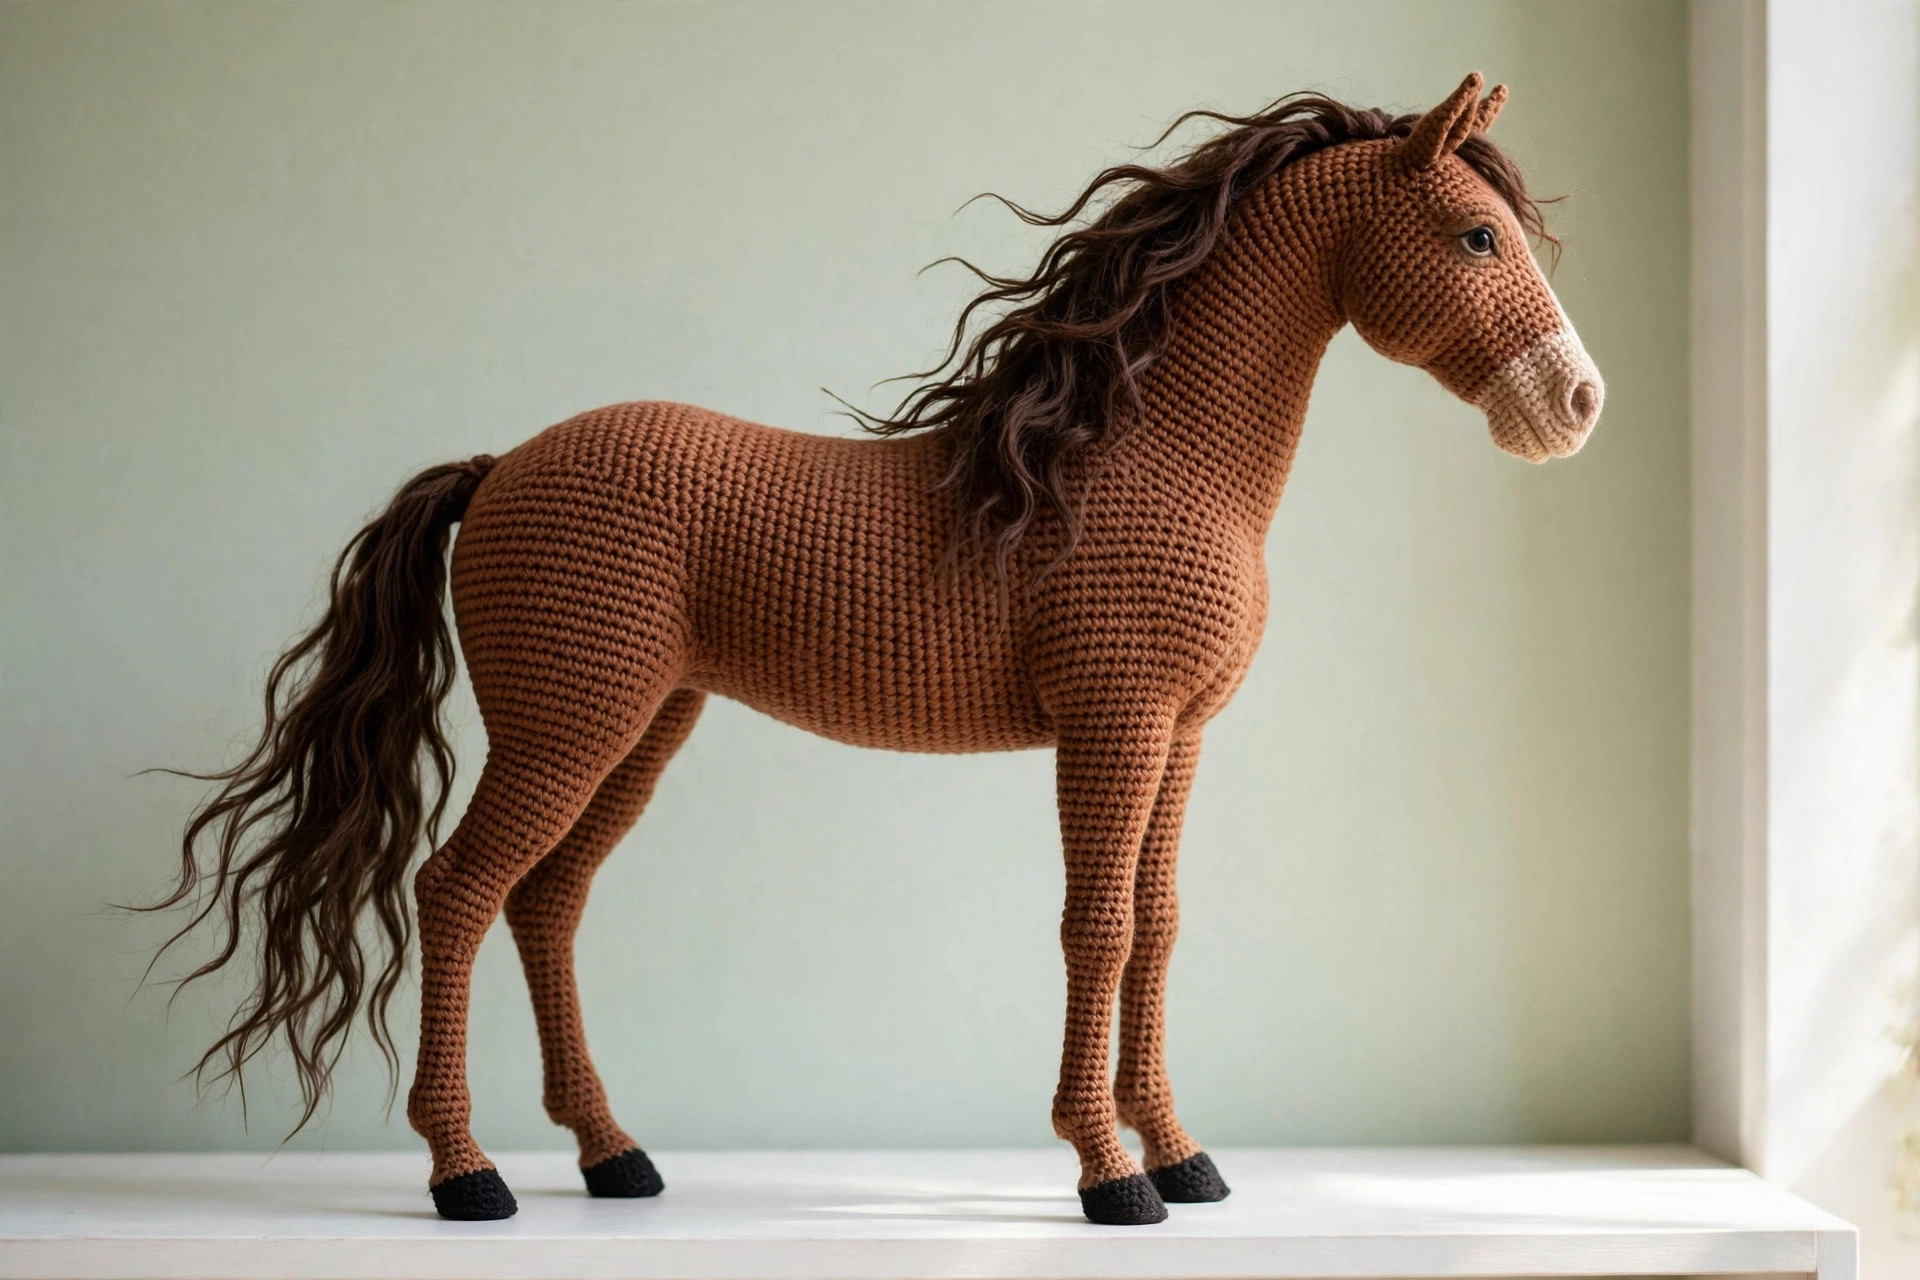
1. The head-to-muzzle ratio. A real horse's head is a long wedge, widest at the cheek and tapering to the nostril. This head is worked as one tapered piece instead of the usual "ball head plus snout ball," so the profile reads as equine from every angle.
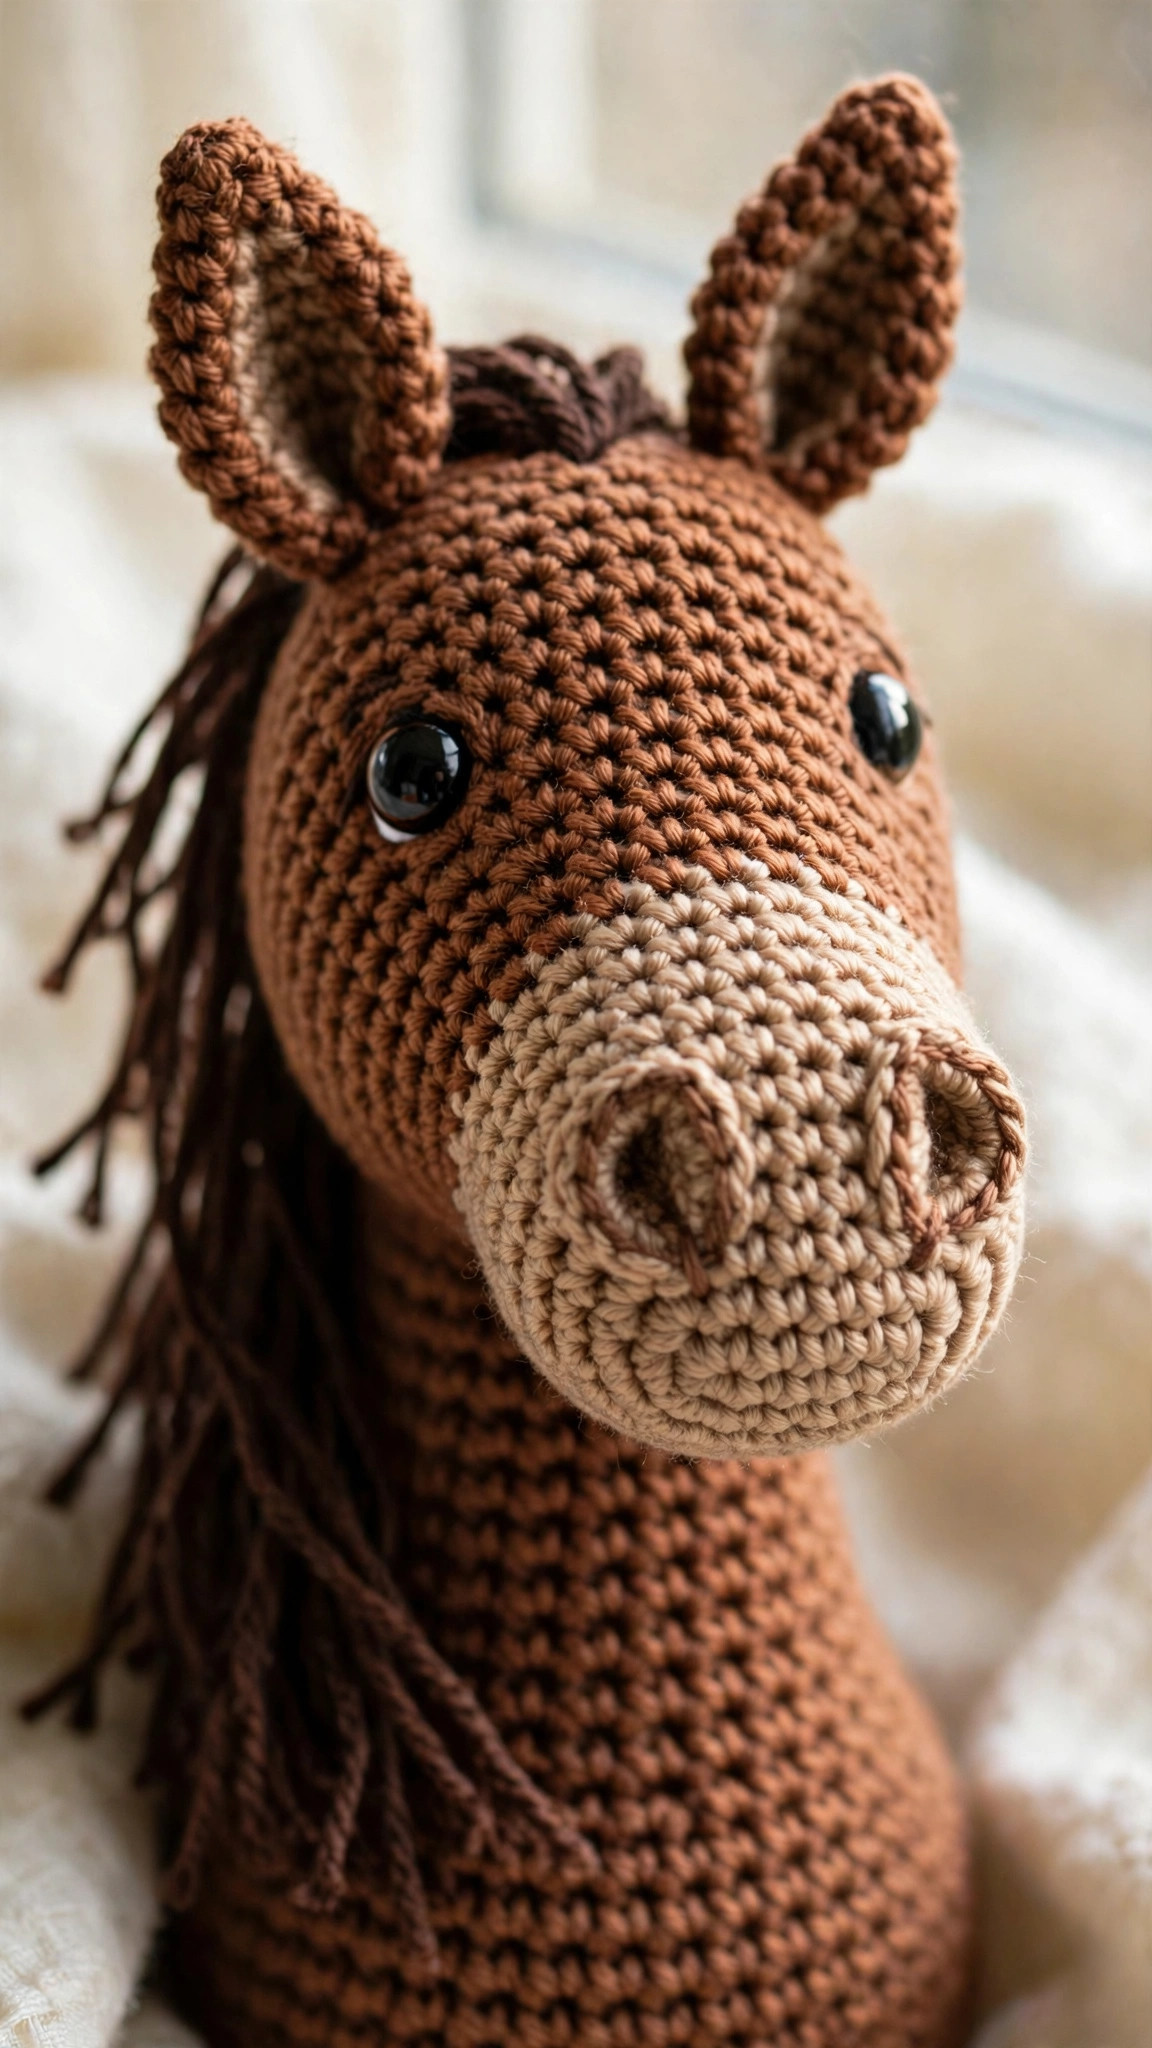
2. A two-tone muzzle. Real chestnuts and bays have a lighter, softer muzzle. The first seven rounds are worked in tan before switching to brown — the dipped-muzzle look with zero embroidery.
3. A throatlatch groove. Round 14 places two decreases on the underside of the head only, forming the subtle groove under the jaw where a real throatlatch sits — a tiny detail that reads as "real" without anyone knowing why.
4. The neck joins at an angle. The tapered neck is sewn on tilted about 35 degrees forward, with the base stuffed slightly fuller — producing the arched crest of a real neck instead of a periscope.
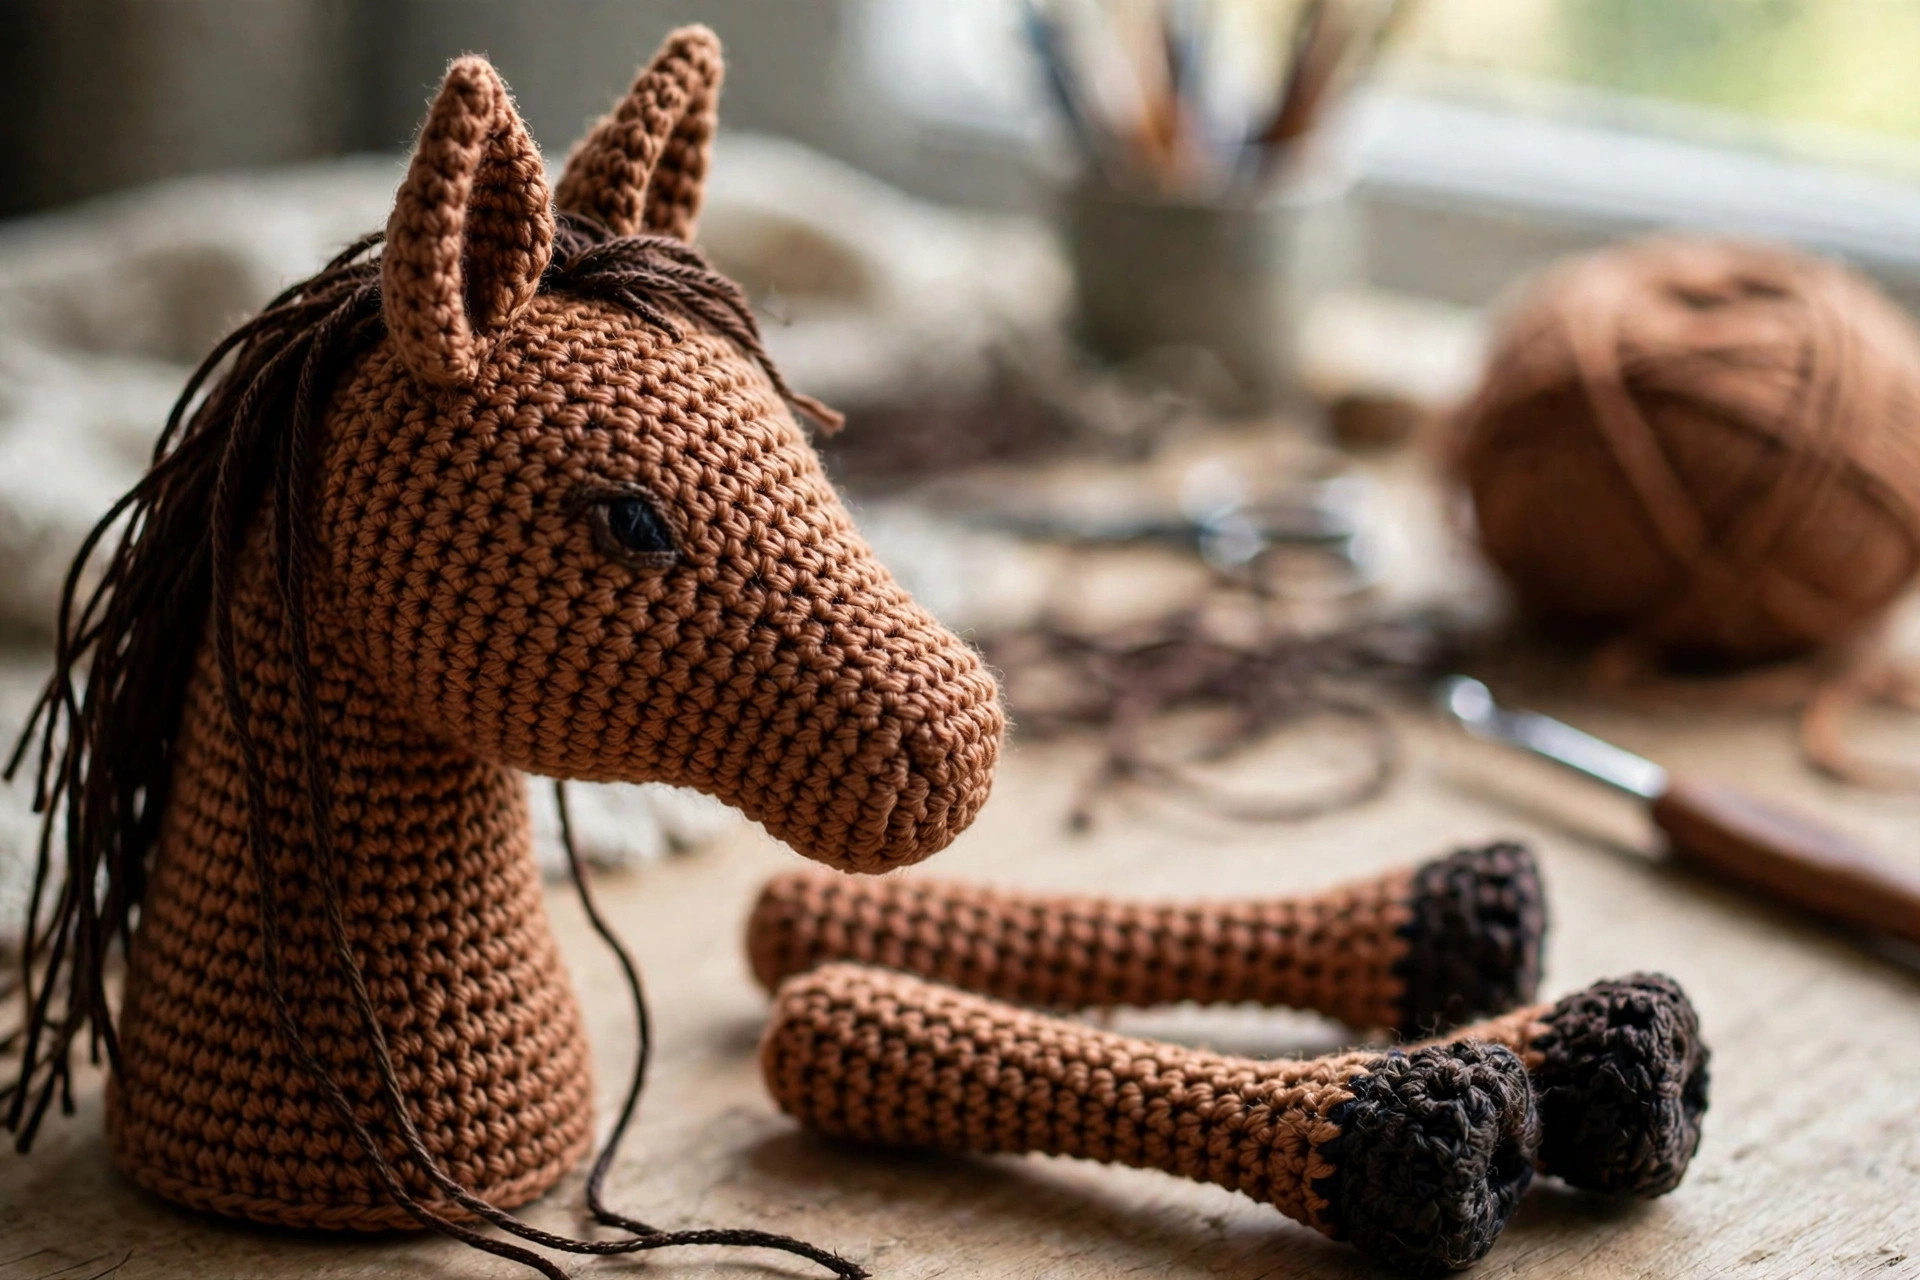
5. Slim cannons with real hooves. A horse's cannon bone is barely finger-wide at this scale. The legs hold 9 stitches through the cannon, flare briefly at the knee, and end in a charcoal hoof cap worked in back-loop-only rounds so the hoof reads as its own structure.
6. A bent hind leg. Real hind legs angle at the hock instead of standing straight. Three short rows across the back of each hind leg add that bend — a five-minute technique that transforms the silhouette.
7. Strand-by-strand mane and tail. Instead of a flat crocheted strip, individual yarn strands are knotted along the crest and trimmed to a taper. Brushed out, they fall and part like real hair — no other step affects realism this much.
8. Pricked, cupped ears. The ears are tapered cones, pinched at the base when sewn on so they cup and tilt slightly outward — the alert expression of a real horse, not flat pasted-on triangles.
Materials
- Yarn (worsted weight / #4, acrylic or wool blend):
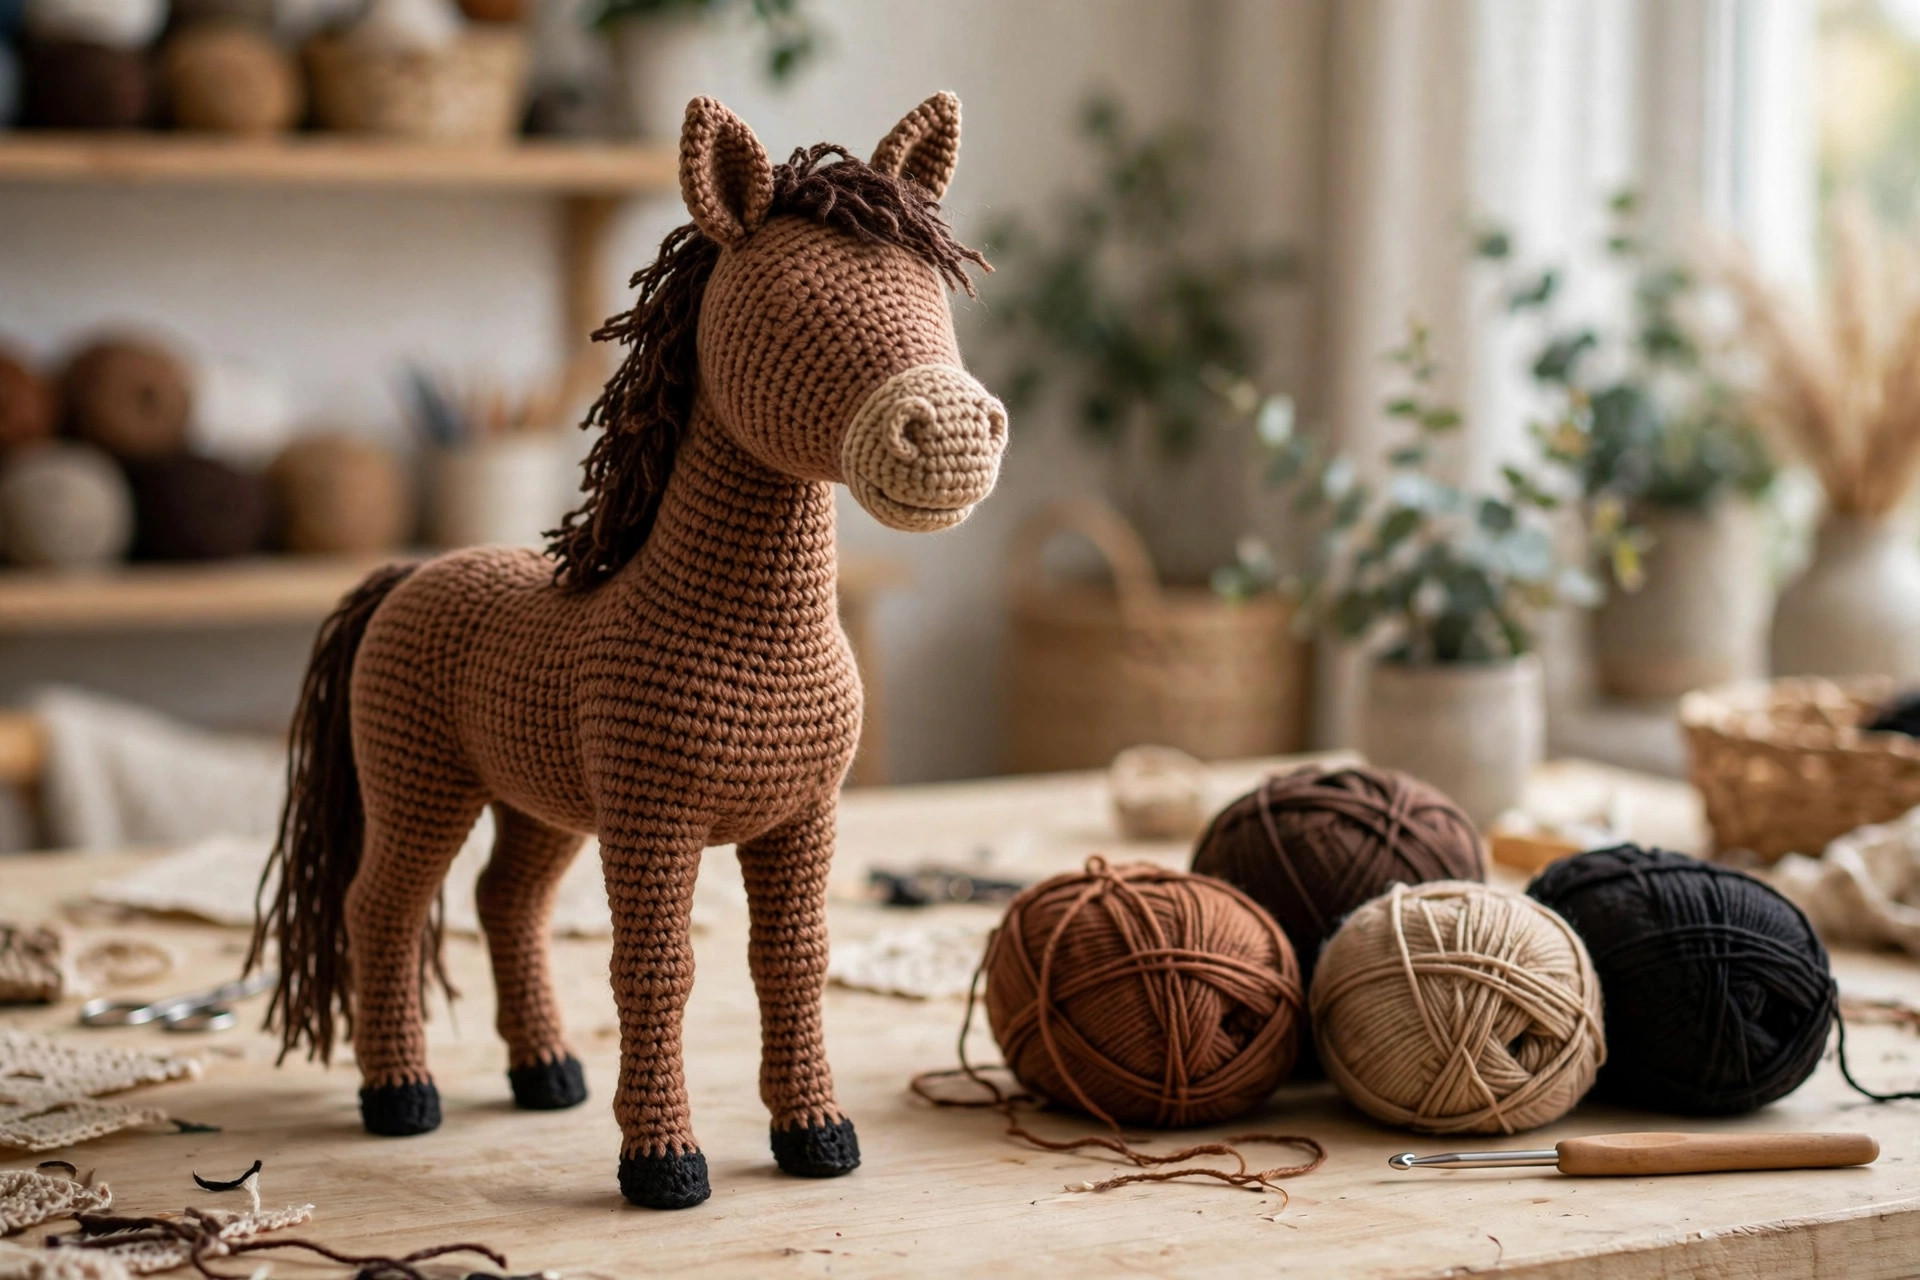
- Color A — chestnut brown: ~280 m / 306 yd - Color B — tan: ~40 m / 44 yd (muzzle) - Color C — dark brown: ~90 m / 98 yd (mane and tail) - Color D — charcoal: ~25 m / 27 yd (hooves)
- Hook: 3.5 mm (E-4); use 3.25 mm if you crochet loosely. Tight stitches keep stuffing from showing through.
- Safety eyes: one pair, 12 mm black (embroider instead for a child's toy — see FAQ).
- Stuffing: ~150 g polyester fiberfill. Pack firmly — it is what keeps slim legs straight and the neck arched.
- Tapestry needle, stitch markers, scissors, pins, and a pet slicker brush or fine-tooth comb for the mane and tail.
Finished Size
Approximately 28 cm (11 in) tall to the ear tips and 30 cm (12 in) nose to tail tip, in worsted weight with a 3.5 mm hook. DK yarn with a 3.0 mm hook gives a delicate ~22 cm horse; bulky yarn with a 5.0 mm hook makes a ~36 cm statement piece. Shaping scales proportionally — just keep stitches tight.
Gauge
Density matters more than exact gauge: aim for 18 sc × 20 rounds = 10 × 10 cm (4 × 4 in). Hold your work to the light — if you see pinpricks of daylight through the stitches, go down a hook size.
Abbreviations
This pattern uses US crochet terminology:
- MR — magic ring
- ch — chain
- sc — single crochet
- hdc — half double crochet
- inc — increase (2 sc in the same stitch)
- dec — decrease (single crochet 2 together)
- BLO — back loop only
- sl st — slip stitch
- st(s) — stitch(es)
- [ ] ×n — repeat the instructions in brackets n times
- ( ) — total stitch count at the end of the round
All pieces are worked in continuous unjoined spirals unless stated otherwise. Move your stitch marker up at the start of every round.
The Pattern
Head (make 1)
Worked from the nose back to the poll. Start with Color B (tan) for the muzzle.
- R1: MR 6 (6)
- R2: inc in each st (12)
- R3: [sc 1, inc] ×6 (18)
- R4: [sc 2, inc] ×6 (24)
- R5–R7: sc in each st around (24)
- R8: Change to Color A (chestnut) in the last yarn-over of R7. Sc in each st around (24)
- R9: [sc 3, inc] ×6 (30)
- R10–R12: sc in each st around (30)
- R13: [sc 3, dec] ×6 (24)
- R14 (throatlatch shaping): sc 8, dec ×2 (worked on the underside of the head — mark this side), sc 14 (22)
- R15: [sc 9, dec] ×2 (20)
- R16: [sc 8, dec] ×2 (18). Begin stuffing: pack the muzzle (Color B section) very firmly, the cheek area medium-firm.
- R17: [sc 1, dec] ×6 (12)
- R18: dec ×6 (6)
Fasten off, leaving a 20 cm tail. Thread the tail through the front loops of the remaining 6 stitches, pull tight to close, and weave the end inside the head. Set aside.
Realism check: the head should be a long wedge — narrow nose, widest at the cheek, tapering to the poll. A bulbous muzzle means under-stuffing; add fiberfill through the poll before closing.
Neck (make 1)
Worked in joined rounds with Color A. This piece is intentionally a tapered tube: the narrow end meets the head, the wide end meets the body.
- Ch 21, join with a sl st to the first ch to form a ring (being careful not to twist).
- R1: ch 1, sc in each ch around, join with sl st to first sc (21)
- R2–R6: ch 1, sc in each st around, join (21)
- R7: ch 1, [sc 6, inc] ×3, join (24)
- R8–R12: ch 1, sc in each st around, join (24)
- R13: ch 1, [sc 7, inc] ×3, join (27)
- R14–R18: ch 1, sc in each st around, join (27)
Fasten off, leaving a 40 cm tail. Stuff firmly, packing extra into the R13–R18 end — that fullness becomes the crest when tilted during assembly.
Body (make 1)
With Color A, worked in a spiral. The long even stretch (R7–R17) is deliberate — a horse's barrel is longer than round, and those rounds create that stretched profile.
- R1: MR 6 (6)
- R2: inc in each st (12)
- R3: [sc 1, inc] ×6 (18)
- R4: [sc 2, inc] ×6 (24)
- R5: [sc 3, inc] ×6 (30)
- R6: [sc 4, inc] ×6 (36)
- R7–R17: sc in each st around (36)
- R18: [sc 4, dec] ×6 (30)
- R19–R20: sc in each st around (30)
- R21: [sc 3, dec] ×6 (24). Stuff firmly now — the body should feel solid, like a well-packed cushion, with no soft spots along the belly.
- R22: [sc 2, dec] ×6 (18)
- R23: [sc 1, dec] ×6 (12)
- R24: dec ×6 (6)
Fasten off and close as for the head. The seam end is the rear of the horse (where the tail will attach); the R1 end is the chest where the neck joins.
Legs (make 4)
Start each leg in Color D (hoof), then switch to Color A. Make two straight front legs and two hind legs with the hock bend.
- R1: With D, MR 6 (6)
- R2: inc in each st (12)
- R3: BLO sc in each st around (12)
- R4: [sc 2, dec] ×3 (9). Change to Color A in the last yarn-over.
- R5–R12: sc in each st around (9)
- R13: [sc 2, inc] ×3 (12)
- R14: sc in each st around (12)
- R15: [sc 2, dec] ×3 (9)
Front legs: R16–R27: sc in each st around (9). Fasten off, leaving a 30 cm tail for sewing.
Hind legs (hock bend): R16–R22: sc in each st around (9). Then work the bend across the back half of the leg:
- R23: sc 6, turn (leave 3 sts unworked)
- R24: sc 6, turn
- R25: sc 6, turn
- R26: sc in each st around, picking up the 3 skipped stitches as you come to them (9)
- R27–R28: sc in each st around (9)
Fasten off, leaving a 30 cm tail. The short rows bend the leg gently backward at hock height — compare with a front leg to see it.
Stuff firmly from the hoof up — a chopstick helps pack the slim cannon. Leave the top 2 cm unstuffed so legs sew flat to the body.
Ears (make 2)
With Color A. Do not stuff.
- R1: MR 4 (4)
- R2: [sc 1, inc] ×2 (6)
- R3: sc in each st around (6)
- R4: [sc 2, inc] ×2 (8)
- R5: sc in each st around (8)
- R6: [sc 3, inc] ×2 (10)
- R7–R8: sc in each st around (10)
- R9: [sc 3, dec] ×2 (8)
Flatten and sc 4 across the top to close. Fasten off, leaving a 20 cm tail. Pinch the base when sewing on — that cupping is what makes them read as real ears.
Mane
Cut 40 strands of Color C, each 22 cm long, plus 8 shorter strands (12 cm) for the forelock. Working from the poll down the crest to the withers:
- Fold a strand in half and pull the loop through a stitch on the crest with your hook.
- Pull the two ends through the loop (lark's head knot) and tighten.
- Place knots about 1 cm apart in a single line along the crest, then add a second staggered line just beside it for fullness.
Knot the 8 short strands between the ears as a forelock. Trim to a taper — longest mid-neck (~12 cm), shorter toward poll and withers — brush out, and spritz lightly with water to settle the strands.
Tail
Cut 24 strands of Color C, each 30 cm. Fold the bundle in half, wrap the folded top with a 40 cm length of Color C to form a 4 cm tailhead, and sew firmly to the rear of the body (R24 end), angled slightly down. Trim ends to a soft point and brush out — or split into two or three twists for a windswept look.
Assembling Your Horse
Pin everything before you sew — repositioning pinned pieces is free, repositioning sewn pieces is not.
- Neck to body: Sew the wide neck end (R18) to the front-top of the body, tilted ~35° forward so it arcs like a real crest. Whipstitch all around, tucking a pinch of stuffing into the joint for a smooth transition.
- Head to neck: Sew the head's poll end to the narrow neck end, tilted slightly downward — a resting horse carries its head just below horizontal, muzzle forward and a touch down.
- Legs: Sew front legs under the chest (~4 cm apart), hind legs under the rear with hock bends facing back. Stand the horse on a flat surface while attaching the last two legs and adjust until it stands level — uneven legs make it rock.
- Ears: Sew to the poll ~3 cm apart, pinching each base so the ears cup, tilted slightly outward.
- Eyes: Insert 12 mm safety eyes between R10–R11, ~10 sts apart and toward the sides of the head (real eyes sit on the sides, not the front). Attach washers before sewing head to neck; embroider instead if already assembled.
- Mane and tail as described above.
Finishing Touches
The face embroidery is small but it carries the whole expression:
- Nostrils: With Color C, embroider two small comma shapes on the muzzle sides (around R4–R5). Keep them modest — oversized nostrils turn realistic into cartoonish fast.
- Mouth: One gently curved Color C stitch across the muzzle front, a round above the magic-ring start.
- Blending: Massage every seam firmly after sewing — a minute of kneading blends stuffing across joints and erases the "separate pieces" look.
Tips for a Lifelike Finish
- Stuff hard. Slim legs and a long neck only hold shape under firm packing. If a leg bends like rubber, pull the stuffing and repack.
- Steam-block. Hold a steaming iron 5 cm above the piece (never touching), then shape the neck arch and leg angles by hand as it cools — acrylic "remembers" the new shape.
- Choose matte yarn. Shiny yarns photograph well but read toy-like in person; matte acrylic or wool blend mimics a real coat.
- Vary your browns. Work the last two leg rounds in darker brown for "socks," or add a dorsal stripe with surface slip stitches for a dun look.
- Mind eye placement. Too far forward gives a teddy-bear face — push eyes toward the sides of the head and slightly high.
- Trim the mane in stages. You can cut more, never less — trim, brush, step back, check the silhouette, repeat.
- Photograph in daylight. Window light shows stitch texture and shaping the way indoor bulbs never will.
Key Takeaways
Frequently Asked Questions
Is this realistic crochet horse pattern suitable for beginners?
Advanced beginners can manage it — every stitch is single crochet, increases, and decreases. The intermediate rating is for shaping judgment: firm stuffing, pinning pieces at natural angles, trimming a strand mane. With two or three amigurumi projects behind you, read the assembly section twice and go for it.
How long does the horse take to crochet?
Most makers finish in 7–9 hours: ~4 hours crocheting, ~1 hour stuffing, 2–3 hours of assembly, mane knotting, and embroidery. The mane alone takes 30–45 minutes — fiddly, but it is the detail everyone notices first.
What is the best yarn for a realistic crochet horse?
A matte worsted-weight (#4) acrylic or wool blend in natural horse colors. Avoid shiny acrylics and fun-fur yarns — they hide the stitch definition the shaping depends on. A slightly rough wool blend holds the brushed mane texture best.
Can I make this horse child-safe?
Yes, with two swaps: embroider the eyes instead of using safety eyes, and double-knot the mane strands securely (or skip the forelock). No small detachable parts remain once assembled, but supervise children under three as with any handmade toy.
How do I keep the legs from splaying so the horse stands?
Stuff legs drum-tight, sew leg tops flat against the body with no gap, and check the stance on a hard surface before fastening off. If a leg still leans, a pipe cleaner pushed up through the hoof (sharp end folded under) gives invisible reinforcement.
Can I sell finished horses made from this pattern?
Yes — sell the finished horses you make. The written pattern (text and photos) may not be redistributed or sold. A credit link back is appreciated.
Why does my horse look more "cute" than realistic?
Usually one of three things: eyes too far forward, neck sewn vertically instead of tilted, or a mane trimmed too short and even. Move the eyes toward the sides, tilt the neck to ~35°, and let the mane fall longer with a tapered trim.
Keep Crocheting
The box below contains an Etsy link. If you buy through it, we may earn a small commission at no extra cost to you. Learn more.
No time to make one?
Short on time? Find handmade realistic crochet horses from independent makers on Etsy.
Browse on Etsy (opens Etsy in a new tab)