Free Crochet Panda Pattern: Cute Amigurumi Bear
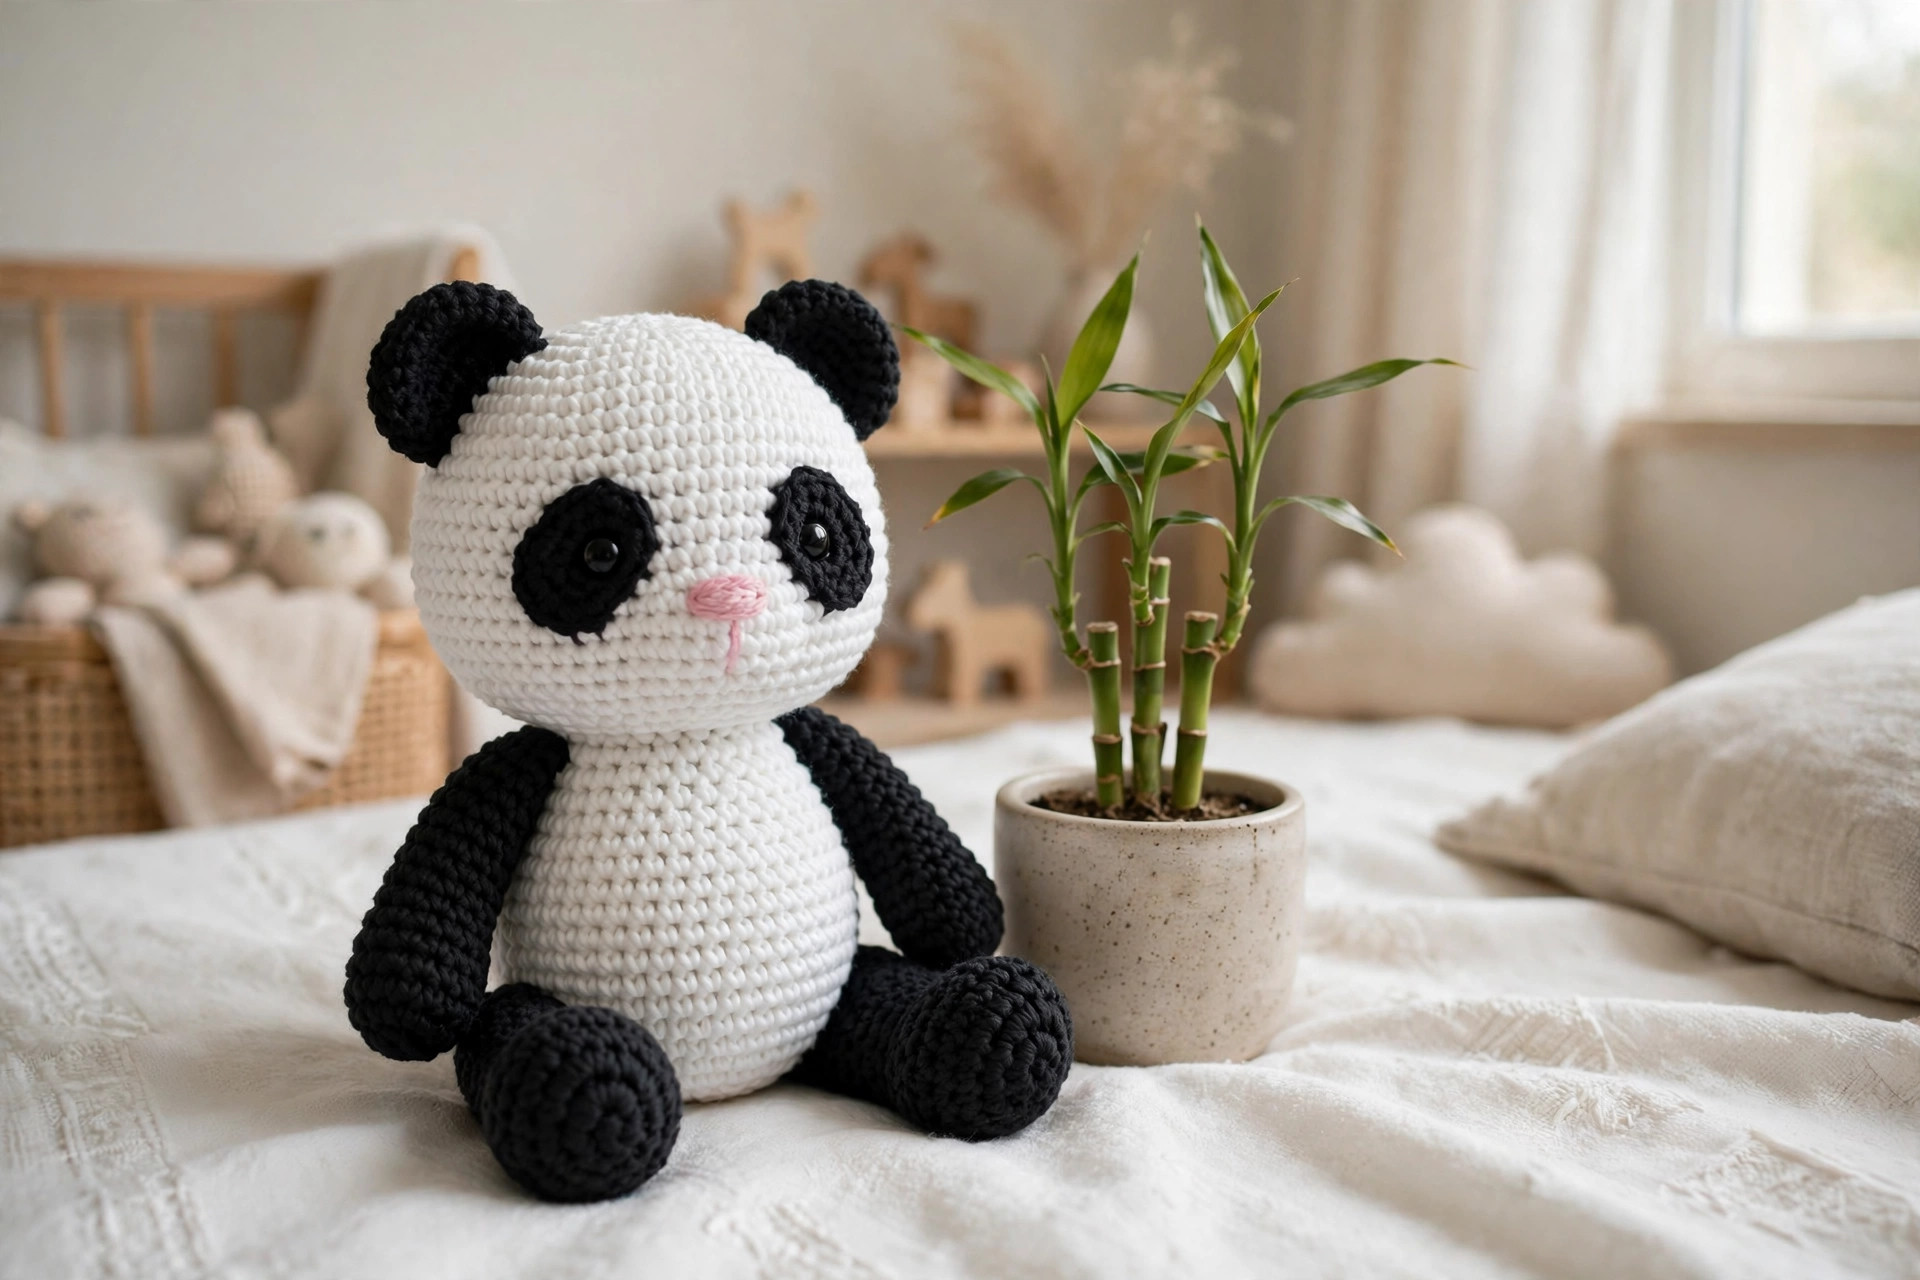
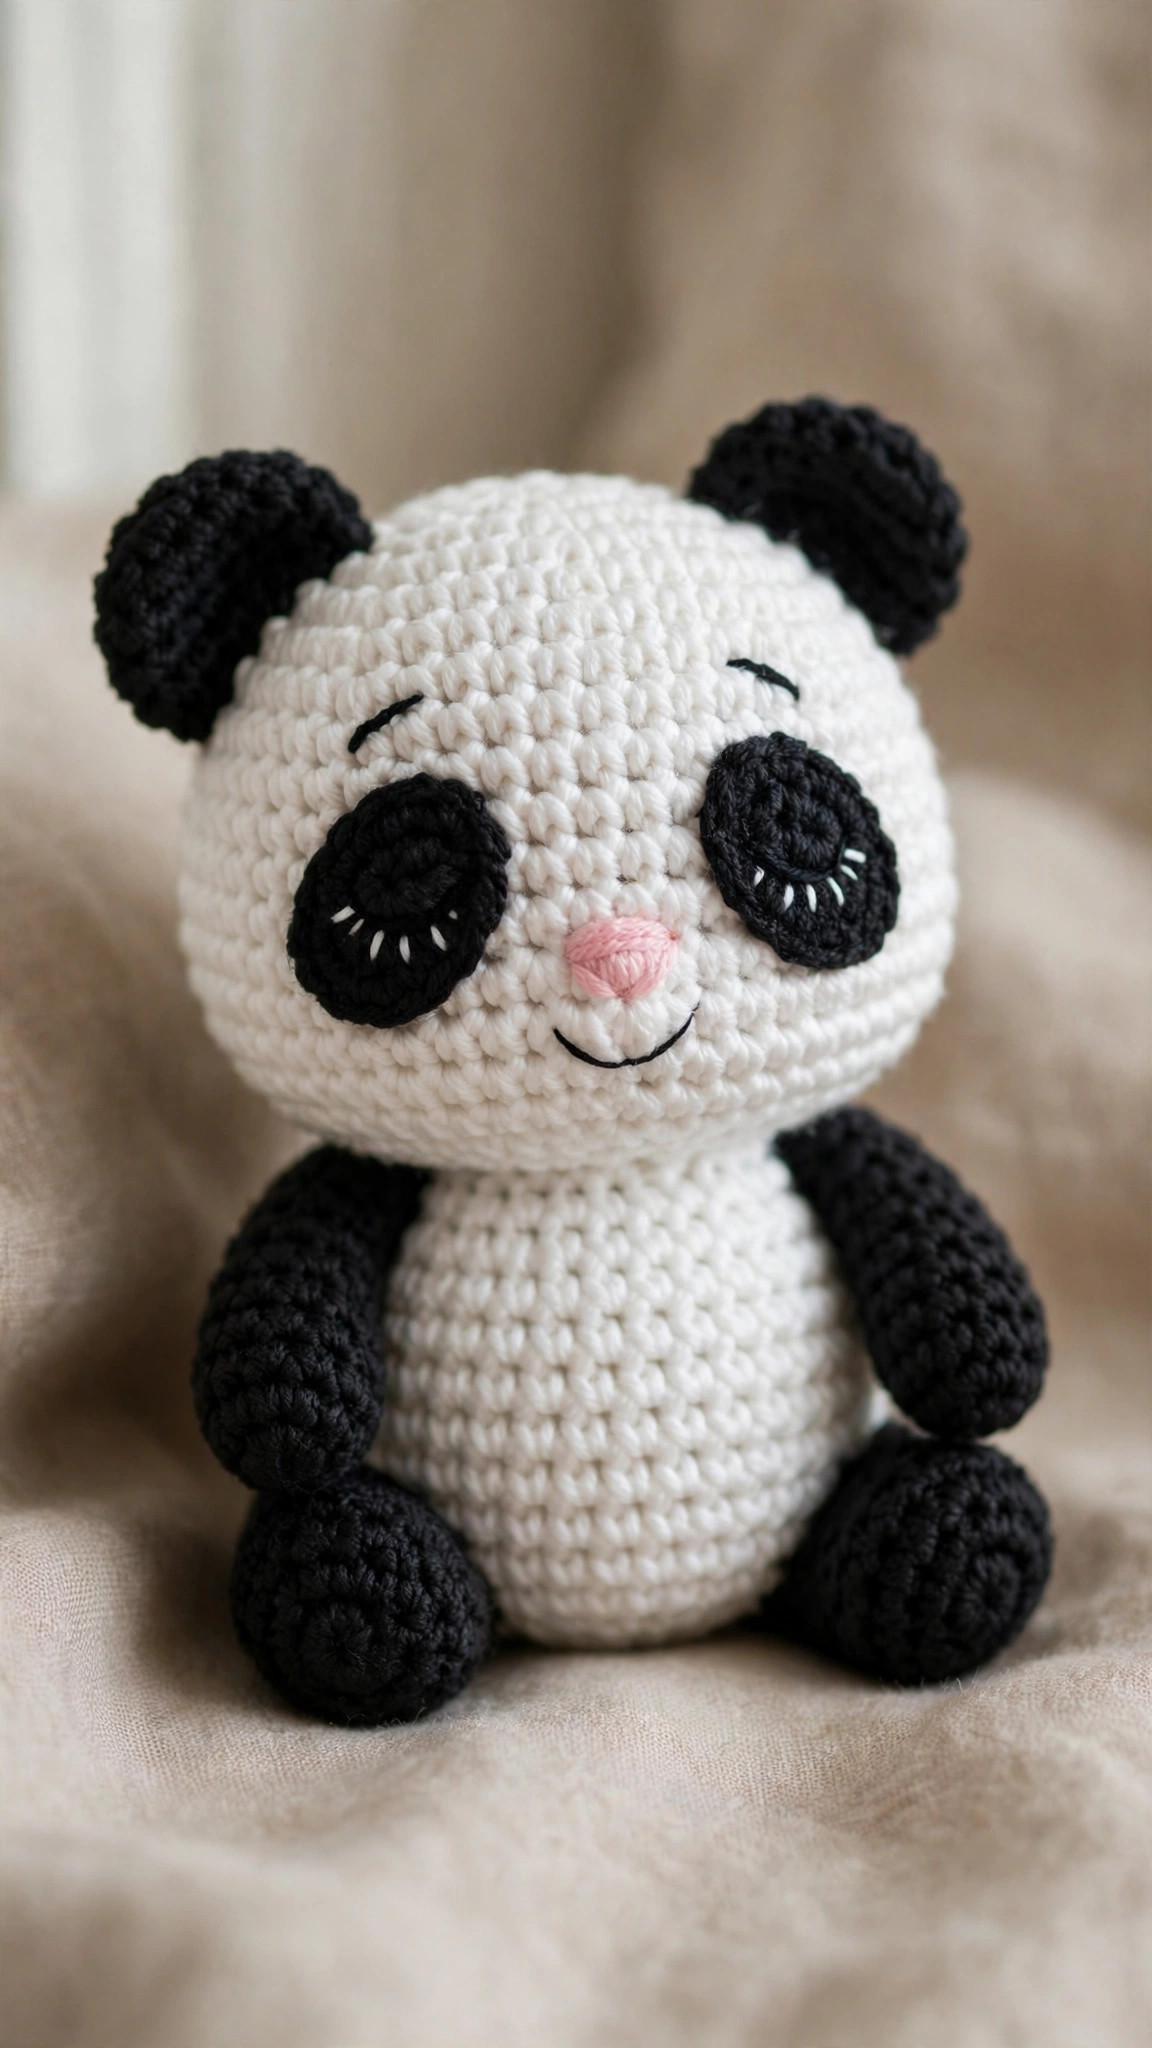
A round, huggable amigurumi panda with black eye patches, perky ears and a tiny pink nose: original design, US terms, one weekend of stitching.

Amigurumi · Crochet
- Finished size
- About 8 in tall sitting
- Making time
- About 5-6 hours
- Hook
- 3.5 mm, worsted yarn
- Set
- 7 pieces, original design
- Skill
- Advanced Beginner
In this post
- Table of contents
- Why you'll love this crochet panda pattern
- Materials you'll need
- Size, gauge and skill level
- Abbreviations, US terms
- The crochet panda pattern (US terms)
- Finishing touches and assembly
- Tips and tricks
- Variations to try next
- Troubleshooting tips
- Frequently asked questions
- More free patterns to try
Few amigurumi projects are as instantly lovable as a panda. This free crochet panda pattern is an original design that makes a round, huggable little bear: a soft white body, classic black eye patches, perky ears, and a tiny embroidered pink nose. It uses only single crochet, increases, and decreases.
The pattern comes in a sitting size of about 8 inches, which makes it the perfect size for a nursery shelf, a child's bedtime buddy, or a thoughtful handmade gift. Everything is worked in the round with a 3.5 mm hook and worsted yarn, and the pieces sew together with simple whipstitches.
One more reason to love it: pandas are basically two colours, so this is a wonderful stash buster.
Table of contents
- Why you'll love this crochet panda pattern
- Materials you'll need
- Size, gauge and skill level
- Abbreviations, US terms
- The crochet panda pattern (US terms)
- Finishing touches and assembly
- Tips and tricks
- Variations to try next
- Troubleshooting tips
- Frequently asked questions
- More free patterns to try
Why you'll love this crochet panda pattern
Pandas are the ideal beginner amigurumi subject because the design does half the work for you. The iconic markings, the black eye patches, the round ears, the dark limbs, are instantly recognisable even in the simplest shapes. You do not need complicated colour changes: you crochet a white egg, add black patches in the right places, and suddenly everyone sees a panda.
The construction is forgiving, too. Every piece is a basic sphere, oval, or tube worked in a spiral, and the charm comes from placement rather than precision. If one eye patch sits a millimetre higher than the other, your panda just looks a little cheeky. This is a pattern that rewards relaxed stitching, making it a lovely weekend project to enjoy with a cup of tea and a good podcast.
It also makes a genuinely excellent gift: for baby showers (in soft washable yarn), birthdays, nursery decor, and desk buddies for panda-obsessed adults. Because it is monochrome, it suits any colour scheme, and because it is handmade, it carries the one thing store-bought plush toys never do: proof that someone sat down and made it.
Materials you'll need
| Supply | What to get |
|---|---|
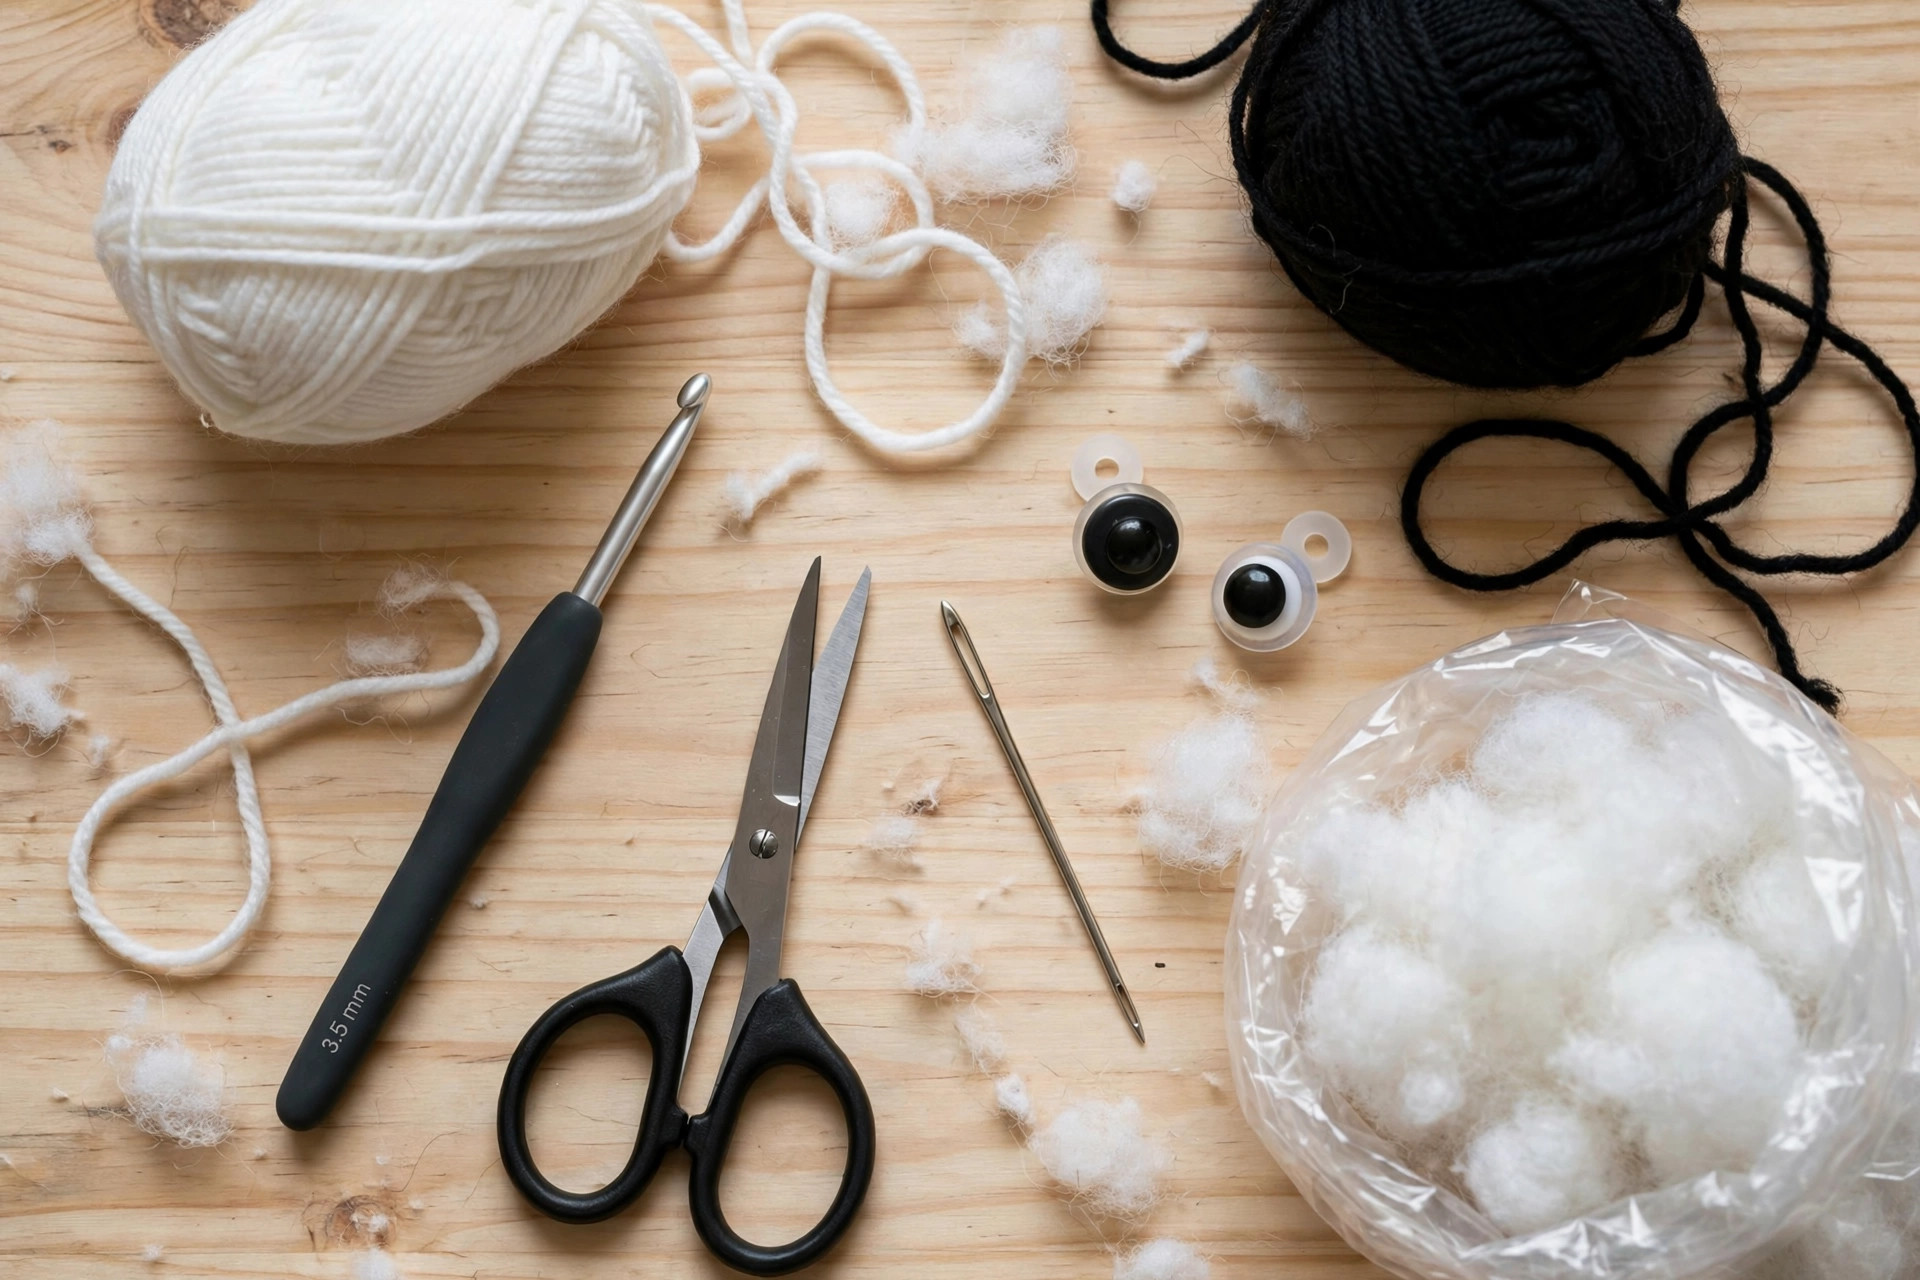
| White yarn | Worsted-weight (#4) acrylic or cotton blend in white, about 90 yds / 82 m |
| Black yarn | Worsted-weight (#4) in black, about 50 yds / 46 m |
| Pink yarn | A small scrap of pink yarn or embroidery floss for the nose |
| Crochet hook | 3.5 mm (E) |
| Safety eyes | Two 10 mm black safety eyes with washers |
| Stuffing | Polyester fiberfill, about 3-4 oz |
| Tapestry needle | For sewing pieces together and embroidering the nose |
| Notions | Scissors, stitch markers, pins for positioning pieces |
Choose a yarn you can see your stitches in: the white body shows everything, so a smooth, non-fuzzy yarn gives the neatest result. Cotton blends hold their shape beautifully and photograph well, while acrylic is softer and more forgiving if this panda is destined for a child who will squeeze it daily. Use black yarn with the same weight and fibre as the white so the pieces match in texture and size.
A note on the hook: 3.5 mm is smaller than you would normally use for worsted yarn, and that is deliberate. Amigurumi needs a tight fabric so the stuffing does not show through. If you can see daylight between your stitches, go down to 3.25 mm.
Size, gauge and skill level
The panda is worked in continuous spirals unless a round says otherwise. Place a stitch marker in the first stitch of every round and move it up as you go: this is the single habit that keeps amigurumi counts clean.
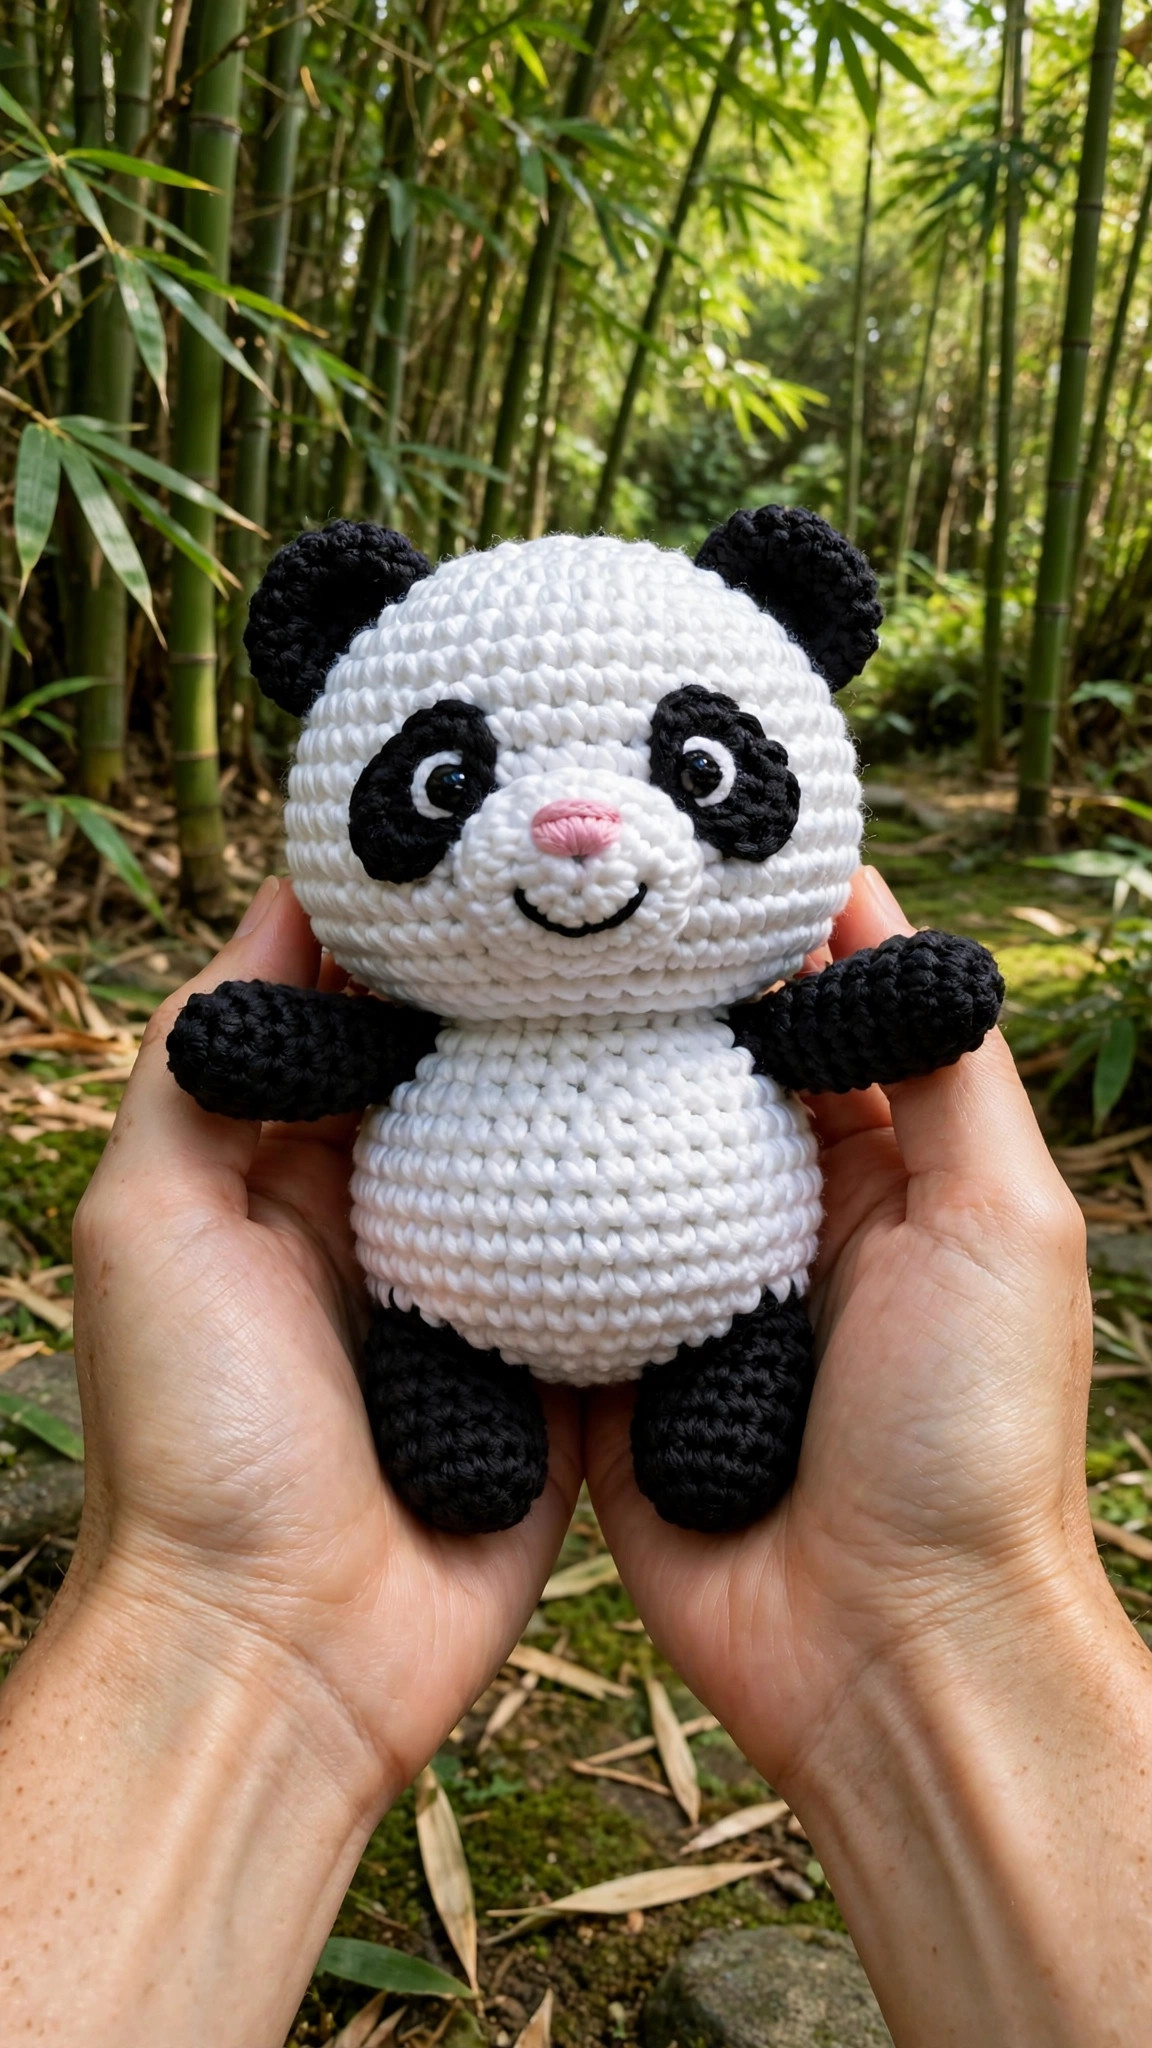
- Finished size: about 8 in (20 cm) tall when sitting, about 6 in (15 cm) wide at the body. The finished panda is a comfortable cuddle size for small hands.
- Gauge: 20 sc and 22 rounds = 4 in (10 cm) with a 3.5 mm hook. Exact gauge matters less than fabric density: the stitches should be tight enough that stuffing cannot peek through.
- Skill level: advanced beginner. You should be comfortable with the magic ring, single crochet in a spiral, increasing, and decreasing. If the magic ring is new to you, our magic ring tutorial walks through it step by step with photos.
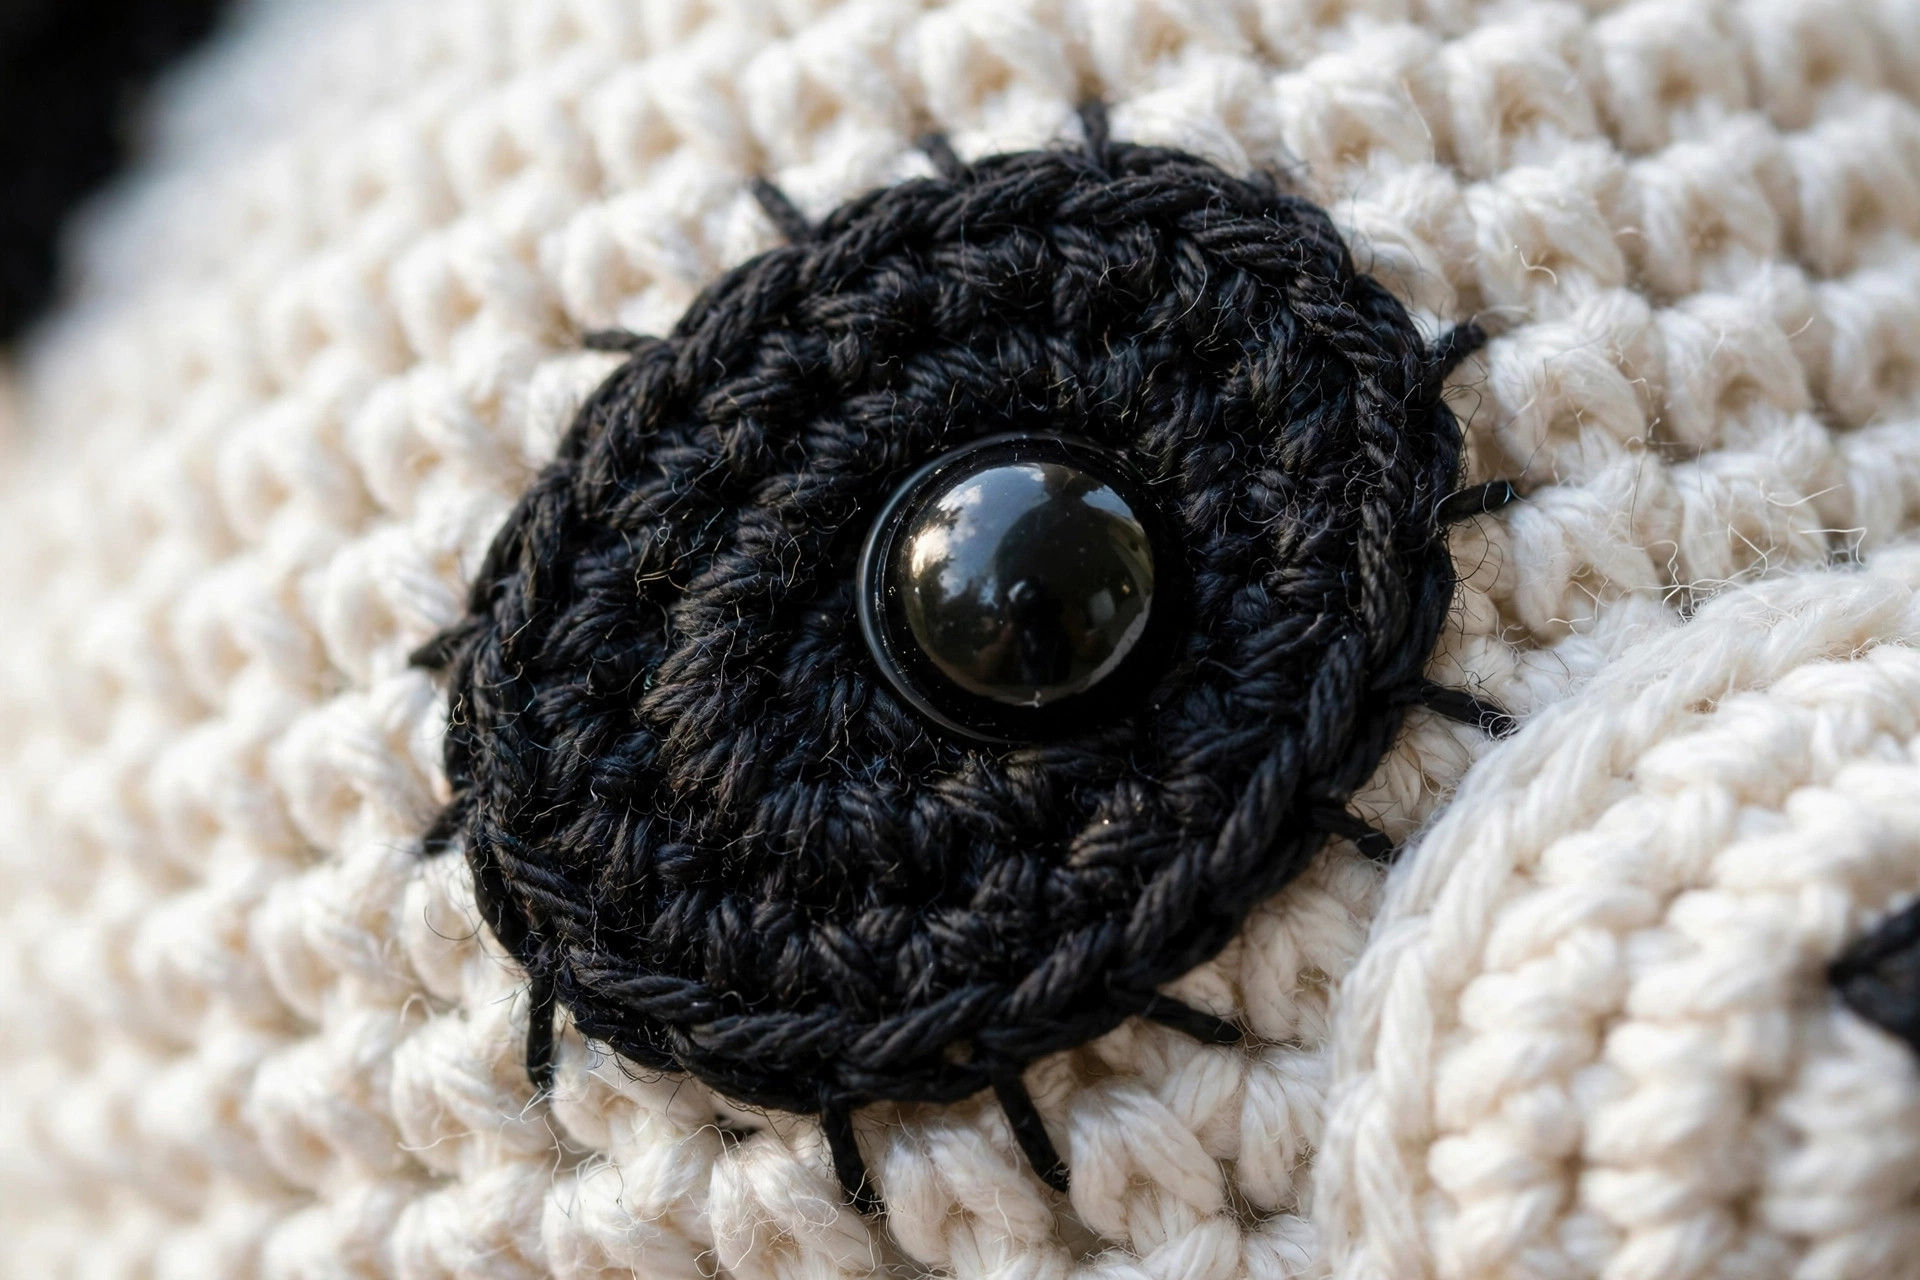
About the eyes: safety eyes are locked in from the inside, so place them before you stuff and close the body. If this panda is for a child under three, embroider the eyes with black yarn instead: safer, and just as cute.
Abbreviations, US terms
| Abbreviation | Meaning |
|---|---|
| MR | magic ring |
| ch | chain |
| sc | single crochet |
| inc | increase: 2 sc in the same stitch |
| dec | decrease: sc 2 together (invisible decrease recommended) |
| st(s) | stitch(es) |
| R | round |
| FO | fasten off |
| [ ] | total stitch count at the end of the round |
A note on the invisible decrease: work it through the front loops only: insert the hook under the front loop of the next two stitches, yarn over, and pull through all three loops. It sits flatter and disappears into the fabric, which keeps the white body smooth.
The crochet panda pattern (US terms)
Work the body first, then the smaller pieces. Stuff the body firmly as you close it: amigurumi should feel plump and springy, not squishy. Add stuffing in small handfuls and press it into the shape with your fingers rather than cramming in one big ball.
Body: the white egg
With white yarn, worked in a continuous spiral.
- R1: MR, 6 sc in ring. [6]
- R2: inc in each st around. [12]
- R3: (sc, inc) x6. [18]
- R4: (2 sc, inc) x6. [24]
- R5: (3 sc, inc) x6. [30]
- R6: (4 sc, inc) x6. [36]
- R7-R13: sc in each st around. [36]
Work seven even rounds to build the plump middle of the body.
- R14: (4 sc, dec) x6. [30]
- R15: (3 sc, dec) x6. [24]
Begin stuffing now, adding fiberfill in small handfuls and shaping the egg with your hands.
- R16: (2 sc, dec) x6. [18]
- R17: (sc, dec) x6. [12]
Add the last of the stuffing, making sure the bottom is firm and flat enough to sit.
- R18: dec x6. [6]
FO, thread the tail through the remaining stitches, pull closed, and weave in the end.
Muzzle: the white snout patch
With white yarn. This little oval sits on the front of the body and carries the nose.
- R1: MR, 6 sc in ring. [6]
- R2: inc in each st around. [12]
- R3: (sc, inc) x6. [18]
- R4: sc in each st around. [18]
Sl st to the first st, FO, leaving a long tail for sewing. Do not stuff the muzzle: it sews on flat.
Eye patches: the black ovals (make 2)
With black yarn. Worked in an oval, turning the chain, not in a ring.
- R1: ch 5. Starting in the 2nd ch from the hook: sc in the next 3 ch, 3 sc in the last ch. Working down the other side of the chain: sc in the next 2 ch, inc (2 sc) in the last ch. [10]
- R2: inc, sc 2, inc x3, sc 2, inc x2. [16]
Sl st to the first st, FO, leaving a long tail for sewing. Set the safety eyes aside: they go through the centre of each patch during assembly.
Ears: the round black ears (make 2)
With black yarn.
- R1: MR, 6 sc in ring. [6]
- R2: inc in each st around. [12]
- R3: (sc, inc) x6. [18]
- R4-R5: sc in each st around. [18]
- R6: (sc, dec) x6. [12]
FO, leaving a long tail. Do not stuff the ears. Flatten each ear and sew the open edge closed with a few stitches so it folds into a neat half circle.
Arms: the black side limbs (make 2)
With black yarn.
- R1: MR, 6 sc in ring. [6]
- R2: (sc, inc) x3. [9]
- R3-R8: sc in each st around. [9]
Stuff very lightly, just enough to give the arm shape without stiffness.
- R9: (sc, dec) x3. [6]
FO, leaving a long tail for sewing. Flatten the top of the arm so it sews on neatly.
Legs: the black feet (make 2)
With black yarn.
- R1: MR, 6 sc in ring. [6]
- R2: inc in each st around. [12]
- R3: (sc, inc) x6. [18]
- R4-R6: sc in each st around. [18]
- R7: (sc, dec) x6. [12]
Stuff firmly: the legs are what the panda sits on.
- R8: dec x6. [6]
FO, thread the tail through the remaining stitches, pull closed, and weave in the end.
Tail: the tiny white puff
With white yarn.
- R1: MR, 6 sc in ring. [6]
- R2: (sc, inc) x3. [9]
- R3: sc in each st around. [9]
FO, leaving a long tail. Stuff a tiny pinch of fiberfill inside and sew the open edge nearly closed.
Finishing touches and assembly
Assembly is where a pile of pieces becomes a panda. Pin everything before you sew: it takes ten minutes and saves you from lopsided ears.
Attach the eye patches. Position the two black ovals on the upper front of the body, about 1.5 in (4 cm) apart and angled very slightly inward, like sleepy panda eyes. Push a 10 mm safety eye through the centre of each patch and into the body, then secure the washer inside before you finish stuffing. If you stuffed the body fully, reach in with tweezers: the washers snap on with firm pressure. Sew each patch down with small whipstitches around the edge, catching the back loop only so the stitches stay invisible.
Sew on the muzzle. Centre the white oval below and between the eye patches, overlapping their lower edges very slightly. Pin it, then whipstitch around the edge: pandas have long faces, and placing the muzzle low is what gives the expression its sweetness.
Embroider the nose and mouth. With pink yarn, embroider a small triangle on the muzzle, about 4 stitches wide at the top and 3 rows tall, filling it with satin stitch. From the bottom point of the triangle, work one straight stitch down, then two short angled stitches out to each side for the mouth. Keep the embroidery small: an oversized nose is the fastest way to lose the panda look.
Attach the ears. Pin the ears to the top sides of the head, tilted very slightly outward, and check the symmetry from the front and the side before you sew. Whipstitch along the folded edge, going through both layers of the ear and into the body. Give each ear a gentle squeeze after sewing to round it out.
Attach the arms and legs. Pin the arms to the sides of the body at about the middle, angled slightly forward so the paws face front. Sew along the flattened top edge. Pin the legs to the bottom front of the body, toes pointing forward, and sew around the top half of each leg: the panda should sit upright on its own when you are done.
Sew on the tail. Centre the tiny white puff on the back of the body, low down, and whipstitch it in place. It is a small detail, but it finishes the silhouette.
Weave every end. Thread each tail onto the tapestry needle, run it through nearby stitches for at least 2 inches, change direction once, and trim flush. Give the whole panda a final fluff and shape check.
Tips and tricks
A few details that take this panda from good to irresistible:
Stuff as you go, not all at once. The body is closed in R18, but you started stuffing at R14 for a reason: layered stuffing shapes the egg evenly. If you wait until the opening is tiny, you get lumps. Small handfuls, pressed into place, every few rounds.
Keep the eye patches symmetrical. This is the number one thing people notice. Pin both patches, step back, and look from directly in front before a single stitch of sewing. The classic panda look comes from patches that angle slightly toward each other at the bottom.
Use the invisible decrease. On white amigurumi, a standard decrease leaves a visible pucker that reads as a shadow. The invisible decrease keeps the fabric smooth and professional.
Match your black yarn weight exactly. If the black yarn is even slightly thicker than the white, the ears and patches will dwarf the body. Hold the two strands together and compare.
Lock safety eyes early. Once the washer is on, the eye is permanent. Position the patches, mark the eye spots with pins, and push the eyes through before the body is fully stuffed. Removing a washer later means cutting the fabric.
Variations to try next
One panda is never enough:
- Baby panda. Work the whole pattern with DK yarn and a 2.75 mm hook for a palm-sized mini panda about 5 in tall, and pair it with our free crochet bunny pattern at the same scale.
- Sleepy panda. Embroider closed eyes with two curved black stitches instead of safety eyes, and skip the mouth: instant napping panda, perfect for a nursery mobile.
- Panda with bamboo. Crochet a simple green stalk with a few leaf ovals and tuck it under one arm. It turns the panda into a little scene and makes a wonderful gift topper.
- Giant cuddle panda. Work the body with bulky yarn and a 5.5 mm hook, adding one extra increase round (to 42) and two extra even rounds for a squishy 12-inch panda.
- Panda family. Make the standard size plus the baby size in the same yarns and pose them together on a nursery shelf: the kind of handmade gift people remember for years.
Troubleshooting tips
- Stuffing shows through the stitches. Your fabric is too loose. Go down half a hook size, or hold your working yarn a little tighter. Dark stuffing inside a white body shows more: white fiberfill helps while you practise.
- The body leans or wobbles. The stuffing is uneven or the base is underfilled. Add more fiberfill to the bottom third and press it flat against the table to shape a stable base.
- The eye patches pucker. You pulled the whipstitches too tight. Sew with relaxed tension, catching only the back loop of the patch edge, and let the patch lie naturally on the curve.
- The ears flop forward. They are sewn too far forward on the head. Move them back and slightly outward: panda ears sit on the top sides, not the forehead.
- The head looks lumpy. Big handfuls of stuffing create lumps. Pull out what you can, then restuff in small pinches, massaging each one into place before adding the next.
- My stitch counts drift. The spiral is sneaky: if you lose the round start, counts wander. Use a locking stitch marker in the first stitch of every round and count at the end of each increase round.
- The panda will not sit up. The legs are sewn too high or too far back. Reposition them lower and forward so the body weight rests on them, and check the stuffing in the base is firm.
Frequently asked questions
Is this free crochet panda pattern really free?
Yes, the complete pattern above is free, with no email signup and no PDF purchase required.
What skill level is this panda pattern?
Advanced beginner. If you can work single crochet in a spiral, increase, decrease, and sew pieces together neatly, you have every skill this pattern needs.
How long does it take to crochet the panda?
About 5-6 hours total: roughly 2.5 hours for the body, 1.5 hours for the smaller pieces, and 1-2 hours for assembly and embroidery.
How much yarn do I need?
About 90 yds of white worsted yarn and 50 yds of black, plus a scrap of pink for the nose. One 100 g ball of each colour is plenty, with yarn left over.
Are safety eyes safe for babies?
Safety eyes are not recommended for children under three because they can be pulled loose with enough force. For baby gifts, embroider the eyes with black yarn instead.
Can I make the panda bigger?
Yes. Move up to bulky yarn with a 5.5 mm hook and add one increase round to the body (to 42 stitches) plus two extra even rounds.
Can I sell the finished pandas I make?
Yes! You may sell finished pandas made from this pattern in small batches (craft fairs, markets, gifts). Please credit Little Loop Finds as the pattern designer.
More free patterns to try
If this panda was fun, your amigurumi shelf is just getting started. Our batch-mate the mini octopus crochet pattern is an even quicker make with the same spiral skills, the mini amigurumi patterns free collection rounds up more small plushies to try, and for a second panda take, the crochet panda bear pattern free offers a different style of the same beloved bear.