Crochet Steering Wheel Cover Pattern (Free Car Makeover)
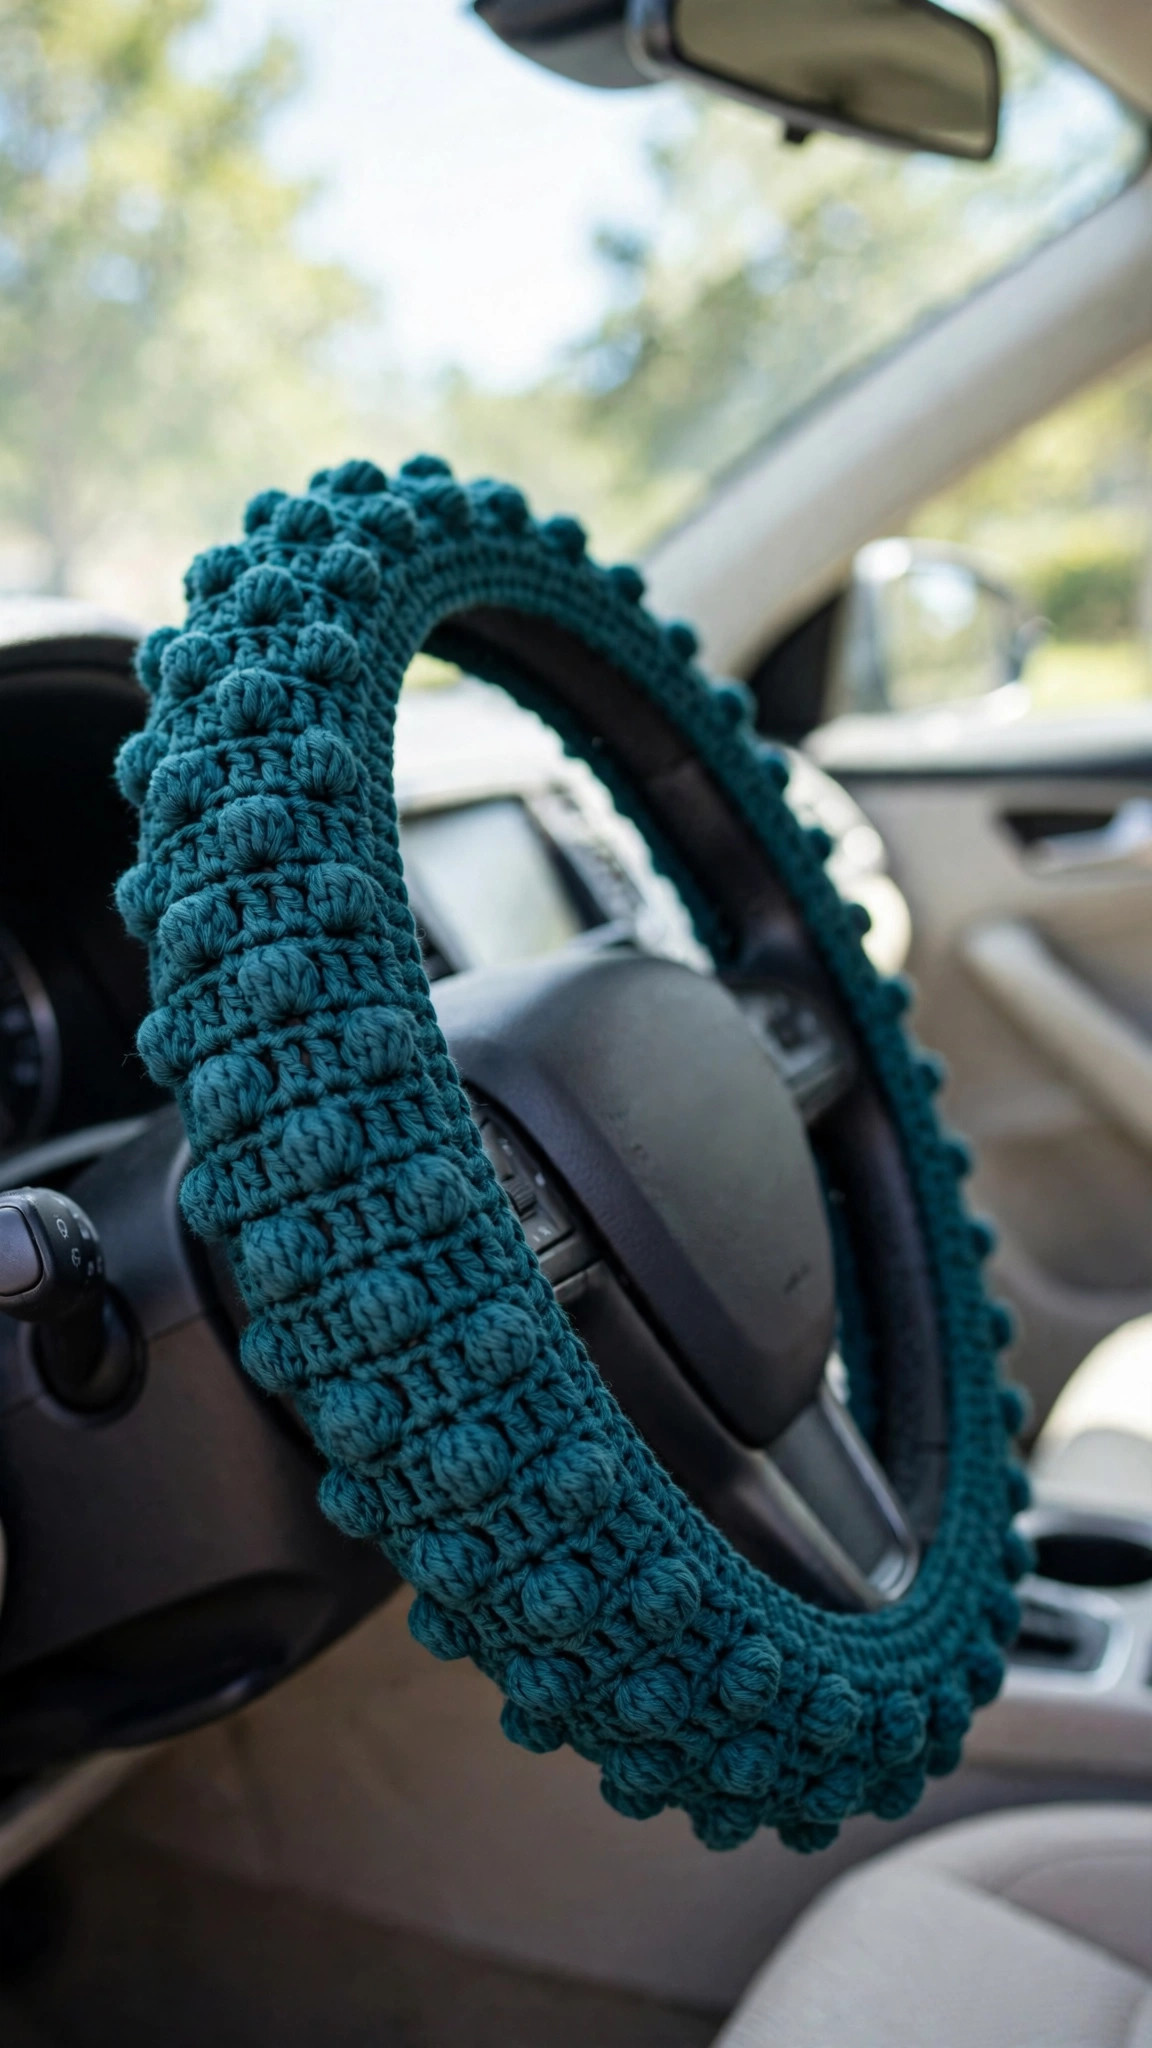
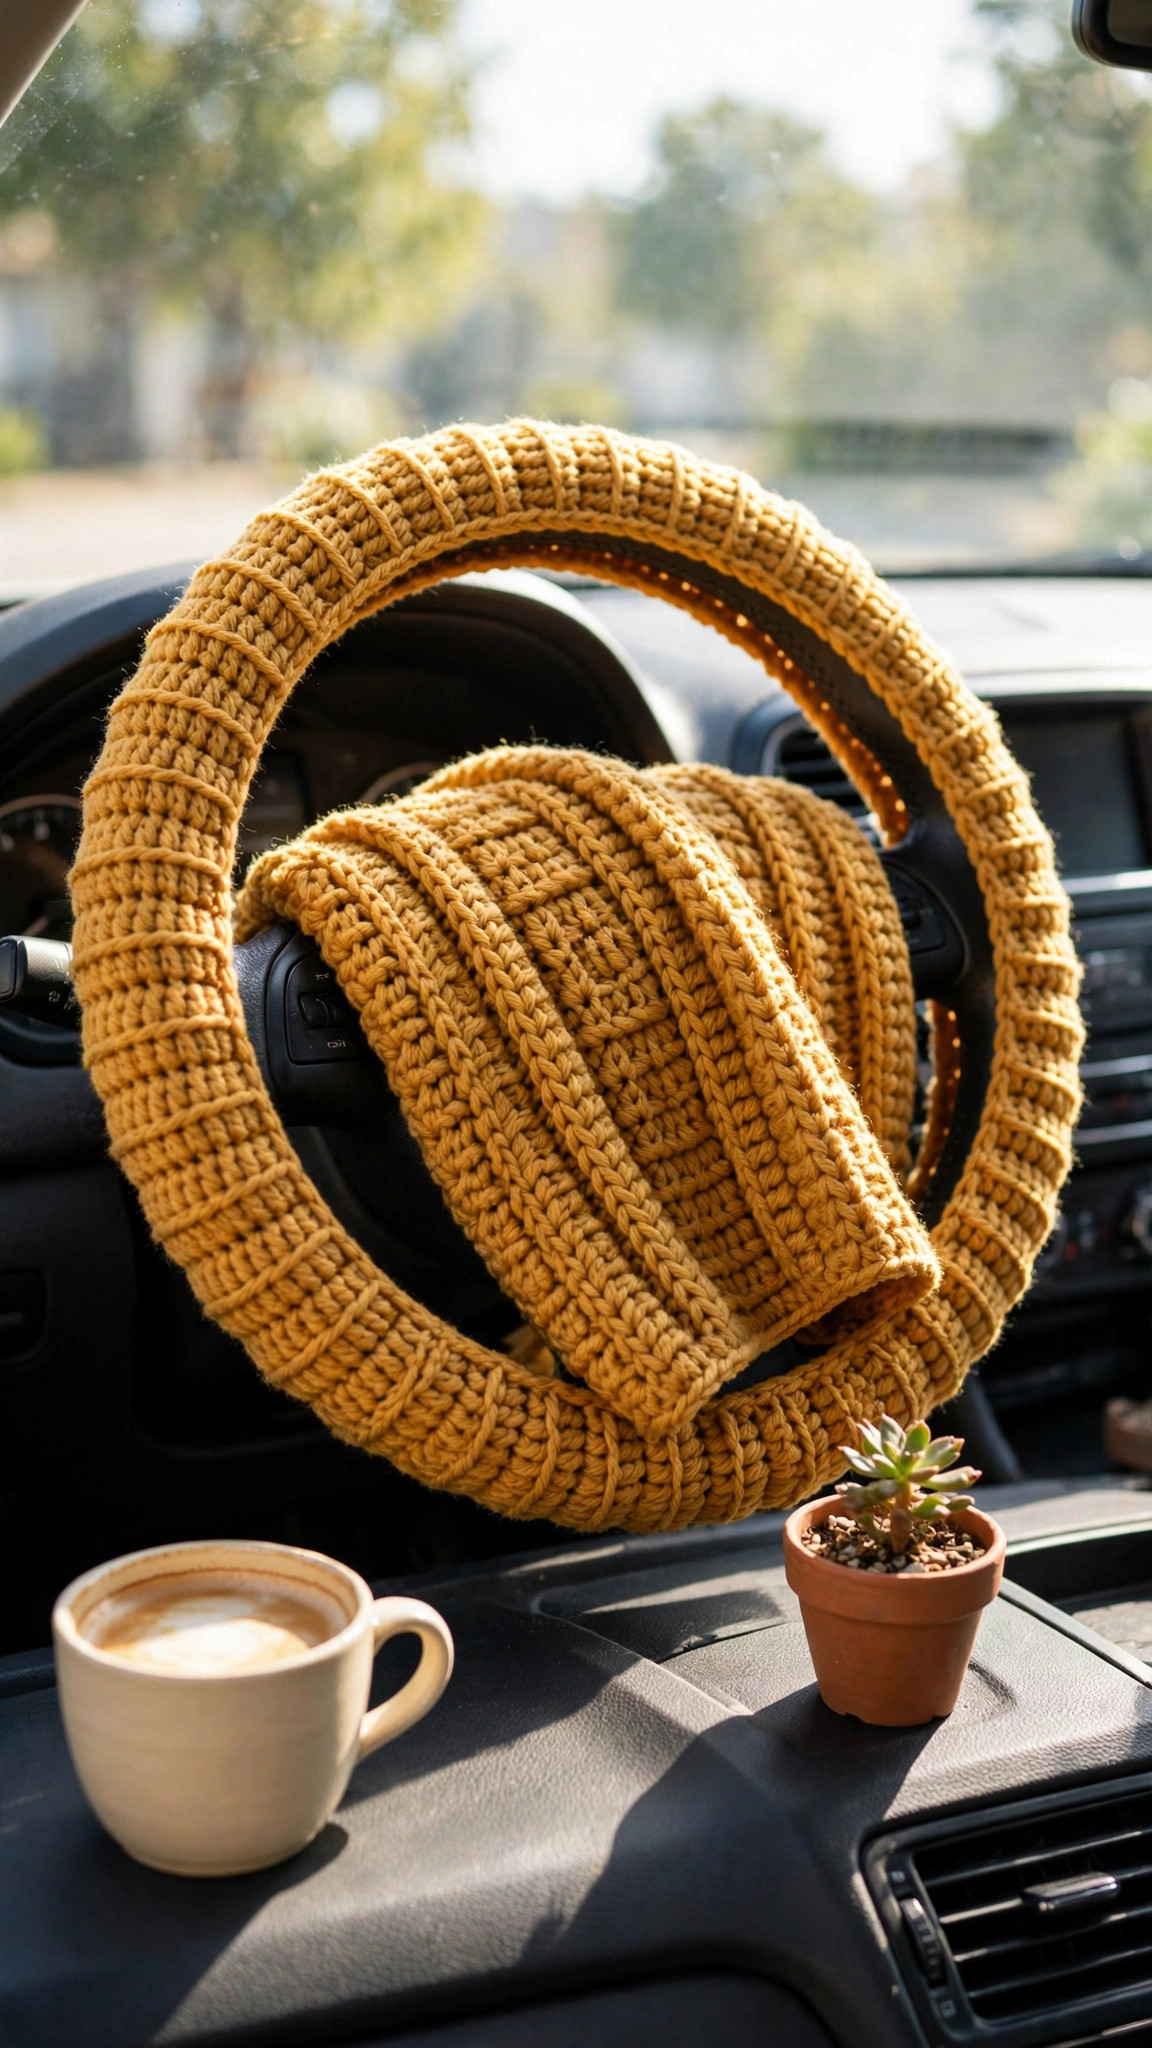
Crochet a stretchy steering wheel cover with a bobble grip in an evening, then slide it onto your wheel for a softer, warmer drive.

Patterns · Crochet
- Finished size
- 15 in wheel
- Making time
- 3 hours per cover
- Hook
- US G-6 (4.0 mm)
- Set
- Cover, ties
- Skill
- Easy
In this post
- Key Takeaways
- Table of Contents
- Why You Will Love This Crochet Steering Wheel Cover
- Finished Size, Skill Level, and Time
- Materials You Need
- Abbreviations (US Terms)
- Gauge and Sizing Notes
- Part 1: The Cover Strip
- Part 2: The Bobble Grip Rows
- Part 3: Joining, Seaming, and Fitting the Cover
- Variations: Colors, Sizes, and Uses
- Troubleshooting a Cover That Will Not Fit
- Care Instructions
- Frequently Asked Questions
A crochet steering wheel cover turns a cold, slippery wheel into a soft, grippy one. This free crochet steering wheel cover pattern makes a stretchy cover with a bobble grip texture, sized to fit the most common car wheels, and it slides on in minutes once the crocheting is done. It works up in one evening and uses less than one ball of yarn.
This is an original Little Loop Finds design, written in US terms and completely free. The cover is a long strip worked flat in rows, with bobble stitches for grip. The strip is joined into a ring, folded, and seamed into a tube that hugs the wheel. If you can chain, single crochet, and work a bobble stitch, you can crochet this cover.
A quick note on scope: this post is about one specific crochet steering wheel cover, a stretchy tube cover with a bobble grip for a standard car steering wheel. It is not a seat cover or a gear shift cover. If you want another quick car accessory, our crochet lanyard pattern makes a handy key holder for your car keys.
Key Takeaways
- Free original pattern: this crochet steering wheel cover pattern is a Little Loop Finds original, written in US terms, and completely free.
- A grippy bobble texture: bobble stitches across the strip give your hands a firm grip on the wheel.
- Stretchy and sized to fit: three sizes cover small, medium, and large wheels, and the crochet stretches to hug the grip.
- Beginner friendly and quick: simple rows of single crochet and bobbles, with every row counted for you.
- A one evening project: one cover takes about 3 hours, so you can finish it in a single cozy evening.
Table of Contents
- Why You Will Love This Crochet Steering Wheel Cover
- Finished Size, Skill Level, and Time
- Materials You Need
- Abbreviations (US Terms)
- Gauge and Sizing Notes
- Part 1: The Cover Strip
- Part 2: The Bobble Grip Rows
- Part 3: Joining, Seaming, and Fitting the Cover
- Variations: Colors, Sizes, and Uses
- Troubleshooting a Cover That Will Not Fit
- Care Instructions
- Frequently Asked Questions
Why You Will Love This Crochet Steering Wheel Cover
A bare steering wheel is cold in winter, sticky in summer, and slippery when your hands are damp. A crochet cover fixes all three at once. The yarn insulates your hands on a cold morning, absorbs a little moisture on a hot day, and the bobble texture gives you a grip you can feel even with gloves on.
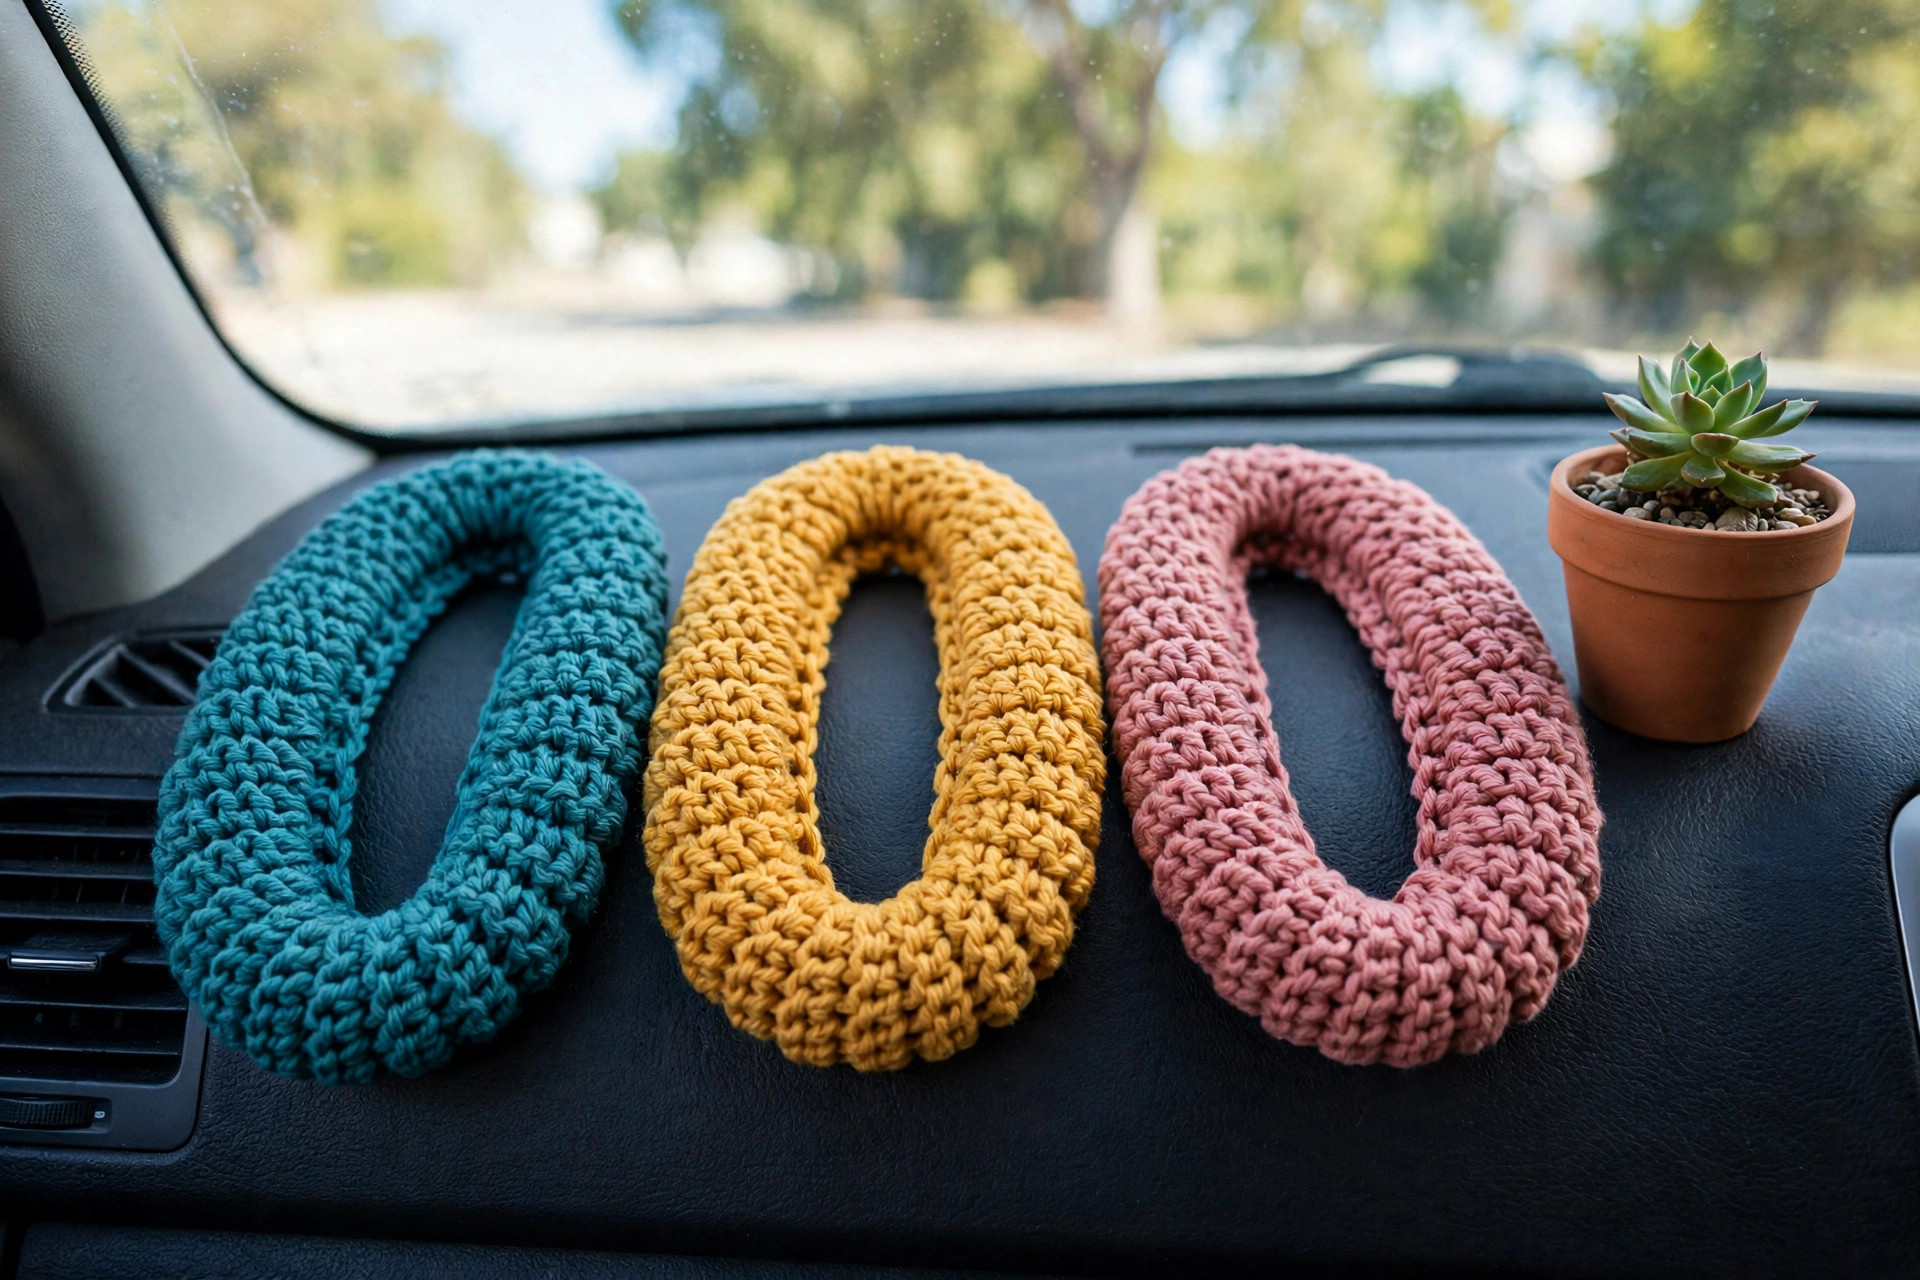
A crochet steering wheel cover is also one of the cheapest car upgrades you can make. One ball of cotton yarn, one evening of stitching, and your car feels personal. Make one in deep teal, one in mustard yellow, and one in dusty rose as a gift for a new driver. Our crochet baby hat pattern uses the same soft cotton idea if you want a matching gift set for a new parent.
Finished Size, Skill Level, and Time
- Finished size: the medium size fits a wheel about 15 inches across, with a grip about 4 to 4.5 inches around. The strip is about 47 inches long before joining and 3.5 inches wide.
- Skill level: Easy. You need chains, single crochet, slip stitches, and bobble stitches, and the bobble is explained stitch by stitch below.
- Time: about 3 hours per cover: 2 hours and 30 minutes for the strip, and 30 minutes for joining, seaming, and fitting.
Materials You Need
| Item | What to get |
|---|---|
| Yarn | Worsted weight (size 4) cotton yarn, 180 yards for the medium size |
| Hook | US G-6 (4.0 mm), or the size that gives you the gauge below |
| Notions | Tapestry needle, scissors, stitch markers, tape measure, 24 inches of narrow elastic cord (optional) |
Cotton yarn is the best choice for a crochet steering wheel cover because it grips the wheel instead of sliding, absorbs moisture, and holds its shape in a warm car. A smooth mercerized cotton works well, because it shows clean stitch definition and the bobbles stand out crisply. Choose deep teal for a classic look, mustard yellow for a bright interior, or dusty rose for a soft finish. Avoid fuzzy yarns, because they hide the bobble texture and shed onto your hands. Avoid acrylic if you can, because it can feel slippery and softens too much in a hot parked car. If you only have acrylic, work the cover one size smaller so the fit stays snug.
Abbreviations (US Terms)
- ch = chain
- sl st = slip stitch
- sc = single crochet
- bobble = bobble stitch (5 double crochet together in one stitch, see Part 2)
- st(s) = stitch(es)
- rep = repeat
- RS = right side
- WS = wrong side
Gauge and Sizing Notes
Gauge matters because the cover has to stretch snugly around the grip without gaping or sliding. Work a swatch of 16 sc stitches and 16 rows. It should measure about 4 inches square. If it is wider, go down a hook size. If it is narrower, go up a hook size.
Measure your wheel before you start: across the wheel for the diameter, and around the grip for the grip circumference. Then pick your size from the table below. The strip should measure about 1 inch shorter than the wheel circumference, because the crochet stretches when it is pulled onto the wheel. Count your stitches at the end of every row, because a missed stitch will make the bobble rows drift.
| Size | Wheel diameter | Foundation chain | Stitches per row |
|---|---|---|---|
| Small | 14 inches | ch 148 | 147 sc |
| Medium | 15 inches | ch 160 | 159 sc |
| Large | 15.5 to 16 inches | ch 168 | 167 sc |
The instructions below are written for the medium size, with the small and large counts in parentheses as small (medium, large). Where only one number is given, it is the same for all sizes.
Part 1: The Cover Strip
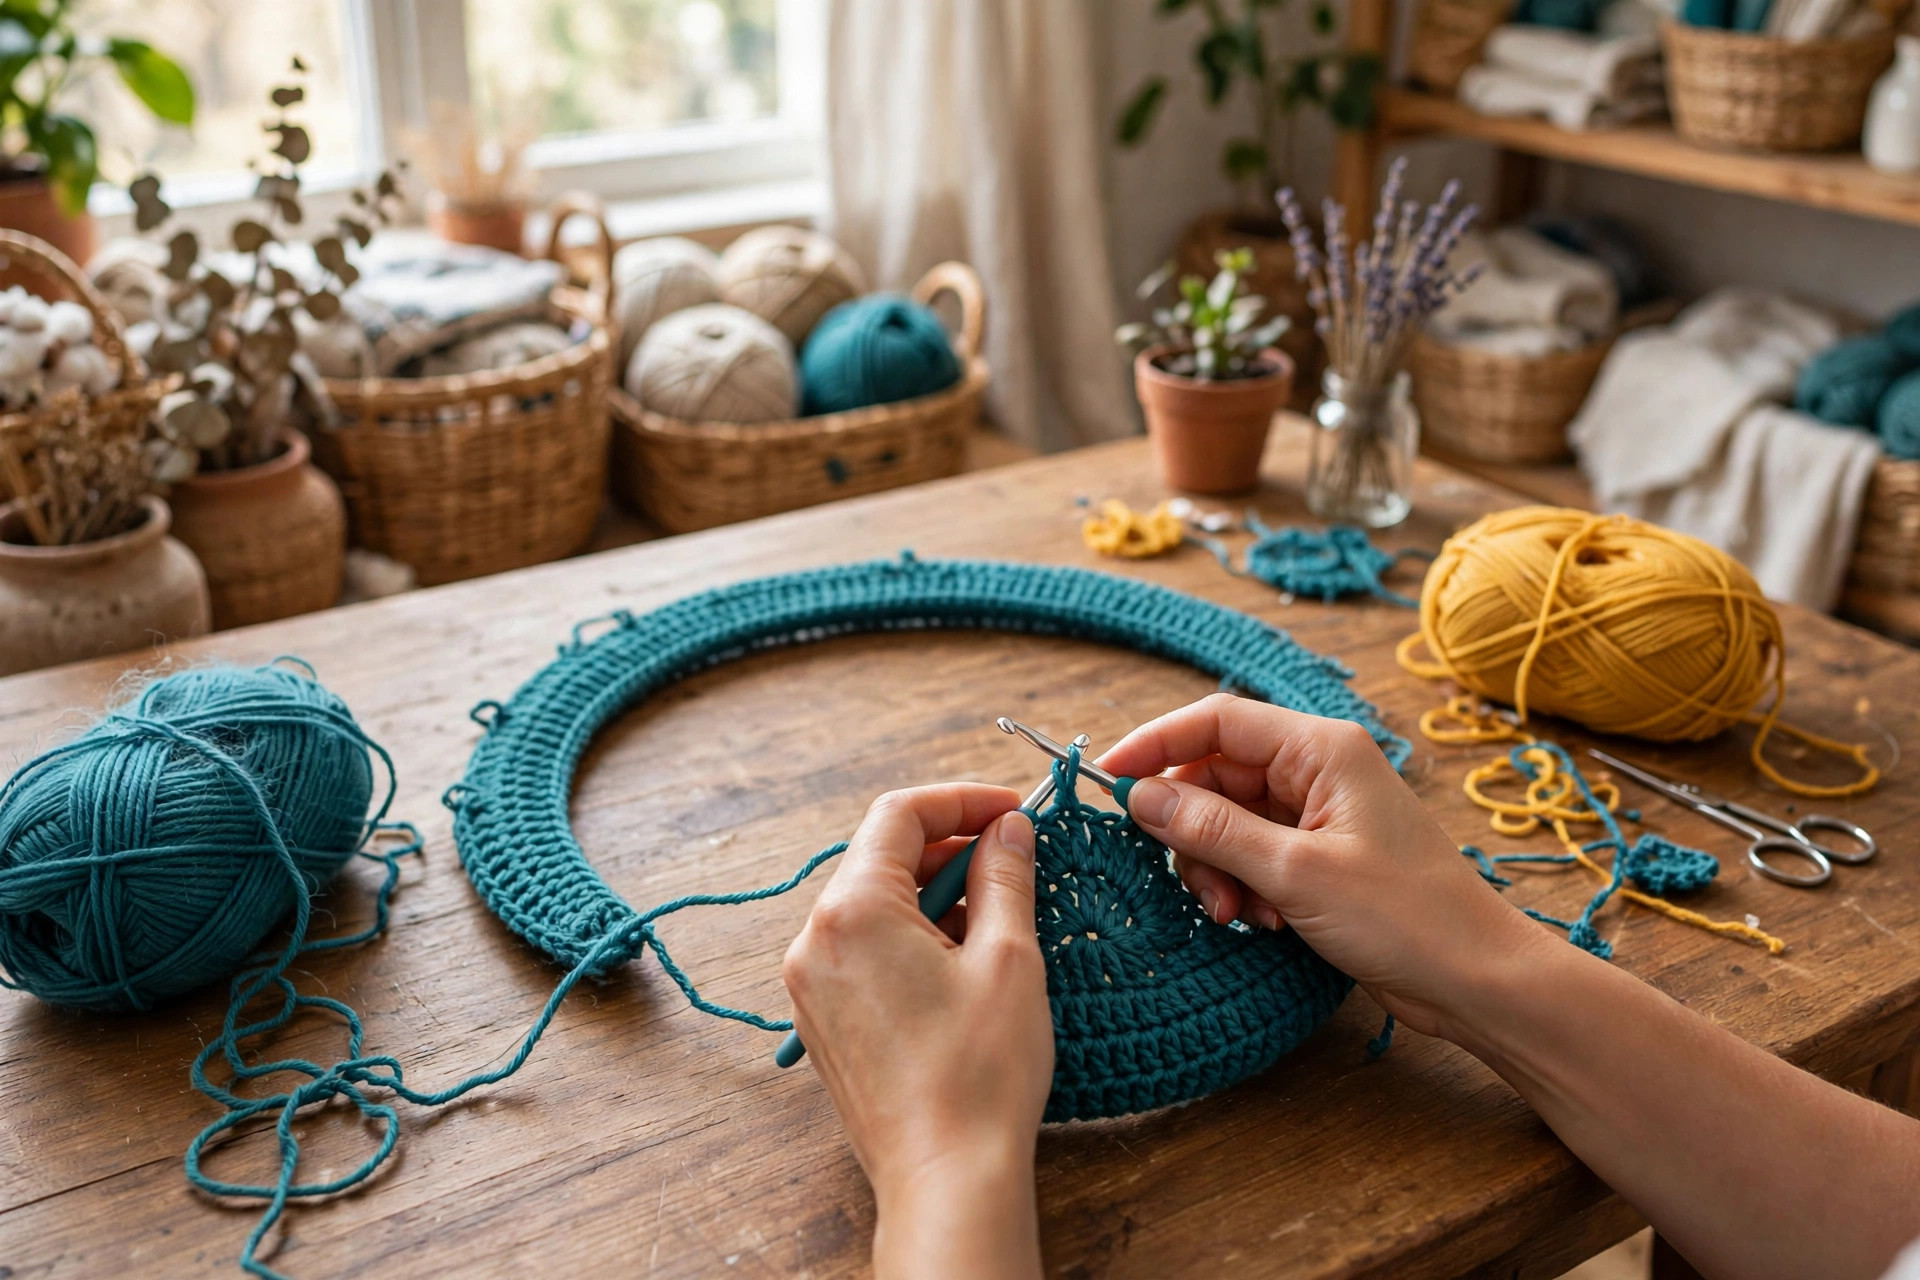
The cover starts as a long, flat strip worked in rows. The strip is the whole cover, so take your time with the first few rows and check your stitch count often. A straight strip makes a smooth ring later, and a wobbly strip makes a cover that twists.
The Foundation and First Rows
With your main color, ch 148 (160, 168).
- Row 1 (RS): sc in the 2nd ch from the hook and in each ch across. (147 (159, 167) sc)
- Row 2 (WS): ch 1, turn, sc in each st across. (147 (159, 167) sc)
The first two rows form a firm base for the bobble rows. Work them slowly and count to the end of each row, because the bobble pattern needs the exact count to line up. Place a stitch marker in the first and last stitch of row 2 so you can find the row ends when the strip gets long.
How Long the Strip Should Be
The strip is worked sideways, so its length is the foundation chain. After row 2, lay the strip around your wheel. The two short ends should meet with about a 1 inch gap, because the crochet will stretch to close it when fitted. If the gap is bigger than 2 inches, go up a hook size and start again. If the ends already overlap, go down a hook size.
Part 2: The Bobble Grip Rows
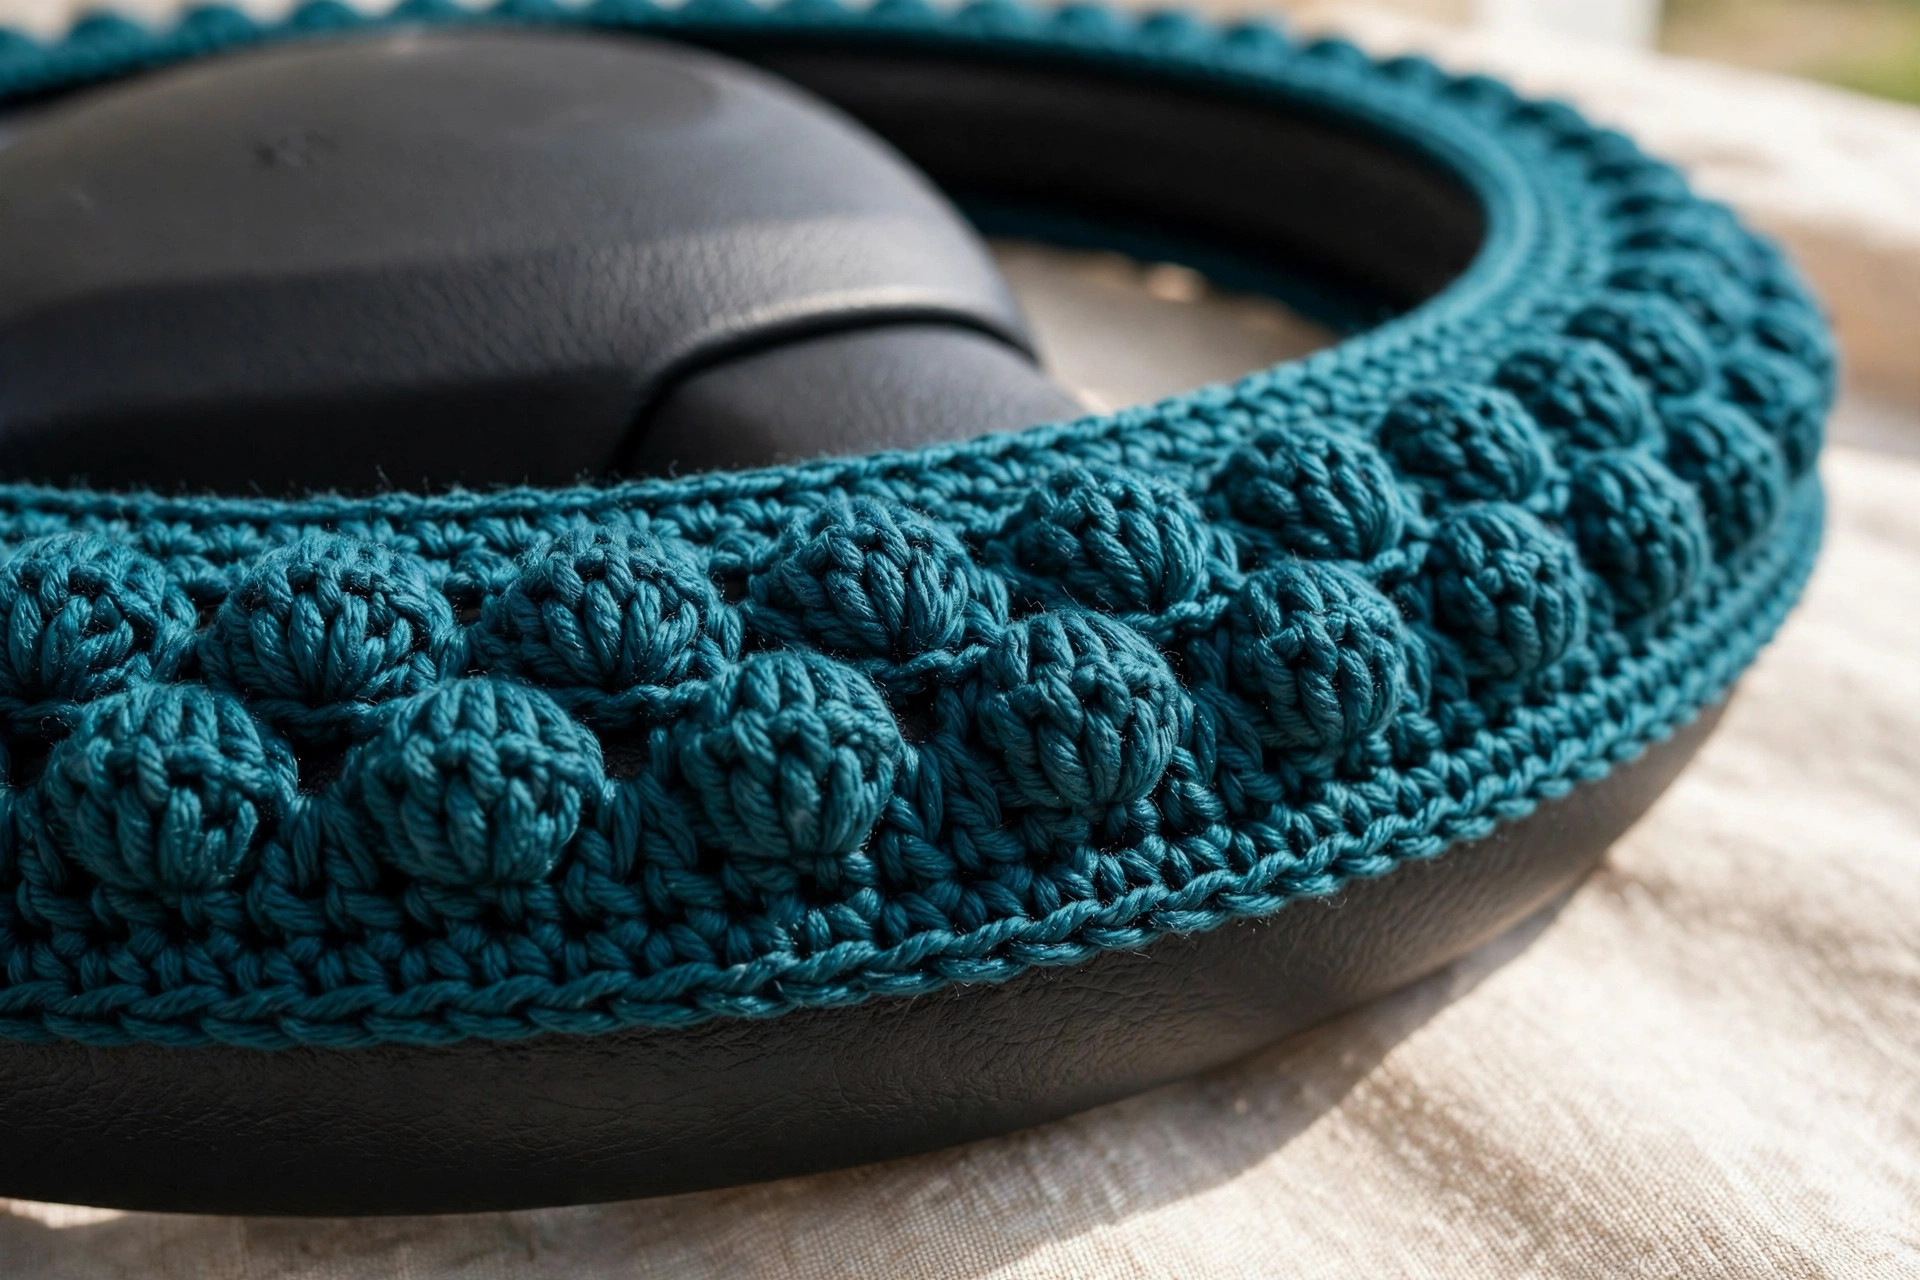
The bobble rows are what make this cover grippy. Each bobble is a little bump of yarn that pops out on the right side, and together they form a dotted texture your hands can feel. The bobbles are worked on the wrong side rows so they pop out on the right side, which faces your hands.
How to Work a Bobble
A bobble is five double crochet stitches worked into one stitch and joined at the top. Work it like this: yarn over, insert the hook, yarn over and pull up a loop, yarn over and pull through 2 loops, and stop. You now have 2 loops on the hook and one unfinished double crochet. Repeat that four more times in the same stitch, so you have 6 loops on the hook. Yarn over and pull through all 6 loops at once. That is one bobble. Push it gently to the right side with your finger as you move on.
The Bobble Rows
Continue from row 2, with the right side facing you after row 2.
- Row 3 (RS): ch 1, turn, sc in each st across. (147 (159, 167) sc)
- Row 4 (WS): ch 1, turn, sc in the first 3 sts, *bobble in the next st, sc in the next 3 sts, rep from * to the end of the row. (36 (39, 41) bobbles, 147 (159, 167) sts in total)
- Row 5 (RS): ch 1, turn, sc in each st across. (147 (159, 167) sc)
- Row 6 (WS): ch 1, turn, sc in the first 3 sts, *bobble in the next st, sc in the next 3 sts, rep from * to the end of the row. (36 (39, 41) bobbles, 147 (159, 167) sts in total)
Repeat rows 5 and 6 four more times, so you have 10 bobble rows in total, ending with a bobble row. Then work two more rows of single crochet:
- Next to last row (RS): ch 1, turn, sc in each st across. (147 (159, 167) sc)
- Last row (WS): ch 1, turn, sc in each st across. (147 (159, 167) sc)
You now have 14 rows in total, and the strip is about 3.5 inches wide. The bobbles should form neat lines of bumps across the right side. If a bobble ended up on the wrong side, push it through with your finger and it will stay there. Do not fasten off yet, because the joining starts from this same yarn.
Part 3: Joining, Seaming, and Fitting the Cover
This is the part where a long flat strip becomes a steering wheel cover. Work slowly, keep the right side facing out, and check the fit before you finish the seam.
Joining the Short Ends
Fold the strip so the two short ends meet, with the right side facing out and the bobbles on the outside. Join the ends with a slip stitch seam, working through both layers, one slip stitch in each stitch across the short end, for 147 (159, 167) slip stitches in total. Keep the slip stitches even and not too tight, so the join lies flat and does not pucker. The strip is now a ring.
Seaming the Long Edges
Fold the ring in half lengthwise, so the two long edges meet and the wrong sides face each other inside the fold, with the bobbles on the outside. Seam the long edges together with slip stitches, working through both layers, one slip stitch in each stitch along the long edge, for 147 (159, 167) slip stitches in total. Work loosely enough that the seam can stretch around the grip. When you reach the end, fasten off and weave in the tail on the inside of the tube.
Turn the cover right side out if any bobbles got pushed inside, and check that the tube is smooth all the way around, with no twists. A twist now means a twist on the wheel, so flatten the tube and run your hand around it.
Fitting the Cover on the Wheel
Slide the cover over the top of the wheel and work it down around the grip, a little at a time, pulling gently and evenly. Do not yank one side, because that stretches the cover unevenly and leaves a loose patch on the other side. Work your way around the whole wheel, smoothing the cover as you go, until it sits evenly with the seam at the bottom of the wheel.
Check the fit by gripping the wheel and turning it. It should feel snug, with no sliding and no bunching. If it slides, thread the elastic cord through the seam stitches at the bottom of the wheel, pull it snug, and tie the ends in a firm knot on the inside. If it is too tight to slide on, spray it lightly with water and try again while it is damp, because damp cotton stretches a little more. A matching strap like our crochet belt pattern uses the same slip stitch seam, so the technique will feel familiar if you have made one.
Final Finishing
Weave in every yarn end with a tapestry needle, working the tail through the back of several stitches on the inside of the cover, then trimming it close. Check the whole wheel once more, top and bottom, and smooth out any bobbles that got flattened during fitting. Sit in the driver seat, hold the wheel at ten and two, then at nine and three, and check that the grip feels even all the way around. Your cover is ready to drive.
Variations: Colors, Sizes, and Uses
- Classic deep teal cover: work the cover in deep teal all the way through, the colorway in the photos. Our crochet dog collar pattern makes a sweet matching accessory for a pet who rides along.
- Mustard yellow cover: make the cover in mustard yellow for a bright, cheerful car interior, and pair it with a plain dark dashboard mat.
- Dusty rose cover: make the cover in dusty rose with cream bobble rows, changing to cream on the bobble rows only.
Troubleshooting a Cover That Will Not Fit
- My cover is too tight to slide on. The strip was too short, or your gauge is tighter than the pattern. Spray the cover lightly with water and try again while damp, or work the next cover one size larger.
- My cover slides around the wheel. The strip was too long, or your gauge is looser than the pattern. Thread elastic cord through the seam and pull it snug, or work the next cover one size smaller.
- My bobbles are on the wrong side. The bobble rows were worked on the right side instead of the wrong side. Push each bobble through to the right side with your finger, and check that you turn the work after every row.
- My bobble rows drift out of line. A stitch was missed or added, so the count changed. Count the stitches at the end of every row, and add the missing stitch in the next row to get back on track.
Care Instructions
Hand wash a crochet steering wheel cover in cool water with a mild detergent, and press the water out gently without wringing. Reshape the cover while it is damp, and let it dry flat on a clean towel, away from direct sunlight so the color does not fade. Do not put it in the dryer on high heat, and do not leave a damp cover on the wheel, because trapped moisture can mark the wheel. After a hot summer in a parked car, give it a wash and a reshape, and it will feel like new.
Frequently Asked Questions
Is this crochet steering wheel cover pattern good for beginners?
Yes, it is a great first car accessory project. You need chains, single crochet, slip stitches, and one bobble stitch, explained stitch by stitch in Part 2. One cover takes about 3 hours, so it is a satisfying evening make.
What yarn is best for a crochet steering wheel cover?
Cotton yarn is the best choice, because it grips the wheel instead of sliding, absorbs moisture, and holds its shape in a warm car. Worsted weight cotton in deep teal, mustard yellow, or dusty rose all work well, and the bobbles stand out crisply in smooth mercerized cotton.
How do I measure my steering wheel for the right size?
Measure across the wheel for the diameter, and wrap a tape measure around the grip for the circumference. Then pick your size from the sizing table: small fits a 14 inch wheel, medium fits a 15 inch wheel, and large fits a 15.5 to 16 inch wheel.
Will the cover fit over a wheel with buttons and controls?
Yes, for most wheels with small buttons on the spokes, because the cover sits on the grip rim and the spokes stay uncovered. If your wheel has large control pads that wrap onto the rim, measure the grip at its thickest point and pick the large size, or add two extra rows for a wider cover.
Is a crochet steering wheel cover safe to drive with?
Yes, when it fits snugly and does not slide. A loose cover that slips while you turn is not safe, so check the fit before every drive for the first week. If it slides at all, thread elastic cord through the seam and pull it snug, or remake it one size smaller.
Can I make the cover in different colors?
Yes, any color works well. Deep teal is classic, mustard yellow is cheerful, and dusty rose is soft and pretty. You can also work the bobble rows in a second color for a two tone finish, changing color at the start of each bobble row.
Can I sell steering wheel covers made from this pattern?
Yes, you may sell finished covers made from this free pattern, with credit to Little Loop Finds. Please do not sell or republish the pattern text itself. A pair of covers in two colors makes a sweet gift set for a two car household, and pairs nicely with a key holder like our crochet lanyard pattern or a pouch like our crochet coin purse pattern.
Happy stitching, and may your next drive feel a little softer and a lot more yours.