Crochet Rose Pattern (3D Layered, Free)
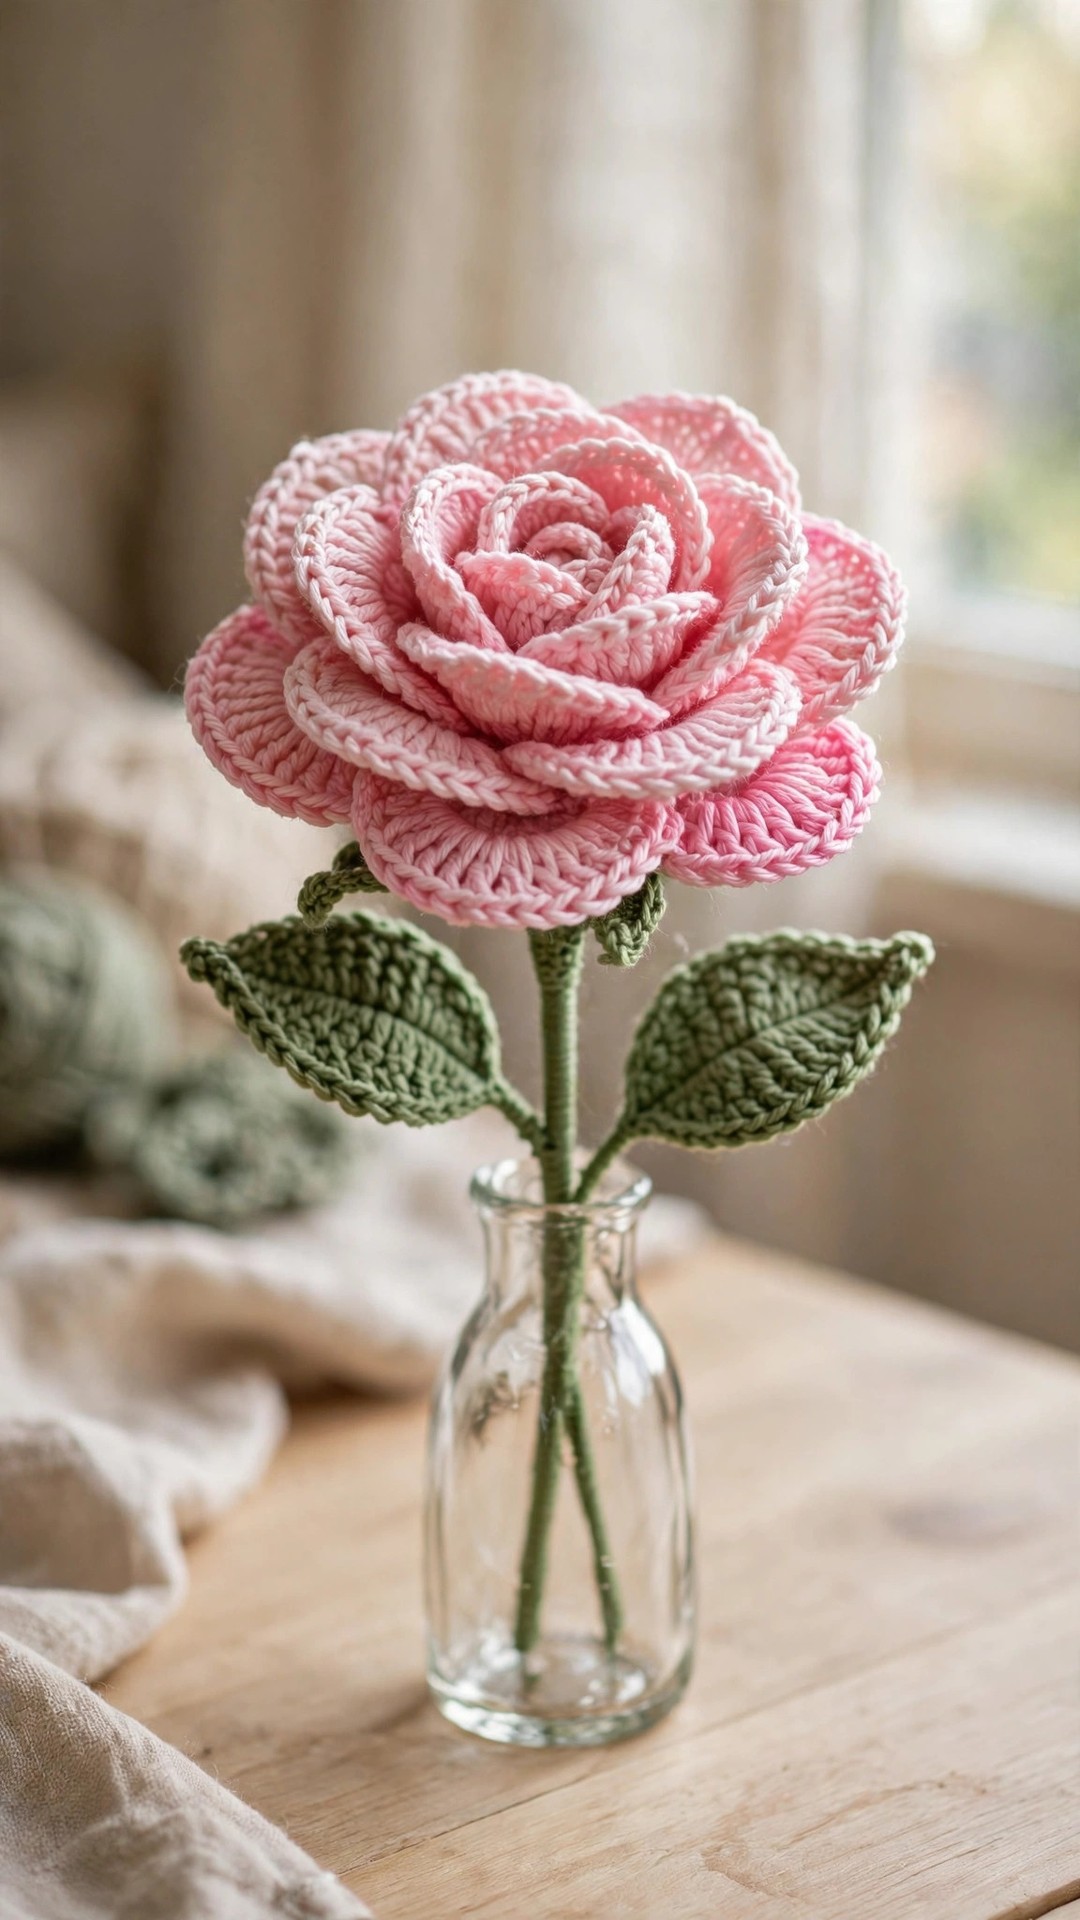
Stitch a 3D layered crochet rose with rolled petals, sepals, and a stem, perfect for bouquets and gifts.

Flowers · Crochet
- Finished size
- 6 in tall, 3 in wide
- Making time
- 3 to 4 hours
- Hook
- US G-6 (4.0 mm)
- Set
- Rose, sepals, stem and leaves
- Skill
- Easy
In this post
- Key Takeaways
- Table of Contents
- Why You Will Love This Crochet Rose
- Finished Size, Skill Level, and Time
- Materials You Need
- Abbreviations (US Terms)
- Gauge and Sizing Notes
- Part 1: The Petal Strip
- Part 2: Sepals, Stem, and Leaves
- Part 3: Rolling and Assembly
- Variations: Colors, Bouquets, and Single Stems
- Troubleshooting Roses That Look Flat or Floppy
- Care Instructions
- Frequently Asked Questions
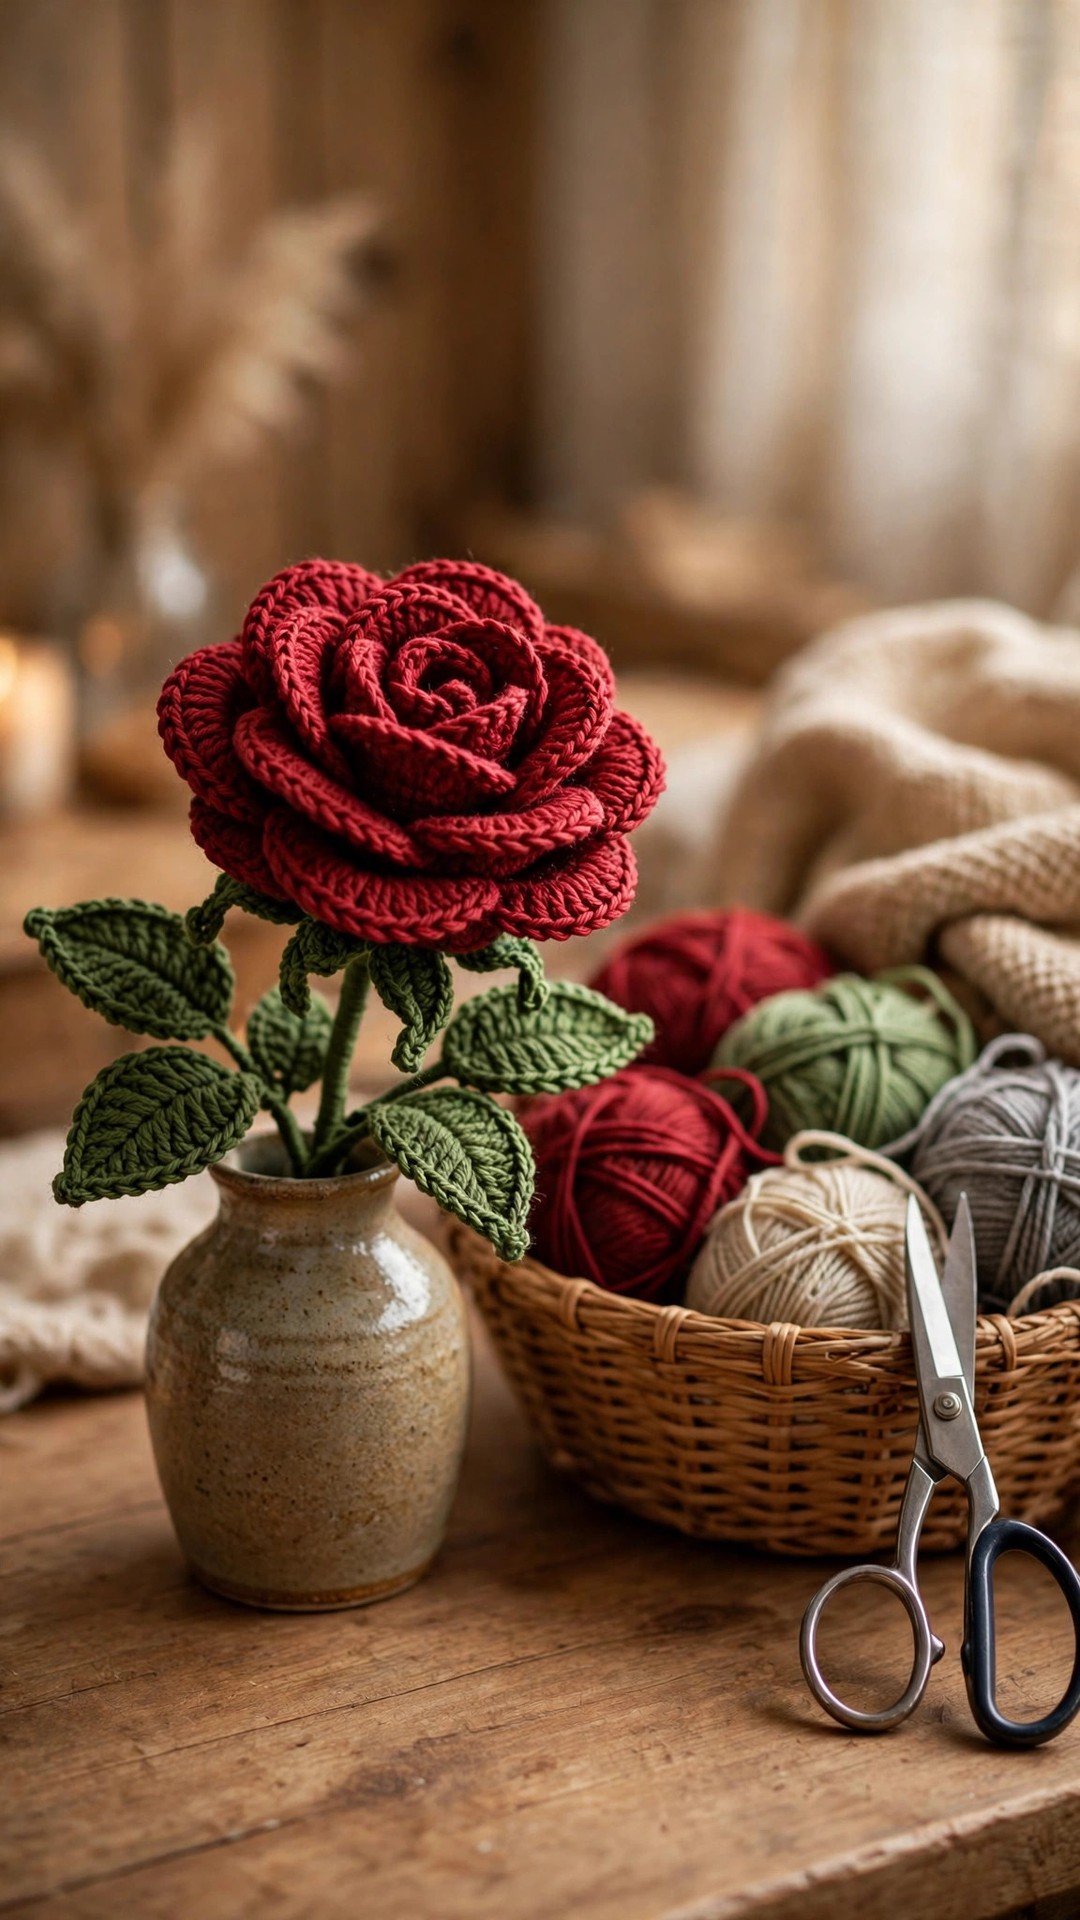
A crochet rose never wilts, never needs water, and never shows up a day late for an anniversary. This free crochet rose pattern makes a full 3D layered rose, the kind with petals that curl and overlap like a real garden rose, plus sepals, a stem, and leaves, so the finished flower looks like it was just cut from the garden. It is a Little Loop Finds original design, written in US terms, and it works up from one long petal strip that you roll into a bloom.
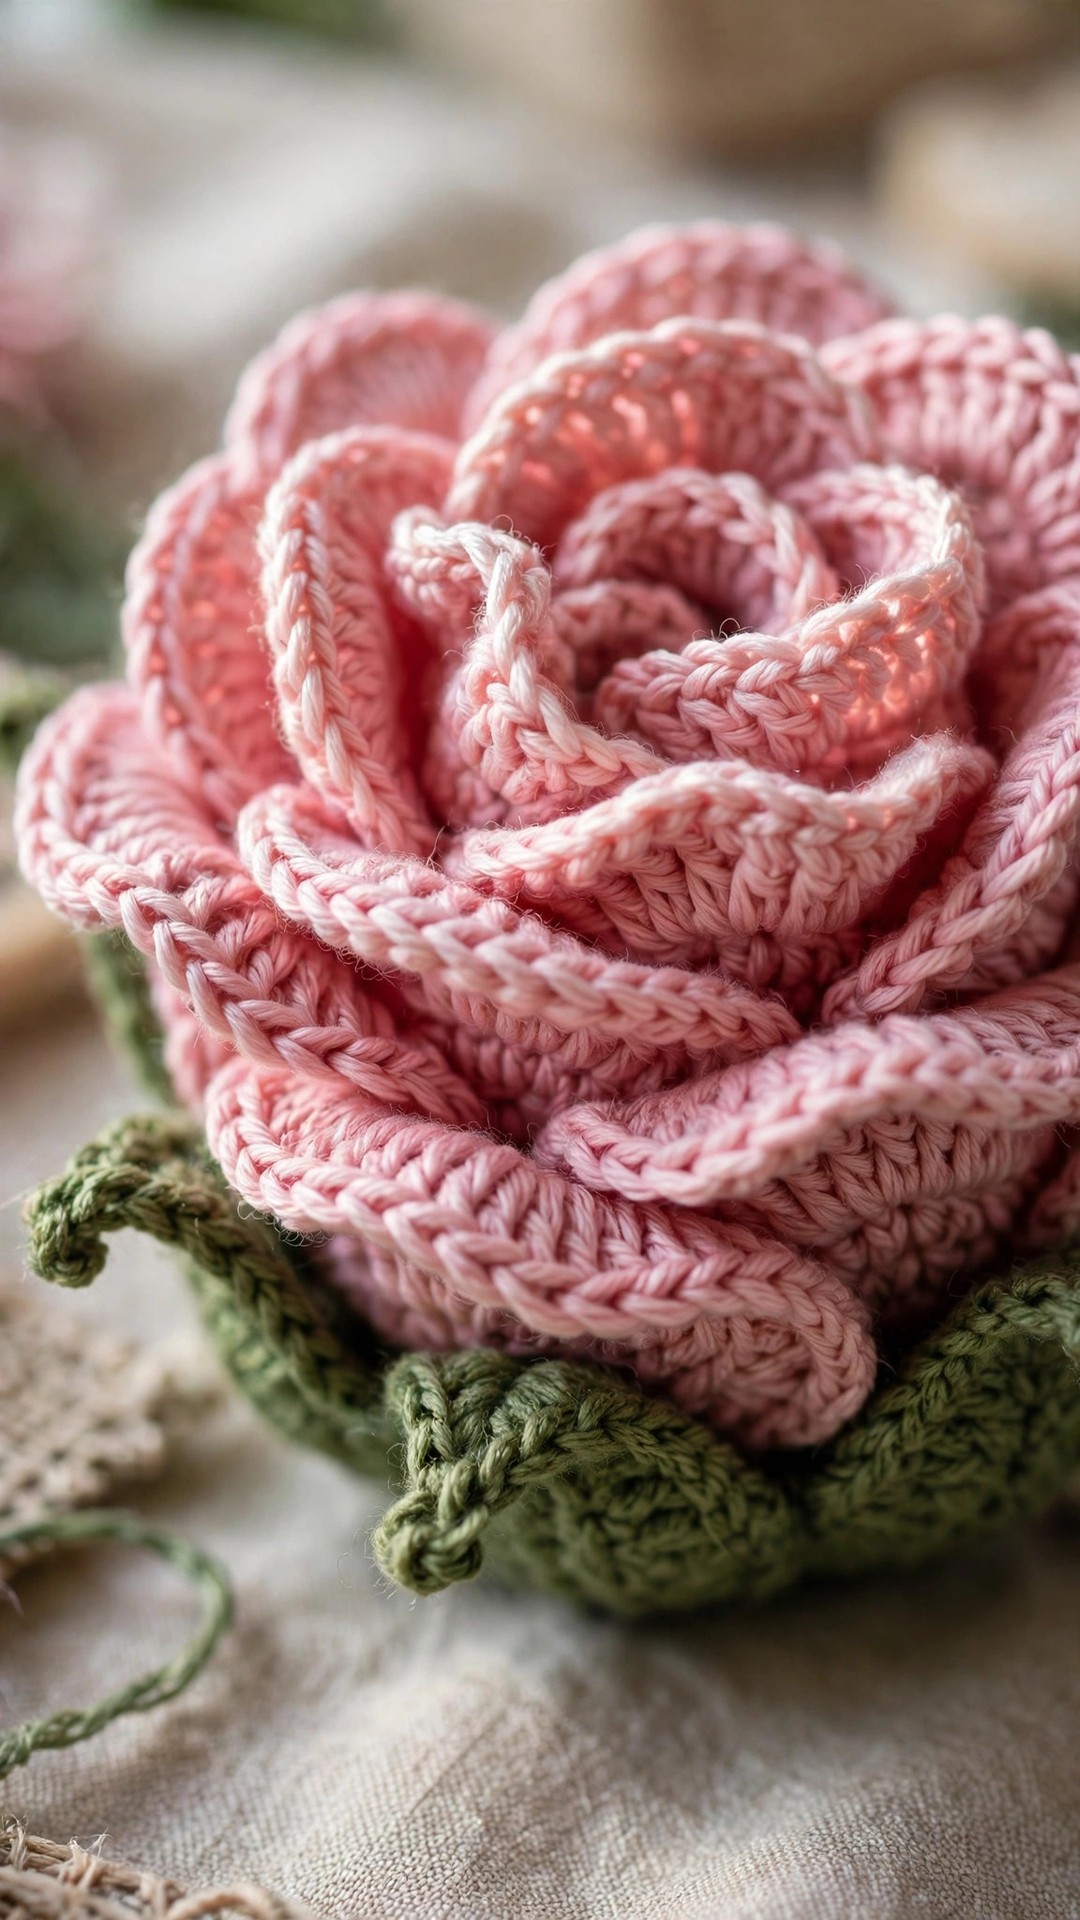
The trick to a rose that looks real instead of flat is layering. The strip in this pattern has three sizes of petals built into it: small tight petals at one end, medium petals in the middle, and big open petals at the other end. When you roll the strip, the small petals form the closed center bud, the medium petals wrap around it, and the big petals open out at the edge, exactly the way a real rose unfolds. A green sepal cup hides the rolled base, a sturdy stem holds the bloom upright, and two simple leaves finish the look.
A quick note on scope: this post is about a freestanding 3D rose with a stem, not a flat rose applique and not a granny square with a rose motif.
Key Takeaways
- Free original pattern: this crochet rose pattern is a Little Loop Finds original design, written in US terms, and free.
- Real 3D layered bloom: a petal strip with three petal sizes rolls into a rose with a closed center and open outer petals.
- Complete flower: sepals, a stem, and leaves are included, so the rose stands in a vase like a real cut flower.
- Beginner friendly: the whole bloom is chains and double crochet worked in rows, with no complicated shaping.
- Endlessly giftable: one rose makes a sweet single-stem gift, and a dozen make a bouquet that never wilts.
Table of Contents
- Why You Will Love This Crochet Rose
- Finished Size, Skill Level, and Time
- Materials You Need
- Abbreviations (US Terms)
- Gauge and Sizing Notes
- Part 1: The Petal Strip
- Part 2: Sepals, Stem, and Leaves
- Part 3: Rolling and Assembly
- Variations: Colors, Bouquets, and Single Stems
- Troubleshooting Roses That Look Flat or Floppy
- Care Instructions
- Frequently Asked Questions
Why You Will Love This Crochet Rose
A real rose lasts about a week if you are lucky. A crochet rose lasts for years, and it carries a message no shop-bought bunch can match: somebody sat down and made this for you, stitch by stitch.
This design is also a wonderful stash buster with a real payoff. One rose uses less than half a skein of yarn, so you can work through odd balls of pink, red, cream, and yellow and end up with a mixed bouquet that looks planned. The petal strip is simple enough to memorize after the first rose, which means the second, third, and twelfth roses fly by while you watch a show or listen to a podcast.
Finished Size, Skill Level, and Time
- Finished size: about 6 inches tall including the stem, with a bloom about 3 inches across, in worsted weight yarn.
- Skill level: Easy. You need chains, slip stitches, single crochet, half double crochet, and double crochet, plus simple increases.
- Time: about 3 to 4 hours for the first rose, including assembly. Once you know the pattern, each rose takes about 1 to 2 hours.
Materials You Need
| Item | What to get |
|---|---|
| Yarn, petal color | Worsted weight (medium 4) acrylic or cotton in pink, red, cream, or yellow, about 60 yards |
| Yarn, green | Worsted weight (medium 4) in leaf green, about 40 yards |
| Hook | US G-6 (4.0 mm), or the size that gives you a firm fabric with your yarn |
| Stem wire | One 12 inch piece of 18 gauge floral wire, plus green floral tape |
| Notions | Tapestry needle, scissors, stitch markers, pins for assembly |
| Optional | A small vase, ribbon for wrapping a bouquet, or a brooch pin back for a wearable rose |
Cotton yarn gives the crispest petal definition and holds a curl beautifully, which is why it is my first choice for roses that will sit in a vase. Whichever you choose, work with a hook one size smaller than you normally would for that yarn, because a firm fabric keeps the petals from stretching out of shape when you roll them.
Abbreviations (US Terms)
- ch = chain
- sl st = slip stitch
- sc = single crochet
- hdc = half double crochet
- dc = double crochet
- tr = treble crochet
- inc = increase (2 dc in the same stitch)
- st(s) = stitch(es)
- rep = repeat
- sk = skip
- sp = space
Gauge and Sizing Notes
Gauge for this rose is more about firmness than exact numbers. Work a small swatch of double crochet and check that the fabric feels firm and holds a curl when you roll it between your fingers. If it flops open, go down a hook size.
To make a smaller rose, use DK weight yarn and a 3.5 mm hook, and stop the petal strip two petals earlier. To make a larger rose, use chunky yarn and a 5.5 mm hook, and add one extra large petal at the end of the strip.
Part 1: The Petal Strip
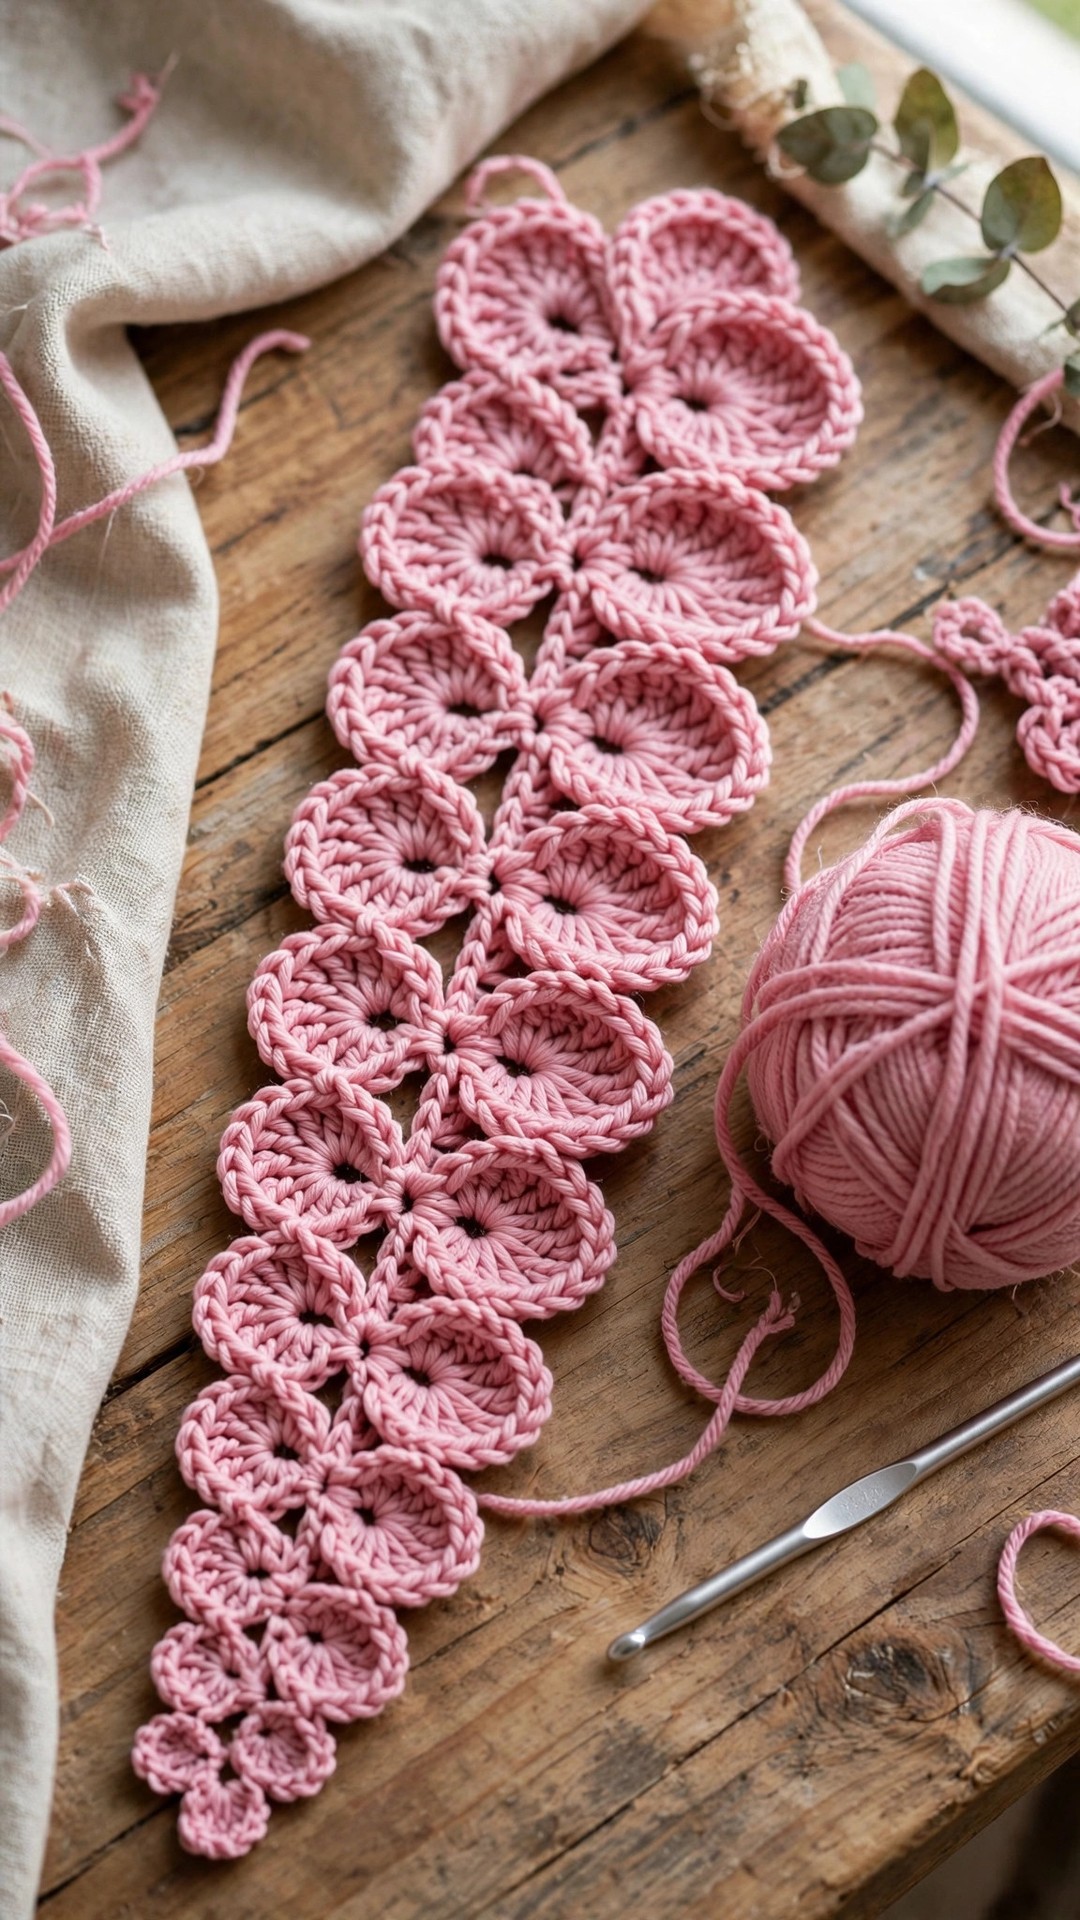
The petal strip is the whole secret of this rose. You crochet a long rectangle with a straight bottom edge and a scalloped top edge, and the scallops grow bigger as you work across the row. Small scallops become the tight center of the rose, big scallops become the open outer petals. Work in rows, turning at the end of each row, and keep your tension even so the strip lies flat before rolling.
The foundation
With your petal color yarn, ch 61.
- Row 1: dc in 4th ch from hook, dc in each ch across. (58 dc) Turn.
- Row 2: ch 3 (counts as first dc), dc in each st across. (58 dc) Turn.
This gives you a firm two-row base for the petals. The bottom edge of this rectangle becomes the base of the rose, and the top edge is where the petals form. Do not worry if the strip curls a little at this stage; the petal row will pull it into shape.
The petal row
This is the row that makes the rose, so read it slowly and count as you go. You will work 12 petals across the strip, and each petal is worked into one stitch of Row 2, with skipped stitches between petals.
- Petal 1 (smallest): sk 1 st, (dc, ch 1, dc) in next st, sk 1 st, sl st in next st.
- Petal 2 (small): sk 1 st, (dc, ch 1, dc, ch 1, dc) in next st, sk 1 st, sl st in next st.
- Petal 3 (small): sk 1 st, (dc, ch 1, dc, ch 1, dc) in next st, sk 1 st, sl st in next st.
- Petal 4 (medium): sk 1 st, (2 dc, ch 1, 2 dc) in next st, sk 1 st, sl st in next st.
- Petal 5 (medium): sk 1 st, (2 dc, ch 1, 2 dc) in next st, sk 1 st, sl st in next st.
- Petal 6 (medium): sk 1 st, (2 dc, ch 1, 2 dc, ch 1, 2 dc) in next st, sk 1 st, sl st in next st.
- Petal 7 (large): sk 1 st, (3 dc, ch 1, 3 dc) in next st, sk 1 st, sl st in next st.
- Petal 8 (large): sk 1 st, (3 dc, ch 1, 3 dc) in next st, sk 1 st, sl st in next st.
- Petal 9 (large): sk 1 st, (3 dc, ch 1, 3 dc, ch 1, 3 dc) in next st, sk 1 st, sl st in next st.
- Petal 10 (largest): sk 1 st, (3 dc, ch 1, 3 dc, ch 1, 3 dc) in next st, sk 1 st, sl st in next st.
- Petal 11 (largest): sk 1 st, (4 dc, ch 1, 4 dc) in next st, sk 1 st, sl st in next st.
- Petal 12 (largest): sk 1 st, (4 dc, ch 1, 4 dc) in next st, sk 1 st, sl st in next st.
Fasten off, leaving a tail about 18 inches long for rolling and sewing. Lay the strip flat with the petals at the top. You should see a clear gradient: tiny petals on the left, big ruffled petals on the right.
Part 2: Sepals, Stem, and Leaves
Sepals (the green star under the bloom)
The sepals are the little pointed green leaves that cup the bottom of a real rose, and they hide the rolled base of your bloom. With green yarn, ch 2, work 5 sc in 2nd ch from hook, join with a sl st. (5 sc)
- Rnd 1: ch 1, 2 sc in each st around, join. (10 sc)
- Rnd 2: ch 1, (sc, 2 sc in next st) rep around, join. (15 sc)
- Rnd 3: ch 1, sc in each st around, join. (15 sc)
- Sepal points: (ch 7, sc in 2nd ch from hook, hdc in next ch, dc in next 2 ch, hdc in next ch, sc in next ch, sl st in next 2 sts on the circle) rep 5 times around. Fasten off, leaving a tail for sewing.
You should have a little green star with five long pointed sepals. Set it aside; it goes on after the bloom is rolled.
Stem
The stem is a wire core wrapped in yarn, which keeps the rose upright in a vase. Take your 12 inch piece of floral wire and bend the top half inch into a small loop with pliers, so the sharp end cannot poke through the bloom. With green yarn, join with a slip stitch just below the loop, then work single crochet stitches tightly around the wire, covering about 6 inches. When the stem is covered, fasten off and weave the end in under the wrapping. Wrap the whole stem in green floral tape for a smooth finish, starting just below the loop and overlapping the tape by half its width as you go down.
Leaves (make 2)
A rose leaf has a pointed tip and a slightly ruffled edge, and this simple leaf gives you both. With green yarn, ch 12.
- Row 1: sc in 2nd ch from hook, hdc in next ch, dc in next 3 ch, tr in next 2 ch, dc in next 2 ch, hdc in next ch, (sc, ch 2, sc) in last ch, then work back down the other side of the chain: hdc in next ch, dc in next 2 ch, tr in next 2 ch, dc in next 3 ch, hdc in next ch, sc in last ch. Sl st to join.
- Row 2 (edging): ch 1, sc in each st around the leaf, working 3 sc in the ch 2 tip space. Sl st to join, fasten off, leaving a tail for sewing.
Make two leaves. If you want a fuller look, make three and cluster them at different heights on the stem.
Part 3: Rolling and Assembly
Rolling is where a flat strip becomes a flower, so take your time and let the petals tell you where to go.
- Hold the strip with the smallest petals on your left and the largest on your right, right side facing out.
- Start rolling from the small petal end, rolling the strip away from you, keeping the bottom edge straight and level as you roll. The small petals will curl into a tight center bud.
- As you reach the medium petals, ease your grip a little so they wrap more loosely around the center, with a small gap between layers. This gap is what gives the rose its depth.
- When you reach the large petals, let them flare outward slightly as you roll, so they open like the outer petals of a real rose.
- When the strip is fully rolled, hold the bloom firmly and use the long tail and a tapestry needle to sew through the bottom edge in a star pattern, catching all the layers. Make at least six passes through the base, pulling gently, until the bloom holds its shape on its own.
- Place the sepal cup over the bottom of the bloom, with the five points sticking out below the petals, and sew it in place with green yarn, catching the base of the bloom.
- Push the looped end of the stem wire up through the center of the sepals and into the base of the bloom, about half an inch deep, and sew around it to anchor it.
- Sew the leaves to the stem, one about halfway down and one a little lower, angling them outward so they look natural. A crochet flowers bouquet pattern free pairs beautifully with this rose if you want to build a full bouquet, and a crochet flower pattern free gives you flat flowers to mix in for variety.
Stand the rose in a vase and step back. If the bloom leans, bend the wire slightly to correct it. If the center looks too tight, use the tip of your hook to gently lift the inner petals apart.
Variations: Colors, Bouquets, and Single Stems
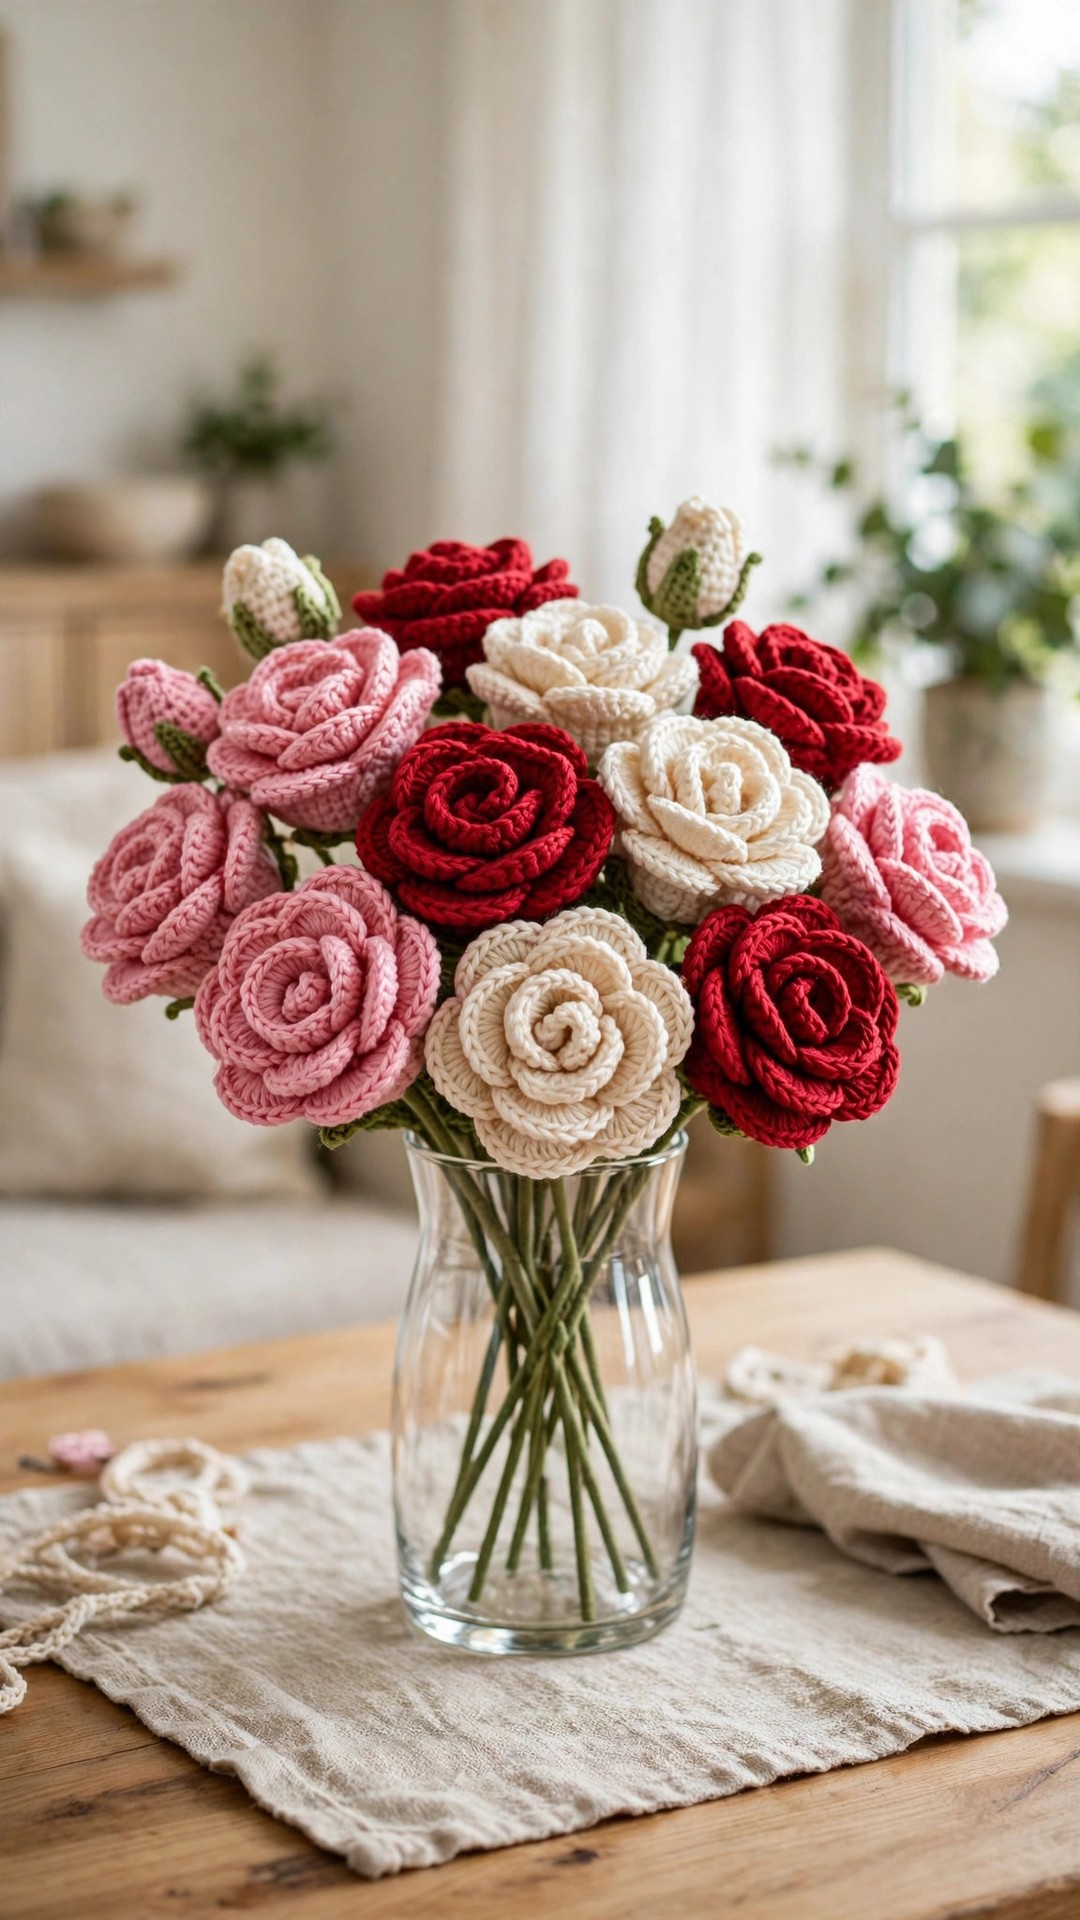
- Classic red rose: work the bloom in deep red and the leaves in dark green, for the most romantic rose there is.
- A dozen for a gift: make twelve roses in mixed colors, wrap the stems together with floral tape, and tie with twine for a bouquet that never wilts.
- Wearable rose: skip the stem, sew a brooch pin back to the sepals, and wear the bloom on a coat or bag.
If you love making flowers for gifts, a flower coaster crochet pattern uses the same petal skills on a flat project, and a holiday crochet gift guide has more handmade gift ideas for every season. For a fun wearable project, a crochet flower hat pattern free puts blooms right on top.
Troubleshooting Roses That Look Flat or Floppy
- My rose looks flat like a pinwheel. You rolled too tightly all the way through. Unpick the base stitches and re-roll with a looser grip on the medium and large petals.
- The center bud will not stay closed. Sew a few extra stitches through the center from underneath, catching the first two petals together, and let the outer petals do the opening.
- The petals flop open and look messy. Your fabric is too loose. Go down a hook size for the next rose, and for the finished one, spray lightly with water, shape the petals, and let it dry flat.
- The bloom wobbles on the stem. The wire loop is not deep enough in the base. Push it in another half inch and sew around the join again, through the sepals and the bloom base.
- The sepal points curl the wrong way. Steam them gently with an iron held an inch above the work, then press the points outward with your fingers while they cool.
Care Instructions
Dust your crochet rose with a soft dry cloth or a gentle puff of air from a hair dryer on a cool setting. If it gets grubby, spot clean with a damp cloth and a tiny amount of mild soap, then reshape the petals with your fingers and let it air dry completely. Do not machine wash a rose on a wire stem, because the wire can bend and the petals can crush, and do not put it in the dryer.
Frequently Asked Questions
Is this crochet rose pattern good for beginners?
Yes, it is one of the friendliest flower patterns you can make. The whole bloom is chains and double crochet worked in rows, and the rolling does the shaping for you. If you can work a double crochet and count stitches, you can make this rose, and the second one will be much faster than the first.
How long does one rose take to make?
About 1 to 2 hours once you know the pattern, or 3 to 4 hours for your very first rose including assembly.
Can I make this rose without the wire stem?
Yes. Skip the stem and leaves, sew a brooch pin back or a hair clip to the sepals, and you have a wearable rose. You can also glue the bloom to a headband or sew it onto a hat, a bag, or a blanket as a 3D flower accent.
What yarn is best for crochet roses?
Cotton yarn gives the crispest petals and the best curl, so it is my first choice for roses that will sit in a vase. Avoid fuzzy or novelty yarns for your first rose, because they hide the petal definition that makes the flower look real.
Can I make the rose bigger or smaller?
Yes. Use DK yarn and a 3.5 mm hook for a small rose about 2 inches across, or chunky yarn and a 5.5 mm hook for a large rose about 4 inches across. Adjust the stem wire to match the bloom: a small bloom looks best on a short stem, and a large bloom needs a longer, sturdier wire.
Can I sell roses made from this pattern?
Yes, you may sell finished roses made from this free pattern, with credit to Little Loop Finds. Please do not sell, share, or republish the pattern text itself, and do not claim this original design as your own.
Do crochet roses really last?
Yes, that is the best part. A crochet rose kept out of direct sunlight and dusted now and then will look as good in five years as it does today. Unlike a real rose, it never wilts and never needs its water changed.
Happy stitching, and may your roses bloom all year round.


