Crochet Dream Catcher Pattern (Boho Wall Hanging)
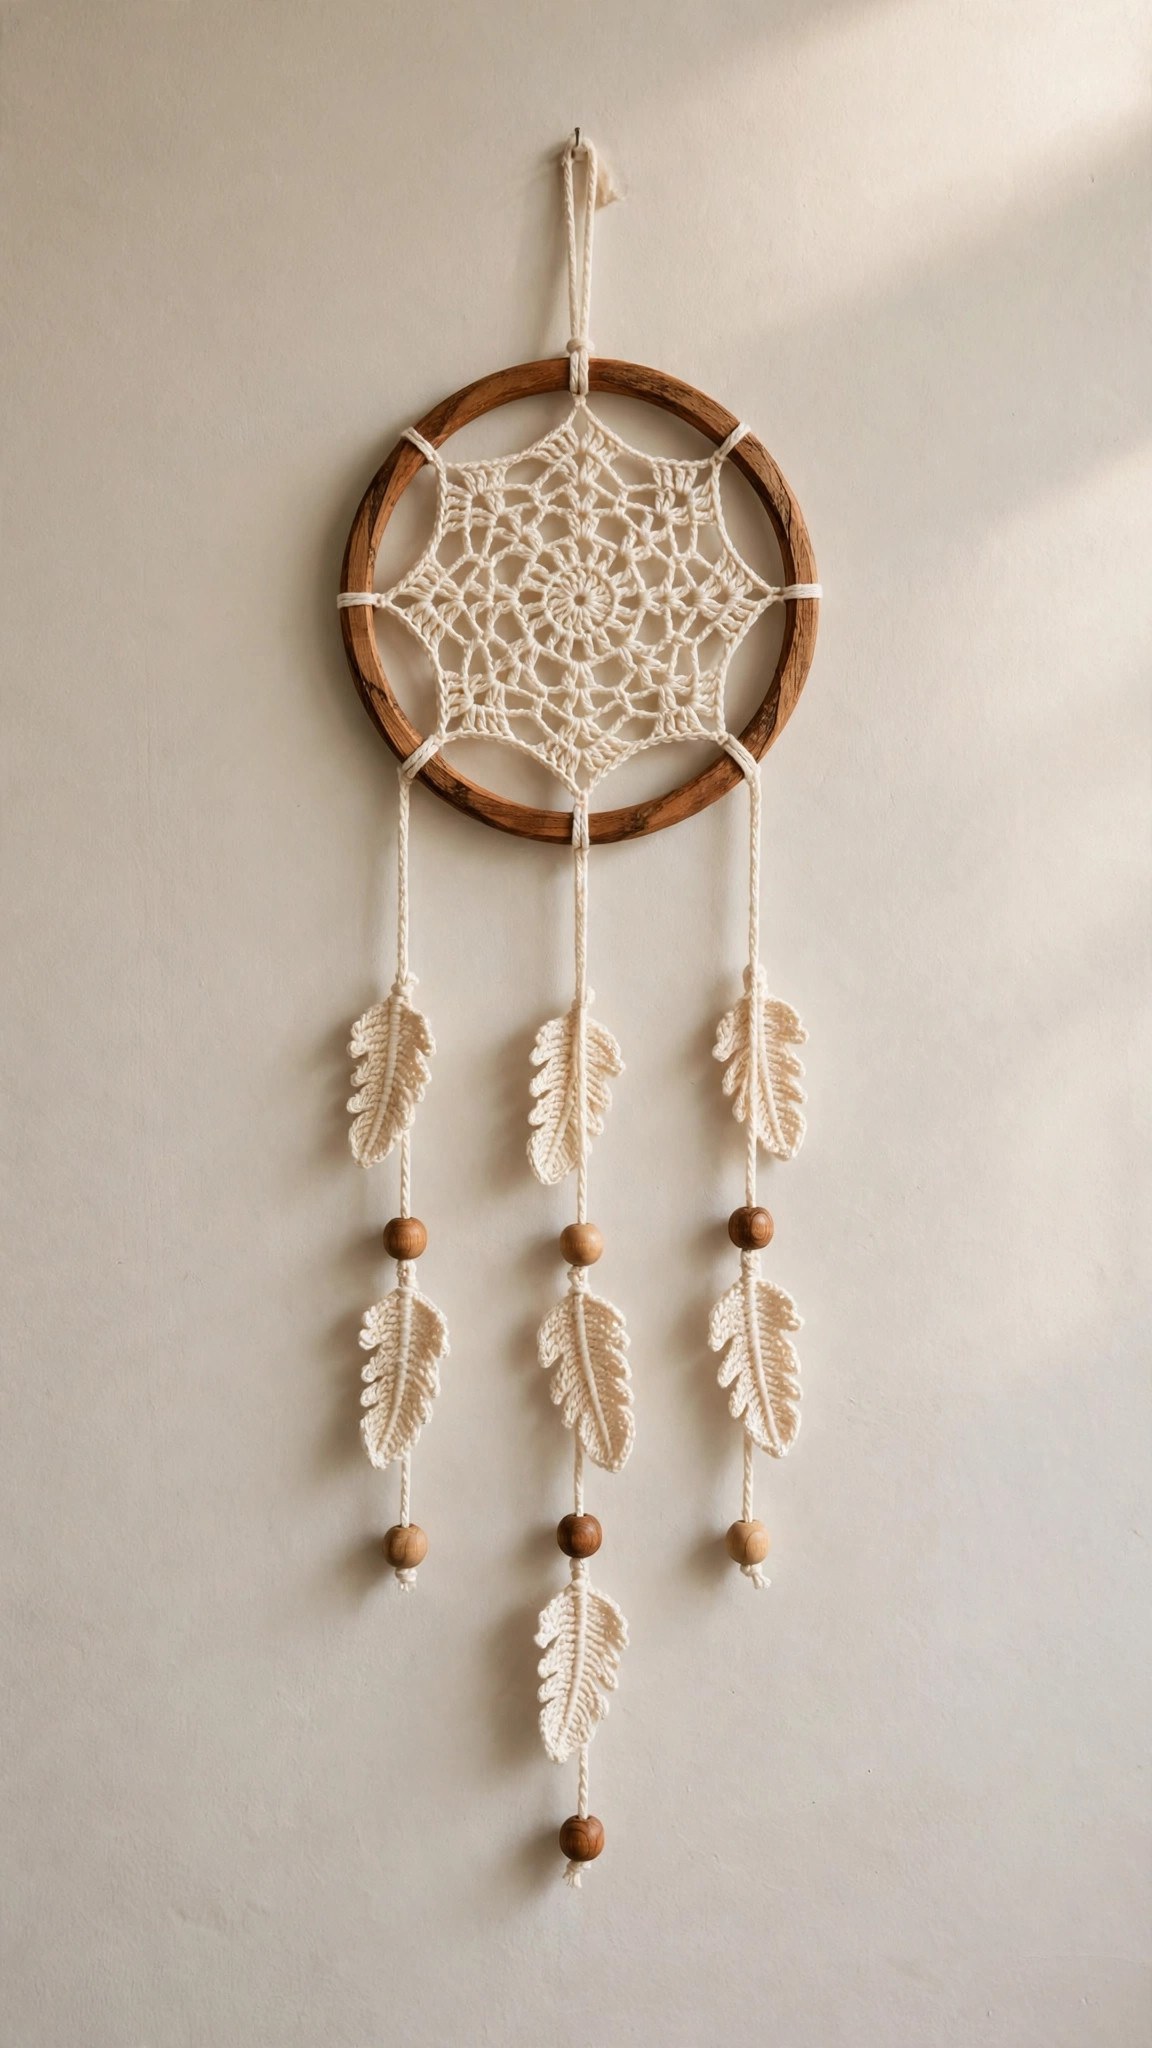
Crochet a boho dream catcher with a lacy web and crocheted feathers in about four hours, then hang it above a bed or in a nursery.

Patterns · Crochet
- Finished size
- 8 in hoop, 18 in long
- Making time
- 4 hours
- Hook
- US G-6 (4.0 mm)
- Set
- Hoop, web, feathers
- Skill
- Easy
In this post
- Key Takeaways
- Table of Contents
- Why You Will Love This Dream Catcher
- Finished Size, Skill Level, and Time
- Materials You Need
- Abbreviations (US Terms)
- Gauge and Sizing Notes
- Part 1: Wrapping the Hoop and Crocheting the Web
- Part 2: The Feathers and the Beads
- Part 3: Assembly and Hanging
- Variations: Colors, Sizes, and Uses
- Troubleshooting a Dream Catcher That Does Not Look Right
- Care Instructions
- Frequently Asked Questions
- More Free Patterns to Try
A crochet dream catcher is one of the prettiest wall hangings you can make with a hook and a ball of cotton yarn, and this free crochet dream catcher pattern turns a simple wooden hoop into a soft boho decoration for a bedroom or a nursery. It takes about 4 hours, uses about 180 yards of yarn, and makes a thoughtful handmade gift.
This is an original Little Loop Finds design, written in US terms and completely free. The dream catcher is made from a hoop wrapped in single crochet, a lacy web worked in chain loops, and three crocheted feathers with wooden beads.
A quick note on scope: this post is about one specific crochet dream catcher, a wall hanging with an 8 inch hoop, a crocheted web, and hanging feathers. That makes it different from a dream catcher mobile, which hangs from the ceiling and spins.
Key Takeaways
- Free original pattern: a Little Loop Finds original design, written in US terms.
- A boho wall hanging: an 8 inch hoop wrapped in single crochet, a lacy web, and three feathers.
- Simple stitches: single crochet, chains, and slip stitches only, plus a little wrapping.
- A 4 hour project: one dream catcher takes about 4 hours.
- Great for gifts: a sweet bedroom decoration, a nursery gift, or a calm handmade present.
Table of Contents
- Why You Will Love This Dream Catcher
- Finished Size, Skill Level, and Time
- Materials You Need
- Abbreviations (US Terms)
- Gauge and Sizing Notes
- Part 1: Wrapping the Hoop and Crocheting the Web
- Part 2: The Feathers and the Beads
- Part 3: Assembly and Hanging
- Variations: Colors, Sizes, and Uses
- Troubleshooting a Dream Catcher That Does Not Look Right
- Care Instructions
- Frequently Asked Questions
- More Free Patterns to Try
Why You Will Love This Dream Catcher
A crocheted dream catcher is a small project with a big payoff. The hoop wrap is relaxing, the web grows quickly, and you can finish one feather in about 15 minutes.
The dream catcher is worked mostly in single crochet and chains, so there are no hard stitches to learn and no shaping to worry about. You wrap the hoop first, then work the web in rounds that get smaller toward the center, and then add the feathers and beads.
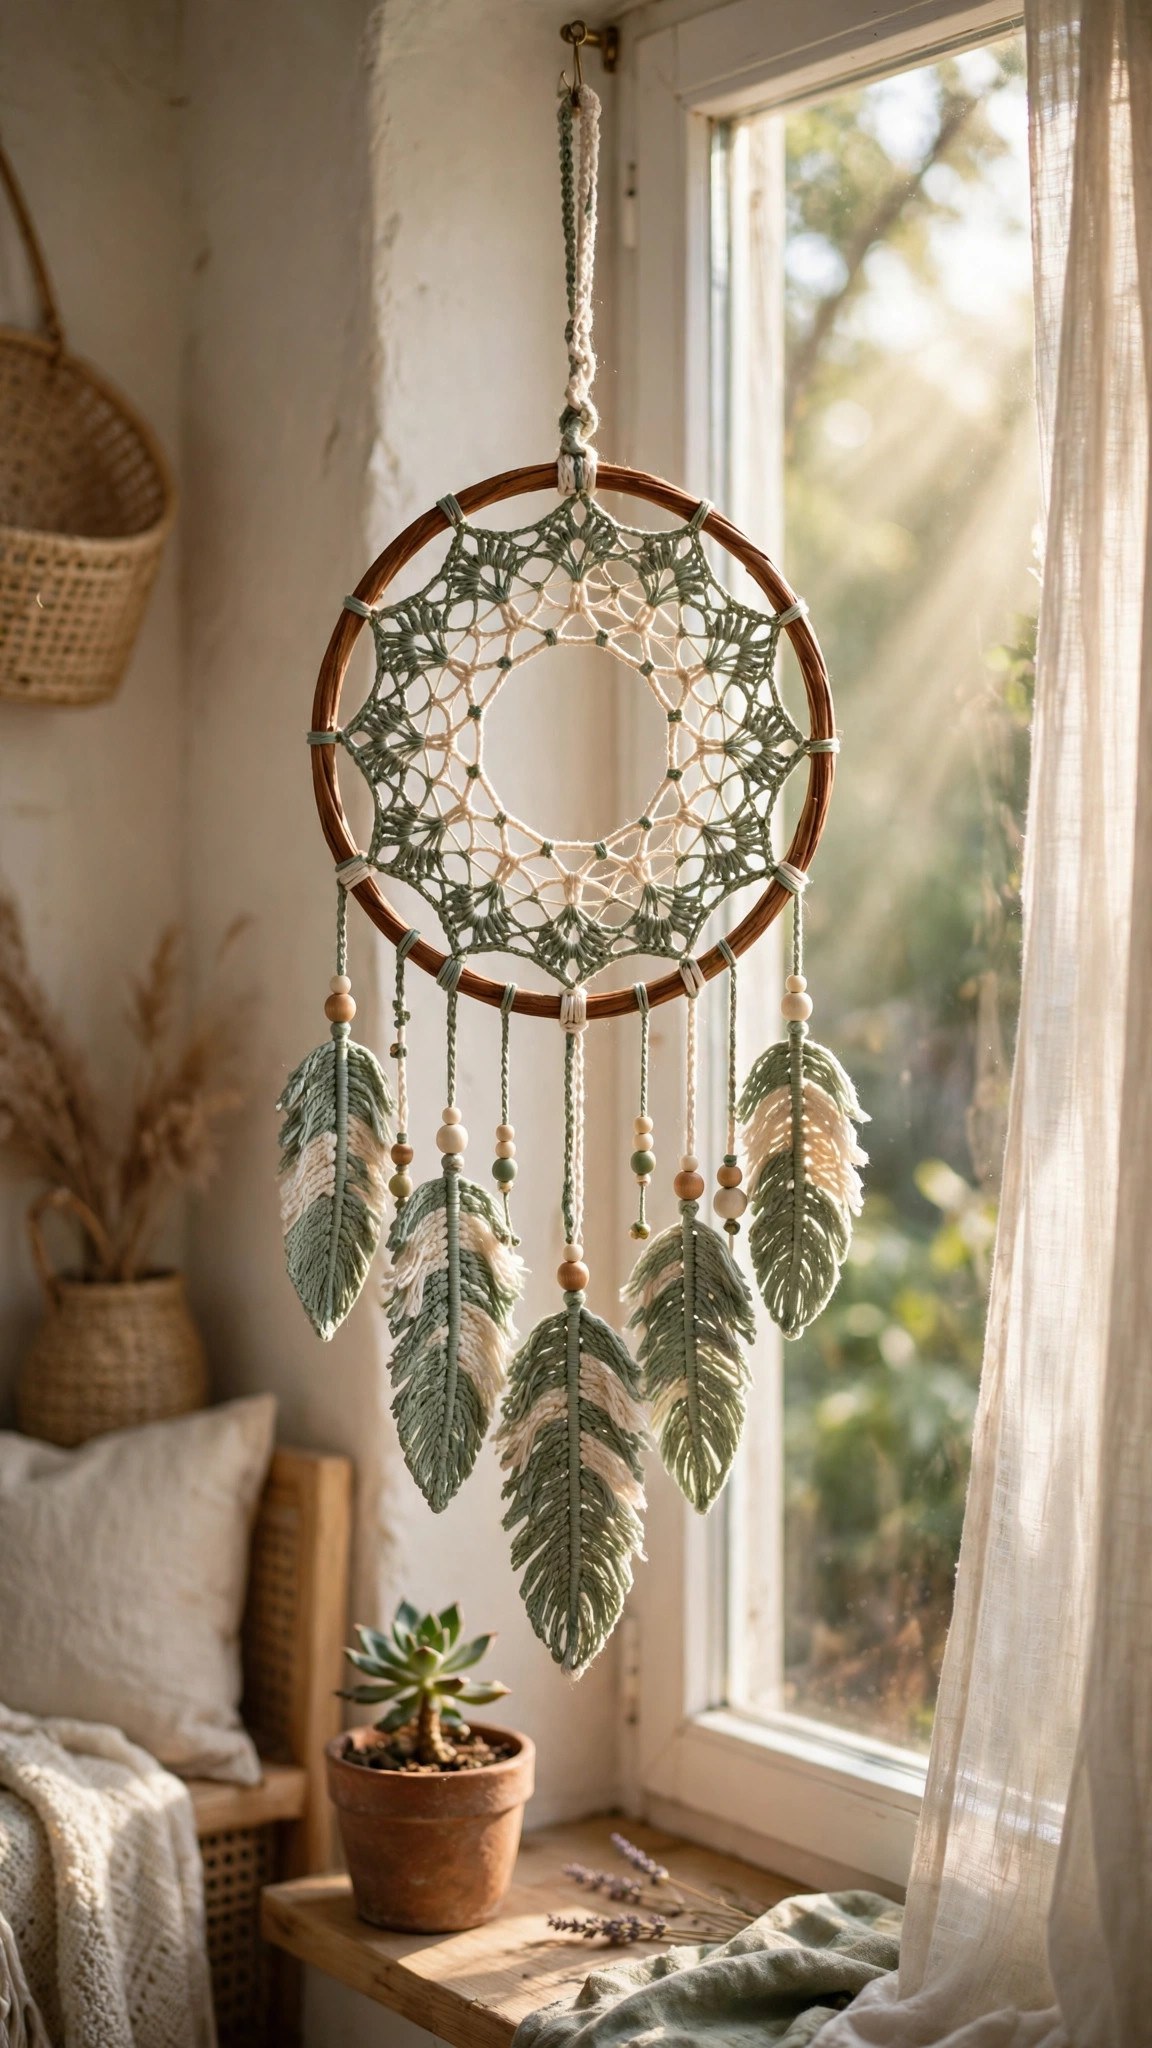
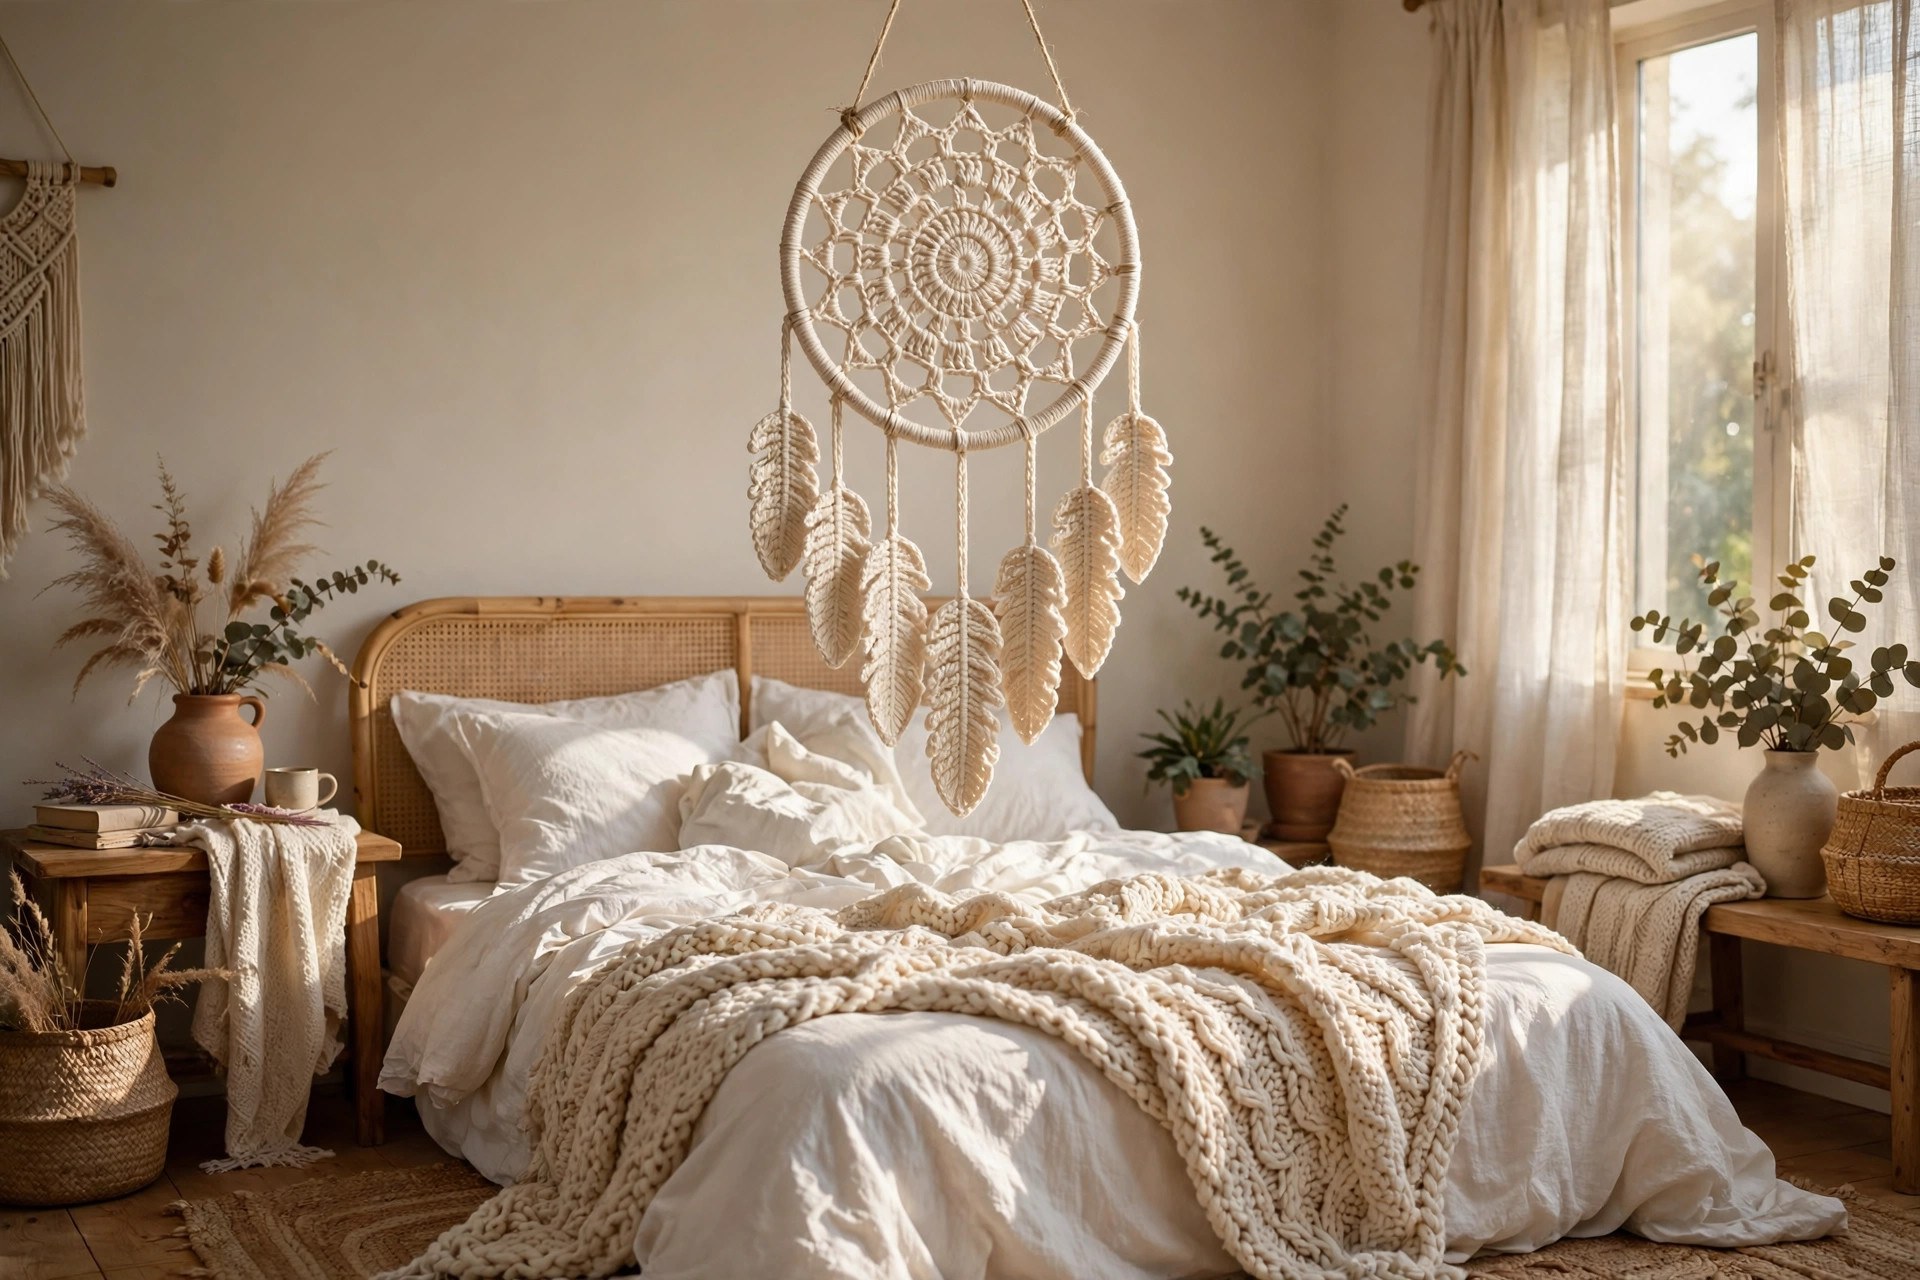
This dream catcher also makes a wonderful gift for someone who loves handmade decor. The cream and sage green colors suit almost any room, and the soft feathers and wooden beads give it a natural, handmade feel. Hang it above a bed or beside a window, and it brings a calm, cozy feeling to the corner.
Finished Size, Skill Level, and Time
- Finished size: one size. The hoop is 8 inches across, and the finished dream catcher is about 8 inches wide and about 18 inches long.
- Skill level: Easy. You need single crochet, chains, slip stitches, and a little patience for wrapping the hoop.
- Time: about 4 hours per dream catcher: 45 minutes to wrap the hoop, 1 hour 15 minutes for the web, 45 minutes for the feathers, and 45 minutes for assembly.
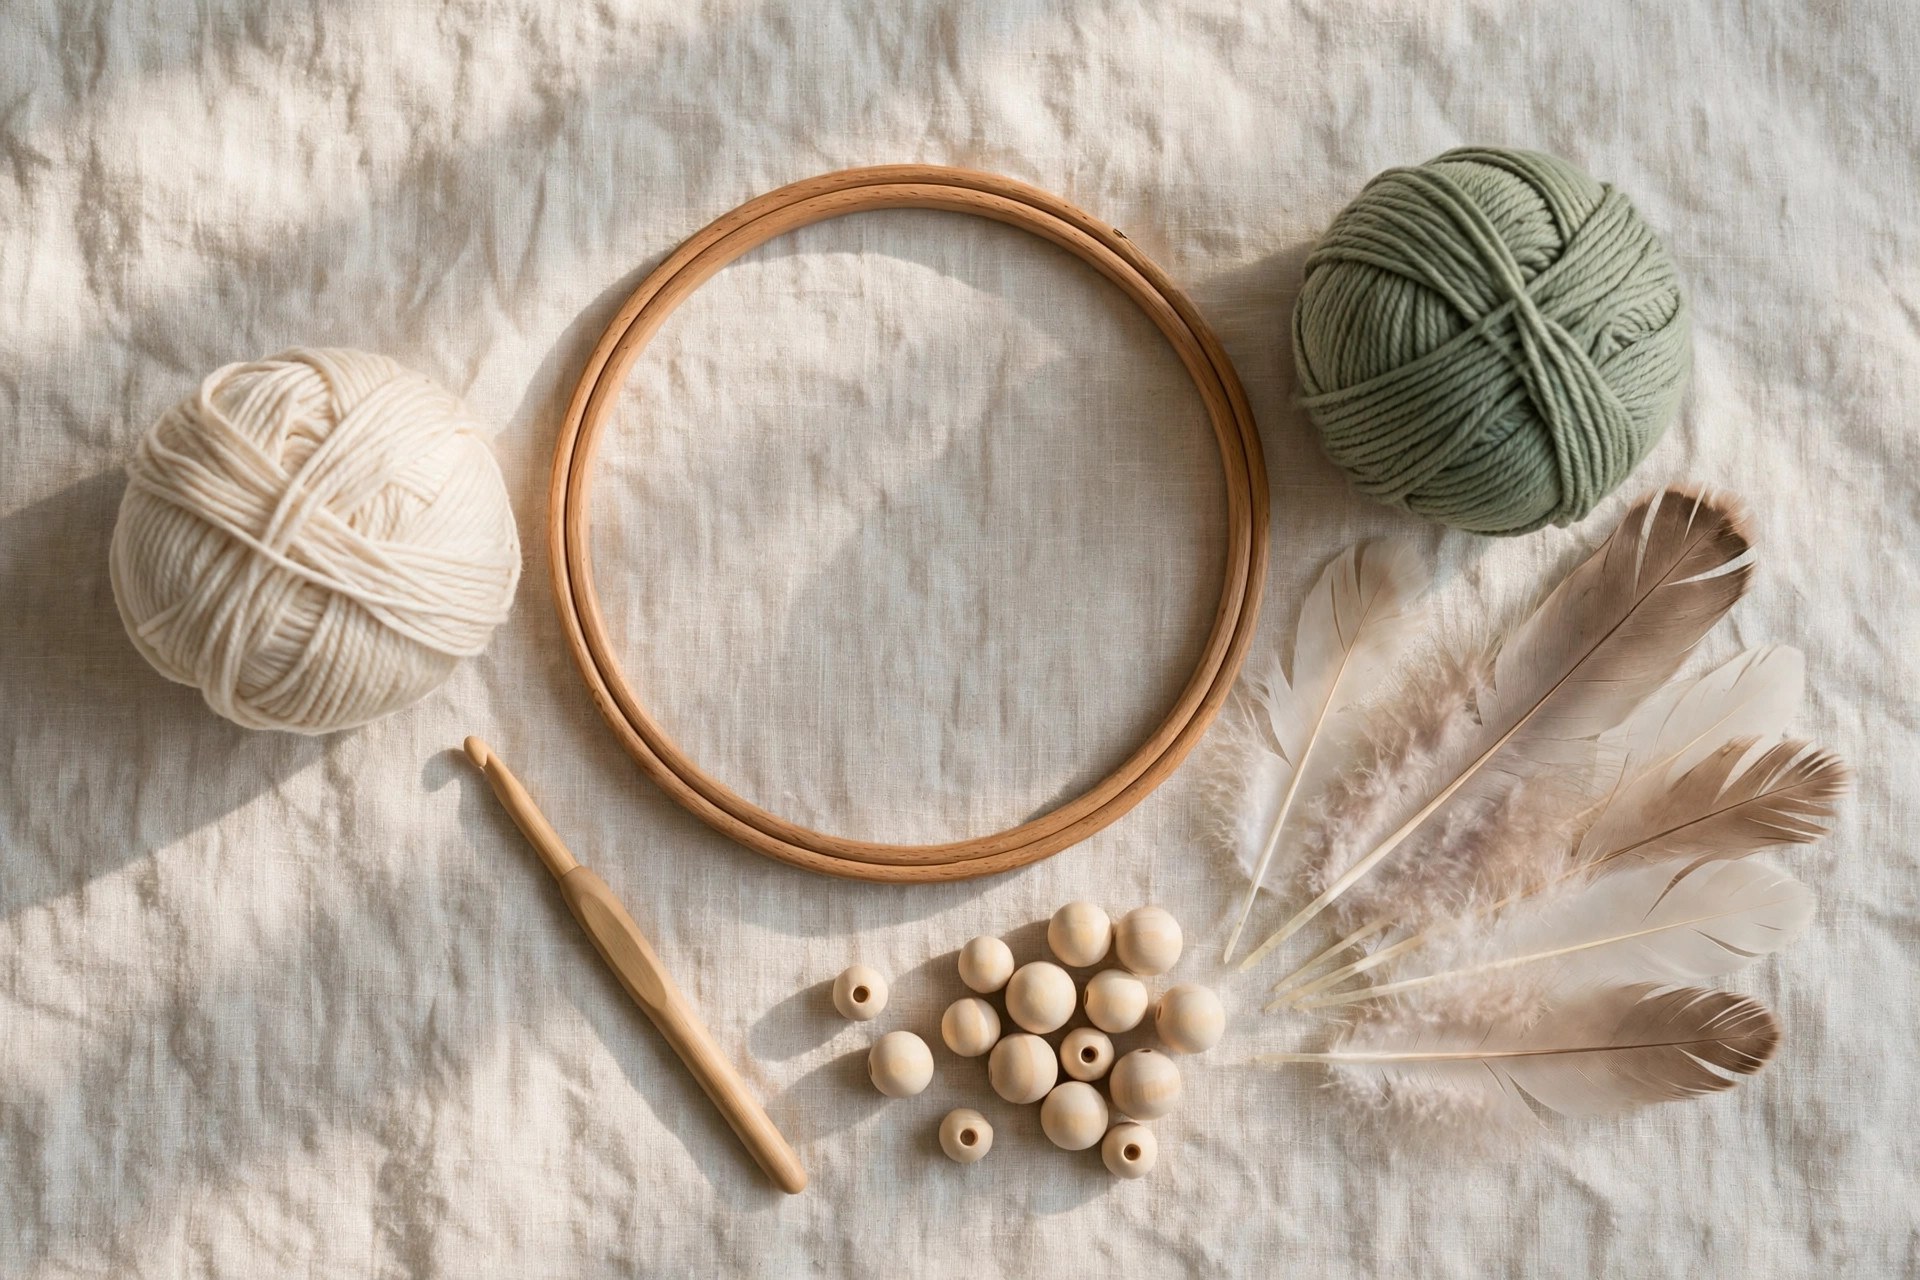
Materials You Need
| Item | What to get |
|---|---|
| Yarn, cotton | DK weight cotton yarn in cream, about 120 yards |
| Yarn, cotton | DK weight cotton yarn in sage green, about 60 yards |
| Hoop | Wooden or metal hoop, 8 inches across |
| Hook | US G-6 (4.0 mm), or the size that gives you the gauge below |
| Notions | Tapestry needle, scissors, stitch markers, 6 wooden beads (12 mm), 3 small wooden beads (8 mm) |
Cotton yarn is the best choice for a crochet dream catcher because it holds its shape and shows the lacy web clearly. A smooth DK cotton yarn works best for the web and the feathers, because it makes crisp, even stitches.
A wooden hoop is the most traditional choice, and it looks warm and natural under the wrapped yarn. A metal hoop works just as well, and it is a little lighter on the wall. Wooden beads add a soft, natural finish to the hanging strands.
Abbreviations (US Terms)
- ch = chain
- sl st = slip stitch
- sc = single crochet
- dc = double crochet
- st(s) = stitch(es)
- rep = repeat
- MR = magic ring
- FO = fasten off
Gauge and Sizing Notes
Gauge matters less on a dream catcher than on a garment, because the hoop sets the size, but a loose web will sag and a tight web will pull the hoop out of round. Work a swatch of 12 sc and 14 rows in the cream yarn, which should be about 2 inches wide and 2 inches tall.
The pattern is written in one size, for an 8 inch hoop. The finished dream catcher is about 8 inches wide and about 18 inches long. To make a smaller one, use a 6 inch hoop and stop the web after round 5. To make a larger one, use a 10 inch hoop and add one more round.
Part 1: Wrapping the Hoop and Crocheting the Web
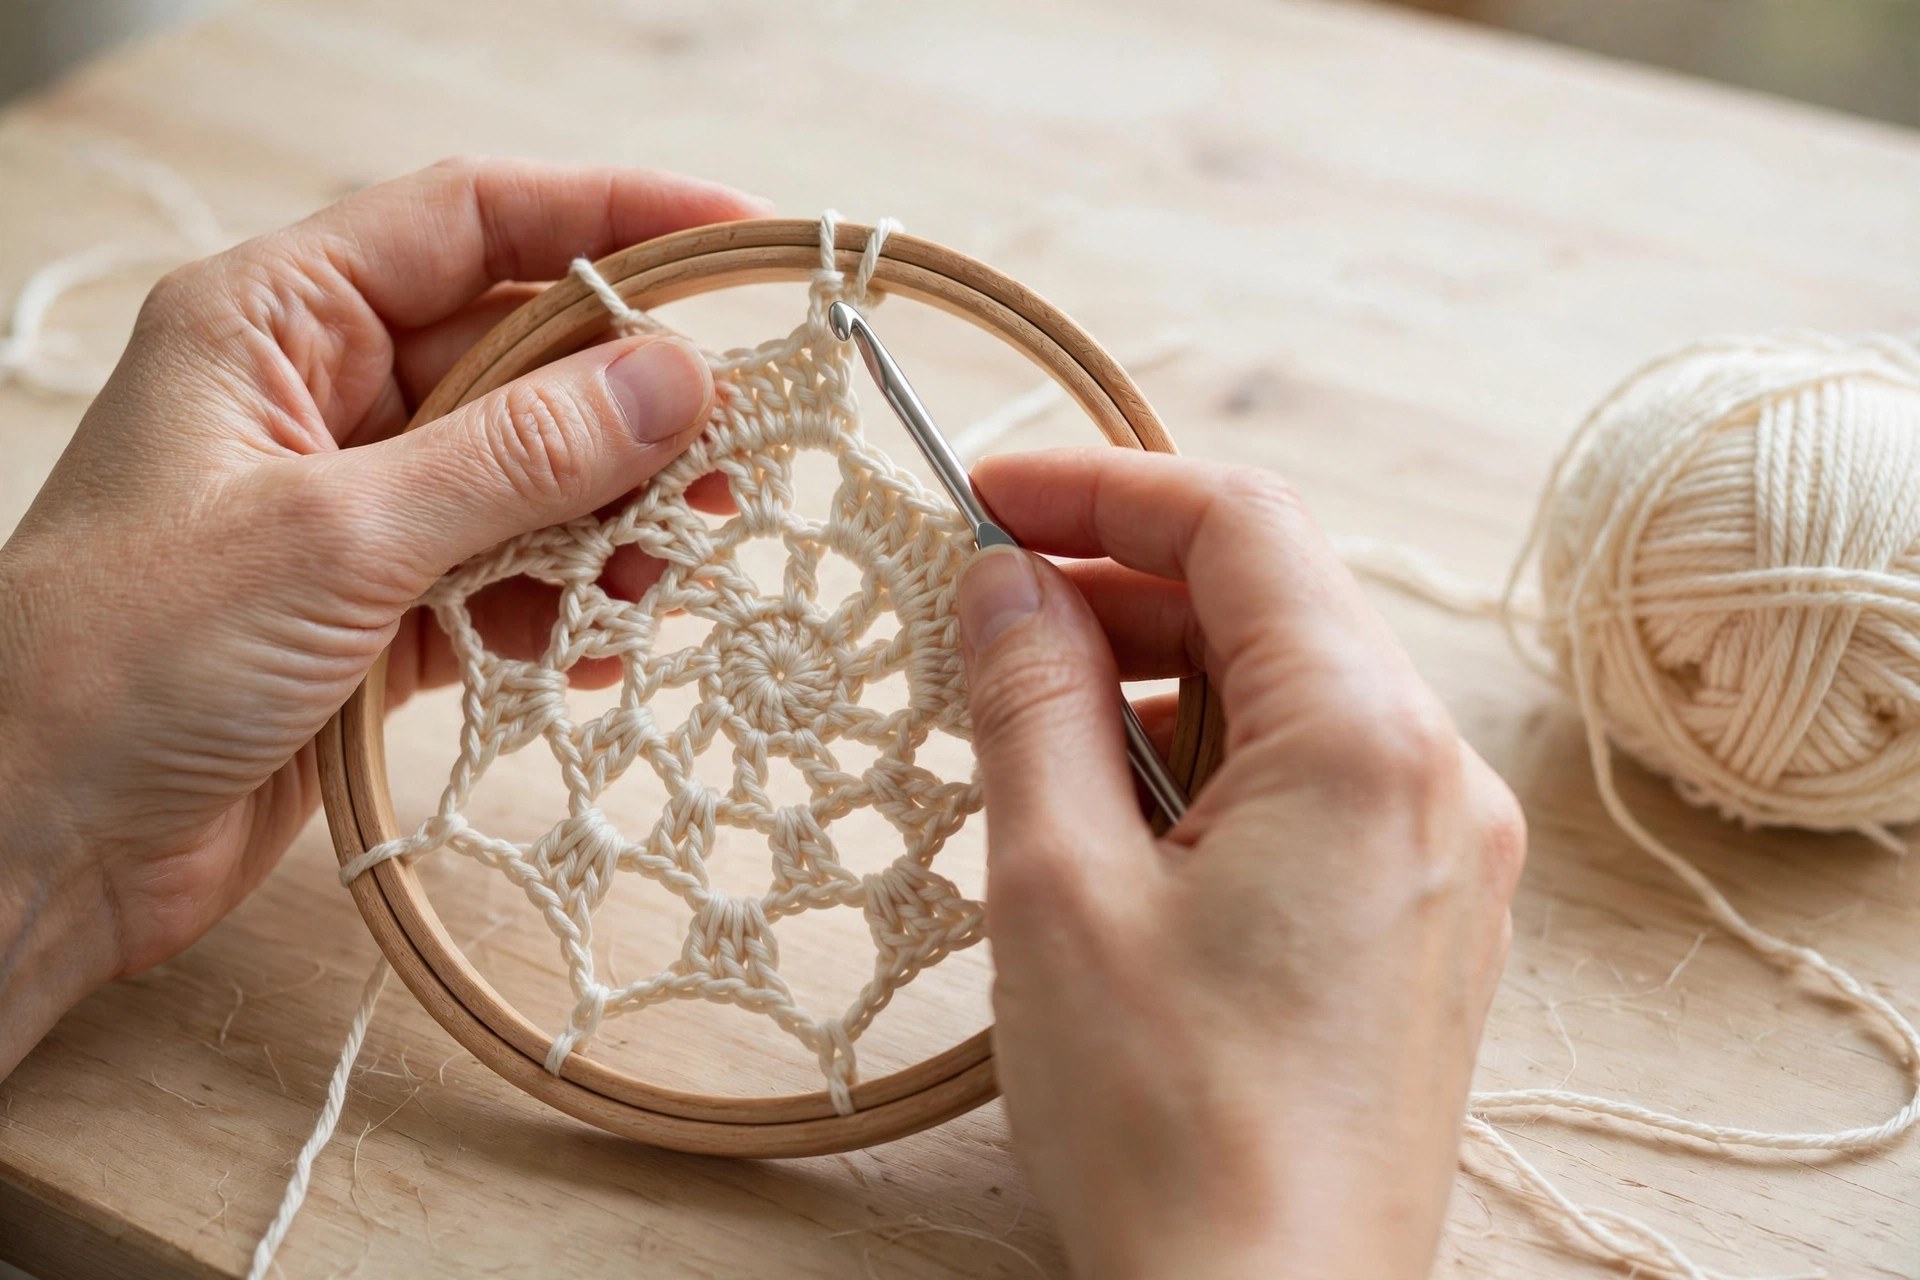
The dream catcher starts with the hoop, which you wrap completely in single crochet so no bare wood shows, and then the web, worked in rounds of chain loops that get smaller toward the center. Keep your tension even so the web lies flat.
Wrapping the Hoop
Take the cream yarn and tie it to the hoop with a small knot, leaving a 4 inch tail to weave in later. Work single crochet stitches around the hoop, pushing each stitch close to the last one so the wood is fully covered. Keep wrapping single crochet stitches around and around the hoop until you come back to the start.
Work about 90 single crochet stitches around an 8 inch hoop, and check as you go that no wood shows through. When you reach the starting knot, slip stitch into the first single crochet, fasten off, and weave in both ends.
Crocheting the Web
The web is worked in the round inside the hoop, starting at the hoop and working toward the center. With the cream yarn, join with a slip stitch to any stitch on the hoop.
- Round 1: ch 5, skip 2 sts on the hoop, sl st in the next st, (ch 5, skip 2 sts, sl st in the next st) rep around the hoop until you have 12 chain loops. Sl st in the first ch-5 loop to join. (12 loops)
- Rounds 2-3: sl st into the first ch-5 loop, ch 6, sl st in the next ch-5 loop, (ch 6, sl st in the next ch-5 loop) rep around. Sl st in the first ch-6 loop to join. (12 loops)
- Round 4: sl st into the first ch-6 loop, ch 5, sl st in the next ch-6 loop, (ch 5, sl st in the next ch-6 loop) rep around. Sl st in the first ch-5 loop to join. (12 loops)
- Round 5: sl st into the first ch-5 loop, ch 4, sl st in the next ch-5 loop, (ch 4, sl st in the next ch-5 loop) rep around. Sl st in the first ch-4 loop to join. (12 loops)
- Round 6: sl st into the first ch-4 loop, ch 3, sl st in the next ch-4 loop, (ch 3, sl st in the next ch-4 loop) rep around. Sl st in the first ch-3 loop to join. (12 loops)
- Round 7: sl st into the first ch-3 loop, ch 2, sl st in the next ch-3 loop, (ch 2, sl st in the next ch-3 loop) rep around. Pull the last loop tight, sl st in the center, and fasten off, leaving a 6 inch tail.
Weave the tail through the center stitches and pull gently to close the small hole in the middle, then weave in the end on the back of the web. The web should lie flat inside the hoop, with even loops all the way around. If the web ripples, your chains are a little too long. If the web pulls tight and cups, your chains are a little too short.
Adding a Bead to the Center
Thread one small wooden bead onto the tail before you weave it in, and pull the bead into the center of the web. Knot the yarn behind the bead so it stays in place, then weave in the end on the back.
Part 2: The Feathers and the Beads
The feathers are three flat crocheted shapes, one long and two shorter, worked in cream and sage green. They hang from the bottom of the hoop on strands of yarn, with wooden beads above each feather. Work each feather in rows, turning at the end of each row, and keep your stitches relaxed so the feather lies flat.
The Long Center Feather
With the sage green yarn, chain 13.
- Row 1: sc in the 2nd ch from the hook, sc in each ch across. Ch 1, turn. (12)
- Row 2: sc in each st across. Ch 1, turn. (12)
- Row 3: dec, sc in the next 8 sts, dec. Ch 1, turn. (10)
- Row 4: sc in each st across. Ch 1, turn. (10)
- Row 5: dec, sc in the next 6 sts, dec. Ch 1, turn. (8)
- Row 6: sc in each st across. Ch 1, turn. (8)
- Row 7: dec, sc in the next 4 sts, dec. Ch 1, turn. (6)
- Row 8: sc in each st across. Ch 1, turn. (6)
- Row 9: dec, sc in the next 2 sts, dec. Ch 1, turn. (4)
- Row 10: dec 2 times. Ch 1, turn. (2)
- Row 11: dec. Fasten off, leaving a 6 inch tail.
The long feather should be about 4 inches long and about 1.5 inches wide. To add a fringe, cut short strands of sage green yarn, fold each one in half, pull the folded loop through an edge stitch with your hook, then pull the two ends through the loop to knot it. Space the fringe evenly down both sides, and trim it to about half an inch long.
The Two Side Feathers
With the cream yarn, chain 11.
- Row 1: sc in the 2nd ch from the hook, sc in each ch across. Ch 1, turn. (10)
- Row 2: sc in each st across. Ch 1, turn. (10)
- Row 3: dec, sc in the next 6 sts, dec. Ch 1, turn. (8)
- Row 4: sc in each st across. Ch 1, turn. (8)
- Row 5: dec, sc in the next 4 sts, dec. Ch 1, turn. (6)
- Row 6: sc in each st across. Ch 1, turn. (6)
- Row 7: dec, sc in the next 2 sts, dec. Ch 1, turn. (4)
- Row 8: dec 2 times. Fasten off, leaving a 6 inch tail.
Make a second side feather the same way. Each side feather should be about 3 inches long and about 1.25 inches wide. Add a fringe to both long edges the same way, using cream yarn, and trim it to about half an inch.
The Hanging Strands
Cut three strands of cream yarn: one 12 inches long for the center, and two 9 inches long for the sides. Thread a 12 mm wooden bead onto each strand, and knot the yarn below the bead. Thread the top of each strand through the bottom of the wrapped hoop, and knot it firmly. The center strand hangs from the bottom center, and the side strands hang about 2 inches to each side.
Part 3: Assembly and Hanging
This is the part where a wrapped hoop, a lacy web, three feathers, and a few beads become a dream catcher. Attach the feathers to the hanging strands first, then add the hanging loop at the top, and finish by blocking the web so it lies flat.
Attaching the Feathers
Take the long sage green feather and thread the bottom end of the center strand through the top of the feather with a tapestry needle. Knot the yarn firmly just above the feather, and weave in the end on the back. Do the same with the two cream side feathers on the two shorter strands, so the long feather hangs lowest in the center.
Check that the feathers hang straight and do not twist. If one twists, untie the knot, turn the feather around, and tie it again.
Adding the Hanging Loop
Cut a strand of cream yarn 14 inches long. Fold it in half, thread the folded loop through the top center of the wrapped hoop, and pull the two ends through the loop to knot it in place. This makes a hanging loop about 6 inches long.
Our free crochet spider web pattern uses the same chain loop web technique on a smaller scale, if you want to practice the web first.
Blocking the Dream Catcher
Lay the dream catcher flat on a clean towel, and gently shape the web with your fingers so the loops are even and the center bead sits in the middle. Pin the feathers flat, and let it dry flat if you have sprayed it lightly with water. Blocking is optional, but it makes the web lie much flatter.
Variations: Colors, Sizes, and Uses
- Classic cream dream catcher: work the whole dream catcher in cream cotton yarn with natural wooden beads for a soft, neutral look.
- Sage and cream dream catcher: work the hoop and web in cream and the feathers in sage green, as in this pattern, for a calm boho feel.
- Terracotta dream catcher: work the feathers in warm terracotta and the web in cream for a sunny, earthy look.
- Nursery dream catcher: work the dream catcher in soft pastel pink or blue, and hang it above a crib.
- Dream catcher set: make three dream catchers in different sizes and hang them together on one wall for a grouped display. Pair them with a crochet hanging plants pattern and a crochet basket pattern for a full boho wall.
Troubleshooting a Dream Catcher That Does Not Look Right
- My web ripples and will not lie flat. Your chain loops are a little too long. Work the next round with one fewer chain per loop, and block the web flat with pins.
- My web pulls tight and cups inward. Your chain loops are a little too short. Add one more chain per loop, and keep your tension relaxed.
- My hoop wrap shows bare wood. The single crochet stitches are spaced too far apart. Push each stitch close to the last one as you wrap.
- My feathers curl at the edges. Your stitches are too tight. Work the feather rows more loosely, and trim the fringe a little shorter.
- My dream catcher hangs crooked. The hanging loop is not centered on the top of the hoop. Move the loop to the exact top center.
Care Instructions
Dust a crocheted dream catcher gently with a soft brush or a feather duster once a month, and keep it out of direct sunlight so the colors stay soft. If the yarn gets dusty, hand wash it in cool water with a mild detergent, press the water out gently without wringing, and lay it flat to dry away from direct heat. Reshape the web and the feathers while it is still damp. Do not put a dream catcher in a washing machine or a dryer, because the hoop can bend and the web can stretch.
Frequently Asked Questions
Is this crochet dream catcher pattern good for beginners?
Yes, it is best for an easy crocheter who knows single crochet, chains, and slip stitches. The web is just chain loops, and the feathers are simple rows of single crochet.
What size hoop should I use for a crochet dream catcher?
An 8 inch hoop is the best size for a first dream catcher, because it is big enough to show the web clearly and small enough to finish in an afternoon.
What yarn is best for a crochet dream catcher?
DK weight cotton yarn is the best choice, because it holds its shape and shows the lacy web clearly. Acrylic yarn also works, but it is softer and the web may sag a little over time.
Can I make a dream catcher without a hoop?
Yes, you can use a metal ring, a wooden embroidery hoop, or a sturdy branch bent into a circle. The pattern works the same way as long as the ring is firm and round. If you want a matching project, see our crochet curtains pattern for another boho home decoration.
How do I hang a crochet dream catcher?
Hang it from a small nail or a removable wall hook, using the yarn loop at the top. Keep it out of direct sunlight and away from damp walls.
Can I sell dream catchers made from this pattern?
Yes, you may sell finished dream catchers made from this free pattern, with credit to Little Loop Finds. Do not sell or republish the pattern text itself.
More Free Patterns to Try
If you loved making this dream catcher, try our crochet doily pattern for more lacy chain work, our crochet spider web pattern for a smaller web project, and our crochet hanging plants pattern for another boho wall decoration.
Happy stitching, and may your little dream catcher bring a calm, handmade feeling to every wall it hangs on.