Free Raccoon Crochet Pattern: Cute Bandit Amigurumi
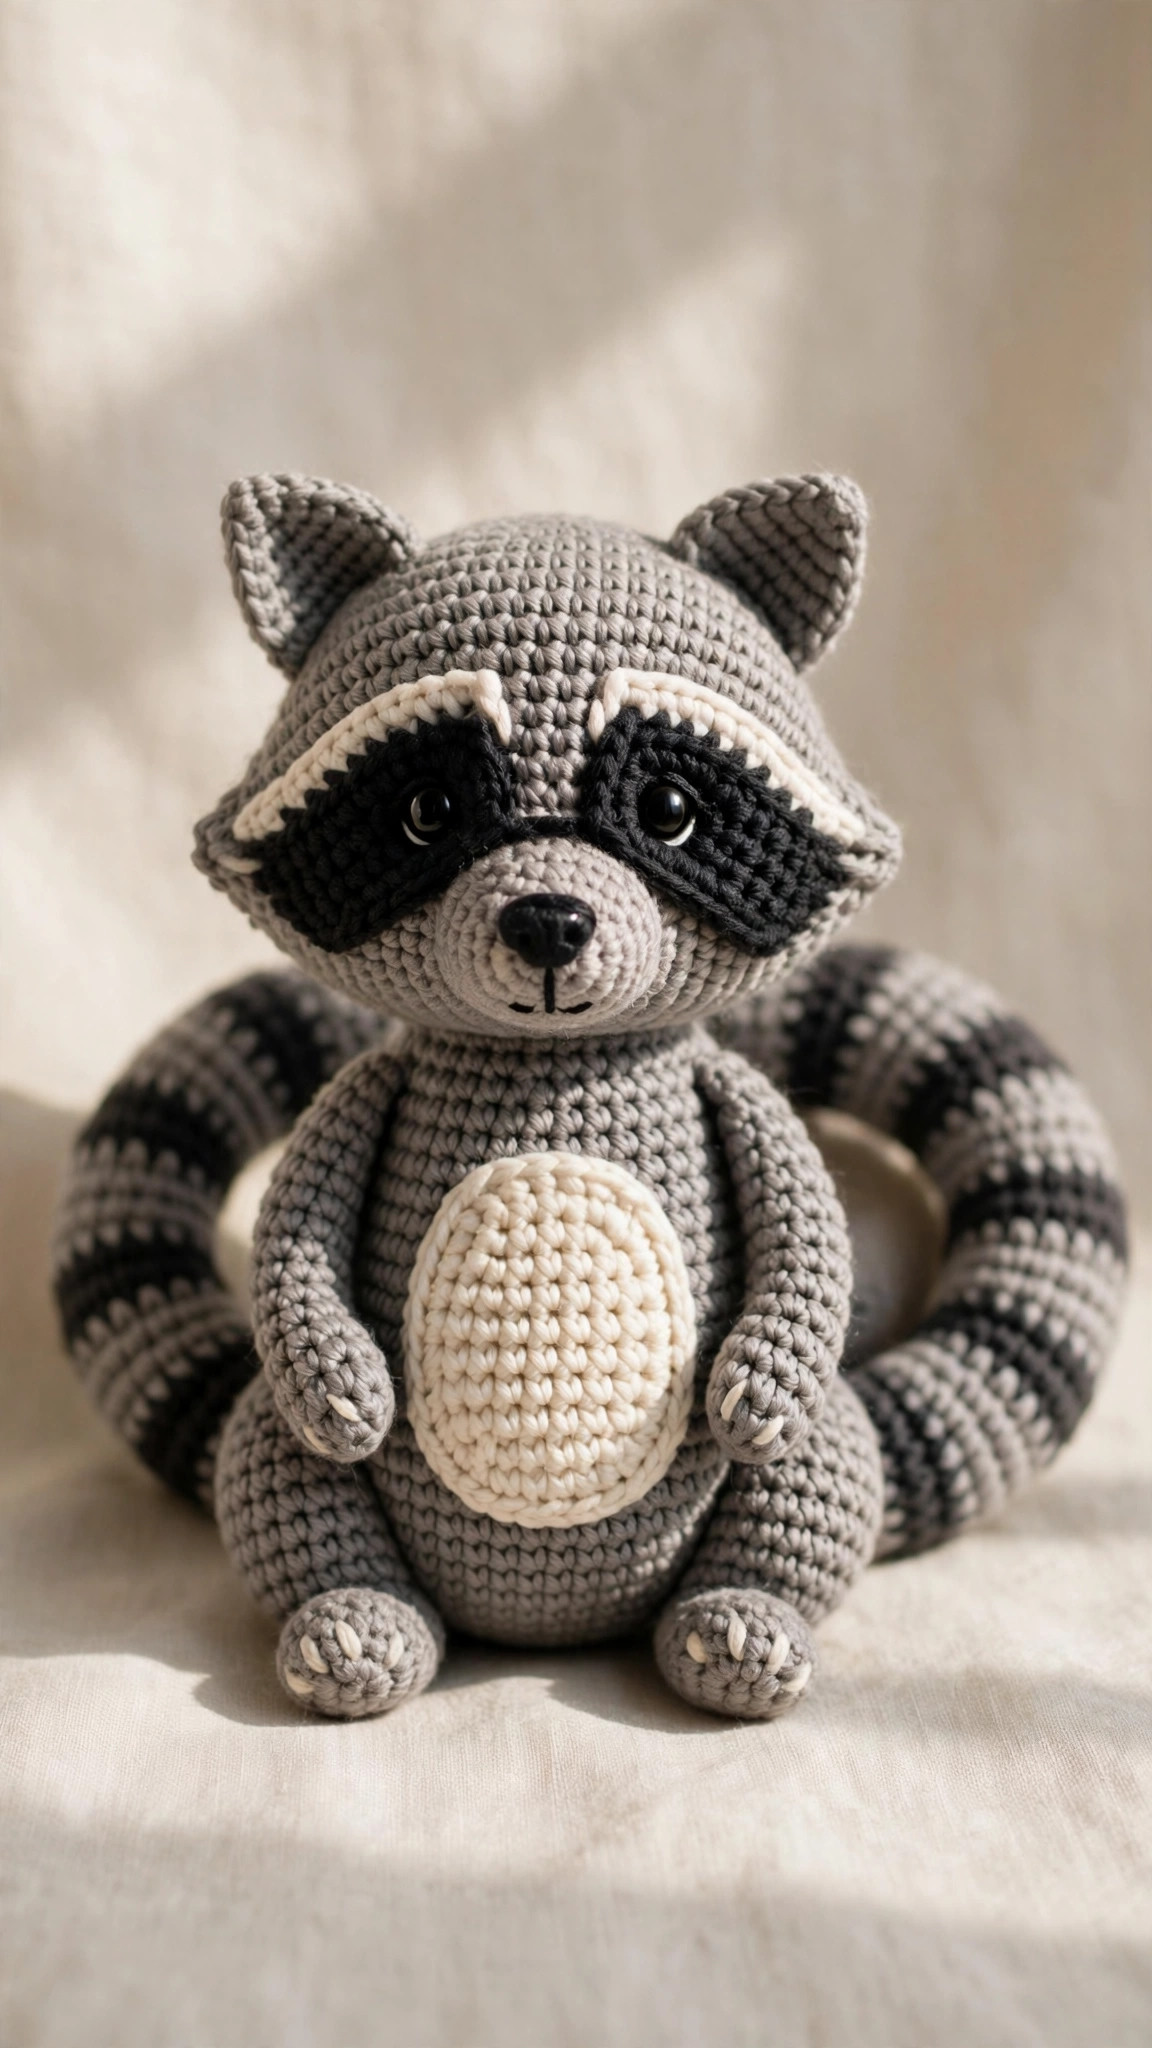
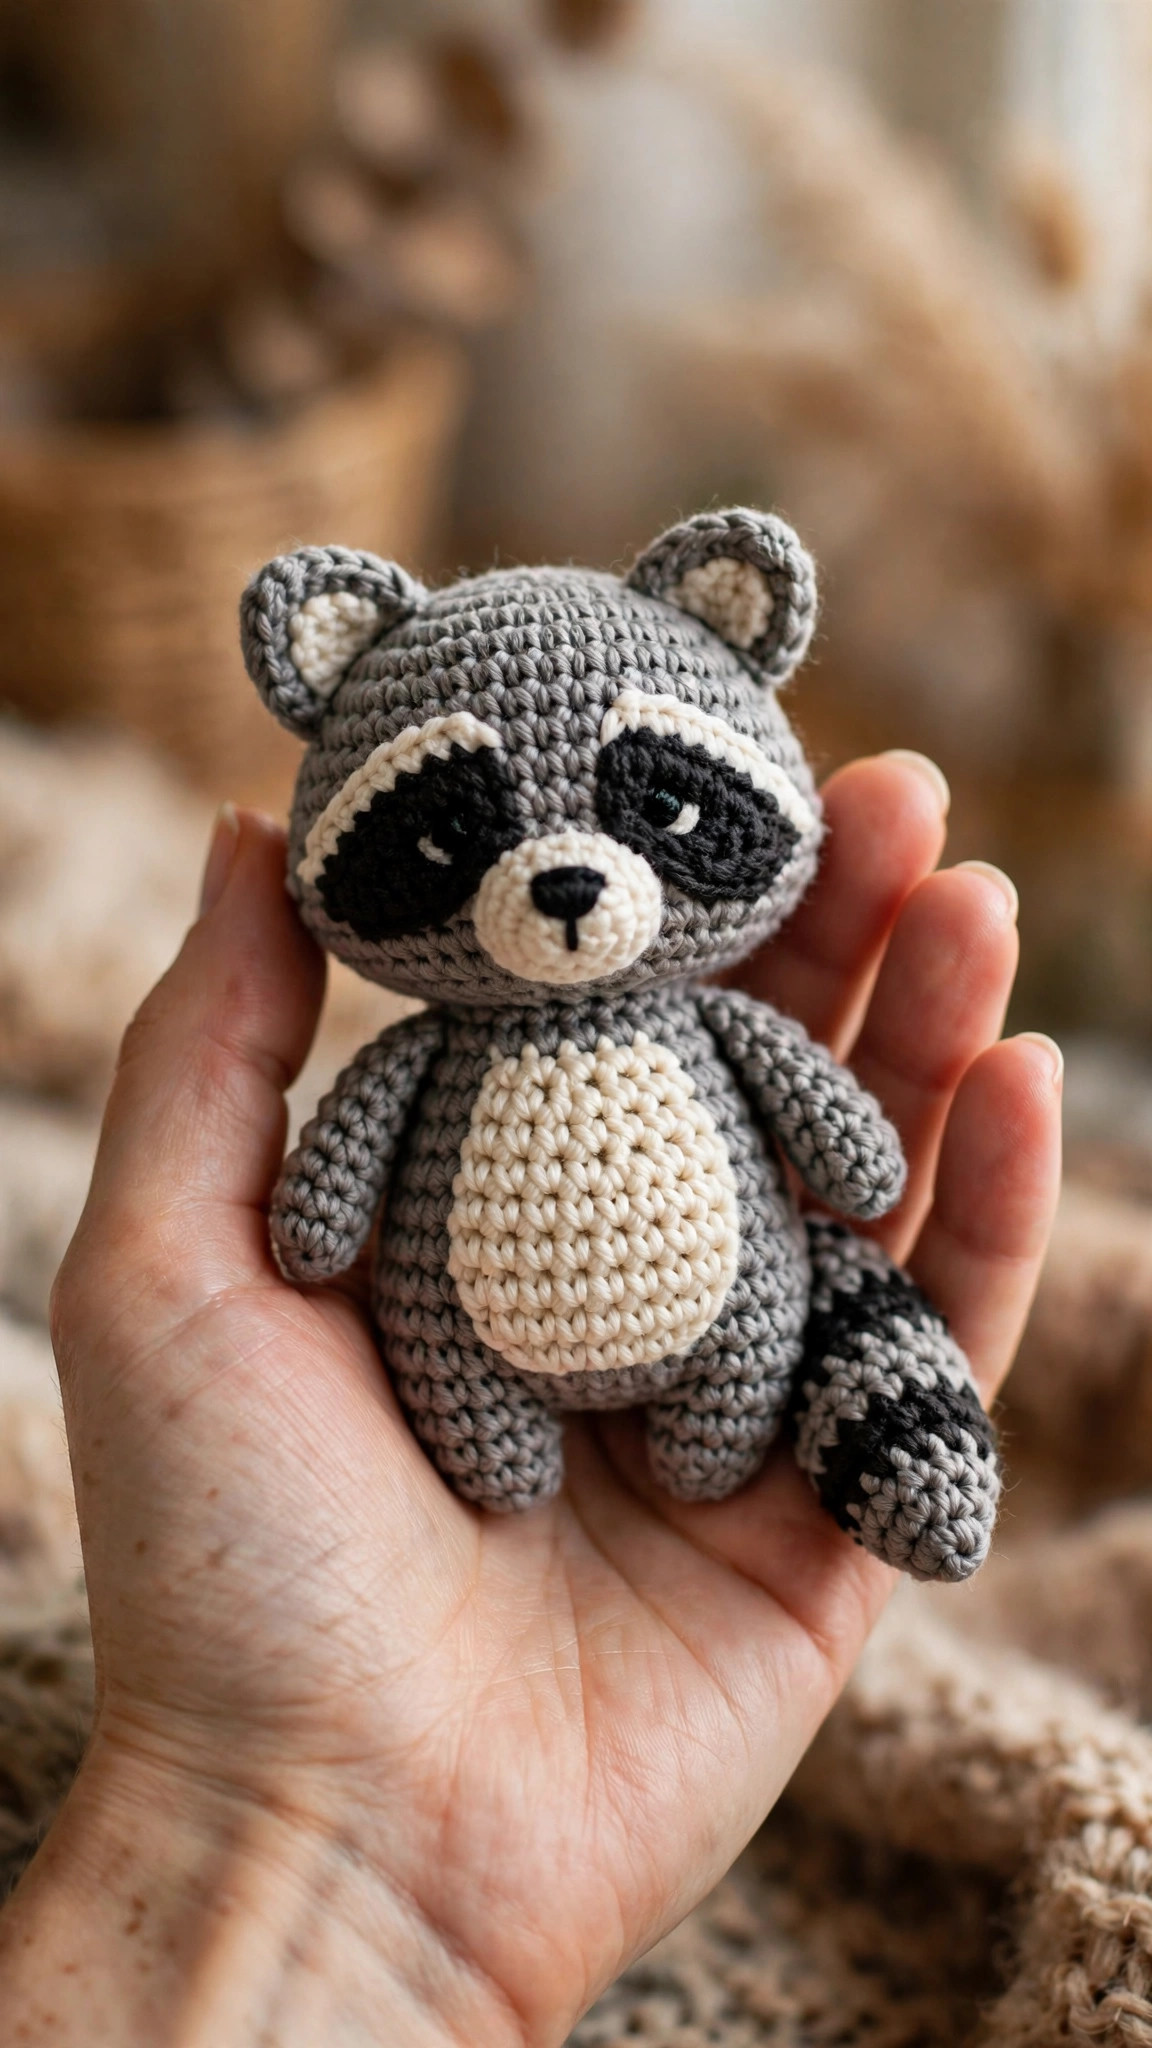
A mischievous little bandit in yarn: black mask, ringed tail, pointy ears and a cream belly. Original design in US terms, advanced beginner friendly.

Amigurumi · Crochet
- Finished size
- 6 in tall, sitting
- Making time
- About 4 hours
- Hook
- 4.0 mm, worsted yarn
- Set
- Original design, US terms
- Skill
- Advanced Beginner
In this post
- Table of contents
- Why you'll love this free raccoon crochet pattern
- Materials you'll need
- Size, gauge and skill level
- Abbreviations, US terms
- The free raccoon crochet pattern (US terms)
- Finishing touches and assembly
- Bandit markings: tips and tricks
- Variations to try next
- Troubleshooting tips
- Frequently asked questions
- More free patterns to try
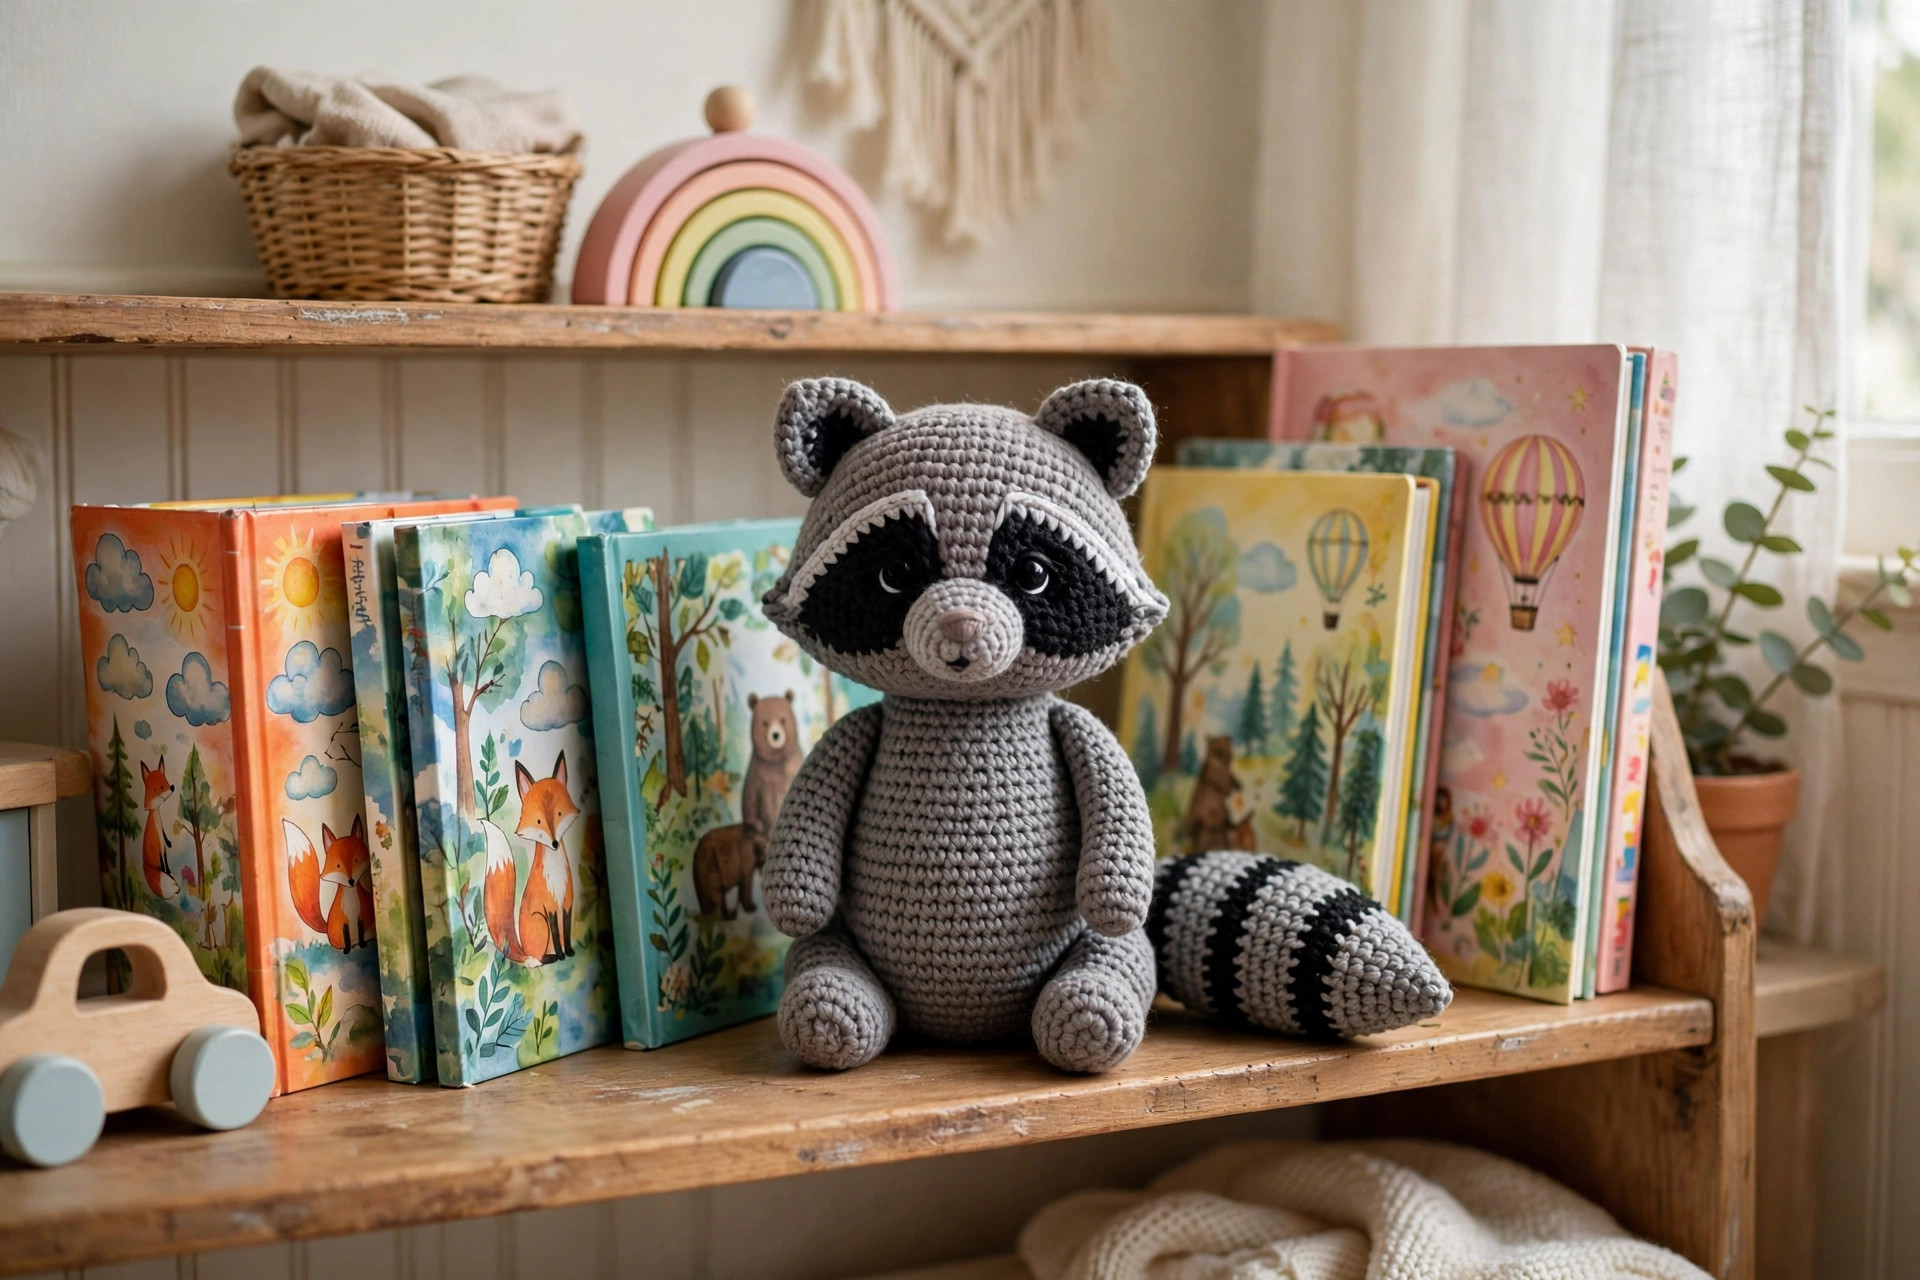
If you have been hunting for a free raccoon crochet pattern that actually looks like a raccoon and not a gray blob, this little bandit is the one to make. He has the whole look: the black bandit mask, the ringed tail, the pointy ears, the cream belly patch, and a mischievous embroidered face that makes him look ready to steal your snacks. The design is all my own, built around the chunky proportions that make amigurumi animals irresistible: a big round head, a pear-shaped body, and a gloriously stripey tail.
This raccoon sits about 6 inches tall and takes roughly four hours from first stitch to final weave-in. Everything is worked in simple spiral rounds of single crochet, so if you can work a magic ring and count your stitches, the construction will feel familiar. Gift him to a woodland-animal lover, perch him on a nursery shelf, or keep him on your desk as a tiny partner in crime.
Table of contents
- Why you'll love this free raccoon crochet pattern
- Materials you'll need
- Size, gauge and skill level
- Abbreviations, US terms
- The free raccoon crochet pattern (US terms)
- Finishing touches and assembly
- Bandit markings: tips and tricks
- Variations to try next
- Troubleshooting tips
- Frequently asked questions
- More free patterns to try
Why you'll love this free raccoon crochet pattern
Raccoons are the tricksters of the animal kingdom, and this pattern captures that personality in every detail. The black mask is the star of the show: a smooth oval worked in dark charcoal yarn that sits across the face like a tiny domino mask, with the eyes placed right on it so they pop. Behind the mask, the gray head is a big soft sphere, and the cream muzzle and belly patch break up the gray exactly the way real raccoon markings do.
The body and head are worked as one piece, which means less sewing and a sturdier finished toy. The tail is where the fun lives: six alternating stripes of gray and charcoal that curl slightly when stuffed. The ears are small pointed triangles that stand up on their own, and the arms and feet are short and chubby so the raccoon sits upright without wobbling.
The mask, stripes and belly patch are perfect for using up small leftovers of dark and cream yarn. If you are new to amigurumi, start with our magic ring tutorial to get the first round neat. And if small plush animals are your thing, the mini amigurumi patterns free collection has more quick makes in the same spirit.
Materials you'll need
| Supply | What to get |
|---|---|
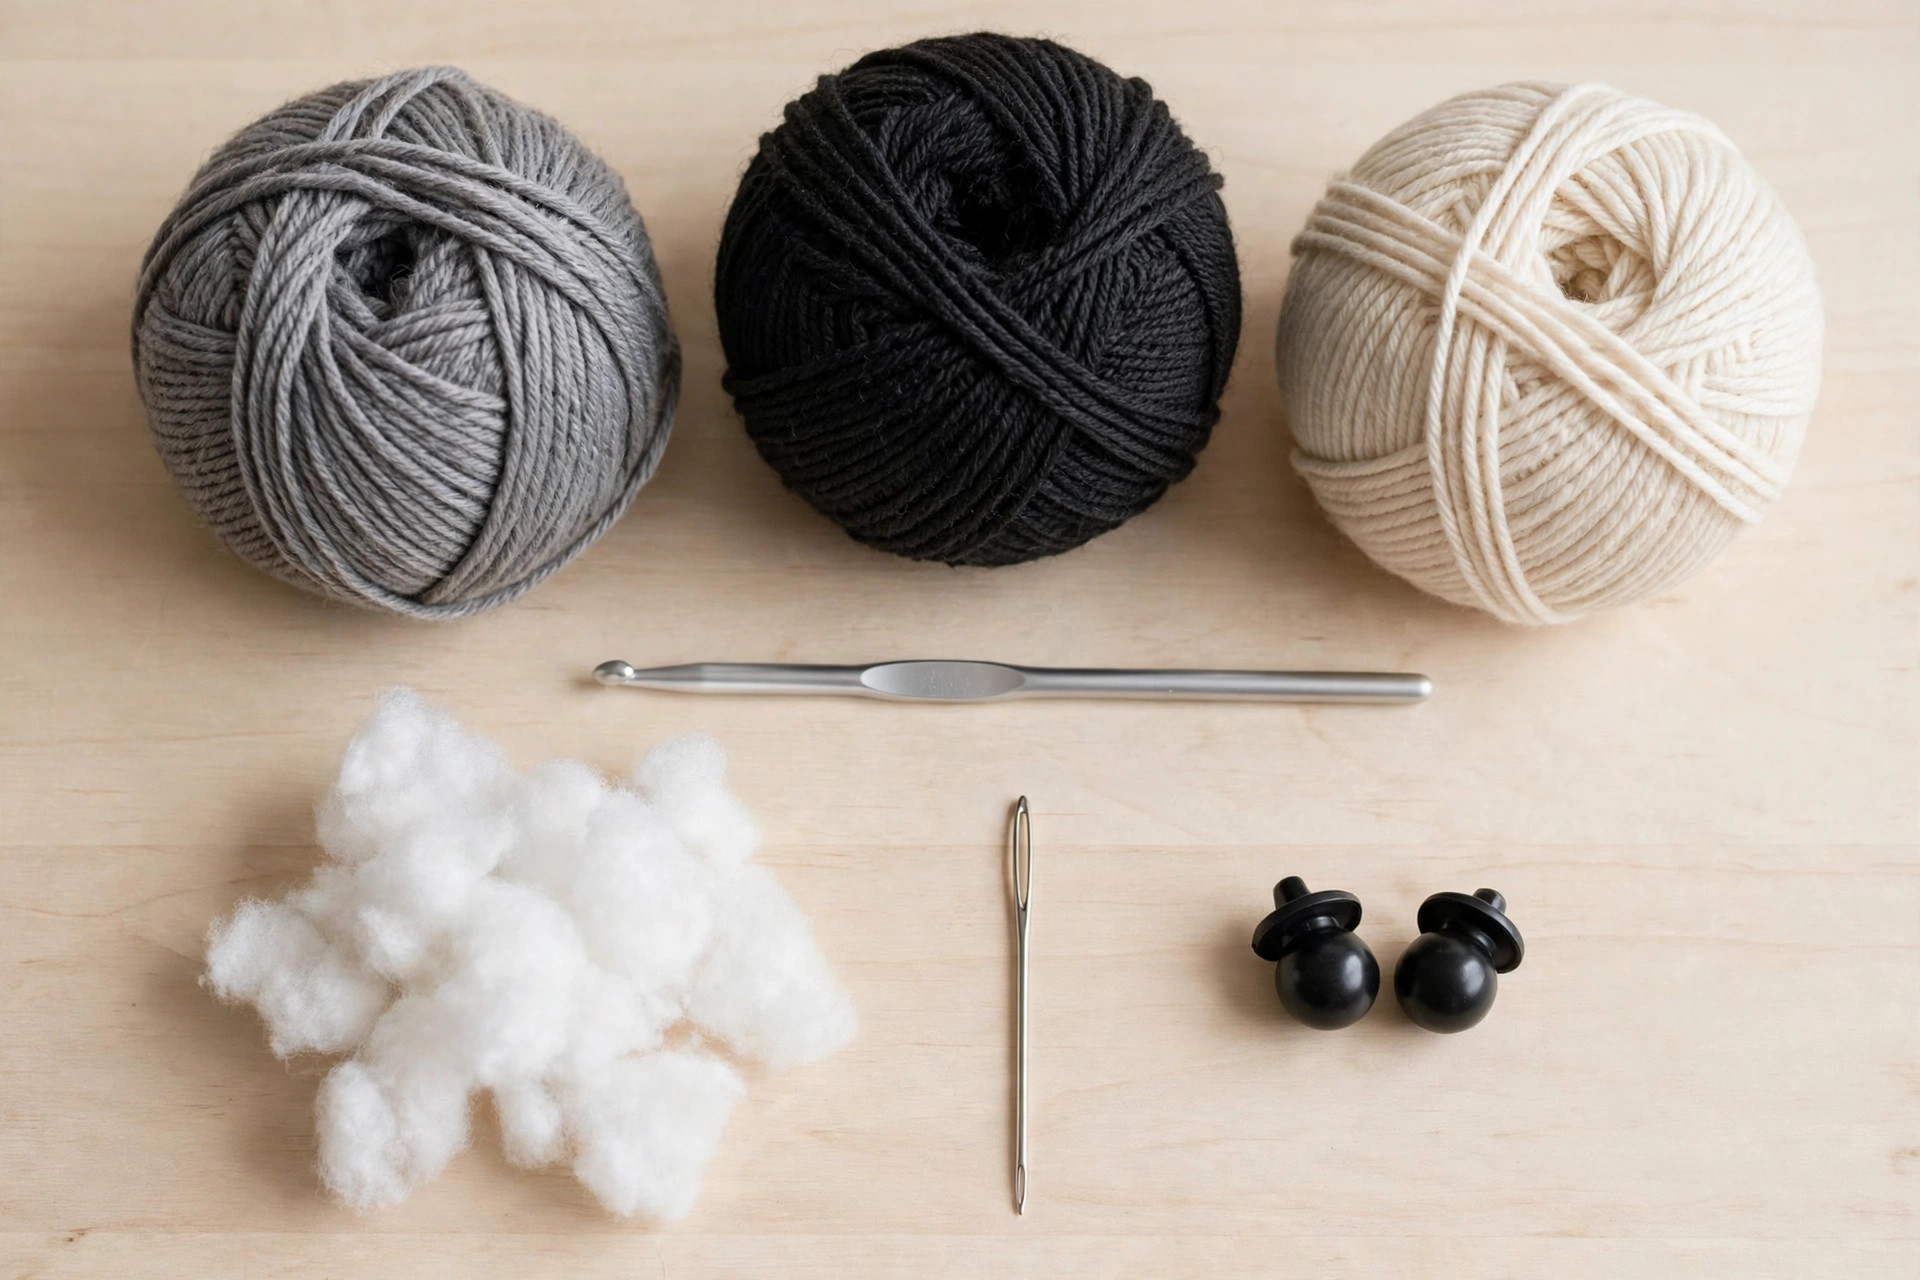
| Main yarn | Worsted-weight (#4) yarn in medium gray, about 110 yds / 100 m |
| Dark yarn | Worsted-weight (#4) yarn in charcoal or black, about 30 yds / 27 m, for the mask, ears backing and tail stripes |
| Cream yarn | Worsted-weight (#4) yarn in cream or off-white, about 20 yds / 18 m, for the muzzle and belly patch |
| Crochet hook | 4.0 mm (G) |
| Stuffing | Polyester toy stuffing, a generous handful |
| Tapestry needle | For sewing pieces together and embroidering the face |
| Eyes | Two 10 mm safety eyes, or black embroidery floss for an embroidered face |
| Notions | Scissors, stitch markers, pins for positioning pieces |
A smooth acrylic or cotton-blend worsted gives the crispest stitch definition for the stripes and mask. Choose three colors with strong contrast: the mask only reads as a mask if the charcoal is clearly darker than the gray.
A note on the hook: use a 4.0 mm hook with worsted yarn, or whatever hook gives you a tight, stuffing-proof fabric. If you can see daylight through your stitches, go down half a size.
Size, gauge and skill level
The pattern is written in one size. Work in continuous spiral rounds and mark the first stitch of each round with a stitch marker.
| Finished height | Yarn | Hook | Approx. time |
|---|---|---|---|
| 6 in / 15 cm sitting | Worsted-weight (#4) | 4.0 mm | About 4 hours |
- Finished size: about 6 in (15 cm) tall sitting, and about 4 in (10 cm) wide at the belly. The tail adds about 4 in (10 cm) of curling length behind the body.
- Gauge: 18 sc and 20 rounds = 4 in (10 cm) in worsted yarn with a 4.0 mm hook. Exact gauge is not critical for a toy, but your fabric should be tight enough that no stuffing peeks through.
- Skill level: advanced beginner. You should know how to work a magic ring, chain, single crochet, increase, and decrease, and how to change colors cleanly. The mask is worked flat in rows, and everything else is spiral rounds.
If you have made one or two amigurumi animals before, this raccoon will feel comfortably familiar.
Abbreviations, US terms
| Abbreviation | Meaning |
|---|---|
| MR | magic ring |
| ch | chain |
| sc | single crochet |
| sl st | slip stitch |
| inc | increase: 2 sc in the same stitch |
| dec | decrease: invisible decrease, sc 2 together through the front loops |
| st(s) | stitch(es) |
| R | round |
| Row | row, worked flat and turned |
| FO | fasten off |
| [ ] | total stitch count at the end of the round or row |
A note on color changes: to keep the tail stripes crisp, work the last yarn-over of the final stitch in the old color with the new color. Complete the stitch with the new yarn, then carry the old color loosely inside the tail or cut it and weave the ends later. Tug the first stitch of the new color gently so the join sits tight.
The free raccoon crochet pattern (US terms)
Work all pieces in continuous spiral rounds unless a section says Row. Stuff pieces firmly as you go, a little at a time, shaping with your fingers.
Body and head: one piece, bottom to top
With gray yarn, start at the base of the body.
- R1: MR, 6 sc in ring. [6]
- R2: inc in each st around. [12]
- R3: (sc, inc) x6. [18]
- R4: (2 sc, inc) x6. [24]
- R5: (3 sc, inc) x6. [30]
- R6-R10: sc in each st around. [30]
- R11: (3 sc, dec) x6. [24]
- R12: (2 sc, dec) x6. [18]
Begin stuffing the body now, shaping a rounded pear. Press the base flat so the raccoon will sit.
- R13-R14: sc in each st around. [18]
- R15: (2 sc, inc) x6. [24]
- R16: (3 sc, inc) x6. [30]
- R17-R21: sc in each st around. [30]
- R22: (3 sc, dec) x6. [24]
- R23: (2 sc, dec) x6. [18]
Stuff the head firmly into a smooth sphere, pushing extra stuffing into the cheeks.
- R24: (sc, dec) x6. [12]
- R25: dec x6. [6]
FO, thread the tail through the front loops of the last round, pull tight to close, and weave the end into the head.
Mask: the black bandit oval
With charcoal yarn, work flat in rows.
- Row 1: ch 14. Sc in the 2nd ch from the hook and in each ch across. [13] Ch 1, turn.
- Row 2: sc in each st across. [13] Ch 1, turn.
- Row 3: dec, 9 sc, dec. [11] Ch 1, turn.
- Row 4: sc in each st across. [11] Ch 1, turn.
- Row 5: dec, 7 sc, dec. [9]
FO, leaving a long tail for sewing. Do not block it; the curve of the head will shape the oval when sewn on.
Muzzle: cream oval
With cream yarn:
- R1: MR, 6 sc in ring. [6]
- R2: inc in each st around. [12]
- R3: (sc, inc) x6. [18]
- R4: sc in each st around. [18]
FO, leaving a long tail. Stuff lightly, just enough to dome it, and set aside for assembly.
Ears: pointy triangles (make 2)
With gray yarn:
- R1: MR, 6 sc in ring. [6]
- R2: (sc, inc) x3. [9]
- R3: (2 sc, inc) x3. [12]
- R4: sc in each st around. [12]
FO, leaving a long tail. Flatten each ear between your fingers into a triangle; do not stuff. For a darker ear tip, work R1-R2 in charcoal and R3-R4 in gray.
Arms: short and chubby (make 2)
With gray yarn:
- R1: MR, 6 sc in ring. [6]
- R2: (sc, inc) x3. [9]
- R3-R5: sc in each st around. [9]
- R6: (sc, dec) x3. [6]
- R7-R8: sc in each st around. [6]
Stuff the lower half lightly, flatten the top. FO, leaving a long tail.
Feet: rounded paws (make 2)
With gray yarn:
- R1: MR, 6 sc in ring. [6]
- R2: inc in each st around. [12]
- R3: (sc, inc) x6. [18]
- R4: sc in the back loops only. [18]
- R5-R6: sc in each st around. [18]
- R7: (sc, dec) x6. [12]
- R8: dec x6. [6]
The back-loop round at R4 creates a crisp edge where the paw meets the leg. Stuff lightly, close, and FO with a long tail.
Tail: the ringed showpiece
Alternate gray and charcoal every two rounds. Start with gray.
- R1: MR, 6 sc in ring. [6]
- R2: inc in each st around. [12]
- R3-R4: sc in each st around, gray. [12]
- R5-R6: sc in each st around, charcoal. [12]
- R7-R8: sc in each st around, gray. [12]
- R9-R10: sc in each st around, charcoal. [12]
- R11-R12: sc in each st around, gray. [12]
- R13: (sc, dec) x4, charcoal. [8]
- R14: sc in each st around, charcoal. [8]
Stuff the tail lightly so it stays soft and slightly floppy. FO with charcoal, leaving a long tail for sewing.
Belly patch: cream oval
With cream yarn, work flat:
- Row 1: ch 9. Sc in the 2nd ch from the hook and next 6 ch, 3 sc in the last ch; working down the other side of the chain, 6 sc, 2 sc in the last ch. [18]
- Row 2: inc, 6 sc, inc x3, 6 sc, inc x2. [24] Sl st to the first st.
FO, leaving a long tail. The patch should be a flat oval about 3 in long.
Finishing touches and assembly
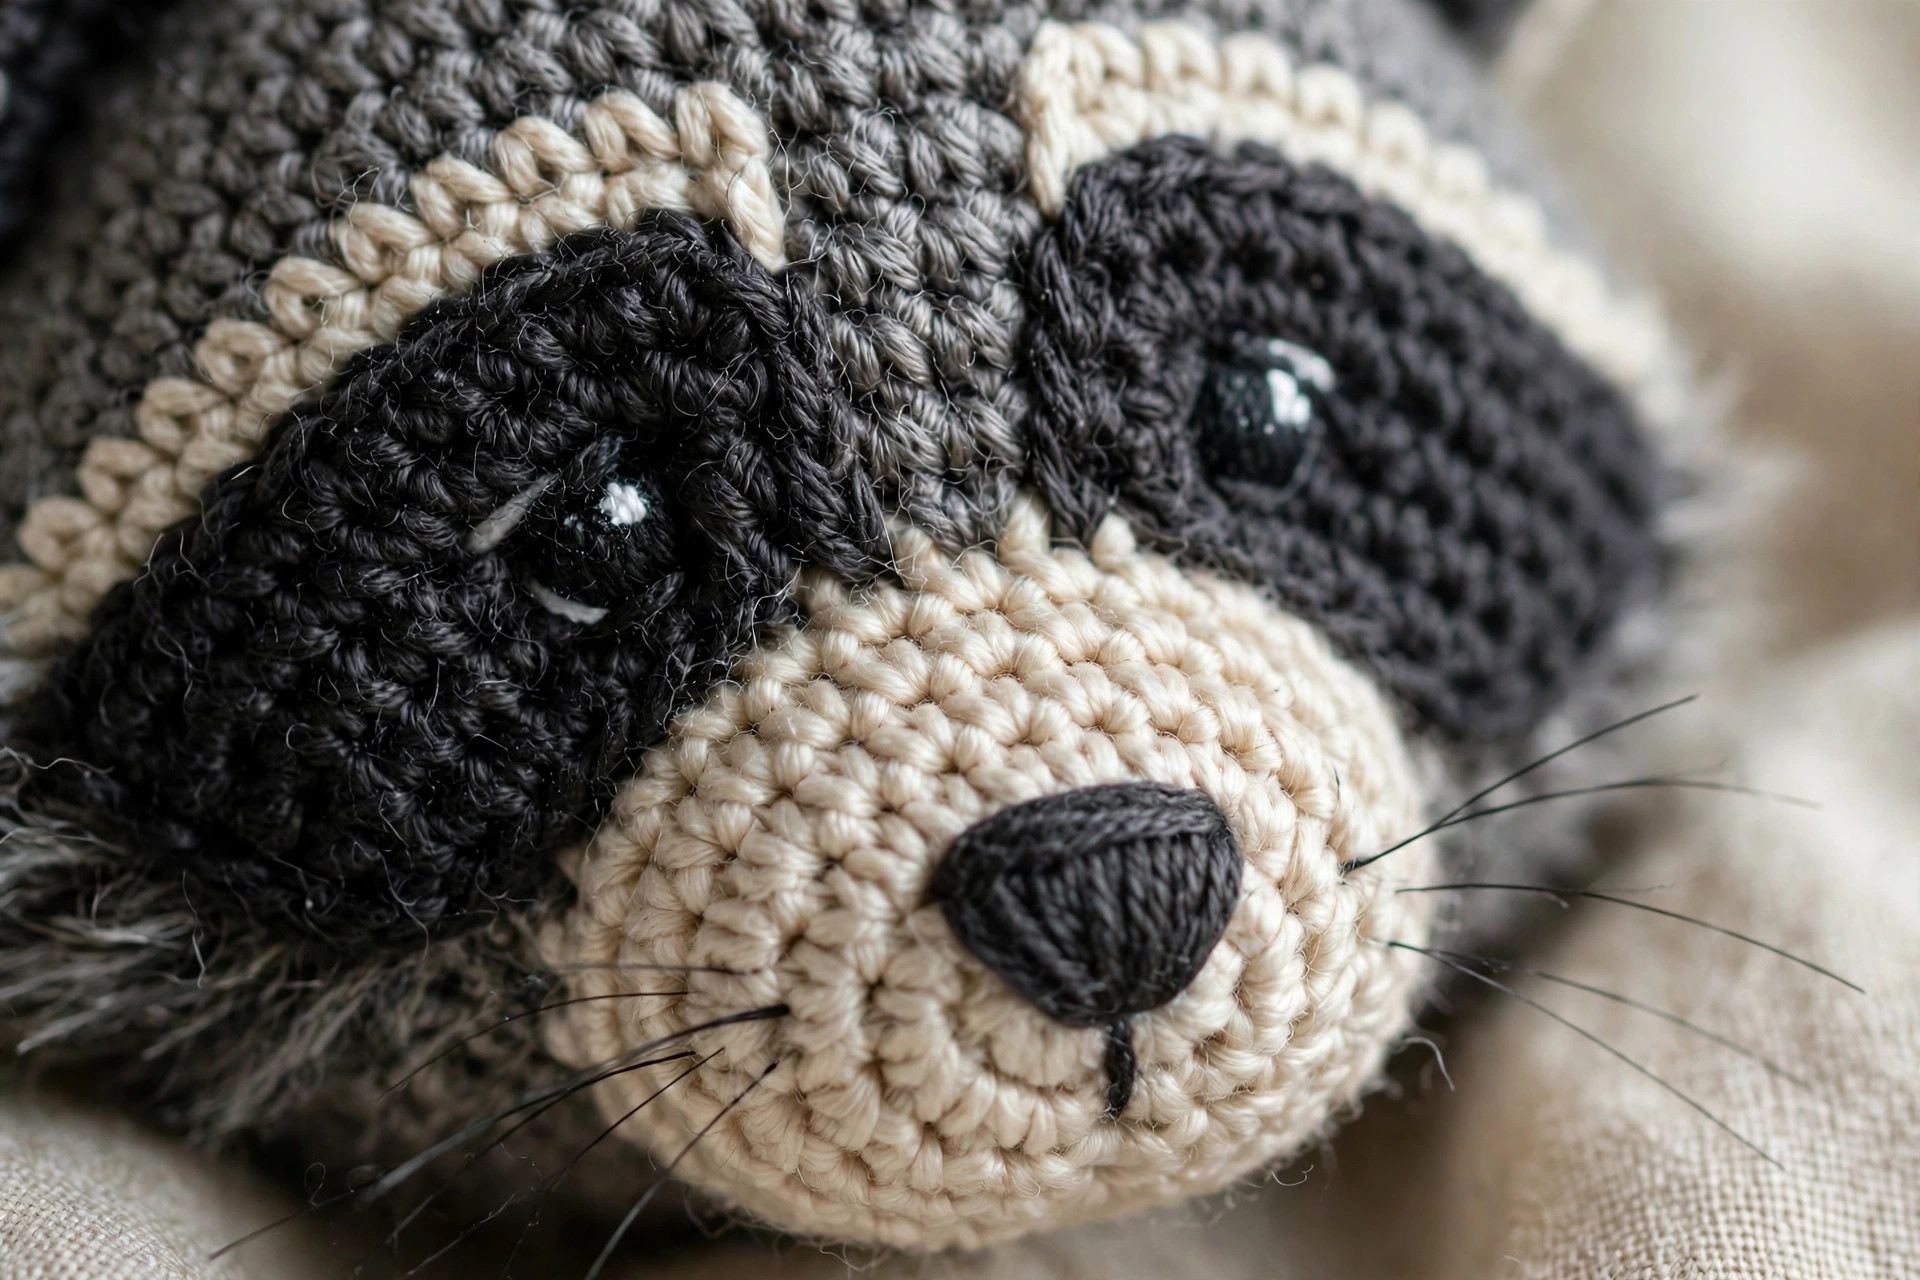
Sew on the mask. Center the charcoal oval on the face at about R19-R20, top edge just below the crown. Pin it in place and sew around the edge with small whipstitches, easing the flat oval onto the curved head.
Add the eyes. If using safety eyes, push two 10 mm eyes through the mask about 6 stitches apart and secure the washers inside before the head is fully closed (do this before R25). If embroidering, use black floss to stitch two small vertical ovals on the mask in the same positions, stacking 4 or 5 straight stitches side by side, and add one tiny white stitch at the top corner of each eye for a catchlight.
Attach the muzzle. Pin the cream muzzle just below the mask, overlapping its bottom edge slightly, and sew around with cream yarn, stuffing lightly as you close the seam.
Embroider the nose and mouth. With charcoal floss, stitch a small triangle nose on the upper center of the muzzle, about 3 stitches wide. From the bottom point of the triangle, work a short vertical line down one round, then two small curves sweeping outward for the mouth.
Sew on the ears. Flatten each ear into a triangle and pin them to the top sides of the head at about R21, angled slightly outward. Sew through the base of each ear with small whipstitches.
Attach the arms and feet. Sew the arms to the sides of the body at about R8, angled slightly forward. Sew the feet to the front base of the body at about R4, side by side, so they act as little kickstands.
Sew on the tail. Pin the tail to the back of the body at about R6-R7, charcoal tip curling up, and sew around the base twice so it can take some handling.
Add the belly patch. Center the cream oval on the front of the body and sew around the edge with cream yarn.
Weave every end. Run each tail through the stuffing for at least 2 inches, changing direction once so it locks, then trim flush.
Bandit markings: tips and tricks
The difference between a raccoon and a gray teddy bear is all in the markings:
Make the mask wide enough. The most common mistake is a mask that is too small, which reads as sunglasses instead of a bandit mask. The finished oval should span roughly half the width of the face. When in doubt, add one more increase row rather than one less.
Keep stripe edges sharp. Change colors on the last yarn-over of the final stitch, and pull the first stitch of the new color snug.
Place the eyes on the mask, not above it. Eyes sitting on the charcoal oval with a catchlight stitch look alert and mischievous; eyes above the mask look surprised.
Brush the tail lightly. Brush the finished tail gently with a slicker brush to fluff the stitches: it softens the stripe edges just enough to look like fur.
Variations to try next
Once you have made the classic gray bandit, try these:
- Sleepy baby raccoon. Work the pattern as written but embroider closed eyes: two small curved lines instead of open eyes. It reads instantly as a sleeping baby and makes a beloved nursery gift. For another sleepy woodland friend, our crochet fox pattern free uses similar shaping with a very different personality.
- Trash panda with attitude. Add a tiny crocheted top hat or a miniature paper coffee cup in his paws, and embroider a smug little smirk instead of a smile. The internet loves a raccoon with a backstory.
- Mini raccoon keychain. Use DK yarn and a 3.0 mm hook and follow the same rounds for a raccoon about 4 inches tall. Sew everything extra firmly and add a keychain ring through the top of the head. Our crochet squirrel pattern free scales down just as well for a matching woodland set.
Troubleshooting tips
- The mask puckers when sewn on. You are sewing a flat oval onto a curved surface. Pin the center first, then ease the edges down gradually, adding pins as you go instead of stretching the mask flat.
- The tail stripes look wobbly. The color changes are drifting because the round start moved. Mark the first stitch of every round and change colors exactly at the marker, even if the stripe looks one stitch off from the last.
- The raccoon will not sit up. The base is too round or the feet are sewn too high. Press the base flat while the stuffing is fresh, and sew the feet low at the front so they prop the body upright.
- The ears flop instead of standing. They were stuffed or sewn too far apart. The ears should be unstuffed, flattened into triangles, and sewn close enough together that they support each other.
Frequently asked questions
Is this free raccoon crochet pattern really free?
Yes, the complete pattern above is free, with no email signup and no PDF purchase required.
What skill level is this raccoon pattern?
Advanced beginner. If you can work a magic ring, single crochet, increase, and decrease, and change colors at the end of a round, you have every skill this pattern needs. The mask is simple flat rows and the face is basic embroidery.
How do I make the raccoon's black mask look neat?
Pin the center of the mask to the face first, then ease the edges down gradually and sew with small whipstitches in charcoal yarn. Place the eyes inside the mask area, about 6 stitches apart.
Can I use safety eyes instead of embroidering the face?
Absolutely. Two 10 mm safety eyes pushed through the mask look fantastic; just attach them before you close the head. For toys meant for babies or toddlers, embroider the eyes instead.
How much yarn do I need for the raccoon?
About 110 yds of gray worsted for the body and head, 30 yds of charcoal for the mask and stripes, and 20 yds of cream for the muzzle and belly. One ball of the main color is plenty.
Can I sell the finished raccoons I make?
Yes! You may sell finished raccoons made from this pattern in small batches (craft fairs, markets, gifts). Please credit Little Loop Finds as the pattern designer.
Is this raccoon safe for babies and toddlers?
Make it with an embroidered face and no safety eyes, and there are no small hard parts to come loose. Always supervise babies with handmade toys and check the stitching regularly, especially the tail join.
More free patterns to try
If this little bandit was fun to make, keep the hook moving through the woodland: a shelf of forest animals always gets compliments.