Elephant Crochet Pattern (Amigurumi, Free)
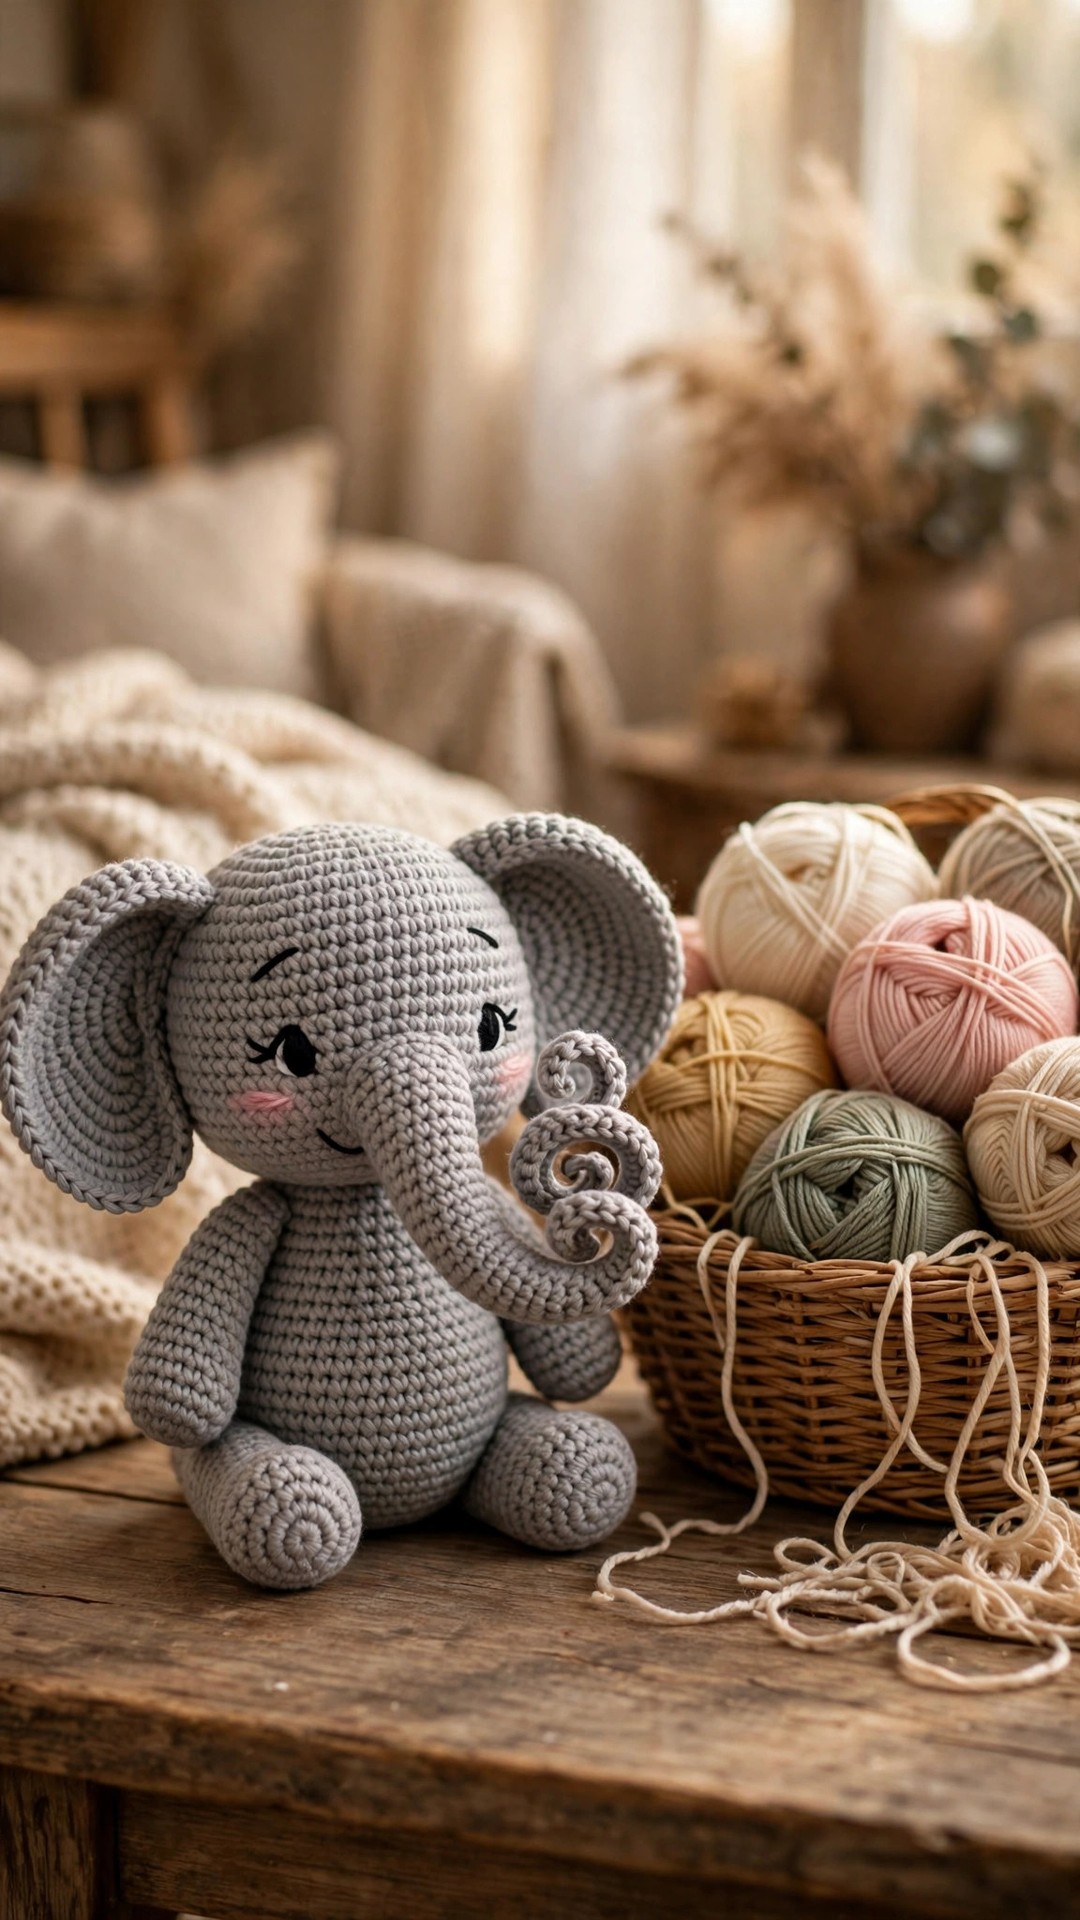
Stitch a cute amigurumi elephant with big floppy ears, a curly trunk, and a sweet stitched smile.

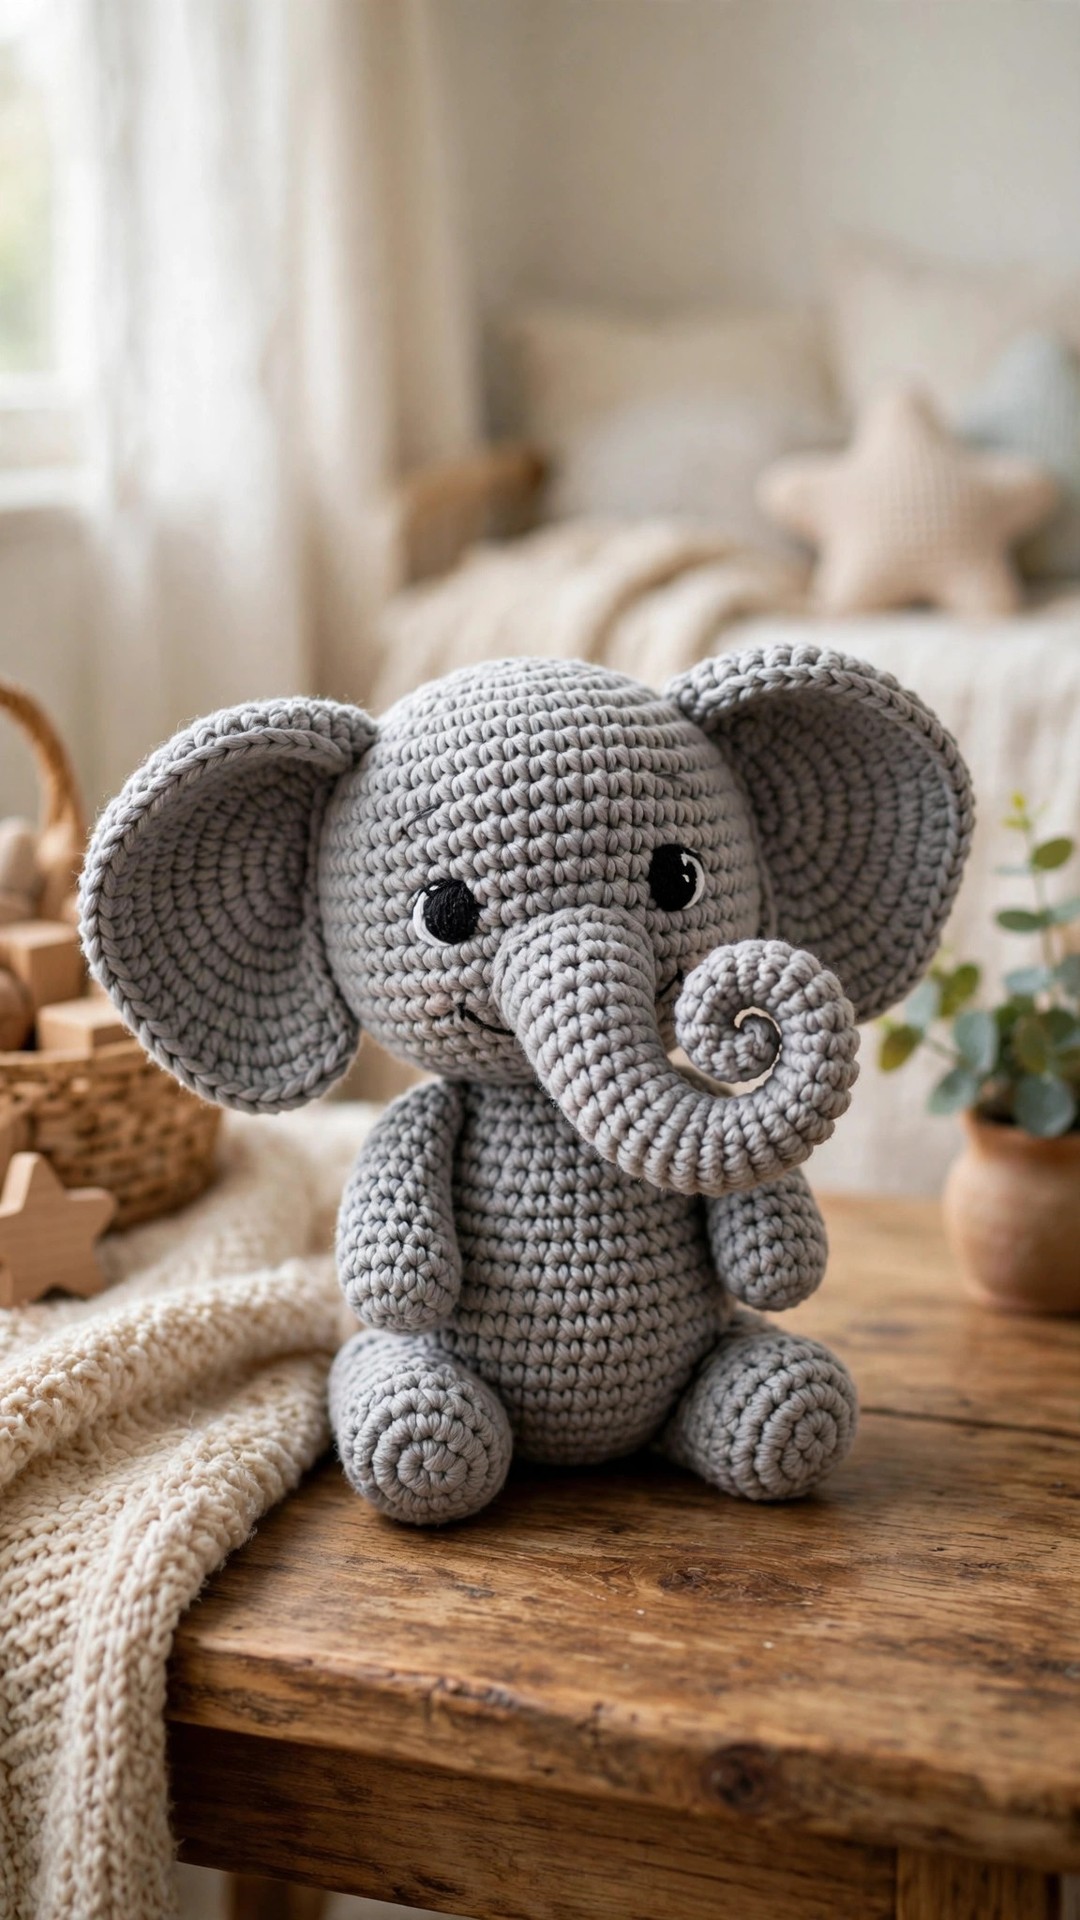
Amigurumi · Crochet
- Finished size
- 8 in tall, 6 in wide
- Making time
- 5 to 6 hours
- Hook
- US G-6 (4.0 mm)
- Set
- Head, body, ears, trunk and legs
- Skill
- Easy
In this post
- Key Takeaways
- Table of Contents
- Why You Will Love This Crochet Elephant
- Finished Size, Skill Level, and Time
- Materials You Need
- Abbreviations (US Terms)
- Gauge and Sizing Notes
- Part 1: Head and Body
- Part 2: Ears, Trunk, and Legs
- Part 3: Assembly and Face Details
- Variations: Colors, Sizes, and Baby Safe Options
- Troubleshooting Elephants That Lean or Look Lopsided
- Care Instructions
- Frequently Asked Questions
There is a reason the amigurumi elephant is one of the most loved crochet animals there is. Big floppy ears, a trunk that curls just so, and a round friendly body make it impossible not to smile at. This free elephant crochet pattern gives you a cute amigurumi elephant with big ears, a curly trunk, four sturdy legs, and a sweet stitched smile, all in one original Little Loop Finds design written in US terms.
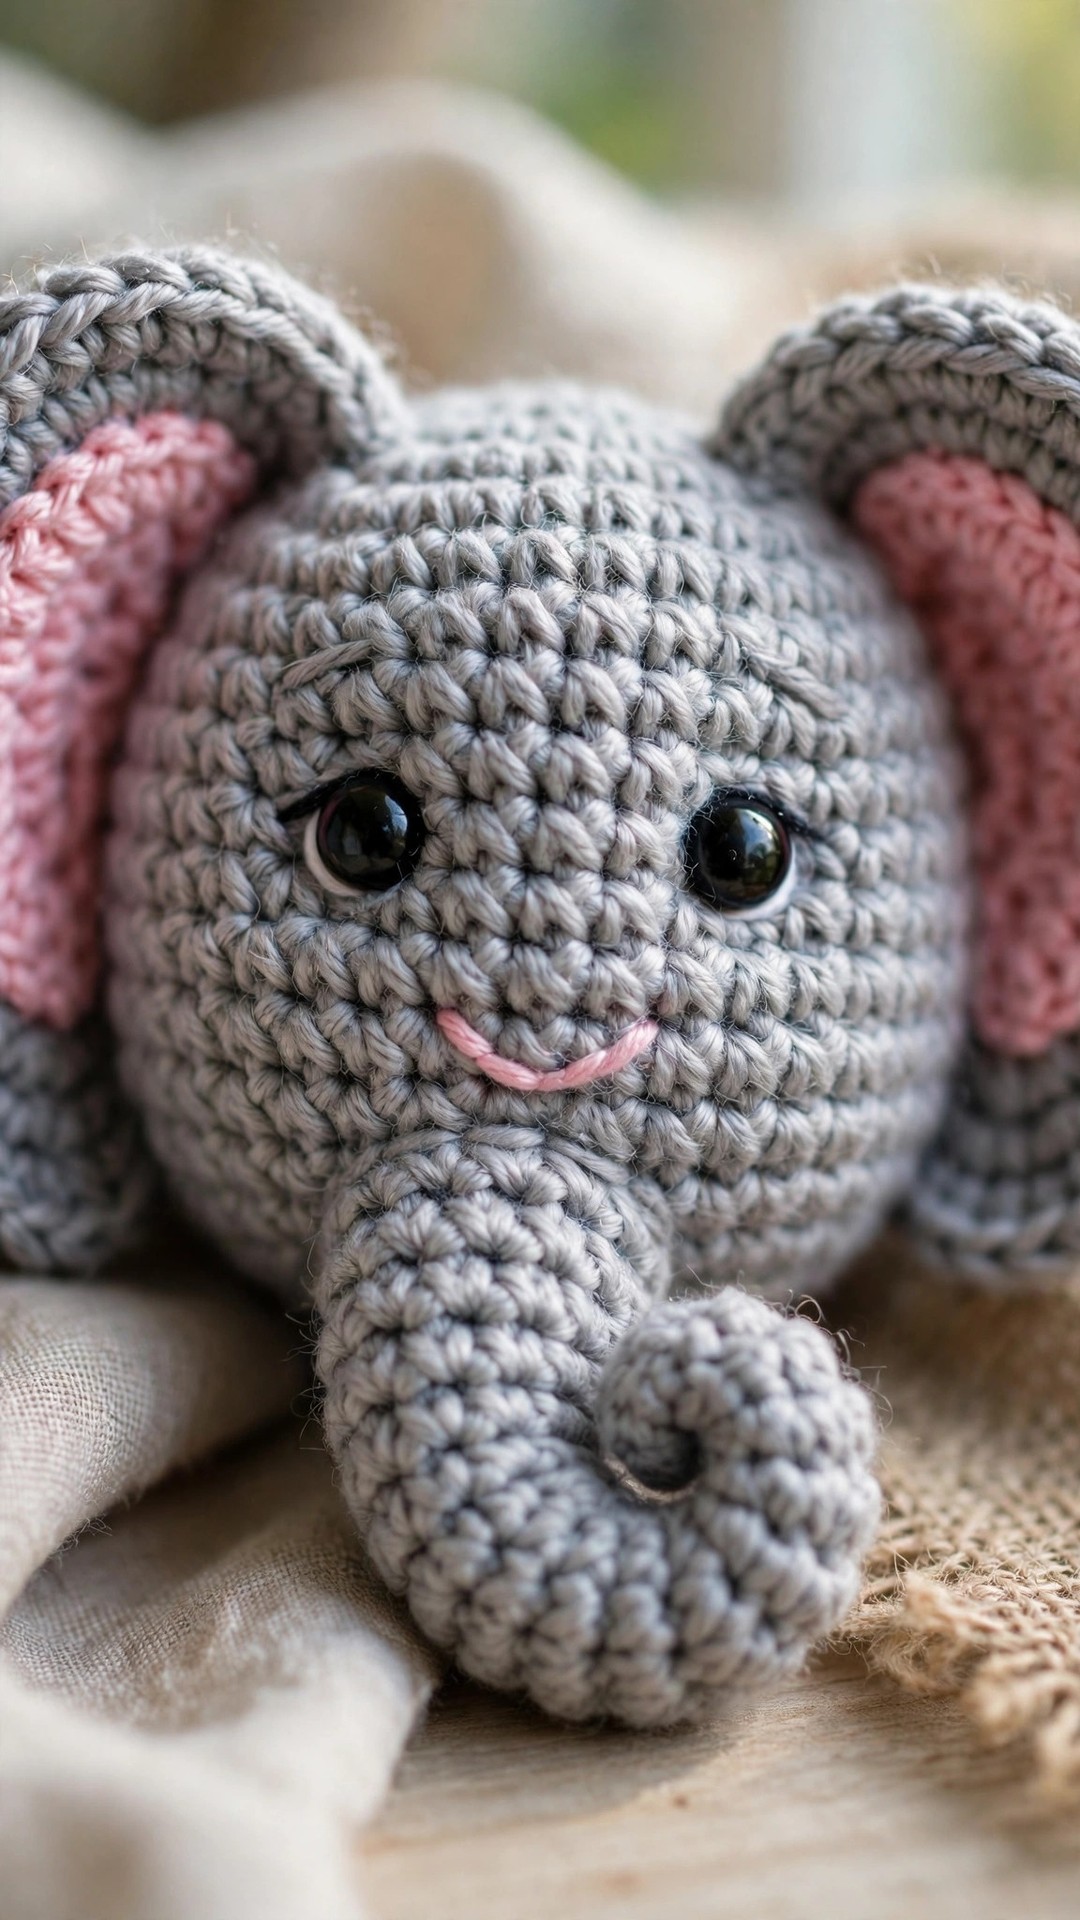
The elephant is built from simple shapes: a round head, an oval body, two flat ears, a tapered trunk, four little legs, and a tiny tail. Each piece is worked in the round with the same increase rhythm you already know from other amigurumi, so nothing here is tricky, and the assembly is just careful pinning and sewing. The ears are the star of the show, big and floppy, with a pink inner ear that makes the whole face come alive.
A quick note on scope: this post is about a freestanding amigurumi elephant toy, not a flat elephant applique and not an elephant blanket. If you want flat animals to sew onto blankets or smaller amigurumi friends, we have those too, and you will find links to them below.
Key Takeaways
- Free original pattern: this elephant crochet pattern is a Little Loop Finds original design, written in US terms, and completely free.
- Classic amigurumi elephant: round head, oval body, big floppy ears, curly trunk, four legs, and a tiny tail.
- Beginner friendly shaping: every piece is worked in the round with simple increases and decreases you can count easily.
- Weekend project: about 5 to 6 hours from first stitch to finished elephant, including assembly.
- Perfect nursery gift: soft, huggable, and safe when made with embroidered eyes, for babies and toddlers.
Table of Contents
- Why You Will Love This Crochet Elephant
- Finished Size, Skill Level, and Time
- Materials You Need
- Abbreviations (US Terms)
- Gauge and Sizing Notes
- Part 1: Head and Body
- Part 2: Ears, Trunk, and Legs
- Part 3: Assembly and Face Details
- Variations: Colors, Sizes, and Baby Safe Options
- Troubleshooting Elephants That Lean or Look Lopsided
- Care Instructions
- Frequently Asked Questions
Why You Will Love This Crochet Elephant
Elephants mean good luck, wisdom, and gentle strength in so many cultures, and that is part of why they make such meaningful handmade gifts. A crochet elephant is the classic baby shower gift and the nursery shelf companion, and making one by hand adds a layer of love no shop toy can match.
This design is also a great next step if you have made one or two amigurumi animals already. The head and body use the same increase rhythm as a ball, so they feel familiar, while the ears and trunk teach you two new skills: working flat shapes for the ears and working a gentle taper for the trunk.
Finished Size, Skill Level, and Time
- Finished size: about 8 inches tall (including the ears) and 6 inches wide, in worsted weight yarn.
- Skill level: Easy. You need a magic ring, chains, slip stitches, single crochet, increases, and decreases, plus basic sewing.
- Time: about 5 to 6 hours total: roughly 1 hour for the head, 1 hour for the body, 1 hour for the ears and trunk, 1 hour for the legs and tail, and 1 to 2 hours for assembly and face details.
Materials You Need
| Item | What to get |
|---|---|
| Yarn, main color | Worsted weight (medium 4) acrylic or cotton in soft grey, about 200 yards |
| Yarn, accent color | Small amounts of dusty pink (inner ears) and dark grey or black (face details) |
| Hook | US G-6 (4.0 mm), or the size that gives you a firm fabric with your yarn |
| Stuffing | Polyester fiberfill, about one bag per elephant |
| Eyes | 12 mm safety eyes, or black yarn for an embroidered baby safe face |
| Notions | Tapestry needle, scissors, stitch markers, pins for assembly |
Acrylic yarn is a great choice here because it is soft, washable, and comes in every shade of grey, blue, and pink you could want. Whichever you choose, work with a hook one size smaller than you normally would for that yarn, because a firm fabric keeps the stuffing from showing through and helps the legs hold their shape.
A safety note for baby gifts: if this elephant is for a child under three, skip the safety eyes and embroider the eyes with black yarn instead.
Abbreviations (US Terms)
- ch = chain
- sl st = slip stitch
- sc = single crochet
- hdc = half double crochet
- dc = double crochet
- inc = increase (2 sc in the same stitch)
- dec = decrease (sc 2 together)
- BLO = back loop only
- FLO = front loop only
- st(s) = stitch(es)
- rnd(s) = round(s)
- rep = repeat
- MR = magic ring
Gauge and Sizing Notes
Gauge for amigurumi is more about firmness than exact numbers. Work 4 inches of single crochet in the round and check that you cannot easily see stuffing through the fabric. If you can, go down a hook size.
To make a smaller elephant, use DK weight yarn and a 3.5 mm hook, which gives you an elephant about 6 inches tall. To make a larger elephant, use chunky yarn and a 5.5 mm hook, which gives you one closer to 11 inches tall.
Part 1: Head and Body
The head and body are both worked in continuous rounds, starting with a magic ring. Use a stitch marker to mark the first stitch of each round, and stuff each piece firmly as you go.
Head
With grey yarn, MR, ch 1.
- Rnd 1: 6 sc in MR. (6 sts)
- Rnd 2: inc in each st around. (12 sts)
- Rnd 3: (sc, inc) rep around. (18 sts)
- Rnd 4: (2 sc, inc) rep around. (24 sts)
- Rnd 5: (3 sc, inc) rep around. (30 sts)
- Rnd 6: (4 sc, inc) rep around. (36 sts)
- Rnd 7: (5 sc, inc) rep around. (42 sts)
- Rnd 8: (6 sc, inc) rep around. (48 sts)
- Rnds 9 to 15: sc around. (48 sts)
- Rnd 16: (6 sc, dec) rep around. (42 sts)
- Rnd 17: (5 sc, dec) rep around. (36 sts)
- Rnd 18: (4 sc, dec) rep around. (30 sts) Stuff firmly now, shaping the head into a round ball.
- Rnd 19: (3 sc, dec) rep around. (24 sts)
- Rnd 20: (2 sc, dec) rep around. (18 sts)
- Rnd 21: (sc, dec) rep around. (12 sts)
- Rnd 22: dec around. (6 sts) Fasten off and weave in the end.
If you are using safety eyes, insert them between Rnds 12 and 13, about 8 stitches apart, before you stuff the head. The trunk will sit between and just below the eyes, so keep the spacing even.
Body
With grey yarn, MR, ch 1.
- Rnd 1: 6 sc in MR. (6 sts)
- Rnd 2: inc in each st around. (12 sts)
- Rnd 3: (sc, inc) rep around. (18 sts)
- Rnd 4: (2 sc, inc) rep around. (24 sts)
- Rnd 5: (3 sc, inc) rep around. (30 sts)
- Rnd 6: (4 sc, inc) rep around. (36 sts)
- Rnd 7: (5 sc, inc) rep around. (42 sts)
- Rnd 8: (6 sc, inc) rep around. (48 sts)
- Rnd 9: (7 sc, inc) rep around. (54 sts)
- Rnds 10 to 16: sc around. (54 sts)
- Rnd 17: (7 sc, dec) rep around. (48 sts)
- Rnd 18: (6 sc, dec) rep around. (42 sts)
- Rnd 19: (5 sc, dec) rep around. (36 sts) Stuff firmly now, shaping the body into a plump oval.
- Rnd 20: (4 sc, dec) rep around. (30 sts)
- Rnd 21: (3 sc, dec) rep around. (24 sts)
- Rnd 22: (2 sc, dec) rep around. (18 sts)
- Rnd 23: (sc, dec) rep around. (12 sts)
- Rnd 24: dec around. (6 sts) Fasten off and weave in the end. Set the body aside with the head while you make the ears and trunk.
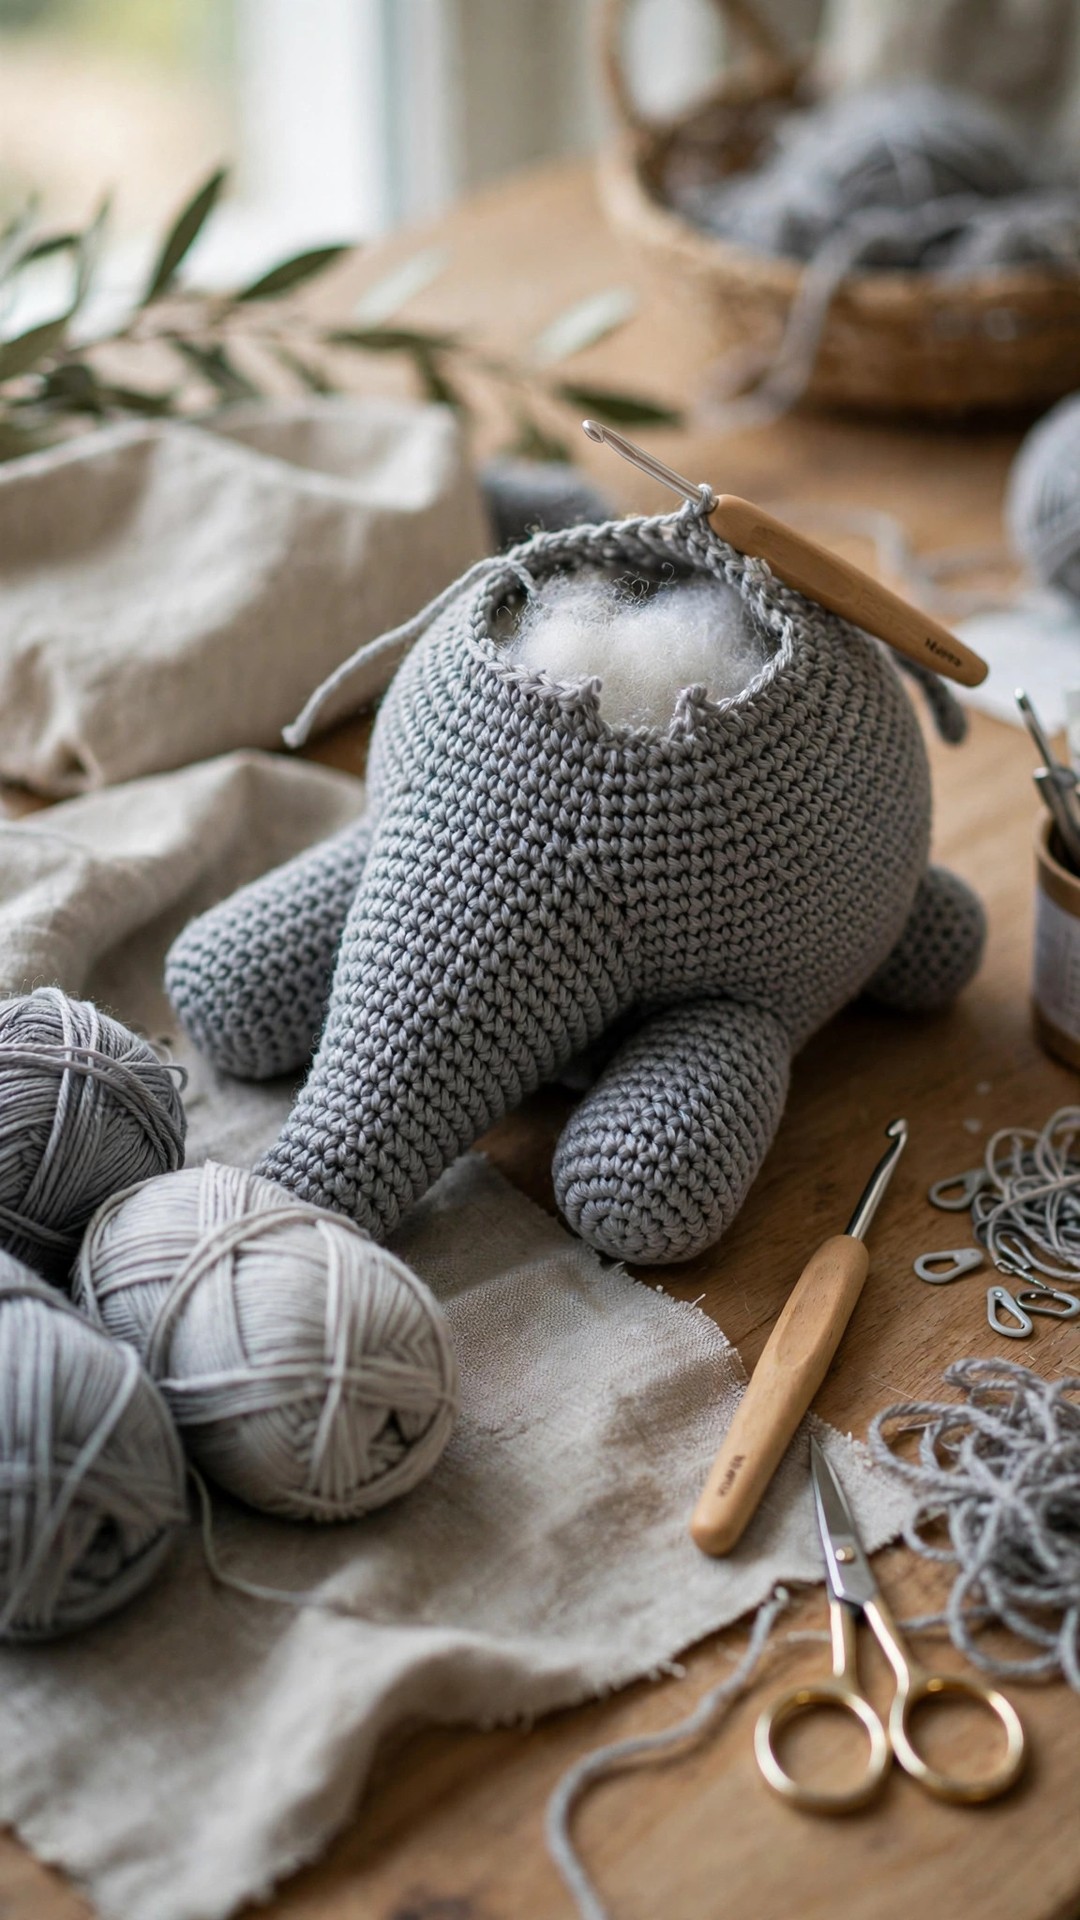
Part 2: Ears, Trunk, and Legs
Ears (make 2)
The ears are worked flat in rows, which gives them their lovely floppy shape. With grey yarn, ch 2, work 4 sc in 2nd ch from hook, turn. (4 sts)
- Row 1: ch 1, inc in each st across. (8 sts) Turn.
- Row 2: ch 1, (sc, inc) rep across. (12 sts) Turn.
- Row 3: ch 1, (2 sc, inc) rep across. (16 sts) Turn.
- Row 4: ch 1, (3 sc, inc) rep across. (20 sts) Turn.
- Row 5: ch 1, sc across. (20 sts) Turn.
- Row 6: ch 1, (4 sc, inc) rep across. (24 sts) Turn.
- Rows 7 to 9: ch 1, sc across. (24 sts) Turn.
- Row 10: ch 1, (4 sc, dec) rep across. (20 sts) Turn.
- Row 11: ch 1, sc across. (20 sts) Fasten off, leaving a long tail for sewing. Do not stuff the ears; they are meant to flop. Make two the same way.
Inner ears (make 2)
With pink yarn, work exactly as for the ears, but stop after Row 6 (24 sts) and fasten off, leaving a tail. Sew each pink inner ear to the front of a grey ear, lining up the bottom edges and leaving a small grey border showing all the way around.
Trunk
The trunk is a tube that tapers gently from the face to the tip, worked in continuous rounds. With grey yarn, MR, ch 1.
- Rnd 1: 6 sc in MR. (6 sts)
- Rnd 2: inc in each st around. (12 sts)
- Rnd 3: (sc, inc) rep around. (18 sts)
- Rnds 4 to 7: sc around. (18 sts)
- Rnd 8: (4 sc, dec) rep around. (15 sts)
- Rnds 9 to 11: sc around. (15 sts)
- Rnd 12: (3 sc, dec) rep around. (12 sts)
- Rnds 13 to 15: sc around. (12 sts)
- Rnd 16: (2 sc, dec) rep around. (9 sts)
- Rnds 17 to 18: sc around. (9 sts) Stuff the trunk lightly as you go, keeping it soft so it can curl.
- Rnd 19: (sc, dec) rep around. (6 sts)
- Rnd 20: dec around. (3 sts) Fasten off, leaving a long tail for sewing. The trunk should be about 4 inches long, wide where it joins the face and narrow at the tip.
Legs (make 4)
With grey yarn, MR, ch 1.
- Rnd 1: 6 sc in MR. (6 sts)
- Rnd 2: inc in each st around. (12 sts)
- Rnd 3: (sc, inc) rep around. (18 sts)
- Rnd 4: in BLO, sc around. (18 sts) This creates the flat bottom of the foot.
- Rnds 5 to 9: sc around. (18 sts)
- Rnd 10: (sc, dec) rep around. (12 sts) Stuff firmly.
- Rnd 11: sc around. (12 sts)
- Rnd 12: dec around. (6 sts) Fasten off, leaving a long tail for sewing. Make four legs the same way.
Tail
With grey yarn, ch 12, sl st in 2nd ch from hook and in each ch across. Fasten off, leaving a tail. Make a tiny tassel by wrapping grey yarn around two fingers six times, tying it in the middle, cutting the loops, and trimming it short, then sew the tassel to the end of the tail chain.
Part 3: Assembly and Face Details
Assembly is where a pile of grey pieces becomes an elephant, so take your time and pin everything before you sew.
- Sew the head to the front top of the body, tilting it slightly forward, with several passes through both pieces. Pin first, check from the side that the head sits high and proud, then sew.
- Sew the trunk to the center of the face, between and just below the eyes, with the wide end against the head. Curve the tip gently upward as you sew the last few stitches, so the trunk has its classic happy curl.
- Sew the ears to the sides of the head, with the top of each ear level with the top of the head and the pink inner ear facing forward. Let the ears flop naturally; if they stick straight out, sew them down a little lower on the head.
- Sew the legs to the bottom of the body, two at the front and two at the back, spacing them evenly so the elephant stands level. Check from the front and the side before you finish each leg.
- Sew the tail to the back of the body, at about the middle height, letting it hang down with the tassel at the end.
- Embroider the smile: with dark grey or black yarn, make a small curved stitch under the trunk, like a gentle U shape. A mini amigurumi patterns free collection has more small friends to make next, and an amigurumi doll free pattern is a lovely companion gift for the same nursery.
Stand the elephant on a table and step back. The ears should frame the face, the trunk should curl up, and the legs should hold the body level. If the head tilts, add a few extra stitches at the neck join. If the trunk points down, sew one more stitch through the tip and the face to lift it.
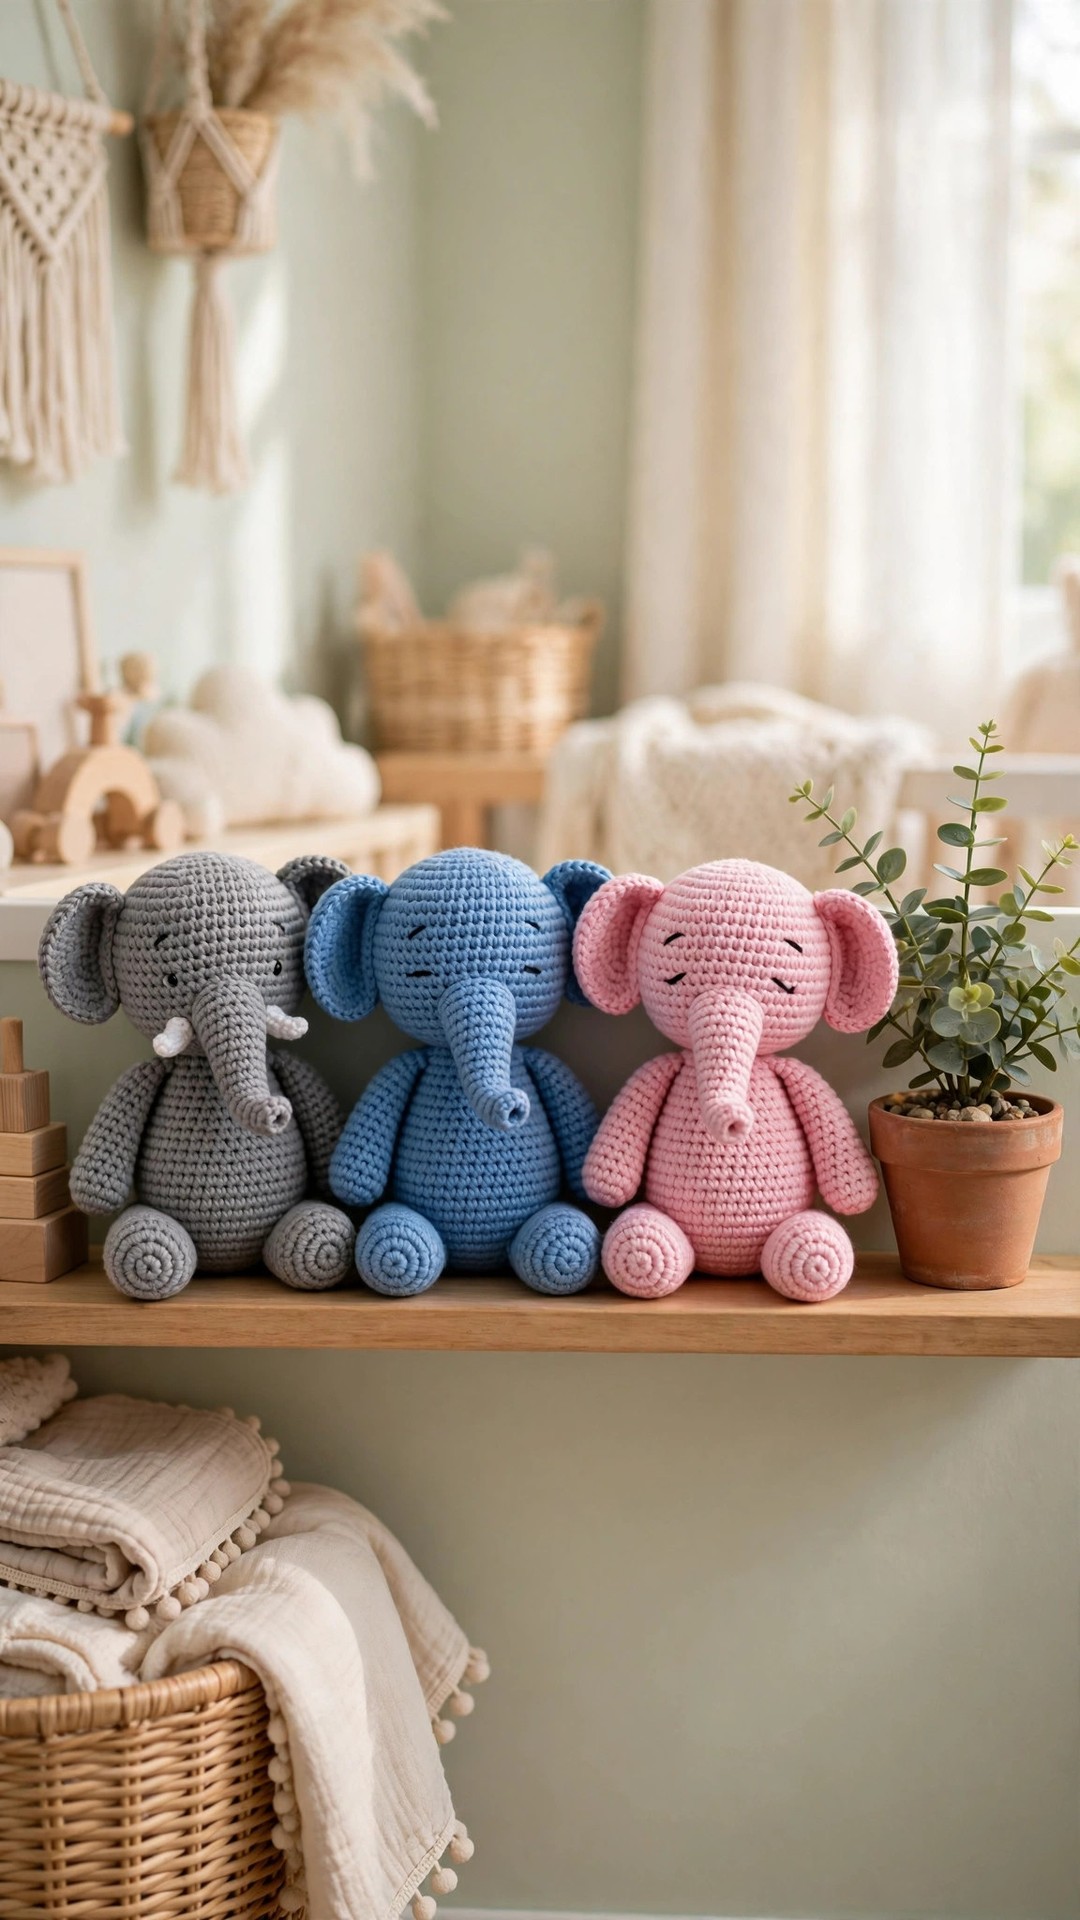
Variations: Colors, Sizes, and Baby Safe Options
- Classic grey elephant: work the whole elephant in soft grey with dusty pink inner ears, for the most traditional nursery look.
- Blush pink girl: use soft pink yarn with white inner ears for a baby girl gift, and add a small crochet flower on one ear.
- Lavender dream: use lavender yarn with lilac inner ears for a whimsical shelf elephant that matches a purple nursery.
- Baby safe version: embroider the eyes with black yarn, skip the safety eyes, and sew every piece with extra passes, so the elephant is safe for babies and toddlers who chew on their toys.
If you love making amigurumi animals, an amigurumi body pattern free teaches the shaping behind every plush toy, and a crochet highland cow plush is the perfect next animal for your collection.
Troubleshooting Elephants That Lean or Look Lopsided
- My elephant leans to one side. This is almost always an uneven leg. Unpick the shortest leg, re-pin it while the elephant stands on a flat table, and sew it again. A few stitches at the join makes a big difference at the top.
- The head flops forward. The neck join is too small. Sew around the join again with several more passes, catching the head and the body deeply, and add a little more stuffing to the neck area.
- The ears stick straight out. They are sewn too high on the head. Move them down by half an inch and angle the tops slightly backward, so they flop naturally against the head.
- The trunk will not curl. Sew one stitch through the tip of the trunk and into the face just above the mouth, pulling gently, and the trunk will hold its curl. You can also bend a short piece of floral wire inside the trunk before you stuff it, for a poseable trunk.
- I can see stuffing through the stitches. Go down a hook size for the next piece, and for the finished elephant, add a thin inner lining of matching felt inside the worst piece if needed.
Care Instructions
Spot clean your elephant with a damp cloth and a tiny amount of mild soap, then let it air dry completely. If the yarn label says it is machine washable, you can wash the elephant on a gentle cold cycle inside a pillowcase, then reshape it and let it air dry. Do not put it in the dryer, because the heat can melt safety eyes and flatten the stuffing.
Frequently Asked Questions
Is this elephant crochet pattern good for beginners?
Yes, with one caveat: it is best as a second or third amigurumi project, not your very first. You should be comfortable with a magic ring, single crochet, and increases and decreases. If those feel familiar, every piece here is just the same increase rhythm repeated, and the assembly is simple sewing.
How tall is the finished elephant?
About 8 inches tall including the ears, and about 6 inches wide, in worsted weight yarn with a 4.0 mm hook.
Is this elephant safe for babies?
Yes, if you make the baby safe version: embroider the eyes with black yarn instead of using safety eyes, and sew every piece with extra passes so nothing can come loose.
Can I make the trunk curl more?
Yes. Sew one stitch through the tip of the trunk and into the face just above the mouth to lift the tip, or slip a short piece of floral wire inside the trunk before you stuff it, for a trunk you can bend into any shape.
What yarn is best for amigurumi elephants?
Acrylic yarn is soft, washable, and comes in every color, which makes it the best choice for toys that will be hugged and washed. Avoid fuzzy or novelty yarns for your first elephant, because they hide the stitch definition that makes the shaping look neat.
Can I sell elephants made from this pattern?
Yes, you may sell finished elephants made from this free pattern, with credit to Little Loop Finds. Please do not sell, share, or republish the pattern text itself, and do not claim this original design as your own.
How do I keep the ears floppy?
Do not stuff the ears, and sew them to the head with the top of the ear level with the top of the head, so gravity pulls them down naturally. If an ear still sticks out, sew it down a little lower on the head and angle the top slightly backward.
Happy stitching, and may your elephant bring good luck to whoever receives it.


