Crochet Wolf Pattern Free: Adorable Amigurumi Pup
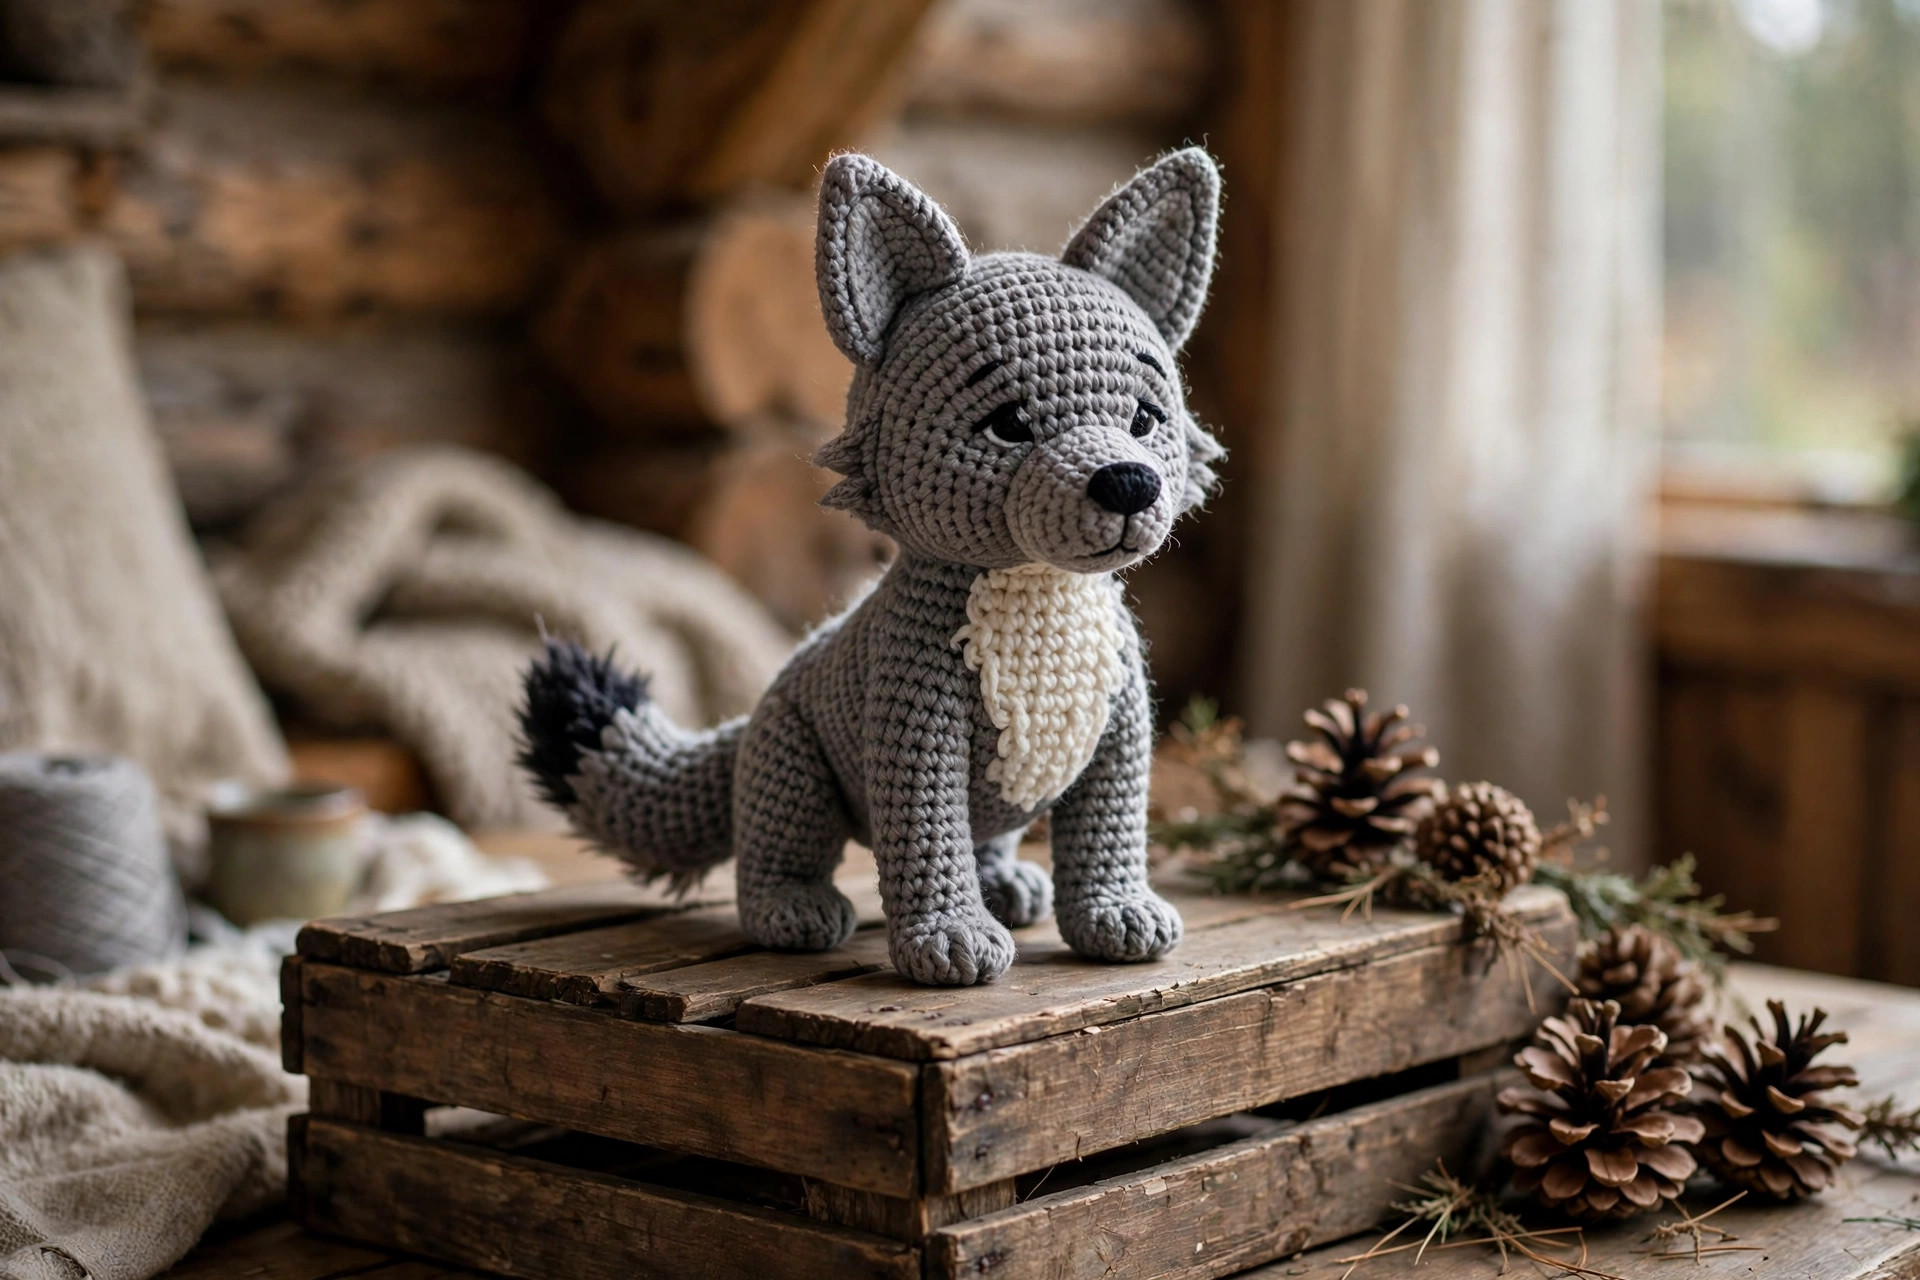
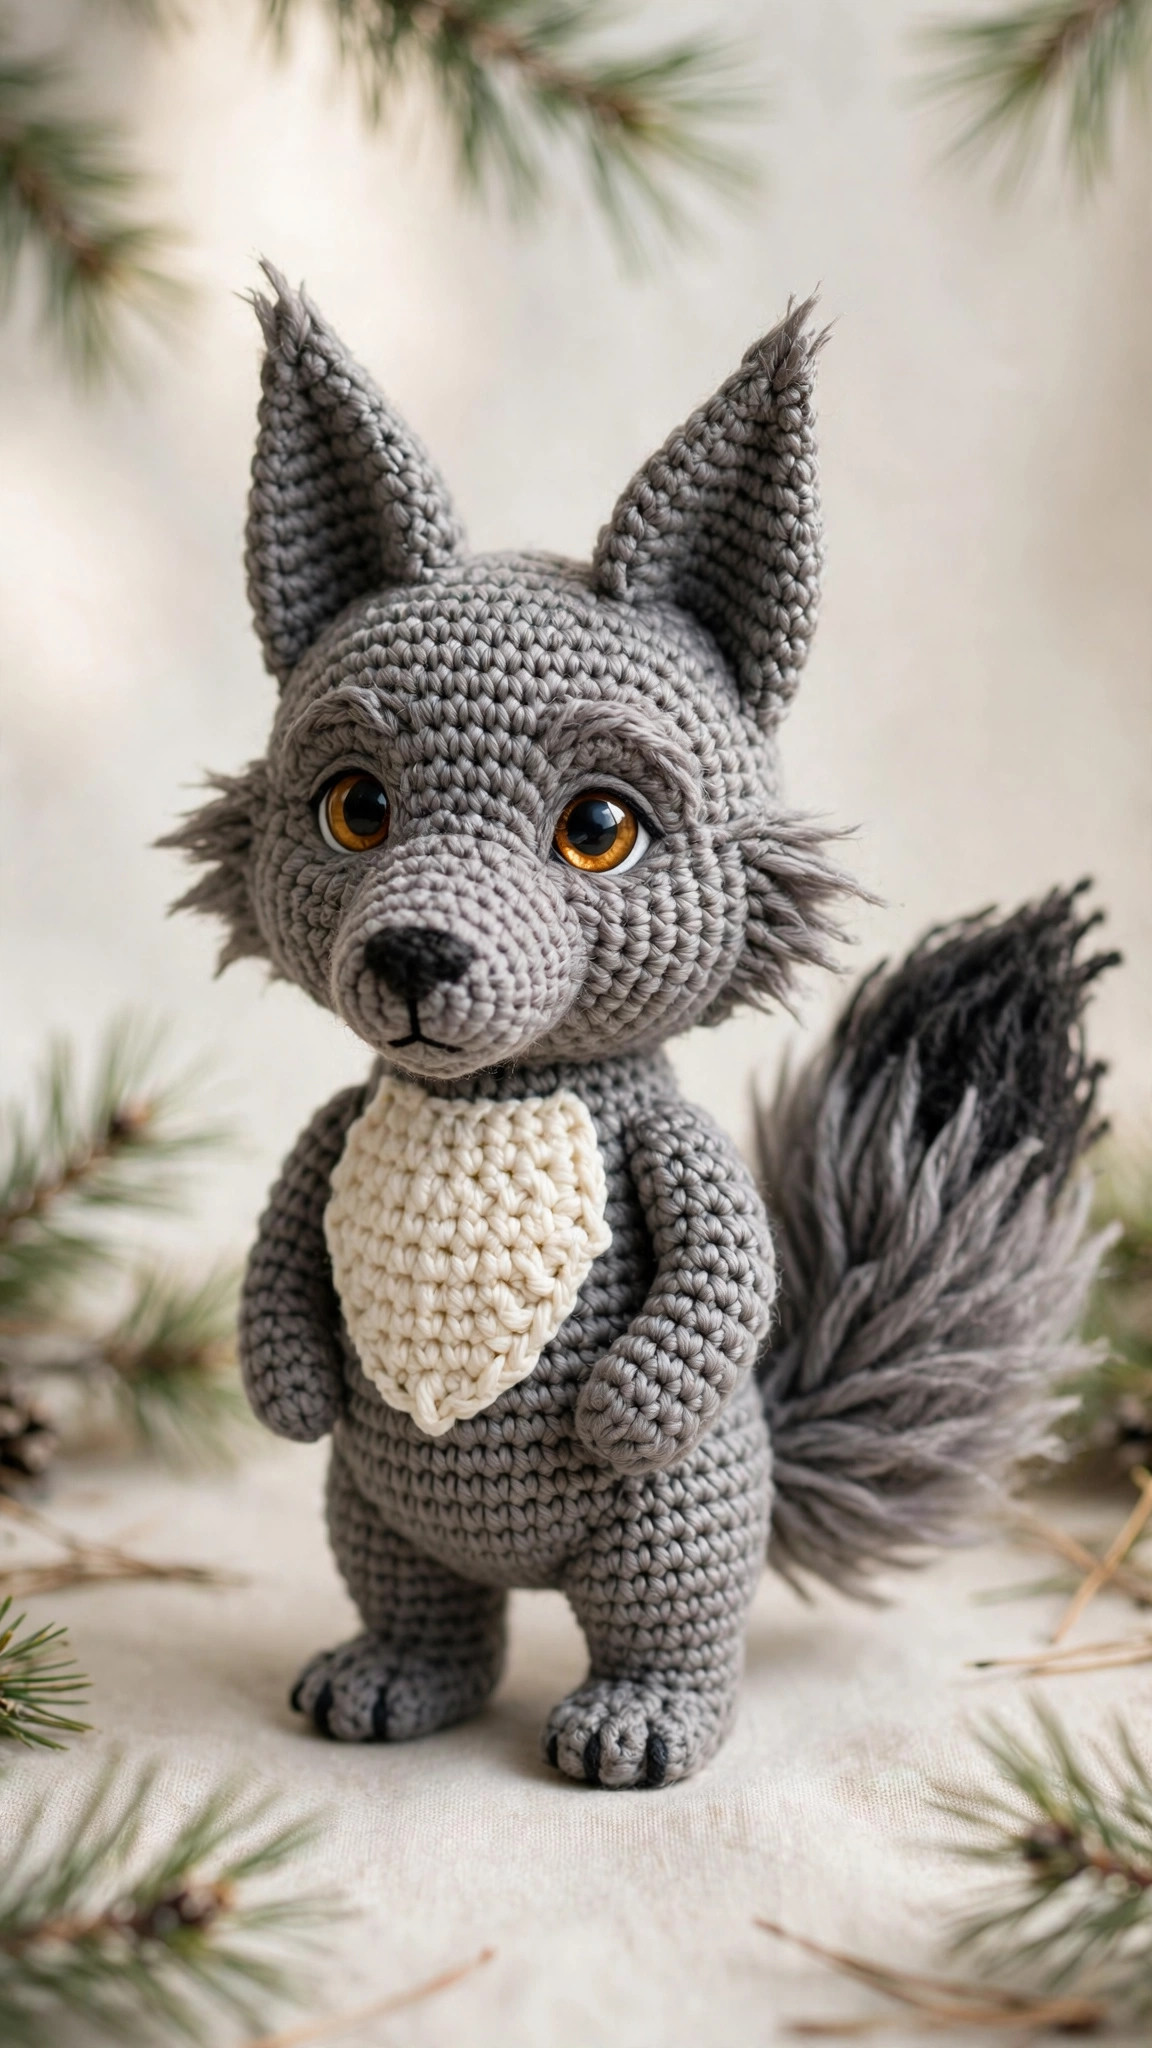
A noble little pup in yarn: tall alert ears, a gloriously bushy tail, cream chest and a gently elongated snout. Original design in US terms, intermediate friendly.

Amigurumi · Crochet
- Finished size
- 7 in tall, standing
- Making time
- About 5 hours
- Hook
- 4.0 mm, worsted yarn
- Set
- Original design, US terms
- Skill
- Intermediate
In this post
- Table of contents
- Why you'll love this crochet wolf pattern
- Materials you'll need
- Size, gauge and skill level
- Abbreviations, US terms
- The crochet wolf pattern (US terms)
- Finishing touches and assembly
- Woodland realism: tips and tricks
- Variations to try next
- Troubleshooting tips
- Frequently asked questions
- More free patterns to try
If you have been looking for a crochet wolf pattern free of charge that captures the real spirit of a wolf, this little pup is the one to make. He has the noble look down: tall pointed ears, a proud cream chest, a big bushy tail with a dark tip, and wise amber eyes that make him look far older than his seven inches. The design is all my own, built around the leaner, longer proportions that separate a wolf from a husky or a fox: a slightly elongated snout, a deep chest, and legs that look ready to run.
This wolf stands about 7 inches tall and takes roughly five hours from first stitch to final weave-in. The body and head are worked as one piece in spiral rounds, and the intermediate touches come from clean color changes in the tail and a simple brushed-fur finish that gives the gray yarn a wild texture. Gift him to a wildlife lover, add him to a woodland nursery, or keep him on your own shelf as a tiny guardian.
Table of contents
- Why you'll love this crochet wolf pattern
- Materials you'll need
- Size, gauge and skill level
- Abbreviations, US terms
- The crochet wolf pattern (US terms)
- Finishing touches and assembly
- Woodland realism: tips and tricks
- Variations to try next
- Troubleshooting tips
- Frequently asked questions
- More free patterns to try
Why you'll love this crochet wolf pattern
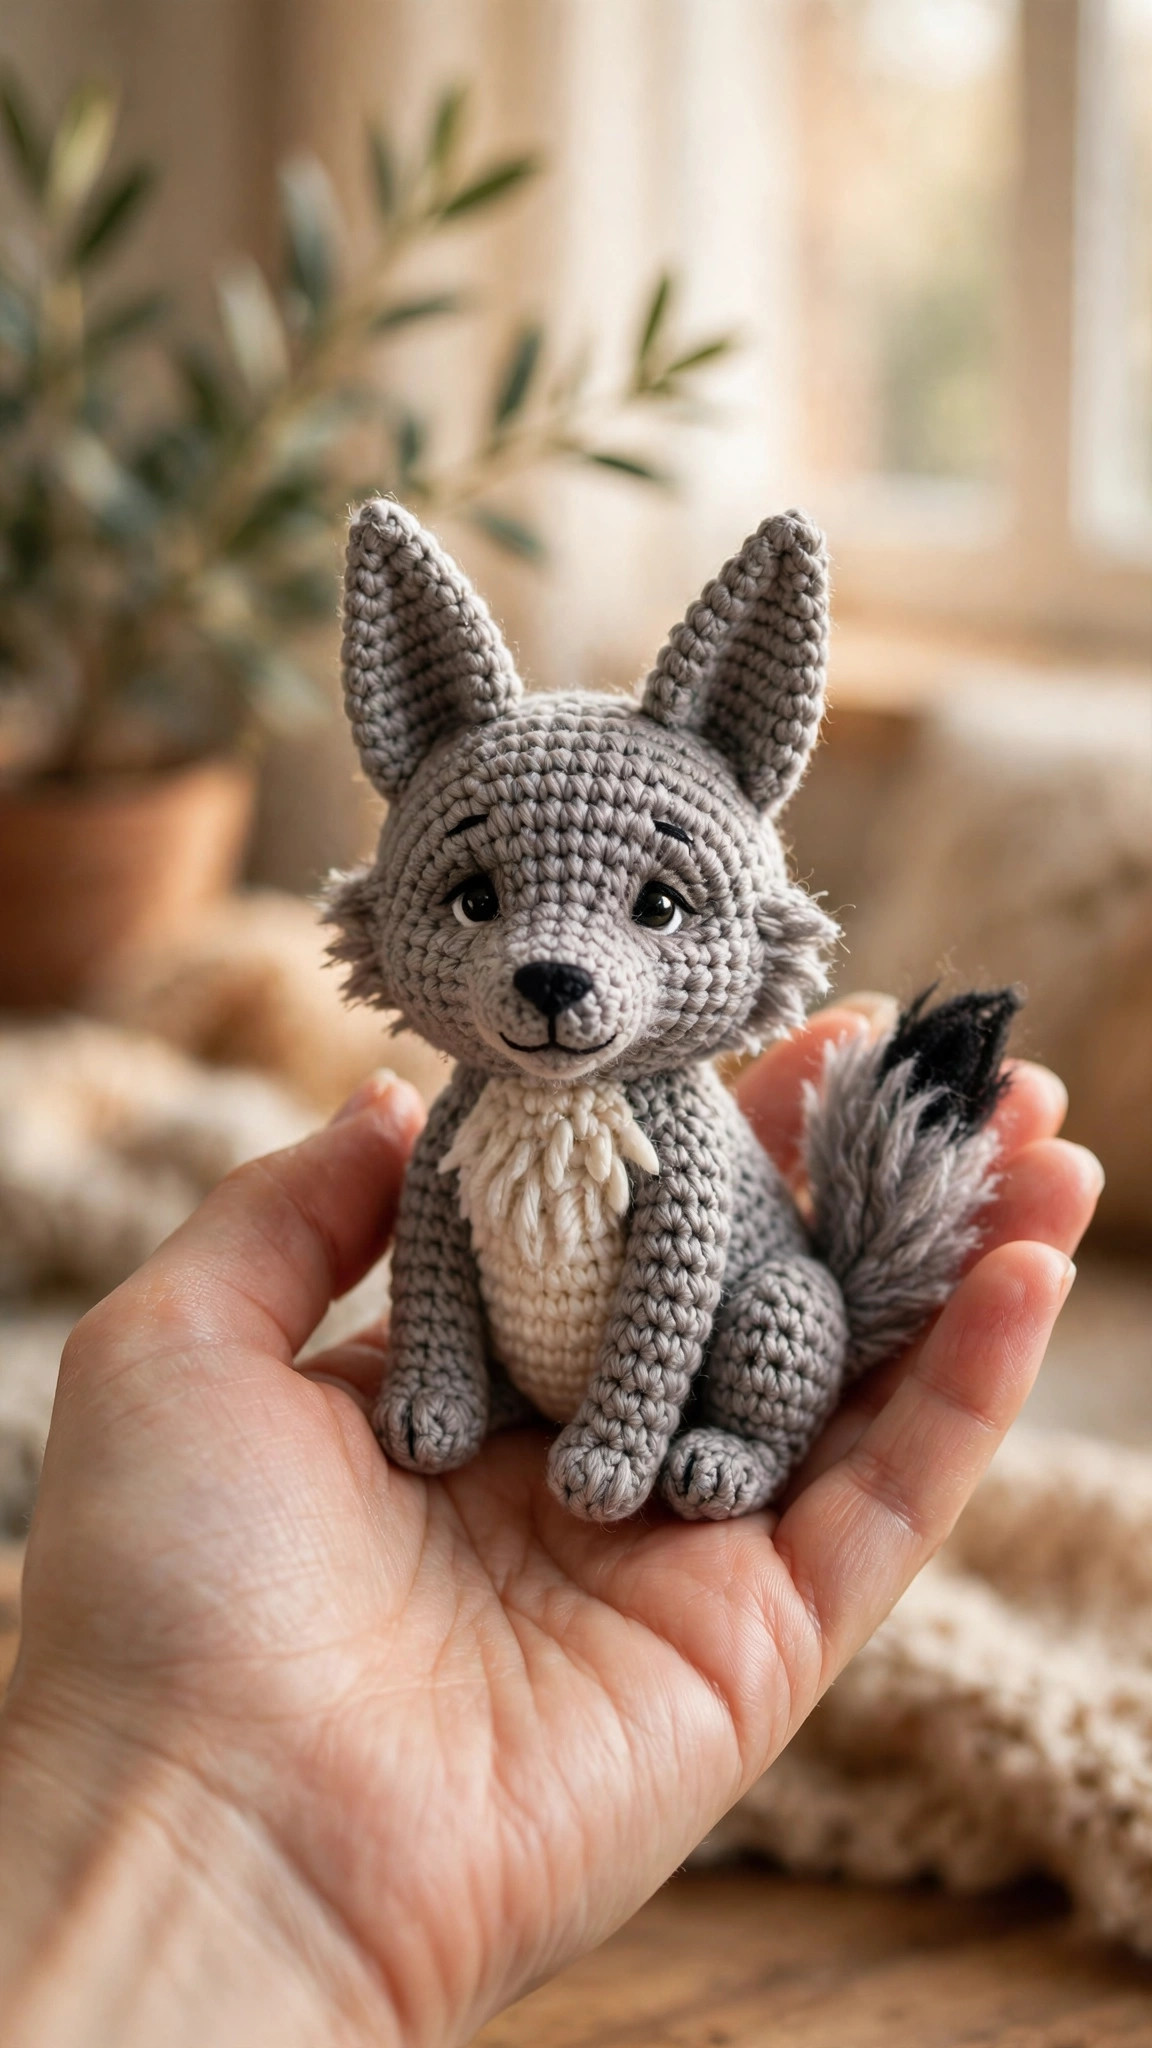
Wolves have a dignity that most amigurumi animals miss, and this pattern was designed to capture it. The head sits high on a deep chest, the ears are tall and alert, and the snout is a touch longer than a typical plush muzzle, which reads instantly as wolf rather than dog. The tail is the showpiece: worked wide and stuffed firmly, with a dark charcoal tip that anchors the whole silhouette.
The construction keeps the sewing to a minimum: the body and head flow as one piece, so the neck is strong and the head never wobbles. The tail alternates gray and charcoal in clean stripes, and the cream chest patch is sewn on at the end, so there is no stranded colorwork. The brushed-fur finish is optional but transformative.
If you have already made a plush or two, the color changes and snout shaping will stretch your skills without any scary techniques. New to the magic ring? Our magic ring tutorial gets the first round neat in minutes.
Materials you'll need
| Supply | What to get |
|---|---|
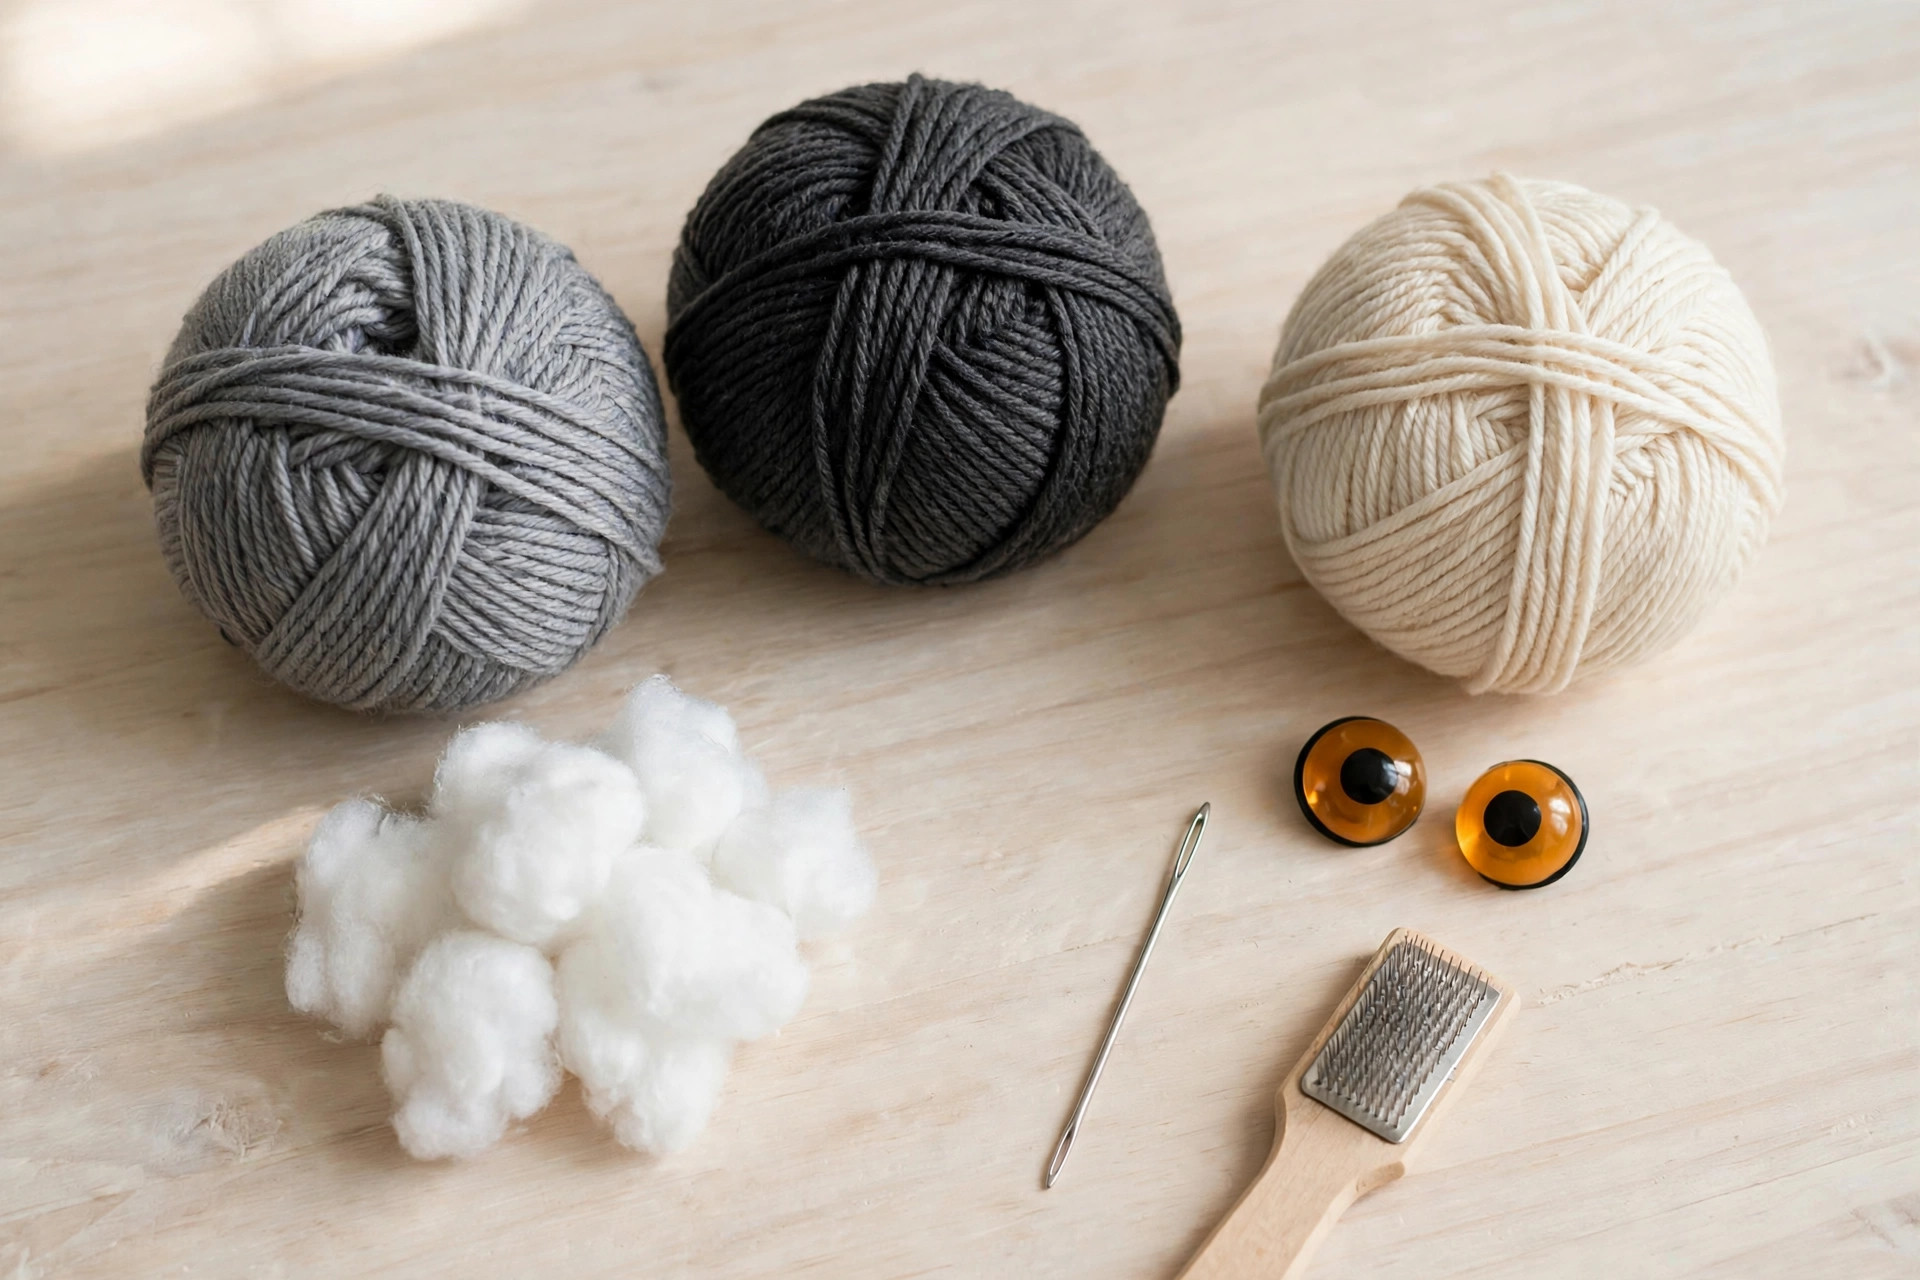
| Main yarn | Worsted-weight (#4) yarn in medium gray, about 130 yds / 119 m |
| Dark yarn | Worsted-weight (#4) yarn in charcoal or dark gray, about 35 yds / 32 m, for the tail tip, ear backs and nose |
| Cream yarn | Worsted-weight (#4) yarn in cream or off-white, about 30 yds / 27 m, for the muzzle and chest patch |
| Crochet hook | 4.0 mm (G) |
| Stuffing | Polyester toy stuffing, a generous handful |
| Tapestry needle | For sewing pieces together and embroidering the face |
| Eyes | Two 12 mm safety eyes in amber or brown, or black embroidery floss for an embroidered face |
| Notions | Scissors, stitch markers, pins for positioning pieces, a small slicker brush or old toothbrush for the fur finish (optional) |
Choose a gray with a slightly heathered look if you can: the tonal variation reads as fur even before brushing. A smooth acrylic or wool-blend worsted brushes up best; very silky yarns resist the brushed finish.
A note on the hook: use a 4.0 mm hook with worsted yarn, or whatever hook gives you a tight, stuffing-proof fabric. The brushed finish looks best over dense, even stitches.
Size, gauge and skill level
The pattern is written in one size. Work in continuous spiral rounds and mark the first stitch of each round with a stitch marker.
| Finished height | Yarn | Hook | Approx. time |
|---|---|---|---|
| 7 in / 18 cm standing | Worsted-weight (#4) | 4.0 mm | About 5 hours |
- Finished size: about 7 in (18 cm) tall standing, and about 4.5 in (11 cm) wide at the chest. The bushy tail adds about 5 in (13 cm) of length behind the body.
- Gauge: 18 sc and 20 rounds = 4 in (10 cm) in worsted yarn with a 4.0 mm hook. Exact gauge is not critical for a toy, but keep the fabric tight so no stuffing shows through, especially on the tail.
- Skill level: intermediate. You should be comfortable with the magic ring, single crochet, increases and decreases, clean color changes, and sewing curved pieces together. The only new skill is the optional brushed-fur finish, and the instructions walk you through it.
If you made our free raccoon crochet pattern, you already know the one-piece body technique and the striped tail method, so this wolf will feel like a natural next step.
Abbreviations, US terms
| Abbreviation | Meaning |
|---|---|
| MR | magic ring |
| ch | chain |
| sc | single crochet |
| sl st | slip stitch |
| inc | increase: 2 sc in the same stitch |
| dec | decrease: invisible decrease, sc 2 together through the front loops |
| st(s) | stitch(es) |
| R | round |
| Row | row, worked flat and turned |
| FO | fasten off |
| [ ] | total stitch count at the end of the round or row |
A note on color changes: change colors on the last yarn-over of the final stitch in the old color, completing the stitch with the new yarn. Pull the first stitch of the new color gently snug so the stripe edge sits tight and even.
The crochet wolf pattern (US terms)
Work all pieces in continuous spiral rounds unless a section says Row. Stuff pieces firmly as you go, a little at a time, shaping with your fingers.
Body and head: one piece, base to crown
With gray yarn, start at the base of the body.
- R1: MR, 6 sc in ring. [6]
- R2: inc in each st around. [12]
- R3: (sc, inc) x6. [18]
- R4: (2 sc, inc) x6. [24]
- R5: (3 sc, inc) x6. [30]
- R6: (4 sc, inc) x6. [36]
- R7-R11: sc in each st around. [36]
- R12: (4 sc, dec) x6. [30]
- R13: (3 sc, dec) x6. [24]
Begin stuffing the body now, shaping a deep chest. Press the base flat so the wolf stands steadily.
- R14-R15: sc in each st around. [24]
- R16: (3 sc, inc) x6. [30]
- R17: (4 sc, inc) x6. [36]
- R18-R22: sc in each st around. [36]
- R23: (4 sc, dec) x6. [30]
- R24: (3 sc, dec) x6. [24]
- R25: (2 sc, dec) x6. [18]
Stuff the head firmly into a proud, slightly elongated shape, pushing extra stuffing toward the front for the snout area.
- R26: (sc, dec) x6. [12]
- R27: dec x6. [6]
FO, thread the tail through the front loops of the last round, pull tight to close, and weave the end into the head.
Ears: tall and alert (make 2)
With gray yarn:
- R1: MR, 6 sc in ring. [6]
- R2: sc in each st around. [6]
- R3: (sc, inc) x3. [9]
- R4: sc in each st around. [9]
- R5: (2 sc, inc) x3. [12]
- R6-R7: sc in each st around. [12]
FO, leaving a long tail. Flatten each ear between your fingers; do not stuff. For darker ear backs, work R1-R3 in charcoal and R4-R7 in gray, then sew with the charcoal side facing back.
Muzzle: elongated snout
With cream yarn:
- R1: MR, 6 sc in ring. [6]
- R2: inc in each st around. [12]
- R3: (sc, inc) x6. [18]
- R4-R5: sc in each st around. [18]
- R6: (2 sc, inc) x6. [24]
FO, leaving a long tail. Stuff lightly so the snout holds a gentle wedge shape, slightly longer than it is wide.
Legs: sturdy runners (make 4)
With gray yarn:
- R1: MR, 6 sc in ring. [6]
- R2: (sc, inc) x3. [9]
- R3: (2 sc, inc) x3. [12]
- R4-R7: sc in each st around. [12]
- R8: (2 sc, dec) x3. [9]
- R9: sc in each st around. [9]
Stuff each leg firmly, then flatten the top. FO, leaving a long tail. The front legs will be sewn slightly higher on the body than the back legs.
Tail: big and bushy
Start with gray, switching to charcoal for the tip.
- R1: MR, 6 sc in ring. [6]
- R2: inc in each st around. [12]
- R3: (sc, inc) x6. [18]
- R4: (2 sc, inc) x6. [24]
- R5-R8: sc in each st around, gray. [24]
- R9: (2 sc, dec) x6, gray. [18]
- R10-R12: sc in each st around, gray. [18]
- R13: (sc, dec) x6, charcoal. [12]
- R14: sc in each st around, charcoal. [12]
- R15: dec x6, charcoal. [6]
Stuff the tail very firmly: a plump tail holds its proud upward curve. FO with charcoal, leaving a long tail for sewing.
Chest patch: cream bib
With cream yarn, work flat:
- Row 1: ch 11. Sc in the 2nd ch from the hook and next 8 ch, 3 sc in the last ch; working down the other side of the chain, 8 sc, 2 sc in the last ch. [22]
- Row 2: inc, 8 sc, inc x3, 8 sc, inc x2. [28] Sl st to the first st.
FO, leaving a long tail. The patch should be a long oval about 4 in tall, wider at the top.
Finishing touches and assembly
Attach the muzzle. Pin the cream snout to the front of the head at about R20-R22, centered. Sew around with cream yarn, adding stuffing as you close the seam so it keeps its wedge shape.
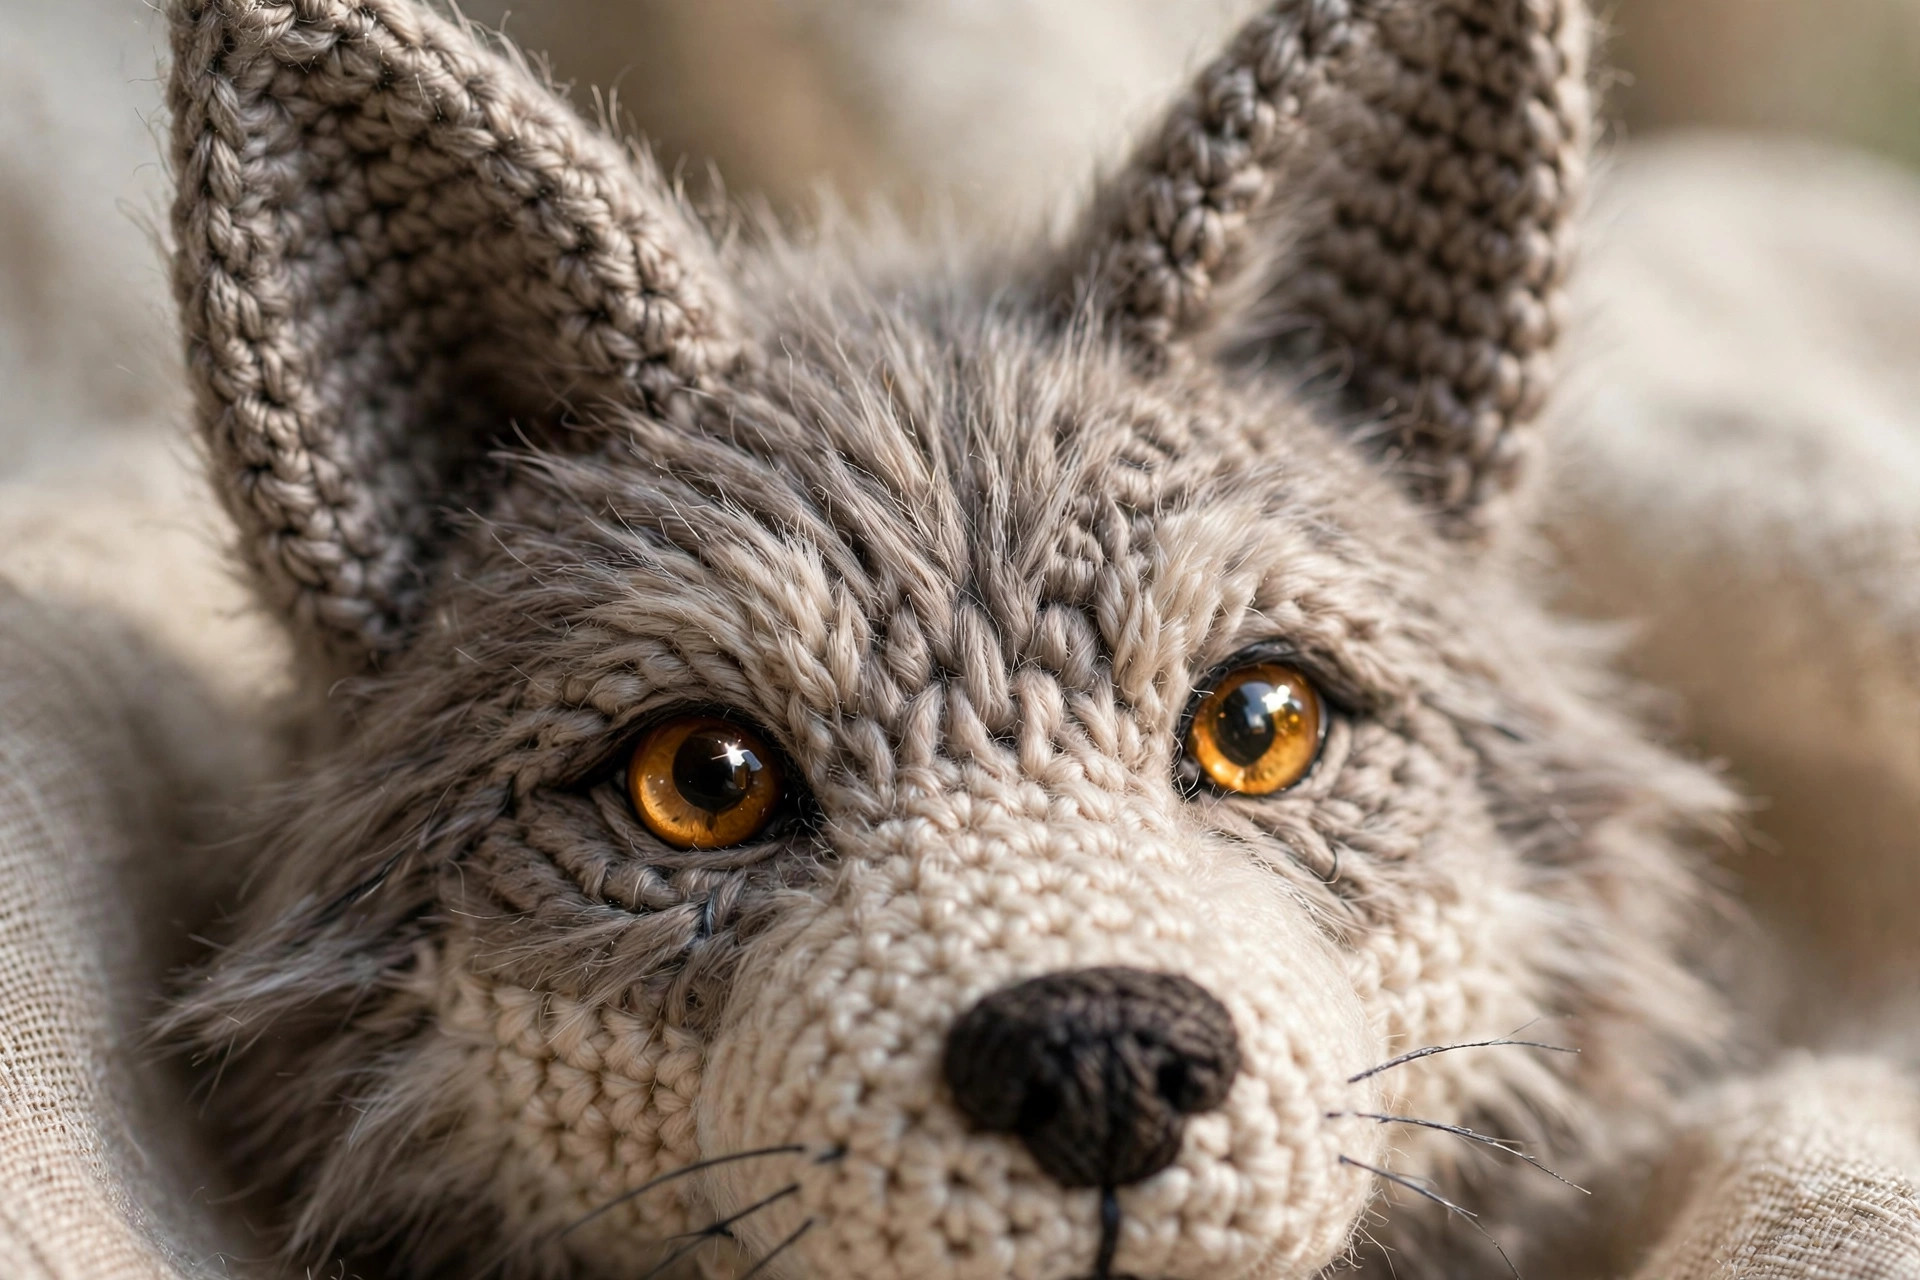
Add the eyes. If using safety eyes, push two 12 mm amber eyes into the head just above and to the sides of the muzzle, about 8 stitches apart, and secure the washers inside before the head is fully closed (do this before finishing R27 if you can). If embroidering, stitch two alert almond shapes with black floss in the same positions, and add one tiny white stitch at the inner top corner of each eye for a catchlight.
Embroider the nose. With charcoal floss, stitch a rounded triangle nose on the muzzle tip, about 4 stitches wide, then a straight vertical line down two rounds for the mouth.
Sew on the ears. Pin the tall ears to the top of the head at about R23, set wide apart and angled very slightly outward. Sew through the flattened base with small whipstitches, going around twice so they stand at attention permanently.
Attach the legs. Sew the front legs to the lower front of the body at about R9, and the back legs slightly lower and wider at about R7. Stand the wolf up and check all four legs touch the table evenly before you knot off.
Sew on the tail. Pin the tail to the lower back of the body at about R8, with the charcoal tip curving upward. Sew around the base firmly, going around twice: this tail is heavy and gets handled a lot.
Add the chest patch. Center the cream bib on the front of the body, wide end up under the chin, and sew around the edge with cream yarn. It should run from just below the muzzle to mid-belly.
Brush the fur (optional). With a small slicker brush, brush the gray yarn gently with the fur direction: downward on the body, back along the tail, upward on the cheeks. Stop at the first soft halo; brush cream patches more lightly.
Weave every end. Run each tail through the stuffing for at least 2 inches, changing direction once so it locks, then trim flush.
Woodland realism: tips and tricks
A few deliberate choices separate a wolf from a generic gray plush:
Lengthen the snout. The extra round on the muzzle (R6) is doing real work. A snout that is slightly longer than wide reads as canine-wild; a short round snout reads as teddy bear. Do not skip it.
Keep the ears tall and wide-set. Wolf ears sit high and apart. Sewing them too close makes a fox; too far forward makes a bat. Pin them and check the silhouette before sewing.
Let the tail tip droop or rise. A tail tip curving up looks alert and proud; angled down it looks calm and gentle. Choose the mood before you sew.
Brush with restraint. The goal is a soft halo, not a fuzzy mess. Ten light strokes per area is plenty. Over-brushing loosens the stitches and lets stuffing peek through, which ruins the effect.
Amber eyes beat black. Black eyes look cute; amber or warm brown eyes look wild. If you only have black safety eyes, embroider a thin amber ring around each one with floss for the same effect.
Variations to try next
Once you have made the classic gray pup, try these:
- Arctic wolf. Work the entire pattern in white or pale silver yarn with a light gray tail tip. The brushed finish looks spectacular in white, like real winter fur. Pair him with our crochet fox pattern free in classic red for a striking seasonal duo.
- Wolf pup, extra small. Use DK yarn and a 3.25 mm hook and follow the same rounds for a pup about 5 inches tall. The proportions get even cuter at small scale, and he makes a wonderful companion to the free crochet bunny pattern in a woodland nursery set.
- Howling wolf. Before sewing the head closed, tilt it slightly upward, and embroider the mouth as a small open oval instead of a straight line. Perch him on a crocheted rock (a gray half-sphere) for the full moonlit effect.
Troubleshooting tips
- The wolf will not stand on all four legs. The legs are different lengths or sewn unevenly. Stand him on the table, find the leg that dangles, and re-sew it slightly higher until all four touch.
- The head tilts to one side. The neck rounds were stuffed unevenly. Push more stuffing into the low side of the neck and massage the head level before the final rounds are closed.
- The tail droops instead of curving up. It is understuffed. Pack the tail firmly, especially the base, and pin it in the curled position for an hour so the stuffing sets the shape.
- The color change in the tail looks jagged. You completed the stitch with the old color instead of the new one. Undo to the change point and switch yarns on the final yarn-over of the last gray stitch.
- The brushed fur looks patchy. You brushed some areas harder than others. Go back over the whole piece with light, even strokes in one direction until the halo is uniform.
- The muzzle looks like a pig snout. It is sewn too low and too round. Reposition it higher on the face with the wedge pointing slightly upward, and make sure the stuffing gives it length, not just roundness.
Frequently asked questions
Is this crochet wolf pattern really free?
Yes, the complete pattern above is free, with no email signup and no PDF purchase required.
Why is this wolf pattern rated intermediate?
Three reasons: the two-color tail changes, the shaped elongated muzzle, and sewing four legs so the wolf stands level. None are hard alone, but together they ask for steadier tension and more careful assembly.
How do I get the fluffy, fur-like look?
After assembly, brush the gray yarn gently with a small slicker brush, stroking in the direction the fur would grow, about ten light strokes per area. Brush the cream patches more lightly.
Can I pose the wolf sitting instead of standing?
Yes. Sew the back legs folded forward against the belly and the front legs straight down, then press the base flat like a sitting plush. The pattern's leg counts work for both poses; only the placement changes.
How much yarn do I need for the wolf?
About 130 yds of gray worsted for the body, head, ears and legs, 35 yds of charcoal for the tail tip and ear backs, and 30 yds of cream for the muzzle and chest. One ball of the main color covers it.
Can I sell the finished wolves I make?
Yes! You may sell finished wolves made from this pattern in small batches (craft fairs, markets, gifts). Please credit Little Loop Finds as the pattern designer.
Is this wolf safe for babies and toddlers?
Make it with an embroidered face and no safety eyes, and brush the fur finish lightly so no loose fibers shed. As with any handmade toy, supervise babies during play and check the stitching regularly.
More free patterns to try
If this little wolf was a joy to make, the mini amigurumi patterns free collection is full of friends waiting for your hook.