Crochet Pineapple Pattern (Free Amigurumi Fruit)
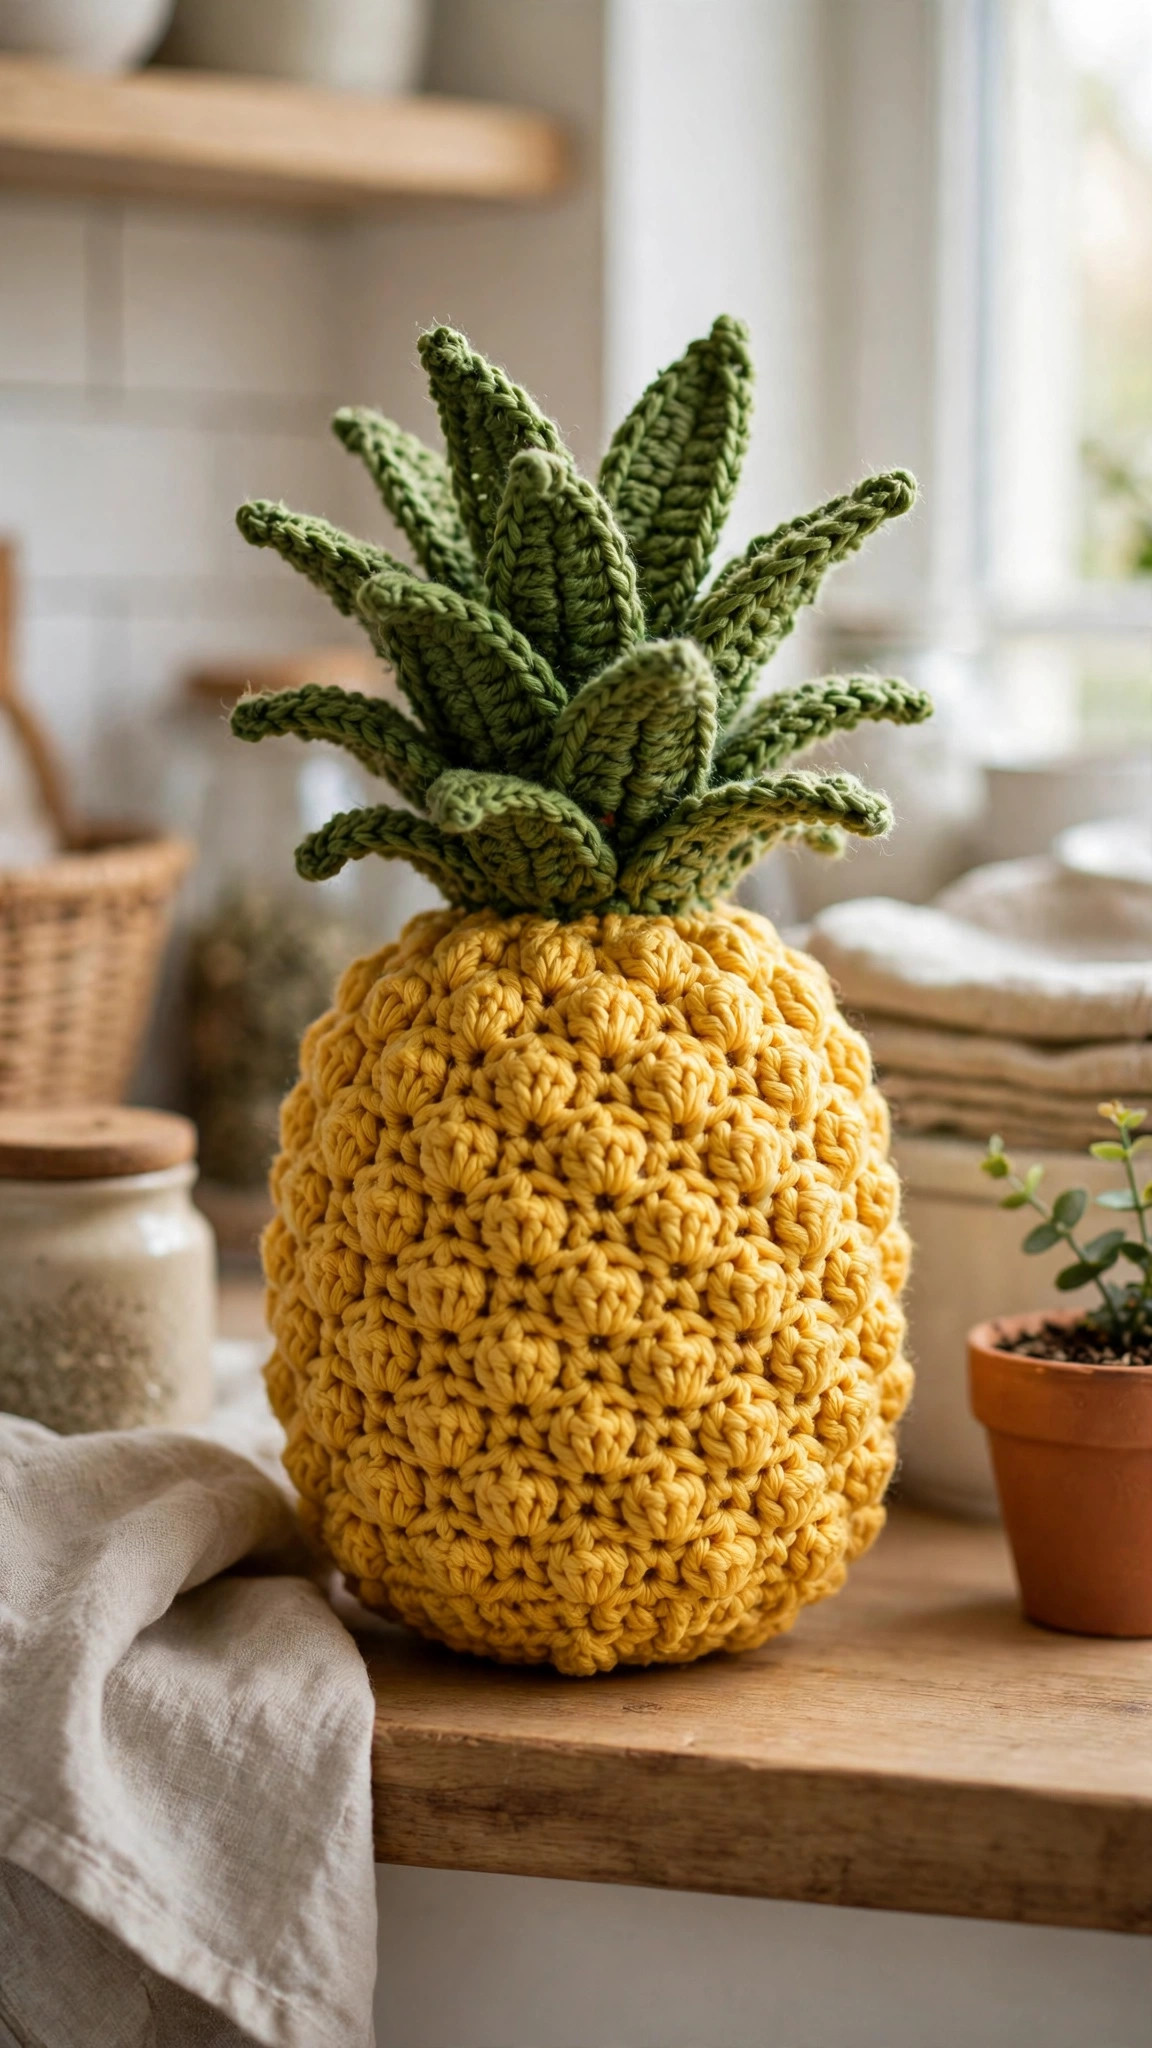
Crochet a textured pineapple with a leafy green crown in about three hours, then display it on a shelf or give it as a gift.

Patterns · Crochet
- Finished size
- 8 in tall
- Making time
- 3 hours
- Hook
- US G-6 (4.0 mm)
- Set
- Pineapple, leaves
- Skill
- Easy
In this post
- Key Takeaways
- Table of Contents
- Why You Will Love This Crochet Pineapple
- Finished Size, Skill Level, and Time
- Materials You Need
- Abbreviations (US Terms)
- Gauge and Sizing Notes
- Part 1: The Pineapple Body
- Part 2: The Leafy Crown
- Part 3: The Face, Assembly, and Finishing
- Variations: Colors, Sizes, and Uses
- Troubleshooting a Pineapple That Will Not Sit Up
- Care Instructions
- Frequently Asked Questions
A crochet pineapple is a cheerful little project that looks far harder than it is. This free crochet pineapple pattern makes a soft amigurumi pineapple with a textured golden body, a leafy green crown, and a sweet smiling face, perfect for summer decor, a kitchen shelf, or a gift for a fruit loving friend. It works up in about three hours and uses less than one ball of yellow yarn.
This is an original Little Loop Finds design, written in US terms and completely free. The body is worked in simple rounds of single crochet with a bobble stitch texture, and the leaves are worked flat in rows, then sewn on top. If you can crochet a magic ring and a single crochet, you can crochet this pineapple.
A quick note on scope: this post is about one specific crochet pineapple, a small amigurumi fruit with a textured body and a leafy crown. It is not a pineapple stitch shawl or a pineapple motif doily. If you want another sweet fruit friend, our crochet strawberry pattern is a bright red berry in the same amigurumi style.
Key Takeaways
- Free original pattern: this crochet pineapple pattern is a Little Loop Finds original design, written in US terms, and completely free.
- A textured amigurumi fruit: a golden body with bobble stitch texture, a leafy green crown, and a sweet smiling face.
- Beginner friendly: simple rounds of single crochet, with the texture made from easy bobble stitches.
- A three hour project: one pineapple takes about 3 hours, so it is a satisfying weekend make.
- Three ways to use it: summer shelf decor, a kitchen gift, and a cheerful toy for older children.
Table of Contents
- Why You Will Love This Crochet Pineapple
- Finished Size, Skill Level, and Time
- Materials You Need
- Abbreviations (US Terms)
- Gauge and Sizing Notes
- Part 1: The Pineapple Body
- Part 2: The Leafy Crown
- Part 3: The Face, Assembly, and Finishing
- Variations: Colors, Sizes, and Uses
- Troubleshooting a Pineapple That Will Not Sit Up
- Care Instructions
- Frequently Asked Questions
Why You Will Love This Crochet Pineapple
A pineapple is the friendliest fruit in the bowl, and a crochet pineapple keeps that sunny feeling all year round. The golden body and green crown look bright on a shelf or a kitchen windowsill, and the bobble texture gives it a lovely handmade feel.
A crochet pineapple is also a great first amigurumi project. The body is one simple oval worked in rounds, the leaves are small flat shapes, and the face is just a few embroidered stitches. Make one in classic yellow and green, or a whole fruit bowl set for a housewarming gift. Our crochet mushroom pattern makes a sweet matching shelf friend if you want a pair.
Finished Size, Skill Level, and Time
- Finished size: about 8 inches tall including the leaves, with the body about 4 inches wide at its widest point.
- Skill level: Easy. You need a magic ring, single crochet, increases, decreases, and a simple bobble stitch.
- Time: about 3 hours per pineapple: 90 minutes for the body, 45 minutes for the leaves, and 45 minutes for the face, assembly, and finishing.
Materials You Need
| Item | What to get |
|---|---|
| Yarn, color A | Worsted weight (size 4) yarn in golden yellow, 90 yards |
| Yarn, color B | Worsted weight (size 4) yarn in leaf green, 40 yards |
| Yarn, color C | Small amounts of black and pink yarn for the face |
| Hook | US G-6 (4.0 mm), or the size that gives you the gauge below |
| Notions | Tapestry needle, scissors, stitch markers, polyester fiberfill stuffing, two 9 mm safety eyes (or black yarn for an embroidered face) |
Worsted weight yarn is the best choice for a crochet pineapple because it works up quickly, the bobble texture shows up clearly, and the body holds its shape when stuffed. A smooth acrylic or cotton blend works well, because it shows clean stitch definition and washes easily. Choose a warm golden yellow for the body and a fresh leaf green for the crown. Avoid fuzzy yarns, because they hide the bobble texture. If this pineapple is for a small child, embroider the eyes with black yarn instead of using safety eyes.
Abbreviations (US Terms)
- ch = chain
- sl st = slip stitch
- sc = single crochet
- hdc = half double crochet
- dc = double crochet
- inc = increase (2 sc in the same stitch)
- dec = decrease (sc 2 together)
- bob = bobble stitch (yarn over, insert hook, yarn over, pull up a loop, yarn over, pull through 2 loops, repeat 4 more times in the same stitch, yarn over, pull through all 6 loops on the hook)
- st(s) = stitch(es)
- rep = repeat
- RS = right side
- WS = wrong side
Gauge and Sizing Notes
Gauge for amigurumi matters because the stitches need to be tight enough that the stuffing does not show through. Work a swatch of 12 sc stitches and 12 rounds in color A. It should be about 4 inches square. If your swatch is wider than 4 inches, go down a hook size. If it is narrower, go up a hook size.
Count your stitches at the end of every round, because a missed increase will make the body lopsided. Place a stitch marker in the first stitch of each round and move it up as you go, so you always know where the round begins.
Part 1: The Pineapple Body
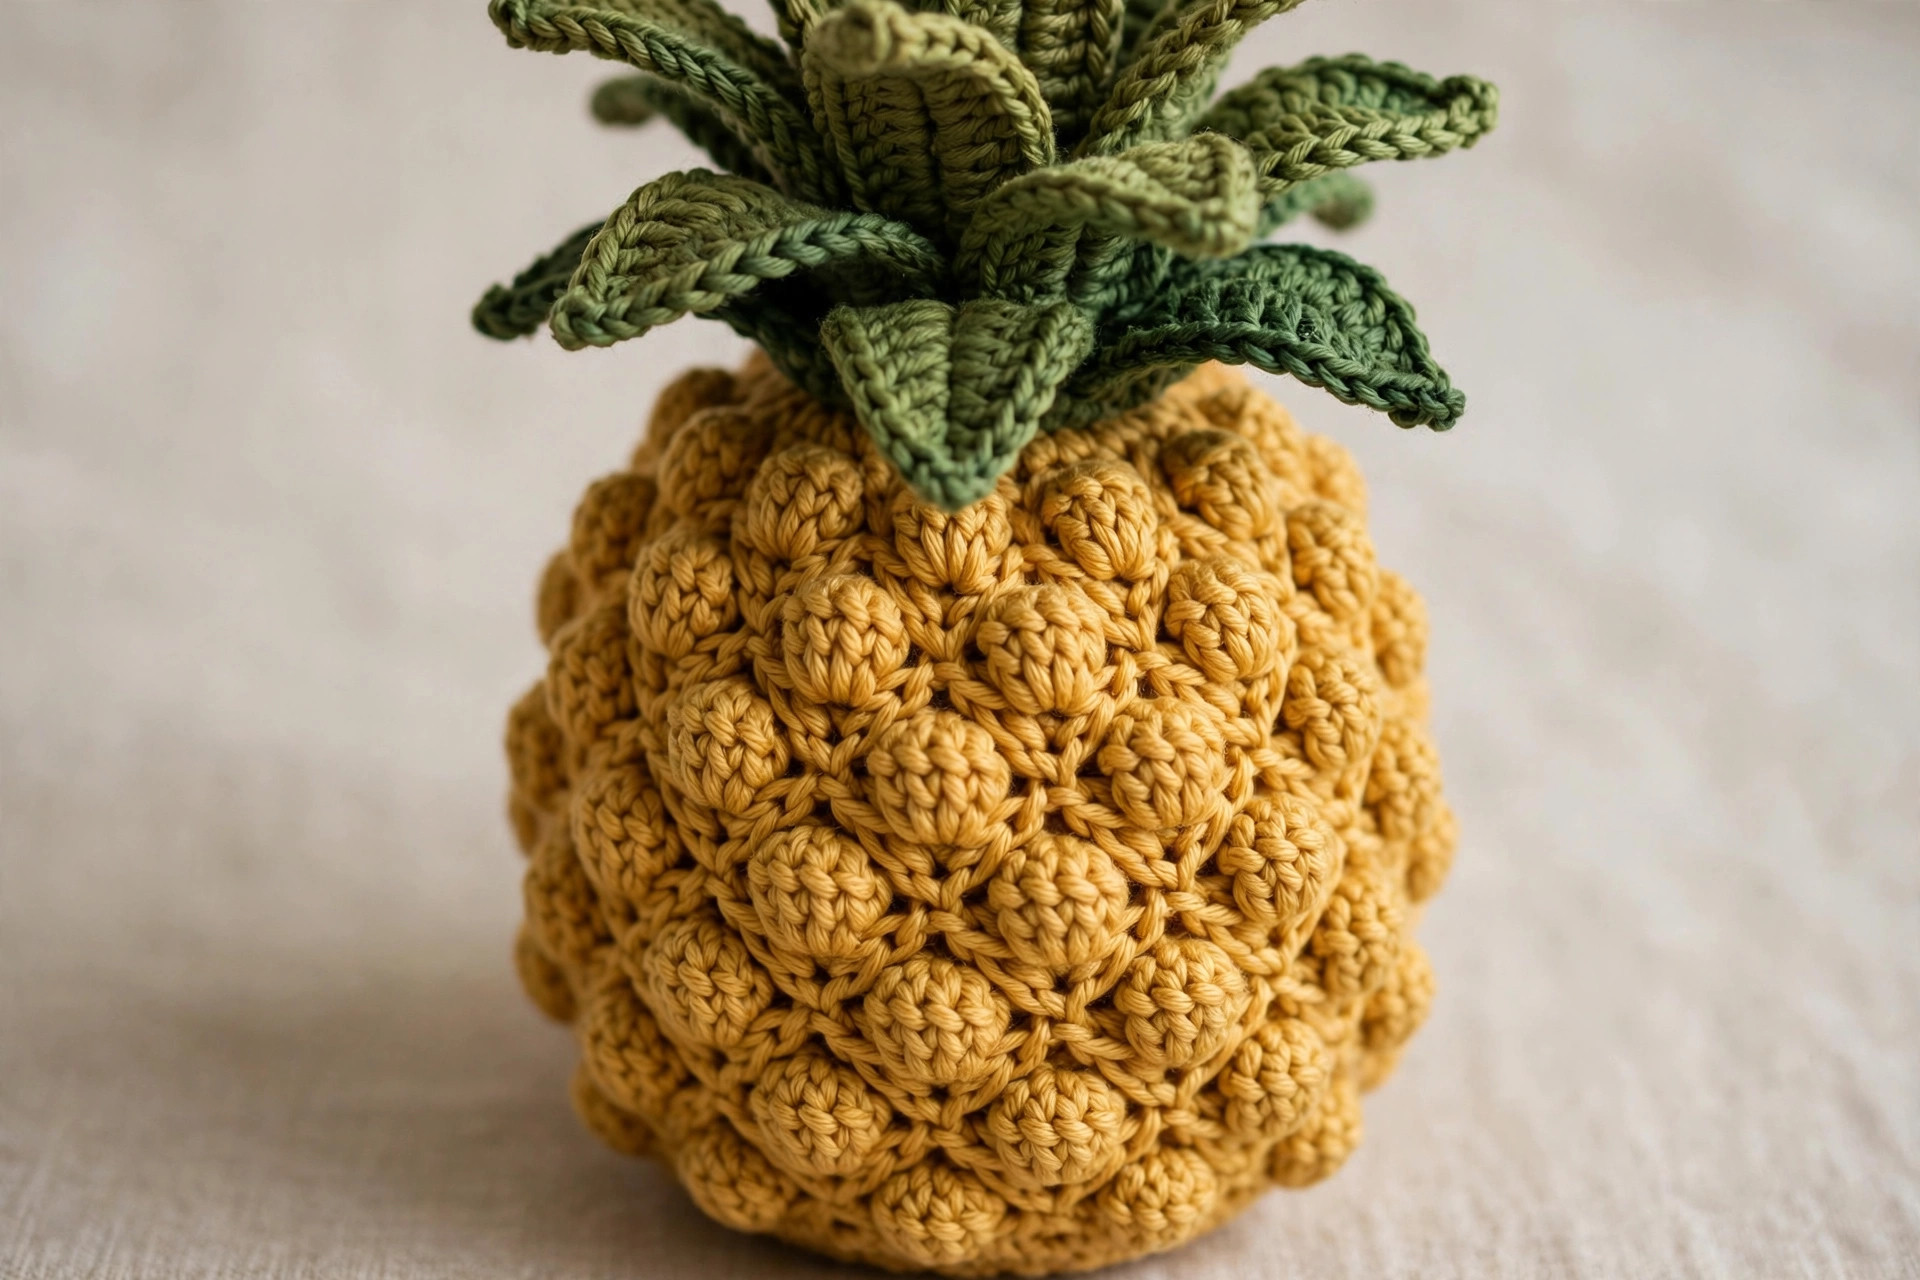
The body is worked in the round from the bottom up, starting with a magic ring. The increases shape a gentle oval, the bobble rounds give it the pineapple skin texture, and the decreases close the top, where the leaves are sewn on.
The Body
With color A, make a magic ring.
- Rnd 1: 6 sc in the ring. (6 sts)
- Rnd 2: inc in each st around. (12 sts)
- Rnd 3: (sc, inc) 6 times. (18 sts)
- Rnd 4: (2 sc, inc) 6 times. (24 sts)
- Rnd 5: (3 sc, inc) 6 times. (30 sts)
- Rnd 6: (4 sc, inc) 6 times. (36 sts)
- Rnd 7: (5 sc, inc) 6 times. (42 sts)
- Rnd 8: (6 sc, inc) 6 times. (48 sts)
- Rnd 9: sc in each st around. (48 sts)
- Rnd 10: (7 sc, bob) 6 times. (48 sts, with 6 bobbles)
- Rnd 11: sc in each st around. (48 sts)
- Rnd 12: sc in each st around. (48 sts)
- Rnd 13: 3 sc, (7 sc, bob) 5 times, 4 sc, bob. (48 sts, with 6 bobbles, offset from the bobbles below)
- Rnd 14: sc in each st around. (48 sts)
- Rnd 15: sc in each st around. (48 sts)
- Rnd 16: (7 sc, bob) 6 times. (48 sts, with 6 bobbles)
- Rnd 17: (6 sc, dec) 6 times. (42 sts)
- Rnd 18: (5 sc, dec) 6 times. (36 sts)
- Rnd 19: (4 sc, dec) 6 times. (30 sts)
- Rnd 20: (3 sc, dec) 6 times. (24 sts)
- Rnd 21: (2 sc, dec) 6 times. (18 sts)
Stop here and stuff the body firmly with polyester fiberfill. Push the stuffing into the bottom first, then fill the middle, so the body is plump and round. Add a little extra stuffing near the top, because the decreases will pull the opening closed.
- Rnd 22: (sc, dec) 6 times. (12 sts)
- Rnd 23: dec 6 times. (6 sts)
Fasten off, leaving a long tail. Thread the tail through the front loops of the 6 remaining stitches, pull tight to close the hole, and weave the end inside the body. The body should stand about 5 inches tall and 4 inches wide, with bobbles dotted across it like pineapple skin.
A note on round 13: the bobbles on this round are offset from the bobbles on rounds 10 and 16, which gives the texture a diamond pattern like a real pineapple. If you lose track, place the bobbles roughly halfway between the bobbles on the round below.
Part 2: The Leafy Crown
The crown is made of ten leaves in three sizes, worked flat in rows. The large leaves stand tall in the center, the medium leaves fill the sides, and the small leaves sit at the front, so the crown looks full from every angle.
The Large Leaves (make 3)
With color B, ch 13.
- Row 1: sc in the 2nd ch from the hook and in the next 3 ch, hdc in the next 4 ch, dc in the next 3 ch, 3 dc in the last ch. Now work down the other side of the chain: dc in the next 3 ch, hdc in the next 4 ch, sc in the last 4 ch. Join with a sl st to the first sc. (25 sts)
- Row 2: ch 1, sc in each st around the leaf, working 2 sc in the tip stitch at the top. Join with a sl st to the first sc. (26 sts)
Fasten off, leaving a long tail for sewing. Each large leaf should be about 4 inches long and 1 inch wide, with a gentle point at the tip.
The Medium Leaves (make 4)
With color B, ch 11.
- Row 1: sc in the 2nd ch from the hook and in the next 3 ch, hdc in the next 3 ch, dc in the next 2 ch, 3 dc in the last ch. Now work down the other side of the chain: dc in the next 2 ch, hdc in the next 3 ch, sc in the last 4 ch. Join with a sl st to the first sc. (21 sts)
- Row 2: ch 1, sc in each st around the leaf, working 2 sc in the tip stitch at the top. Join with a sl st to the first sc. (22 sts)
Fasten off, leaving a long tail for sewing. Each medium leaf should be about 3.5 inches long.
The Small Leaves (make 3)
With color B, ch 9.
- Row 1: sc in the 2nd ch from the hook and in the next 2 ch, hdc in the next 3 ch, dc in the next ch, 3 dc in the last ch. Now work down the other side of the chain: dc in the next ch, hdc in the next 3 ch, sc in the last 3 ch. Join with a sl st to the first sc. (17 sts)
- Row 2: ch 1, sc in each st around the leaf, working 2 sc in the tip stitch at the top. Join with a sl st to the first sc. (18 sts)
Fasten off, leaving a long tail for sewing. Each small leaf should be about 3 inches long.
Assembling the Crown
Lay the leaves out on a table before you sew, with the three large leaves in the center, the four medium leaves around them, and the three small leaves at the front. Overlap the bases slightly, like a fan, so no gaps show.
Sew the leaves together at their bases first, using the long tails and a tapestry needle. Work a few stitches through the base of each leaf, joining them into one flat fan shape. Then sew the whole fan to the top of the body, centering it over the closed hole. Stitch through the leaf bases and into the top rounds of the body, going around the fan twice, so the crown sits firmly and does not wobble. If a leaf flops to one side, add one more stitch at its base to pull it upright.
Part 3: The Face, Assembly, and Finishing
The face is what turns a pineapple into a friend. Two eyes, a small smile, and a pair of pink cheeks give it a sweet expression.
The Eyes
If you are using safety eyes, insert them between rounds 13 and 14, about 8 stitches apart, with the bobbles sitting below them. Push the washers on firmly from the inside before you stuff the body. Check that both eyes sit at the same height, because uneven eyes are the most common reason a face looks surprised.
If you are embroidering the eyes, use black yarn and a tapestry needle. Work a small vertical stitch, about 2 stitches tall, on each side of the face, between rounds 13 and 14. Add a tiny white stitch beside each eye for a sparkle, which makes the face look bright and friendly.
The Smile and Cheeks
With black yarn, stitch a small smile below and between the eyes, between rounds 15 and 16. Work a gentle curve, about 4 stitches wide, using backstitch. With pink yarn, stitch two small cheeks, one on each side of the smile, using 3 straight stitches in a tiny cluster. Step back and check the face from arm's length.
Final Finishing
Weave in every yarn end with a tapestry needle, working the tail through the back of several stitches in the same color, then trimming it close. Check the crown by standing the pineapple on a table. It should sit flat on its base without tipping, and the leaves should fan upward. If it tips forward, push a little more stuffing into the bottom and reshape it. Give the body a gentle squeeze to even out the stuffing, and fluff the leaves with your fingers. Our crochet bee pattern uses the same embroidered face technique if you want another smiling friend.
Variations: Colors, Sizes, and Uses
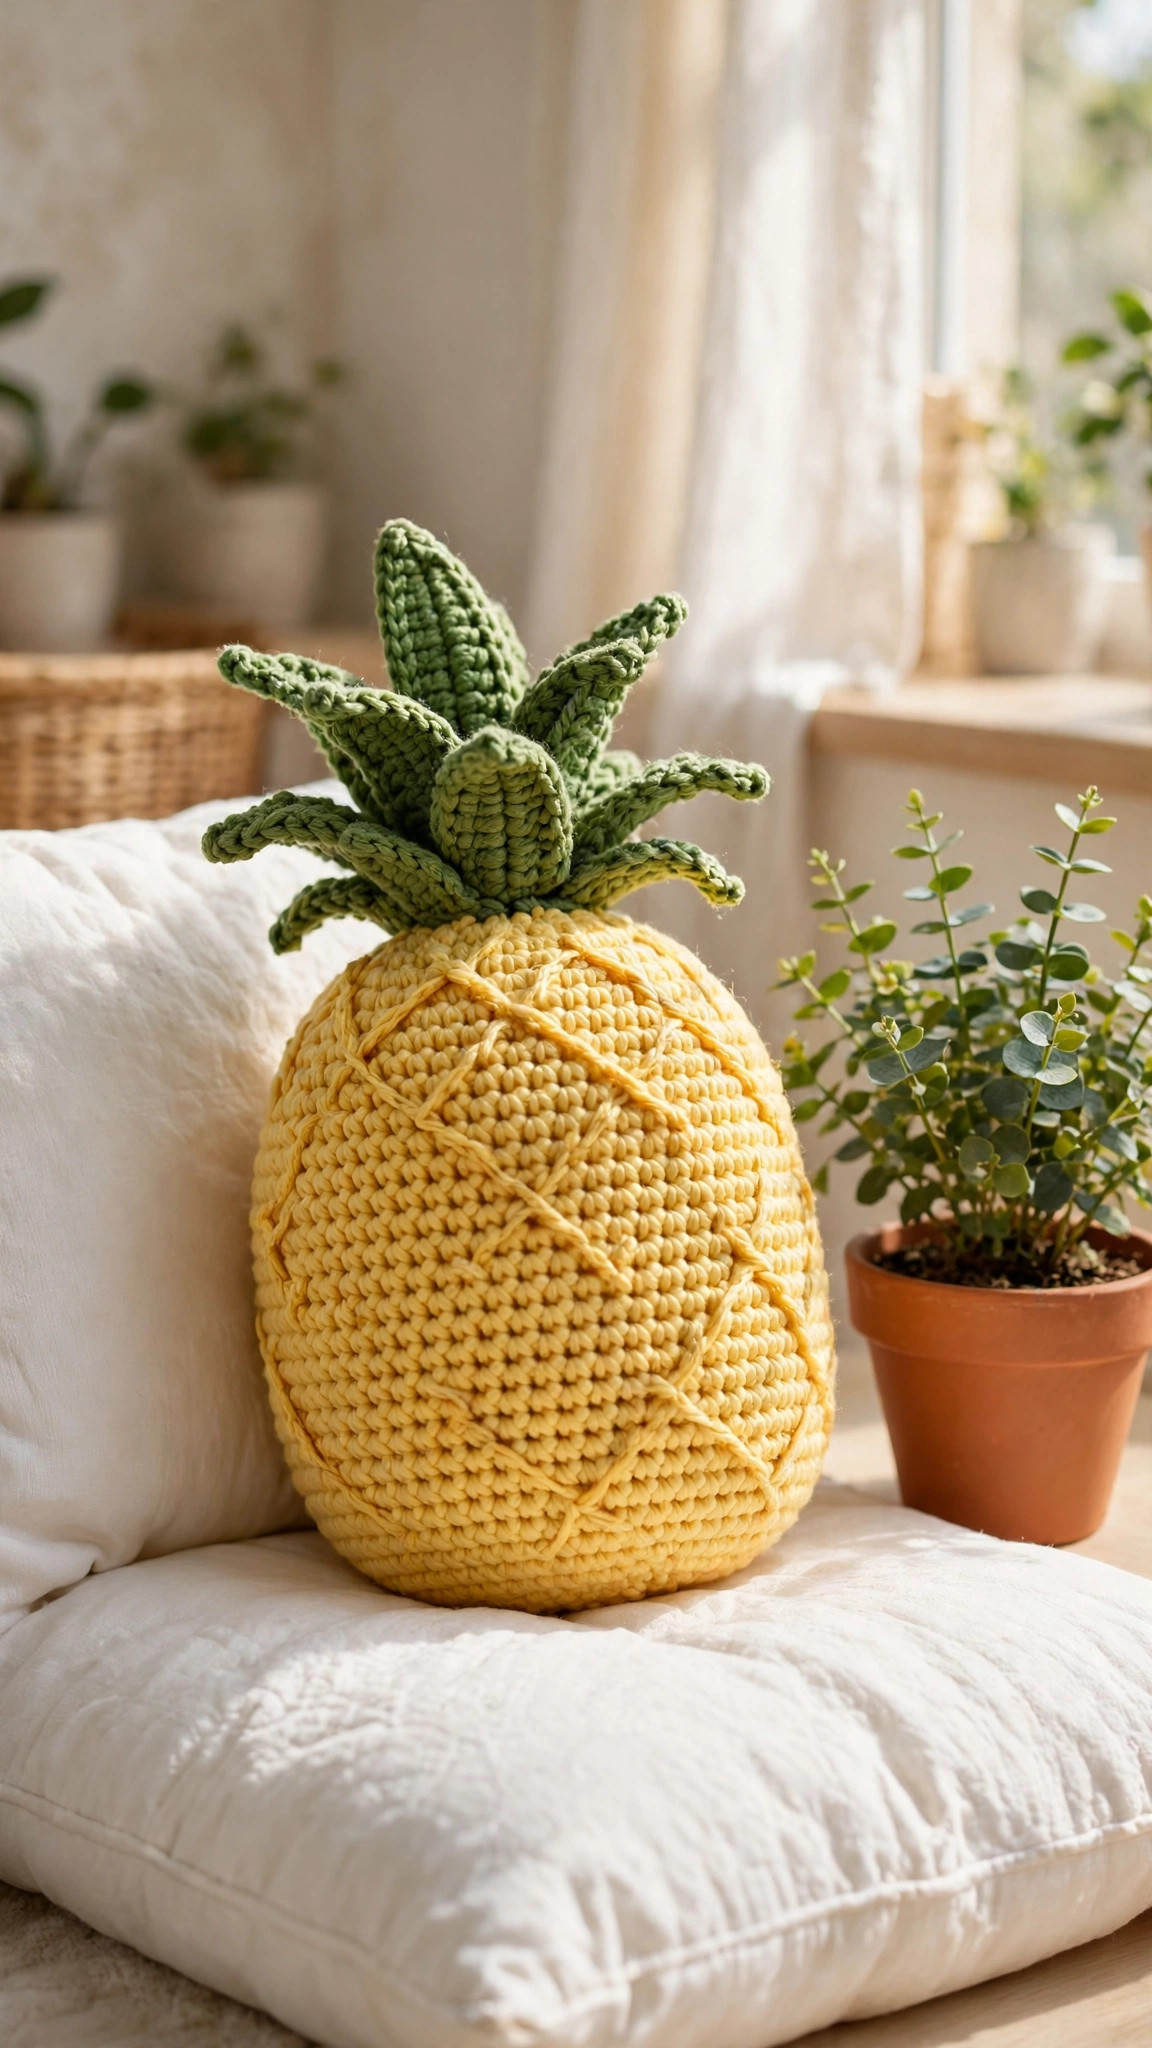
- Classic golden pineapple: work the body in golden yellow with green leaves, the colorway in the photos. Our crochet llama pattern makes a sweet matching shelf friend in the same amigurumi style.
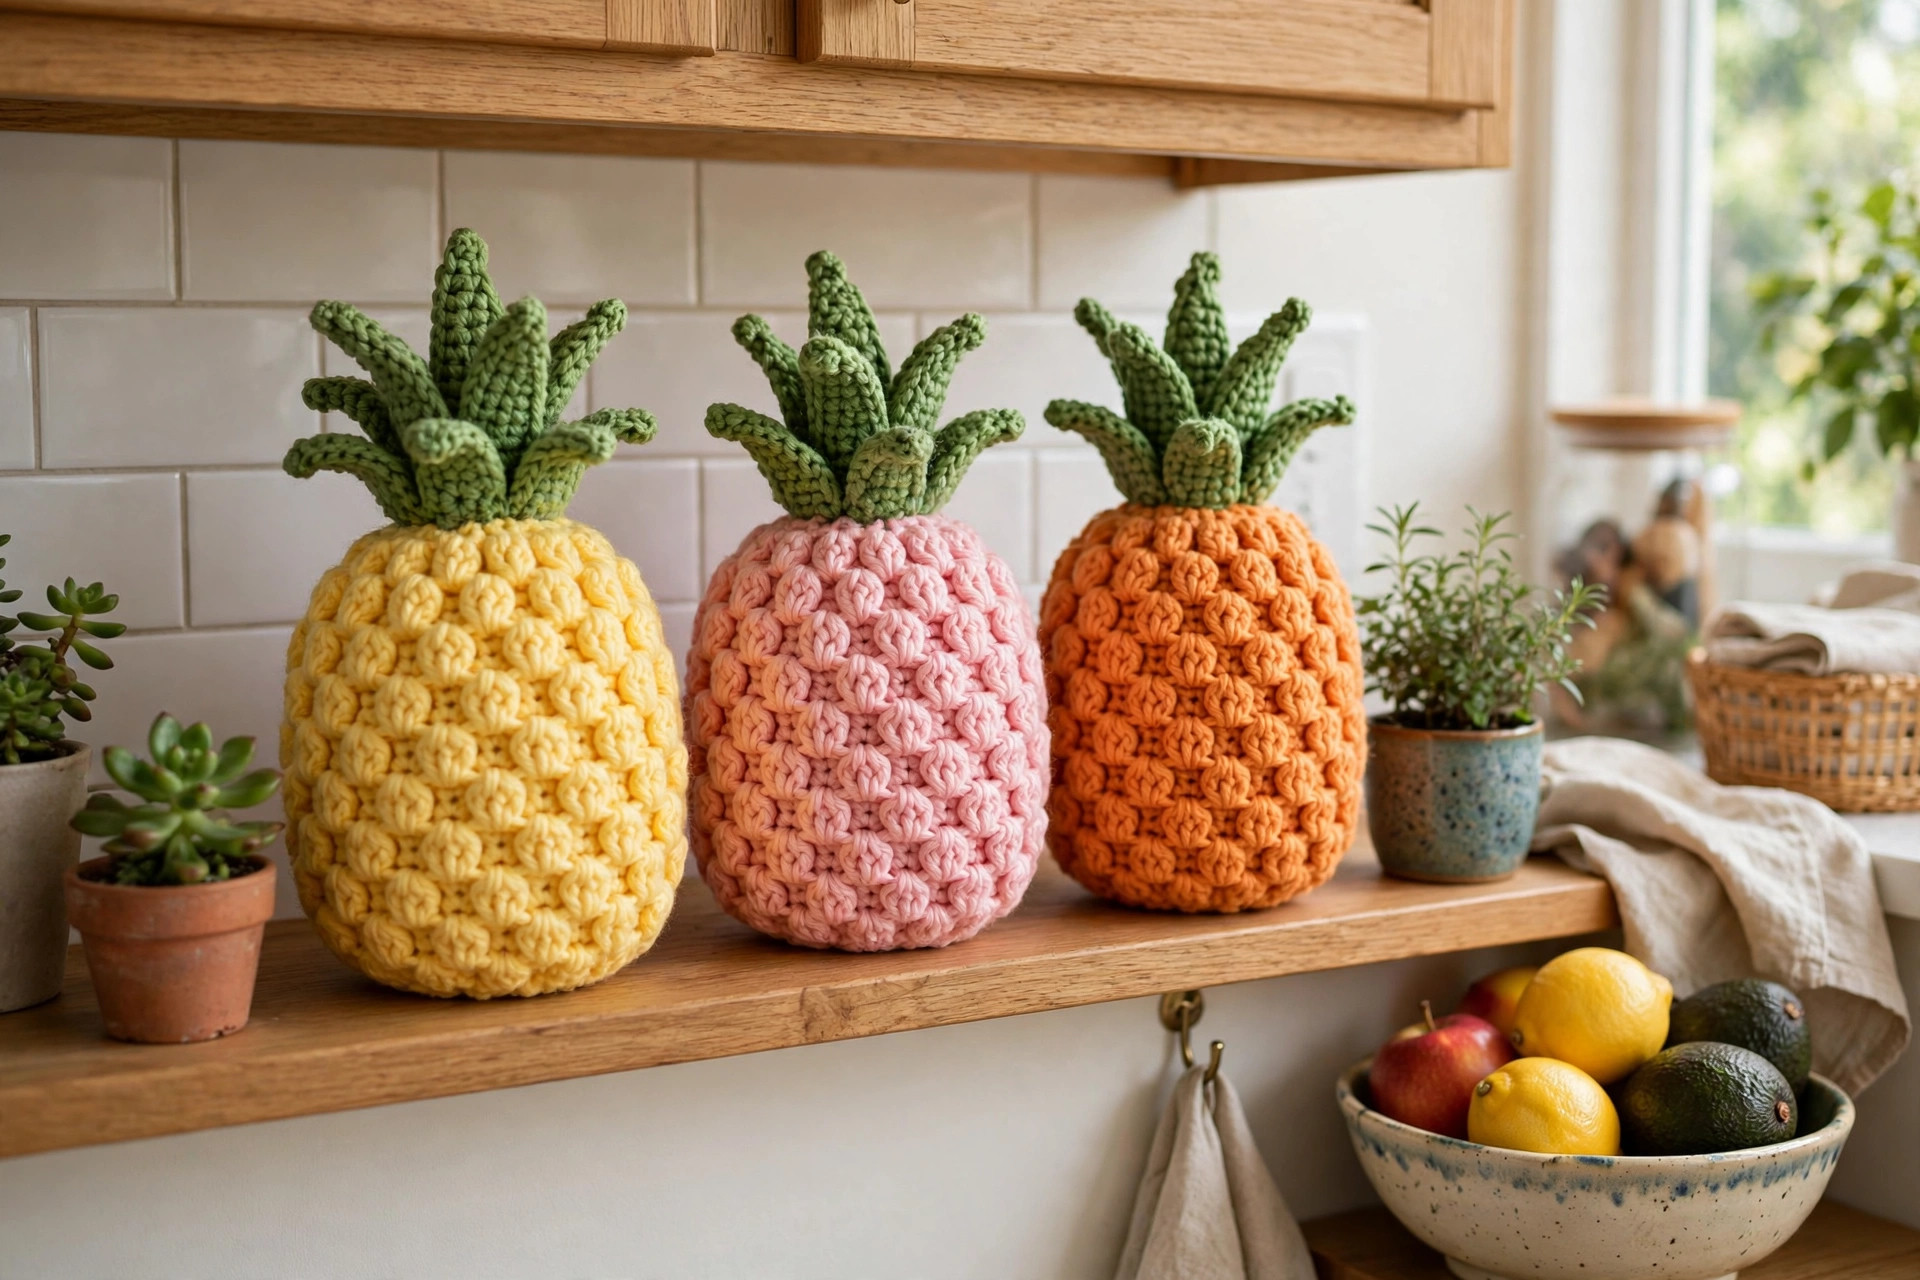
- Pink tropical pineapple: make the body in soft pink with mint green leaves for a party centerpiece.
- Mini pineapple keychain: use fingering weight yarn and a 2.5 mm hook, and add a keychain ring to the top of the crown.
- Pineapple rattle: slip a small rattle insert inside before round 22, and use embroidered eyes only.
- Fruit bowl set: make the pineapple with a strawberry and a lemon in the same style, and display them together in a basket.
Troubleshooting a Pineapple That Will Not Sit Up
- My pineapple tips over. The stuffing is uneven, or the base is too narrow. Add more stuffing to the bottom and press the base flat on a table.
- My stuffing shows through the stitches. Your gauge is too loose. Go down a hook size on your next pineapple, and use a little less stuffing.
- My bobbles look uneven. Some bobbles were worked with fewer loops than others. Make each bobble with 5 repeats so they are all the same size.
- My leaves flop over. The crown was sewn on loosely. Stitch the leaf bases together more firmly, and add one extra stitch at the base of each flopping leaf.
- My face looks lopsided. One eye sits higher than the other. Count the rounds on each side, and move the lower eye up one round.
Care Instructions
Hand wash a crochet pineapple in cool water with a mild detergent, and press the water out gently without wringing. Reshape the body while it is damp, fluff the leaves, and let it dry flat on a clean towel. Keep it out of direct sunlight so the yellow yarn does not fade. If the pineapple has safety eyes, check them before every wash.
Frequently Asked Questions
Is this crochet pineapple pattern good for beginners?
Yes, it is a great first amigurumi project. You need a magic ring, single crochet, increases, decreases, and one bobble stitch, and every round ends with a stitch count. One pineapple takes about 3 hours.
What yarn is best for a crochet pineapple?
Worsted weight yarn is the best choice, because it works up quickly and the bobble texture shows up clearly. Golden yellow with leaf green gives the classic look in the photos.
How big is the finished pineapple?
The finished pineapple is about 8 inches tall including the leaves, with the body about 4 inches wide. The body alone is about 5 inches tall. A mini version in fingering weight yarn comes out about 4 inches tall.
How do I make the bobble texture?
Work a bobble stitch by making 5 half finished double crochets in the same stitch, then pulling the yarn through all 6 loops on the hook at once. The bobbles sit on rounds 10, 13, and 16, with round 13 offset so the texture forms a diamond pattern.
Are safety eyes safe for a baby toy?
No, safety eyes are not safe for babies under three, because they can work loose and become a choking risk. For a baby pineapple, embroider the eyes with black yarn instead. Save the safety eyes for older children and adults.
Can I make the pineapple in different colors?
Yes, any bright color works well. Pink with mint leaves makes a tropical party pineapple, and cream with sage leaves makes a soft nursery piece. Keep the body and the leaves in contrasting colors so the crown stands out.
Can I sell pineapples made from this pattern?
Yes, you may sell finished pineapples made from this free pattern, with credit to Little Loop Finds. Please do not sell or republish the pattern text itself. A fruit bowl set with a pineapple and a strawberry makes a lovely market stall bundle, and pairs nicely with a tiny friend like our crochet ladybug pattern.
Happy stitching, and may your little pineapple bring a sunny smile to whoever receives it.