Crochet Christmas Angel Tutorial for Beginners (Free)
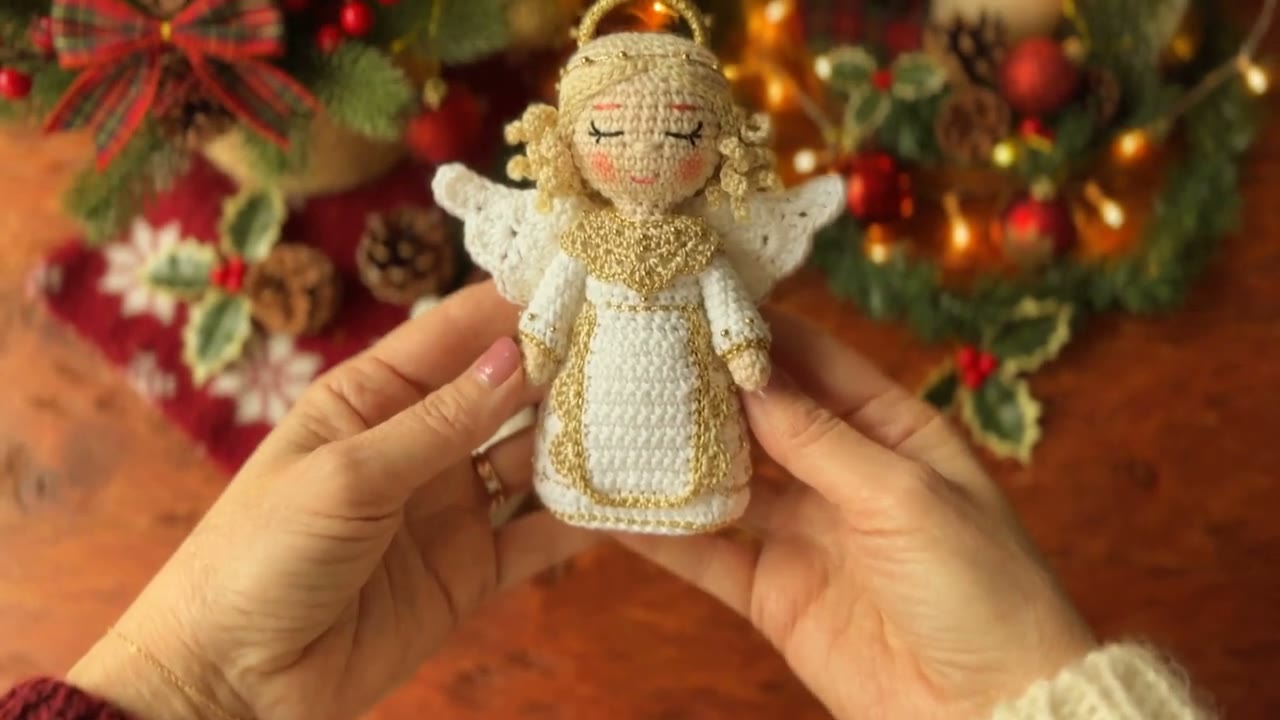
A soft crochet Christmas angel with curly hair, a white dress with gold trim, wings and a halo, made in one free beginner pattern.

Amigurumi · Crochet
- Finished size
- About 18 cm tall, about 7 in
- Making time
- About 4 hours
- Hook
- 2.5 mm hook
- Set
- Head, dress, hair, wings, halo
- Skill
- Beginner
In this post
- Key Takeaways
- Table of Contents
- Why you will love this Christmas angel
- Materials you will need
- Sizes, gauge, and skill level
- Abbreviations in US terms
- The pattern: head and neck
- The pattern: dress and base
- The pattern: arms, make 2
- The pattern: hair cap and 21 spiral curls
- The pattern: wings and halo
- Assembly, in this order
- Tips for a perfect angel
- Variations to try
- Troubleshooting
- Care instructions
- Frequently Asked Questions
- Share your angel
Crochet Christmas Angel Tutorial for Beginners. This free pattern makes a soft little angel with curly hair, a white dress with gold trim, wings and a halo. She is about 18 cm tall, about 7 in, and she is perfect on a Christmas tree, on a quiet shelf at home, as a handmade gift, or to sell at a Christmas fair in small batches.
This angel is worked in one simple order, and no part is hard on its own. The head and the dress are one piece, so there is no body to sew on later. The arms, the hair cap, the wings and the halo are made separately and sewn on at the end, which means you can lay everything out, check the face, and only then commit to a single stitch of sewing.
Work slowly and count at the end of every round. Every round in this pattern ends with its total in bold, so if your count matches, you are right, even if this is your first amigurumi project. Watch the Step 1 video while you start. It covers the magic ring and head Rounds 1 to 4, from 6 stitches to 12, then 18, then 24.
Key Takeaways
- A free, original crochet Christmas angel pattern in US terms, with a head, a flared dress, curly hair, wings and a halo.
- Beginner friendly, with the exact stitch count at the end of every round.
- Worked in DK weight yarn with a 2.5 mm hook, in skin tone, white, hair colour and gold.
- Head builds to 42 stitches, dress flares to 54 stitches, hair cap gives exactly 21 spiral curls.
- About 18 cm tall, about 7 in, with the yarn and hook below. Make one full sample and measure it before you rely on that size for a gift or a sale.
- Safe finishing notes for babies, and a wired halo option for adult decorations only.
Table of Contents
- Why you will love this Christmas angel
- Materials you will need
- Sizes, gauge, and skill level
- Abbreviations in US terms
- The pattern: head and neck
- The pattern: dress and base
- The pattern: arms
- The pattern: hair cap and 21 spiral curls
- The pattern: wings and halo
- Assembly
- Tips for a perfect angel
- Variations to try
- Troubleshooting
- Care instructions
- Frequently Asked Questions
Why you will love this Christmas angel
Most Christmas angels look lovely in a photo and fiddly in real life, because the hair is hard, the dress will not stand, or the wings flop. This one was designed around how beginners actually crochet. The head is a simple sphere that grows by 6 stitches a round. The dress is a simple cone that grows by 6 stitches every other round. The hair is a separate cap with one curl round, so you can try it on, move it, and only then sew it down. The wings are flat leaves, and the halo is a simple ring.
The finished angel stands on her own flat base, so she works on a shelf as well as on a tree. Add a hanging loop and she works on a tree too. Make her in blonde, dark brown or light brown hair, and she looks like a different angel every time, from the same counts.
Materials you will need
| Supply | What to get |
|---|---|
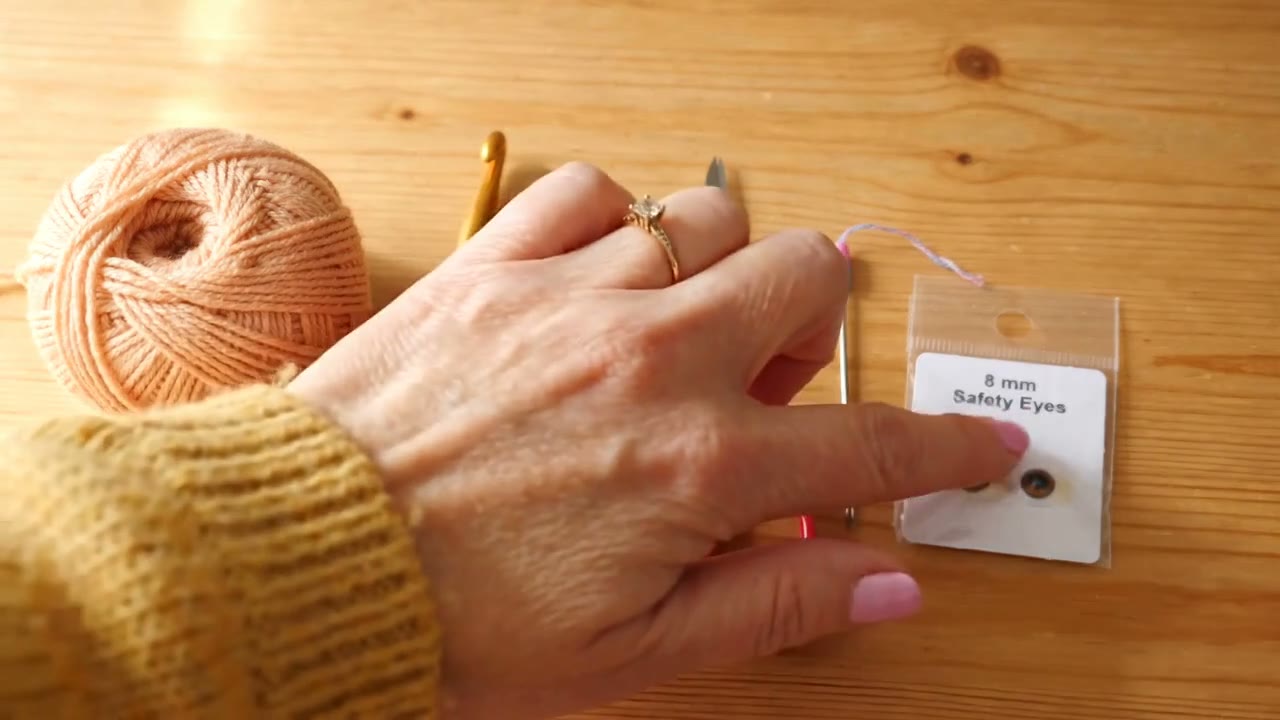
| Skin tone yarn | DK weight yarn, category 3, about 25 g |
| White yarn | DK weight yarn, category 3, about 40 g |
| Hair colour yarn | DK weight yarn, category 3, about 20 g, blonde, dark brown or light brown |
| Gold yarn | Metallic gold yarn or thread, a small amount, for the dress trim and the halo |
| Crochet hook | 2.5 mm |
| Safety eyes | 8 mm, one pair, with backings |
| Stuffing | Polyester stuffing, a small handful |
| Notions | Stitch marker, yarn needle, scissors |
| Embroidery thread | Dark brown thread for the smile and brows, soft pink blush or yarn for the cheeks |
| Thin craft wire | About 25 cm, for the wired halo option only |
Safety note: safety eyes are permanent once the backing clicks on, and they are not suitable for toys given to children under 3 years old. For a baby gift, embroider the eyes instead. The wired halo is for a decoration for adults. For a toy, use the crochet only halo and leave the wire out.
Sizes, gauge, and skill level
Finished size: about 18 cm tall, about 7 in, with the yarn and hook above. This is a target size. Make one full sample and measure it before you state the size on a gift tag or a listing.
Gauge: work single crochet tightly so no stuffing shows through the stitches. If your stitches gape, drop to a 2.25 mm hook. If the work curls hard in your hands, rise to a 2.75 mm hook.
Skill level: beginner who can make a magic ring, a single crochet, an increase and a decrease. Every round states its stitch total, the face is embroidery and two safety eyes, and the separate hair cap and wings mean no shaping has to happen in your hands at the same time.
Abbreviations in US terms
| Abbreviation | Meaning |
|---|---|
| MR | magic ring |
| ch | chain |
| sc | single crochet |
| hdc | half double crochet |
| dc | double crochet |
| inc | increase, 2 sc in the same stitch |
| dec | decrease, invisible decrease |
| sl st | slip stitch |
| st (sts) | stitch (stitches) |
| BLO | back loop only |
| FO | fasten off |
Pattern notes: work in a continuous spiral and move the stitch marker up at the end of every round. Work in US terms throughout.
The pattern: head and neck
Skin tone yarn. The head builds to 42 stitches, holds its shape for seven plain rounds, then decreases to an 18 stitch neck. Place the face before the decreases, while the head is still wide open and easy to reach.
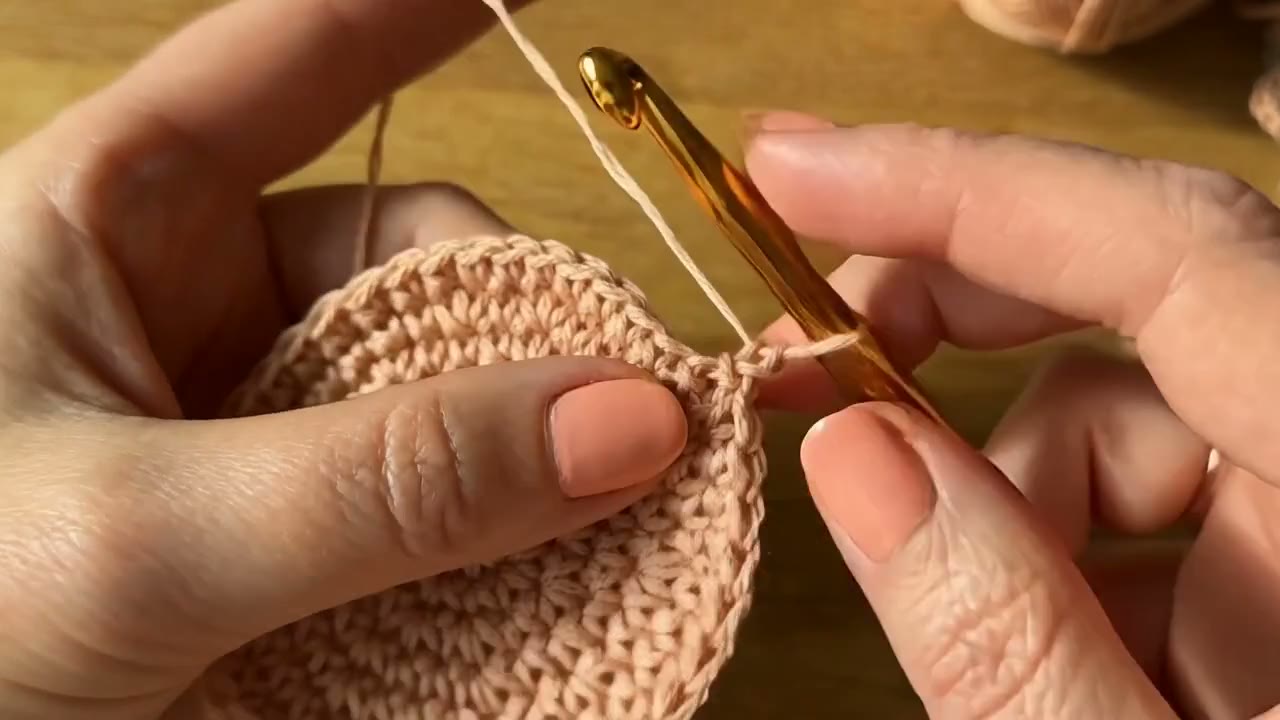
Round 1: MR, 6 sc into the ring. [6 sts] Round 2: inc in every st. [12 sts] Round 3: (1 sc, inc) 6 times. [18 sts] Round 4: (2 sc, inc) 6 times. [24 sts] Round 5: (3 sc, inc) 6 times. [30 sts] Round 6: (4 sc, inc) 6 times. [36 sts] Round 7: (5 sc, inc) 6 times. [42 sts] Rounds 8 to 14: sc in every st, 7 rounds with no change. [42 sts]
Eyes, nose and smile: place them now
Find Round 11 and Round 12. The eyes sit between these two rounds. Count 7 sts between the two eye positions, centre them on the front of the head, and mark both spots with short yarn tails before you push anything through. Push each 8 mm eye through its marked spot, check from the front that both eyes sit level, then click the backings on firmly. Embroider a tiny nose, 2 sts wide, one round below the eye line, centred between the eyes. With dark brown thread, embroider a small smile one round below the nose, and one short brow above each eye. Add a touch of blush to each cheek.
Round 15: (5 sc, dec) 6 times. [36 sts] Round 16: (4 sc, dec) 6 times. [30 sts] Round 17: (3 sc, dec) 6 times. Start stuffing the head now, firm but not stretched. [24 sts] Round 18: (2 sc, dec) 6 times. Top up the stuffing. [18 sts] Round 19: sc in every st. This round is the neck. Push a little stuffing down into it so the head sits steady. [18 sts] Round 20: Change to white. (2 sc, inc) 6 times. The torso begins. [24 sts] Round 21: sc in every st. Do not fasten off. The dress continues from here. [24 sts]
Check before you continue: head stuffed firm, eyes level, smile centred, neck steady at 18 stitches, and 24 white stitches counted at Round 21.
The pattern: dress and base
Stay in white and keep working in a spiral from Round 21. The dress grows by 6 stitches every other round, with one plain round between each increase round, so the flare stays smooth and even all the way down.
Round 22: (3 sc, inc) 6 times. [30 sts] Round 23: sc in every st. [30 sts] Round 24: (4 sc, inc) 6 times. [36 sts] Round 25: sc in every st. [36 sts] Round 26: (5 sc, inc) 6 times. [42 sts] Round 27: sc in every st. [42 sts] Round 28: (6 sc, inc) 6 times. [48 sts] Round 29: sc in every st. [48 sts] Round 30: (7 sc, inc) 6 times. [54 sts] Rounds 31 to 34: sc in every st, 4 rounds with no change. Stuff the torso and the top of the dress lightly as you finish Round 34, keeping the lower dress hollow so it keeps its cone shape. [54 sts]
The dress flares to 54 stitches and closes with a flat base disc worked to the same 54 stitches, so the two edges meet stitch for stitch.
Base disc, white yarn
Round 1: MR, 6 sc into the ring. [6 sts] Round 2: inc in every st. [12 sts] Round 3: (1 sc, inc) 6 times. [18 sts] Round 4: (2 sc, inc) 6 times. [24 sts] Round 5: (3 sc, inc) 6 times. [30 sts] Round 6: (4 sc, inc) 6 times. [36 sts] Round 7: (5 sc, inc) 6 times. [42 sts] Round 8: (6 sc, inc) 6 times. [48 sts] Round 9: (7 sc, inc) 6 times. Fasten off and leave a long tail for sewing. [54 sts]
Hold the disc inside the open dress edge so the two 54 stitch edges line up. Sew stitch to stitch all the way around with the long tail. Set the angel down and check that she stands flat before you add the trim.
Gold shell trim at the hem
Join the gold yarn at any stitch of Round 34, at the dress hem, and work 1 sc in every stitch around first, 54 sc in total. Then work the shell round. One repeat uses 6 stitches: skip 2 sts, work 7 dc in the next st, skip 2 sts, sl st in the next st. Repeat that 9 times all the way around. 54 divided by 6 gives 9 shells, and the last slip stitch lands exactly where the round began. Fasten off and weave the end in along the inside of the hem.
Reader note on the trim count: if your hem count is not 54, stop and recount Round 30 before you add the trim. The shell repeat only sits evenly on a count that divides by 6, and fixing one missed increase now is much easier than easing the trim around later.
The pattern: arms, make 2
Each arm starts with a small skin tone hand and changes to a white sleeve. Make both arms before you sew anything, so the pair matches.
Round 1: Skin tone. MR, 6 sc into the ring. [6 sts] Round 2: (1 sc, inc) 3 times. [9 sts] Rounds 3 to 4: sc in every st, 2 rounds. [9 sts] Round 5: Change to white. (2 sc, inc) 3 times. [12 sts] Rounds 6 to 9: sc in every st, 4 rounds. [12 sts] Round 10: (2 sc, dec) 3 times. Fasten off and leave a long tail for sewing. [9 sts]
Leave the arms unstuffed, or add the smallest pinch of stuffing to the sleeve only. Flatten the open top of each arm so the seam sits in a straight line of 4 to 5 stitches across. The arms are sewn on in the assembly section, angled gently downward at the sides of Round 23 of the dress.
The pattern: hair cap and 21 spiral curls
The hair is one separate cap, so you can try it on the head, adjust the parting, and only then sew it down. Work in hair colour yarn.
Round 1: MR, 6 sc into the ring. [6 sts] Round 2: inc in every st. [12 sts] Round 3: (1 sc, inc) 6 times. [18 sts] Round 4: (2 sc, inc) 6 times. [24 sts] Round 5: (3 sc, inc) 6 times. [30 sts] Round 6: (4 sc, inc) 6 times. [36 sts] Round 7: (5 sc, inc) 6 times. [42 sts] Round 8: sc in every st. [42 sts]
Round 9, the curl round: 21 curls
Chain 18. Starting in the second chain from the hook, work 2 sc in every chain back toward the cap. That is 34 sc along the chain, and the chain twists into a spiral on its own. Slip stitch into the next stitch of the cap, and slip stitch into the stitch after that. One curl is done, and you have used 2 cap stitches. Repeat both steps all the way around the cap. 42 cap stitches divided by 2 gives 21 curls. Fasten off and leave a long tail, about 40 cm, for sewing.
Set the cap on the head so its edge sits just above the brows at the front and low at the back. Pin it, check that the face is centred, then sew the edge down with the long tail. Twist each curl gently with your fingers so every spiral faces forward.
The pattern: wings and halo
The wings are worked flat, in rows, from one point of the leaf to the other. Each row ends with its stitch total, and every row starts with a chain 1 and a turn. White yarn throughout.
Row 1: Ch 2, work 3 sc in the second chain from the hook. [3 sts] Row 2: inc, 1 sc, inc. [5 sts] Row 3: sc in every st. [5 sts] Row 4: inc, 3 sc, inc. [7 sts] Row 5: sc in every st. [7 sts] Row 6: inc, 5 sc, inc. [9 sts] Row 7: sc in every st. This is the widest row, the middle of the wing. [9 sts] Row 8: dec, 5 sc, dec. [7 sts] Row 9: dec, 3 sc, dec. [5 sts] Row 10: dec, 1 sc, dec. [3 sts] Row 11: Work 3 sc together into 1 st. Fasten off and leave a long tail for sewing. [1 st]
Block each wing flat for a few minutes under a damp cloth, or press it gently with your fingers, so the leaf shape holds. The two wings are identical and symmetrical, so there is no left wing and right wing to mix up.
Halo, gold yarn
Crochet only halo, safe for a toy: chain 24 and join with a sl st to make a ring, taking care that the chain is not twisted. Round 1: work 1 sc in every chain, 24 sc in total. Round 2: sl st in every st, 24 sl sts in total. Fasten off. For the stem, join the gold yarn at any point of the ring, chain 6, fasten off, and use that short chain to sew the halo to the back of the hair cap, so the ring stands just above the head.
Wired halo, for a decoration for adults only: bend the 25 cm of thin craft wire into a neat circle of about 3.5 cm across, twist the two ends together twice, and trim and bury the twist at the back. Work single crochet in gold yarn all the way around the wire until the wire is fully covered, then make the same chain 6 stem and sew it on in the same way. Keep every sharp end covered and buried.
Assembly, in this order
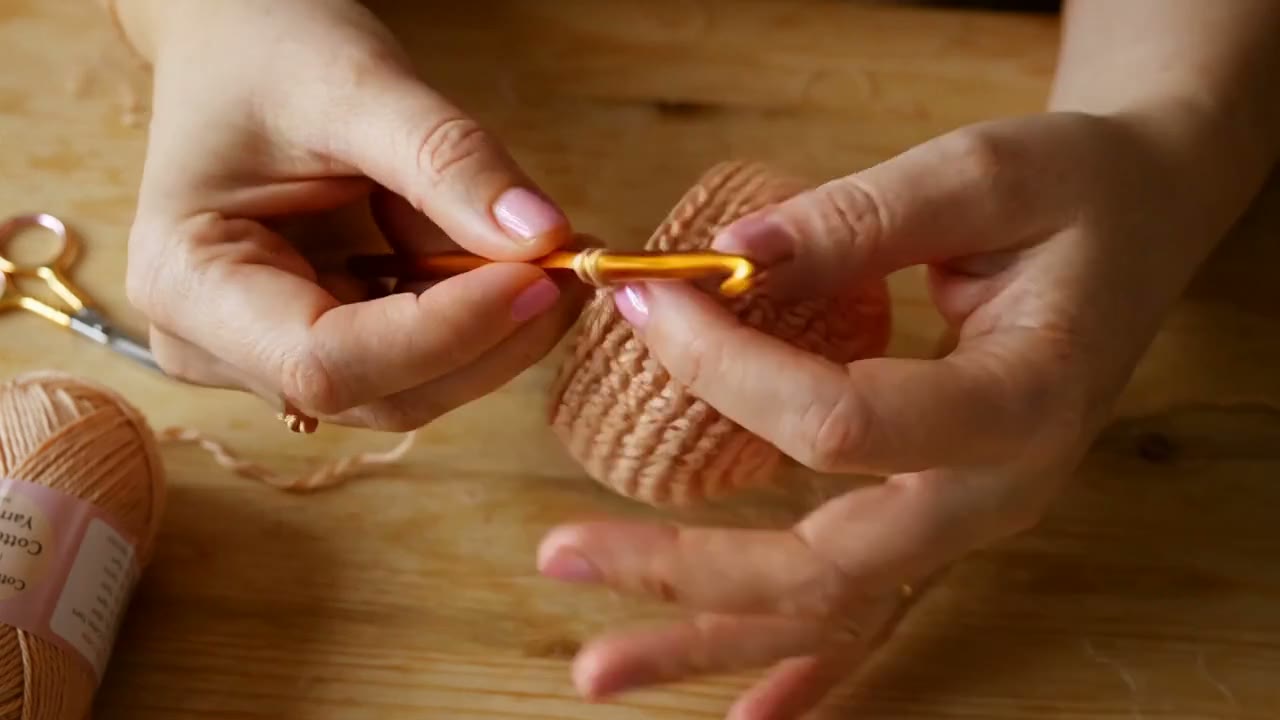
- Hair first. Pin the hair cap on, check the face from the front, the side and the back, then sew the cap edge down all the way around. Arrange all 21 curls.
- Arms. Pin one flattened arm top to each side of the dress at Round 23, angled gently downward, with the skin tone hand at the lower end. Sew across the flattened top, then check from the front that both arms sit at the same height.
- Wings. Turn the angel around. Pin the two wings to the back of the dress, centred on Round 24 to Round 26, angled upward and outward like an open leaf on each side. Sew along the inner edge of each wing, close to the body, so the outer point stays free.
- Halo. Sew the end of the chain 6 stem to the back of the hair cap, at the top, so the gold ring stands above the curls and tilts very slightly forward.
- Hanging loop, for a tree. Thread a short length of gold yarn through the back of the hair cap, under the halo stem, tie it into a loop of about 6 cm, and hide the knot inside the curls. For a shelf angel, leave the loop off and keep the flat base.
- Final check. Stand the angel down flat, turn her slowly, and check: base flat, arms level, wings even, halo centred, no sewing tail showing, and every end woven in.
Tips for a perfect angel
- Count at the end of every round, and place the stitch marker in the first stitch of each round.
- Stuff the head firm, but keep the lower dress hollow, so the cone shape holds and the base stays flat.
- Sew the hair cap down at the front edge, both sides, and the back, not just in one place, or the cap will slide.
- Twist each curl with your fingers after sewing, so every spiral faces forward.
- Photograph the finished angel in daylight, on a plain background, so the white dress and gold trim read clearly.
Variations to try
- Change the hair colour only, blonde, dark brown or light brown, and the same counts make a different angel every time.
- Make a smaller angel with thinner yarn and a 2.25 mm hook, or a larger angel with thicker yarn and a bigger hook. Keep all three main colours in the same yarn weight, or the head, dress and hair will not sit in proportion.
- Leave off the hanging loop for a shelf angel, or add the loop for a tree angel.
- Use soft pink yarn for the cheeks, or embroider the cheeks with pink thread, whichever you prefer.
Troubleshooting
| Problem | Fix |
|---|---|
| The head wobbles on the neck | Add more stuffing to Round 19. A short rolled yarn core inside the neck also helps. Never use wire inside the neck of a toy for a child. |
| Stuffing shows through the stitches | Your tension is too loose for this yarn. Drop one hook size and pull the yarn snug after every stitch. |
| The eyes sit uneven | Mark both positions with yarn tails and look at the face straight on before the backings click. Once a backing is on, it is very hard to remove without damaging the work. |
| Curls stay straight | You worked only 1 sc per chain. The curl comes from 2 sc in every chain. Twist a finished curl around a pencil for a minute and let it rest. |
| The dress flares unevenly | An increase was missed or doubled in one repeat. Count the round. Every dress increase round adds exactly 6 stitches. |
| The angel will not stand | The base disc is not sewn stitch to stitch, or the dress was stuffed to the bottom. Ease the stuffing upward, sew the disc flat again, and let her rest on a hard surface. |
| A wing curls or flops | Block the wing flat again, then sew along more of its inner edge. A wing sewn at one point only will always swing. |
| A round ends with the wrong count | Stop and count before the next round. One missed stitch early shows up as a flat spot later, and undoing one round is far easier than undoing five. |
Care instructions
Spot clean with a damp cloth and mild soap, then reshape and lay flat to dry. Do not put the angel in a washing machine on a hot cycle, because the stuffing can clump and the curls can lose their spiral. Store the angel flat or standing, not squashed under heavier items, so the wings and halo keep their shape between Christmases.
Frequently Asked Questions
Is this crochet Christmas angel pattern really free?
Yes. The full pattern, including the head, dress, hair, wings and halo, is right here in this post, free to use for personal projects and for gifts. You may sell finished angels made from this pattern in small batches, with credit to Little Loop Finds, but please do not copy, repost, or sell the pattern text itself.
Can a complete beginner make this angel?
Yes, if you can make a magic ring, a single crochet, an increase and a decrease. Every round states its stitch total, the face is embroidery and two safety eyes, and the separate hair cap and wings mean no shaping has to happen in your hands at the same time.
What yarn and hook work best?
DK weight yarn, category 3, with a 2.5 mm hook, worked tightly. Thicker yarn with a bigger hook makes a bigger angel from the same counts, and thinner yarn makes a smaller one. Keep all three main colours in the same yarn weight, or the head, dress and hair will not sit in proportion.
How do I make the angel in a different skin tone or hair colour?
Change only the yarn. The counts stay exactly the same. The pattern was written so the same head works in any skin tone, and the cap works in blonde, dark brown, light brown or any other hair colour.
How do I make her safe for a baby?
Embroider the eyes instead of using safety eyes, leave the wire out of the halo and use the crochet only halo, sew every part down twice, and leave off the hanging loop. Check every seam with a firm tug before the angel is given.
How long does the angel take to make?
About 4 hours in total, in two sittings. One calm evening for the head and dress, and a second sitting for the hair, wings and assembly. Beginners should allow a little longer for the first angel, and the second one will be faster.
Share your angel
Save this pattern for Christmas, and share a photograph of your finished angel with her hair colour, blonde, dark brown, light brown or your own choice. Tell readers in the comments which colour they chose, and point them to the Step 1 video if they want to crochet the first four rounds along with you before they read the rest.
Pattern summary for printing: Head 6, 12, 18, 24, 30, 36, 42, then 42 for Rounds 8 to 14. Face between Rounds 11 and 12, 7 stitches between the eyes. Decrease 36, 30, 24, 18. Neck 18. White from Round 20: 24, 24, then dress 30, 30, 36, 36, 42, 42, 48, 48, 54, and 54 to Round 34. Base disc to 54. Gold trim 9 shells. Arms 6, 9, 9, 12, 12, 9. Hair cap to 42, then 21 curls of chain 18 with 2 sc in every chain. Wings in rows 3, 5, 5, 7, 7, 9, 9, 7, 5, 3, 1. Halo ring 24.


